
Attaching the Arms
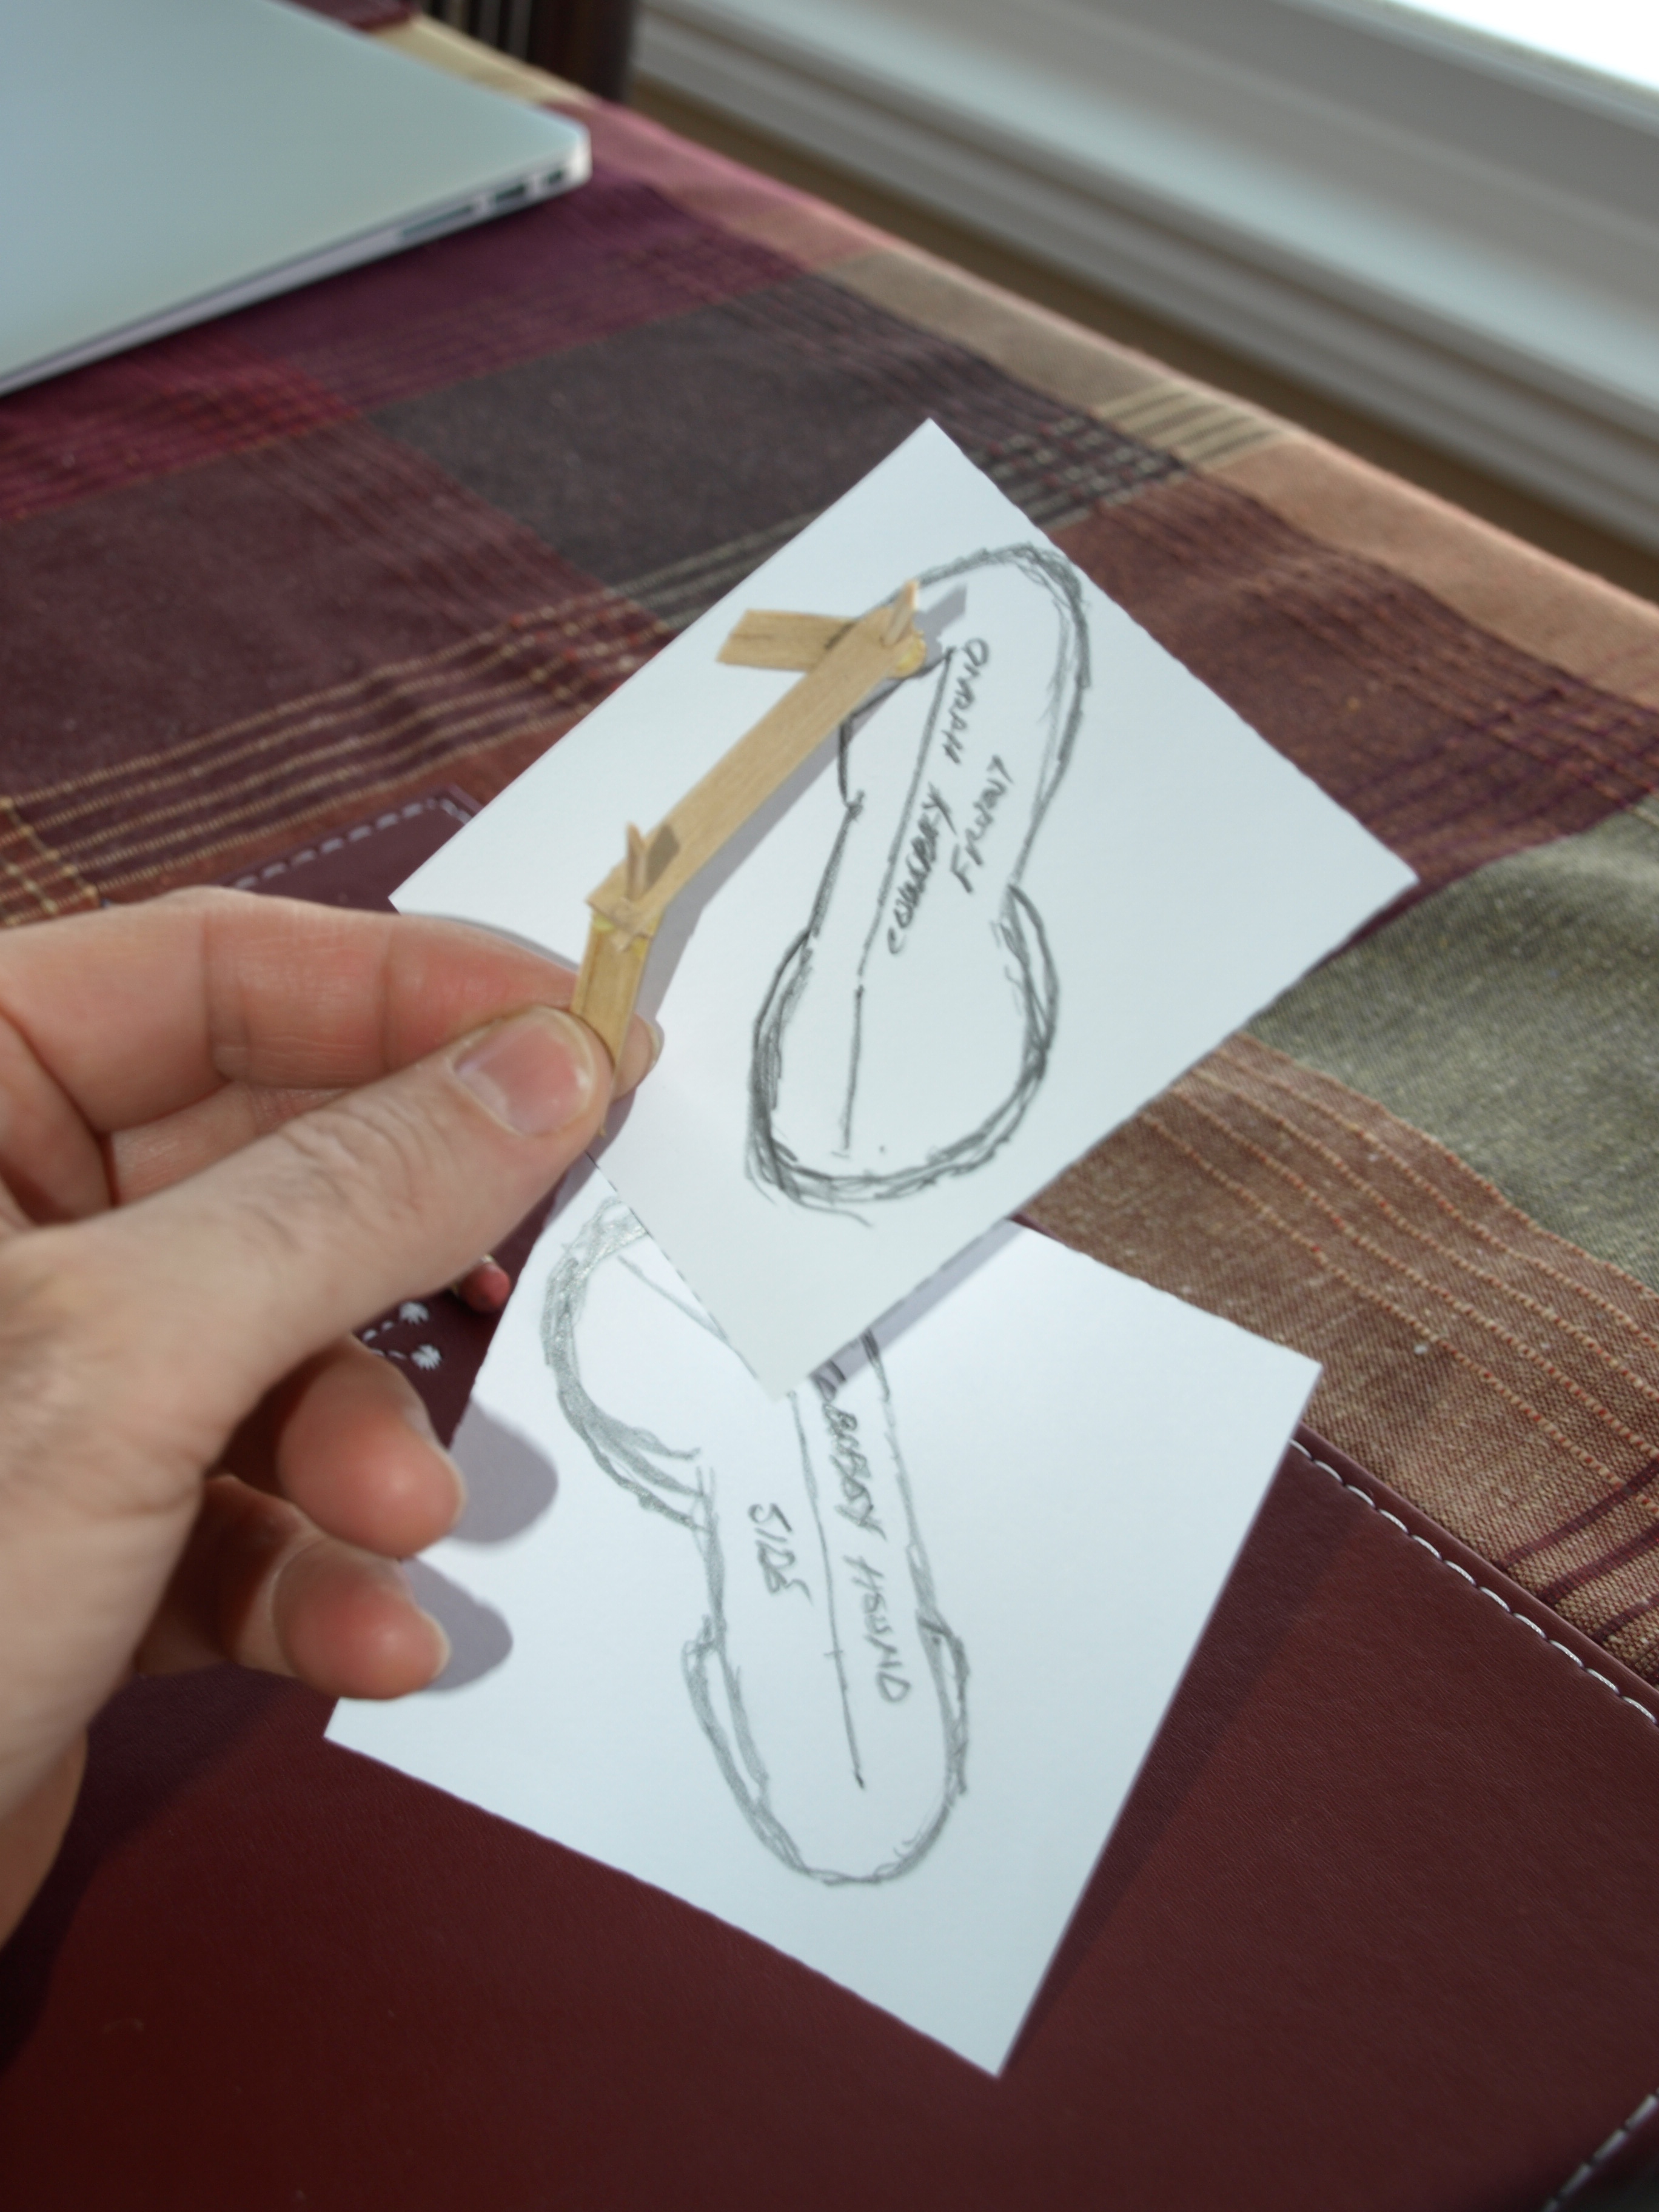
I drew up a bit of a pattern for this carving when I began that I’ve used for guidance and included in it a front and side view of where I felt the arms would land. Remember, this little guy is going to be leaning against a fence and will need his arms, or at least his elbows, projected up and back a bit to rest against the top fence rail.
Although I had the rough pattern, I still needed to do a bit of experimenting to get the arm lengths and angles right. I ended up taking some wooden coffee stir sticks that I had in the shop ( you see…it’s worthwhile to recycle! ) and pinning the joints with a sliver of wood to see exactly how the centre-line of the arm would fall.

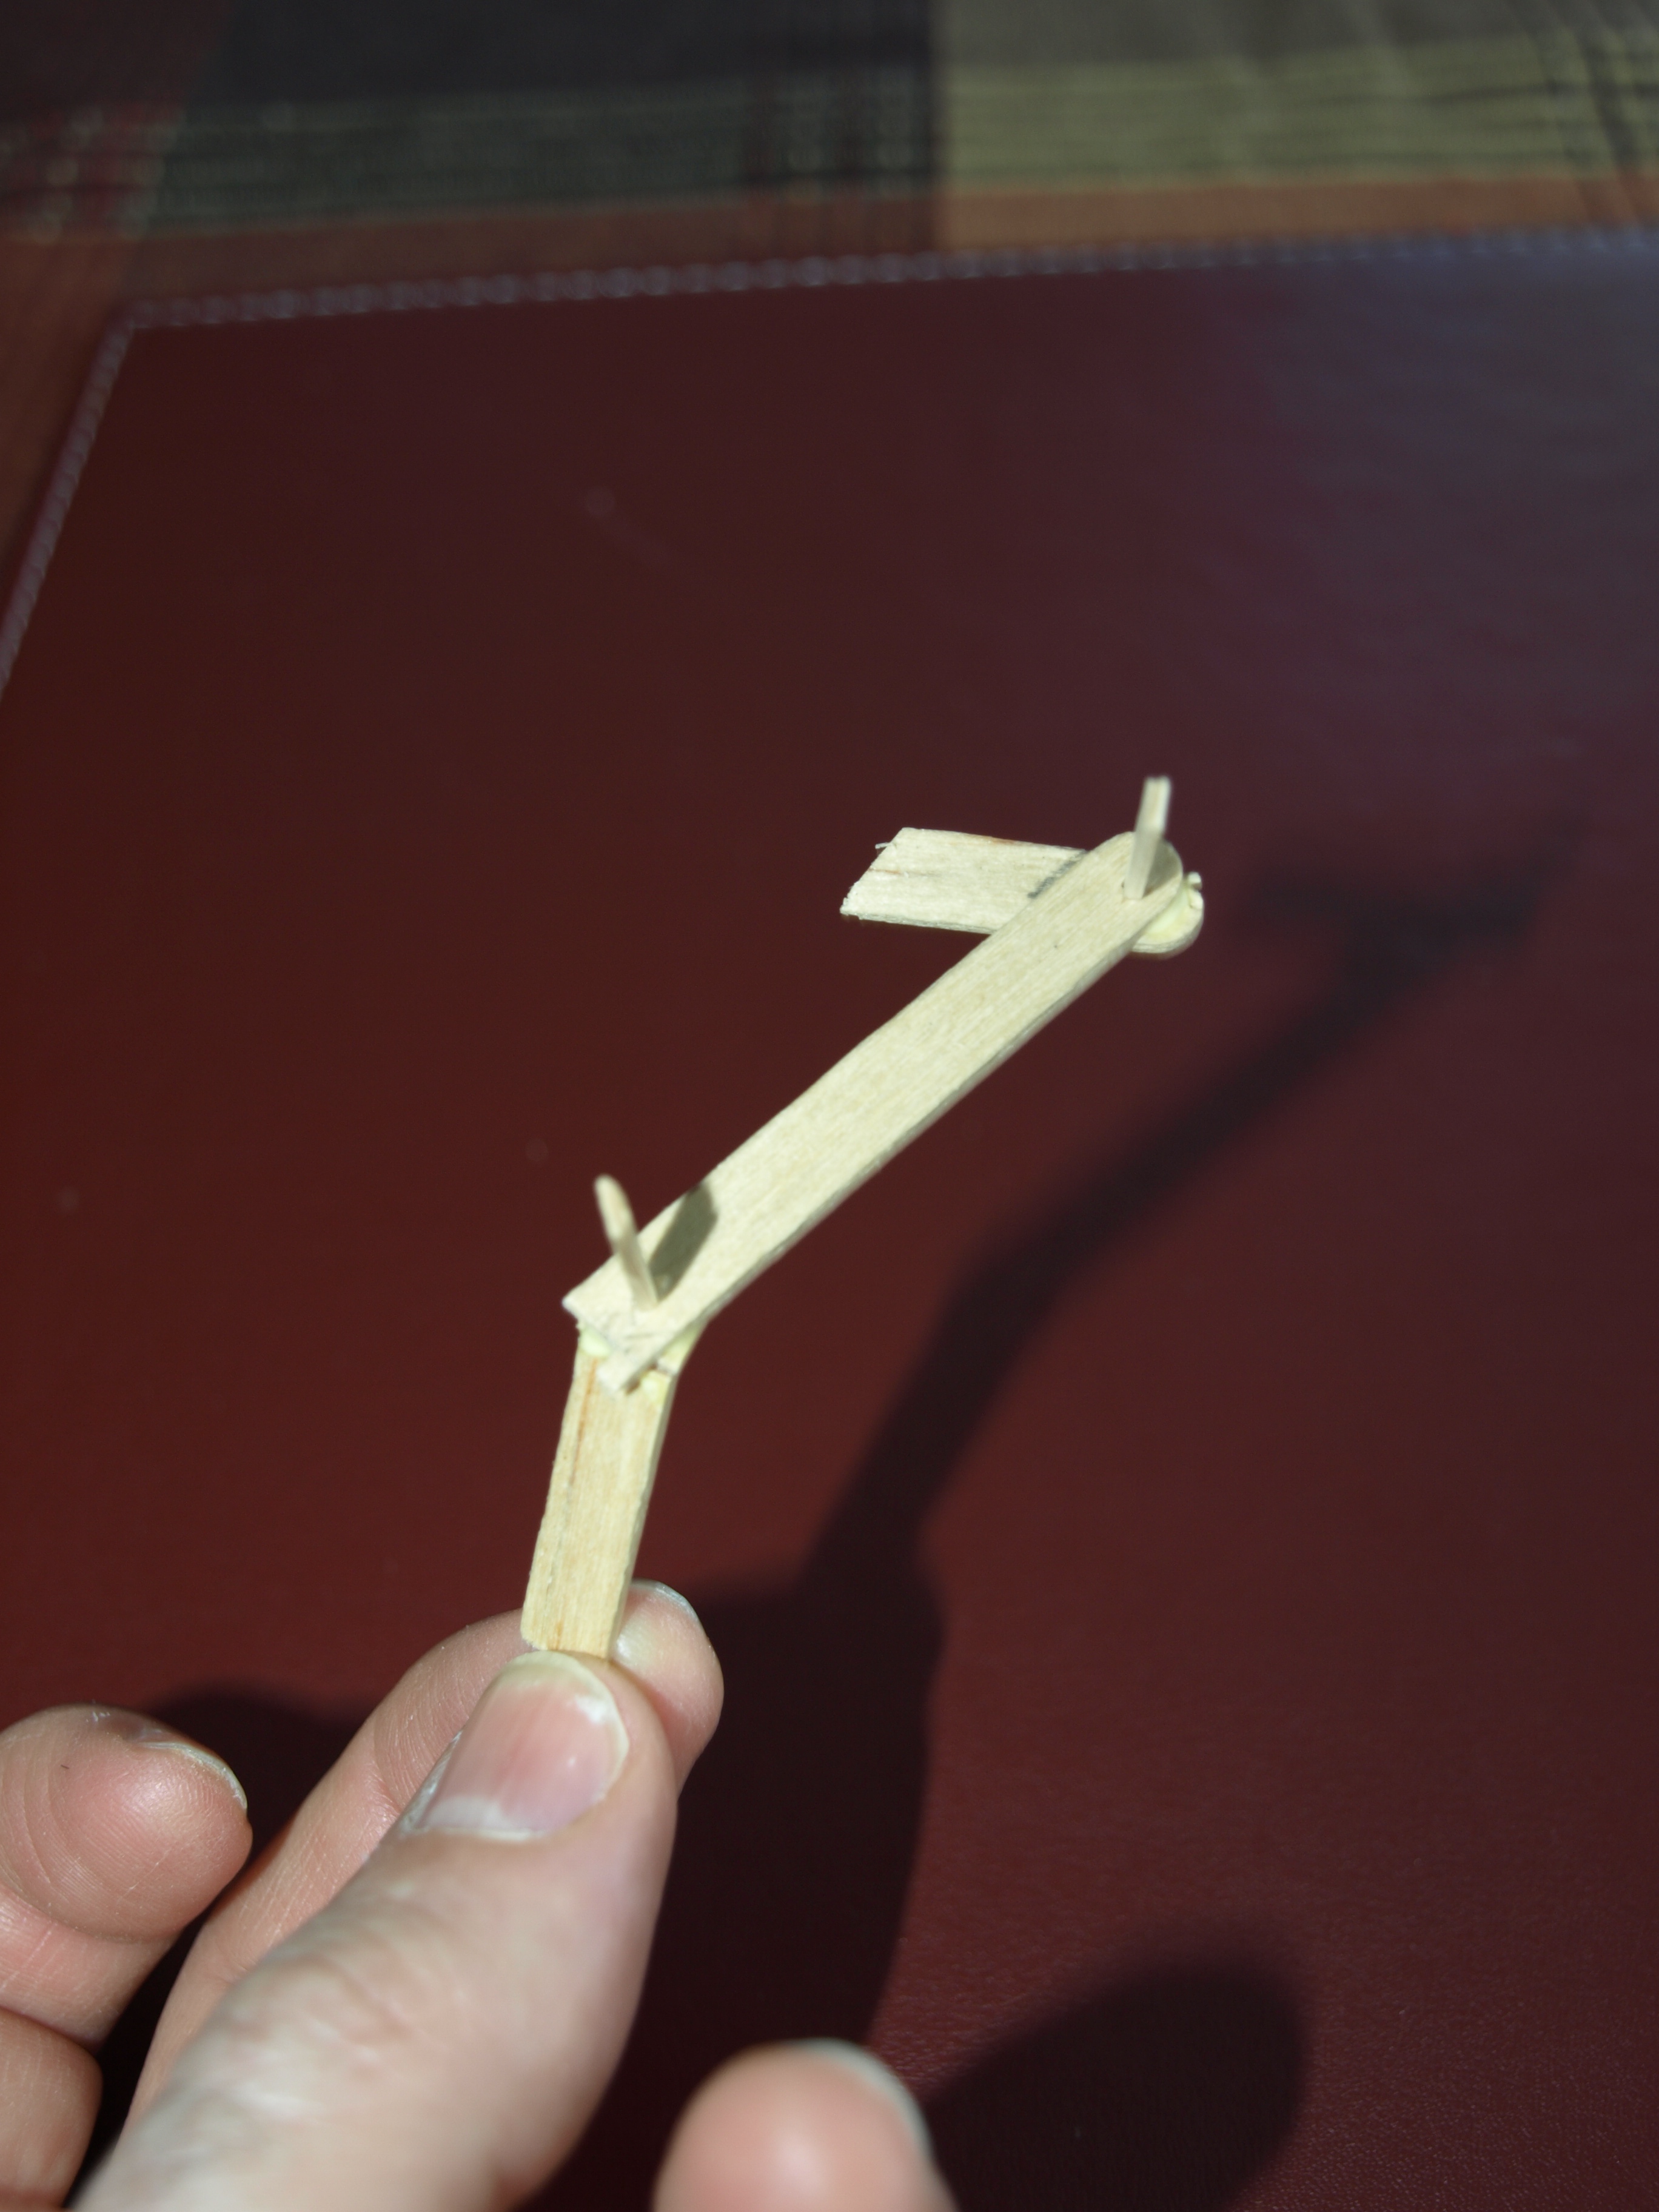
This whole exercise took me back 35 or so years to my engineering schooling…we used to have to draw the actual size and orientation of a linkage or mechanism just based on a front and side view. This method was called “Finding the True Length” and used draughting methods to achieve this. Some of you older engineering types out there will be showing your age if you admit to remembering this! My stir stick method wouldn’t be viewed as good engineering practice, but it worked for me!
After I glued the pinned stir sticks together, I re-drew both the side and front views of the arm to get close to the right size that I needed. Then I headed to the bandsaw.
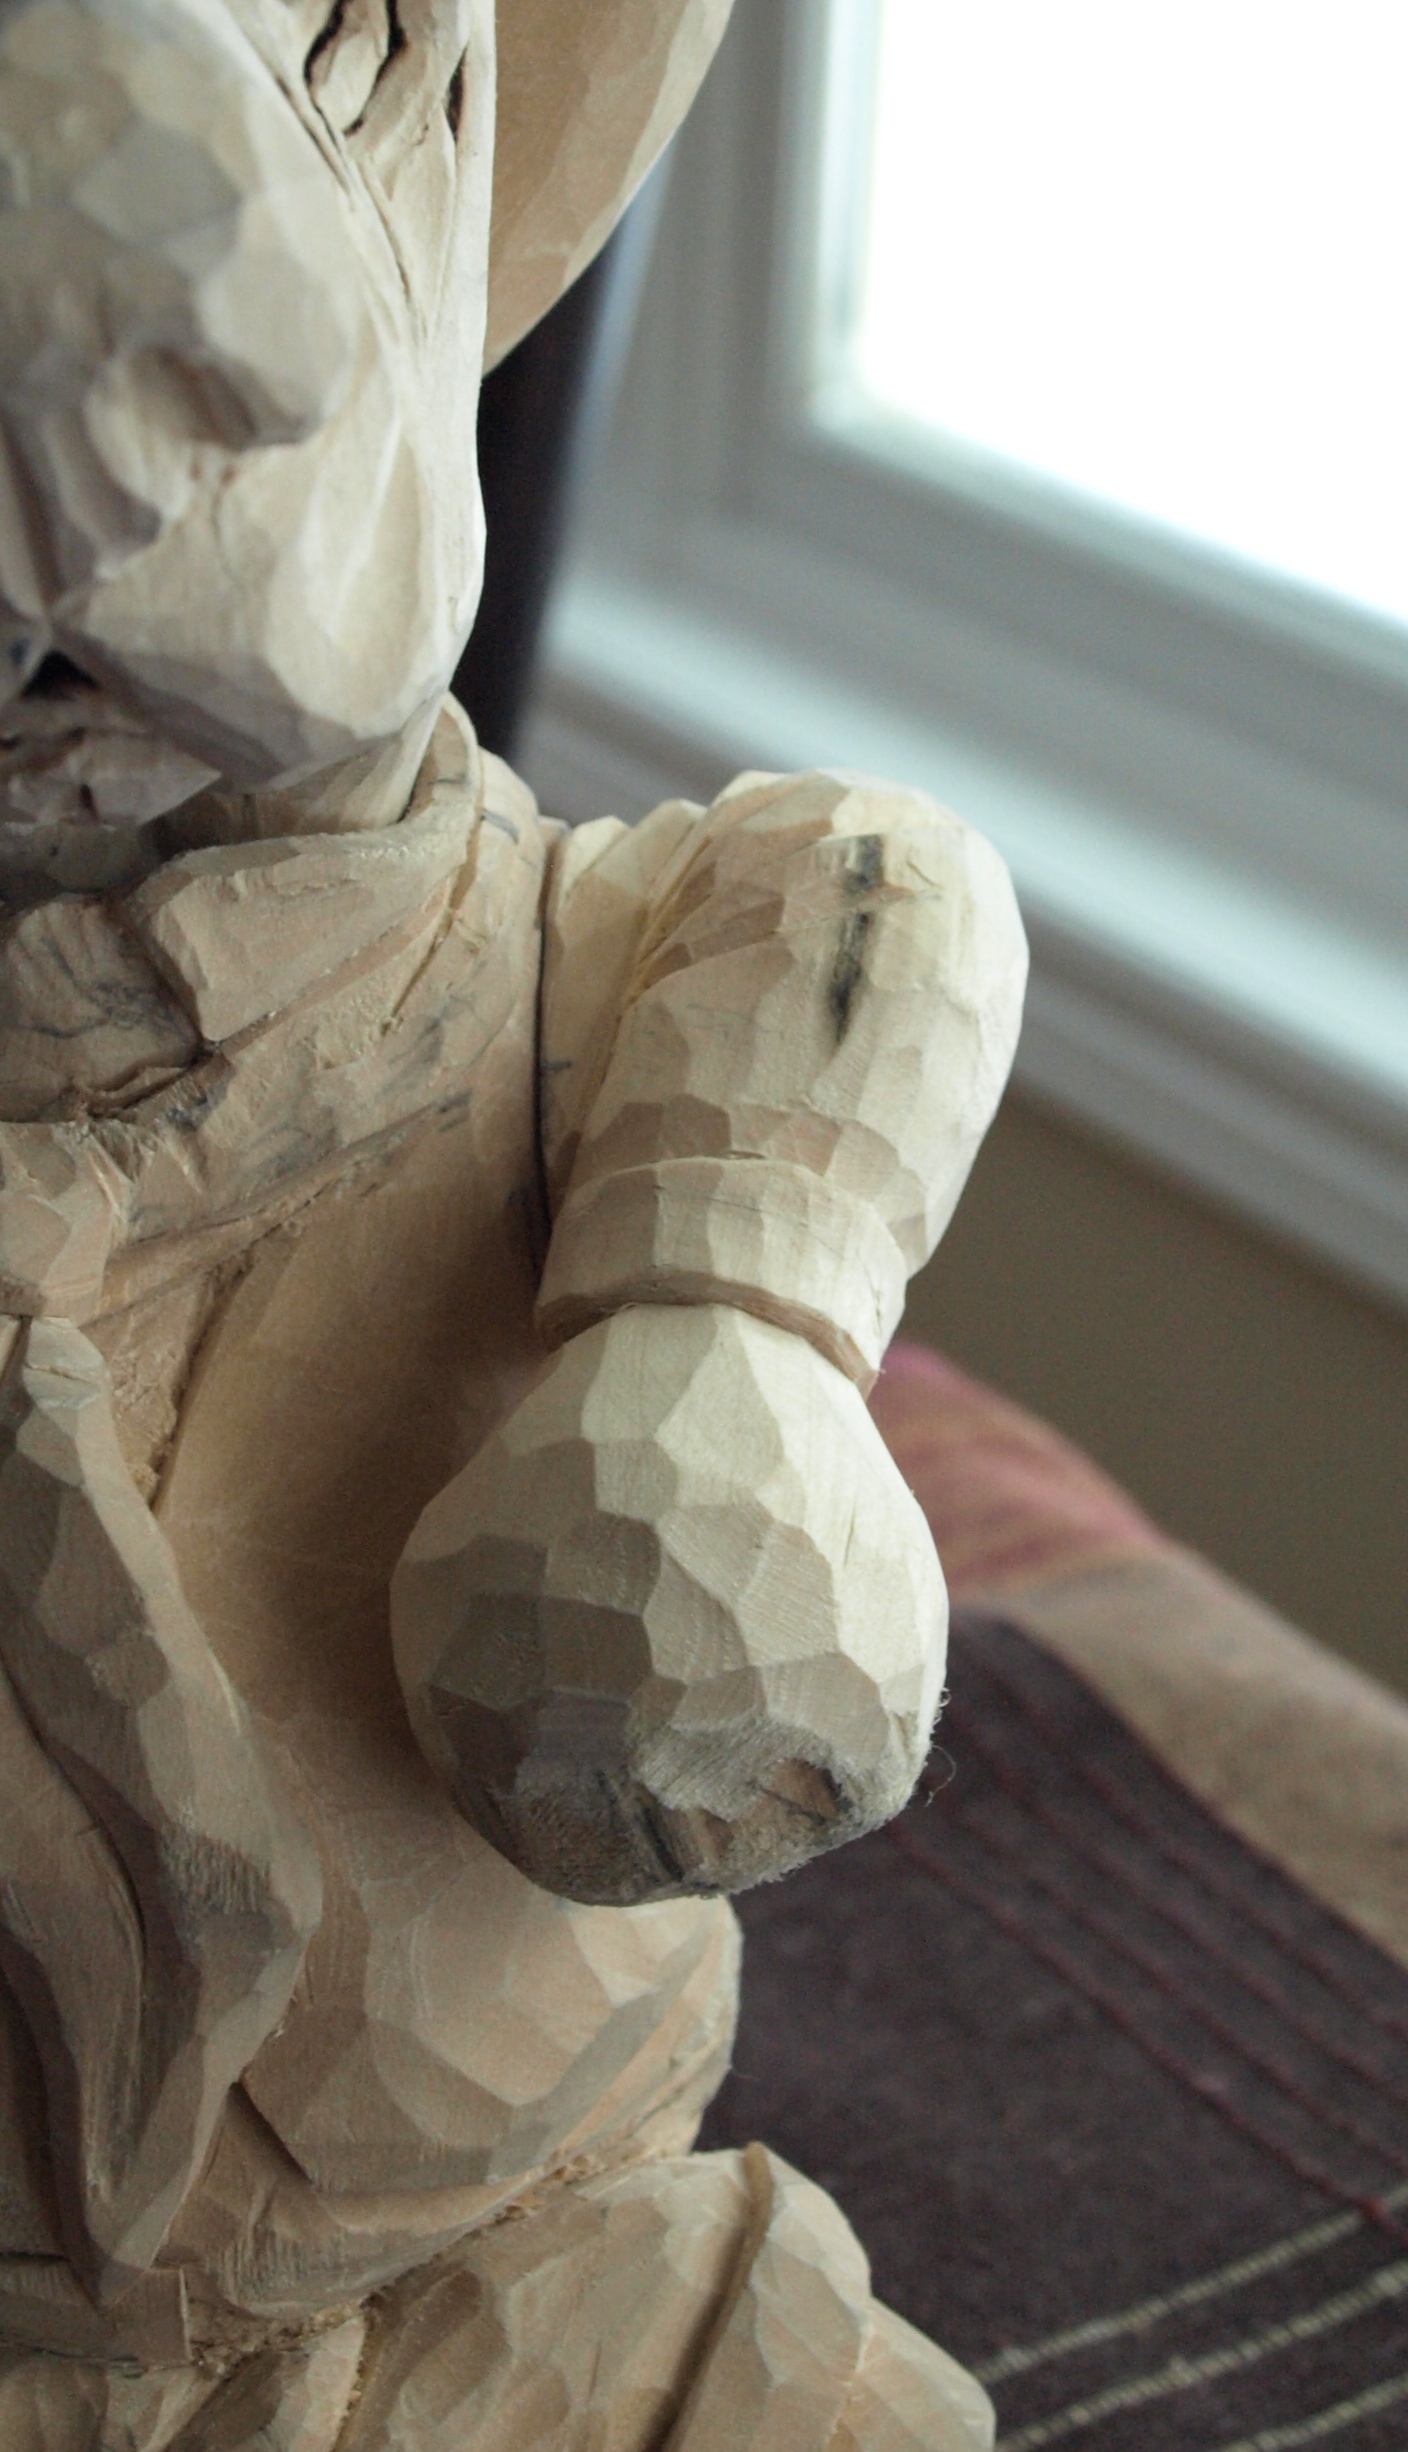
Here’s how it looked with the initial bandsaw cuts and how it looks now with a first pass at providing some fitting and detailing. Check back in a couple of days and I should have the other arm completed.


It’s really facinating how you do that,the arm looks good though 🙂
LikeLike
That method turned out pretty well. The truth is that the hound’s big ears will cover most of the arms, but if someone ever looked beneath the ears…they’d see a nicely shaped arm, I guess.
LikeLike