
A Few “Props” And It’s Done
The “Props” were actually a lot of fun to make and they turned out ok.
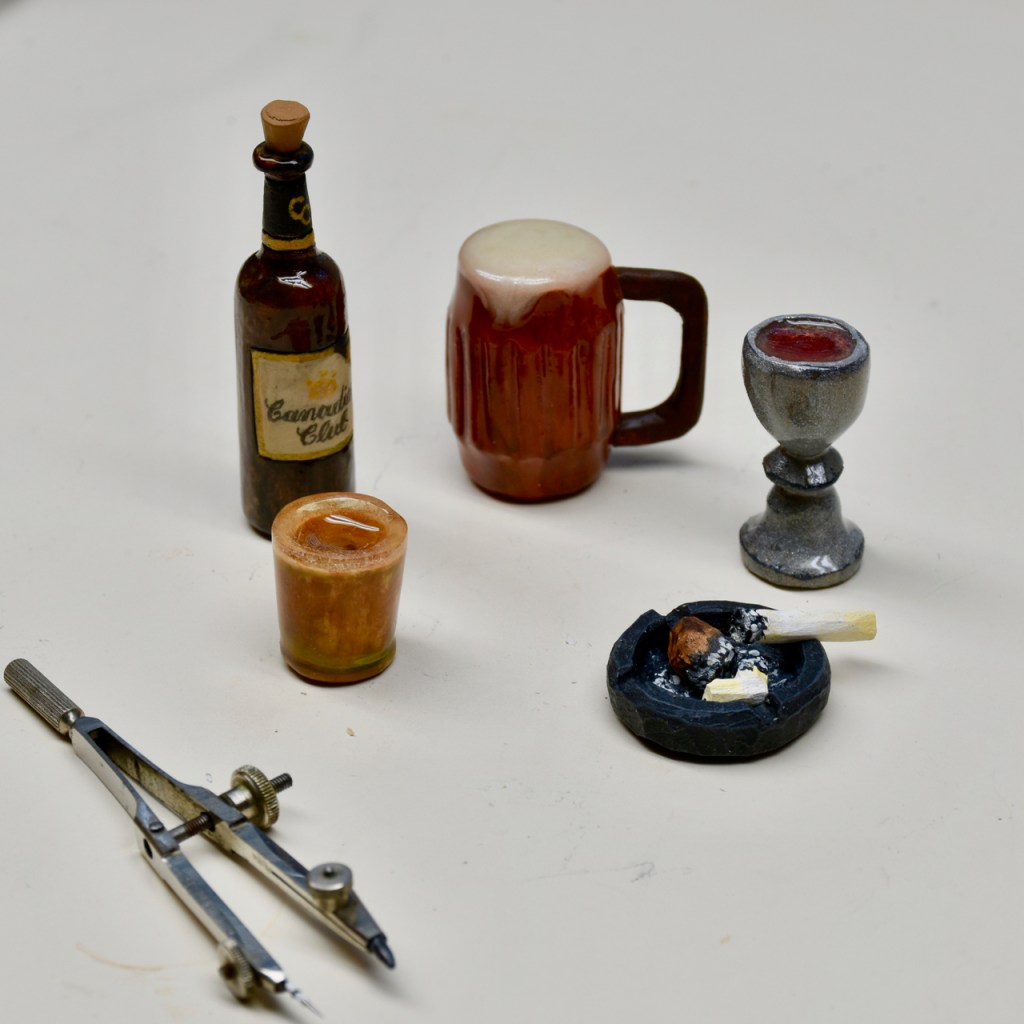
The Vicar’s wine goblet was just carved and sanded and then painted with silver acrylic paint. I mixed a few drops of reddish-brown into a little pool of clear epoxy and dropped it into the cup. The outside of the goblet got a coat of clear epoxy to give it an ultra shiny appearance.
The shot glass was carved and then I built up just about a 1/16th of an inch of epoxy around what would be the rim. I sanded the epoxy as flat as I could and then painted the wood and again covered everything in epoxy. I’m not over-the-moon about it…but it’s ok.
The beer mug was also carved with the handle being added separately. I hollowed out the rim area and after painting the wood, I added some flour to the epoxy and “frothed” it up by stirring it for a while. When I came back to check it, a little drip had formed over the edge of the “mug” and I thought that looked pretty good.
I think that the ashtray is my favourite piece. Just carved and painted it followed by a satin urethane finish.
So, here’s how it all came together. I should mention that I went with the very long caption on the carving so I ended up painting the caption on a base that I made. To get a bit of a template for the script, I printed it out on a Powerpoint program ( in reverse ) and then rubbed the ink-jet printed paper onto the base. It came out pretty light but I just wanted it as an indication of how to space the script…I followed up with a small brush and black paint.


Mark,
Awesome job! Thanks for sharing.
LikeLike
Thanks Terry.
LikeLike
Great job! It’s always the details that make a carving come to life.
LikeLike
Thanks Cam. I agree!
LikeLike
wow it’s so realistic! well done, i have never used epoxy, do you have a recommended brand?
LikeLike