tributesinwood

Wood Carvings by Mark Sheridan

Archive for the category “Soldier”

Startin’ a Spartan

I really have to get Peggy to hide these antler pieces that I have laying around in the workshop…

Here’s the start to my little Spartan soldier.  I’m not sure that they were allowed beards in the ranks but this Spartan looks like he’s ending up with one.

DSC_0554

Advertisement

The Corporal is Ready to March

Check out the photo gallery link at the top of the page for the finished pictures of Duncan Sowerby!  I’m very pleased with the way that he turned out.  I’m also pleased that he’s finished!

OLYMPUS DIGITAL CAMERA

Standing Tall on Cobblestone

ImageToday Corporal Sowerby stands proudly on what will soon become weathered cobblestone.

Here are a couple of shots of his latest progress with everything but the canteen and some assorted equipment straps glued in place.

The cobblestone should be painted by the next update.

Hope you enjoy the pictures!

Image

Accessories Added

Happy St. Patrick’s Day.  I suppose that I should have carved a leprechaun instead of a soldier!  Next year.

I’ve put a coat of urethane on everything and have begun to fasten all of the accessories onto the soldier.  I need to run out and get some silver coloured nails for buttons before I attach the hands and the gun.  I’ll get around to that this week.

Image

Here’s a shot from the front.  I should have also mentioned that I’ve begun the base, as well.  When it’s completed it will be stained and urethaned along the sides.  The top will be painted to look like old cobblestone with dirt and moss growing up through the spaces between the bricks.  I’m still carving the cobblestone.  Right now it looks flat but once it’s finished it will look very uneven and irregular like old roads tend to look.

Image

Here’s a shot of the back of the carving showing the backpack, satchel and ammunition pouch.  I still have the canteen to glue on…still doing a bit of painting on that item.  I’m really happy about how the rolled blanket turned out.

A Colourful Corporal

Image

Well, our 1812 soldier now has some colour.  In a few days, I’ll have his hands and other soldiering accessories painted and glued in place.  A final urethane finish will protect the acrylic paints and really make the colours come out.  You probably can’t see it in this photo, but I have quite a bit of colouring to make him look a bit battle worn…basically, some mud and dirt look.  I’m really glad that I added the legs and shoes as I think that it completes the caricature that started out as a bust.

I’ll get another picture up later this week, hopefully.

Musket and other progress

Here’s a quick picture of the musket that my 1812 soldier caricature will be holding.  The gun stock is made of cherry and the barrel is an old artist’s brush.  The metal plate is aluminum tape and the flintlock mechanism and trigger are made from lead.

Image

The brass looking brackets on the gunstock are actually copper.  I used a piece of electrical copper wiring and flattened it out to make these two brackets.  You might be able to spot two gun strap brackets as well.  These are just made out of wire from straight pins and glued in place.

The gun is in two parts and the split will be hidden beneath one of the soldier’s hands.  I had to split the gunstock in this fashion so that I could fit it closely to the hand that I carved earlier.

In other news…the Corporal now has legs!  I started to paint him and he looked so nice that I decided that it wouldn’t be right to leave him as just a bust…so I glued on some additional wood and carved up his legs and shoes.

I’m just in the process of painting right now, and I’ll get a photo up on the web in the next day or so.

Hands and Musket

We’ll, I guess I’m not setting any land Imagespeed records, but I am making a bit of progress.  It’s tragic how the rest of your life can interfere with carving!

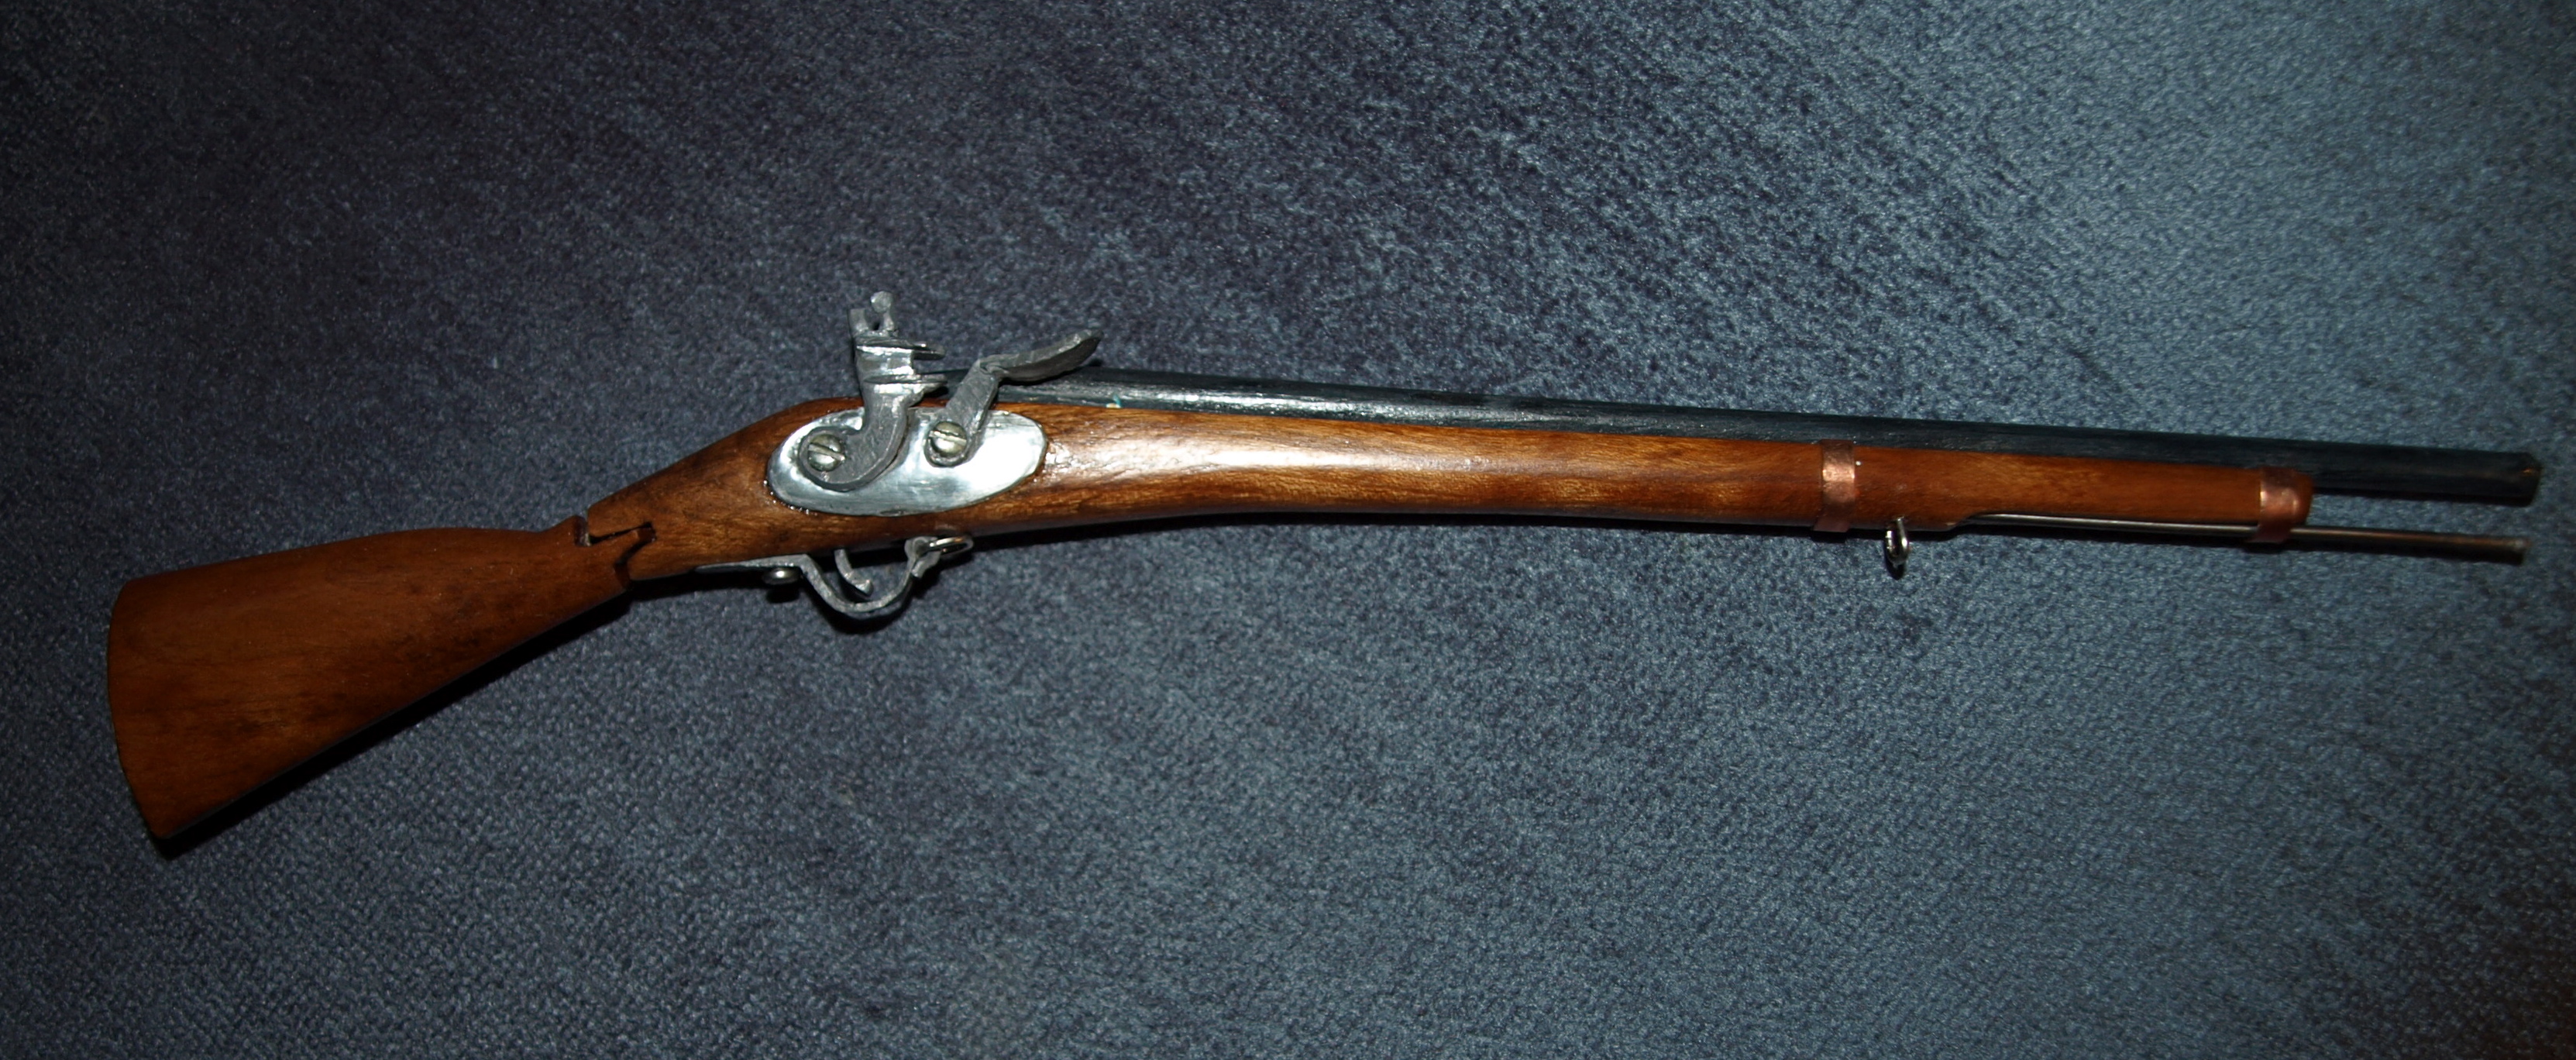
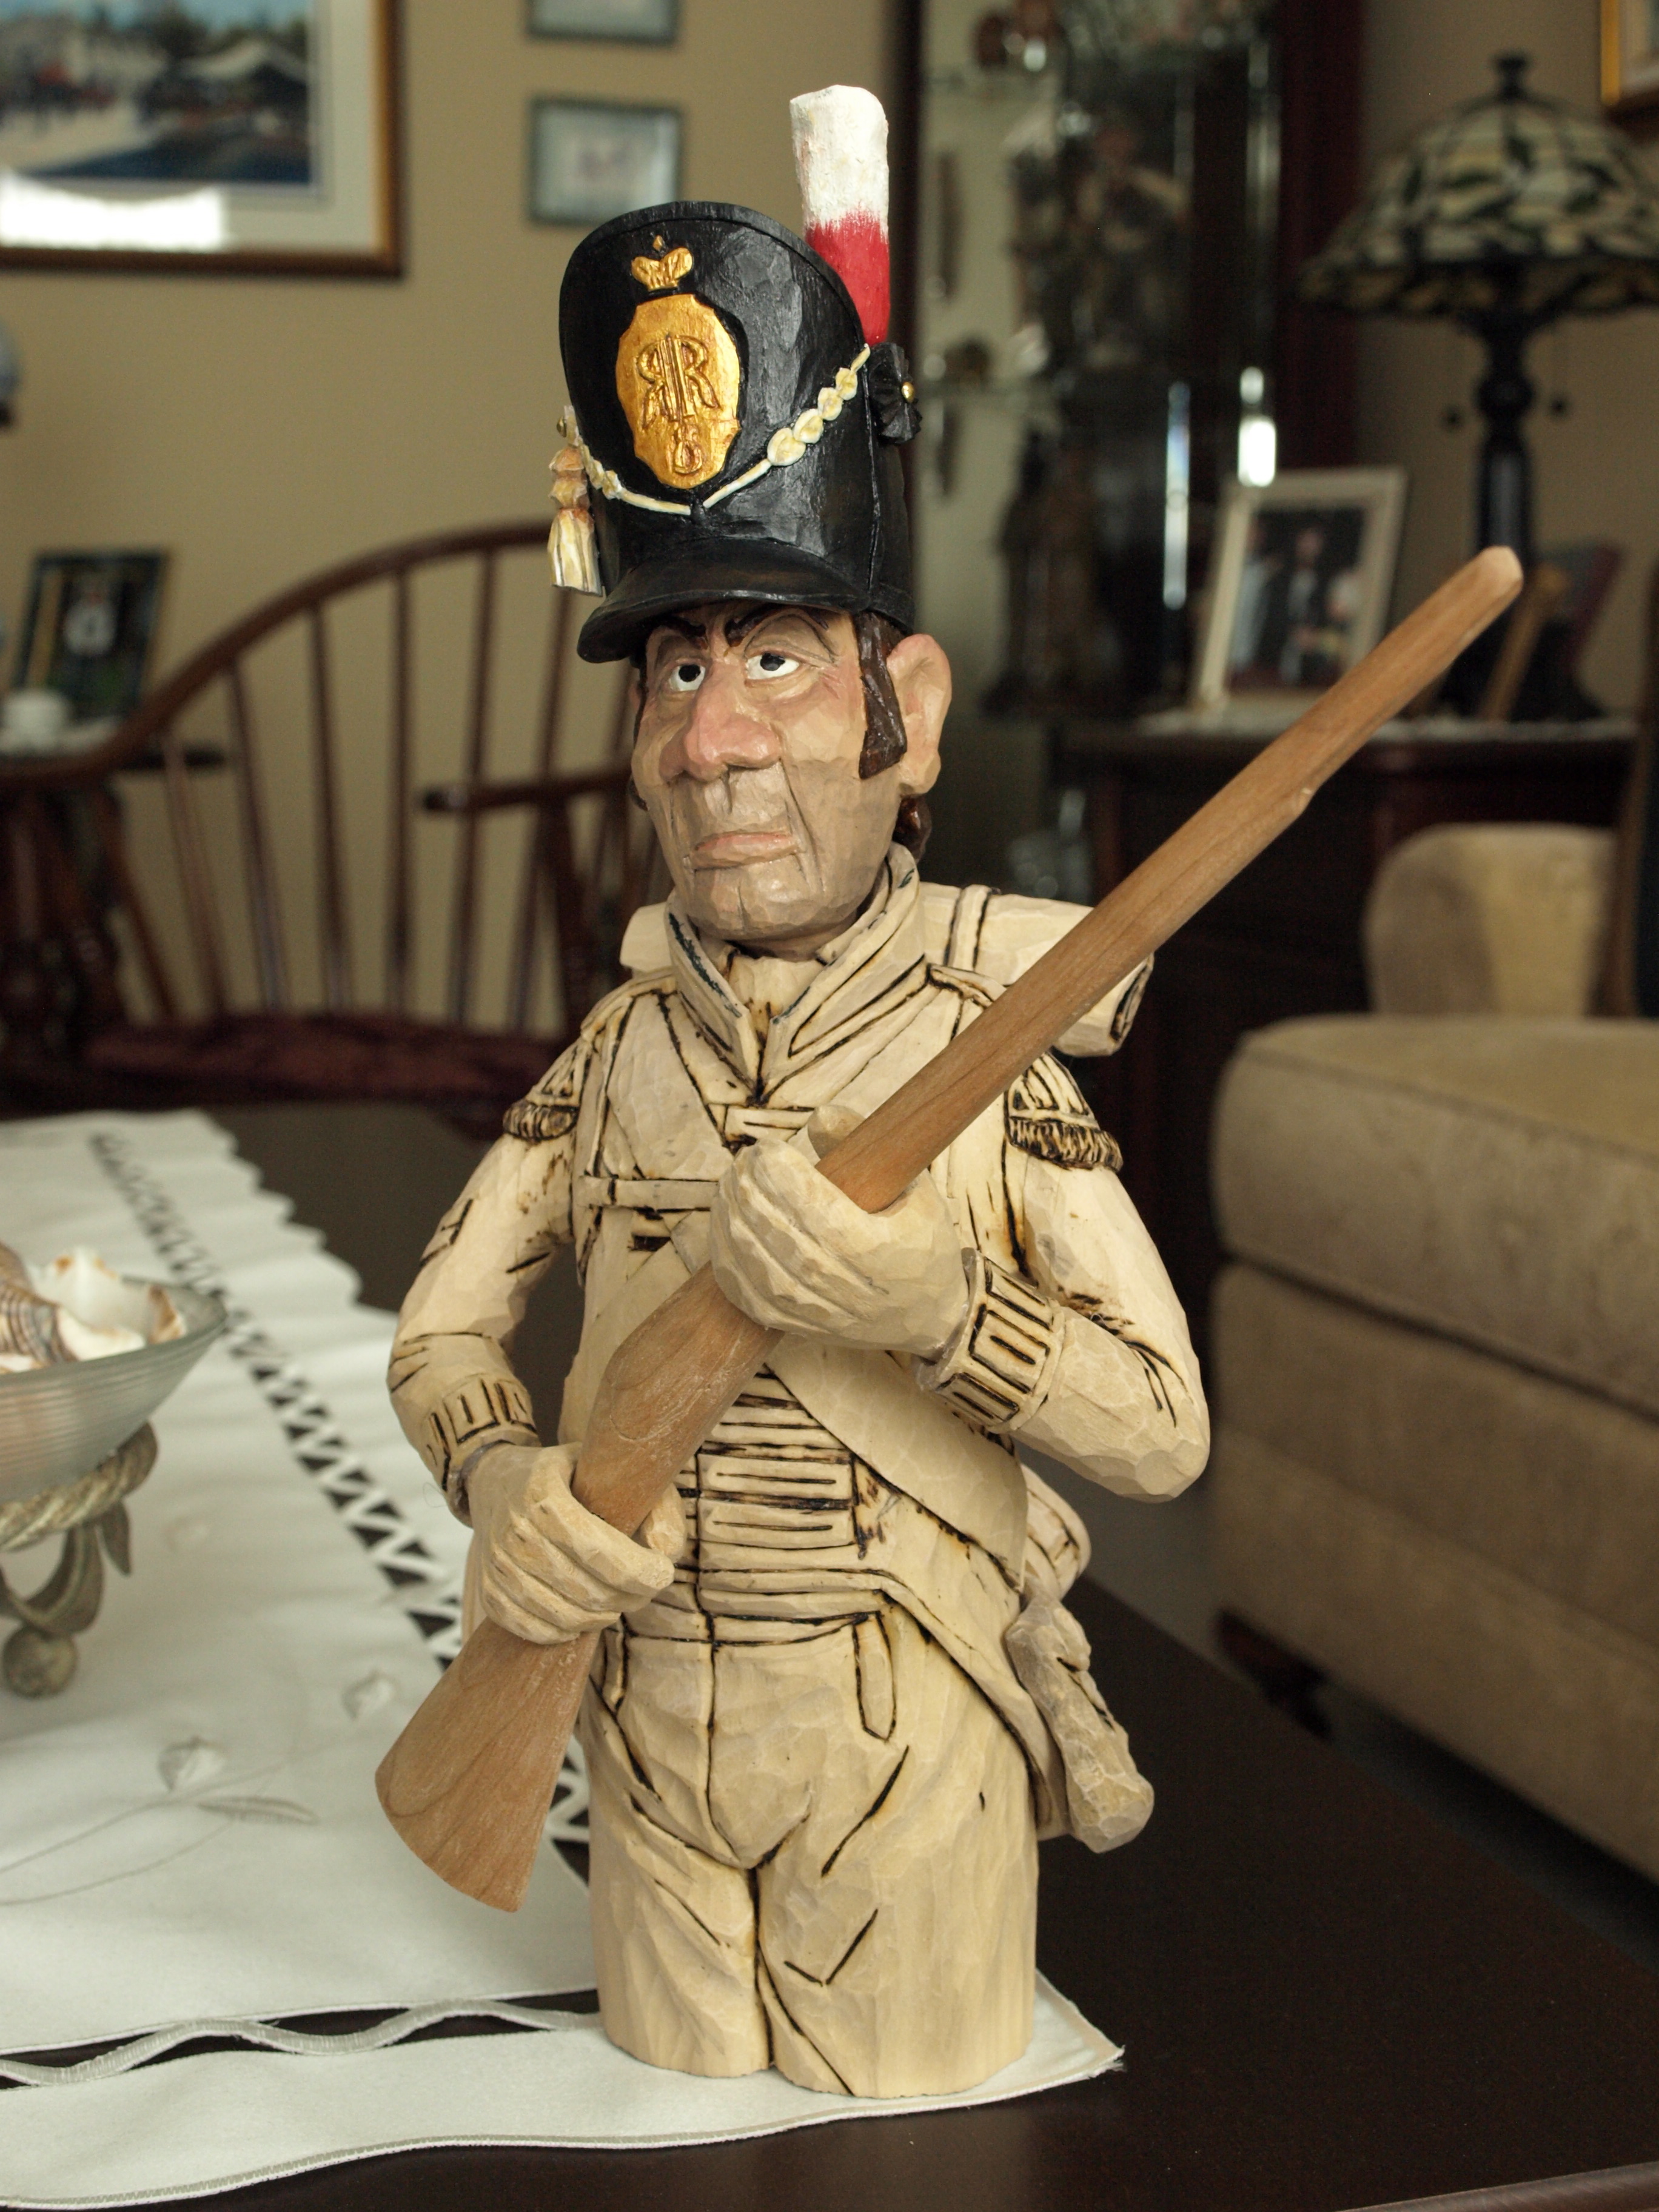
I’ve roughed in the placement of his hands and the musket.  Still a bit more work to do on both…I want to keep the hands over-sized as this is a caricature and the figure should be exaggerated.  The musket still requires a lot of work to include a barrel and flint-lock hammer.  I’ll also include a leather strap ( mine will be probably made from sheet metal ) along the bottom of the barrel with some hardware to attach to the wood gun stock.

The gun stock is actually cut and re-attached underneath his right hand.  If I hadn’t done this, I would never have been able to carve his fingers and thumbs closely wrapped around the gun stock.

I hope that you like the way that he’s progressing…I think that he’s going to look pretty nice when I have him set up on a pedestal.  Just a little more playing around to do and I’ll be ready to start painting.  I’m still shooting for the April wood carving show in Niagara Falls, Ontario, and I now see that there is a second show in Belleville, Ontario on the following weekend.  The Corporal may be doing a bit of travelling.
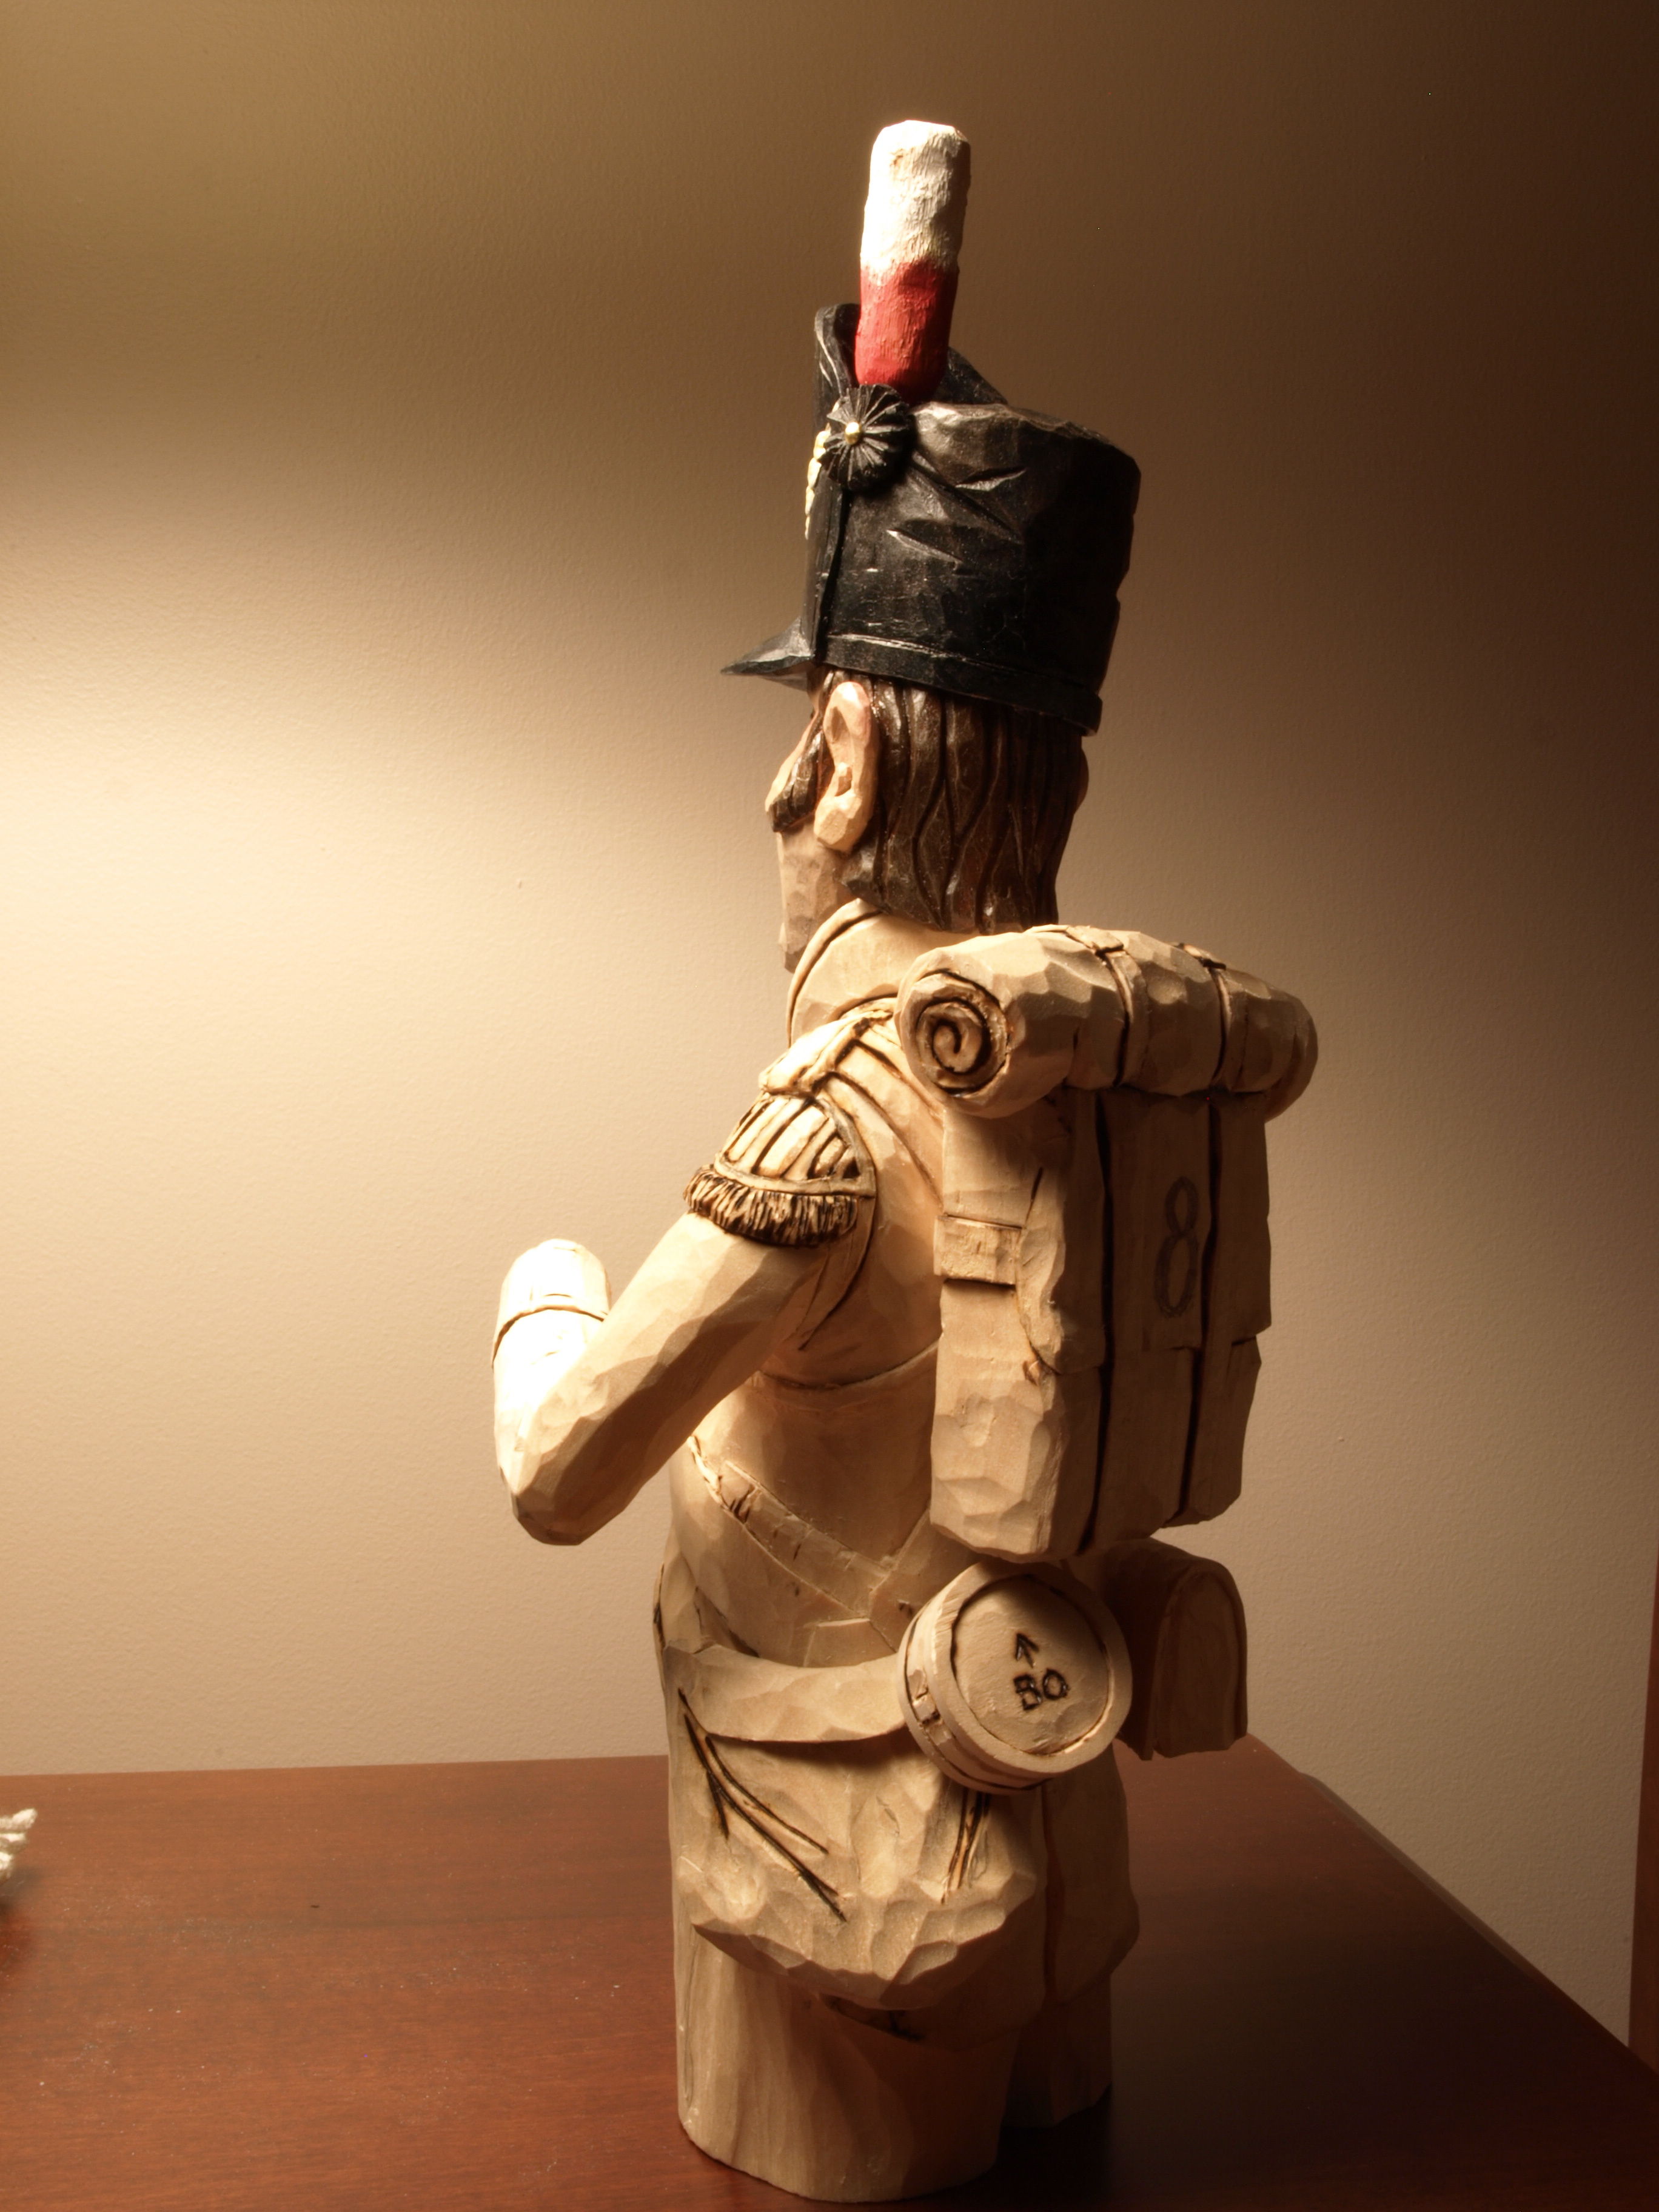
An Update on the Corporal

A bit more progress on Cpl Sowerby.  Didn’t have a lot of time this past week to work on him, but this weekend I hope to get his hands carved and a rough-out of his musket.

Image

I am pleased with the equipment that I’ve carved so far.  That’s a cloth bag on his left side where the soldier would have stored a number of items that he might want to get at more quickly than those items that would be stored in the backpack.  I’m planning on making a strap out of metal strip that will run from that bag up and under one of the carved straps on his body.  Notice that the canteen will lean against that cloth bag and will have another metal strap run up and around his shoulder and the back of his neck.  I like the bed-roll too up on top of the back-pack.  I did see a picture of a soldier with a tin cooking pot strapped to his back-pack and bed-roll…so, the Corporal may just end up with one of those as well.

Image

Here’s a picture of the other side showing his ammunition pouch.  If you’re particularly observant, you’ll notice that the ammo pouch and the canteen are bigger than my earlier pictures.  I wasn’t happy with the size of the previous versions so I quickly carved up a couple more.  I’ve also detailed in the button embellishments on his uniform.  I think that they are going to look great once the tunic is red and the embellishments are yellow.

I’ll get another picture uploaded this weekend…hopefully with a couple of hands in the mix.

The Corporal Gets Some Colour

Cpl Sowerby got a bit of paint this weekend.  I didn’t want him to look too battle worn but not parade perfect, either.  As a result, he has a bit of colourful dirt on his slightly worn hat.

OLYMPUS DIGITAL CAMERAOLYMPUS DIGITAL CAMERA

He’s also been out in the sun a bit too long and picked up a bit of a sunburn on his nose and the tops of his ears where his hat wasn’t giving him any protection.  Then again, I don’t imagine that sun damage was these soldiers’ biggest concern.

A bit of a five-o’clock shadow rounds out his not-so-parade-ready look.

Image

I think the hat badge turned out pretty well.  That’s a base coat of gold with a bit of copper colour for highlighting.  I put a coat of urethane on the front of the hat to give it a more of a leather polished look.  The back of the hat was felt, so it won’t get the shiny treatment.

Cpl. Sowerby Progress

I did a bit more detailing yesterday on Sowerby’s head and hat.  I think it’s looking pretty good with the plume/rosette and rope tassel.  Just a bit more tweaking and it’ll be ready for some paint.

Those are brass coloured nails on the sides to look like button heads.  I’m going to look for some brass or gold coloured film of some sort to put over the badge and still allow the badge carving to show through.

Image

Post Navigation

%d bloggers like this: