Some Fun With Lighting
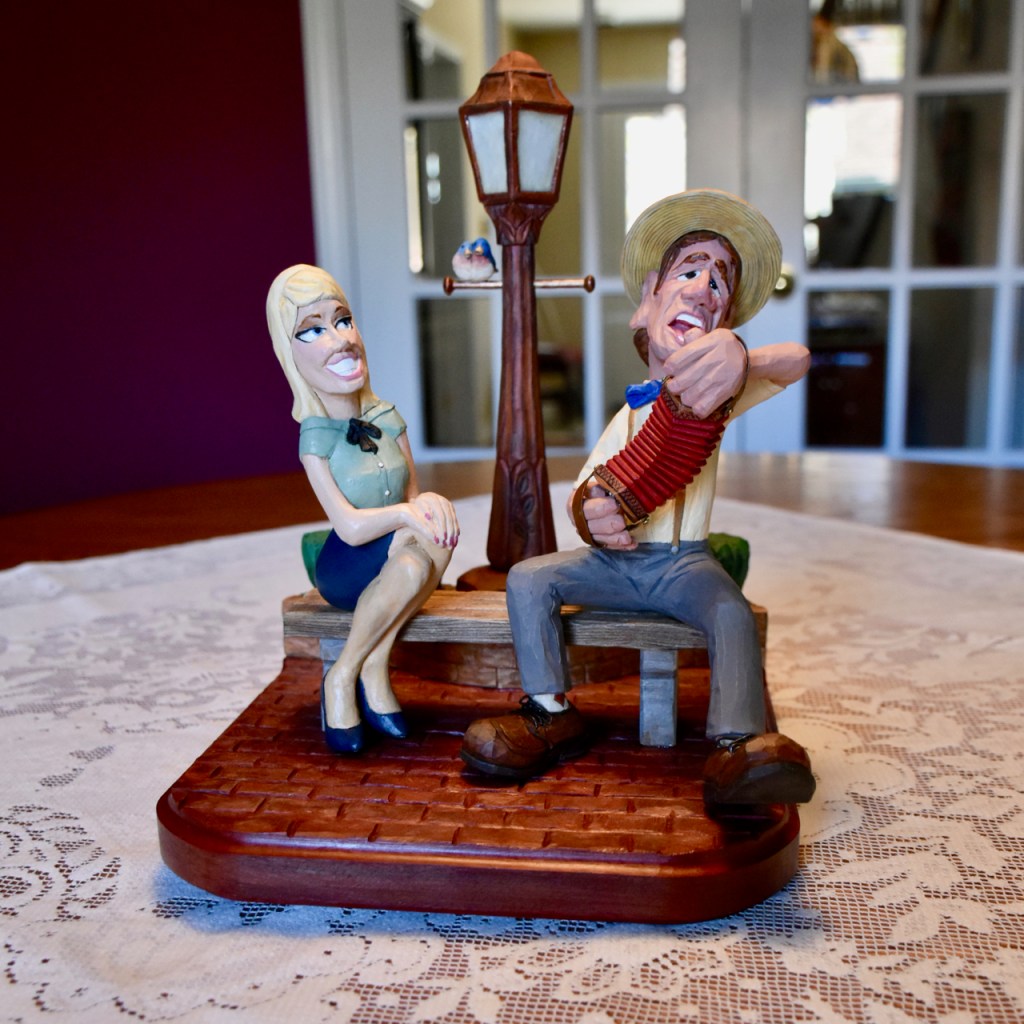
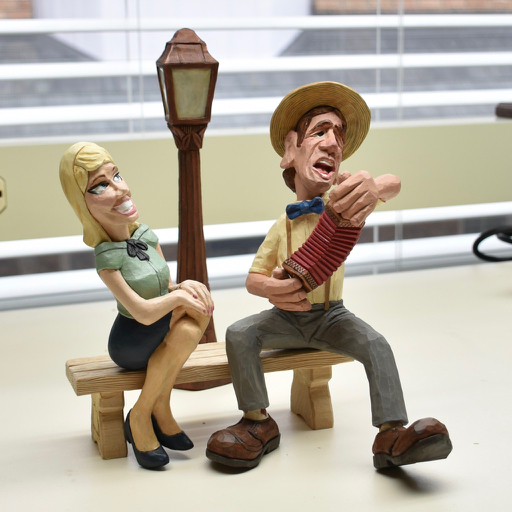
I just needed to post one more picture! I used some lighting behind the carving to make it look like the lamp is on. Combined with a bit of vignetting in the Mac Photo program, it looks pretty convincing.


I just needed to post one more picture! I used some lighting behind the carving to make it look like the lamp is on. Combined with a bit of vignetting in the Mac Photo program, it looks pretty convincing.
I’m never quite sure when I’m finished a carving. I can always think of something extra to add and, in this case, it’s probably going to be a little dog. But for now, I’m going to call this one complete enough to put into a cabinet and move on to some serious gardening.
A friend gave me a piece of bloodwood. I’d never heard of it either. It’s a South American wood, very red in colour and when it’s cut on a power saw it has a very nice odour…something like coconut butter. I used a dust mask but could still smell the fragrance of the wood. Oh…and it’s hard as nails…I would imagine if you were making something substantial from bloodwood, you’d need to buy some new saw blades and router bits after the project was complete.
I used the bloodwood for the base and carved/chiseled/ground/dynamited a few lines in it to represent cobblestone. I then added a little flower bed at the back made from basswood ( which felt like carving butter after carving the bloodwood ) and included a brickwork wall. I added a couple of evergreen bushes and it all ended up looking like a nice backdrop.


I drilled a hole through the lamp post and inserted a brass tube. A couple of screws and washers on the end covered in epoxy made nice little end spindles. Of course, a couple of little blue birds needed to be added to this bar. I also used some light metal sheet to make straps at the end of the accordion.
Before everything was epoxied in place, everything got a light coat of satin urethane.
So, now it’s on to the gardening!


Well, I continue to dabble with a number of projects around the house during our “social distancing” period. I’m not sure if it’s the amount of news we’re watching that consumes our days or just the fact that I have too many projects to play with…but, it seems that I’m not focusing on one thing to any great degree lately.
I did do a bit of carving and painting on my romantic couple scene, though. I decided on a wooden bench with cement support legs and cut that out on the bandsaw as one piece. With a very fine v-tool, I engraved grain marks into the wooden slacks of the bench that will look pretty nice once I paint the bench. I probably did a lot of work for nothing as the two figures will be sitting on much of the grain that I carved…but, I’ll know it’s there! Here’s a photo of just the centre section engraved so that you can see how I went about progressing with it.

I carved and painted the little guy to look a bit ragged but not too ragged. The girl on the other hand was finished with sandpaper to make her smooth and delicate and then painted with bright, clean colours. The little guy has been left with all of the angularity of the knife cuts with wrinkles cut into place…and then painted with a bit of off-colour spots and dry brushed highlighting to make him look just a wee bit dusty.
But the real fun was when I decided he needed a hat. So I made a nice straw hat for him in my usual way with the crown and brim as separate pieces for strength ( thanks to Lynn Doughty for this tip ). After carving it up and glueing the two pieces together, I used a wood burning tool to make a spiral wound weave and then painted the whole thing with a combination of whites, beiges and a honeycomb colour. Of course, the top of the little guy’s head needed to be lopped off to accommodate the hat. Looks pretty nice, I think…


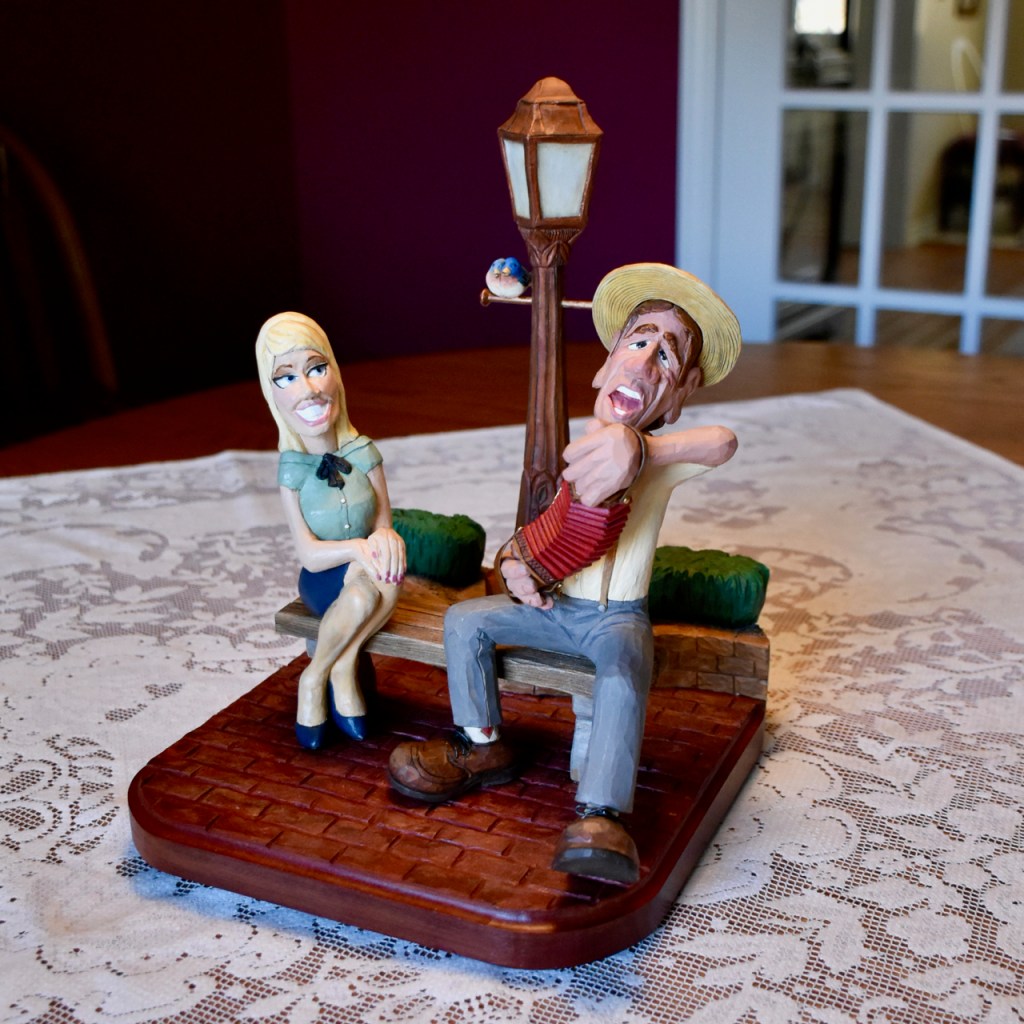
So, here’s how everything is looking so far…
Take care of yourselves, everyone…regardless from where you’re reading this post, we’re all in this together.
Peggy has two brothers who happen to be Maple Leaf fans. Although I’d like to apologize to you for this, that would only make them mad and both are bigger than I am.
To keep them calm in the midst of how this year’s hockey season ended (they both firmly believed that the Leafs would go all the way this year ), I’ve made them both a little carving.

I used a lathe to initially rough out the cup. I tried initially to carve the concentric circles/levels of the cup…but it’s just too hard to get it right. I left the centre portion that would house the face and then just carved away three of the four corners. The last corner left, of course, was there for the face and particularly the nose.
I did carve over the portions that were turned down on the lathe just because I like to see the angular knife marks in a sculpture. Following the carving, I painted the face and the silver portions of the cup, blending the two together. After sealing everything with satin urethane, I applied a bit of antiquing stain just to bring out some of the detail that would have been hidden by the silver paint.

Thank goodness that I have lots of projects to keep me occupied. Like most communities around the world, those of us who can stay indoors are doing just that. We’ve been out to walk Rosie and pick up a few groceries but other than that, we’ve been trying to help out the situation by staying pretty much to ourselves. I hope that all is well at your homes.
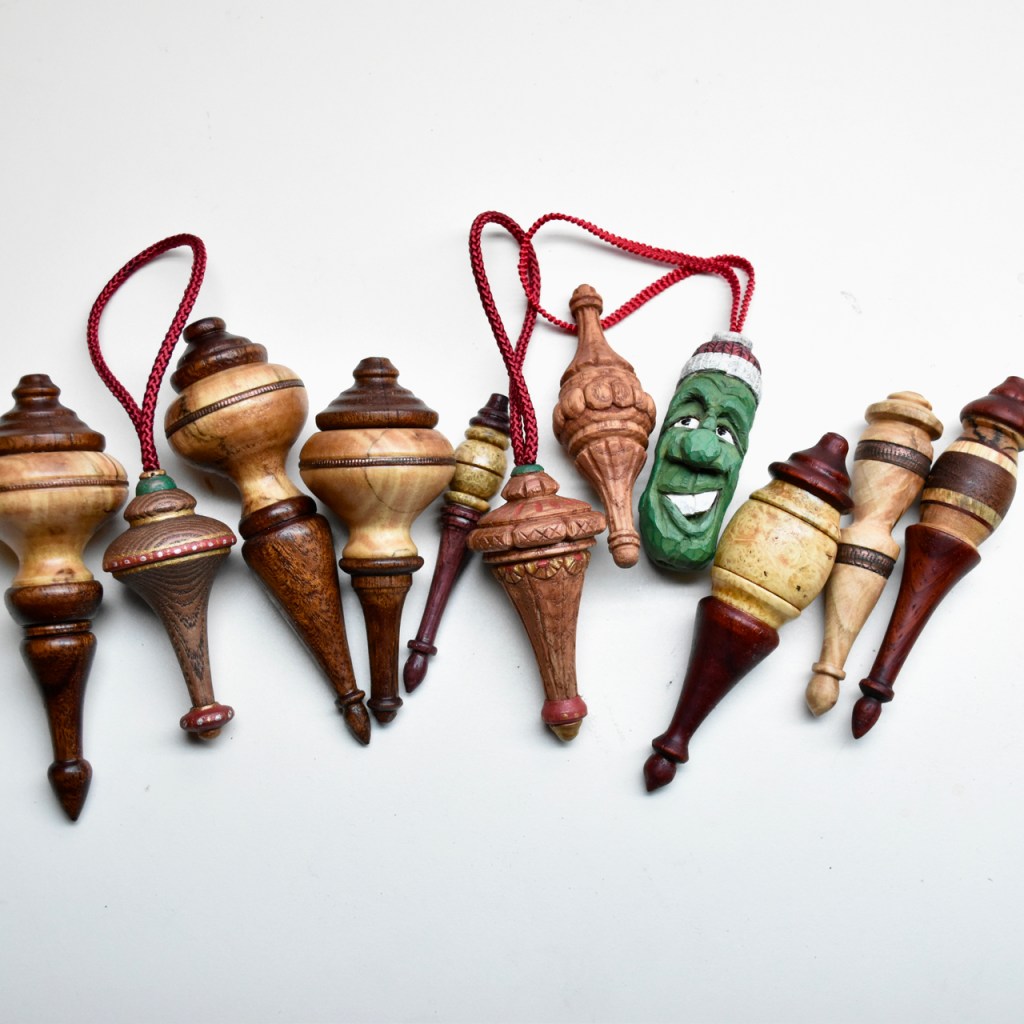
I’ve done a bit of lathe turning since my last post on tributesinwood.com Some friends that I’ve been carving with have been giving me little scraps of some nice exotic woods that are just big enough to turn into Christmas tree ornaments. I’ve been enjoying that. The pickle ornament isn’t exactly exotic wood…but, certainly out of the ordinary!
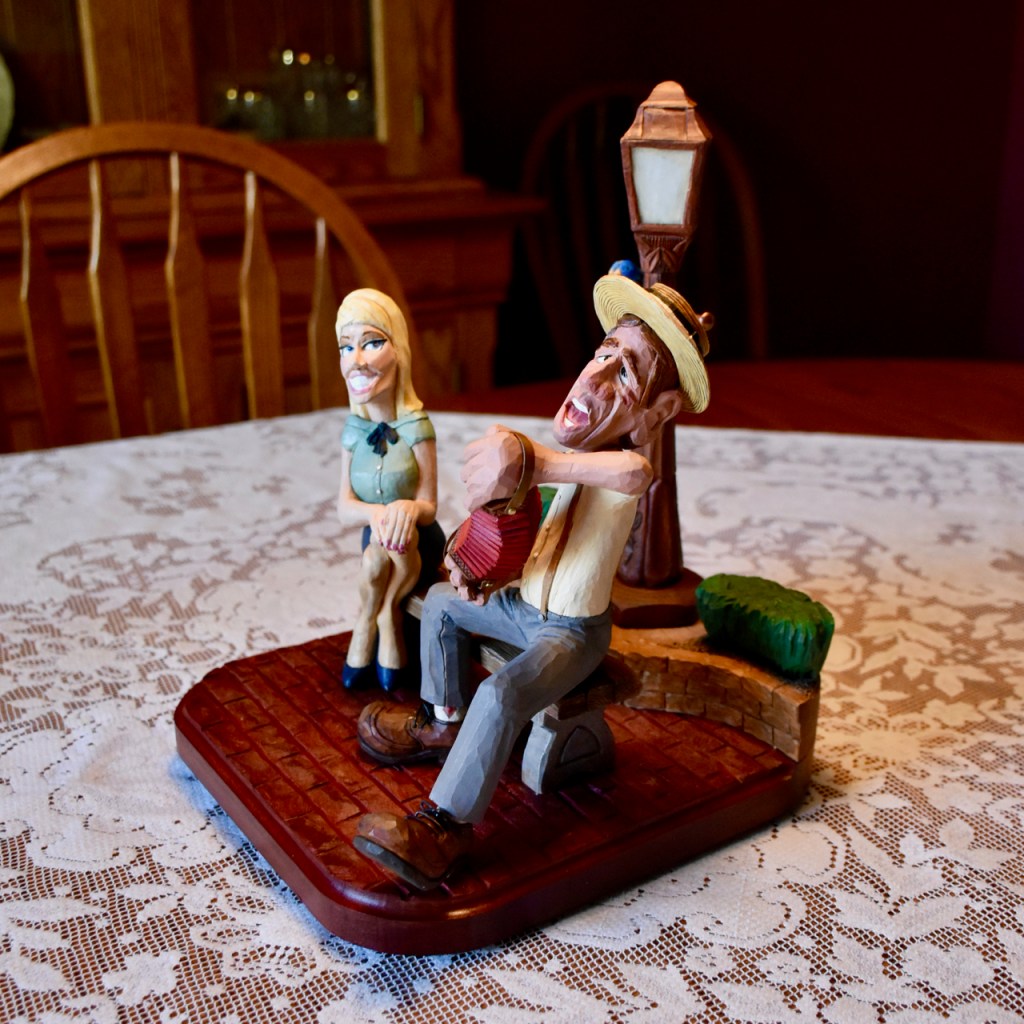
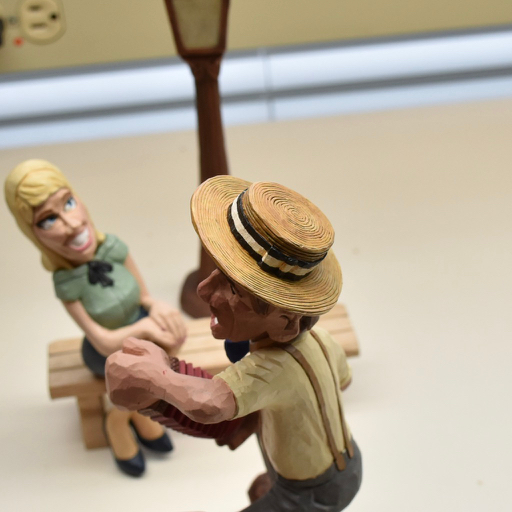
I’ve also been making some progress on my little romantic scene. A street lamp and an accordion has been added to the scene along with a set of oversized shoes for the romantic fella.


My intent all along was to try to make the gal very delicate and her fella kinda rough around the edges. So, I spent a lot of time getting her hands and feet carved quite dainty and then I sanded and smoothed away all of the knife marks. This is the first time that I’ve intentionally sanded away the gouge and knife marks on one of my caricatures. I’m hoping that the contrast between her smooth features and the rougher features of the fella come across well in the final carving.
Here’s how she’s looking all painted up. The painting was pretty straight forward although I added just a bit of silver to her blouse to make it sparkle a bit and I used alternating washes of flesh colour and yellow ochre on her legs to make it look like she’s wearing nylons.

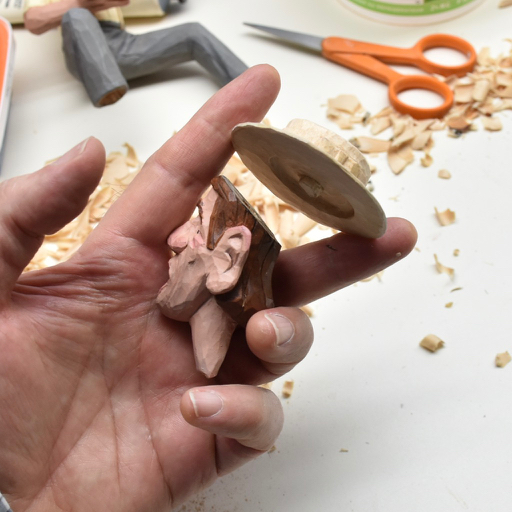
I’ve been busy with a million things but did get some time to start a caricature of a boyfriend for our little gal. She’s been patiently waiting and it seems that Valentine’s Day might be the right occasion for a formal introduction.
This little fellow will be a bit geeky when finished, so I started with a facial expression that was a bit distant and a wide-open mouth singing a love song at the top of his lungs. I stuck that head in what became a clay figure that would accommodate an old fashioned accordion. I thought an accordion would be the least likely instrument that even a love-struck boy would bring with him on a date…

There’s not a lot of detail in the clay figure, just enough to give me a sense of the right posture and a bit of an image to trace onto paper and bring to the bandsaw. After some bandsaw work and some roughing-in with a Foredom and knife, I set the two figures together to get a sense of positioning.
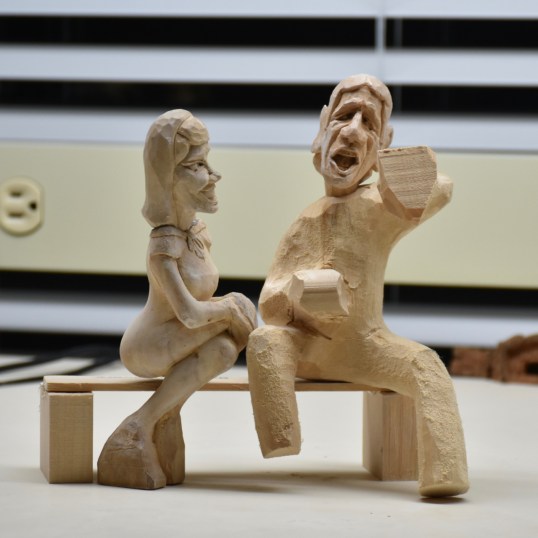
I’ll add shoes later, but needed this rough image to determine the orientation of the hands and the space that I needed to fit the accordion. After adding a bit of detail…including a bow-tie, of course…here’s how it’s coming along.

I finally got around to trying to carve a female caricature. It’s something that I’ve been wanting to try but have never got around to it until now.
I’ve always thought that a male caricature carving would be easier than trying to do a female caricature. A man’s face just seems to me to lend itself more to a caricature…you can really exaggerate the size of the nose and ears, you can give him really baggy eyes and lots of wrinkles and the face will still look great when it’s finished.
Now, if you do similarly exaggerated features for a woman’ face, well, you really start worrying about whether or not you’ll even be able to tell that it’s a woman.
So, off I went with the challenge to carve a pretty caricature…big eyes, nice bright smile and tiny nose.

I liked her so much that I thought that she needed a dainty little stance to go with the pretty face. Sitting with one knee over the other and her hands neatly placed together, she started to take shape.
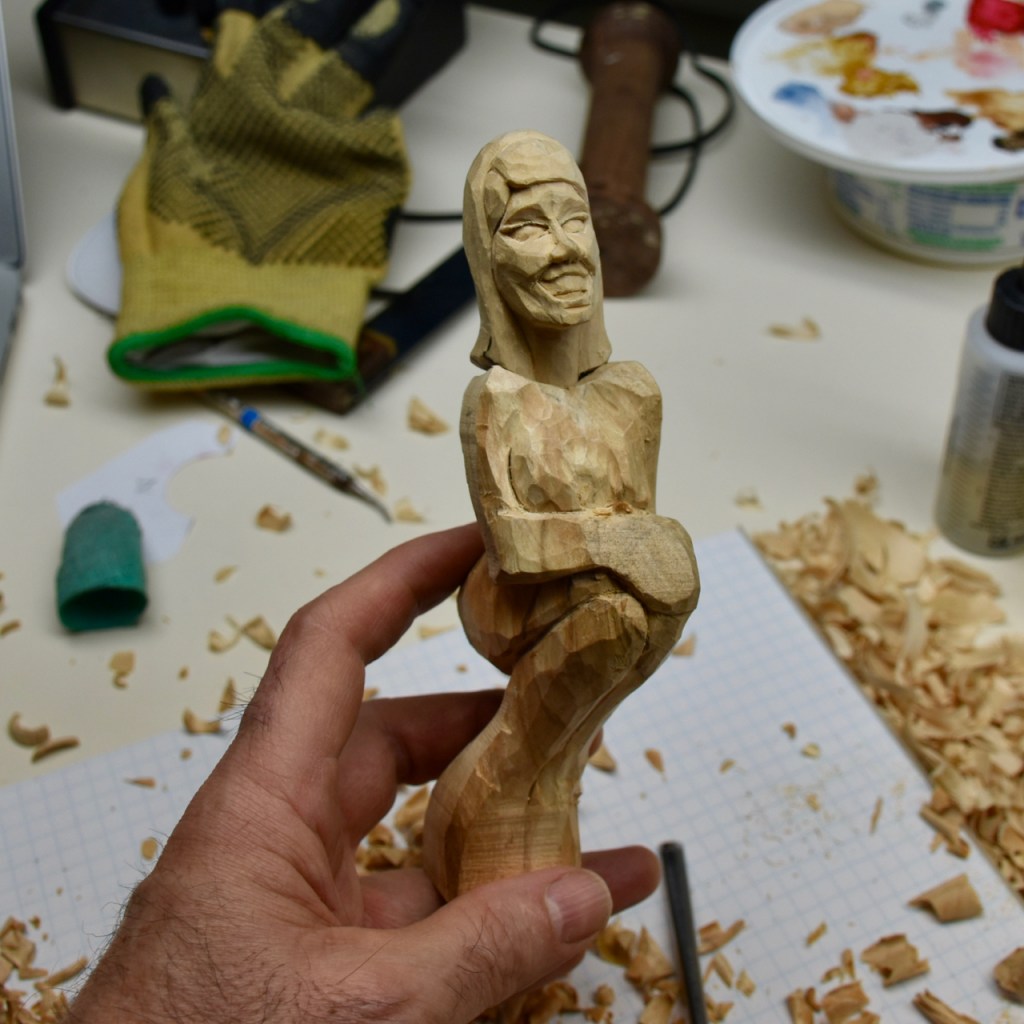

As I went, I started to sand things smooth and remove the knife marks. I thought that this might make her look even more dainty. I’m not sure what the setting will be just yet but I’m thinking about something that pairs her up with a beau who she’s fond of but who is not quite as attractive as her…

A few Christmas carvings along with eating all kinds of Christmas goodies got in the way of completing my latest Basset in a Basket! But here it is all finished.
Finishing included a variety of washes of different tones of brown on the darker sections of the little hound along with a slightly off-white for the remainder. The basket also has a number of tones but predominantly yellow-ochre and shades of almost a butterscotch colour.
Everything was topped off with a light coat of satin urethane that was mostly wiped away before it set.


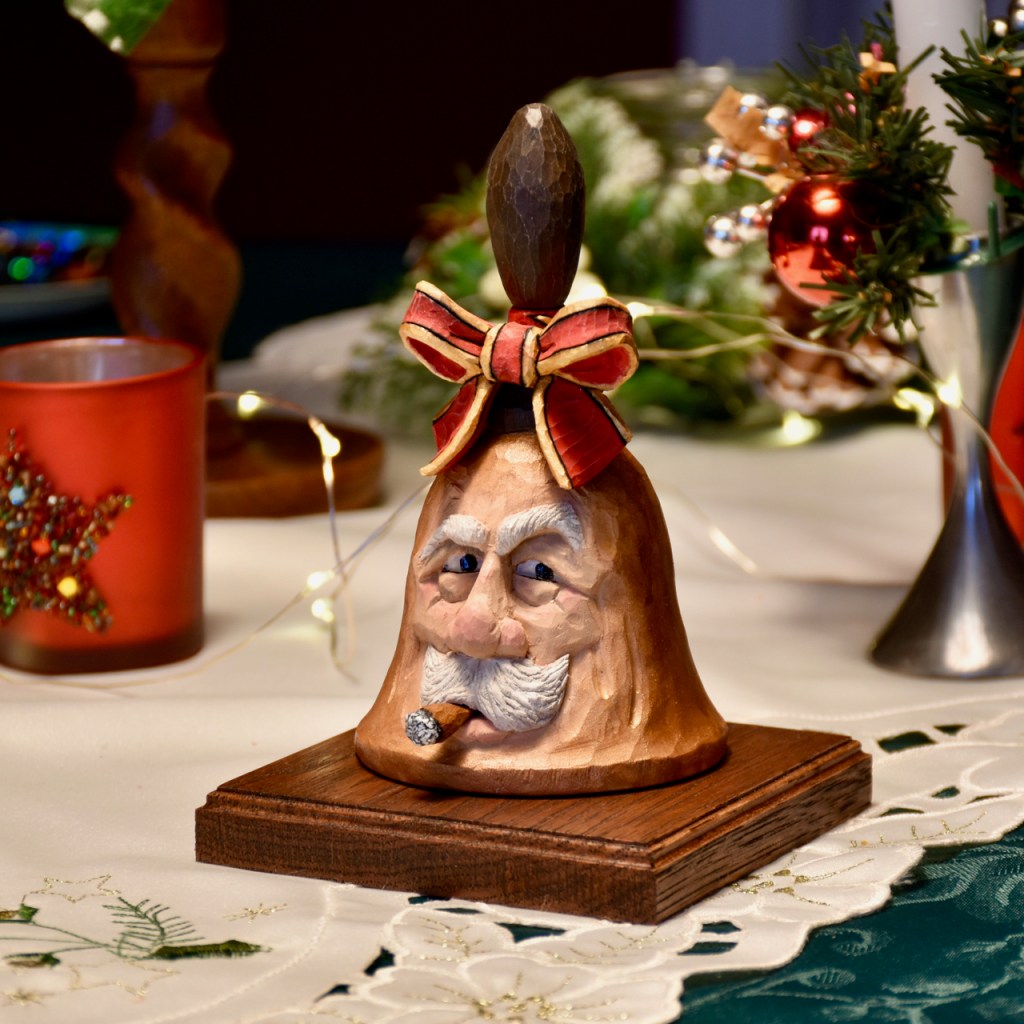
I added a handle and small bow as two separate pieces to the carved bell. Both the handle and the bow have a little dowel drilled into the neighbouring pieces to locate it and were epoxied in place after I had finished the painting. That bow was actually a lot of fun to carve.
The handle is several light coats of asphaltum brown. The bow is cherry red and gold. You can see from the previous photo that I separated the two colours with a wood burning line. This not only looks nice but it also makes a bit of a dam when you’re painting…the two separate colours stop dead at that line and don’t bleed one into the other.
The face is flesh colour with some red mixed in for the nose and cheeks and some Payne’s grey above the eyes. The brass portion of the bell is alternating light coats ( washes ) of gold and “worn penny”…which looks like copper. I was quite surprised that the flesh colour of the face blended nicely into the brass colour without looking odd. At least as non-odd as a bell with a face can be…
After a bit of dry brushing with a beige colour to pick up the high spots on the knife cuts, the whole thing got a light coat of satin urethane. A slightly grumpy looking Christmas Bell and a fun project.
Well, Emily and Paul received their Christmas Pickles and were happy and confused by them. But it was fun.
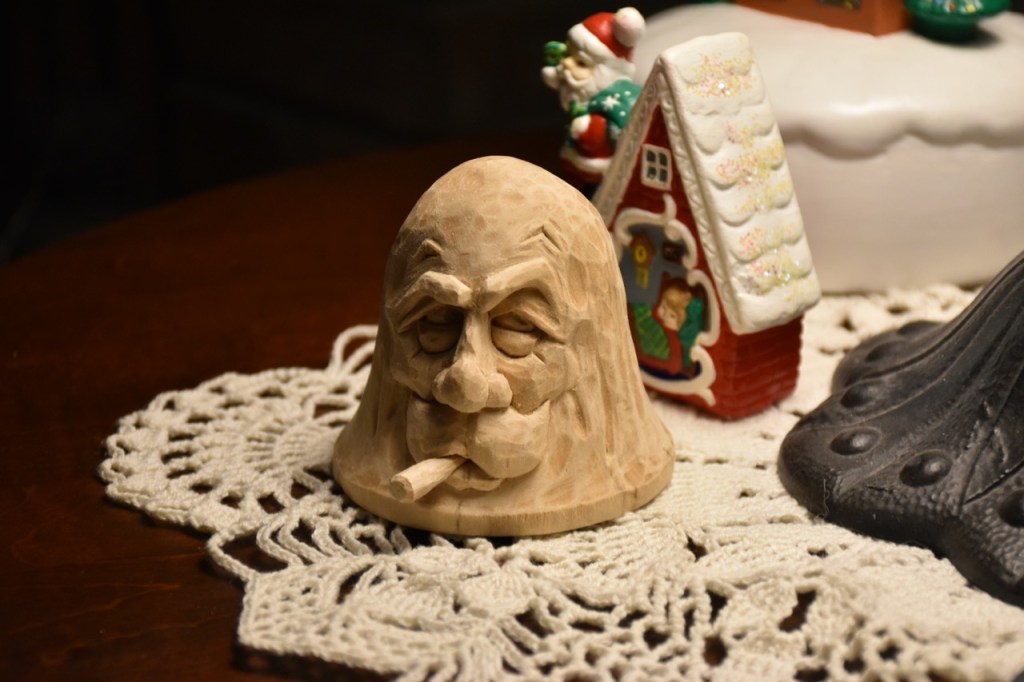
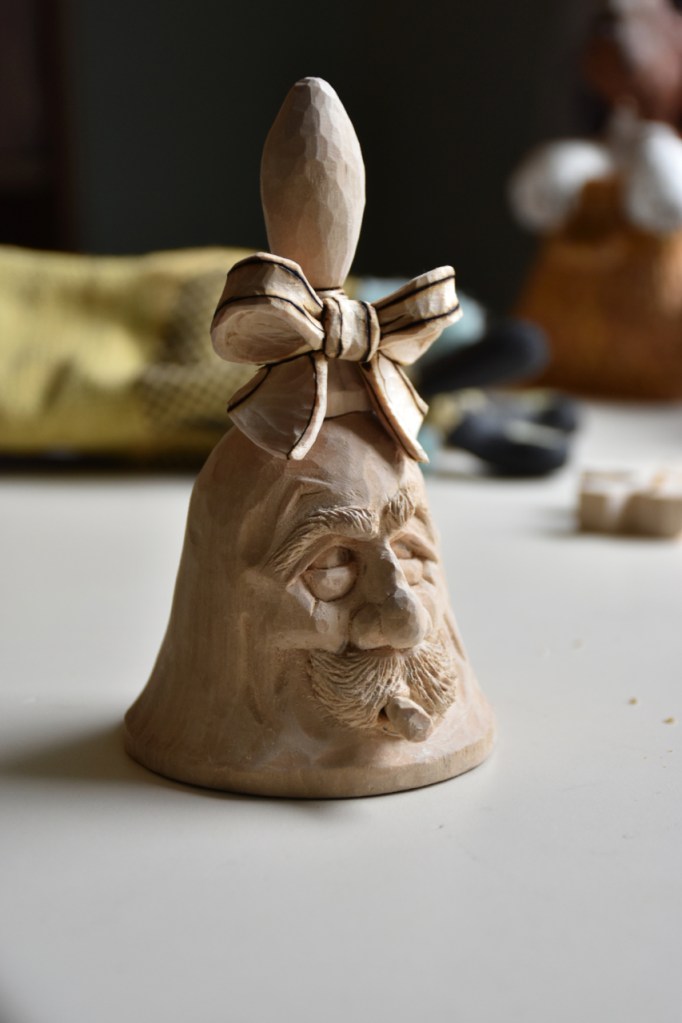
After the festivities, I started carving another little face figure. This time, a face within a bell. You might recall the “Claymations” Christmas versions of the bells. I guess that my bell is loosely based on those. I’m not finished yet, but here’s how things are coming along.
I started with a pretty simple bell pattern cut out on the bandsaw. The face is located on one of the corners of the bandsaw cut so that you have a lot of wood to play with as you start shaping the face.

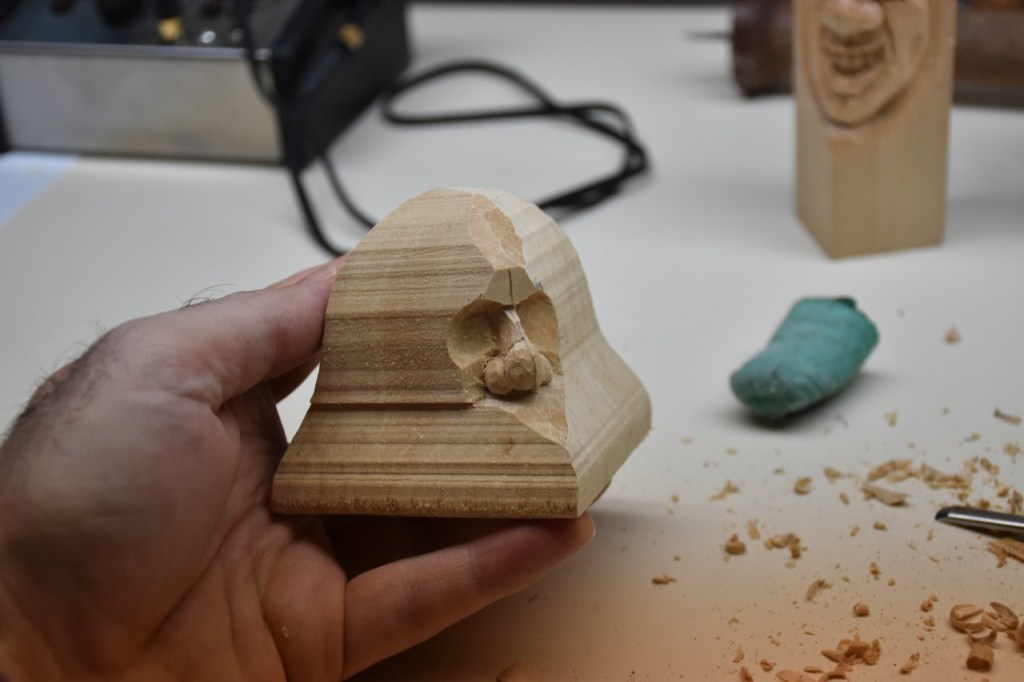
I won’t go into the detail of shaping the face. I basically have been following Lynn Doughty’s method of laying out the face and find that works well for me. Check Lynn’s work and his videos out at outwestwoodcarving.
I want to add a handle with a Christmas bow on it…so, there’s more to come.