tributesinwood

Wood Carvings by Mark Sheridan

Archive for the tag “Basset Hound Carving”

Painting the Howler

I’m not nearly complete on the painting of the Howler, but I had to put a quick photo up to show you the progress.

This little hound is tri-coloured and I used several ( many ) washes of chocolate brown, asphaltum and carbon black over the light cream coloured base that I applied the other day.

I’m pretty pleased with the way the Howler is turning out.

OLYMPUS DIGITAL CAMERA

Final Touch Before Painting

Just a final touch on the figures before they get some paint.  I know this isn’t much of a photo of anything but I wanted to show a shot of what the tails look like with the coat of epoxy covering the twined copper wire.  The epoxy is just that…a two part “glue” that sets within five minutes.  You can get epoxy that sets at different rates, but the five minute version seems to be just right for coating these tails without too much dripping or sagging before the epoxy cures.

I’ll give the clear and smooth epoxy a very light sanding with fine sandpaper to give the acrylic paints something to bite into and adhere to well.  

This is a long weekend coming up and I know that at least one of those days is supposed to be rainy…so, maybe I’ll get a little ways into painting up my three little hounds.

OLYMPUS DIGITAL CAMERA

Squirrels and Tails

Our little squirrel received a bit more detail attention and also found a little acorn to bring to the party.  The little guy also received a light coat of gesso as a paint primer and is ready for some acrylic colours.

OLYMPUS DIGITAL CAMERA

The tails are made from regular household wiring.  I simply remove the protective plastic from the copper wires and twine together the “black”, “white” and “ground” wires into a tight little braid.  The way that I do this is to pinch one end of the three wires together in a vise and the other ends into the chuck of a hand driven drill.  You could also use a battery operated hand drill…but, make sure that you go slowly.  I would not do this with a drill that doesn’t have a variable speed as this would be just too fast and dangerous to you.  You end up with a “braided” wire that you can epoxy into a drilled hole in the carving and then shape to the curvature that you’re looking for.

OLYMPUS DIGITAL CAMERA

OLYMPUS DIGITAL CAMERA

Once I get the tails to this point and positioned the way that I want them, I mix up some slow setting two-part epoxy and coat the tails with this mixture.  As the epoxy sets, you can form the epoxy around the wire to make a nice smooth surface that hides the wire and makes a great, slightly roughened surface for painting.

Cypress Knees and a Squirrel

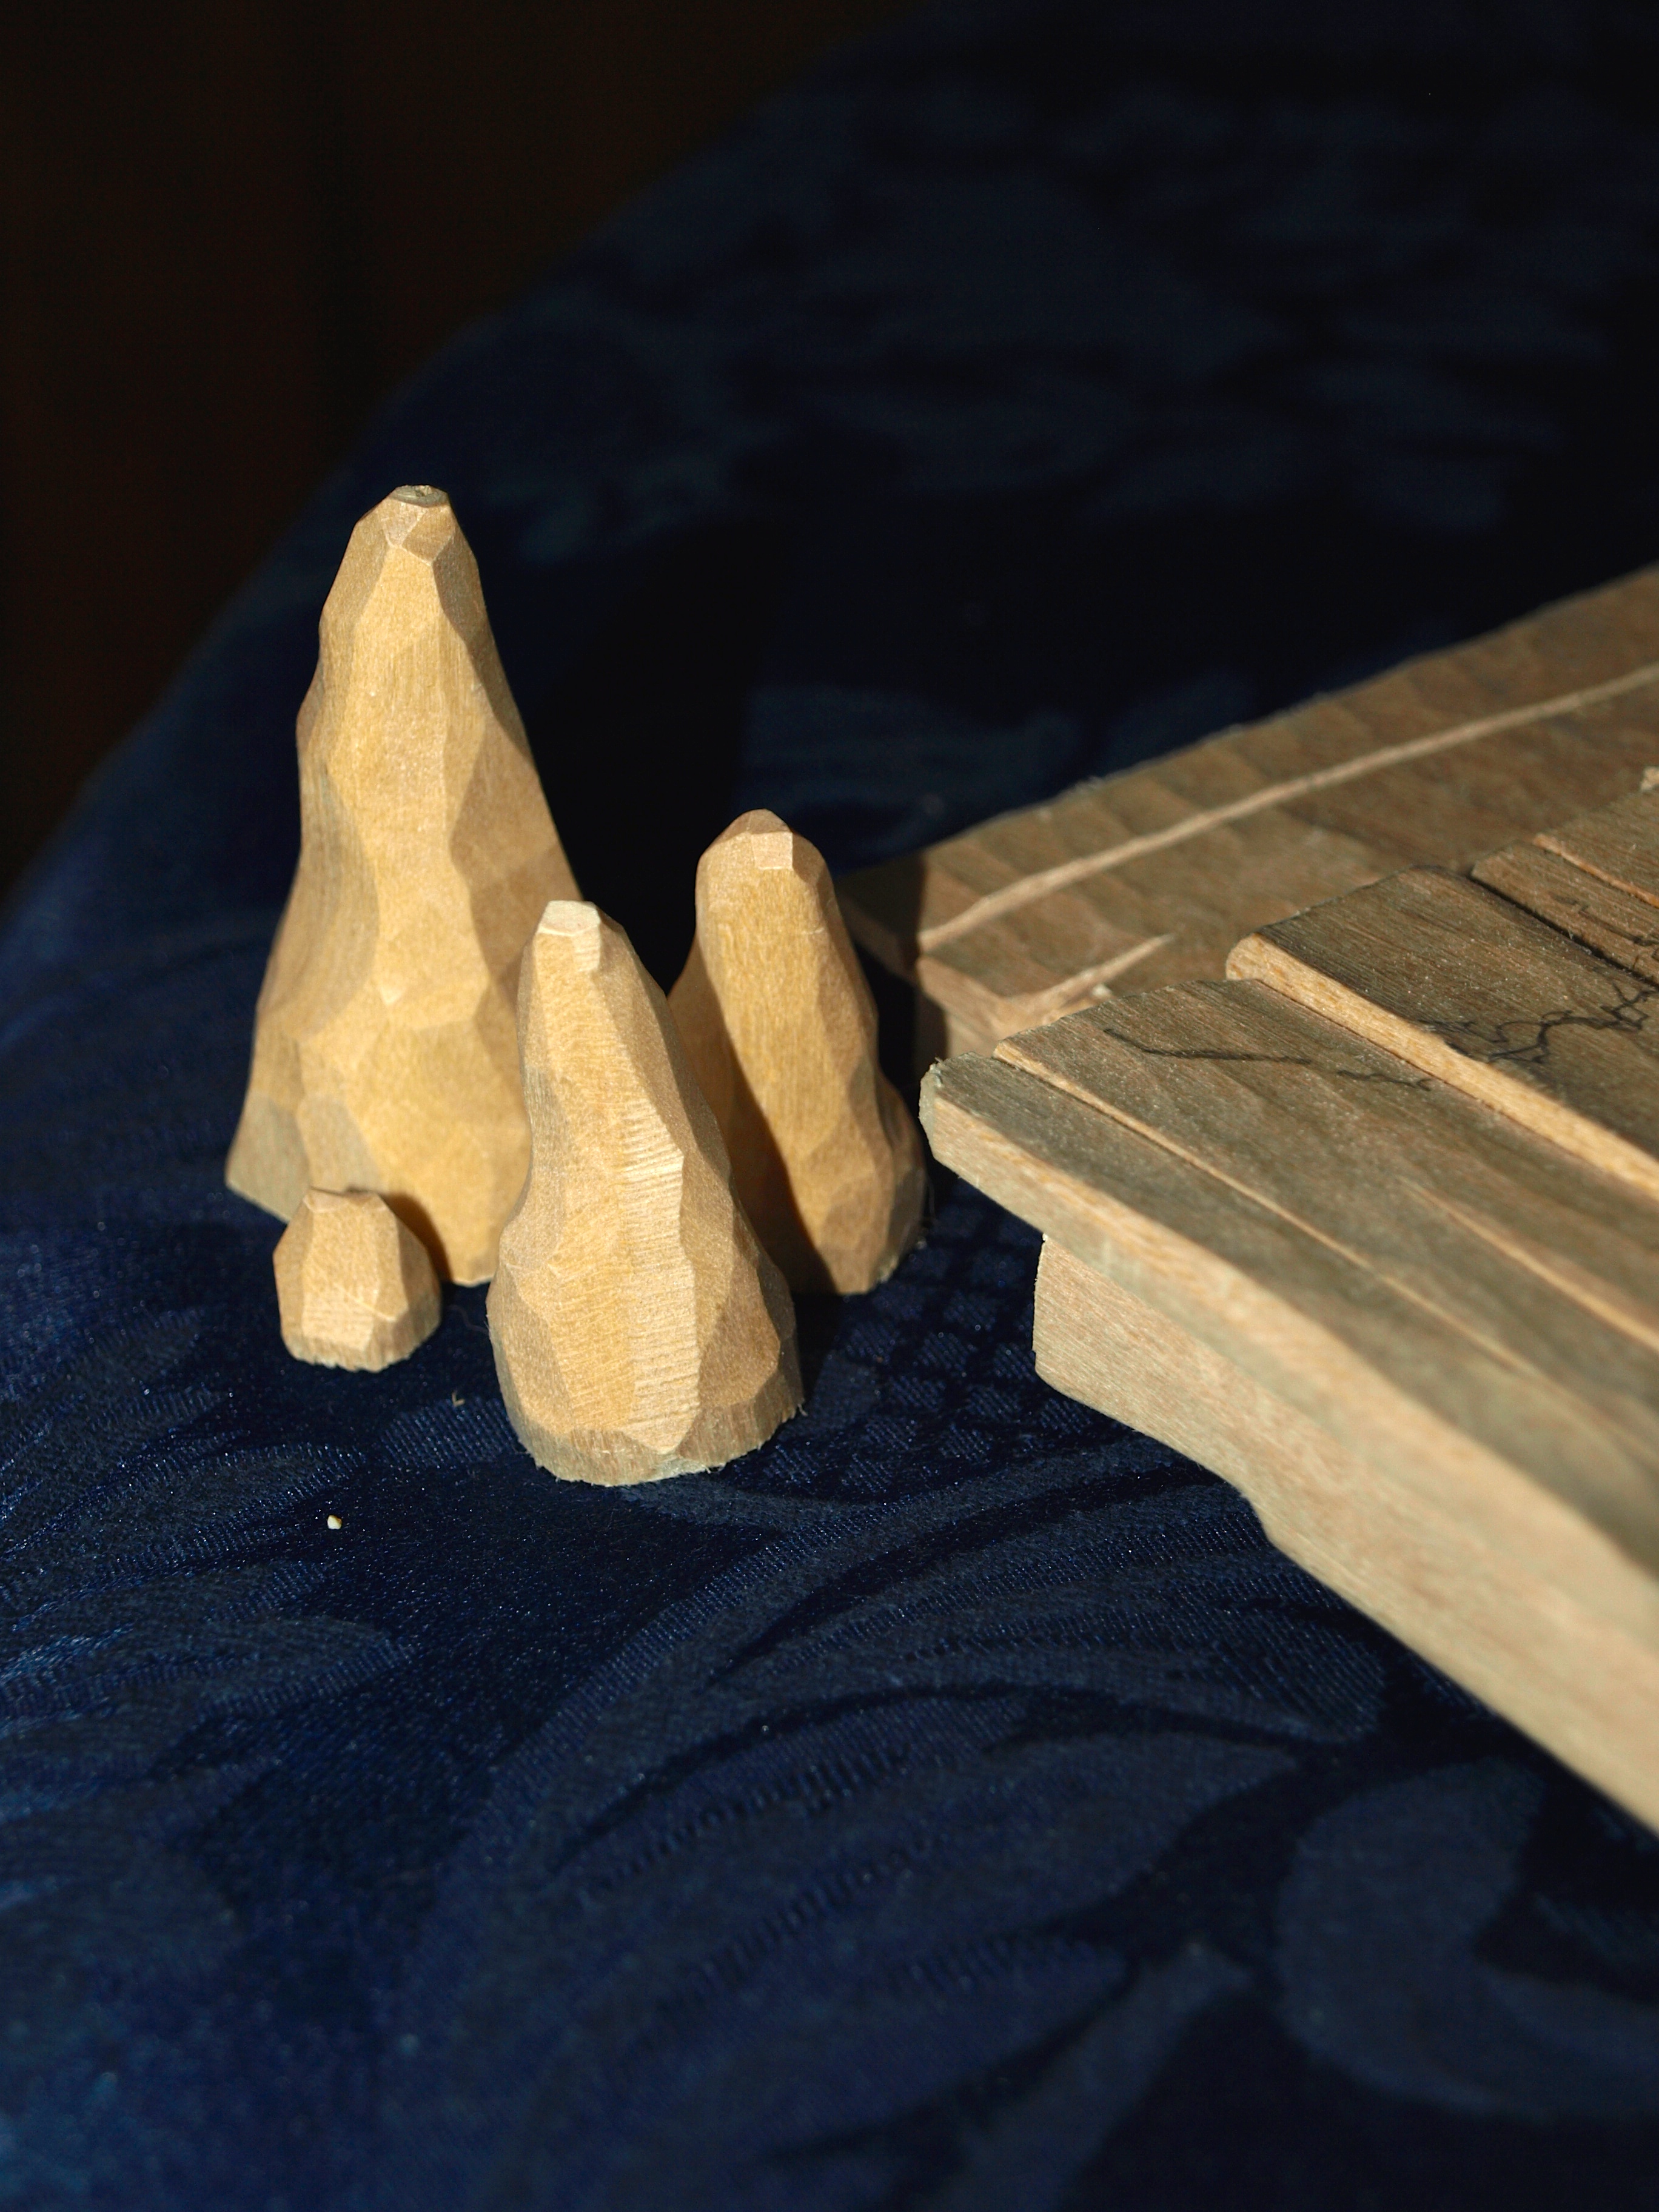
Yep, a few cypress knees and a little squirrel are going to round out this piece.

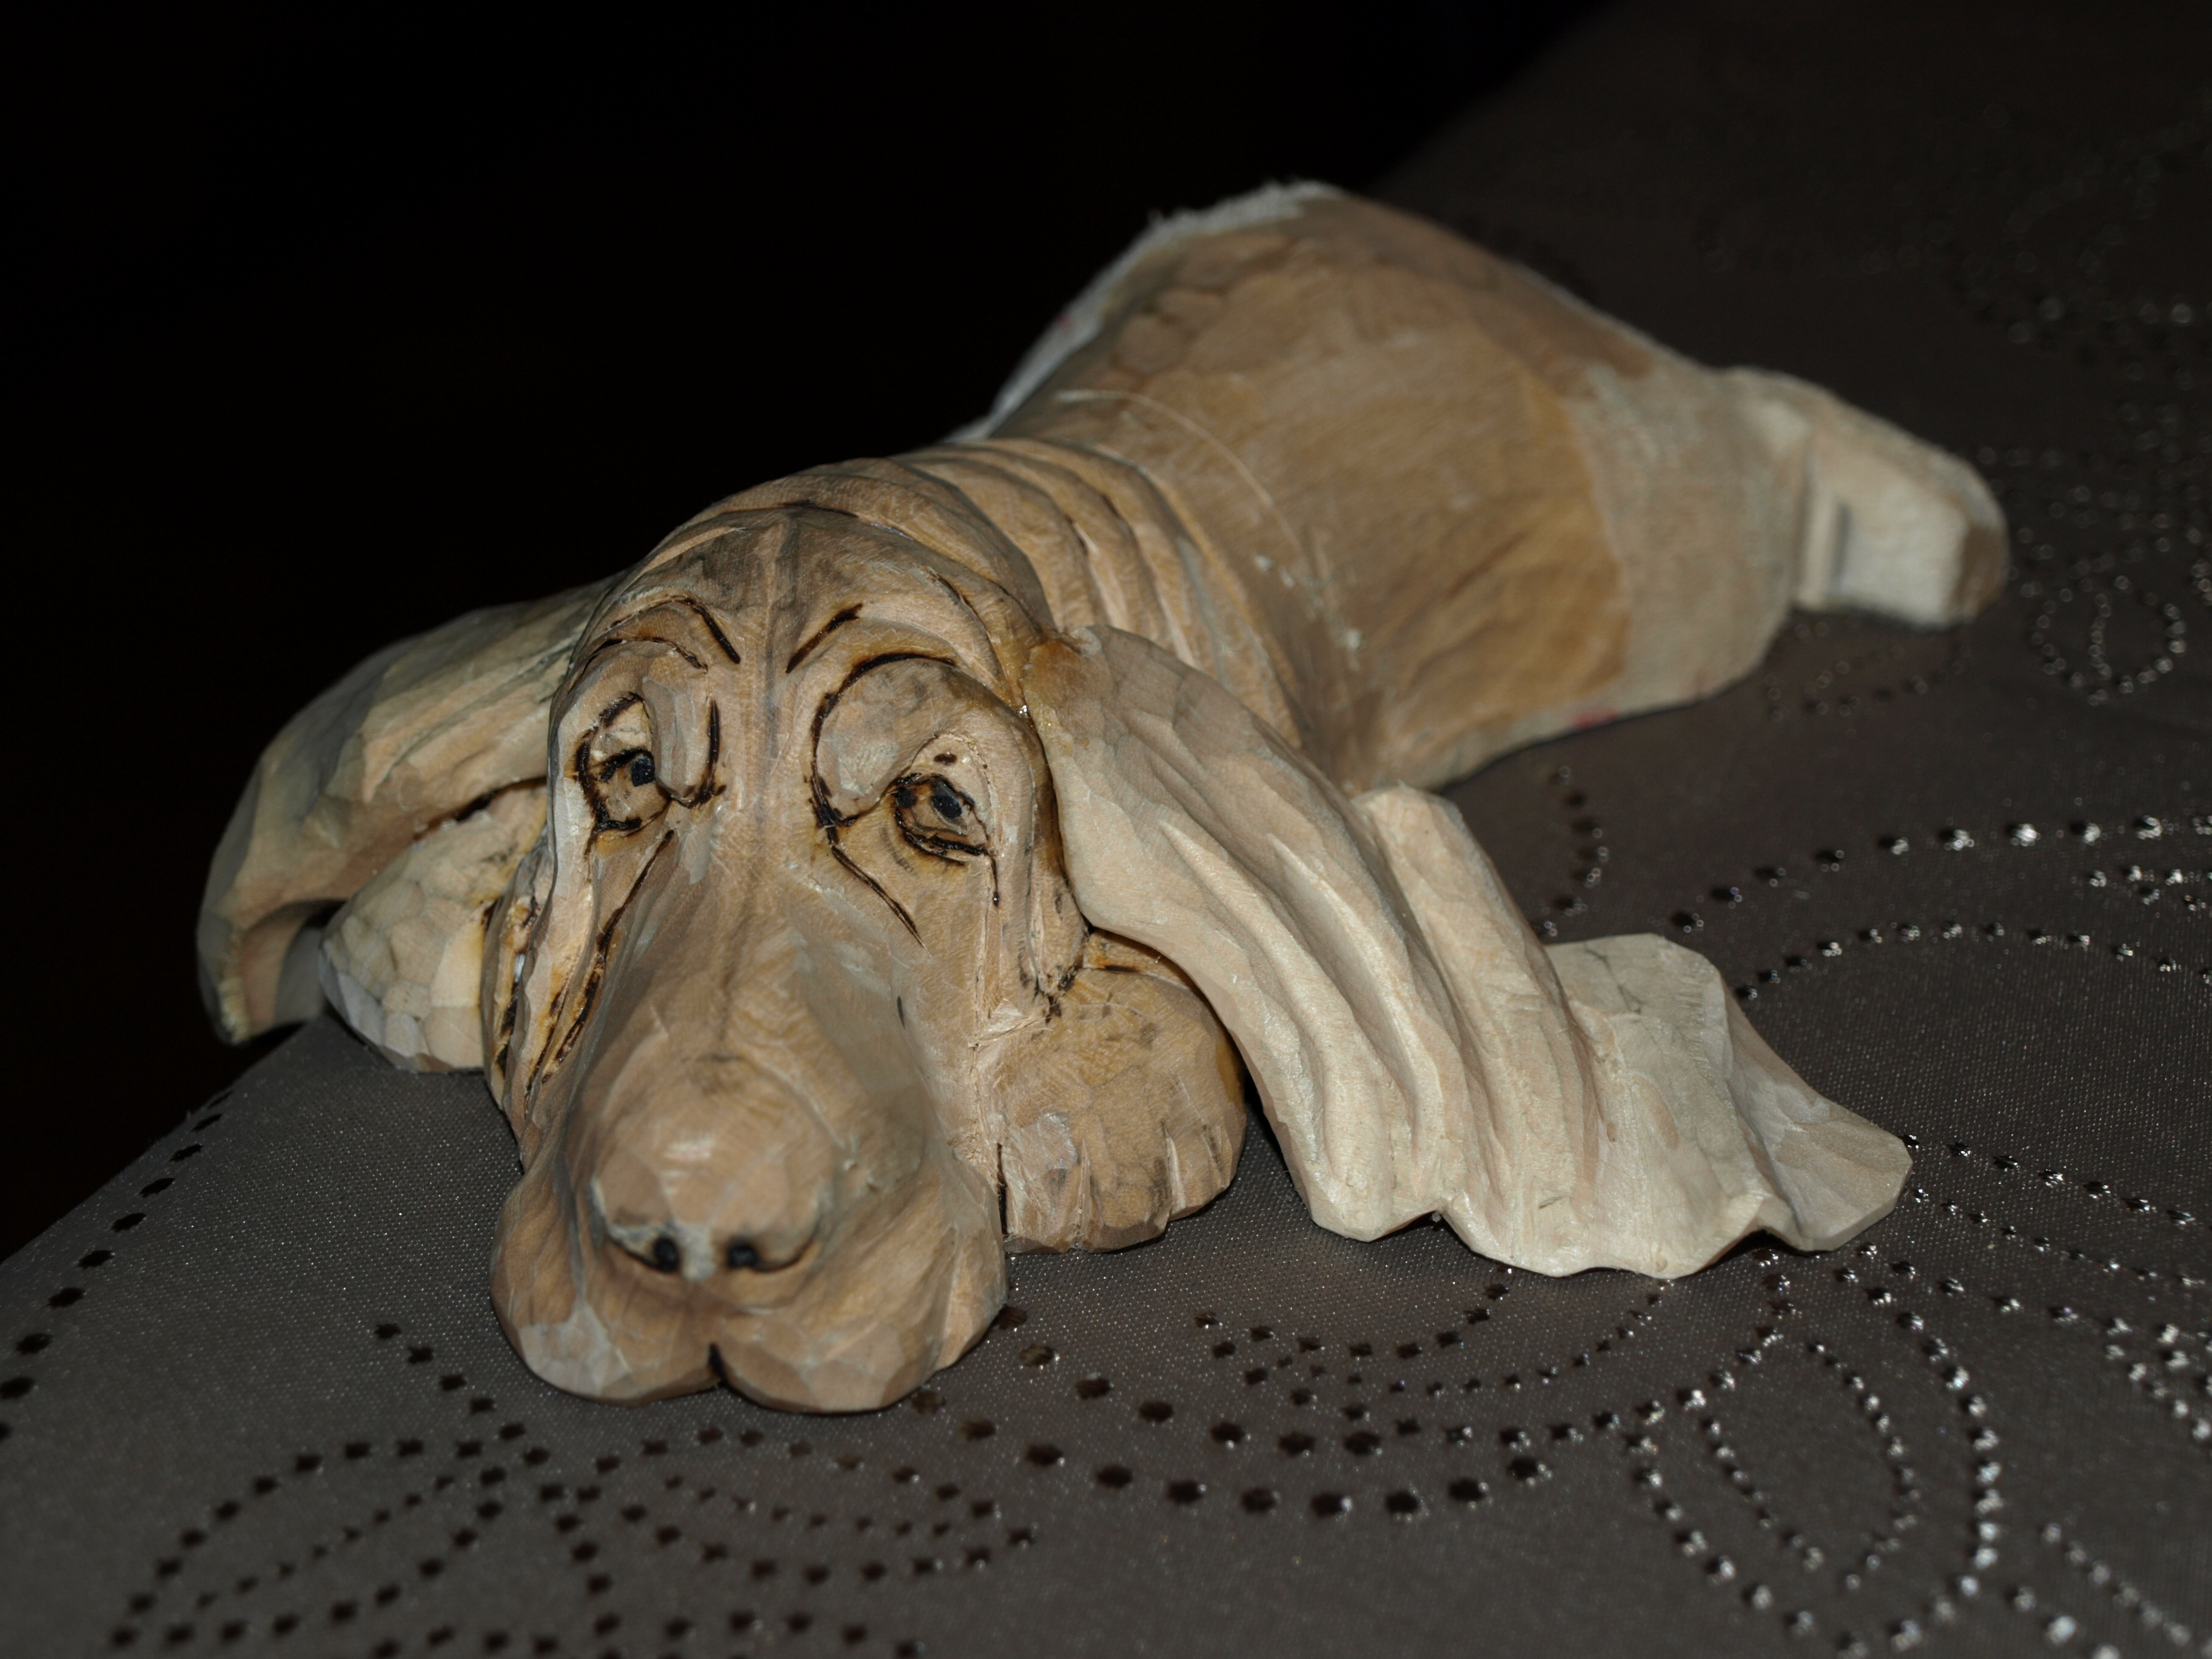
Cypress knees are the cone like growth on cypress tree roots that you see poking above the water surface in many southern states.  These knees are actually a favourite carving medium for many carvers and you’ll see them often carved in to little gnomes or mythical woodland creatures.  It’s kind of funny that I’ve got that turned around and am carving the cypress knee itself.  But, I think that it does add to the scene.

OLYMPUS DIGITAL CAMERA

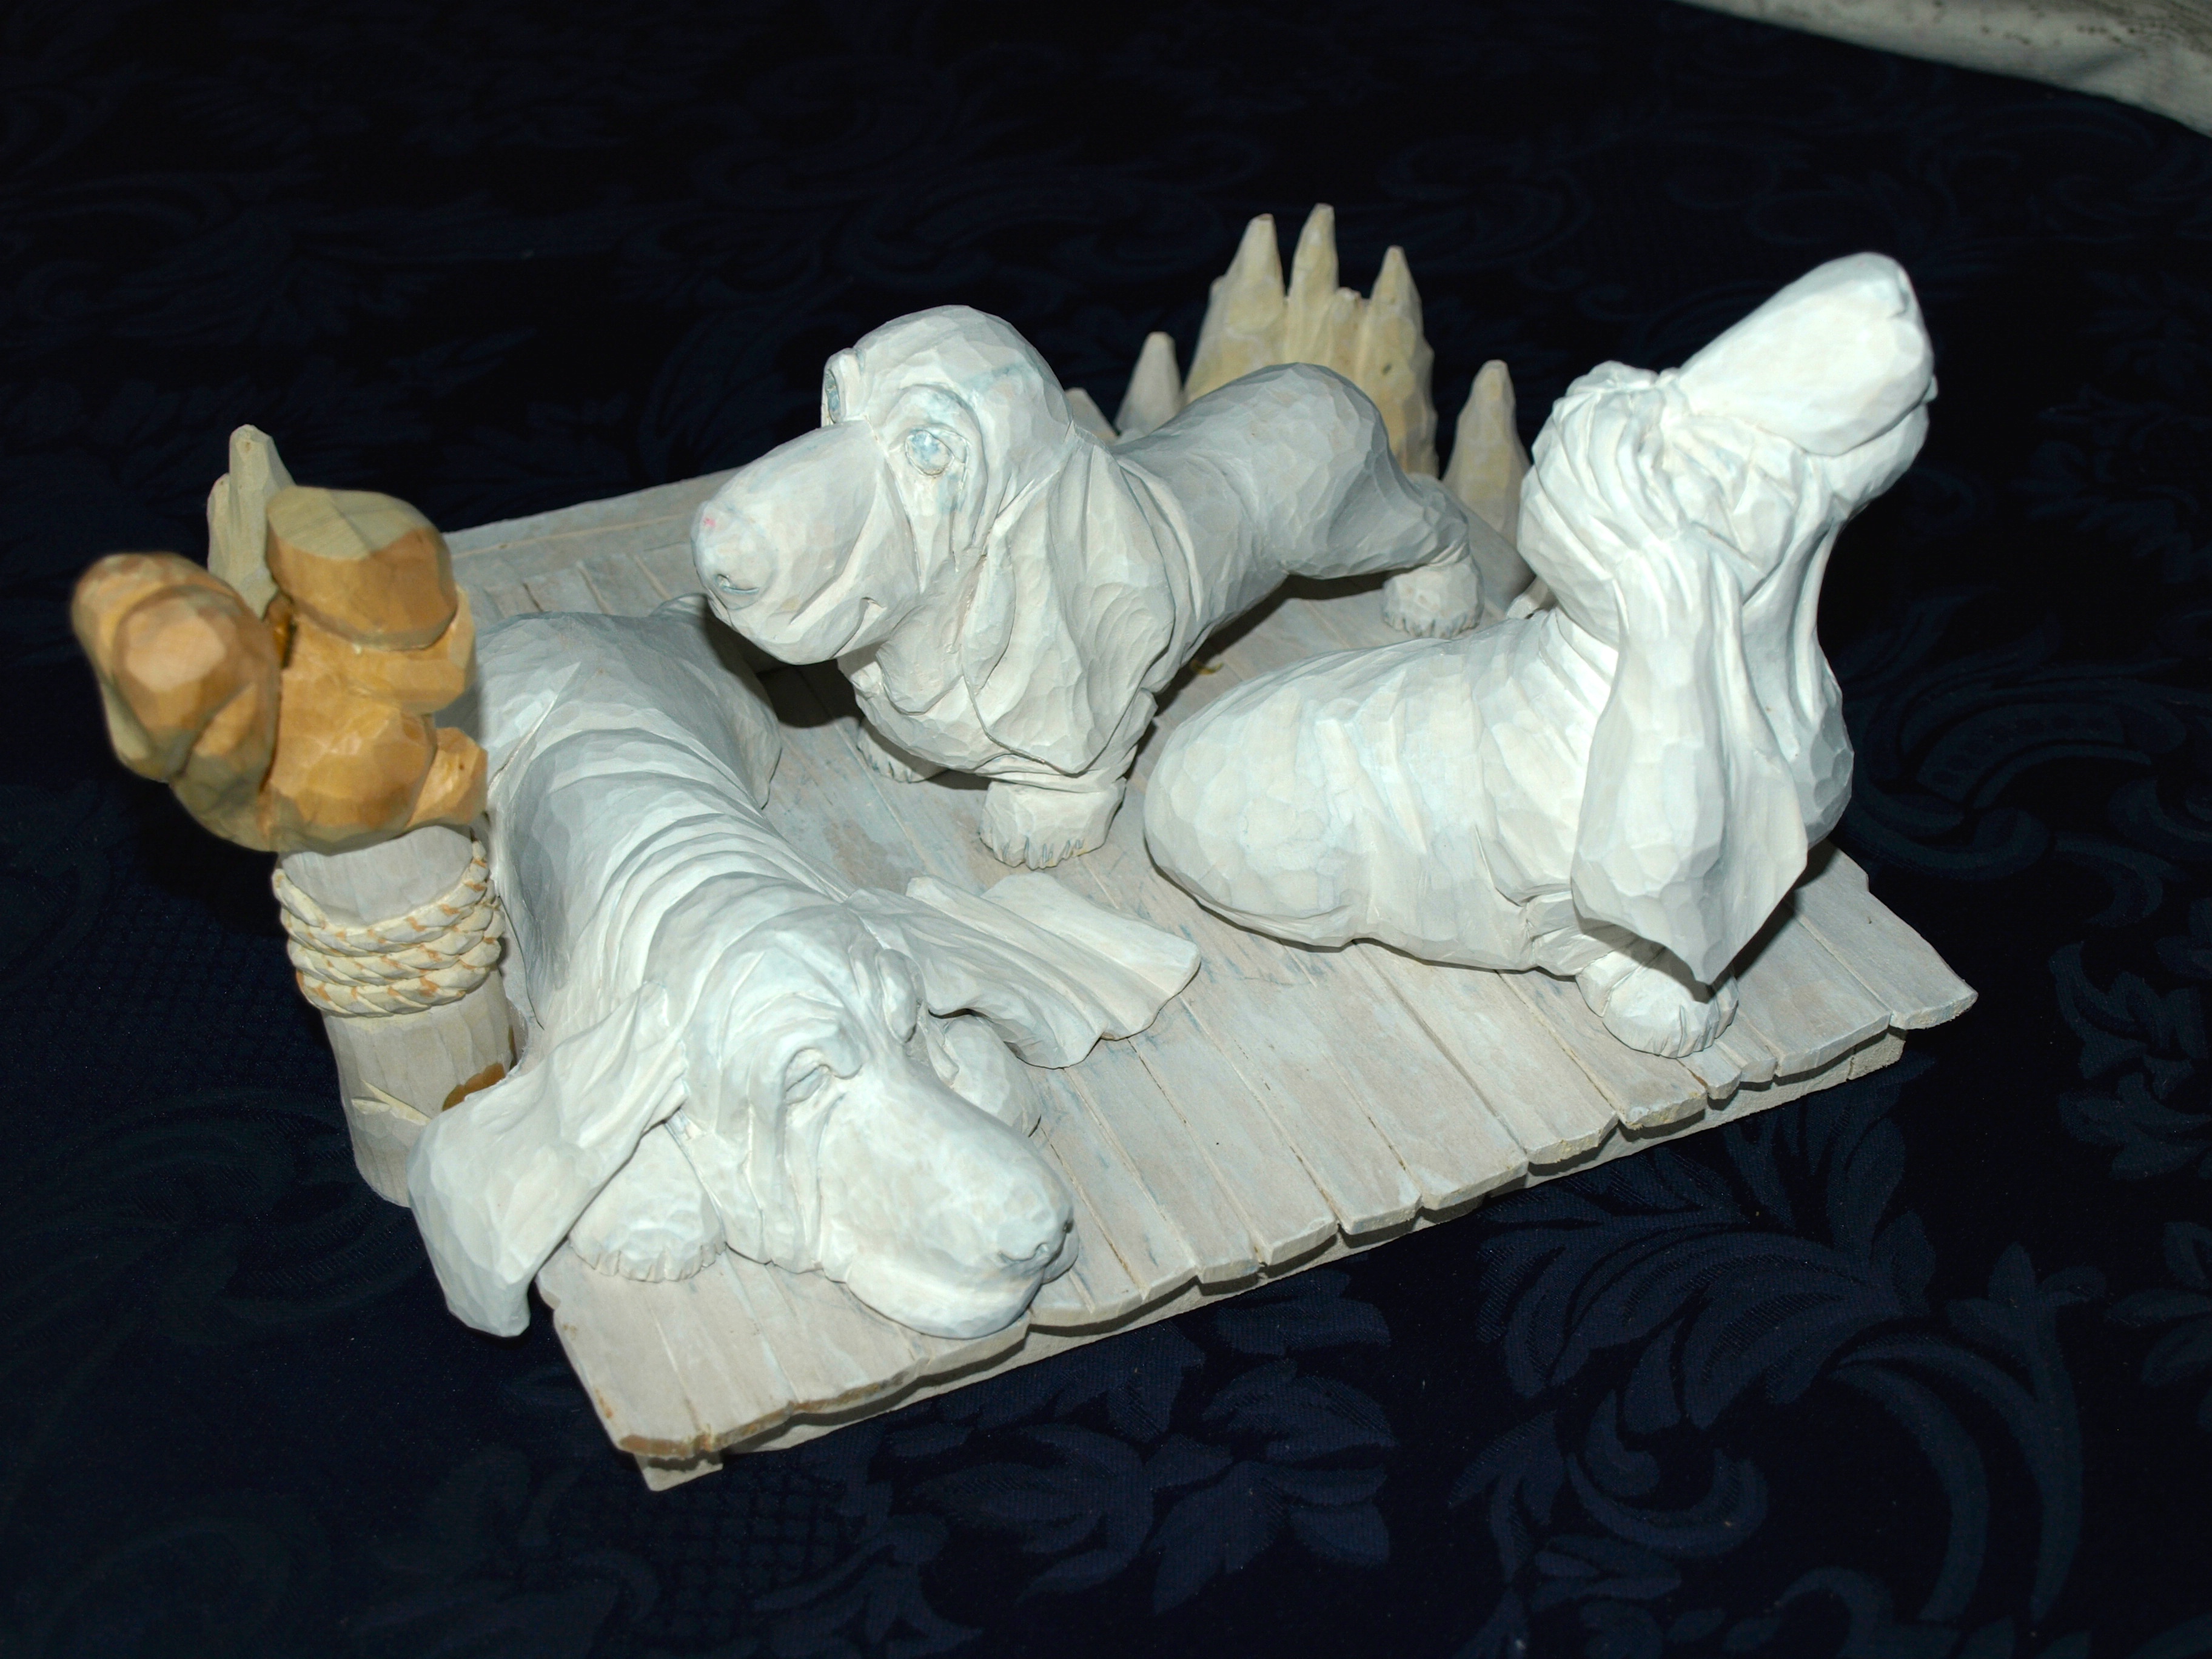
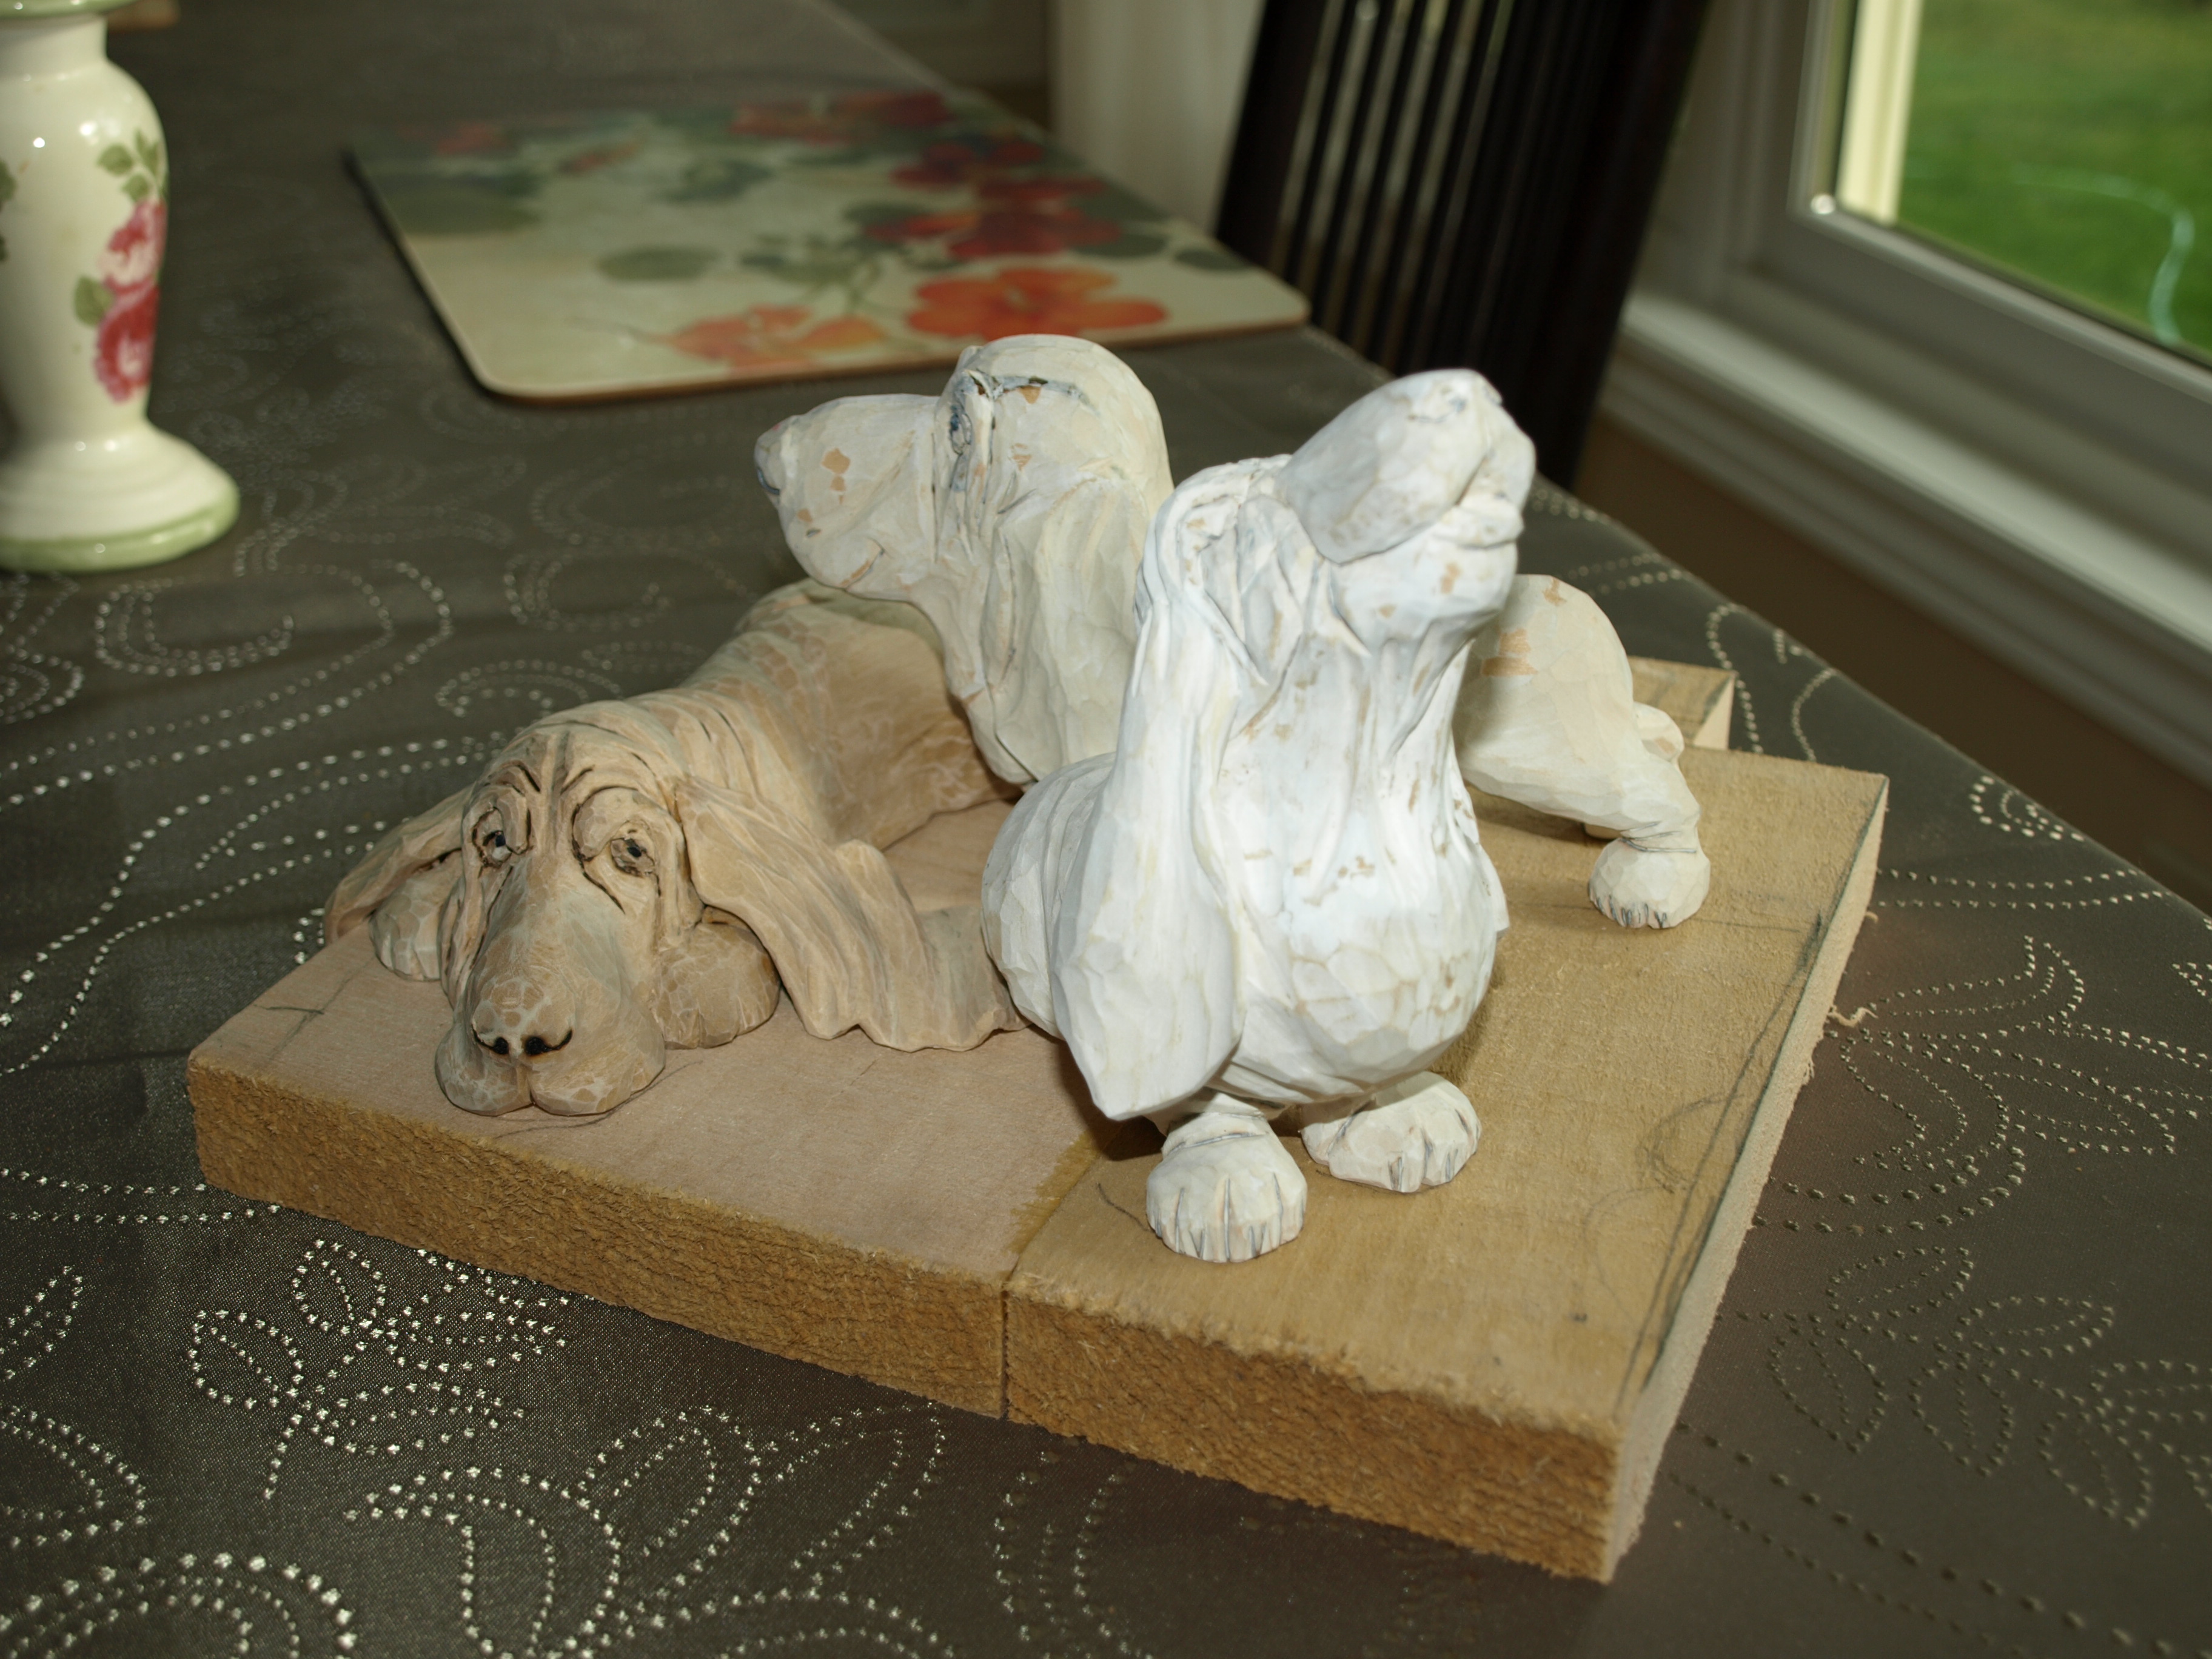
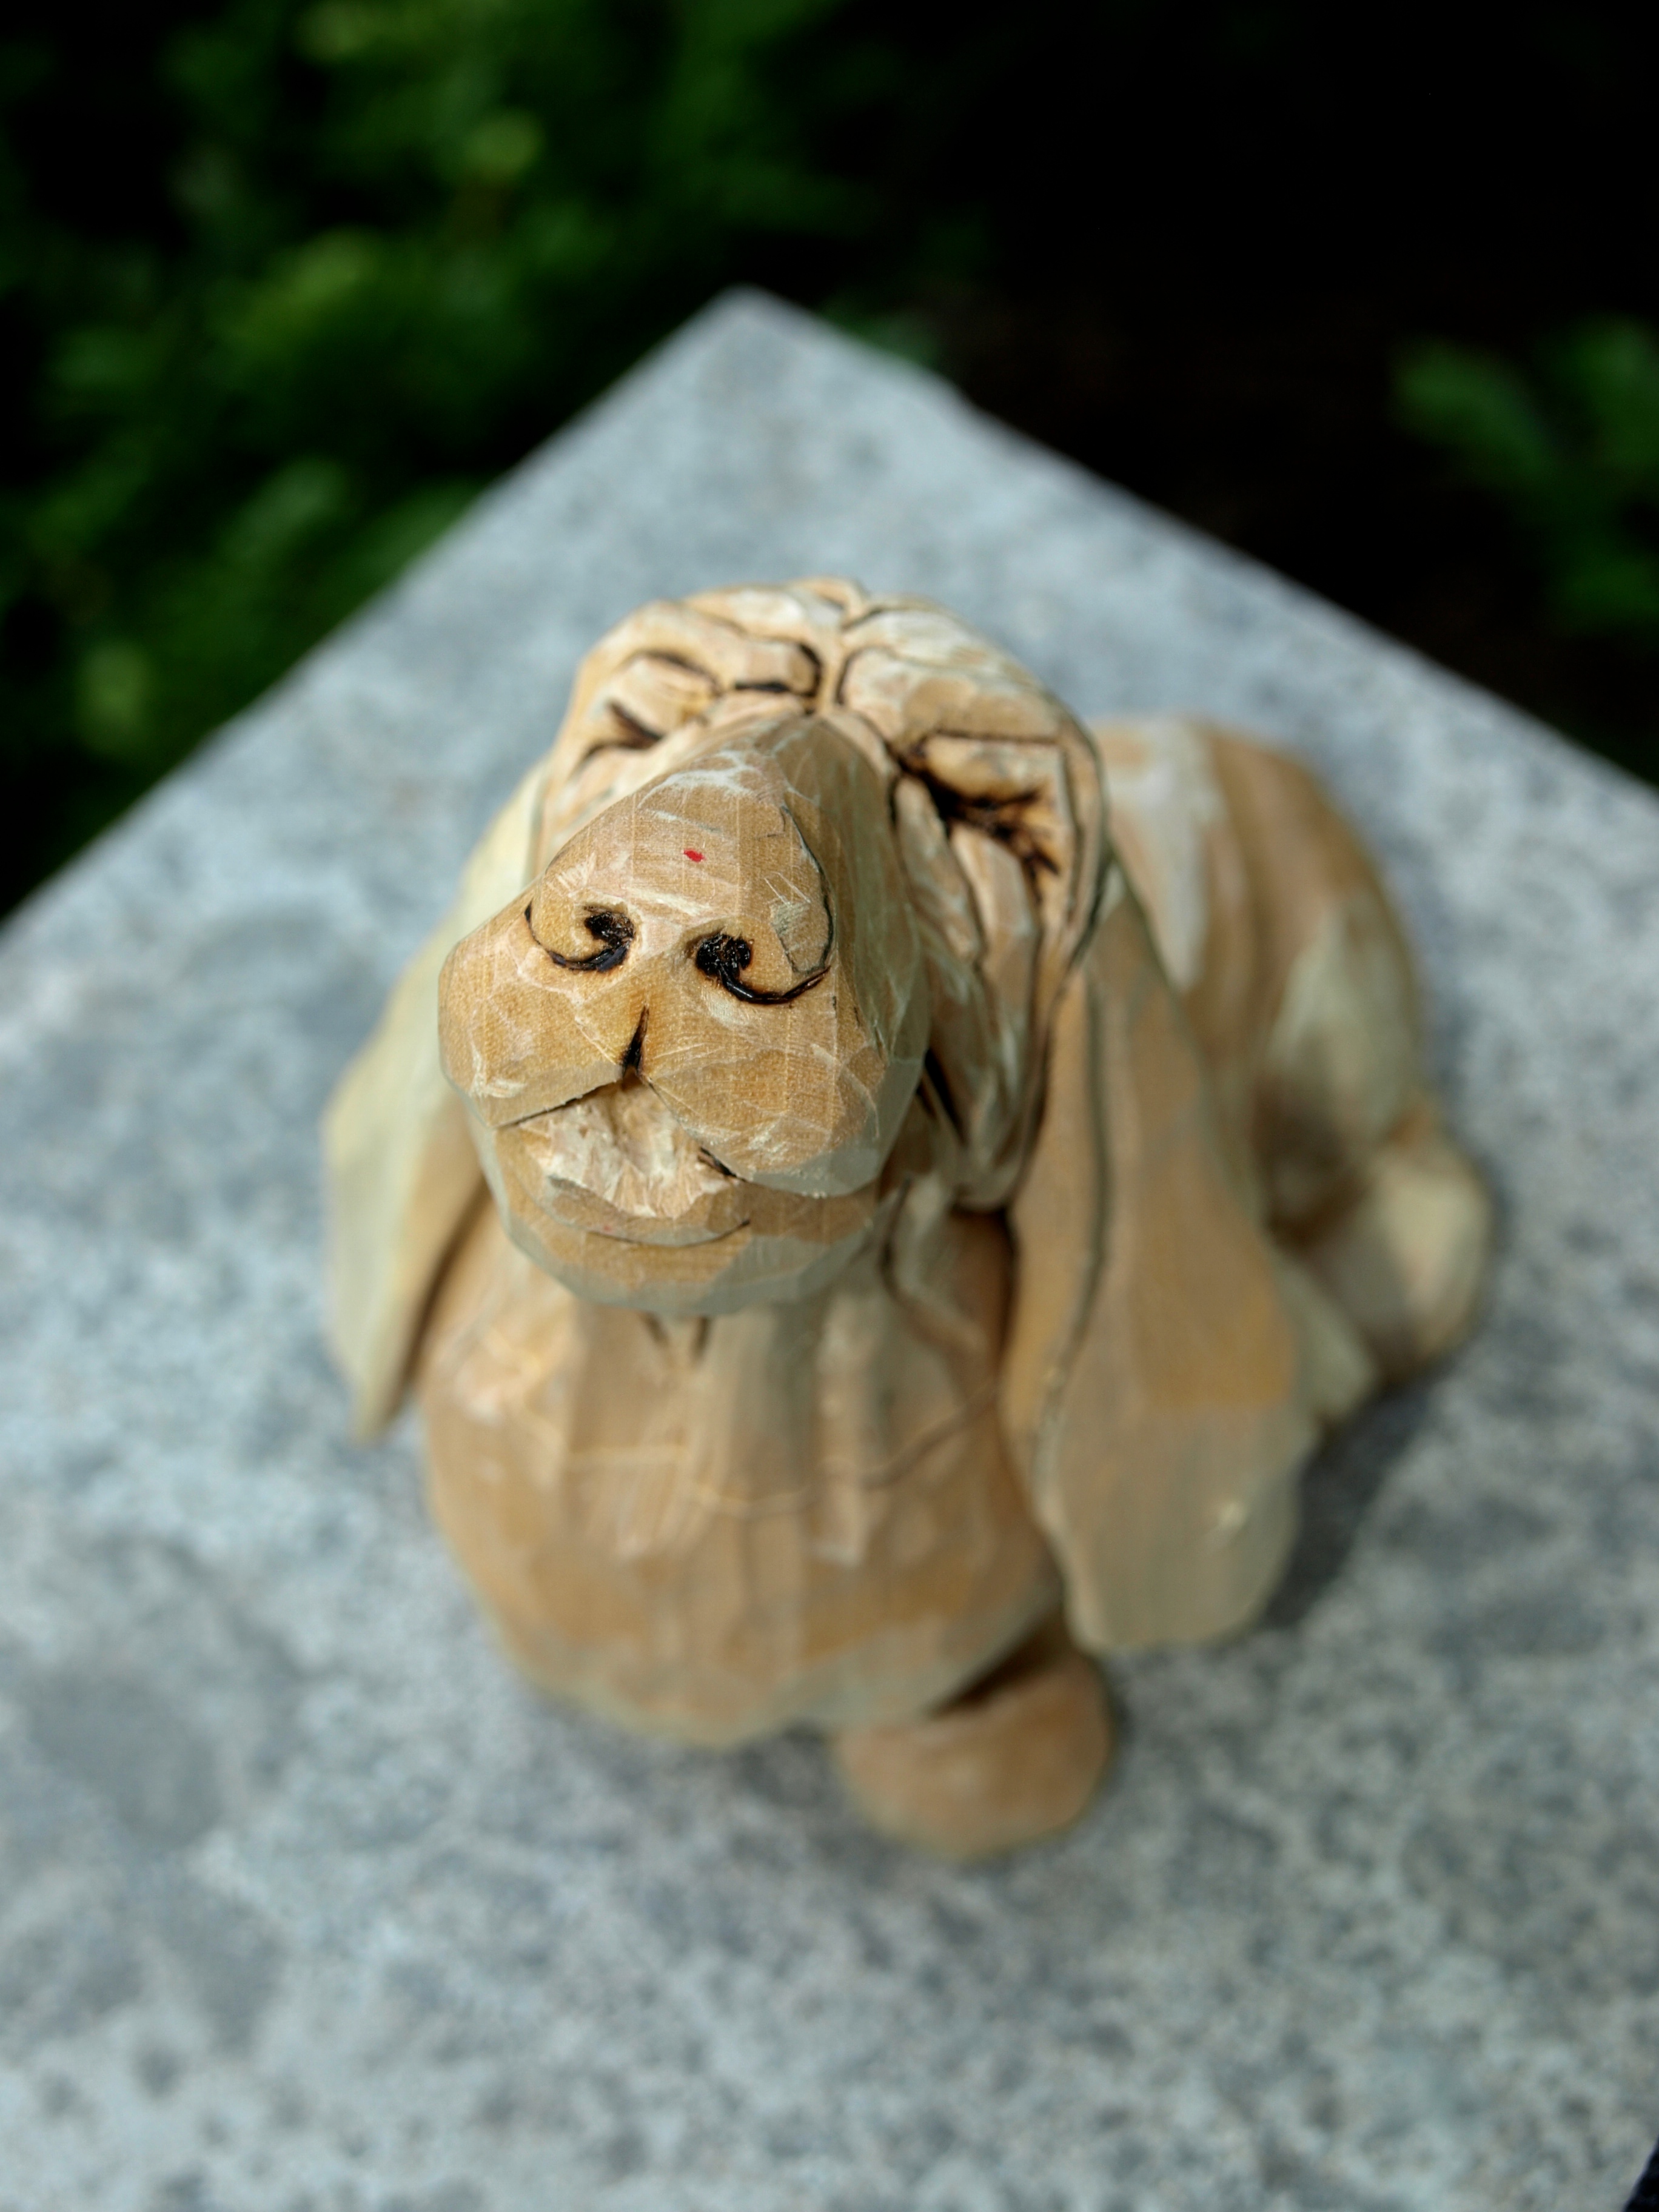
In addition, the little squirrel is just starting to take shape and will eventually be either offering or teasing the little hound with the acorn that it’s holding.  Again, I think that it’s a nice little addition and something to give the standing pup something to focus upon.

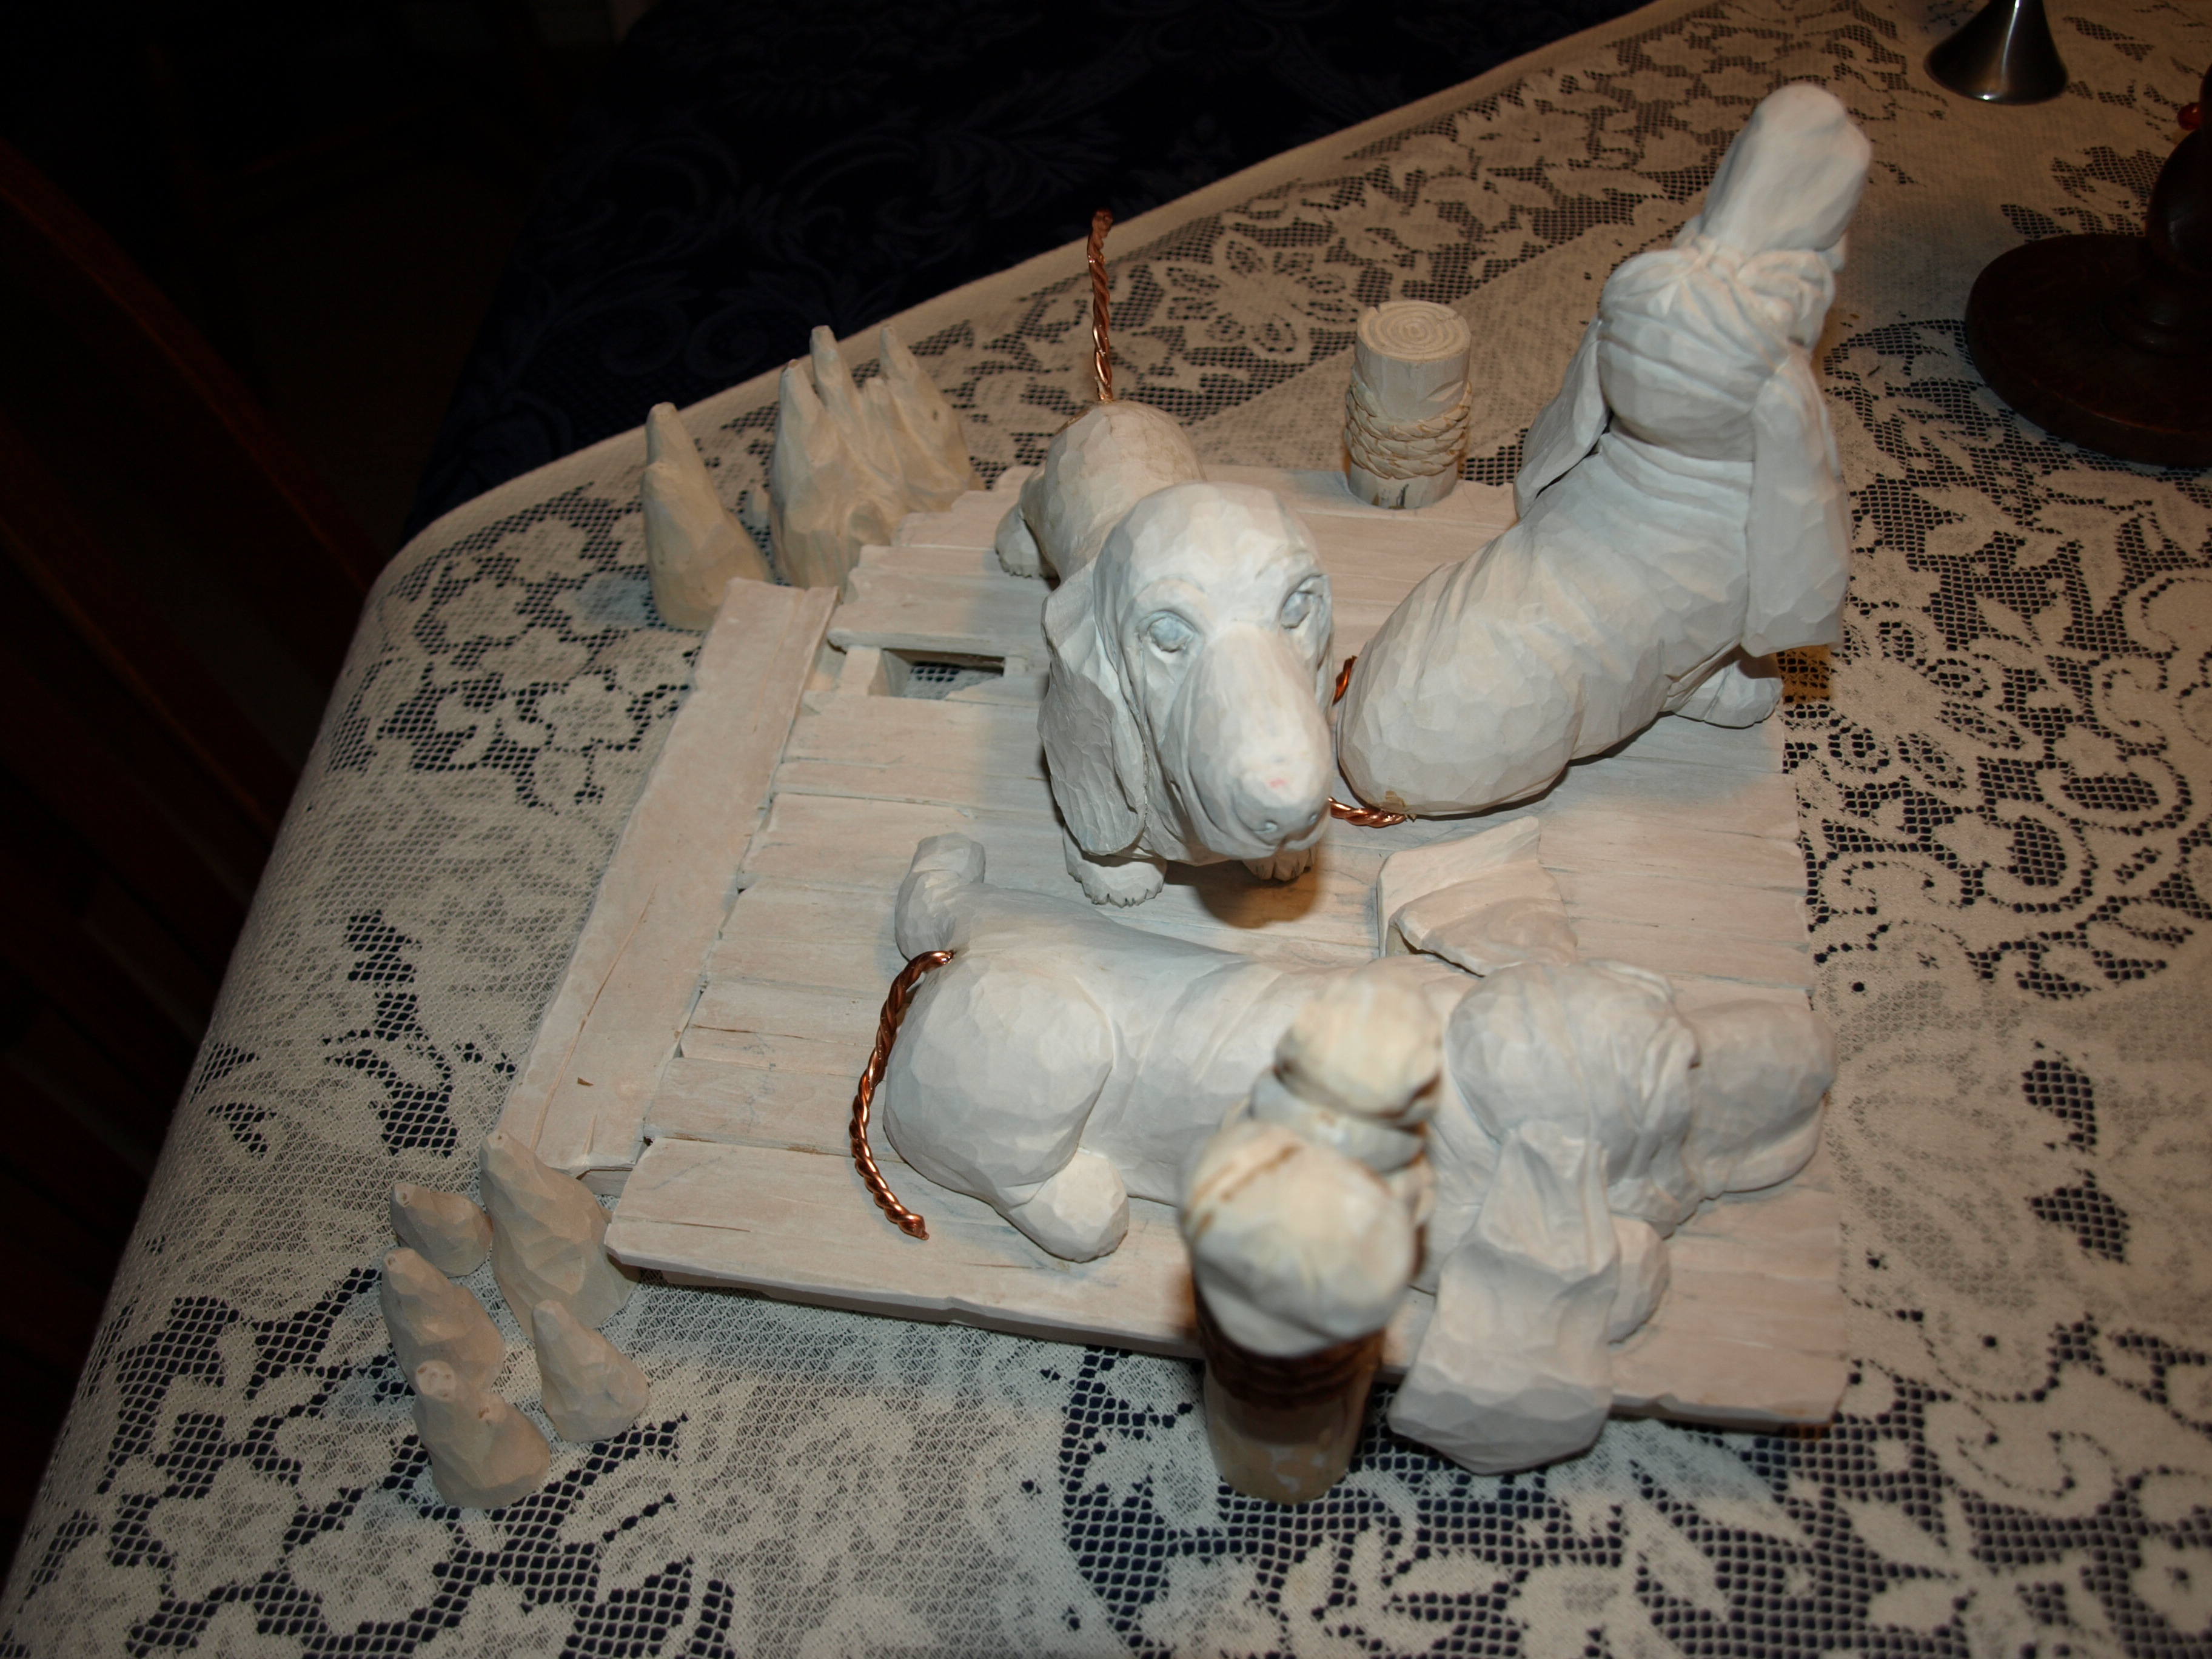
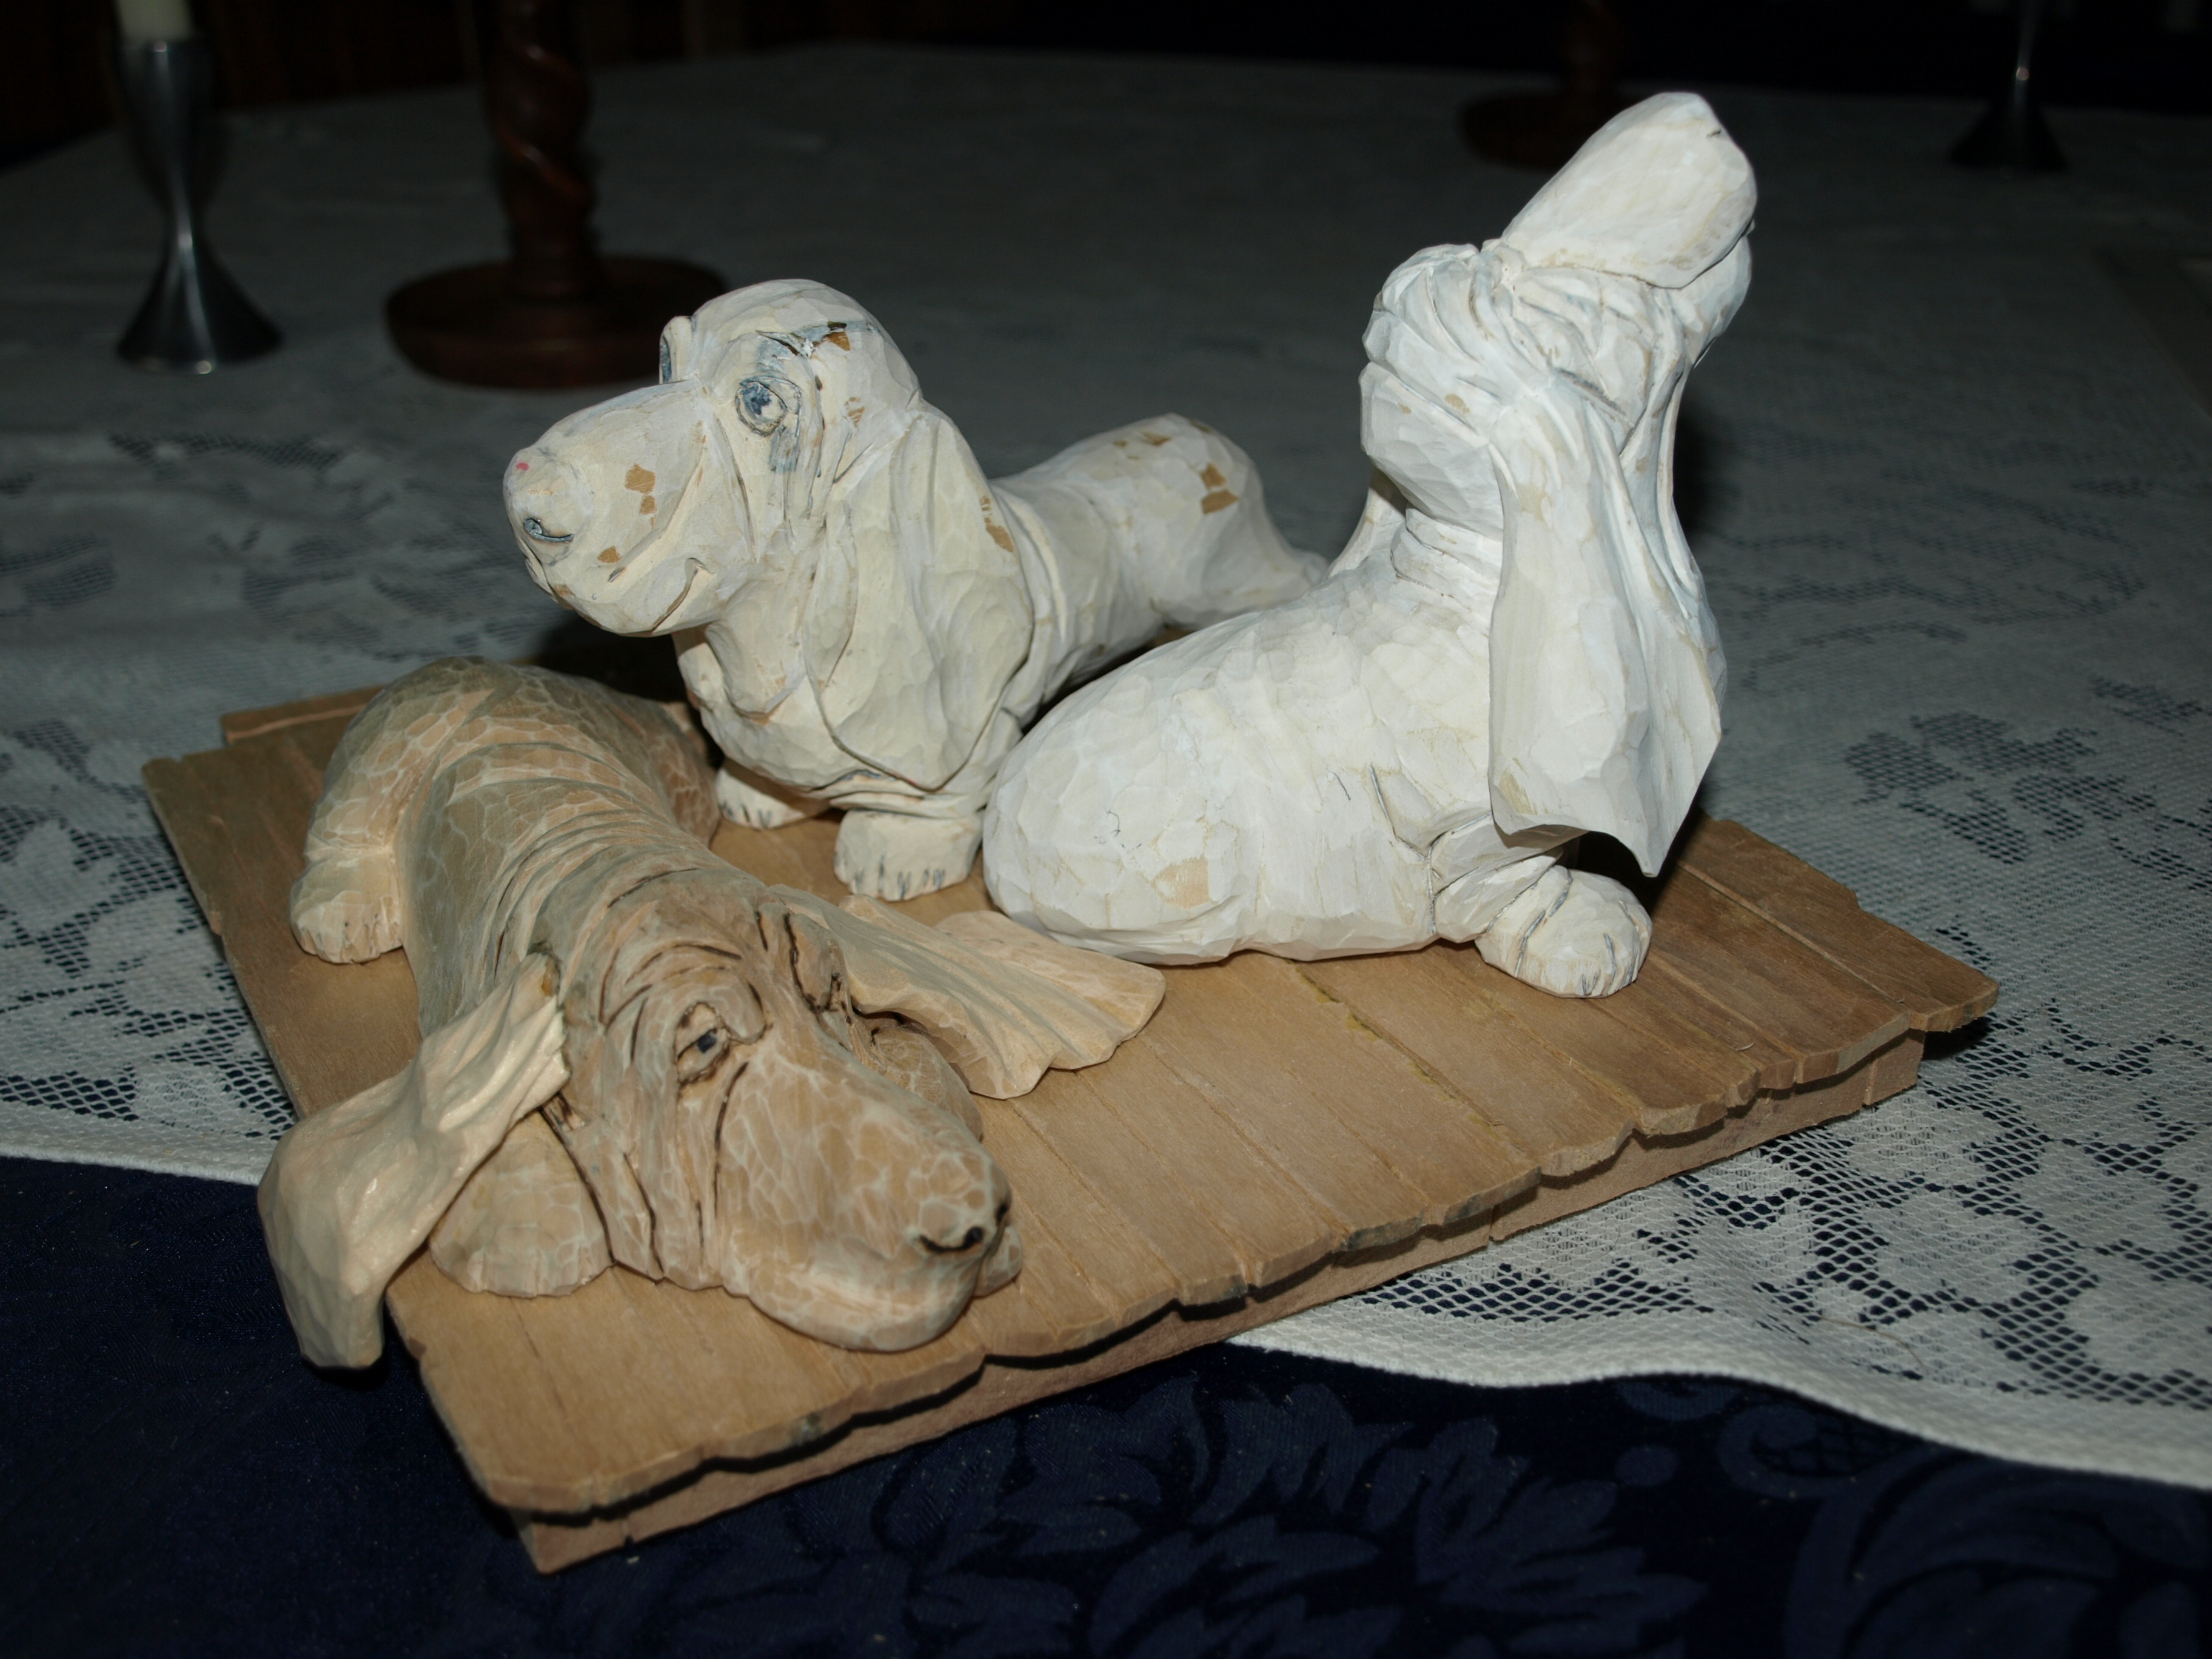
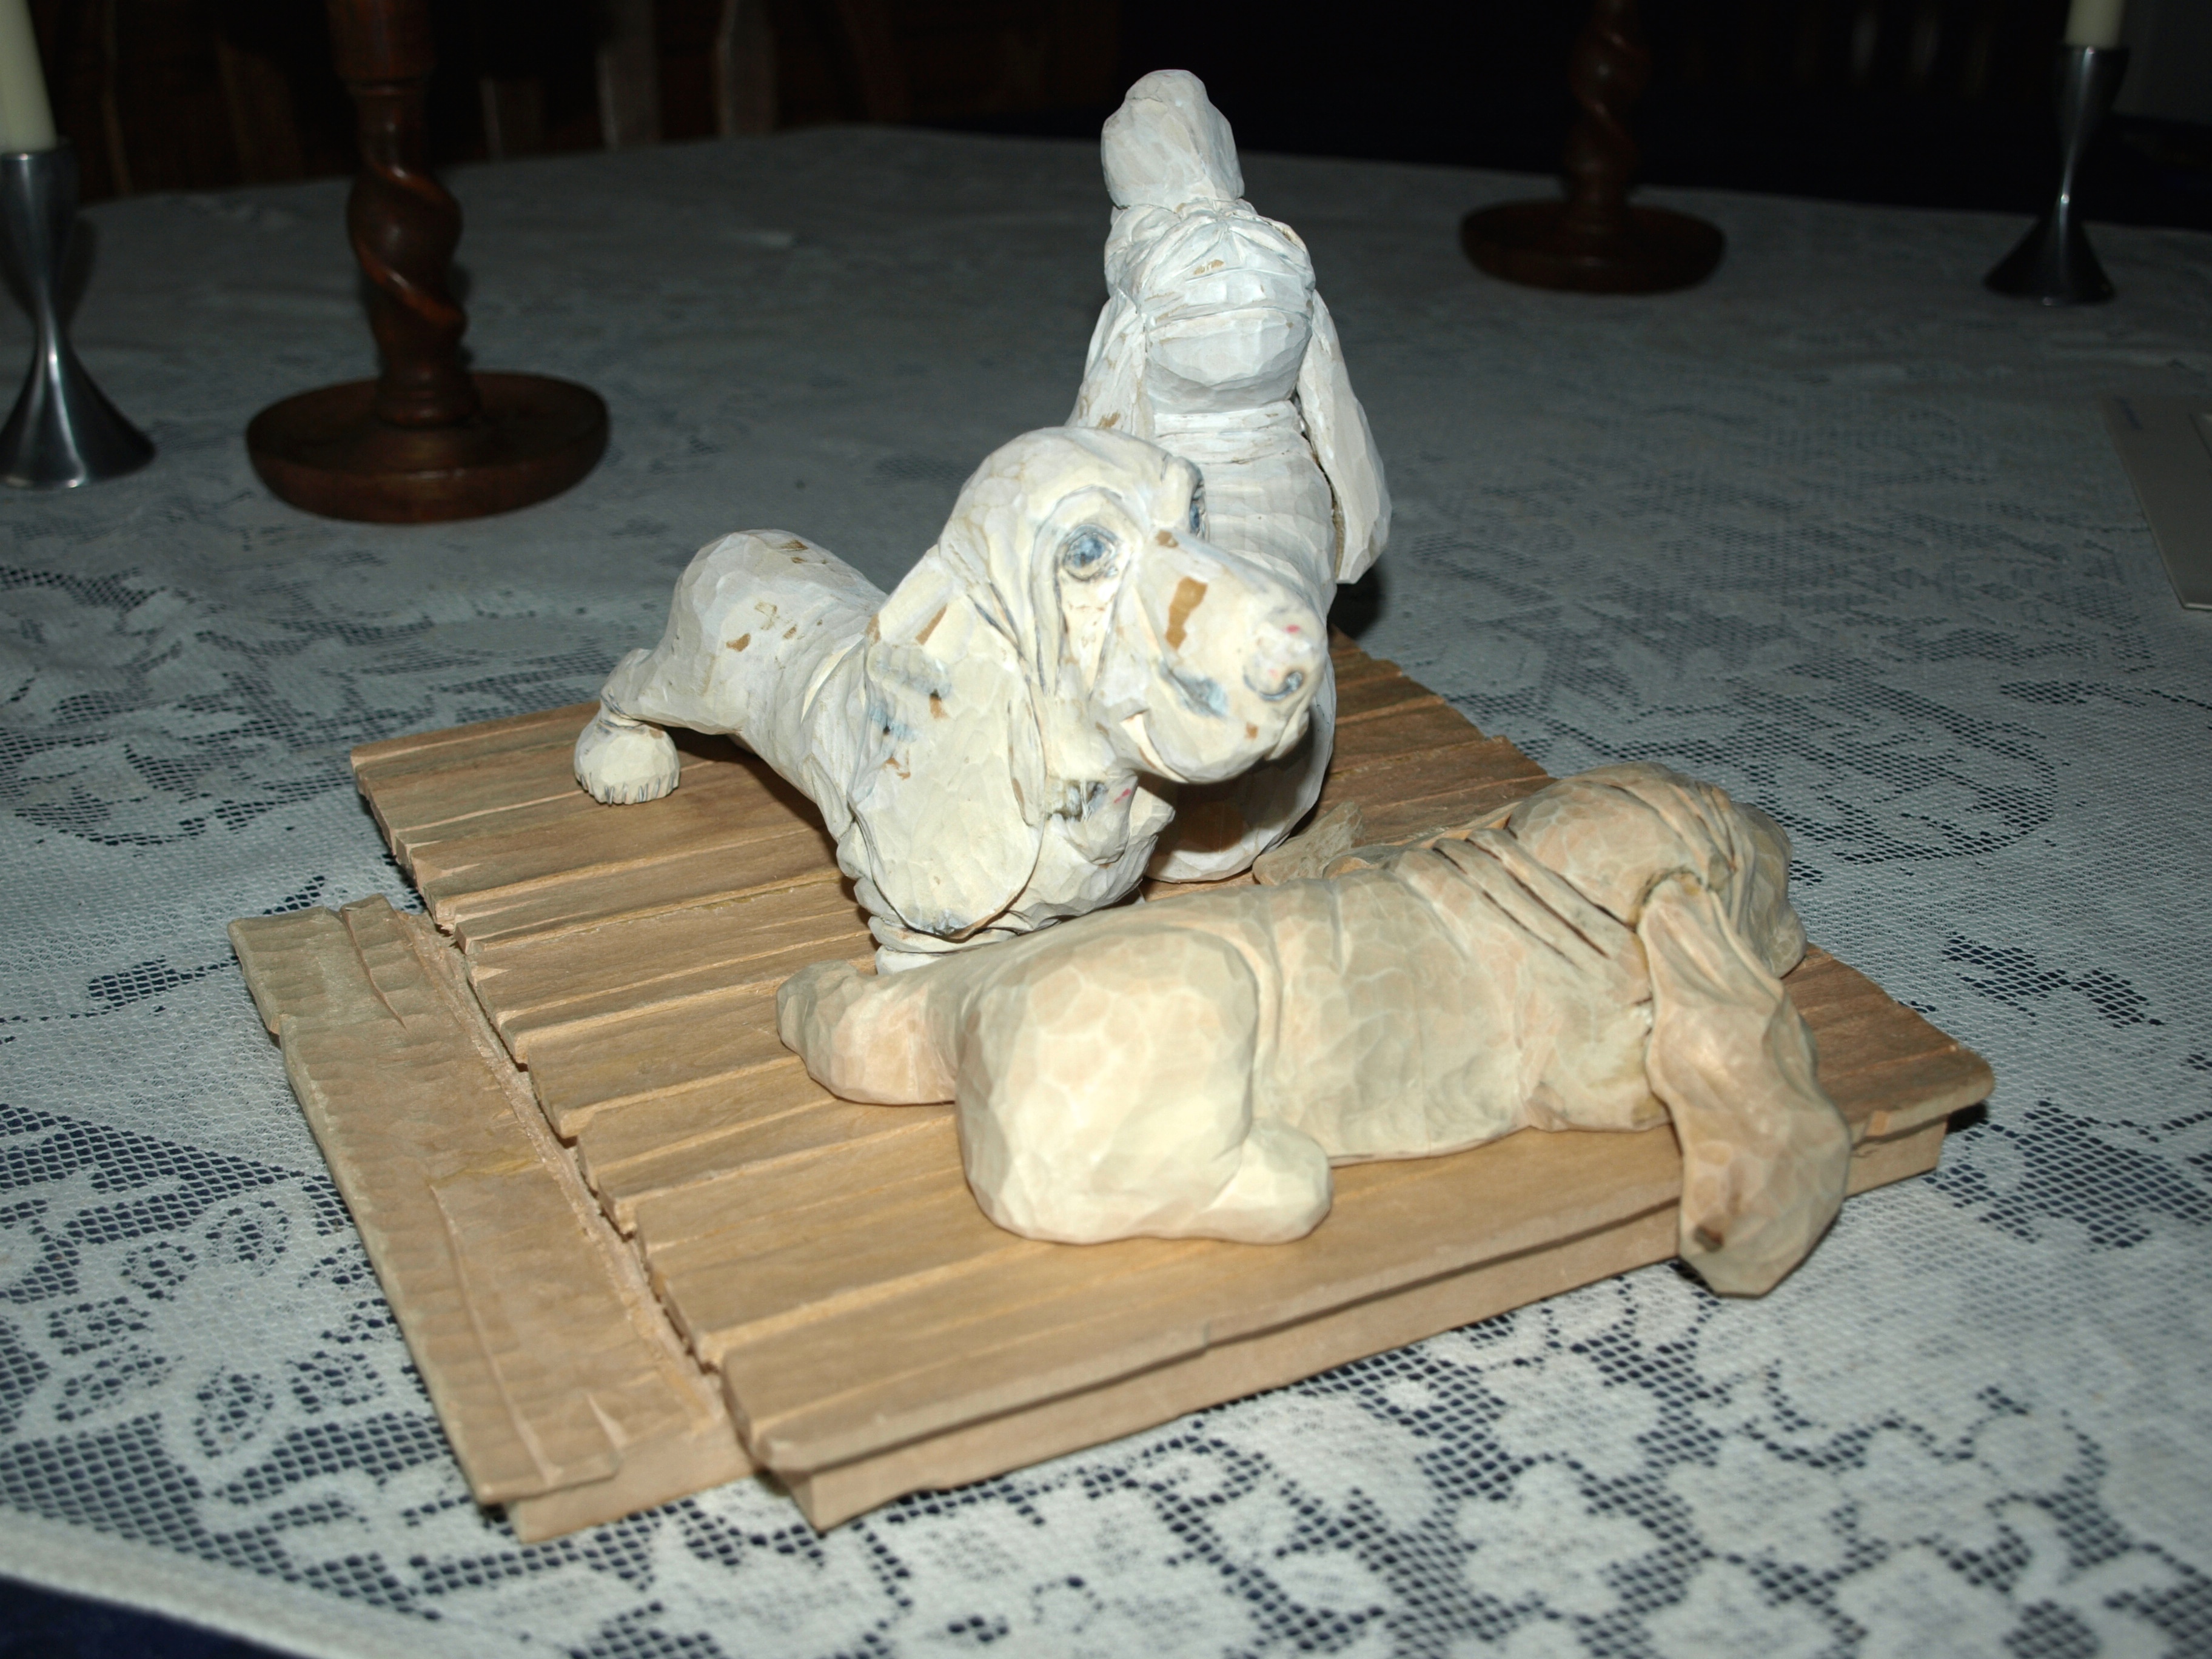
Everything short of the squirrel has now had a light coat of white gesso applied and is ready for the painting phase.  As usual, I’ll paint each piece separately and then pin and glue the pieces together after painting.

OLYMPUS DIGITAL CAMERA

For a little added interest, there’s now a plank missing on the dock and you’re able to see the cross members and “water” beneath the structure.  That was fun to carve…I used a scroll saw to cut through the dock and then dressed up the details with a carving knife.

OLYMPUS DIGITAL CAMERA


By the way, my daughter and I just returned from a quick vacation in Washington DC.  What a great time.  We had never visited but I can tell you that I’ve wanted to see the Smithsonian for many, many years.  We saw absolutely everything and were completely exhausted at the end of each day.  If you haven’t been there, I can tell you that it was one of the best vacations that I’ve ever taken and would head back in an instant.  Of course, being with Emily was a big part of that.

OLYMPUS DIGITAL CAMERAOLYMPUS DIGITAL CAMERA

The Dock Underway

I spent some time working on the dock yesterday and am happy with the way that it’s turning out.  I enjoy making these little docks look old and well used with their split planks and cupped and warped lumber.  This one has a little single step on the back similar to some other docks that I’ve carved, but, in this case, a couple of cypress knees will be carved up to the step…which will be an interesting addition.

The next step will be to add a couple of piers at each side of the dock…one of which will be the perch for the little squirrel that will be added.

OLYMPUS DIGITAL CAMERA


OLYMPUS DIGITAL CAMERA

Late breaking news…I couldn’t wait to do the piers so carved them up this afternoon…

OLYMPUS DIGITAL CAMERA


A Start to the Dock

I went down to my favourite lumber yard after work yesterday and picked up a nice piece of basswood with about a 6″x 2 1/2″ cross-section for the dock on which the three little hounds will lounge and do their thing.

OLYMPUS DIGITAL CAMERA


OLYMPUS DIGITAL CAMERA


After cutting it to the approximate length that I wanted the dock to end up,  I marked the centre and cut it lengthwise along an edge to get two pieces about 1″ thick.  When you do this, remember that you are working off of a much narrower base on the bandsaw and that you need to be extra cautious with the stability of the piece.  Notice that the fence that I use has a black vertical centre section that the wood leans up against during cutting and that allows the wood to be “pivoted” against this vertical support such that you are able to track the centre line that you’ve drawn.  By the way, I always wear eye protection, never have gloves or jewellery on that can get caught in the blade and always use a “push-stick” to feed the wood when near the blade.  I’m extra careful and you should be too.

OLYMPUS DIGITAL CAMERA

OLYMPUS DIGITAL CAMERA

Finally, I planed the edges and laminated the two sections together in order to get the width that I needed…and, bingo!…the start of a dock.  Those notches out of the two right hand corners are going to mark a single step up to the dock and I’m thinking that they’ll also be a good place to add some cypress knees for this Southern scene.

OLYMPUS DIGITAL CAMERA

The little hounds sure look at home on it.  By the way, I should mention that you might notice that a couple of the hounds are whiter…I always apply a very dilute coat of gesso to the carving prior to the acrylic paint.  This has a dual purpose for me…it seals the wood initially and makes a great base for the acrylics to adhere to, and, it tends to highlight any imperfections that I can take care of before I start applying the colour.  “Taking care of” is done with the knives and chisels that I’ve used up to this point and just a touch of sandpaper.  If you use gesso ( which you can find in any art or crafts stores ), use it thinned down considerably and be sure to also just use a touch of sandpaper so that you don’t lose all of the detail of the carving that you’ve done.

OLYMPUS DIGITAL CAMERA

And the Squirrel Chaser Makes Three…

The three amigos are all together now and nestled into one another nicely.  I still need to come up with that little squirrel trying to share an acorn with her buddy.

I’ll need to get some larger basswood to start making up the dock base…and, then, a nice piece of hardwood to create the decorative lower base.  It’s a fun summer project.

OLYMPUS DIGITAL CAMERA

My, What Big Ears…

The little sleepy hound has found quite a set of ears.  Not sure how she can possibly sleep at all with all of that reception power.

This is a lot of fun.  The Howler is sitting partially on the one ear, which is ruffling it up pretty dramatically.

Both ears, once again, were cut out roughly on the bandsaw and then “fitted” to the head by using pencil lead on the dogs head where the ear was to be placed…rubbing the ear up against the pencil lead to leave marks where the high points are…chiseling away the high points…and, then repeating the process again about a thousand times…or maybe fifteen times ( I lost count ).  Anyways, it’s absent minded relaxation and the end result looks pretty nice.

OLYMPUS DIGITAL CAMERA

OLYMPUS DIGITAL CAMERA

OLYMPUS DIGITAL CAMERA

Sleepy Hound

The sleepy little pup of the Trio is shaping up now.  It always amazes me that once you start putting a face onto a carving, even if it’s only the first rough “blocking” of the face, it changes everything about the carving.


OLYMPUS DIGITAL CAMERA OLYMPUS DIGITAL CAMERA

This little one will have eyes that are droopily open ( I’m pretty sure that’s a carving term ) and looking up and to the side to see what all the howling is about.  Additionally, the right ear will be draped over a paw and flowing onto and over the dock…with just the tip of the ear in the “water.”  The left ear will be similarly draped over a paw and on the dock, but, in this case, the Howler will be sitting partially on the ear…another reason for that sideways glance.

Wrinkles to Howl About

Just wanted to get a quick photo up of the little howler…I really like this little pup.  I’m anxious to get him painted up but will force myself to wait while I get the other two hounds detailed in.

I changed up the ears a bit just to make them balloon out a bit more and I like the result.  The idea of gluing ( I actually used two part epoxy for strength ) the ears on after carving worked out really well.

Lots of wrinkles to howl about…


OLYMPUS DIGITAL CAMERA

OLYMPUS DIGITAL CAMERA

OLYMPUS DIGITAL CAMERA

OLYMPUS DIGITAL CAMERA


Post Navigation