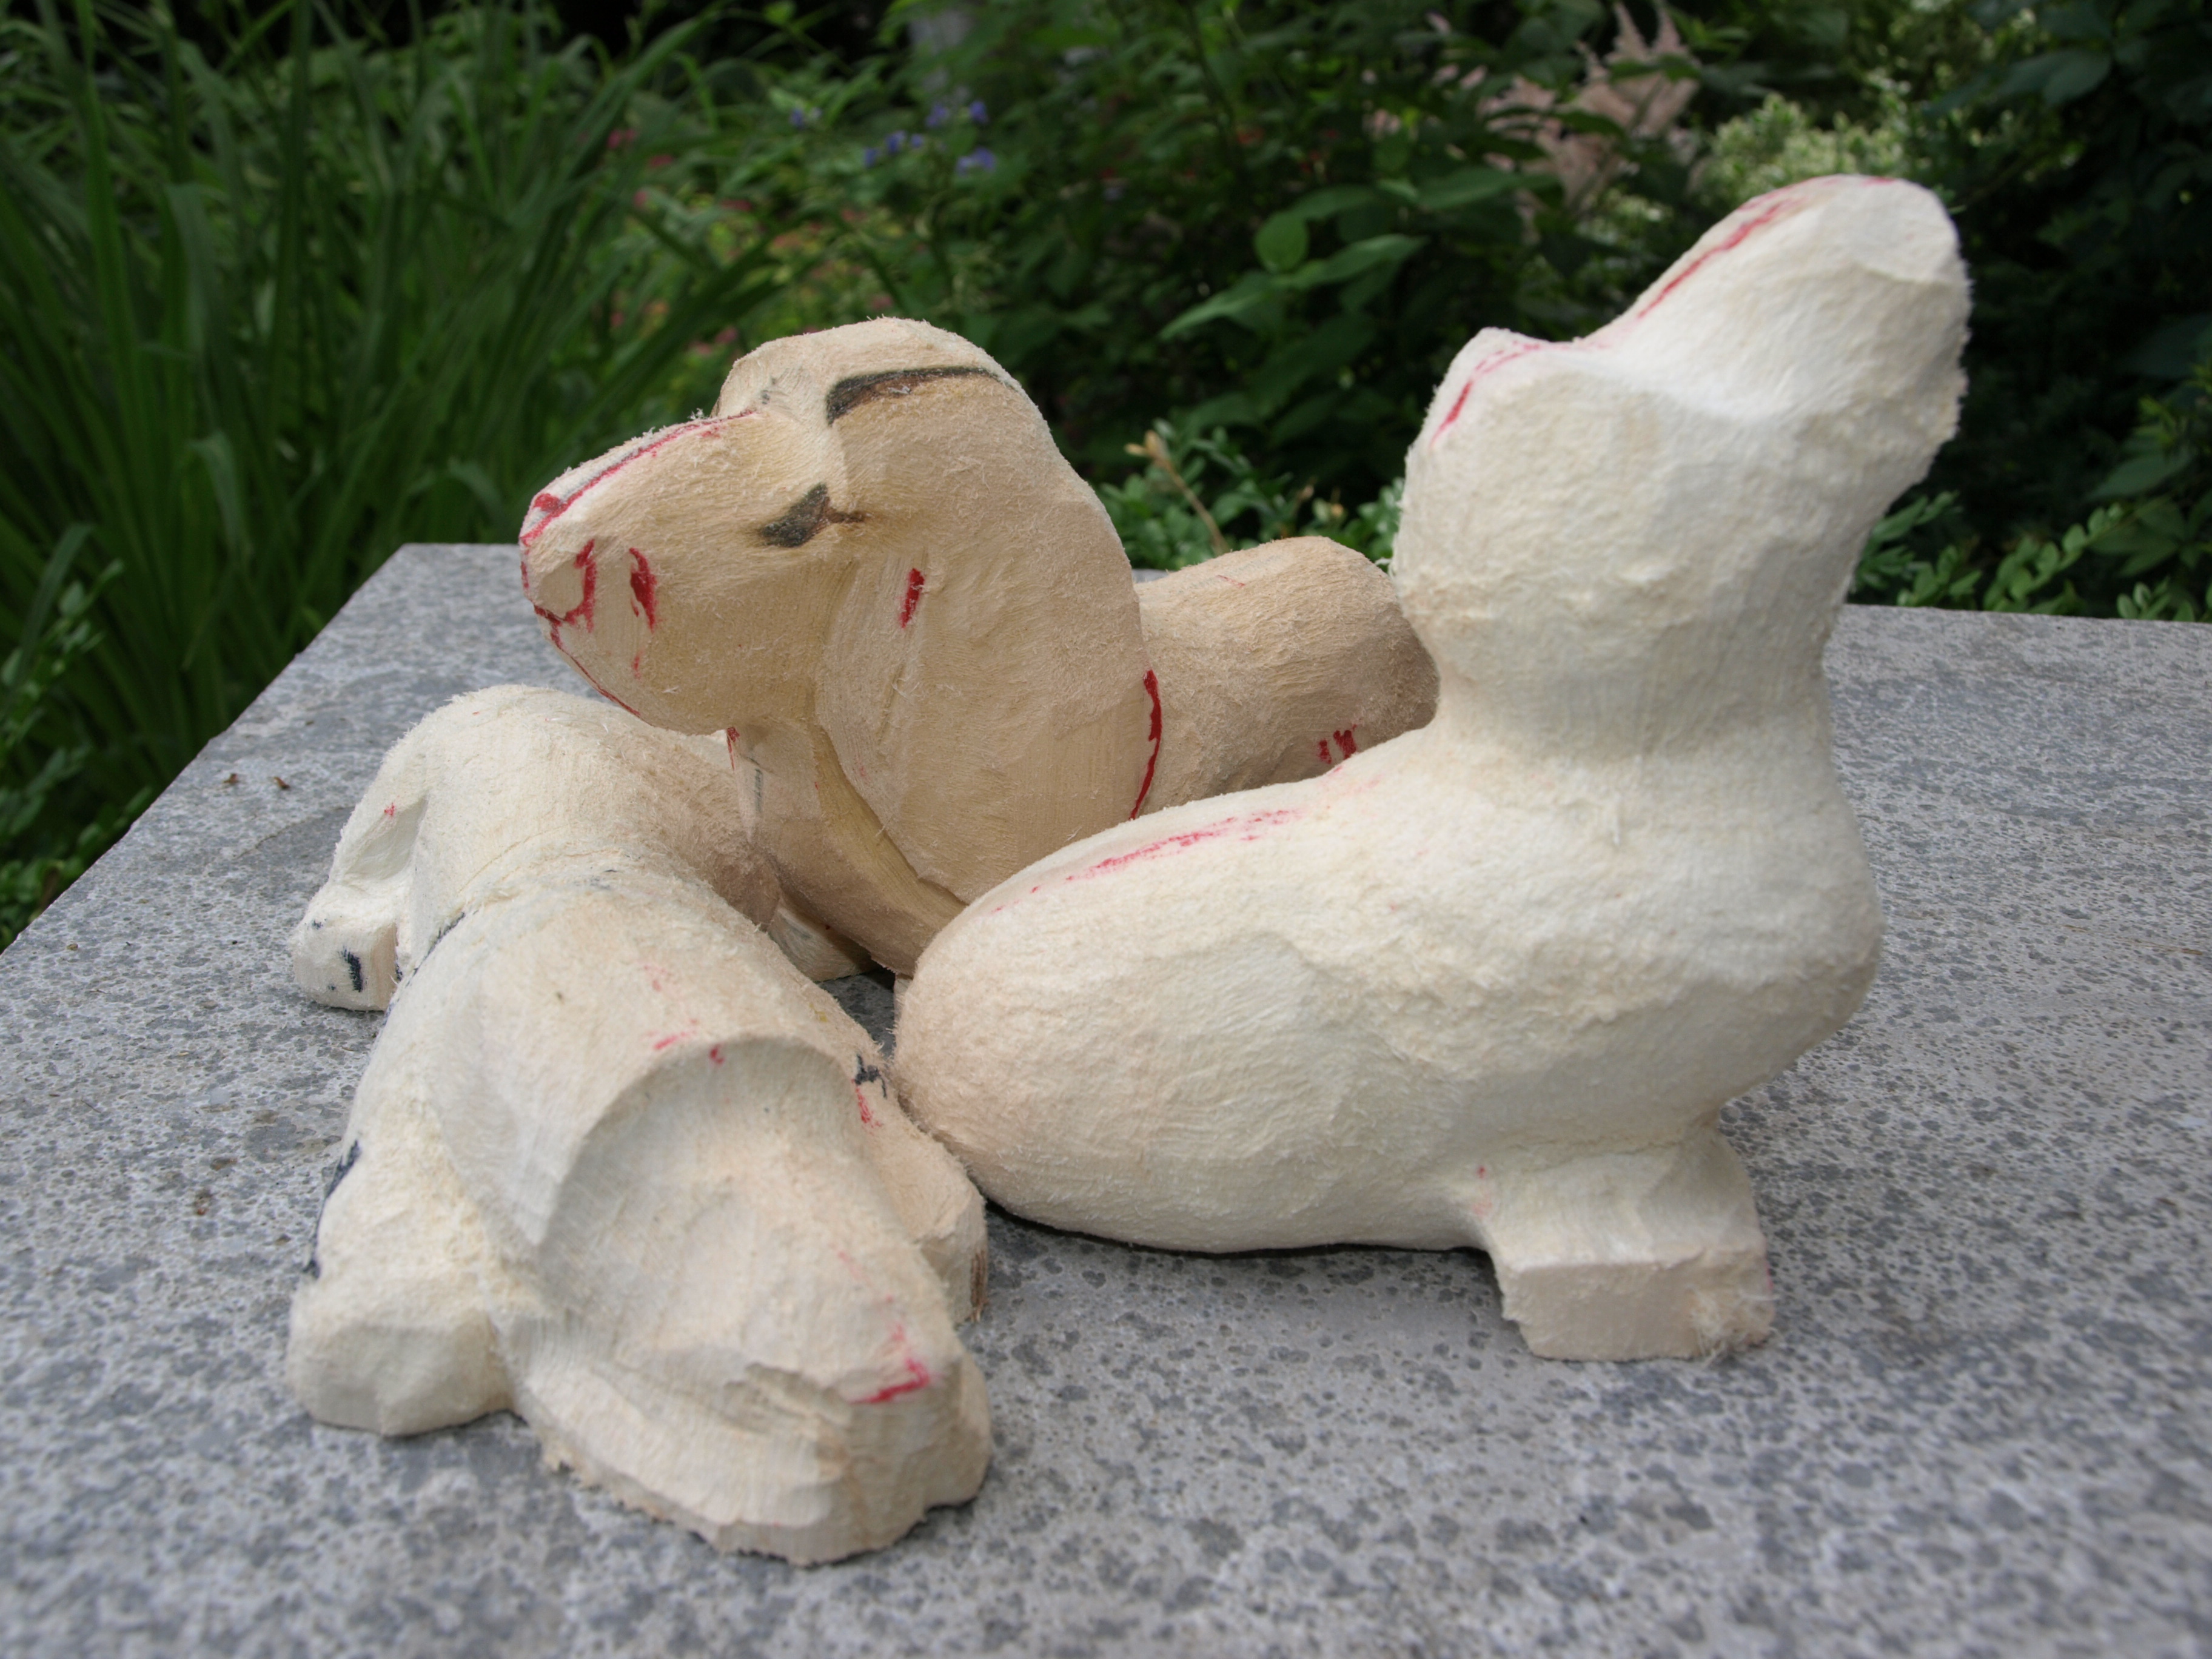
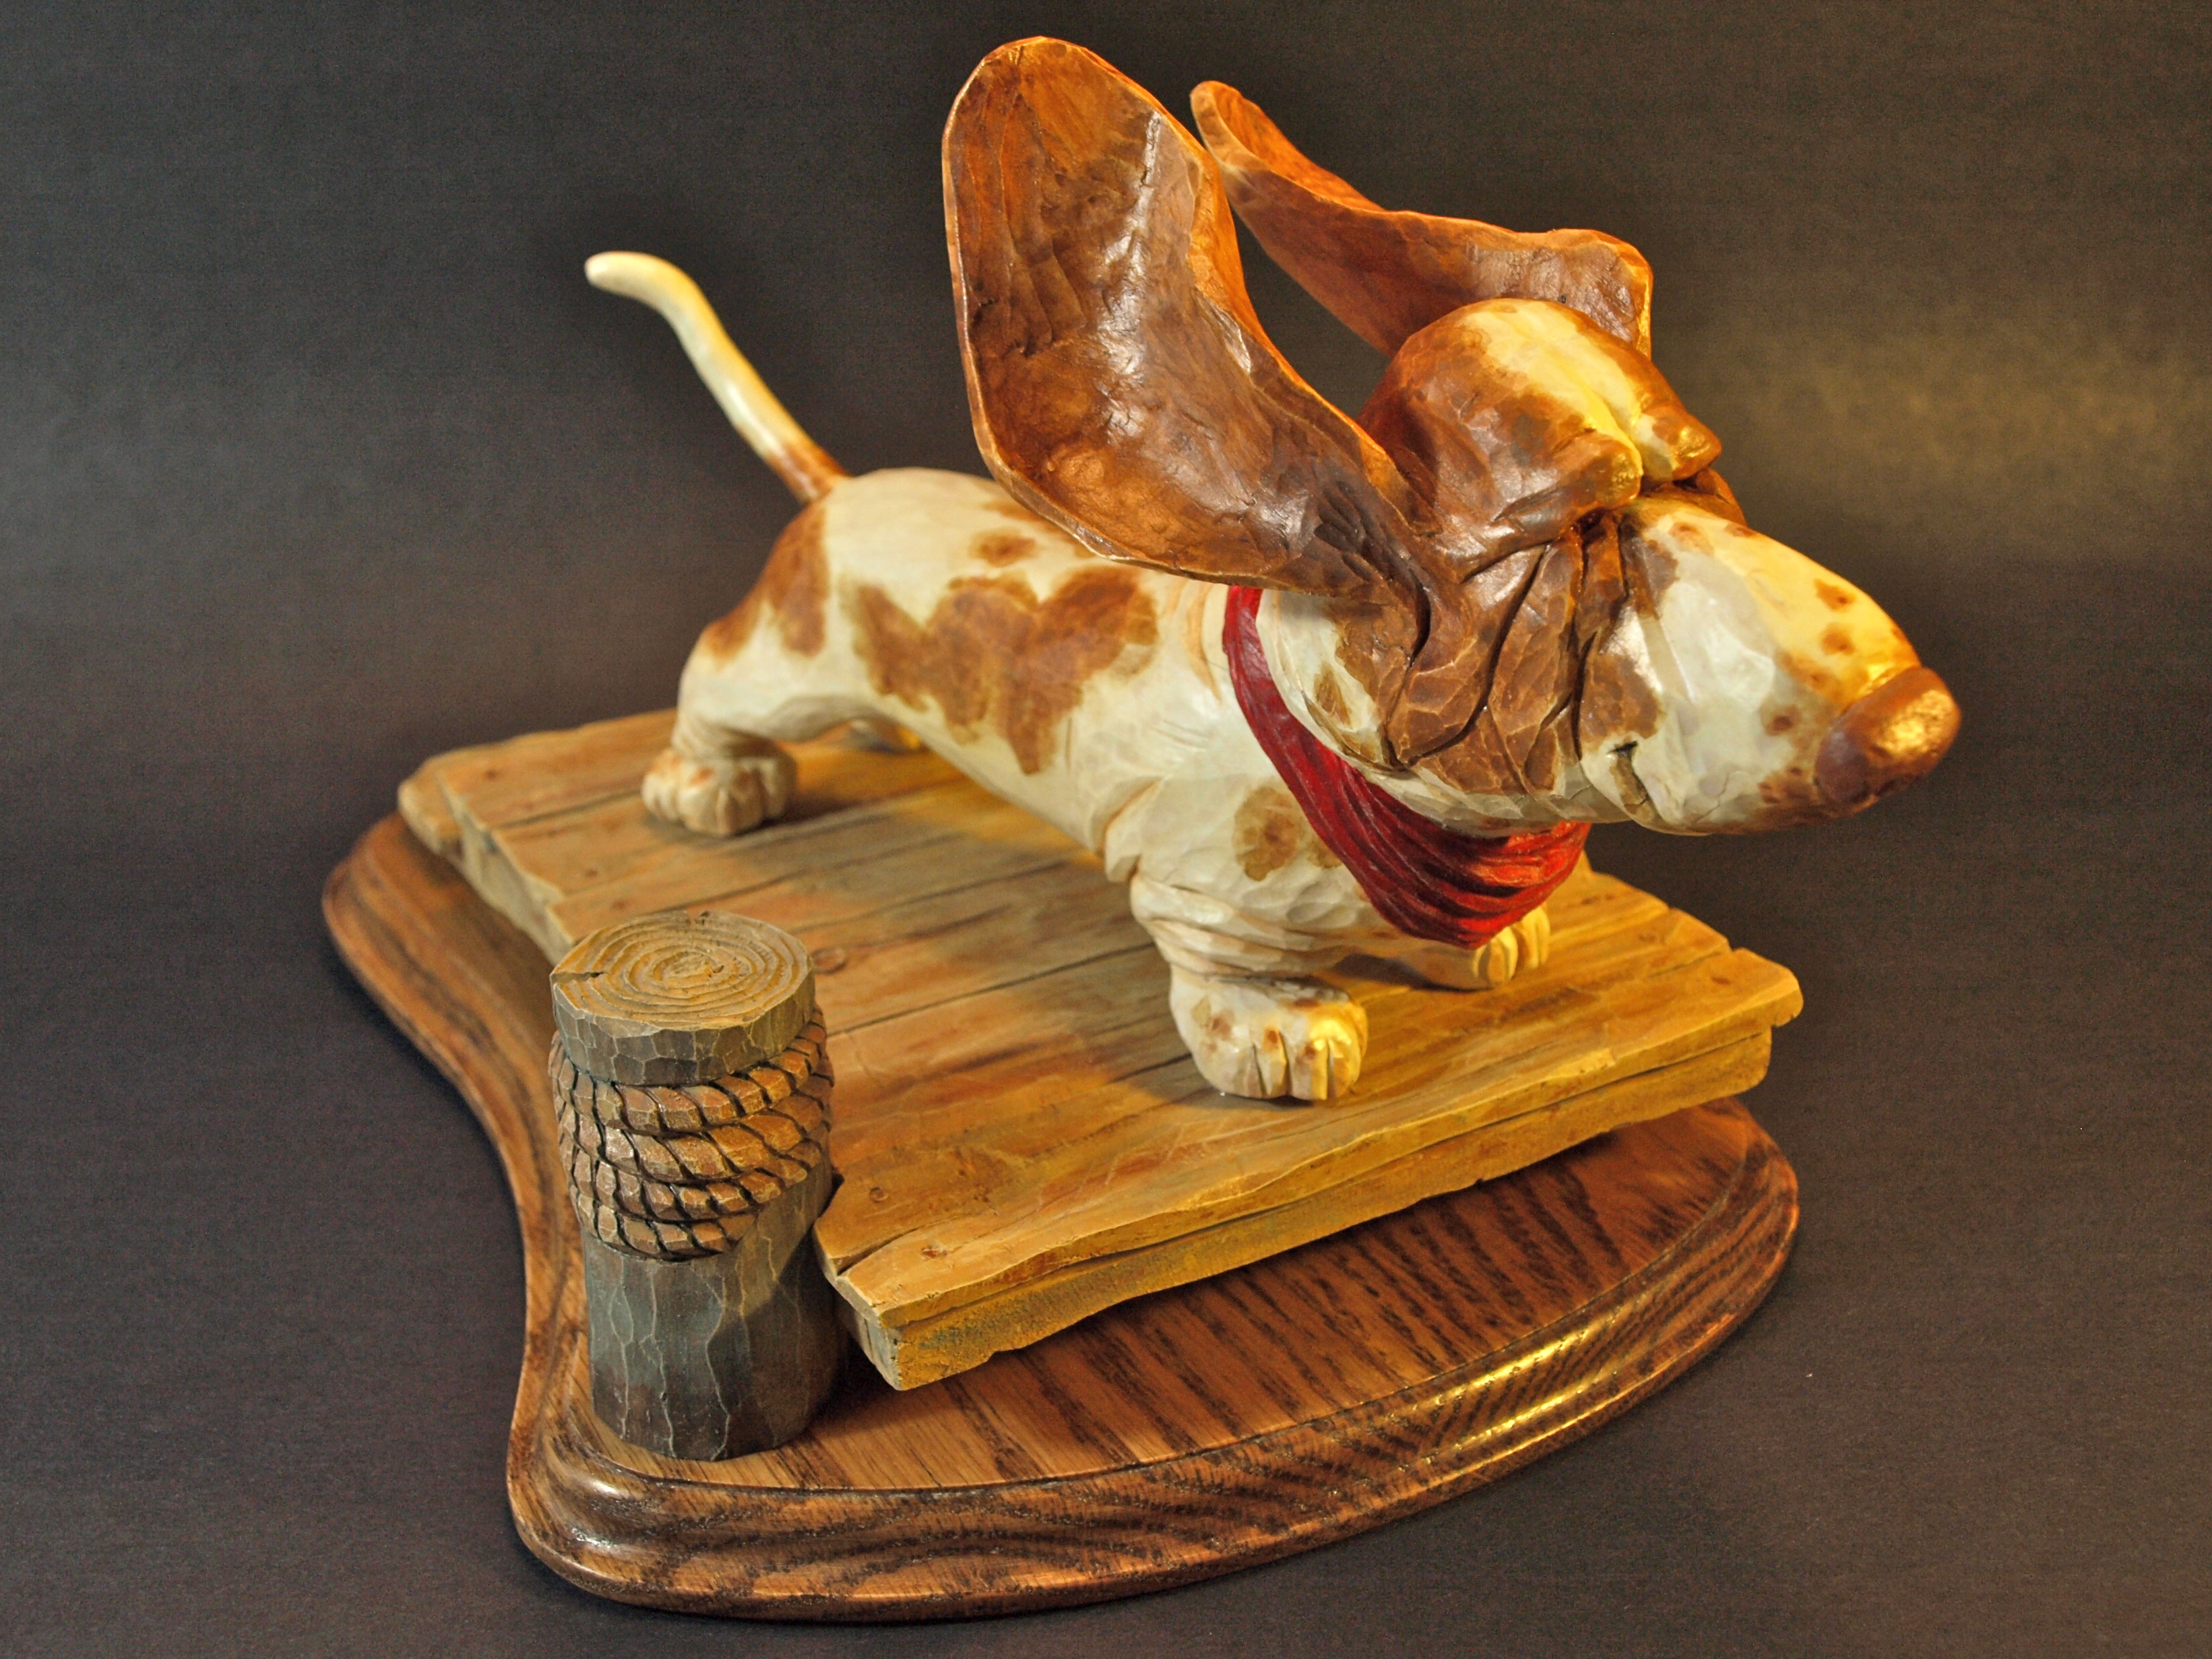
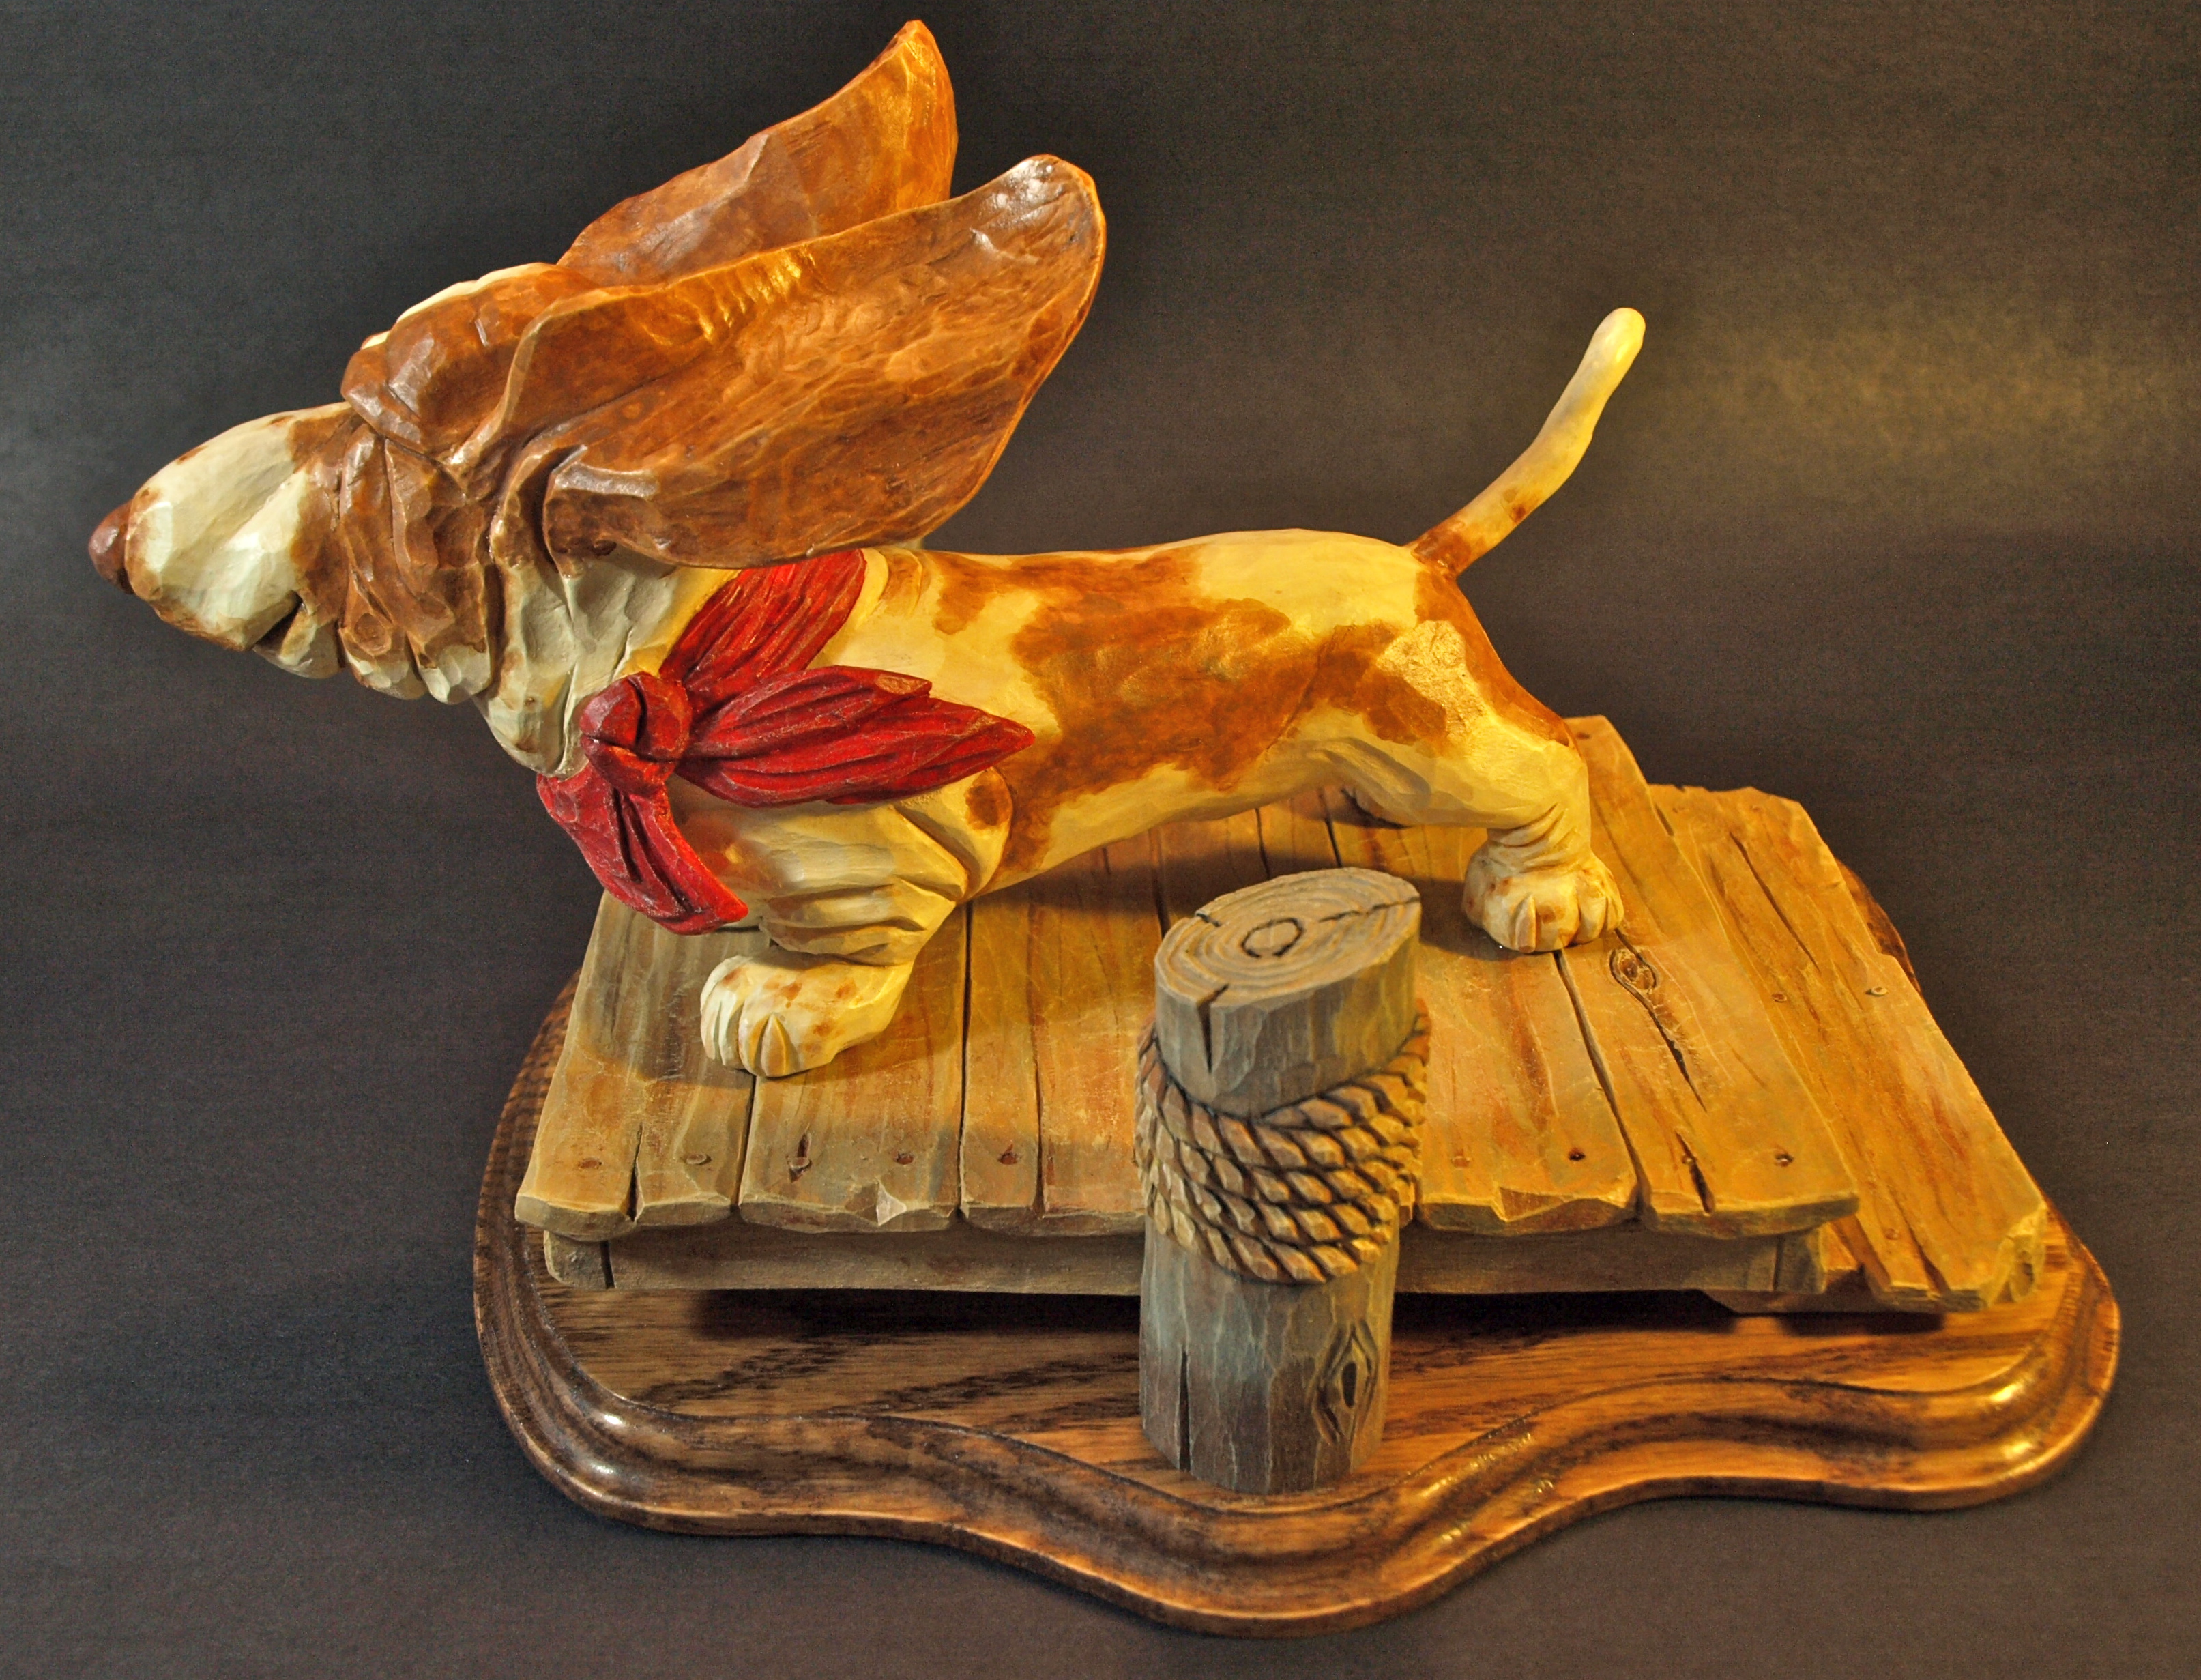
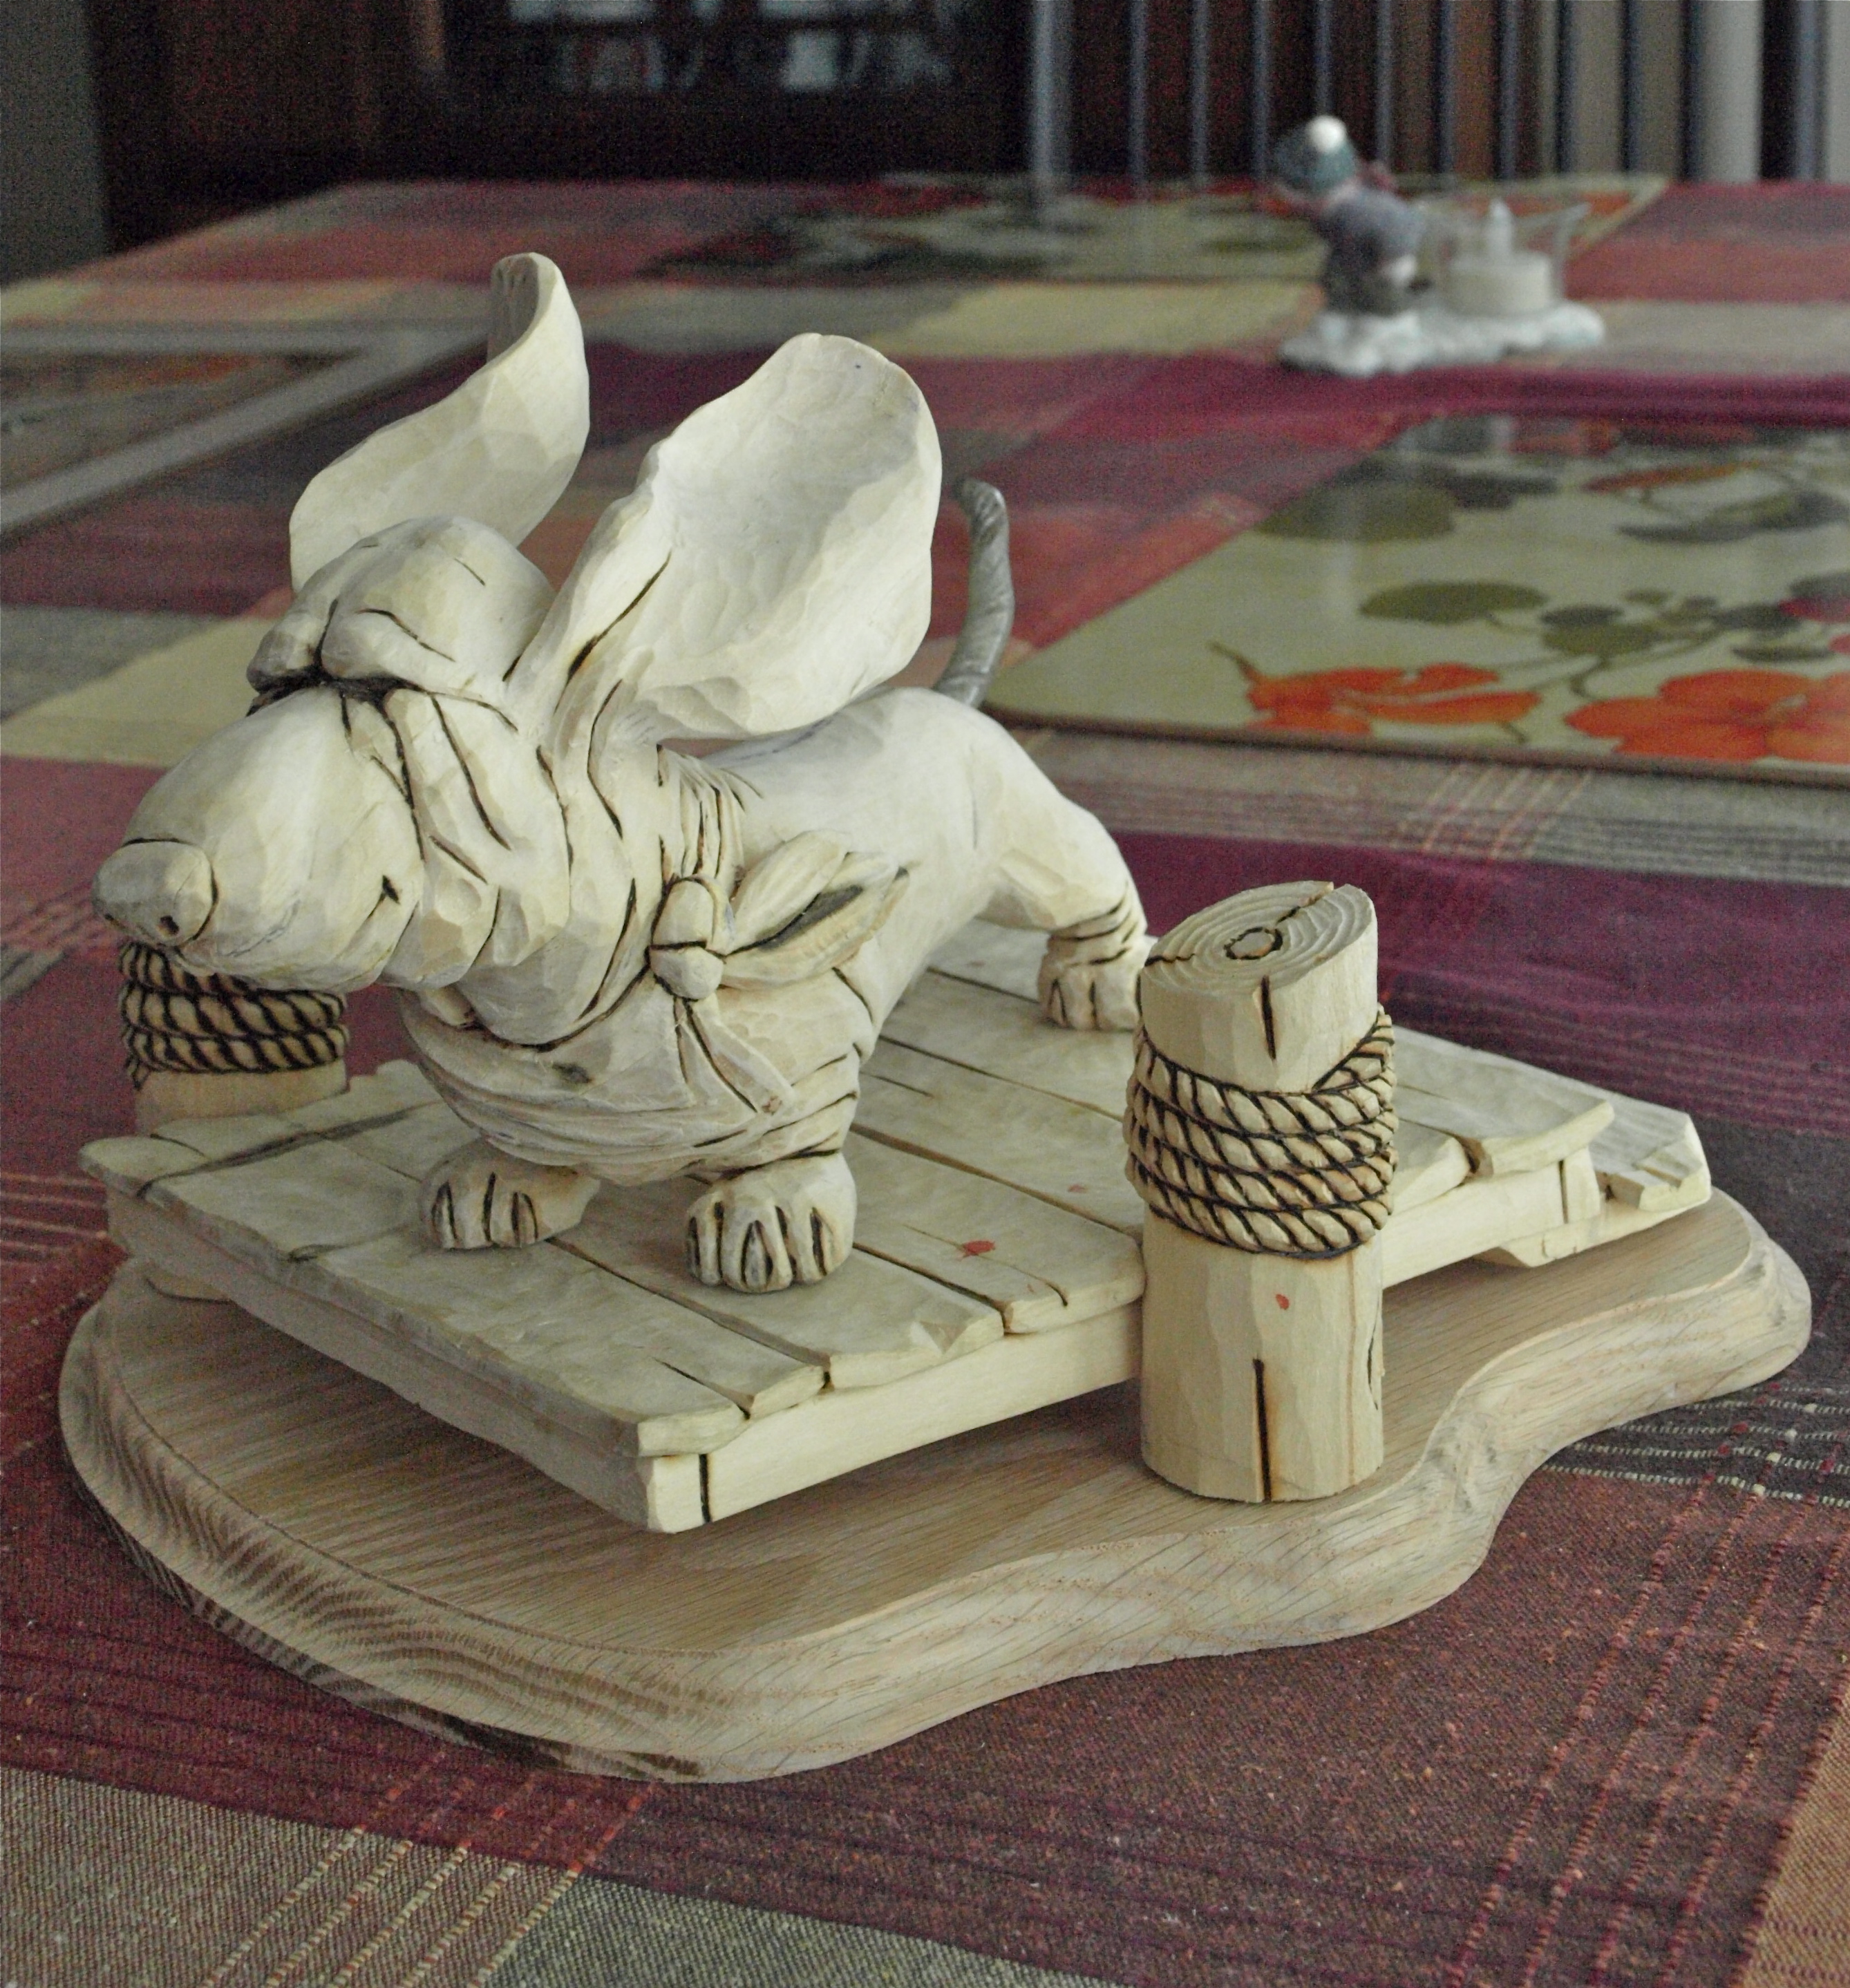
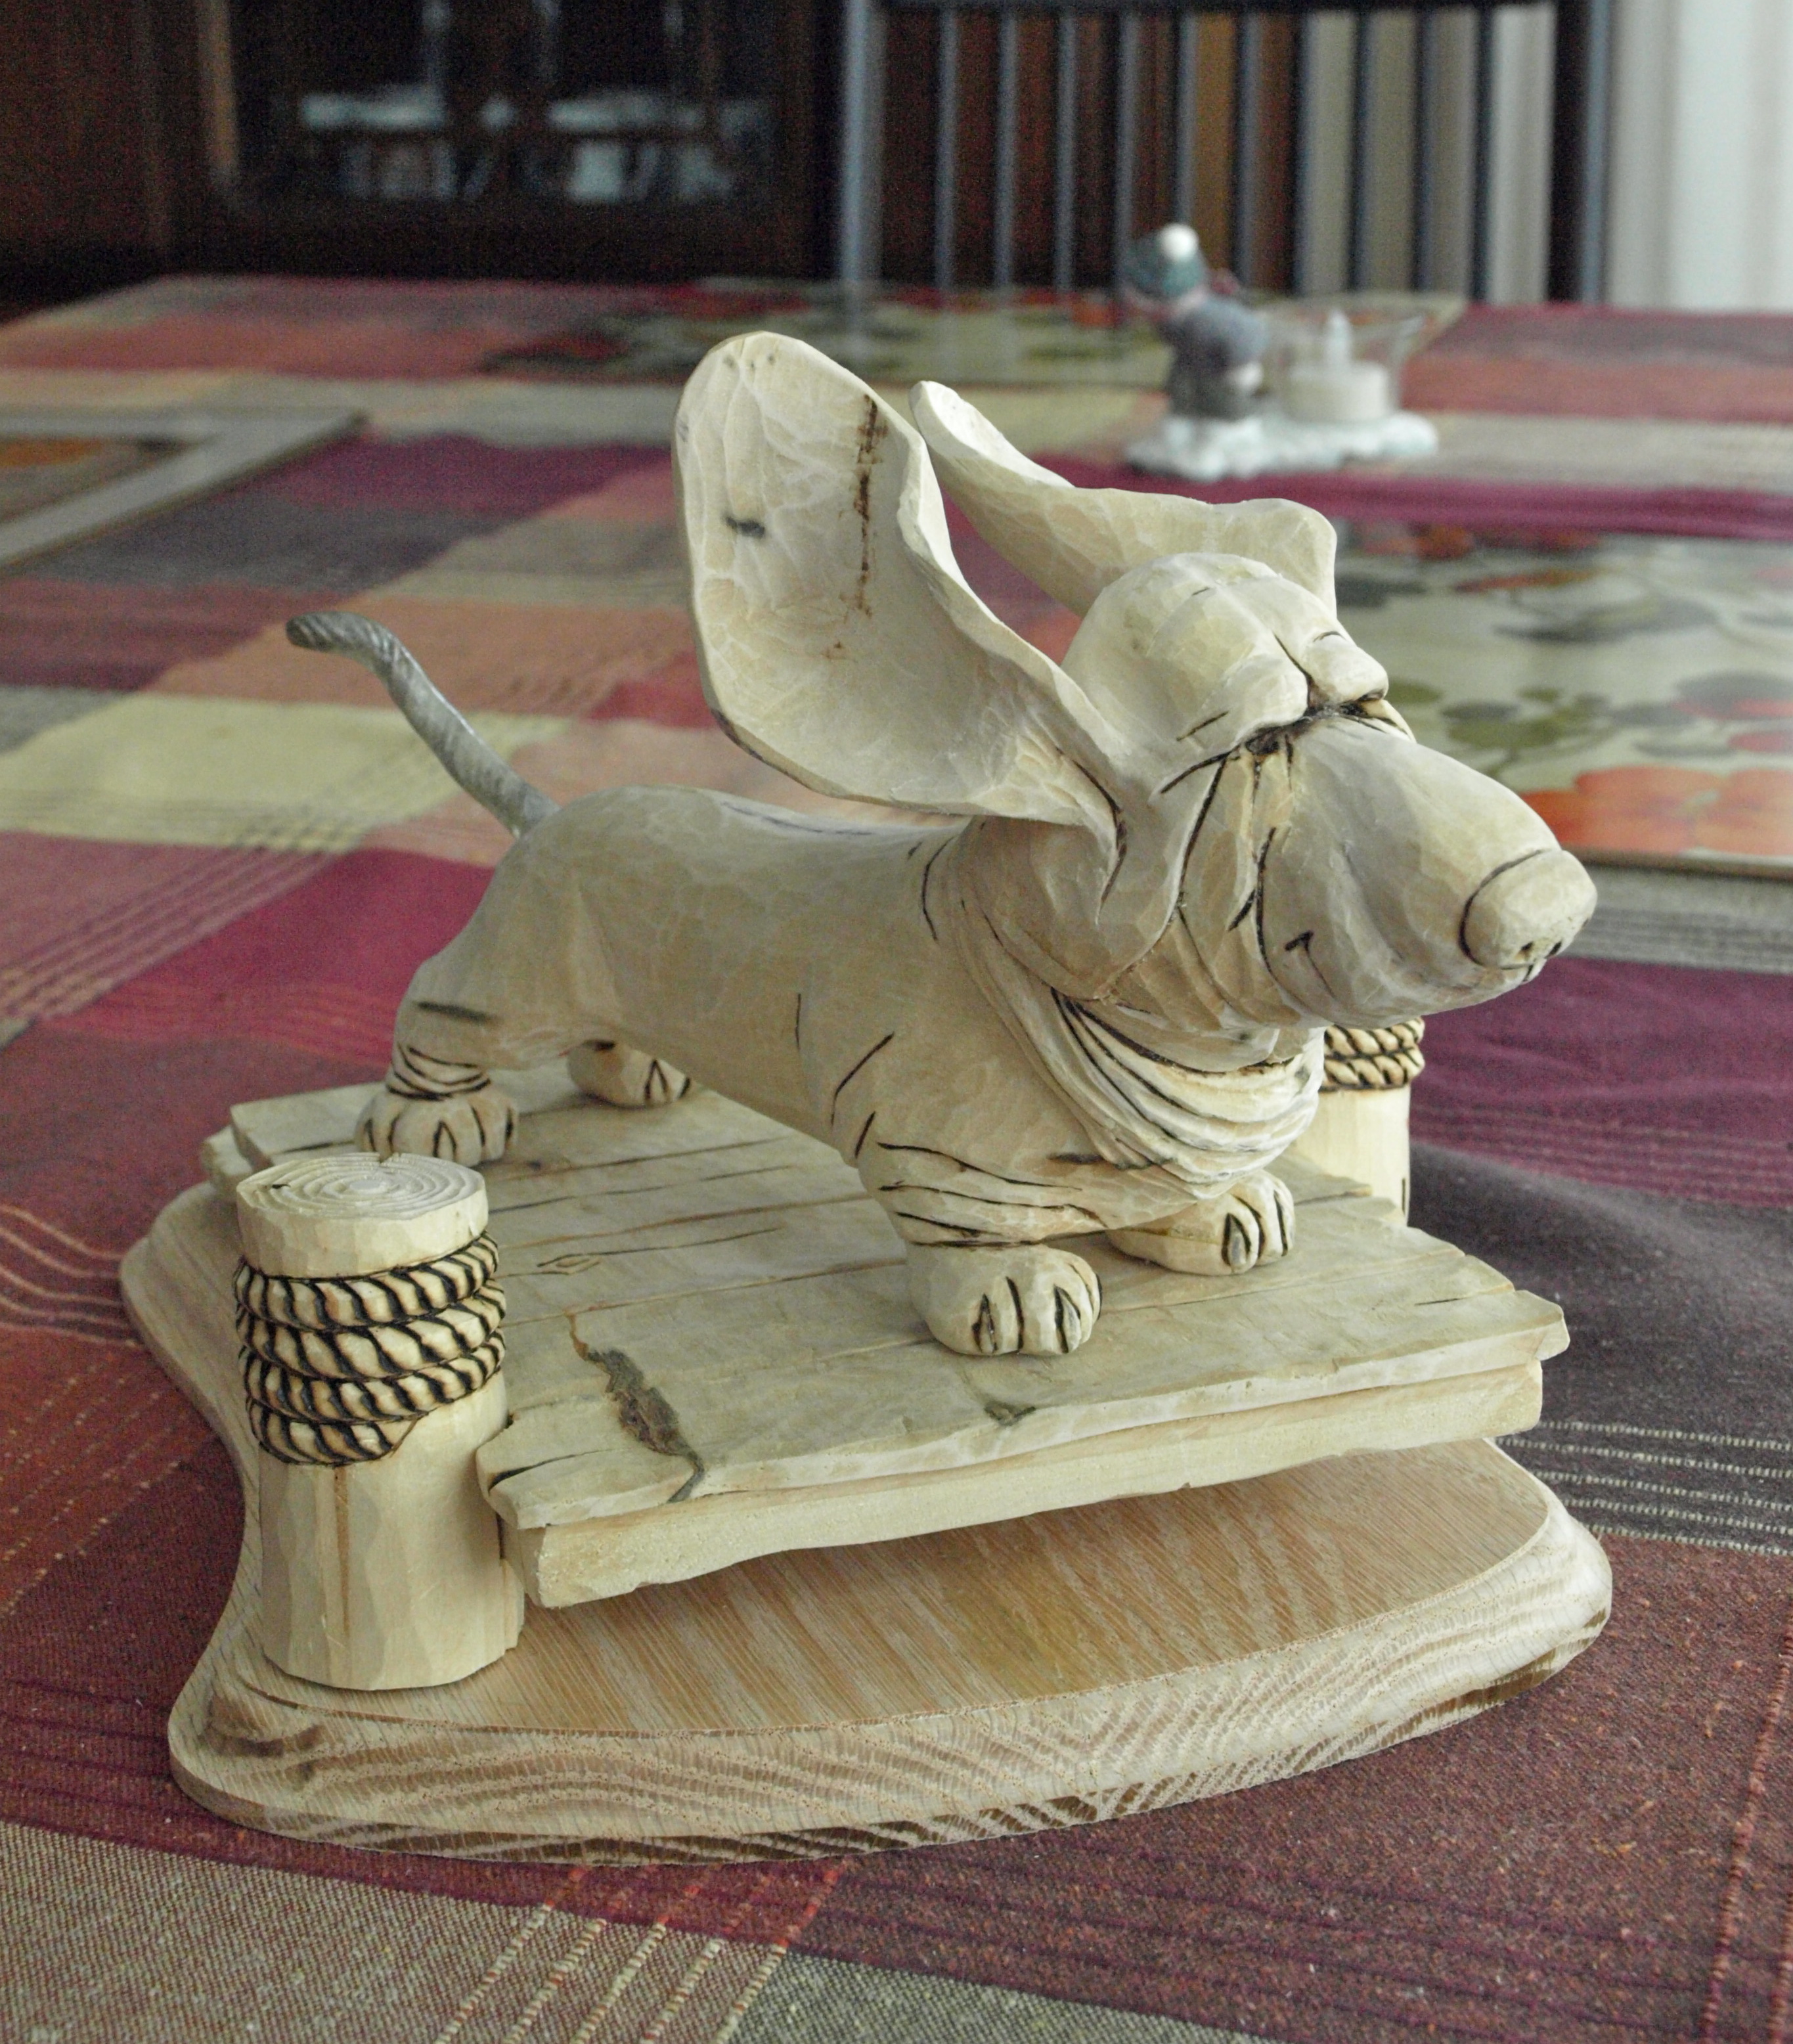
tributesinwood

Wood Carvings by Mark Sheridan

Archive for the tag “Basset Hound Carving”

The Howler

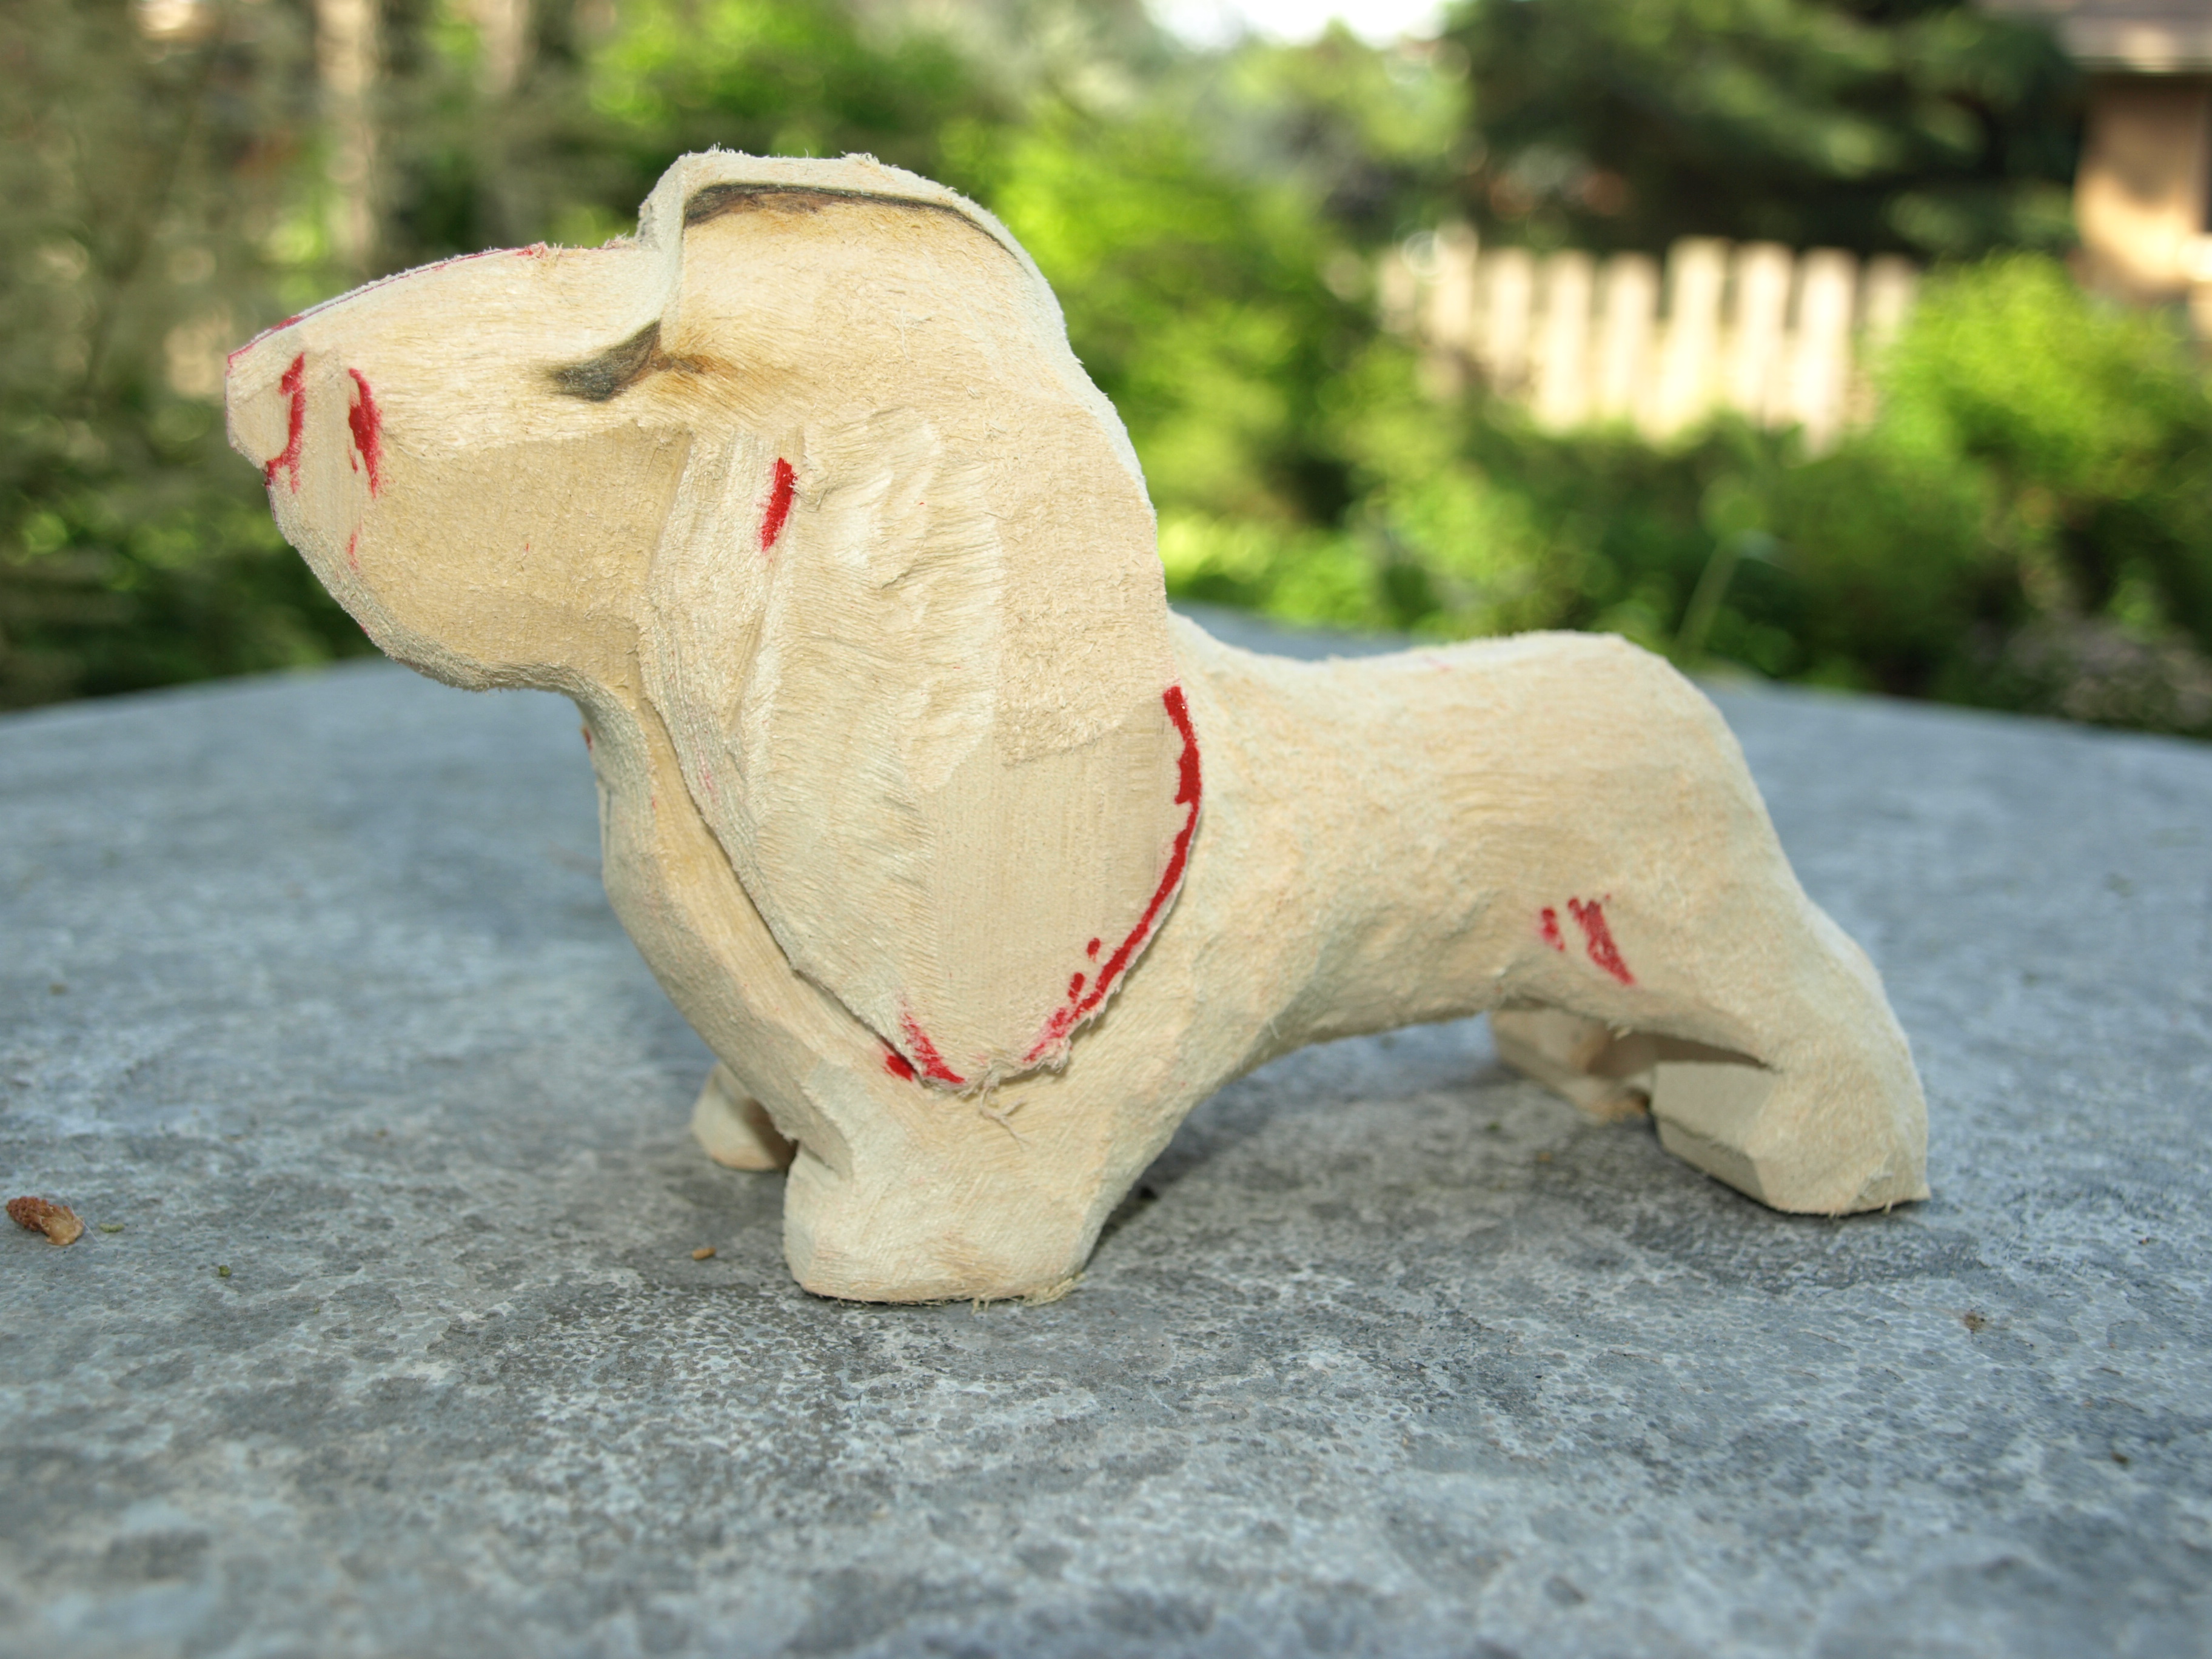
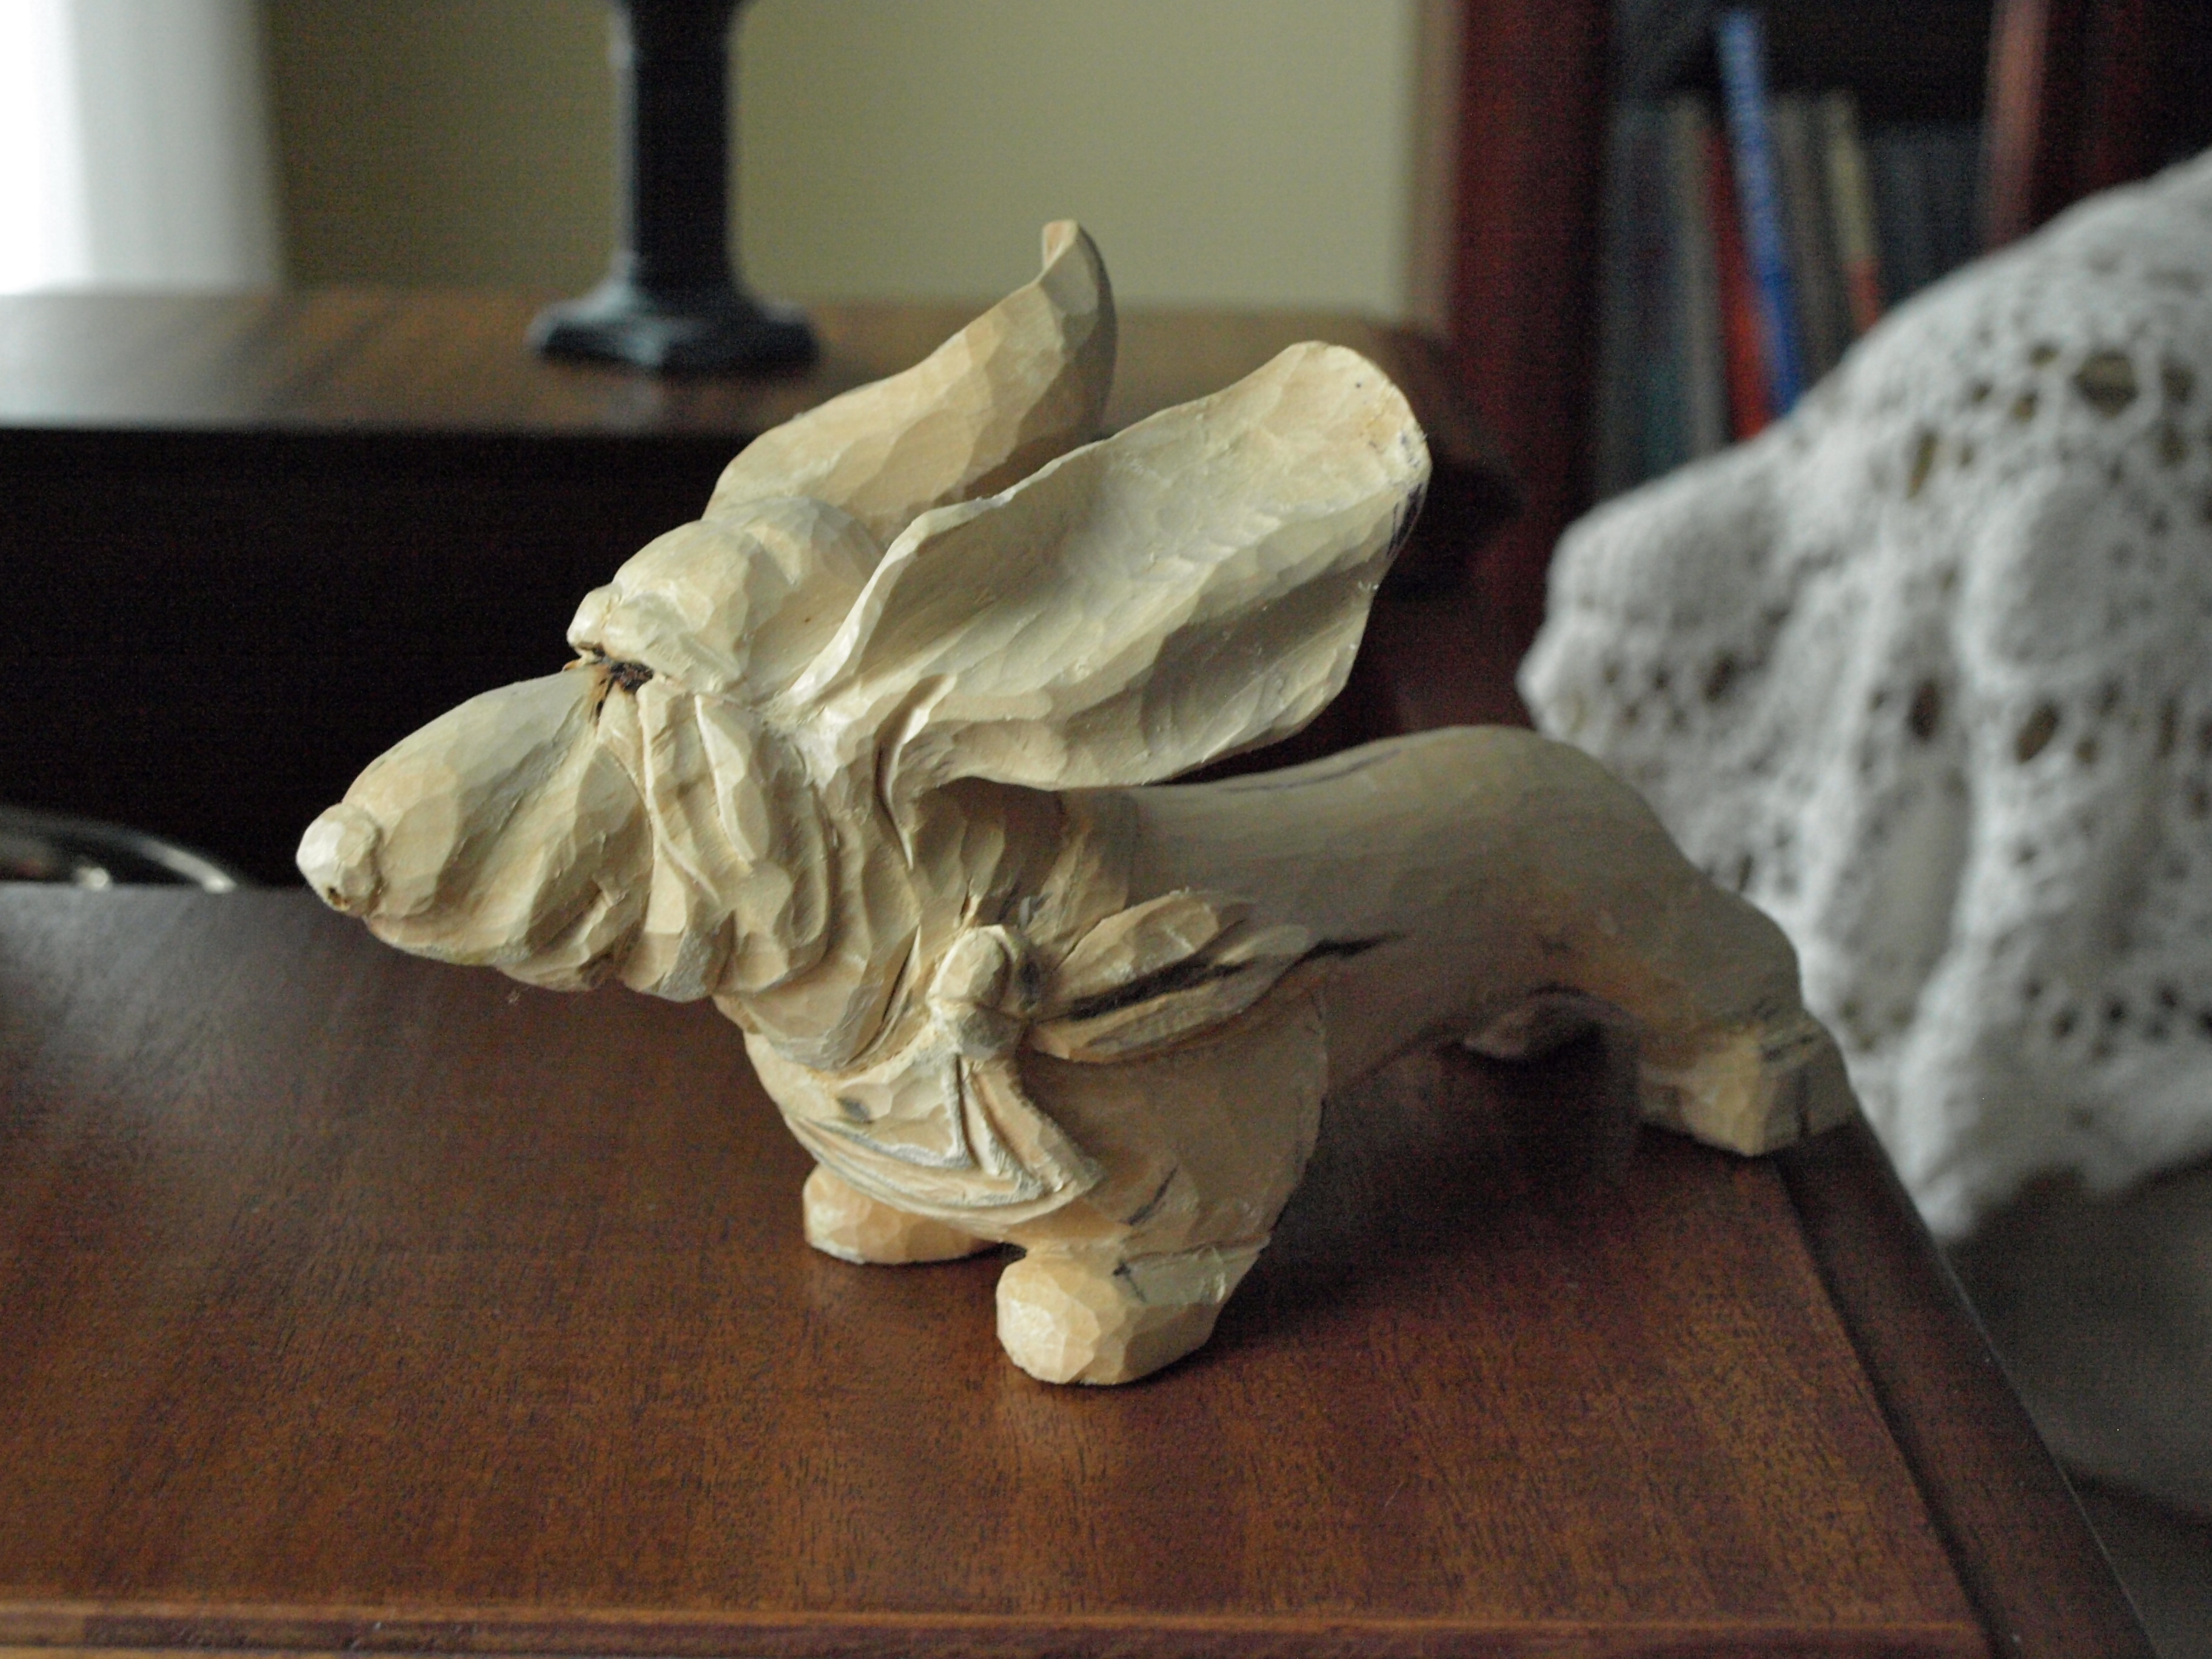
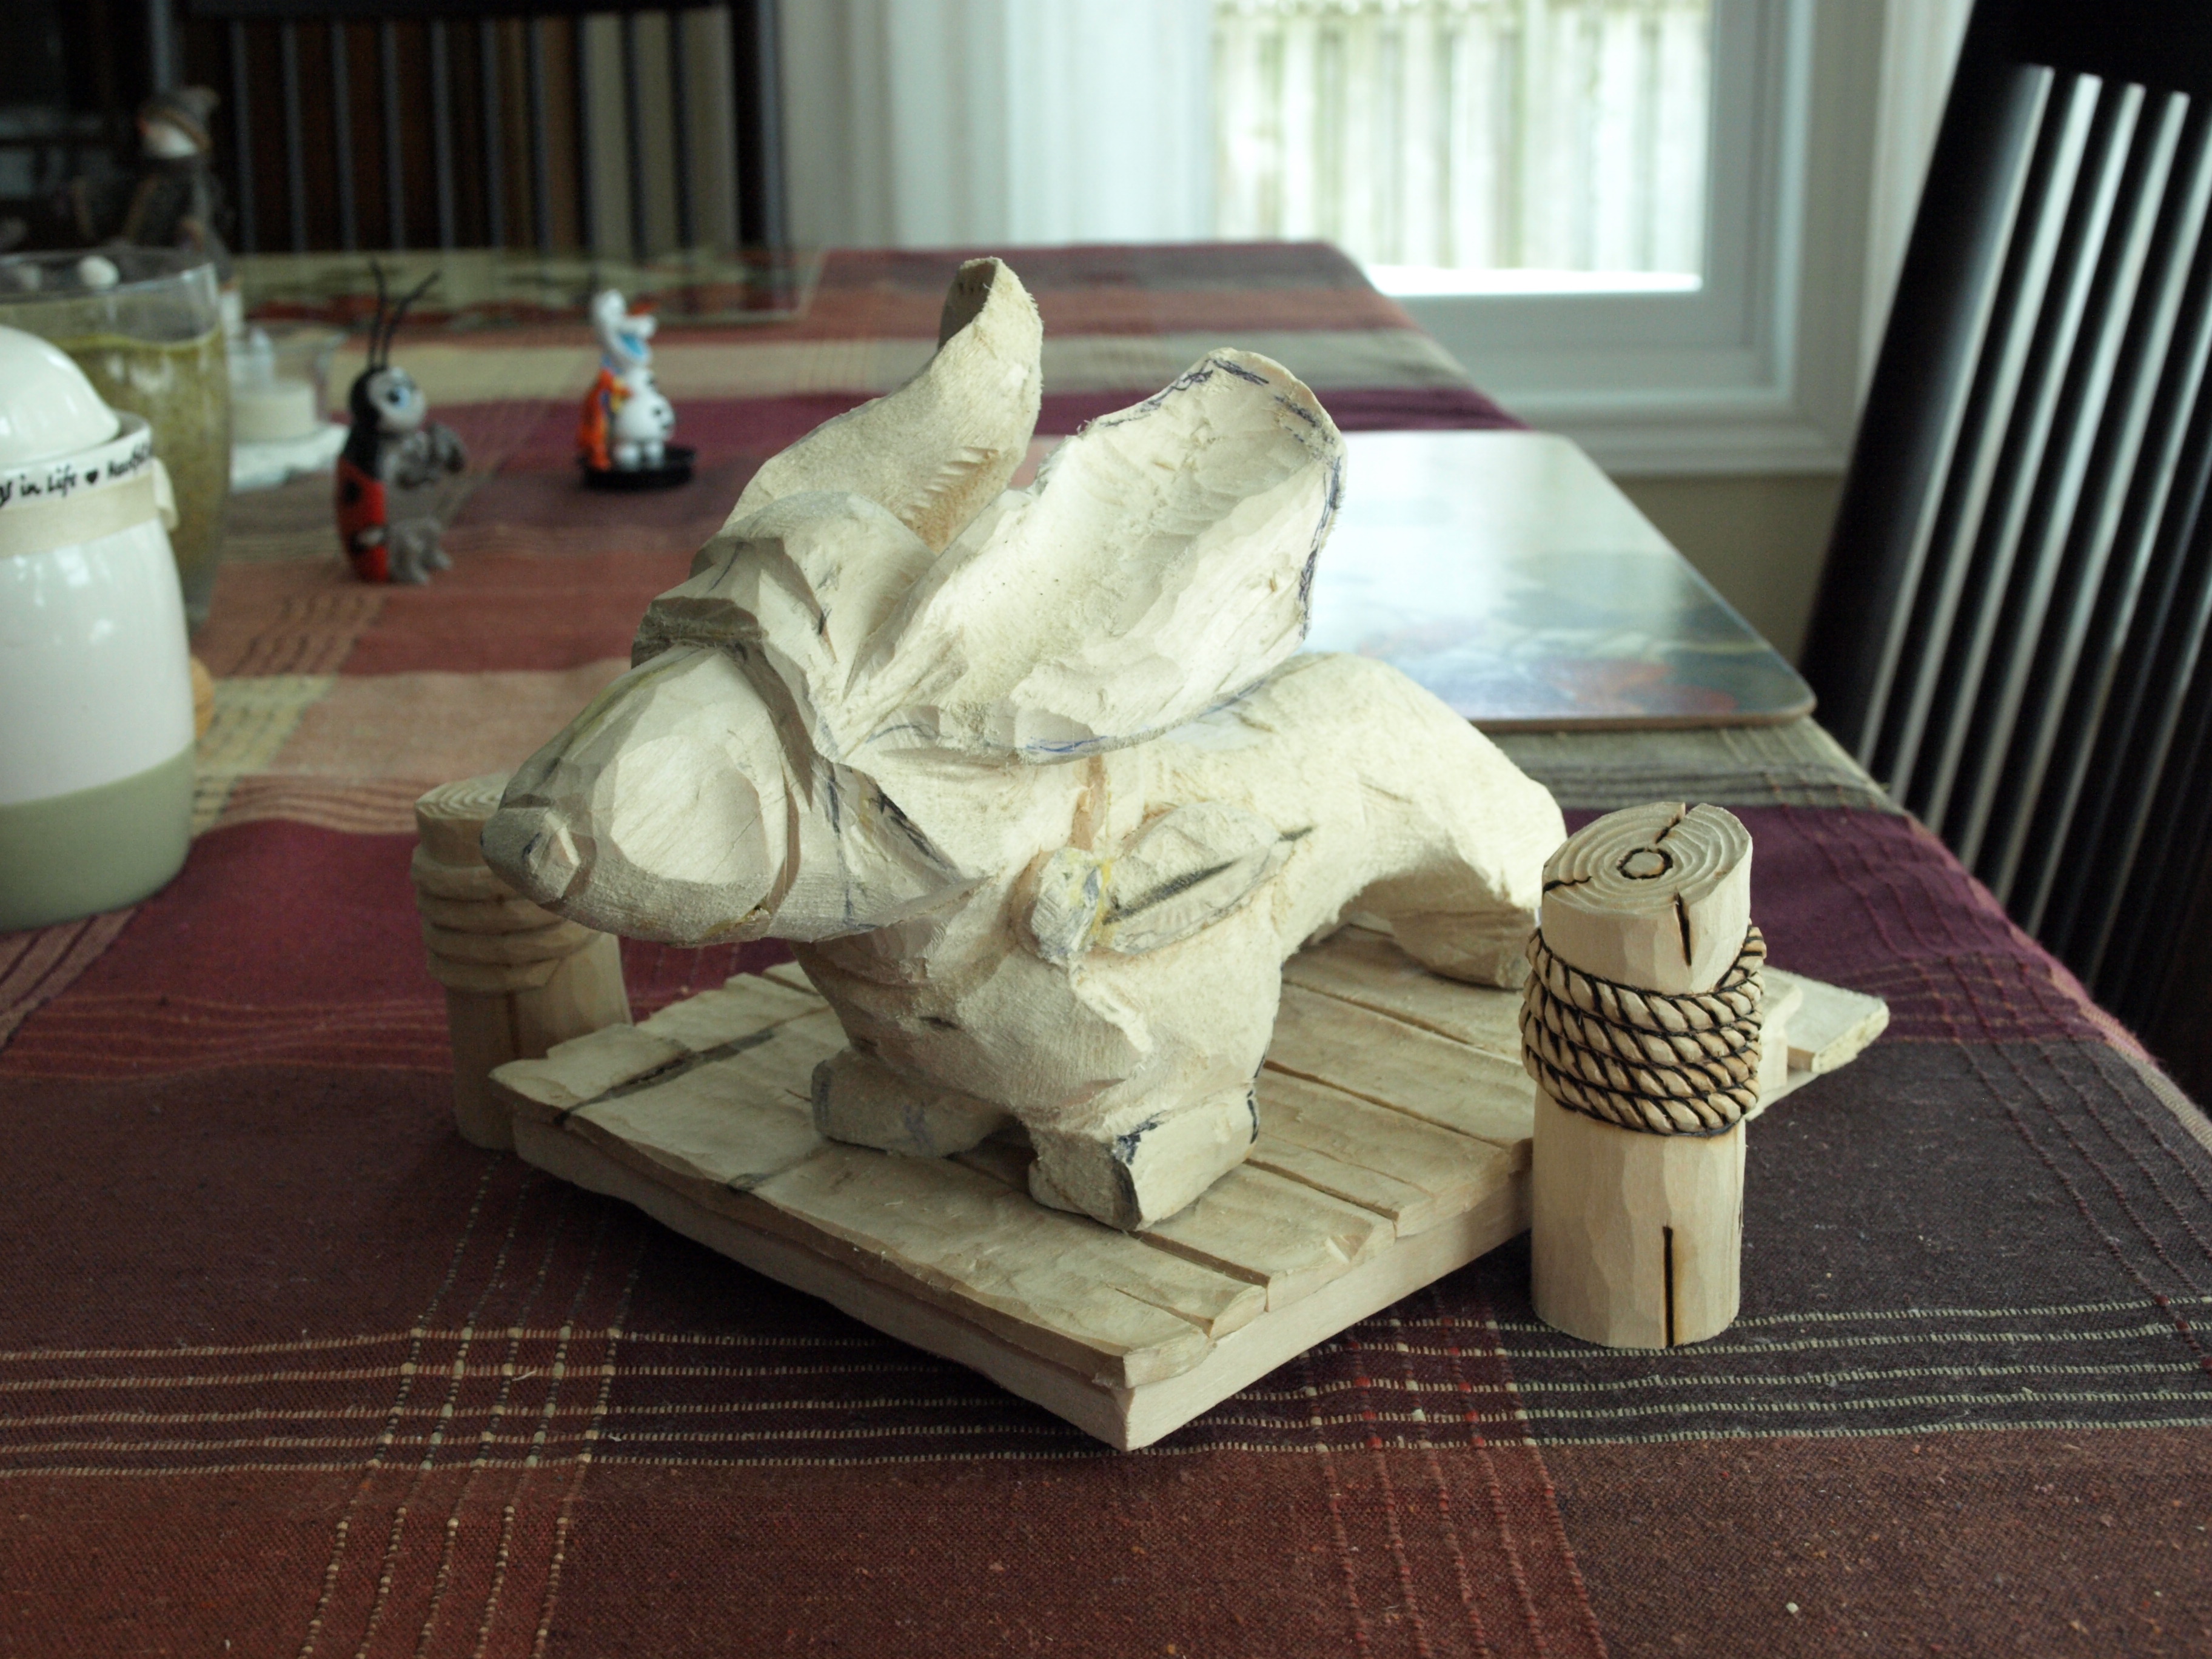
The little howler is coming along with some detail today.  As I mentioned earlier, the ears are being attached separately so that the grain of the wood follows the direction of the ear…and ends up being a stronger carving.

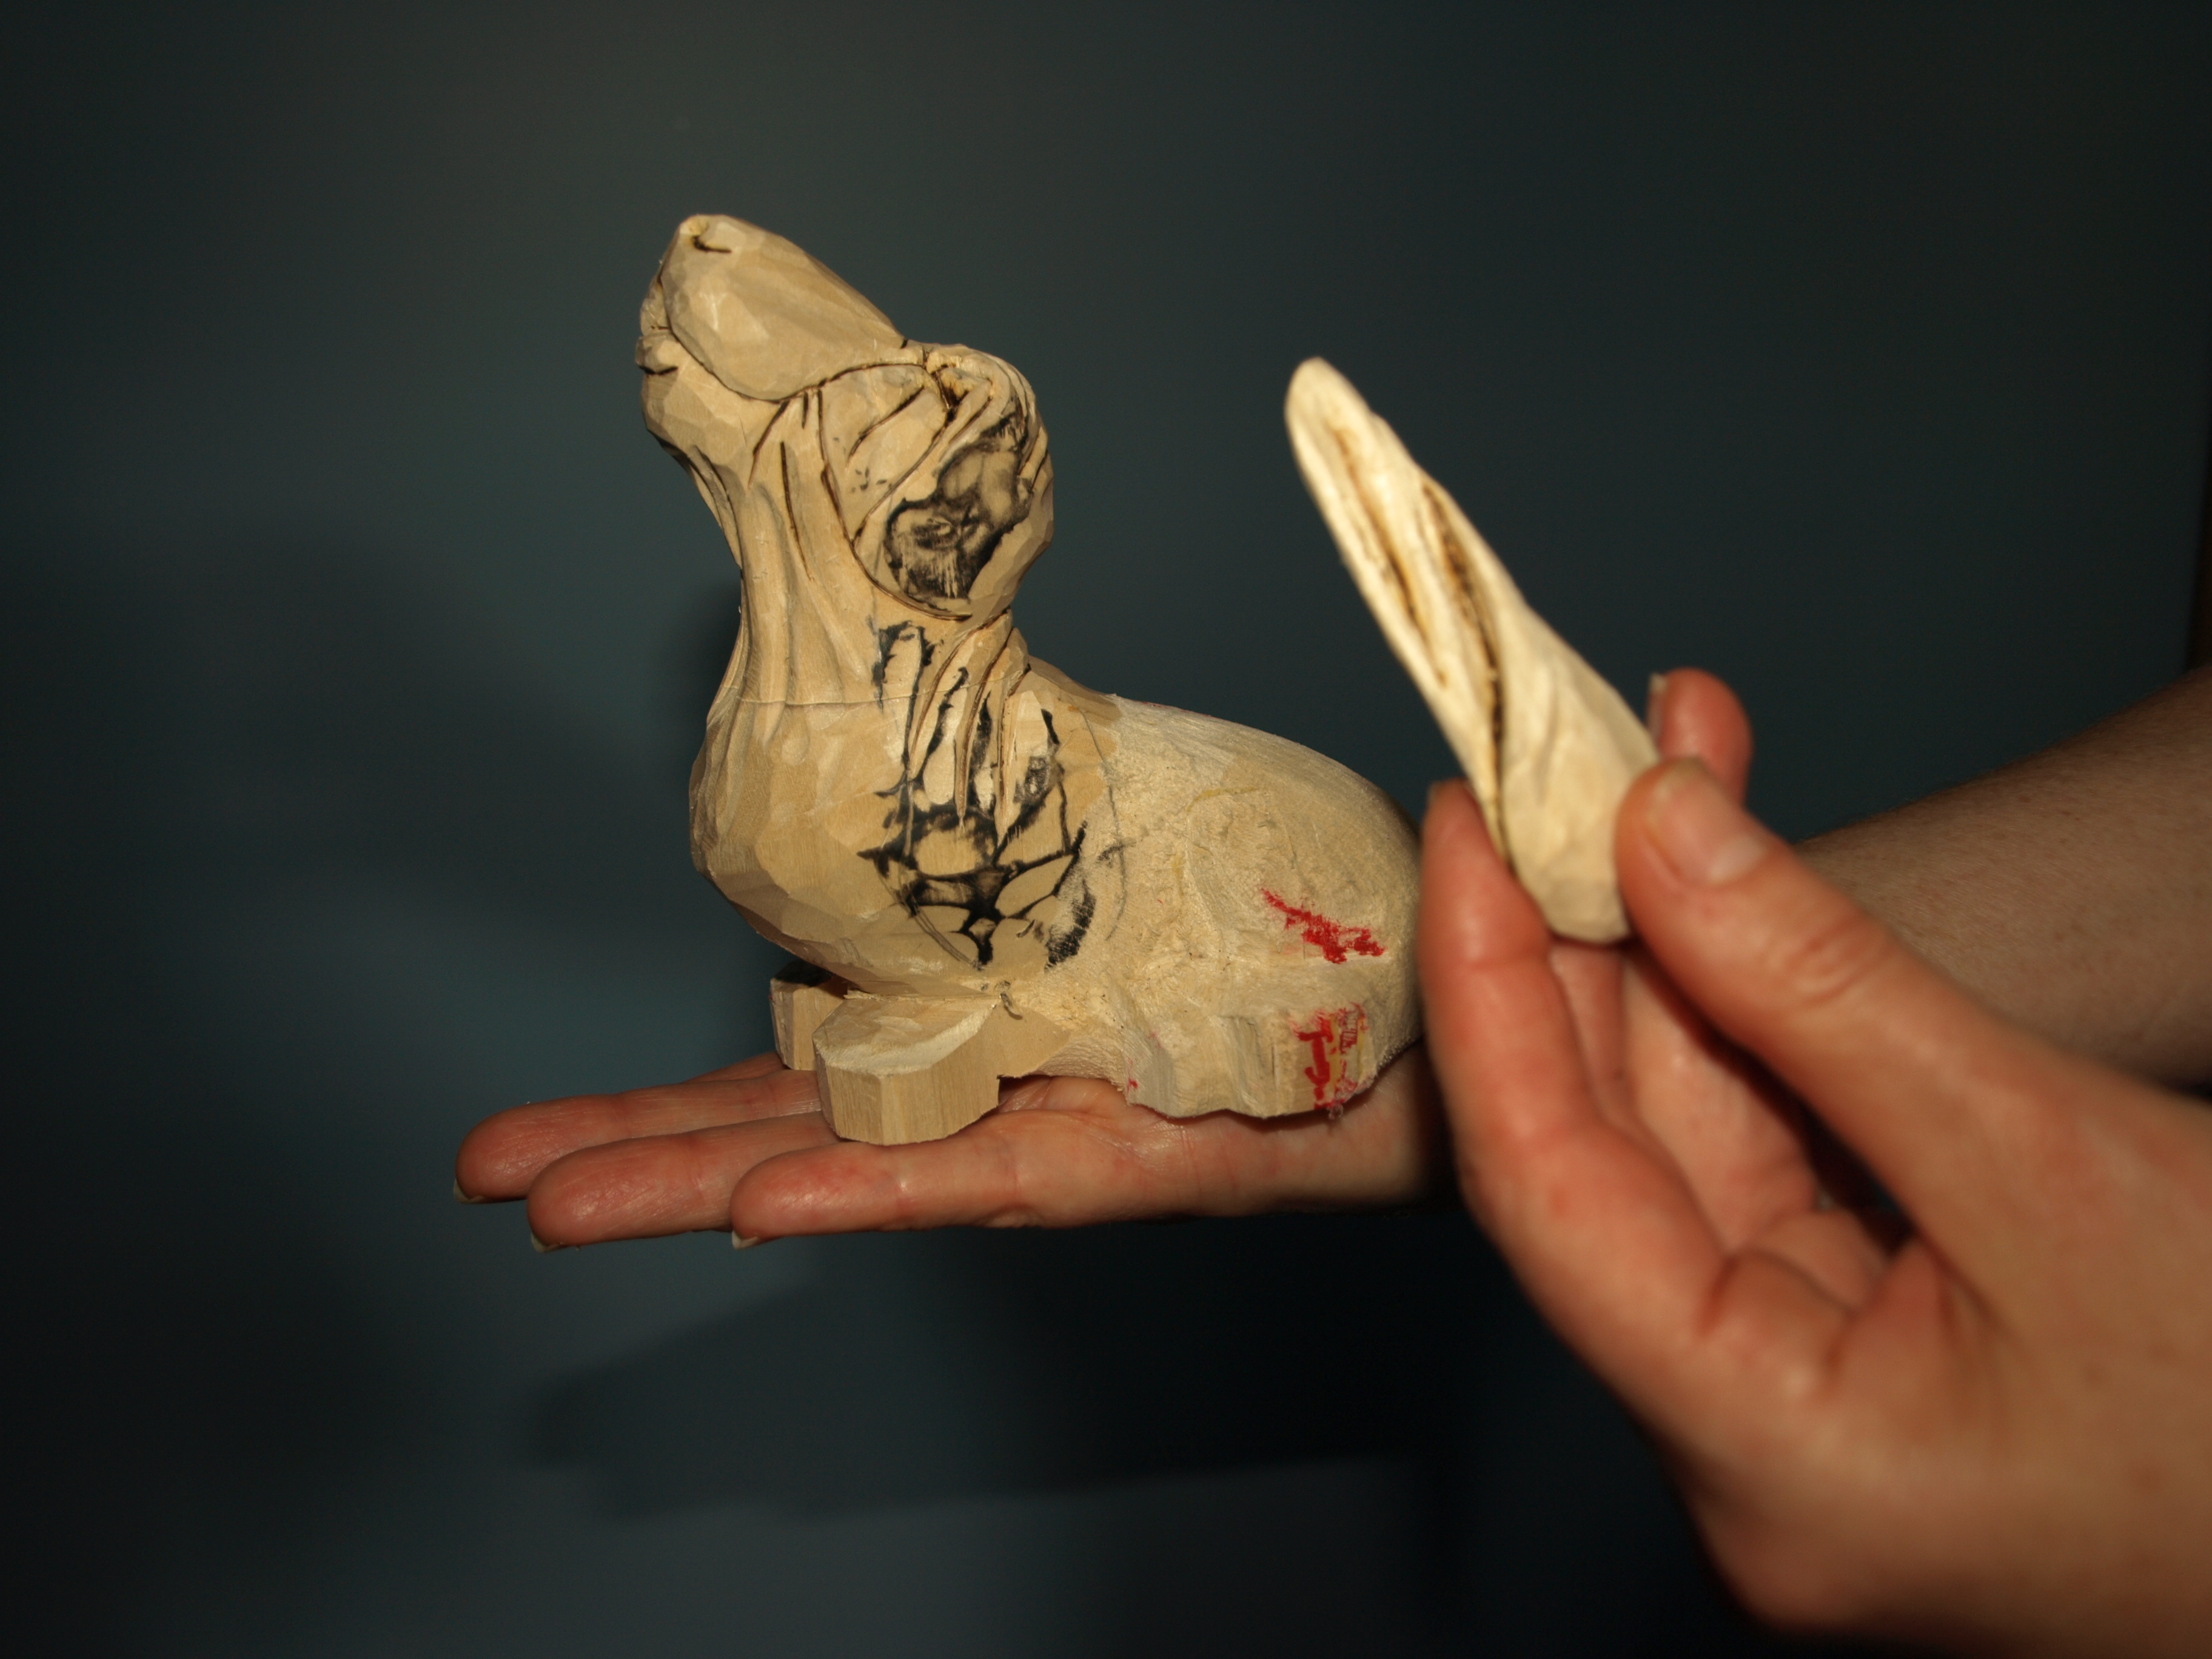
Below is a picture that will give you an idea of how that is done.  The ear was first cut out from a piece of wood in the general shape that I was looking for.  Then I took a piece of pencil lead that you can buy from an art shop and scrubbed that lead all over the area on the dog where I wanted to place the ear.  The ear blank was then positioned where I wanted it to eventually land and pressed ( and wiggled a bit ) against the leaded area on the dog carving.  You guessed it…you end up with lead markings on the underside of the ear that marks all of the high points that now need to be shaved away.  As you keep doing this, the underside of the ear eventually gets dished and shaped accurately to fit the contour of the dog carving.  And, voila…you have a pretty decently fitted ear and you can then continue to carve the exterior of the ear…which I did making folds and hollows.

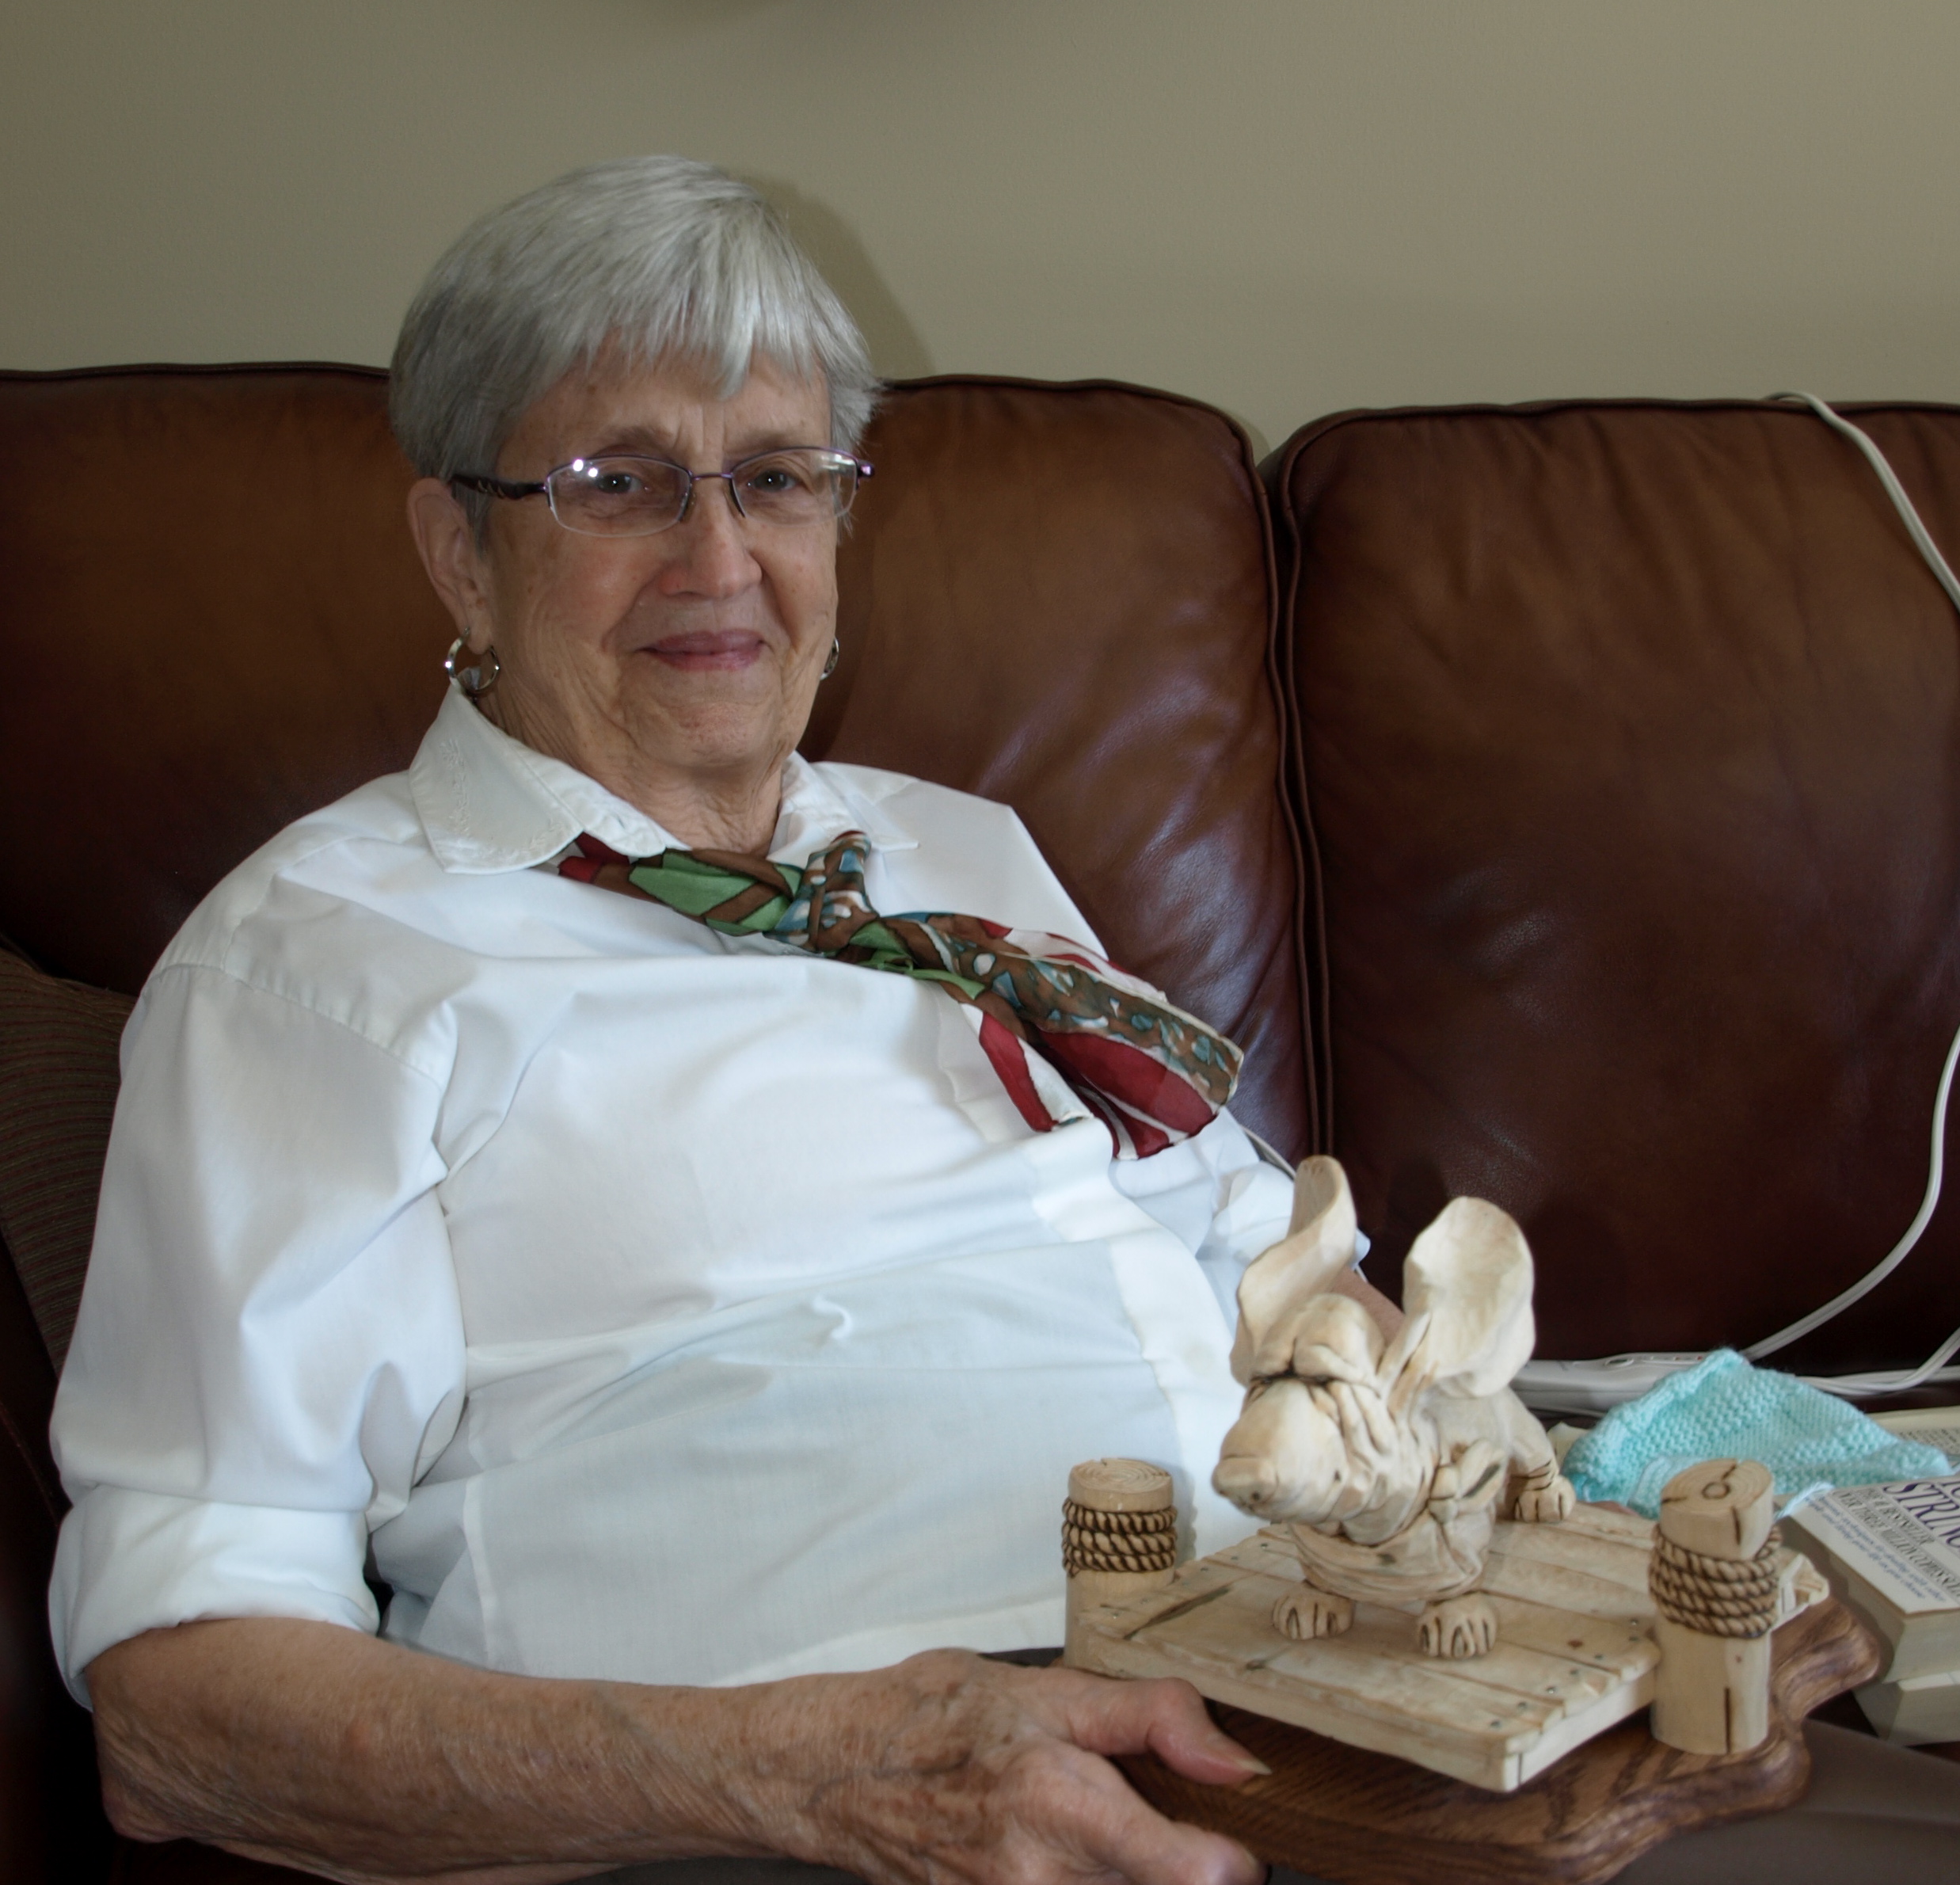
By the way, the fine black lines are from a wood burning tool used to clean up the deep cuts of the wrinkles…also, by the way…those are Peggy’s hands doing the modelling.  This is a real team effort.

Image


Image

Image


A Rough Looking Trio…

The three little Basset Hounds are roughed in and I’m quite pleased with the way that they are looking.  It’s incredible how often you have to stop carving just to look at them and chuckle.

“Sky”, the howler, completes the trio.  As usual, I first cut the outline on the bandsaw.  This photo shows the first cut and I later, very carefully, drew on the plan ( from the top ) view of a rough outline and cut that out on the saw as well.  I say “very carefully” as you need to take a great deal of care on the bandsaw and always ensure that you are sawing against a stable, flat, base on the figure.  Anything else just does not give you the control that you need…remember, these tools are powerful and can quickly pull a workpiece out of your hands if it does not have a completely stable and flat base.

Image

After doing some initial roughing with the Typhoon bit on the Foredom tool, Sky started to take on a nice shape.  Whereas the other two, and most of the dogs that I carve, go through the “pig stage”, Sky looks as though she’s going through a seal stage!  One of the reasons for the seal look-alike is that I’m going to have the front legs pulled close together with the little paws turned outward.

Now, come on…does this already look cute and hilarious, or what?  Don’t you want to run down to the pet store right now?

Image

OLYMPUS DIGITAL CAMERA


Lucy’s Pals

With Lucy having been roughed in, it was time to provide a bit of shaping to one of her pals, Rain.   Now Rain apparently likes her 23 hours of sleep per day whether she needs it or not.  So, she’ll obviously be depicted as a bit laid back and with a bit of a “can’t you see I’m resting” attitude.

You’ll have seen the bandsaw blocking from a previous post…it was pretty hard to identify just what was going to come out of that pattern.  With the first bit of roughing complete, you can see that Rain will be stretched out pretty long with one hind leg tucked in and the other shooting off to the side.  Her front paws are under her jowls and the ears will cover the majority of those paws.  Speaking of the ears…you can’t see them because they’re not there.

Image

I decided to add the ears in later as I wanted the grain of the wood going along the length of the ears for strength.  Eventually, these ears will flow over the paws and onto a dock…and, probably, the tips of an ear over the end of the dock.  I actually won’t start fitting the ears until I’ve done quite an amount of detailing of the head.

Here’s a shot of the two together in the rough positioning that they’ll end up.  Right now, Rain ( laying down ) looks larger than Lucy only because I left more wood so that I could create a “puddle” of wrinkles flowing over her and onto the dock.  She’ll be trimmed down a lot once I get detailing.

Image

Lucy of the “Hound Trio”

This is going to be a fairly ambitious carving of what I’m calling “The Hound Trio” for a new acquaintance and owner/lover of Basset Hounds.  One of the hounds will be standing and “conversing” with a little squirrel friend, another will be howling dramatically and a third will be trying to get some shut-eye with all the commotion around.

Here’s a very roughed-in version of “Lucy”, the squirrel lover.  I call this stage of a dog carving the “pig stage”, as I really think they look more like pigs than dogs at this point.  But, I make sure that changes.  I wonder if I tried to carve a pig, would it go through a dog stage?  Not sure.

Image

The roughing is done with the blank that I cut out earlier on the bandsaw and a “Typhoon” carbide cutter on a Foredom tool.  If you are not familiar with a Foredom tool, it’s much like a Dremel tool with a flexible shaft.  The carbide tip cuts very quickly and leaves a rough surface.  What is nice about it is that you can fairly quickly smooth out a general shape that you can later detail and shape with knives and chisels.  A word of caution even though I know that I’m repeating myself from an earlier post…these cutters are very aggressive and you absolutely must wear protective clothing including a leather apron and heavy sleeves, gloves and eye protection.  One slip and one touch of this cutter on any part of your body is bad news fast.

Image

This will be an enjoyable project and it’s nice to get started.

The Hound Trio…

I’ve just begun some preliminary work on a trio of hounds for a friend.  These little pups will be in a variety of poses and will include at least one friendly squirrel in the mix.

I’m actually in the final stages of carving “Lola”, but here’s a couple of shots of some quick bandsaw work I’ve completed toward the Trio.

This little one will be standing up, obviously, enjoying the day in deep conversation with the little squirrel friend.

Image

Although this next one doesn’t look like much, it will in time…can you make out the shape of this little pup laying down with one back leg extended out to the side, head resting on paws?  If you can, you’re good…I only know because that’s the way the drawing looks!  This one is going to be a lot of fun to carve as the pup’s extra skin folds that I’ve planned are going to be plentiful!

I’ll get a progress shot of Lola up shortly as she is looking real nice.

Image

The Completed “Fergus”

Here is the completed Fergus in all of his glory looking over the waterfront and into a brisk breeze.  I really like the way that he turned out and especially like the dock and piers…I can almost hear the old wood dock creaking.

Image

I think that I mentioned earlier that a new acquaintance had asked for this rendition of “Fergus”.  My next step is to build a small shipping box that will ensure that Fergus arrives safely at his new home should Fergus’ Mom like the design.  I’ll get that done this weekend and will be able to get a sense of shipping charges.  Actually, there’s a Carving Show in Belleville next weekend and, if I drag my feet a bit, perhaps Fergus can compete for a ribbon there.

Image

I’ve loaded additional photos of Fergus on the Flickr site, which you can link to at the side-bar of this page.

Please leave a comment here as I always appreciate hearing from you.

Image

Painting Underway

Fergus received some colour this weekend as did the two piers holding up his observation dock.

The painting is done with acrylic paints.  I put on several washes, or light coats of colour so that Fergus’ coat didn’t look too uniform with hard lines where the colouring would have stopped and started.

I also like the way that the piers turned out.  Again, several acrylic washes followed by some dry-brush highlighting.  I hope that you can see the water line on the piers…I thought that would be a nice touch.

All of the acrylics get a coat of urethane to seal and deepen the colours.

I’m enjoying this carving and will be sad when it’s finished.


Image

Next Stop…Painting

Well, I think that the carving portion of Fergus looking out from the dock is wrapped up.  I had originally intended to add a bit of a rope coil to the dock, but I’m liking the way he looks without the extra accessory as it keeps the focus on the dog carving.

The base is oak and will be stained and get a few coats of urethane.  I carved the dock so that it is perched up on the piers and creates a space between the dock and the oak base.  I also cut and shaped it in an irregular pattern around the piers…I like the way that it turned out.

The tail is made from copper wire, twisted together and soldered and finally coated with epoxy. Making something like a tail out of wood is just asking for trouble…the wire and epoxy combination will have it last forever.

Take a look at the completed version and pass along your thoughts.  There’s still some room for modifications before the painting begins.  There are a few more pictures of Fergus on the Flickr Site that you can get to through the link at the side of this page

Image

Image


By the way, Grandma has enjoyed knitting alongside of Fergus’ progress…but, not as much as she enjoys getting her photo taken!

OLYMPUS DIGITAL CAMERA

Fergus Makes More Progress

I was able to make a bit of progress on the little Basset Hound during the evenings.

My Mother is actually spending some time with us right now, and as she’s hooked on “Coronation Street” and knitting, I’ve been carving away as we sit together.  I can’t say that it’s improving my carving ability at all, but I am learning a bit more about all of the characters on Coronation Street.   And I’m enjoying my Mom’s company.

“Fergus” is starting to get a bit more detailed in his hound looks and I’ll make some more progress on him this weekend.

I’ve been quite surprised on the number of visits to my site just based on people’s interest in Basset Hounds.  I didn’t realize that there were so many hound lovers…but, I can understand why.

Image


OLYMPUS DIGITAL CAMERA

…and Fergus gets a body!

Little Fergus acquired a body these past evenings and I think that he’s taking shape nicely.  Those ears are billowing from the breeze off of the water and you can already get a sense of his eyes squinting against the wind.

This week I’ll start detailing in the face and feet which will start to bring him to life.

I also have a nice piece of oak that will be cut in an irregular pattern that the pier and posts will be mounted on eventually.

Image

Post Navigation