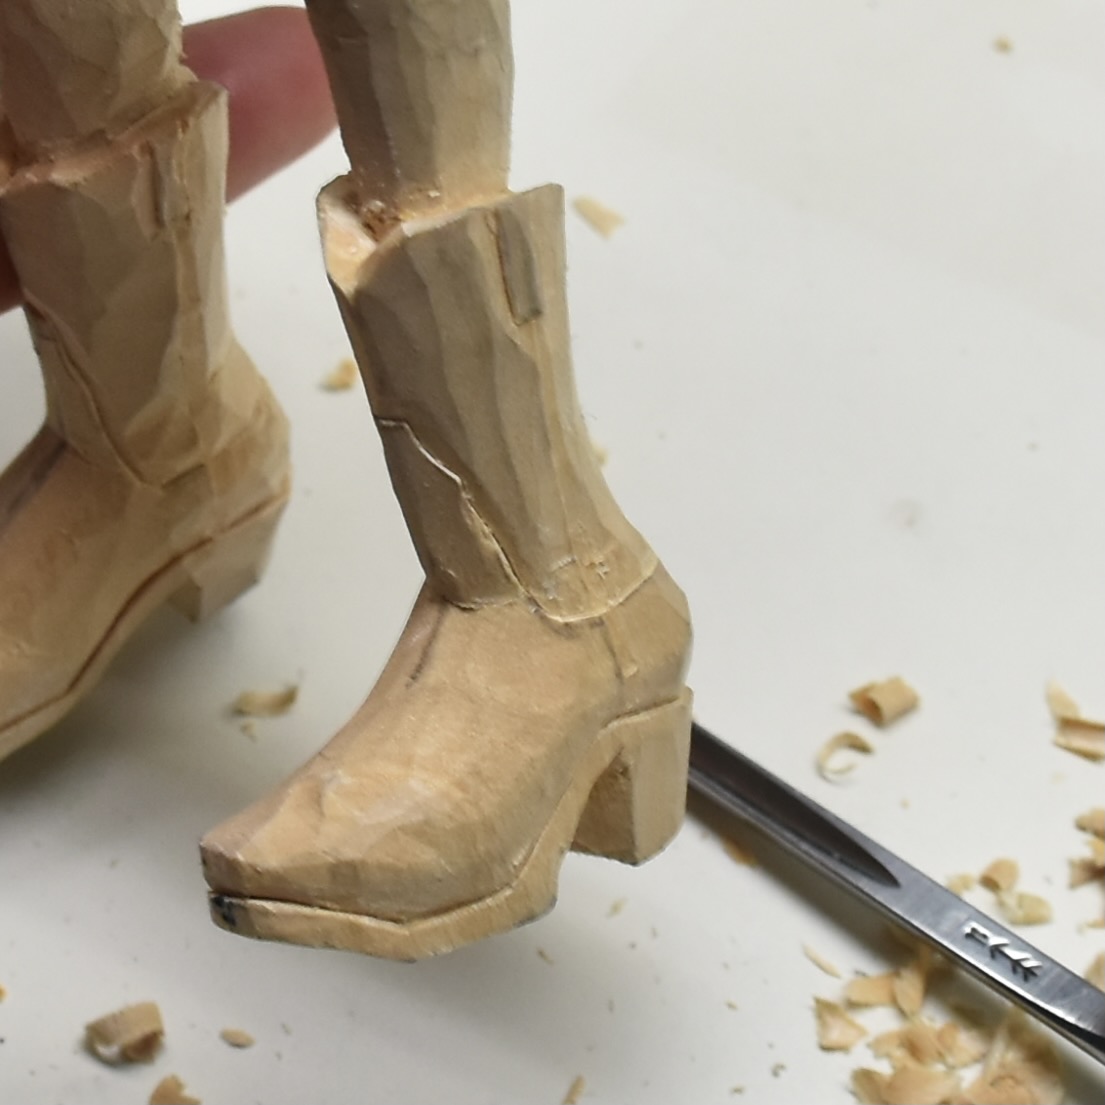
I started by calling up some images on the computer and choosing a boot style that I thought would look nice on this carving. Some very minimal carving gave me the basic shape that I wanted and I carved in a bit of relief followed by some wood burning to show the upper boot from the lower boot leather as well as an indication of some boot straps. I basically used a ruler to make sure that I had the left and right boots the same height and width. Remember that the inside and outside of your footprint is different…take a look at the bottom of one of your dress shoes and copy that pattern for the bottoms of your boots. Making a pencil “etching” pattern of the bottom of one of the shoes, cutting it out from the paper and flipping it over to draw on to the other foot is a good way of ensuring that the boots are going to be the same size.
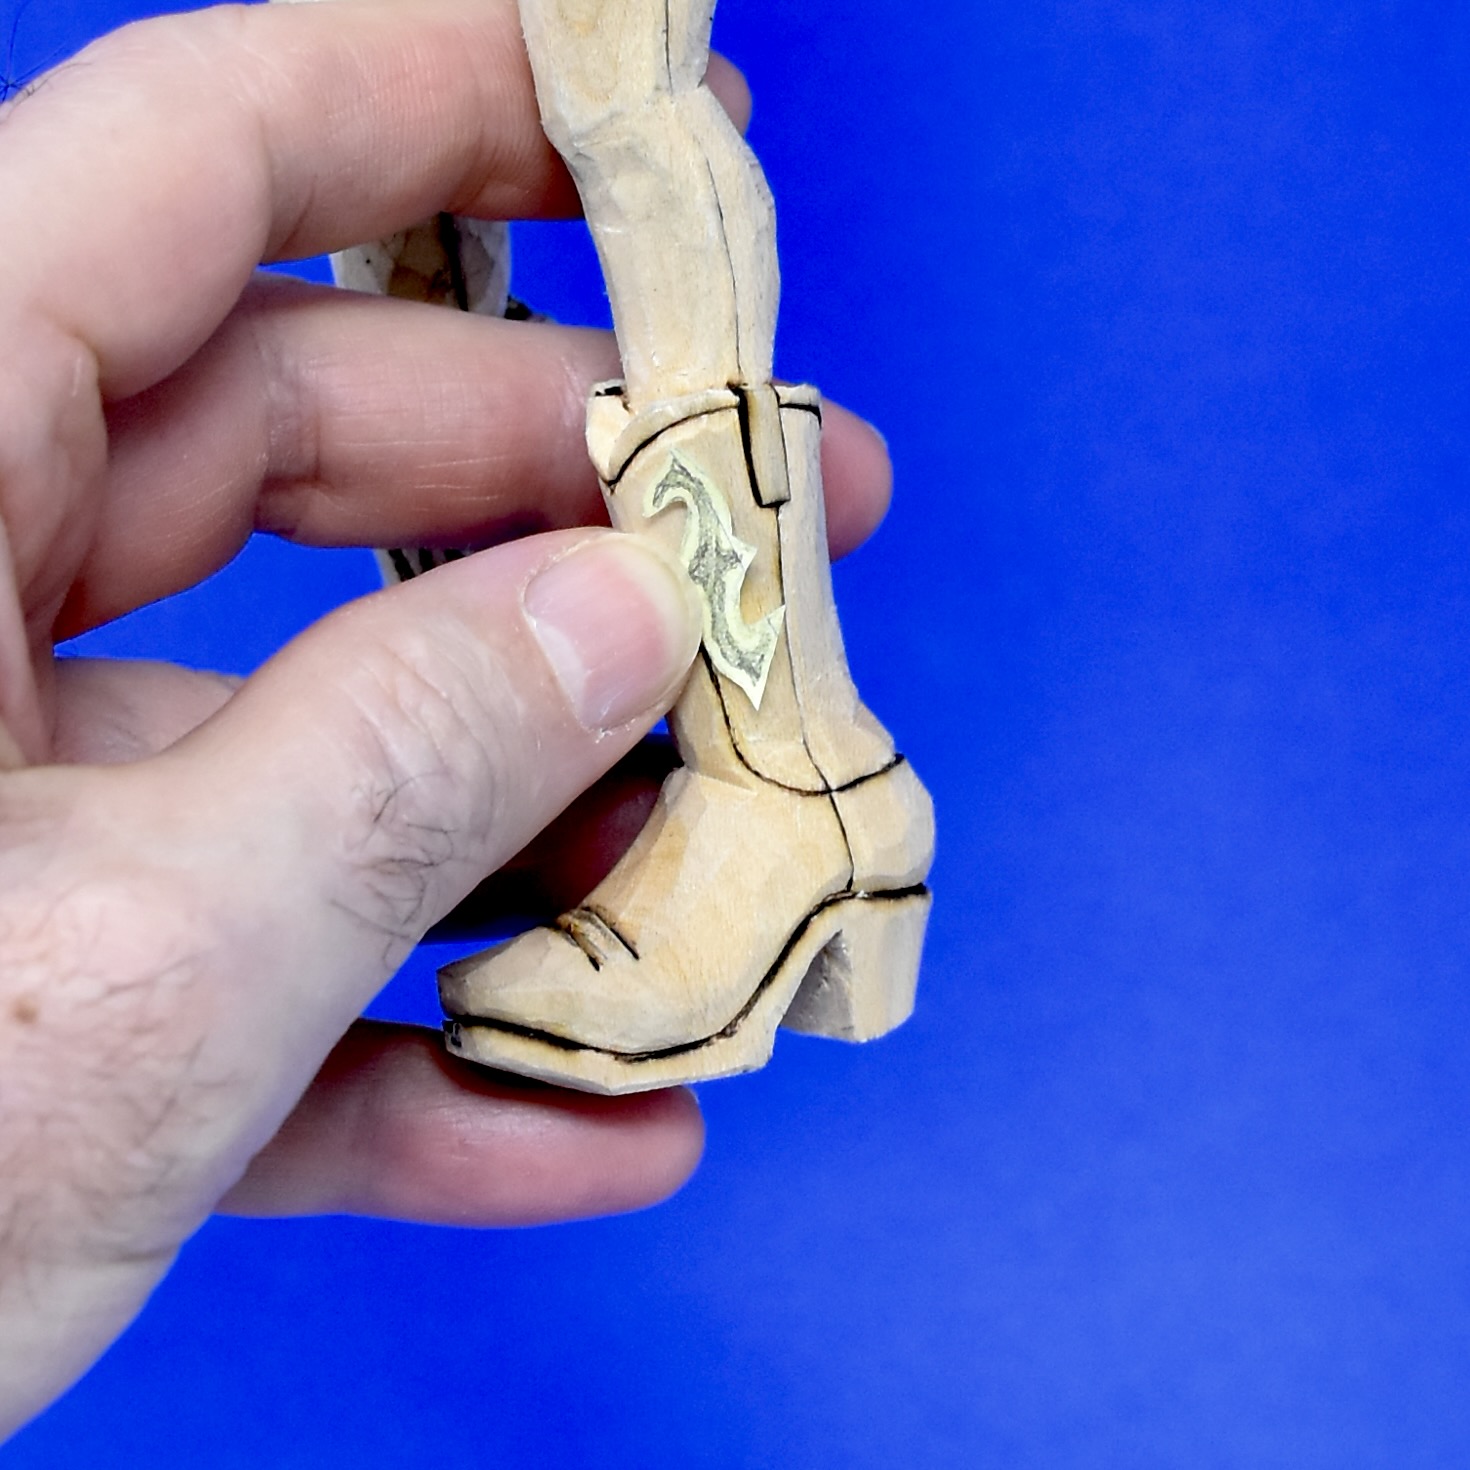
I drew up a little decorative pattern for the upper boot and cut that to make a paper pattern. Again, flipping it over and redrawing the pattern onto the boot created a uniform pattern completely around the boot. With a bit of initial wood burning followed by some slight and shallow carving around the wood burning, produced an elevated “leather” pattern. Some burned “stitches” and some very slight addition of creases in the leather completed the detail for the boots.
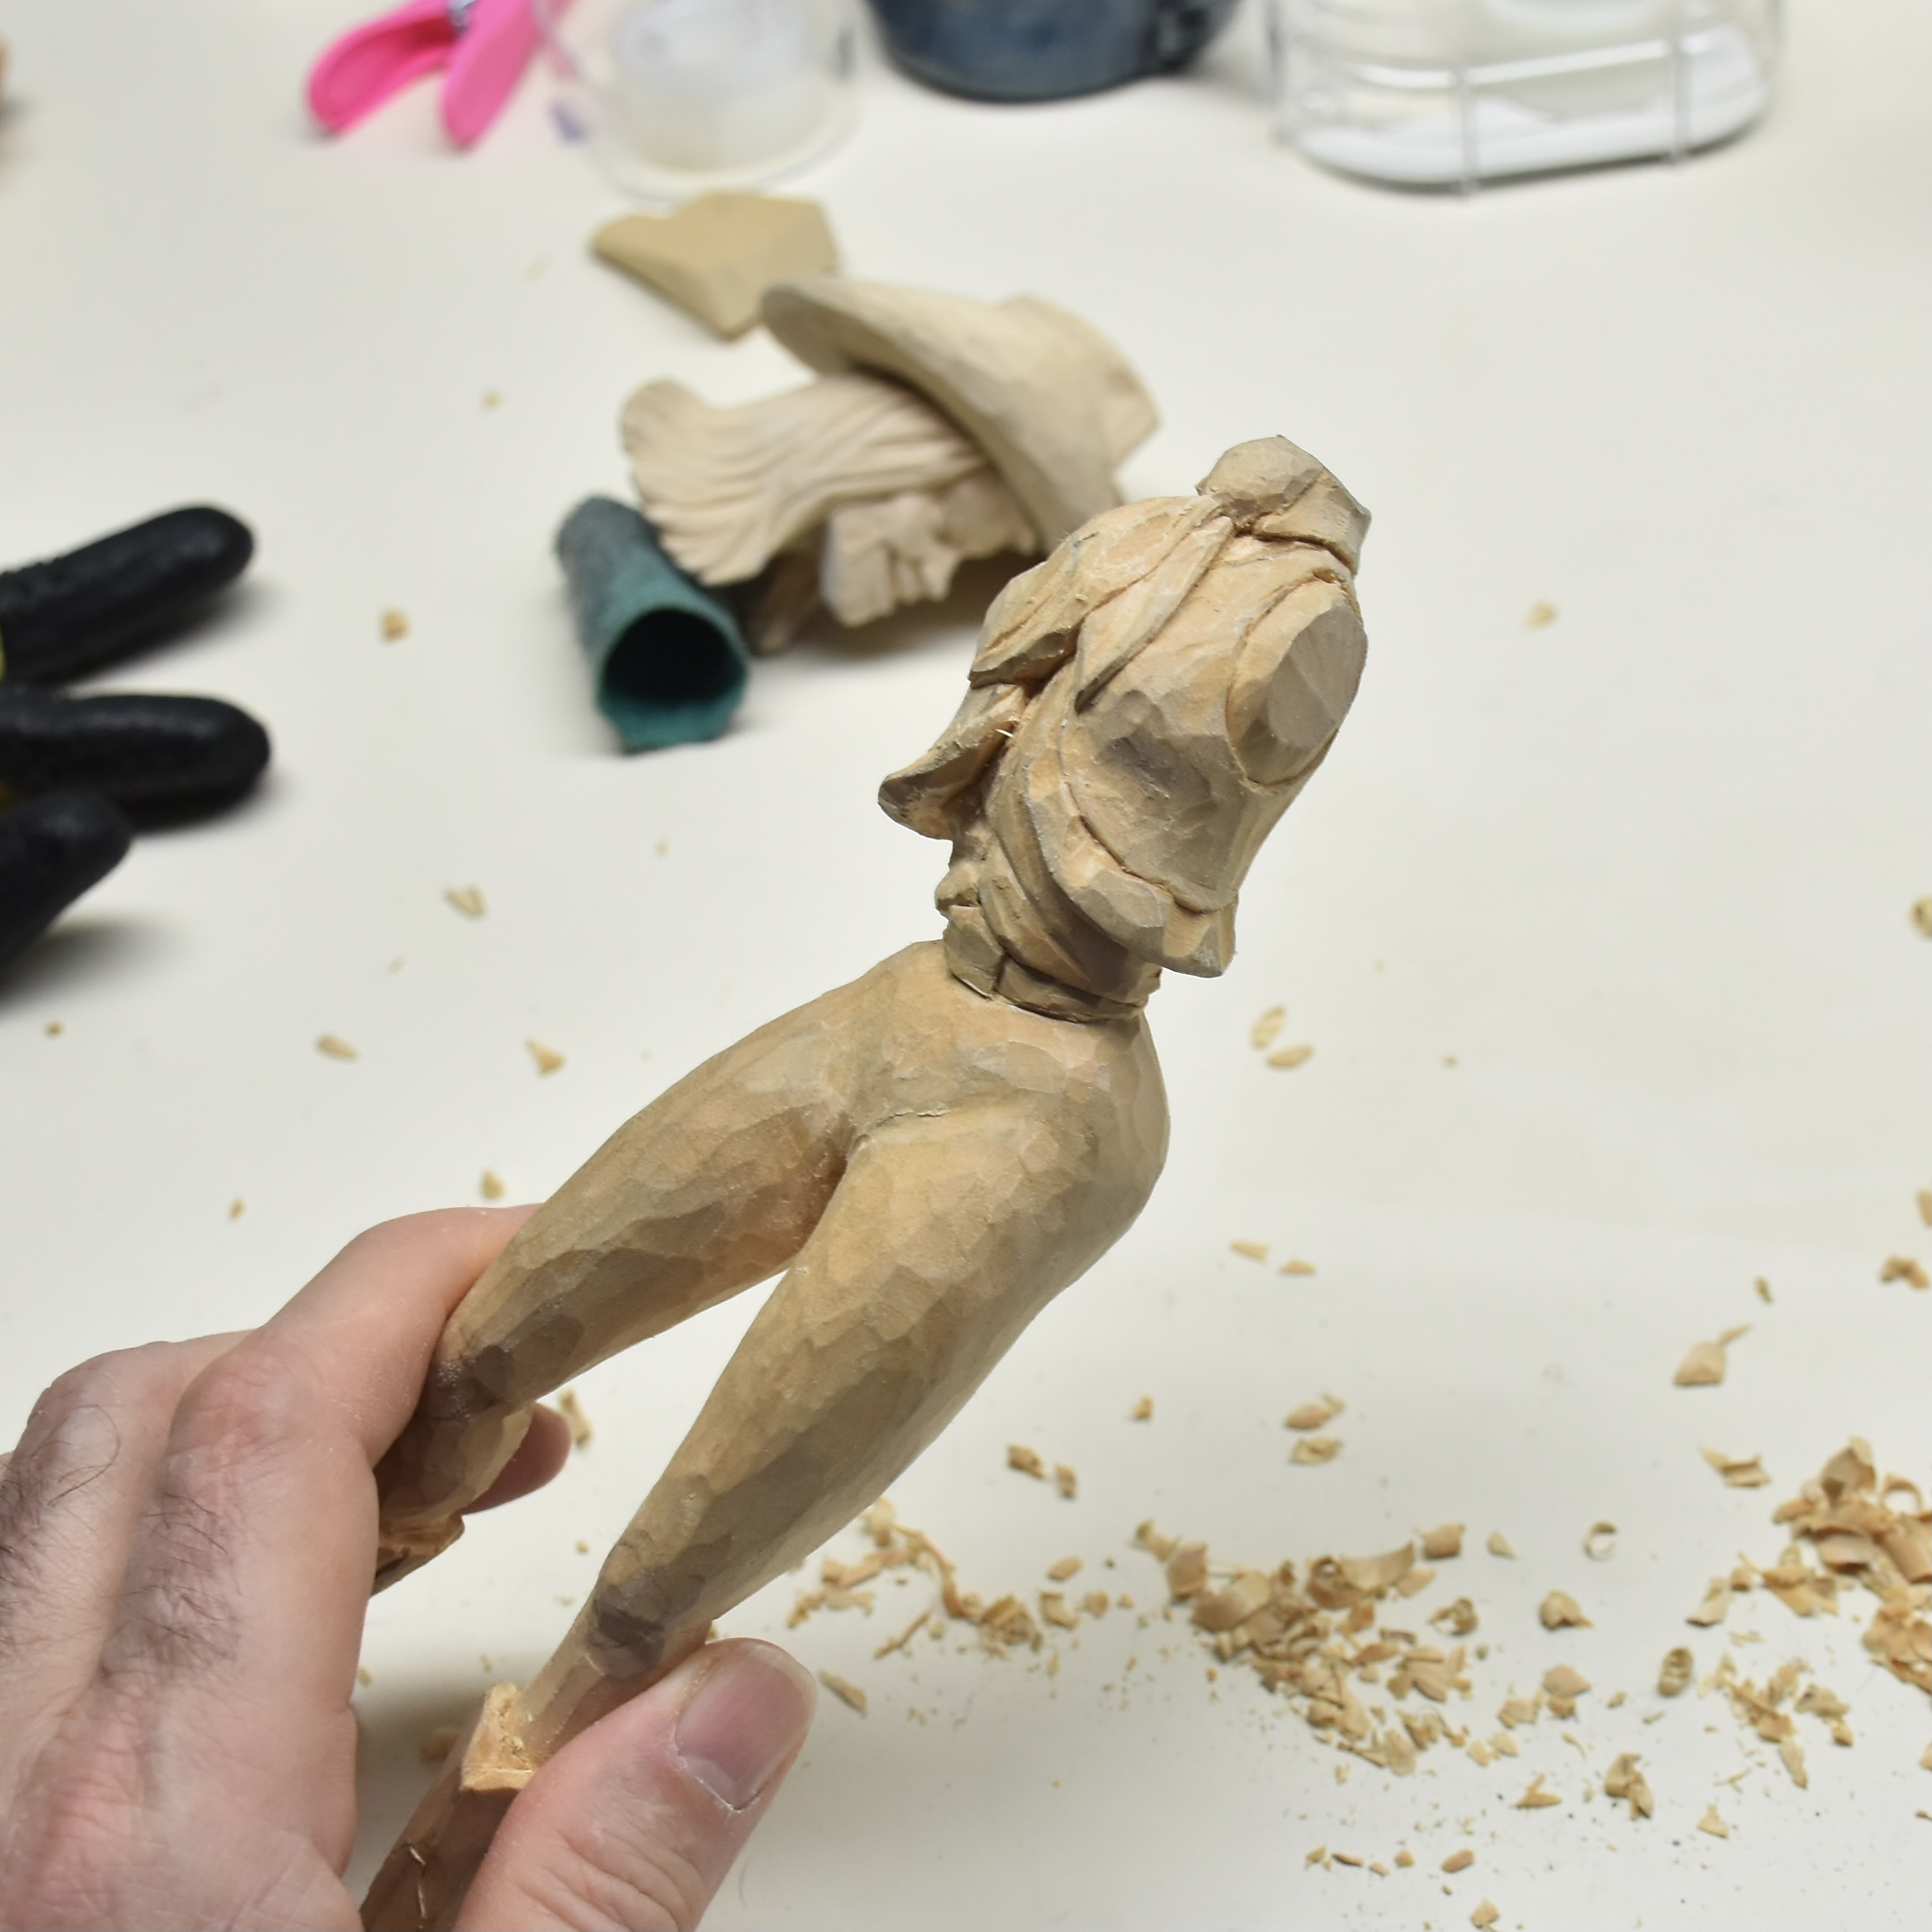
Now that I had the cowgirl form smoothed out with some “rough” detail, it was time to add in some finer detail.
I started with the boots and added in the heel and sole followed by some leather pattern at the front and top and a boot strap. I also added a more pronounced “v” shape to the front and back of the very top of the boot. None of this was done from my memory of what a cowboy boot looks like. I went to the computer and searched for “women’s cowboy boots” and selected one to model my carving after. Remember, also, to get the bottom of the sole right. Pick up one of your dress shoes from the closet and take a look at the bottom noting how the instep of the shoe curves differently from the outer side of the shoe. Once you carve the boot in a similar fashion, etch that onto a piece of paper and transfer the identical but opposite profile to the other boot. Now you have two boots of the same size!
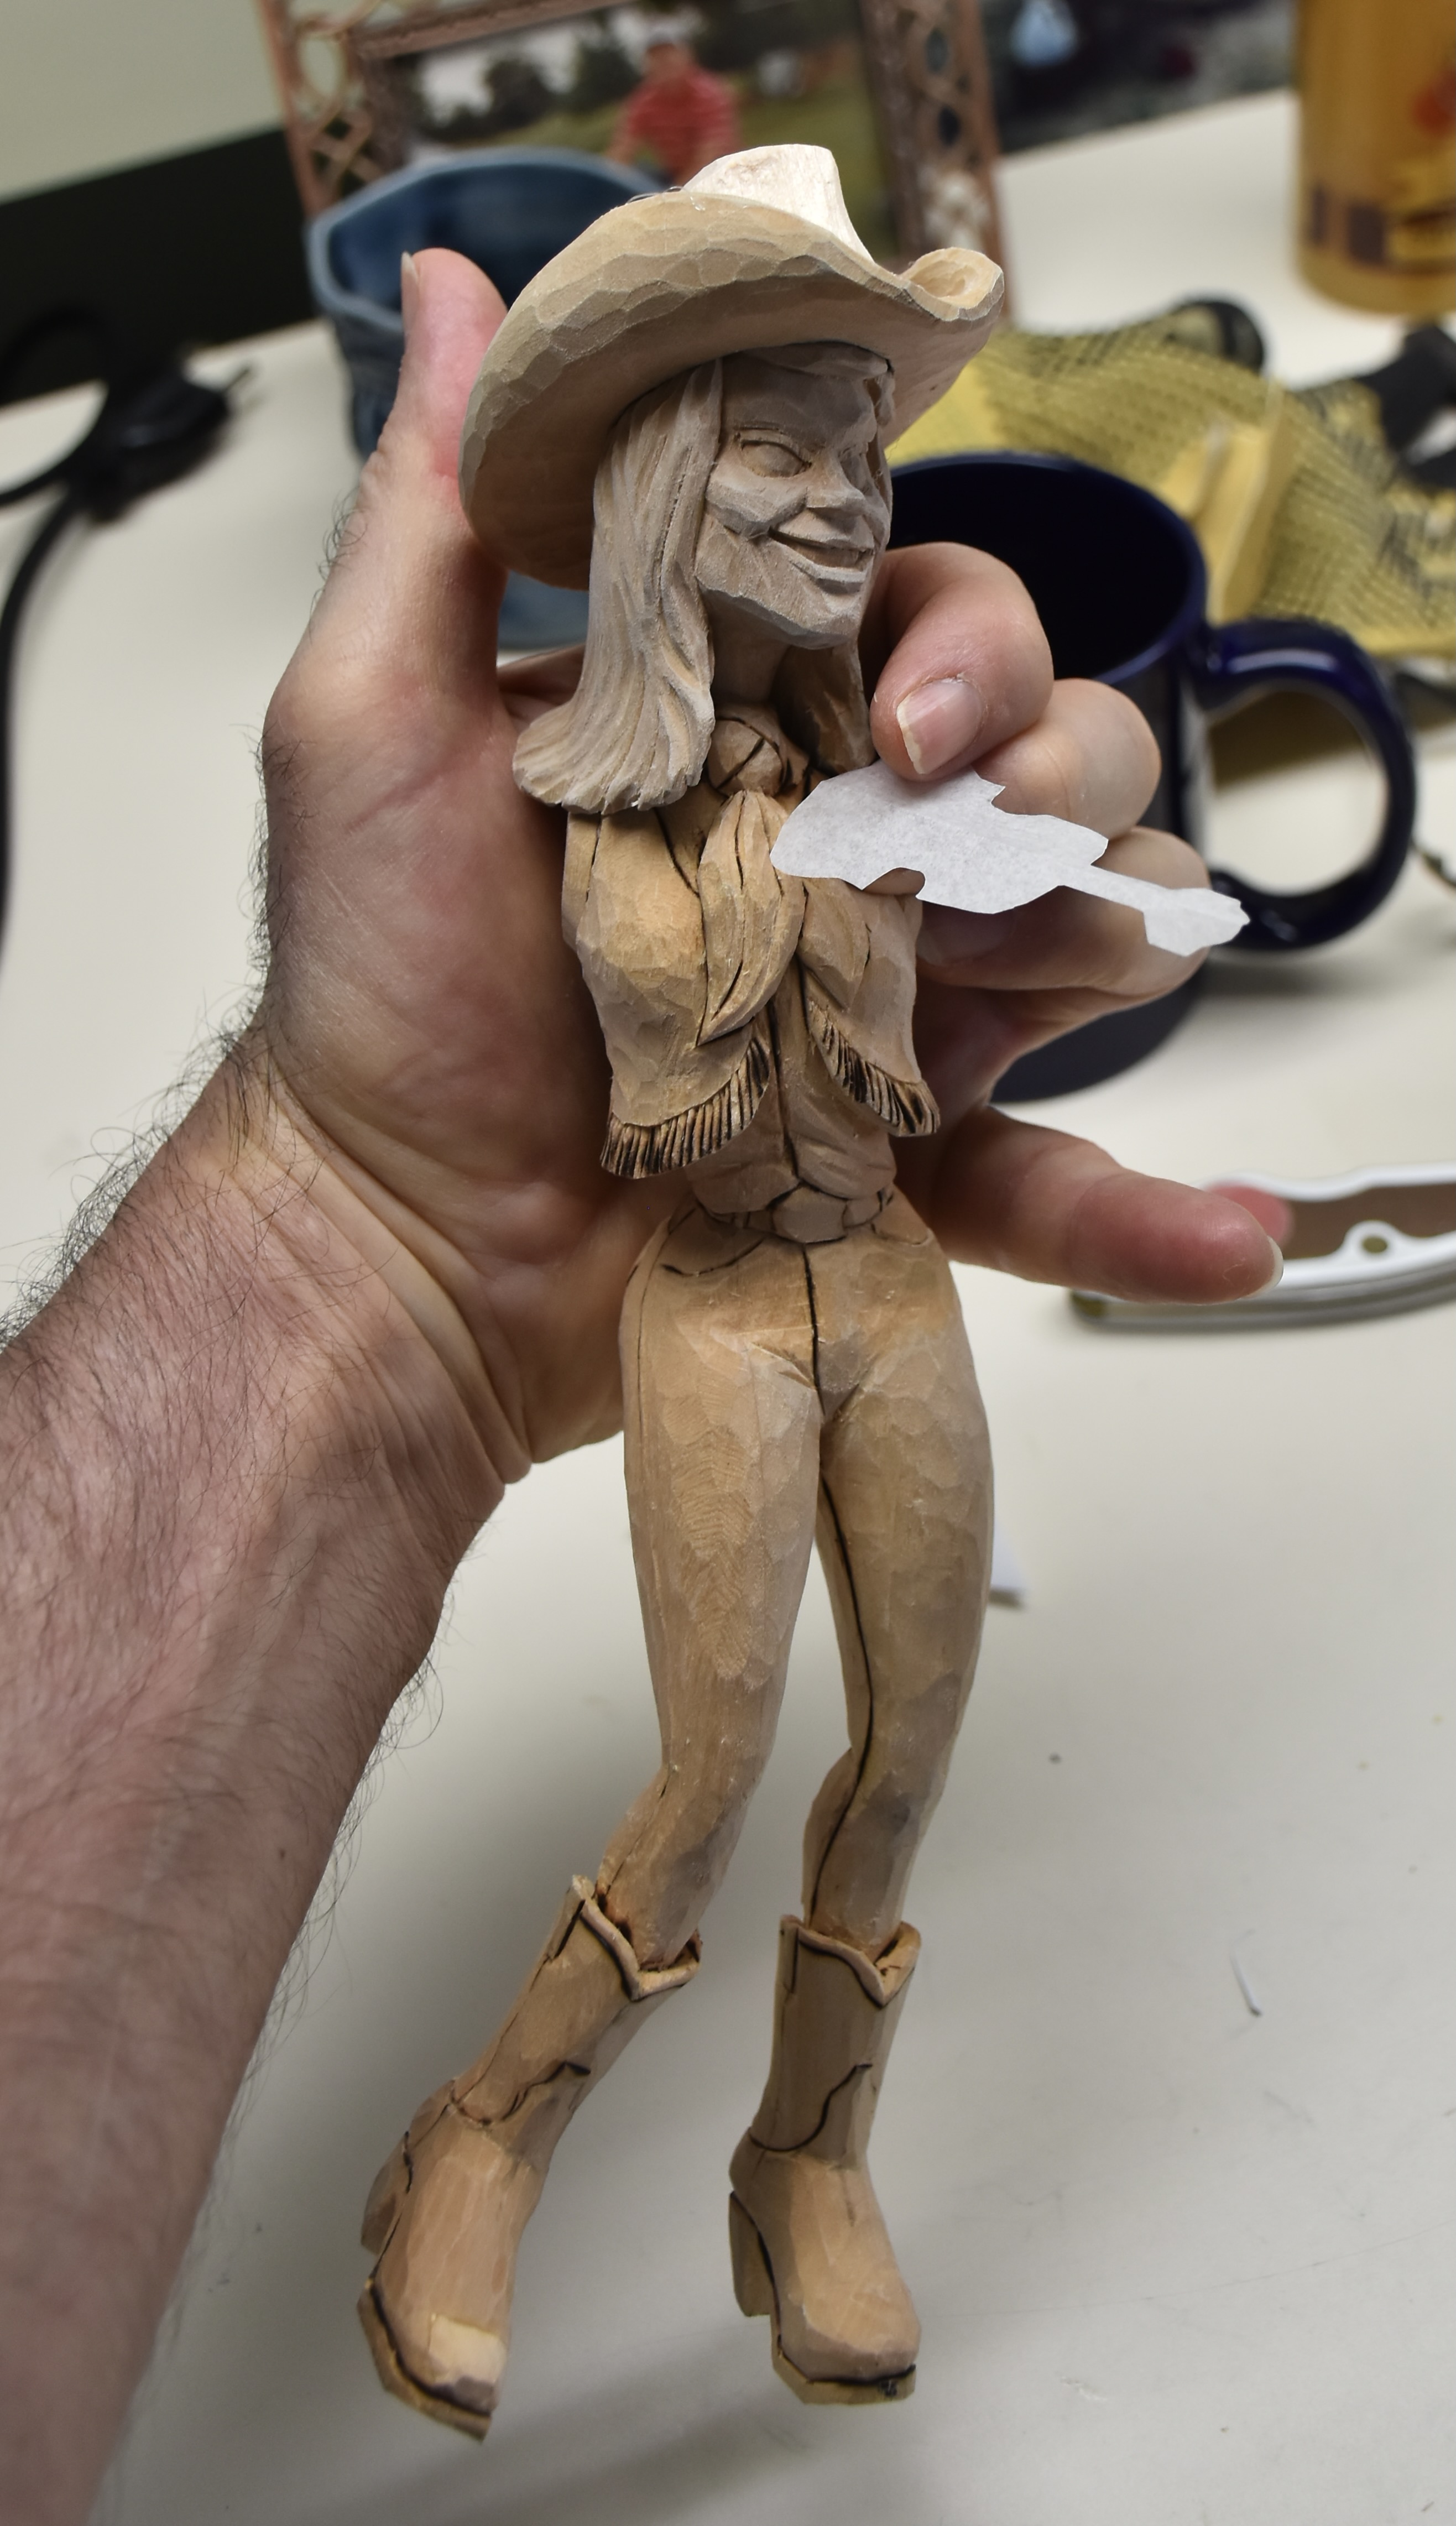
My daughter, Emily, came up with the idea of some frill ( cowgirls surely use a better word than frill ) on the vest. So I marked where the frill would go, cut in a line to indicate the border between the frill and the vest and then used a gouge to make some random vertical cuts in the frill section to make it look like it was wavy rather than just hanging straight down. I could have used a v-tool, I suppose, to cut the individual frill but I used a knife instead. I eventually followed up with some undercutting with a gouge and will probably do a bit more later on to make the fringe look nice and thin. I think that it ended up looking kinda nice.
From there, I used a combination of some shallow knife cuts and a light use of a burning tool to add pockets, seams, folds in the scarf, belt line, etc.
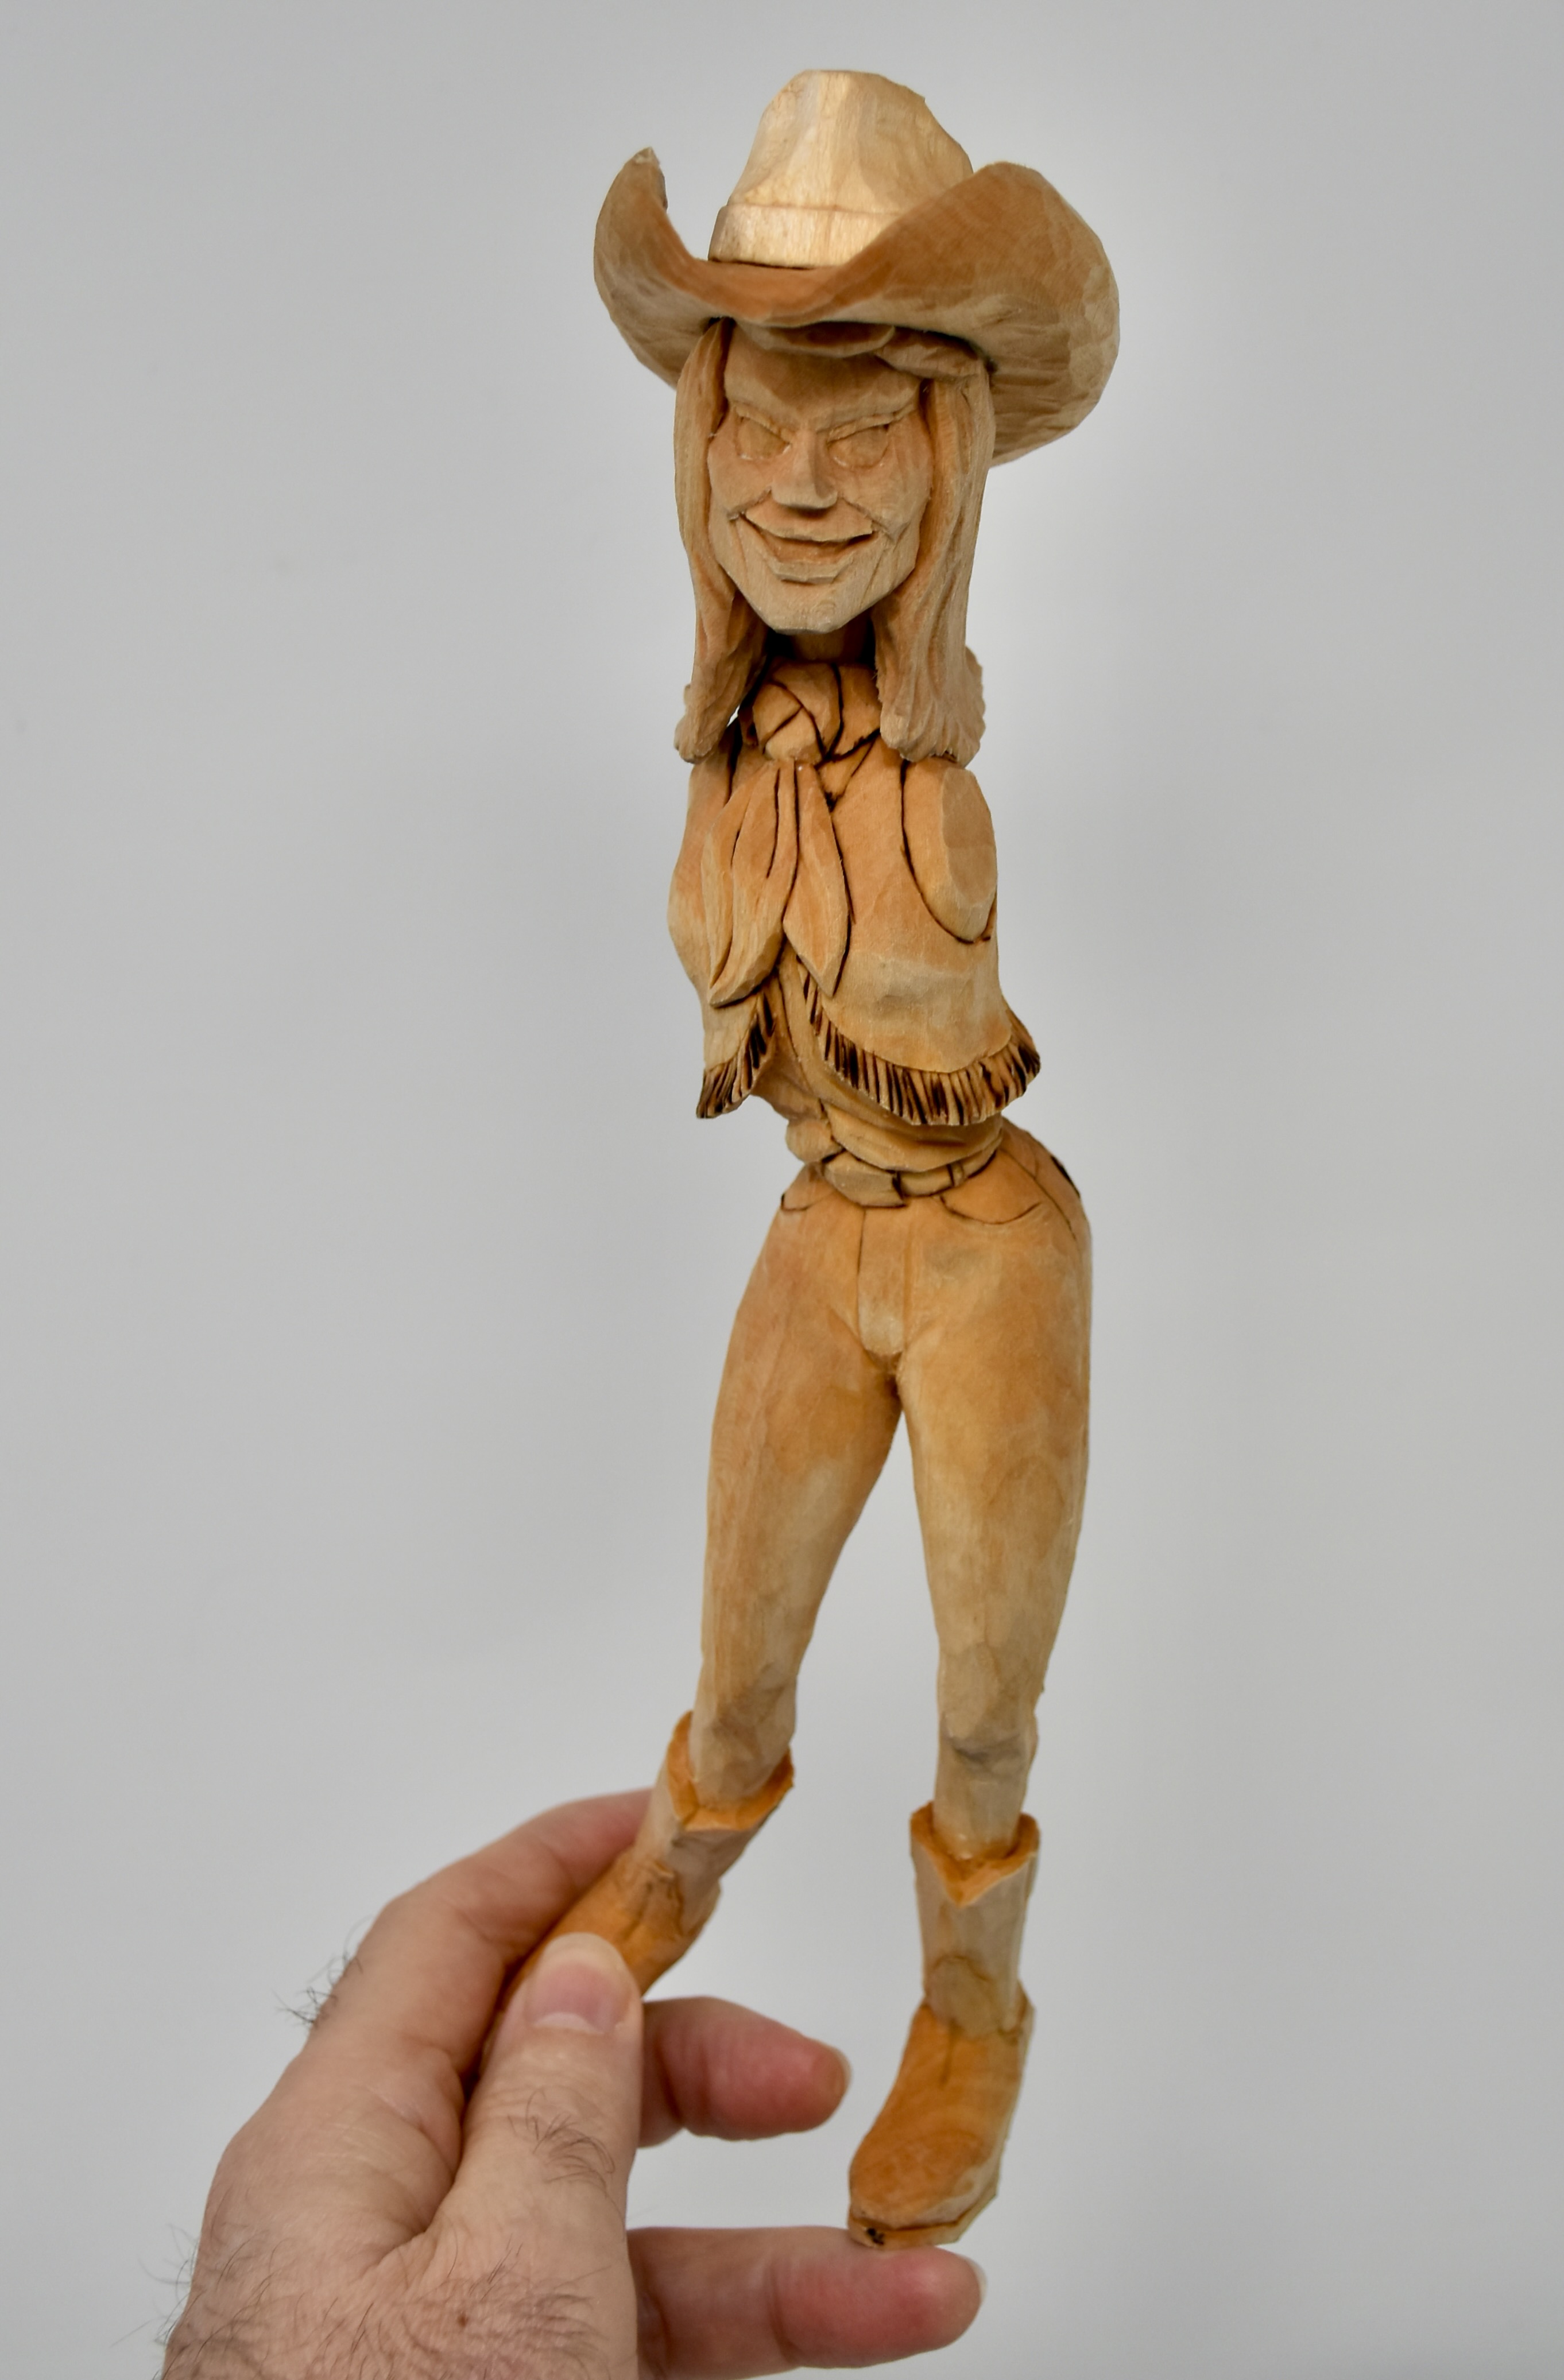
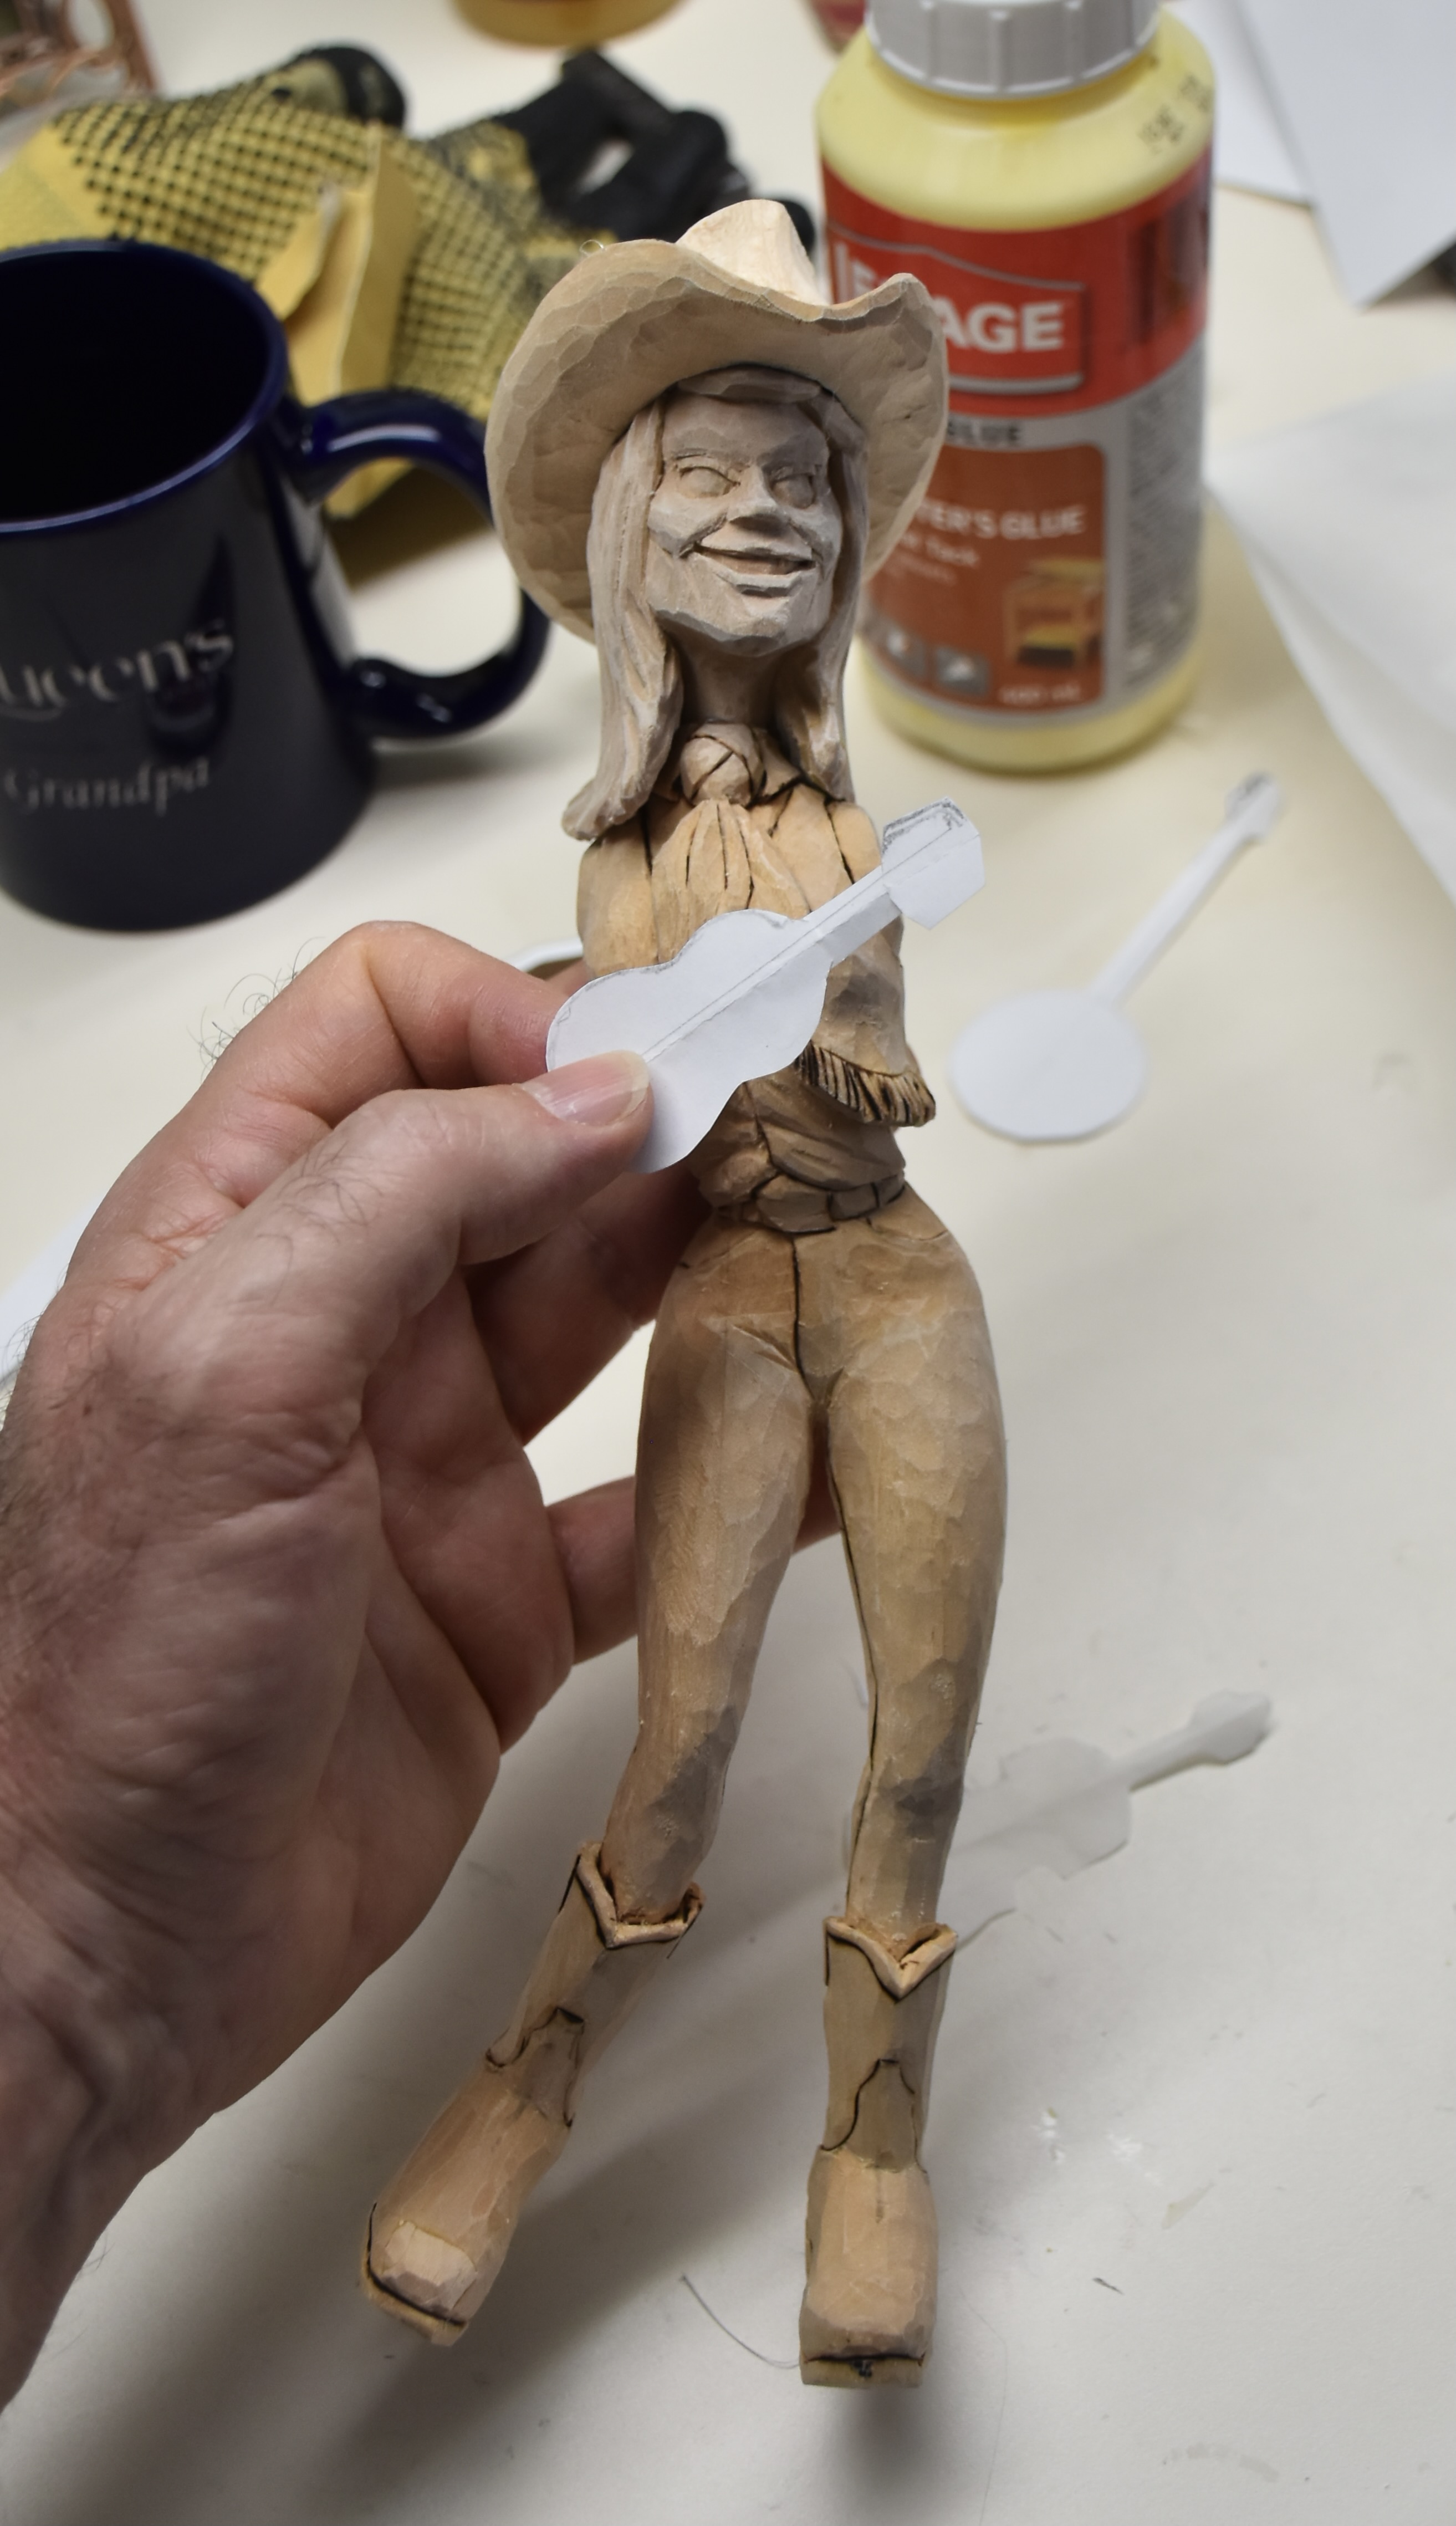
At this point, I started to think about the exact placement of the arms. Of course, I had the clay model to refer to but I had to get the exact measurements for the arms to fit and look right against the banjo that she’d be playing.
So, I cut out a paper banjo to hold up to her…and, I hated it. No matter how I placed that darn banjo…I hated the way it blocked out her waist and the detail of the vest and frills. I had to go for something smaller…a ukulele! I cut out a paper ukulele…and, I hated it too. Whew! A fiddle then…and, bingo, the fiddle looked great to me and it only blocked out a bit of her scarf and shoulder.
So, back to the computer search to find a fiddle ( by the way, I learned that a violin and a fiddle are the exact same instrument ). I printed out the fiddle this time to the exact size that I wanted and cut that out as a pattern to bring to the bandsaw. After a bit a carving, it was ready to place under her chin temporarily with a dab from a hot glue gun.
I’ll note a couple of things. Because the fiddle will be eventually permanently glued to the head and arm as well as the hand, it represents a “structural” part of the carving to me…it has to be strong. For this reason, I made it from maple rather than basswood. Probably overkill, but that’s me. Also, note that I replaced a section of her right foot. I just didn’t like the way it originally turned out so I carefully cut out a chunk and even more carefully fitted and glued another piece of basswood in as a tight fit. Some carvers don’t like that sort of thing and view it as a bit of cheating some how. I think that it’s the only reasonable thing to do…if you don’t like something, why let the whole carving suffer when you can just make a quick change that you’ll never see?
Next step…create that arm holding the fiddle. I’m having fun with this carving.