tributesinwood

Wood Carvings by Mark Sheridan

Archive for the category “Pickin’ and a-grinnin’”

A Bit of Painting and We’re Done!

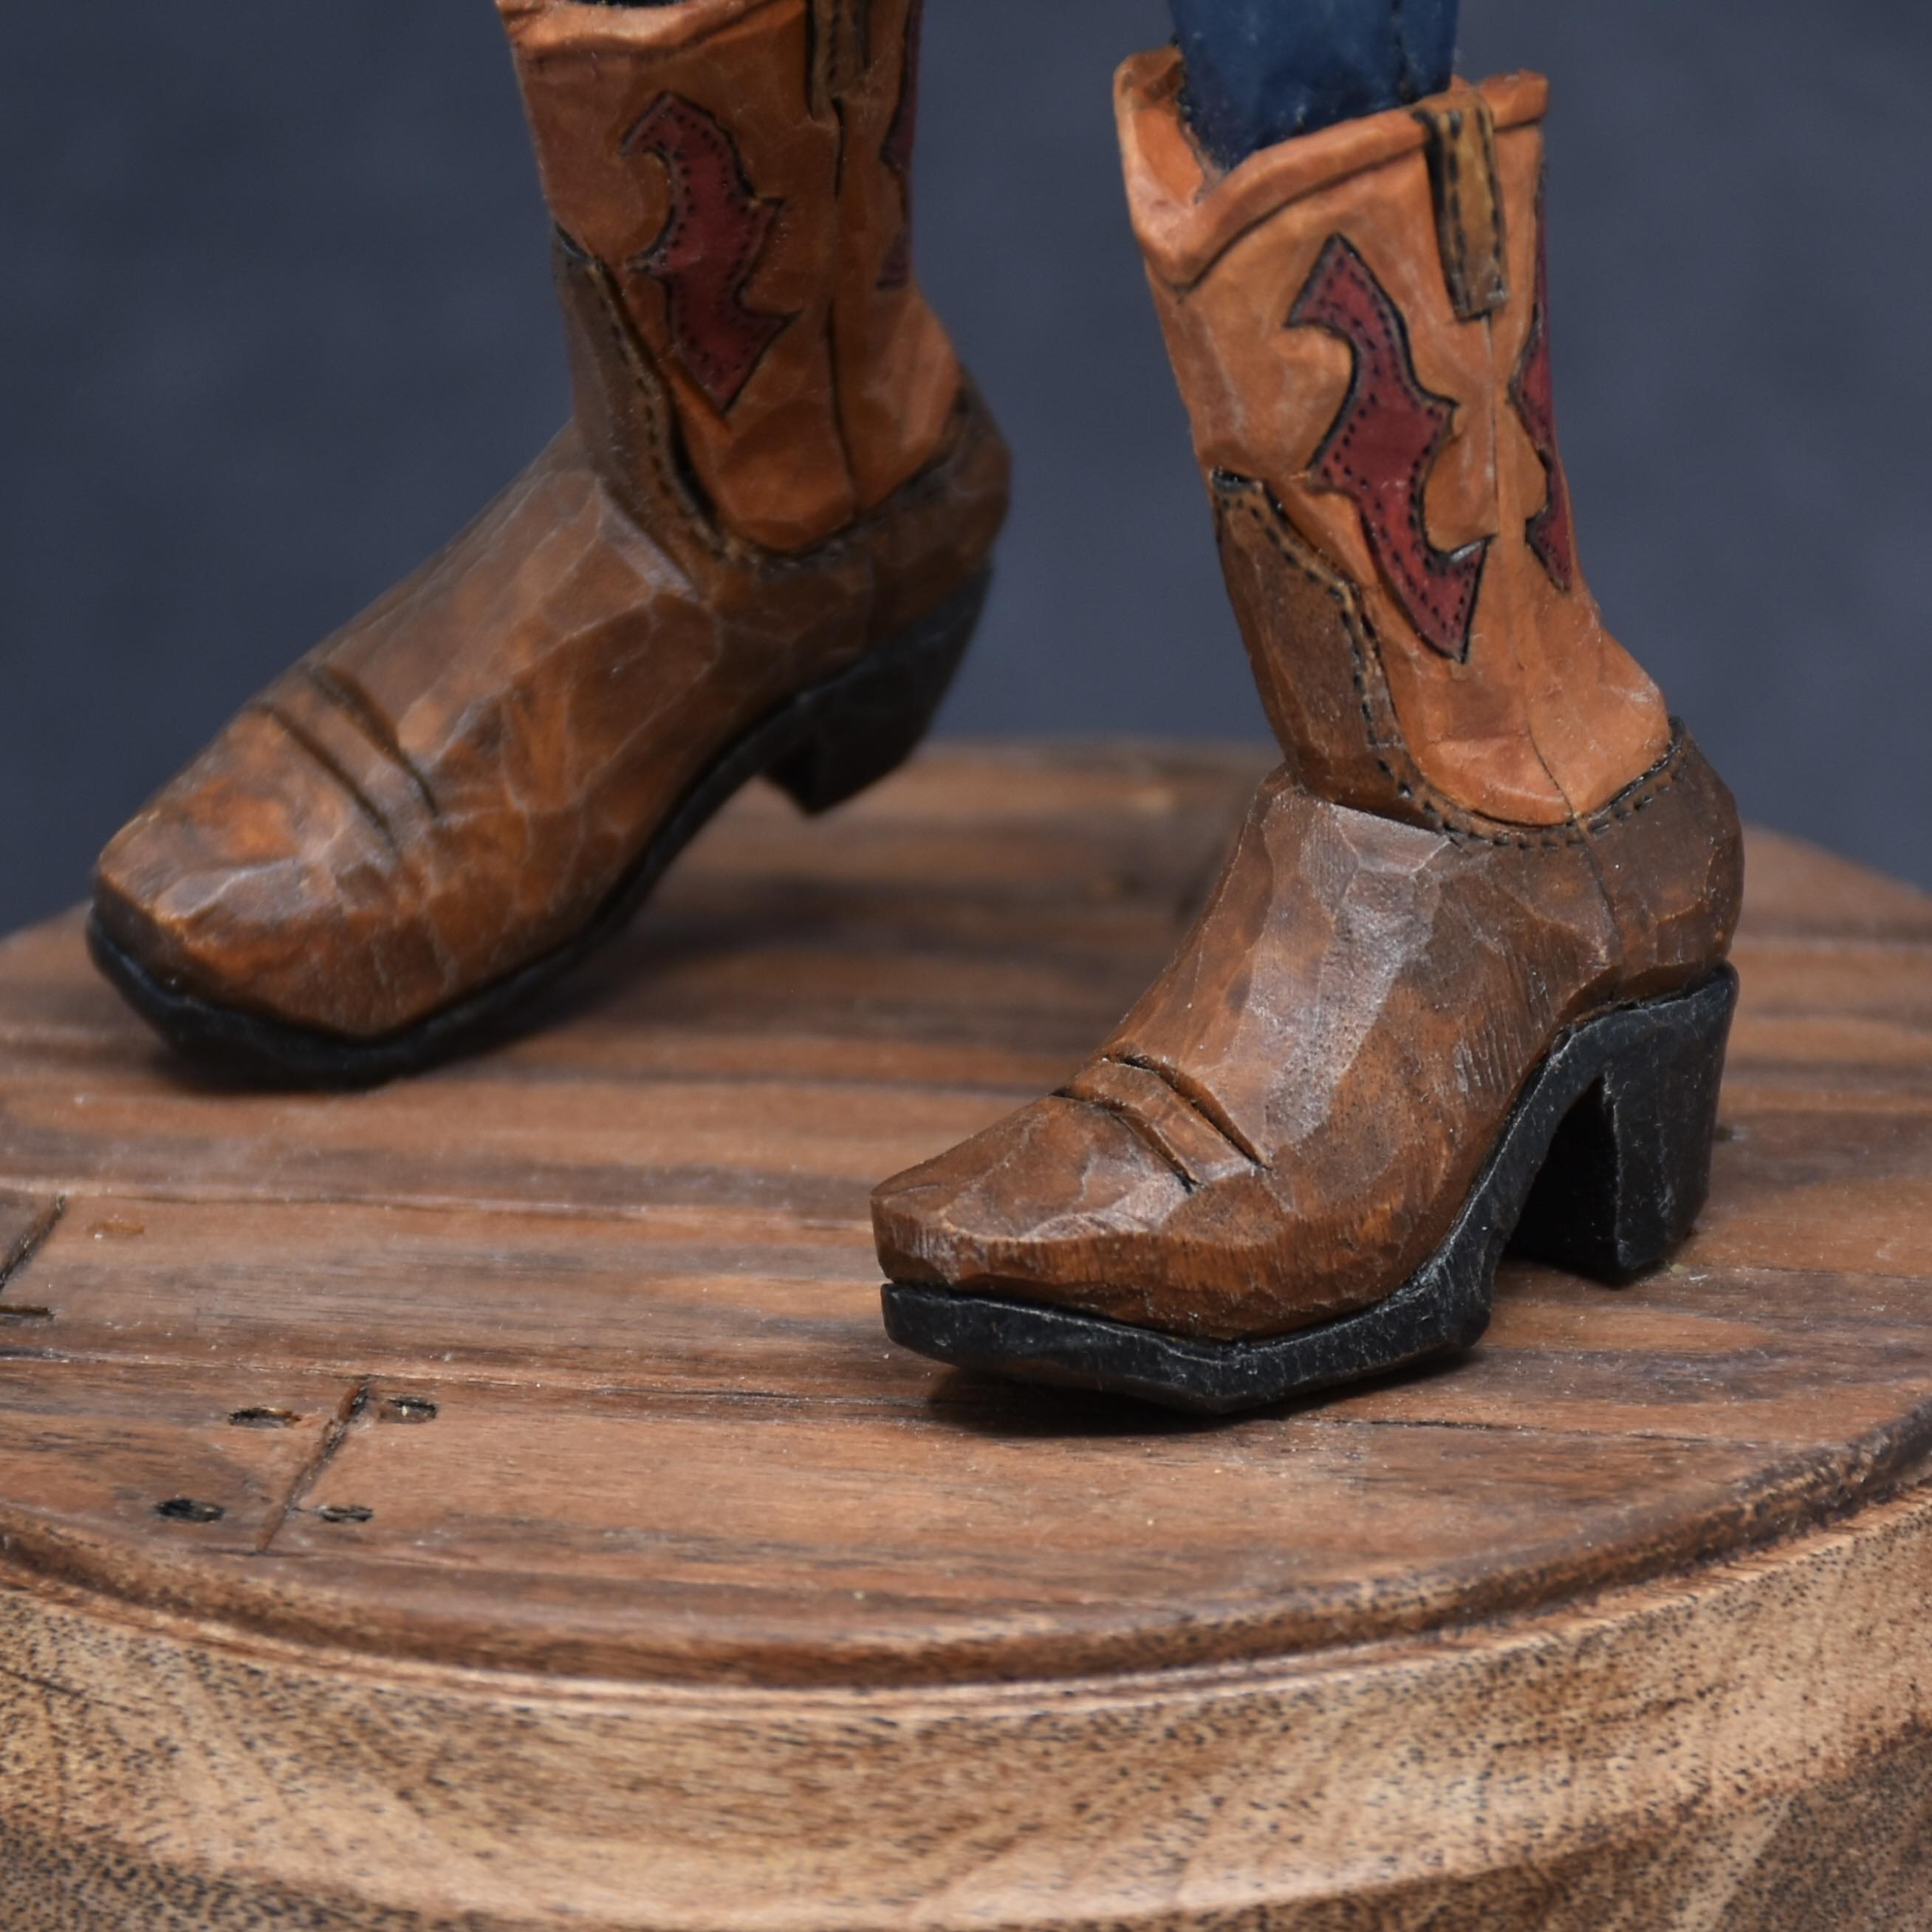
I won’t go into a lot of detail in regard to painting, but I’ll post some photos of the various sections of the carving showing the painting.

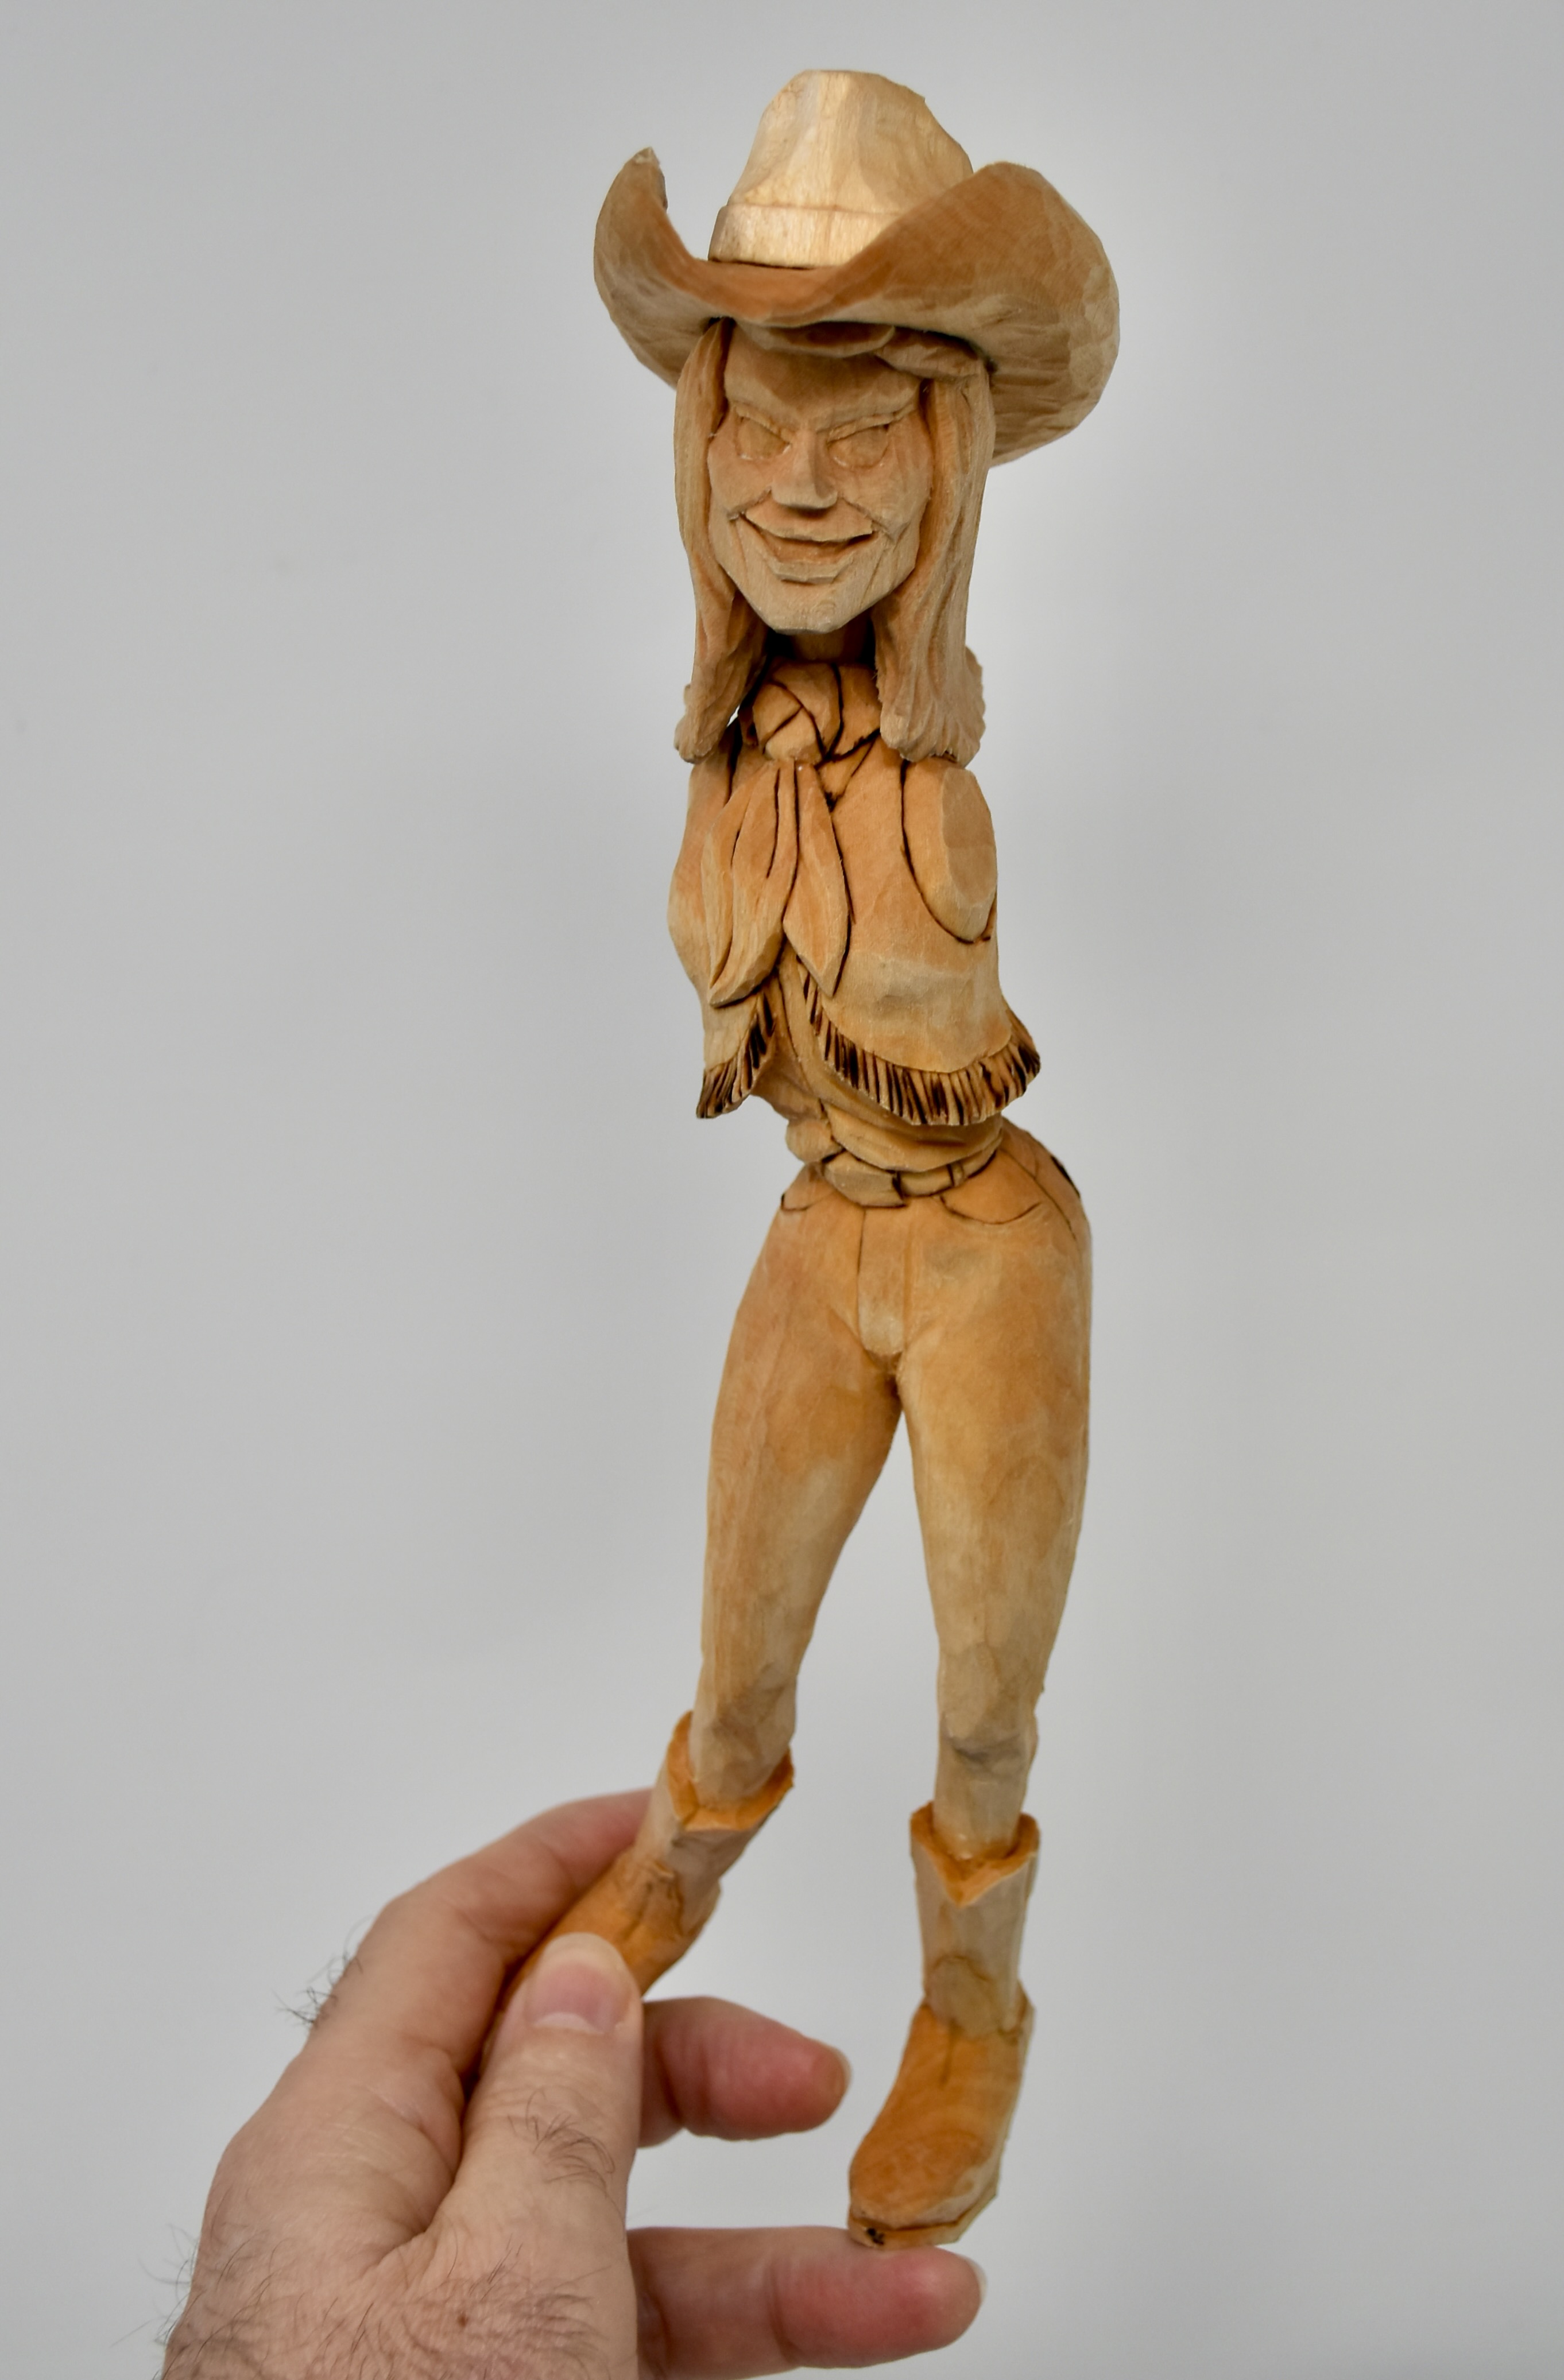
I use latex acrylic paints that you can buy at any store that sells art related items. I probably have something like thirty or forty small bottles of a variety of colours and spend some amount of time mixing various colours together to get the tone that I’m looking to achieve for a particular part of the carving.

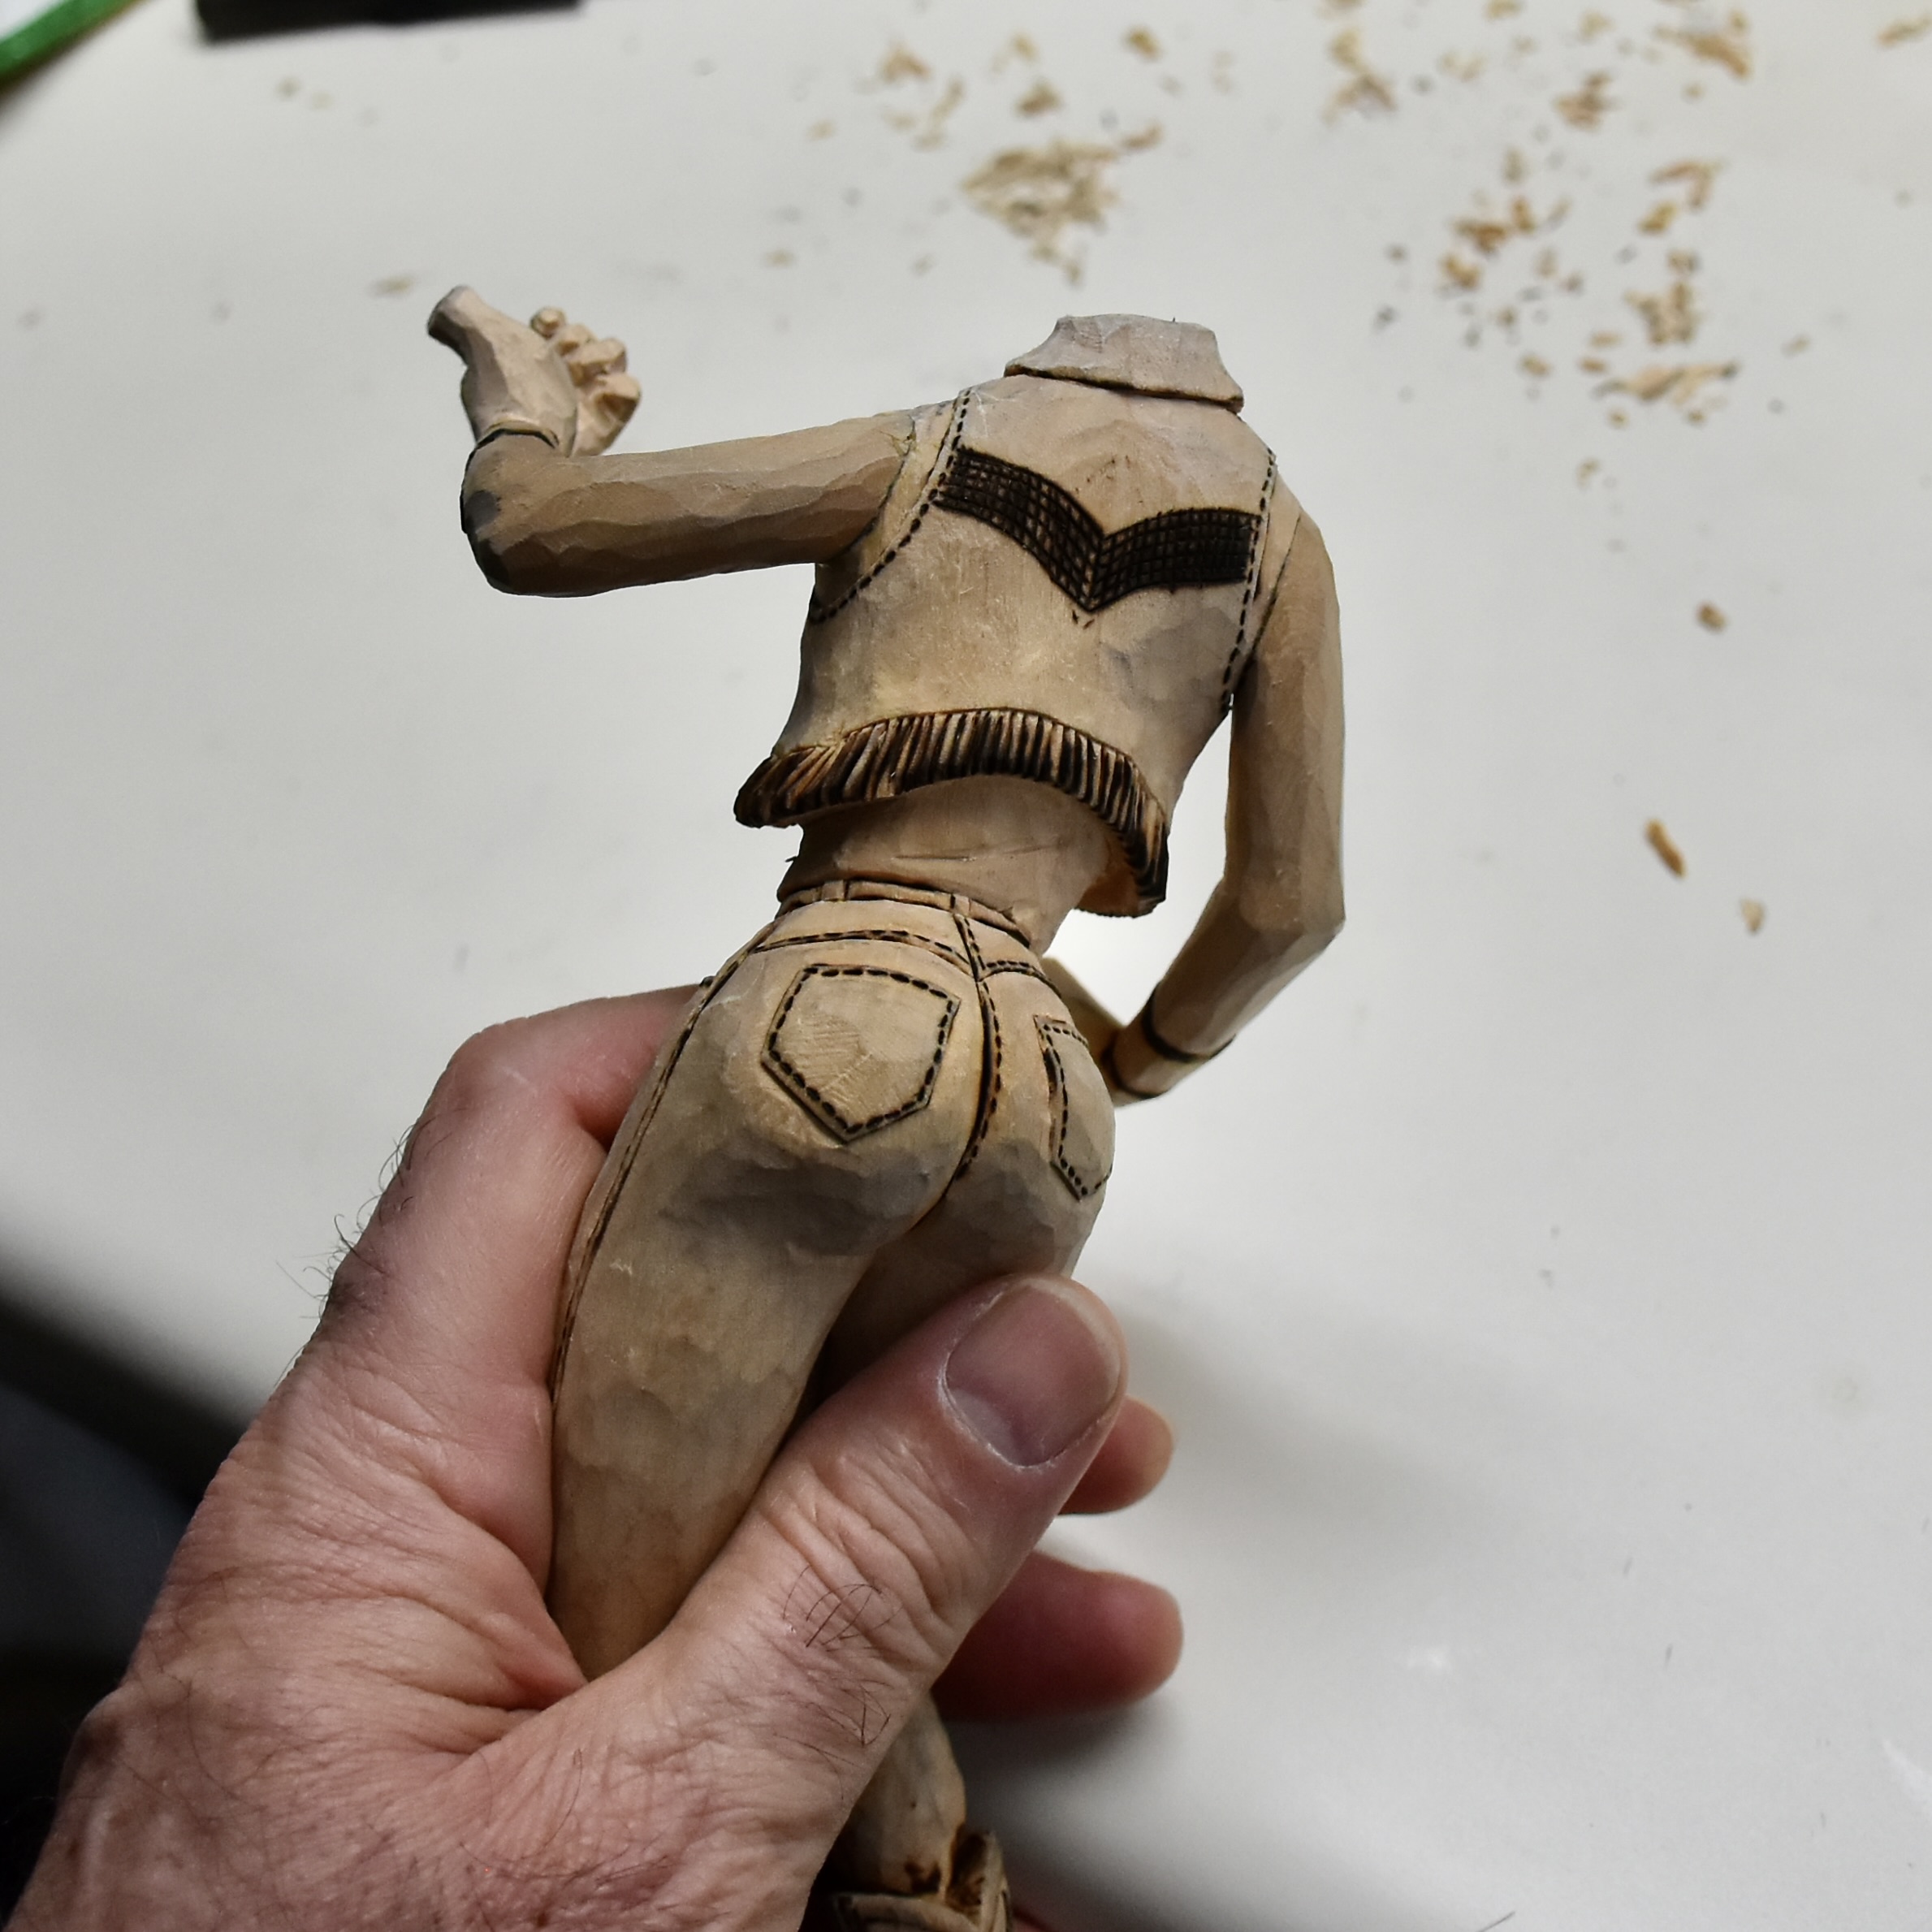
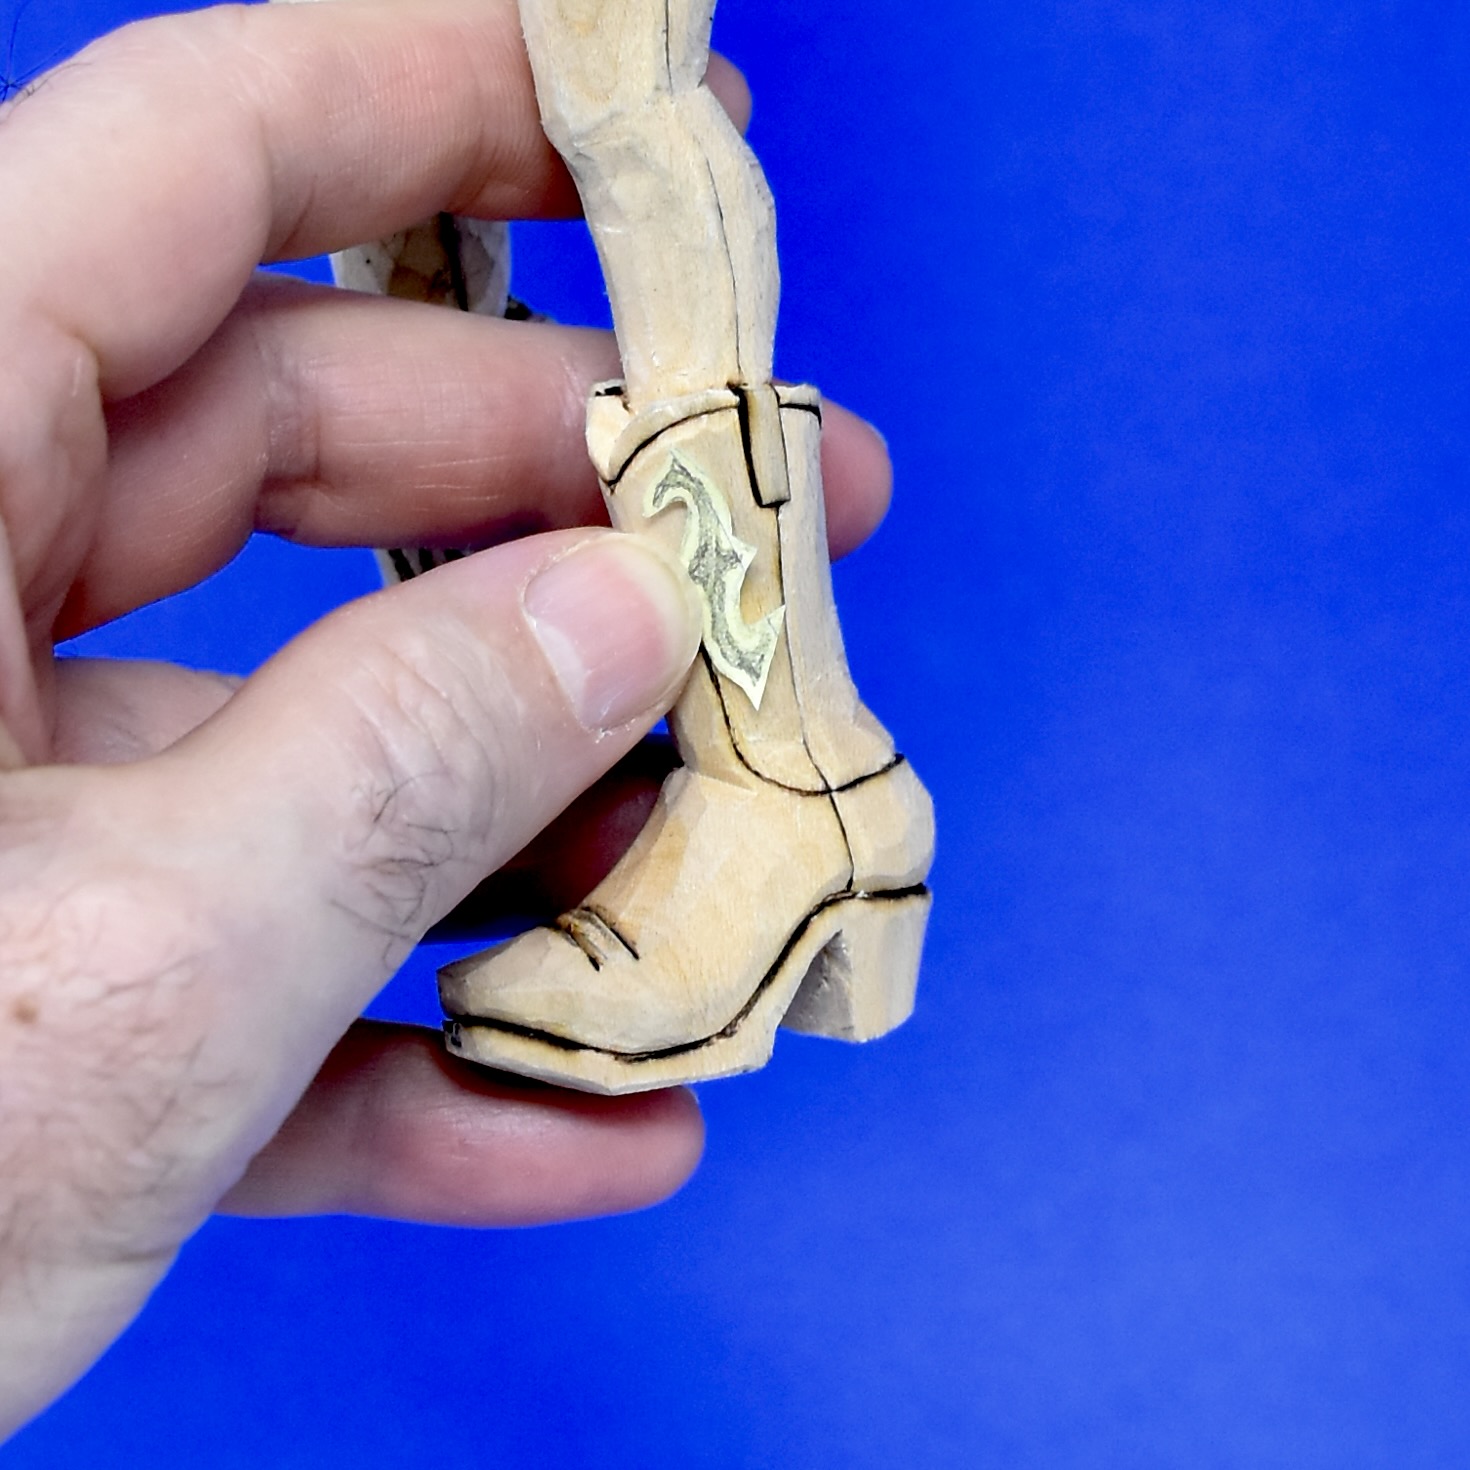
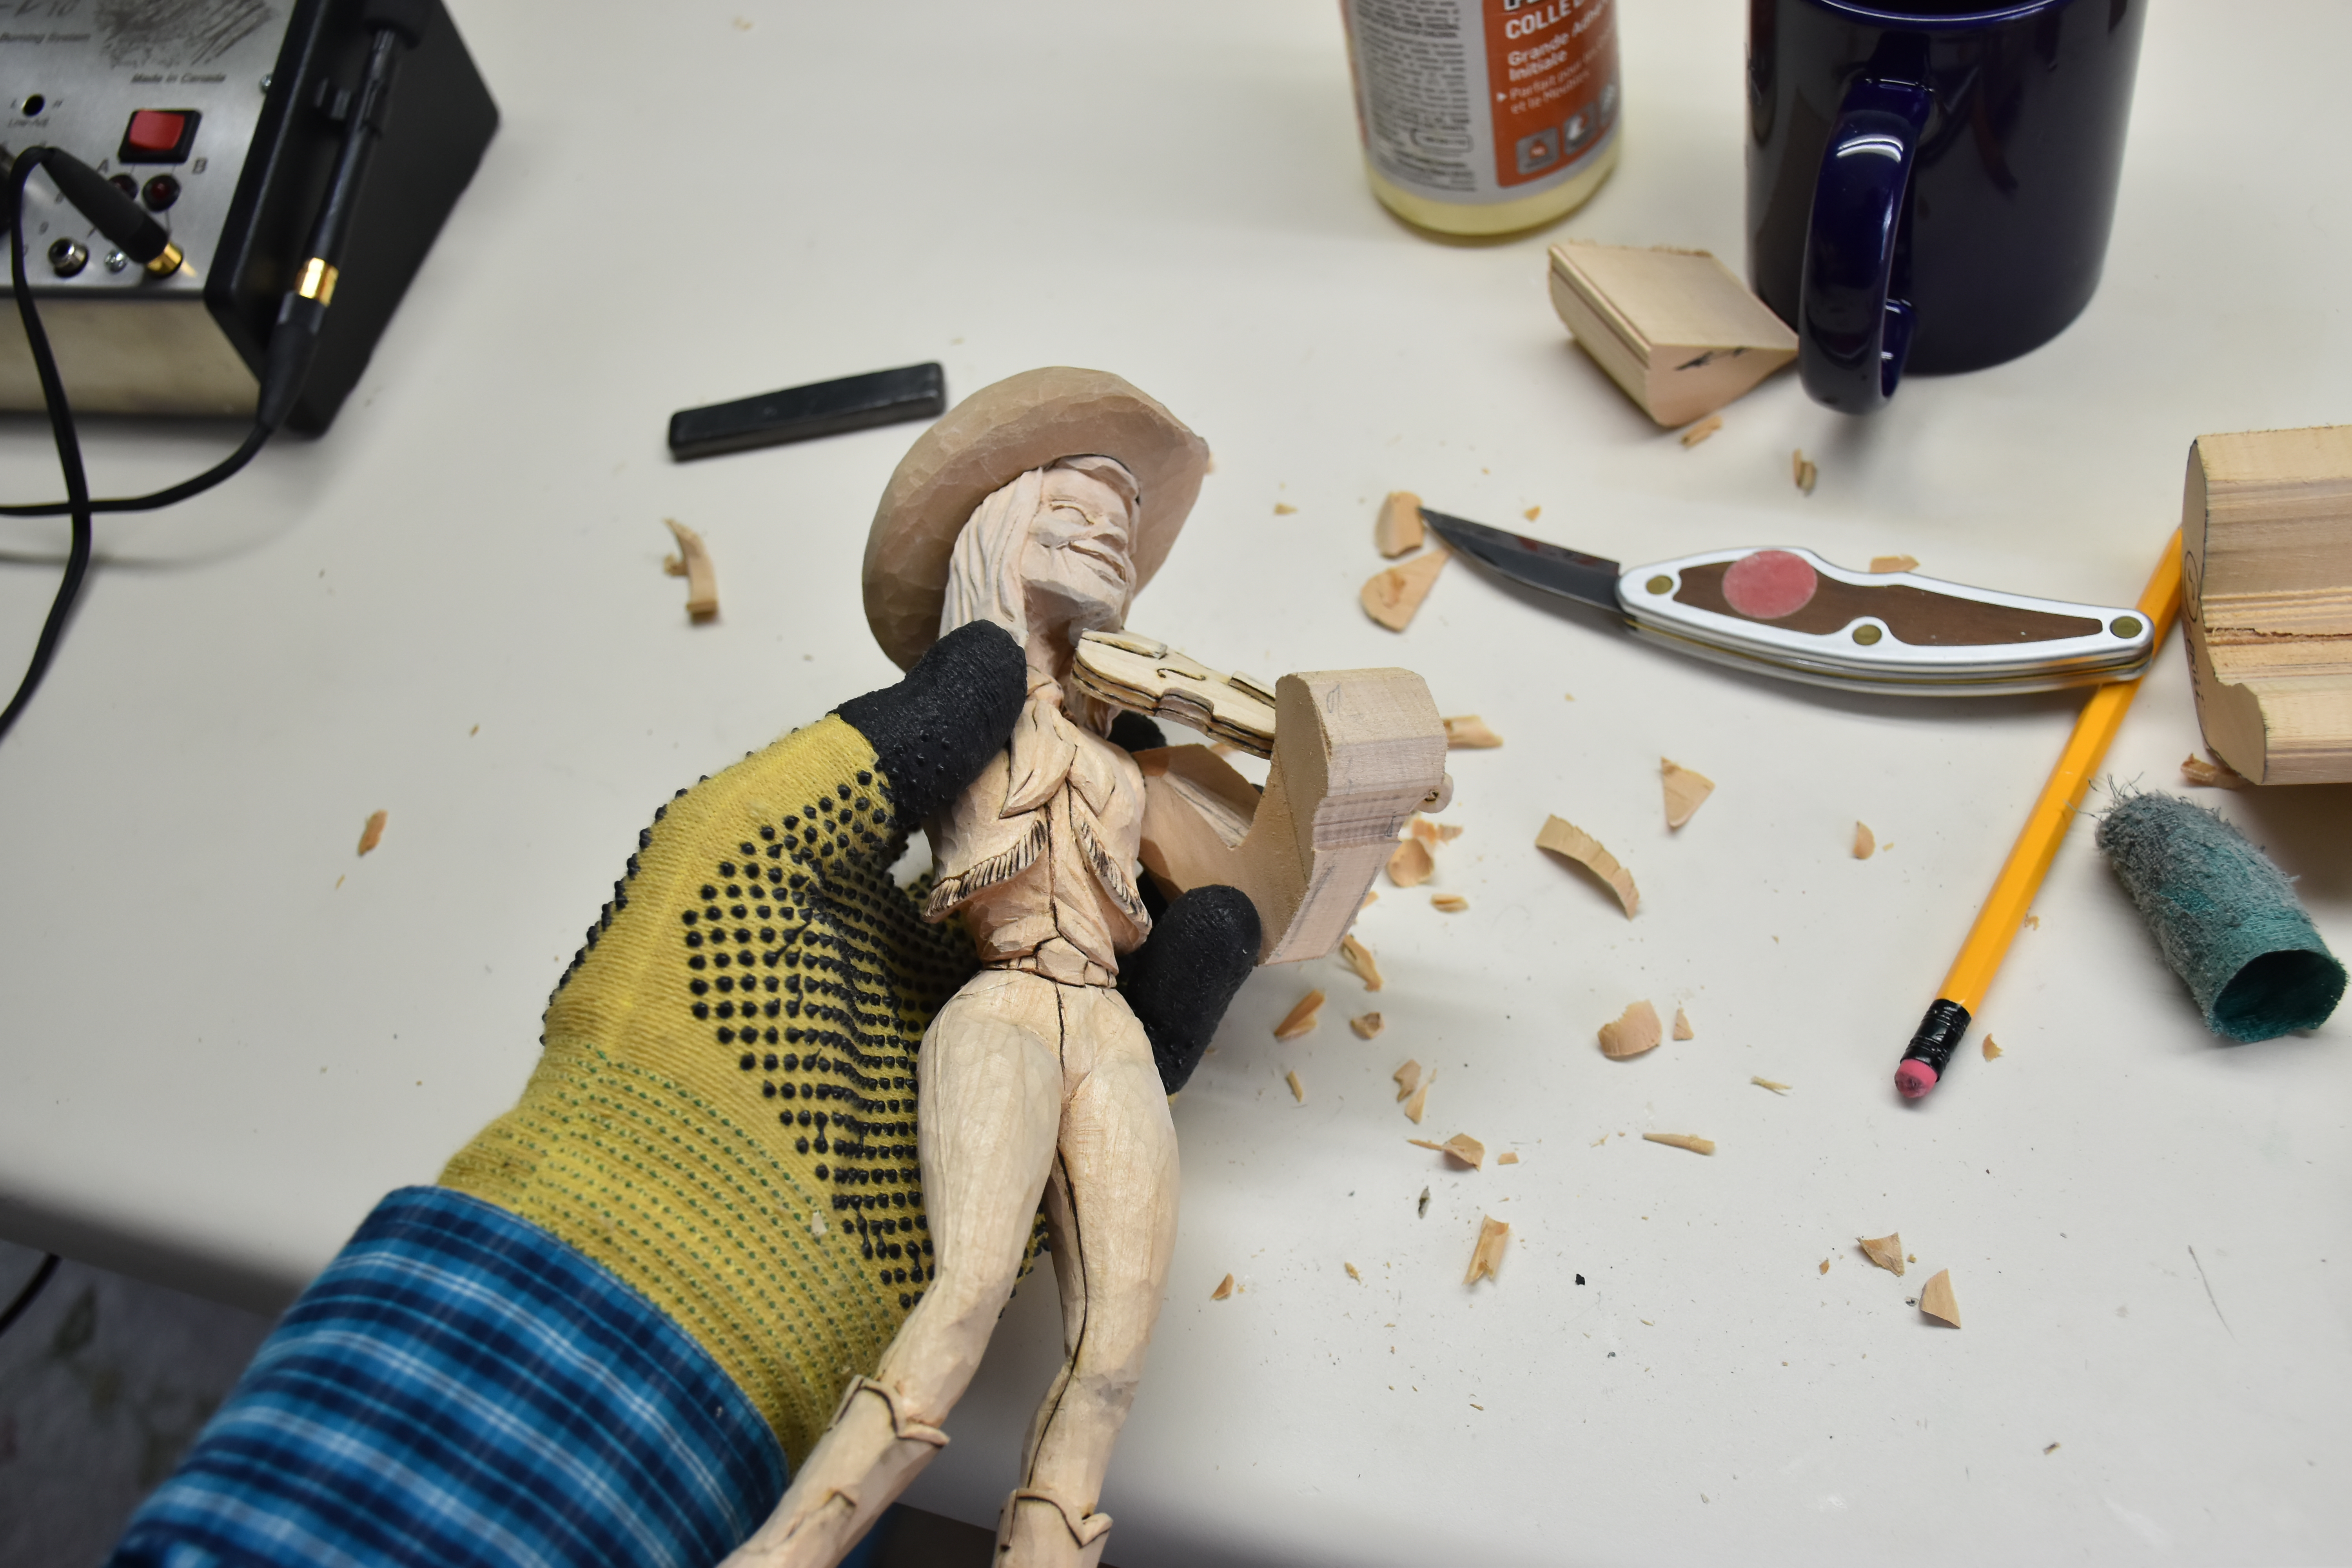
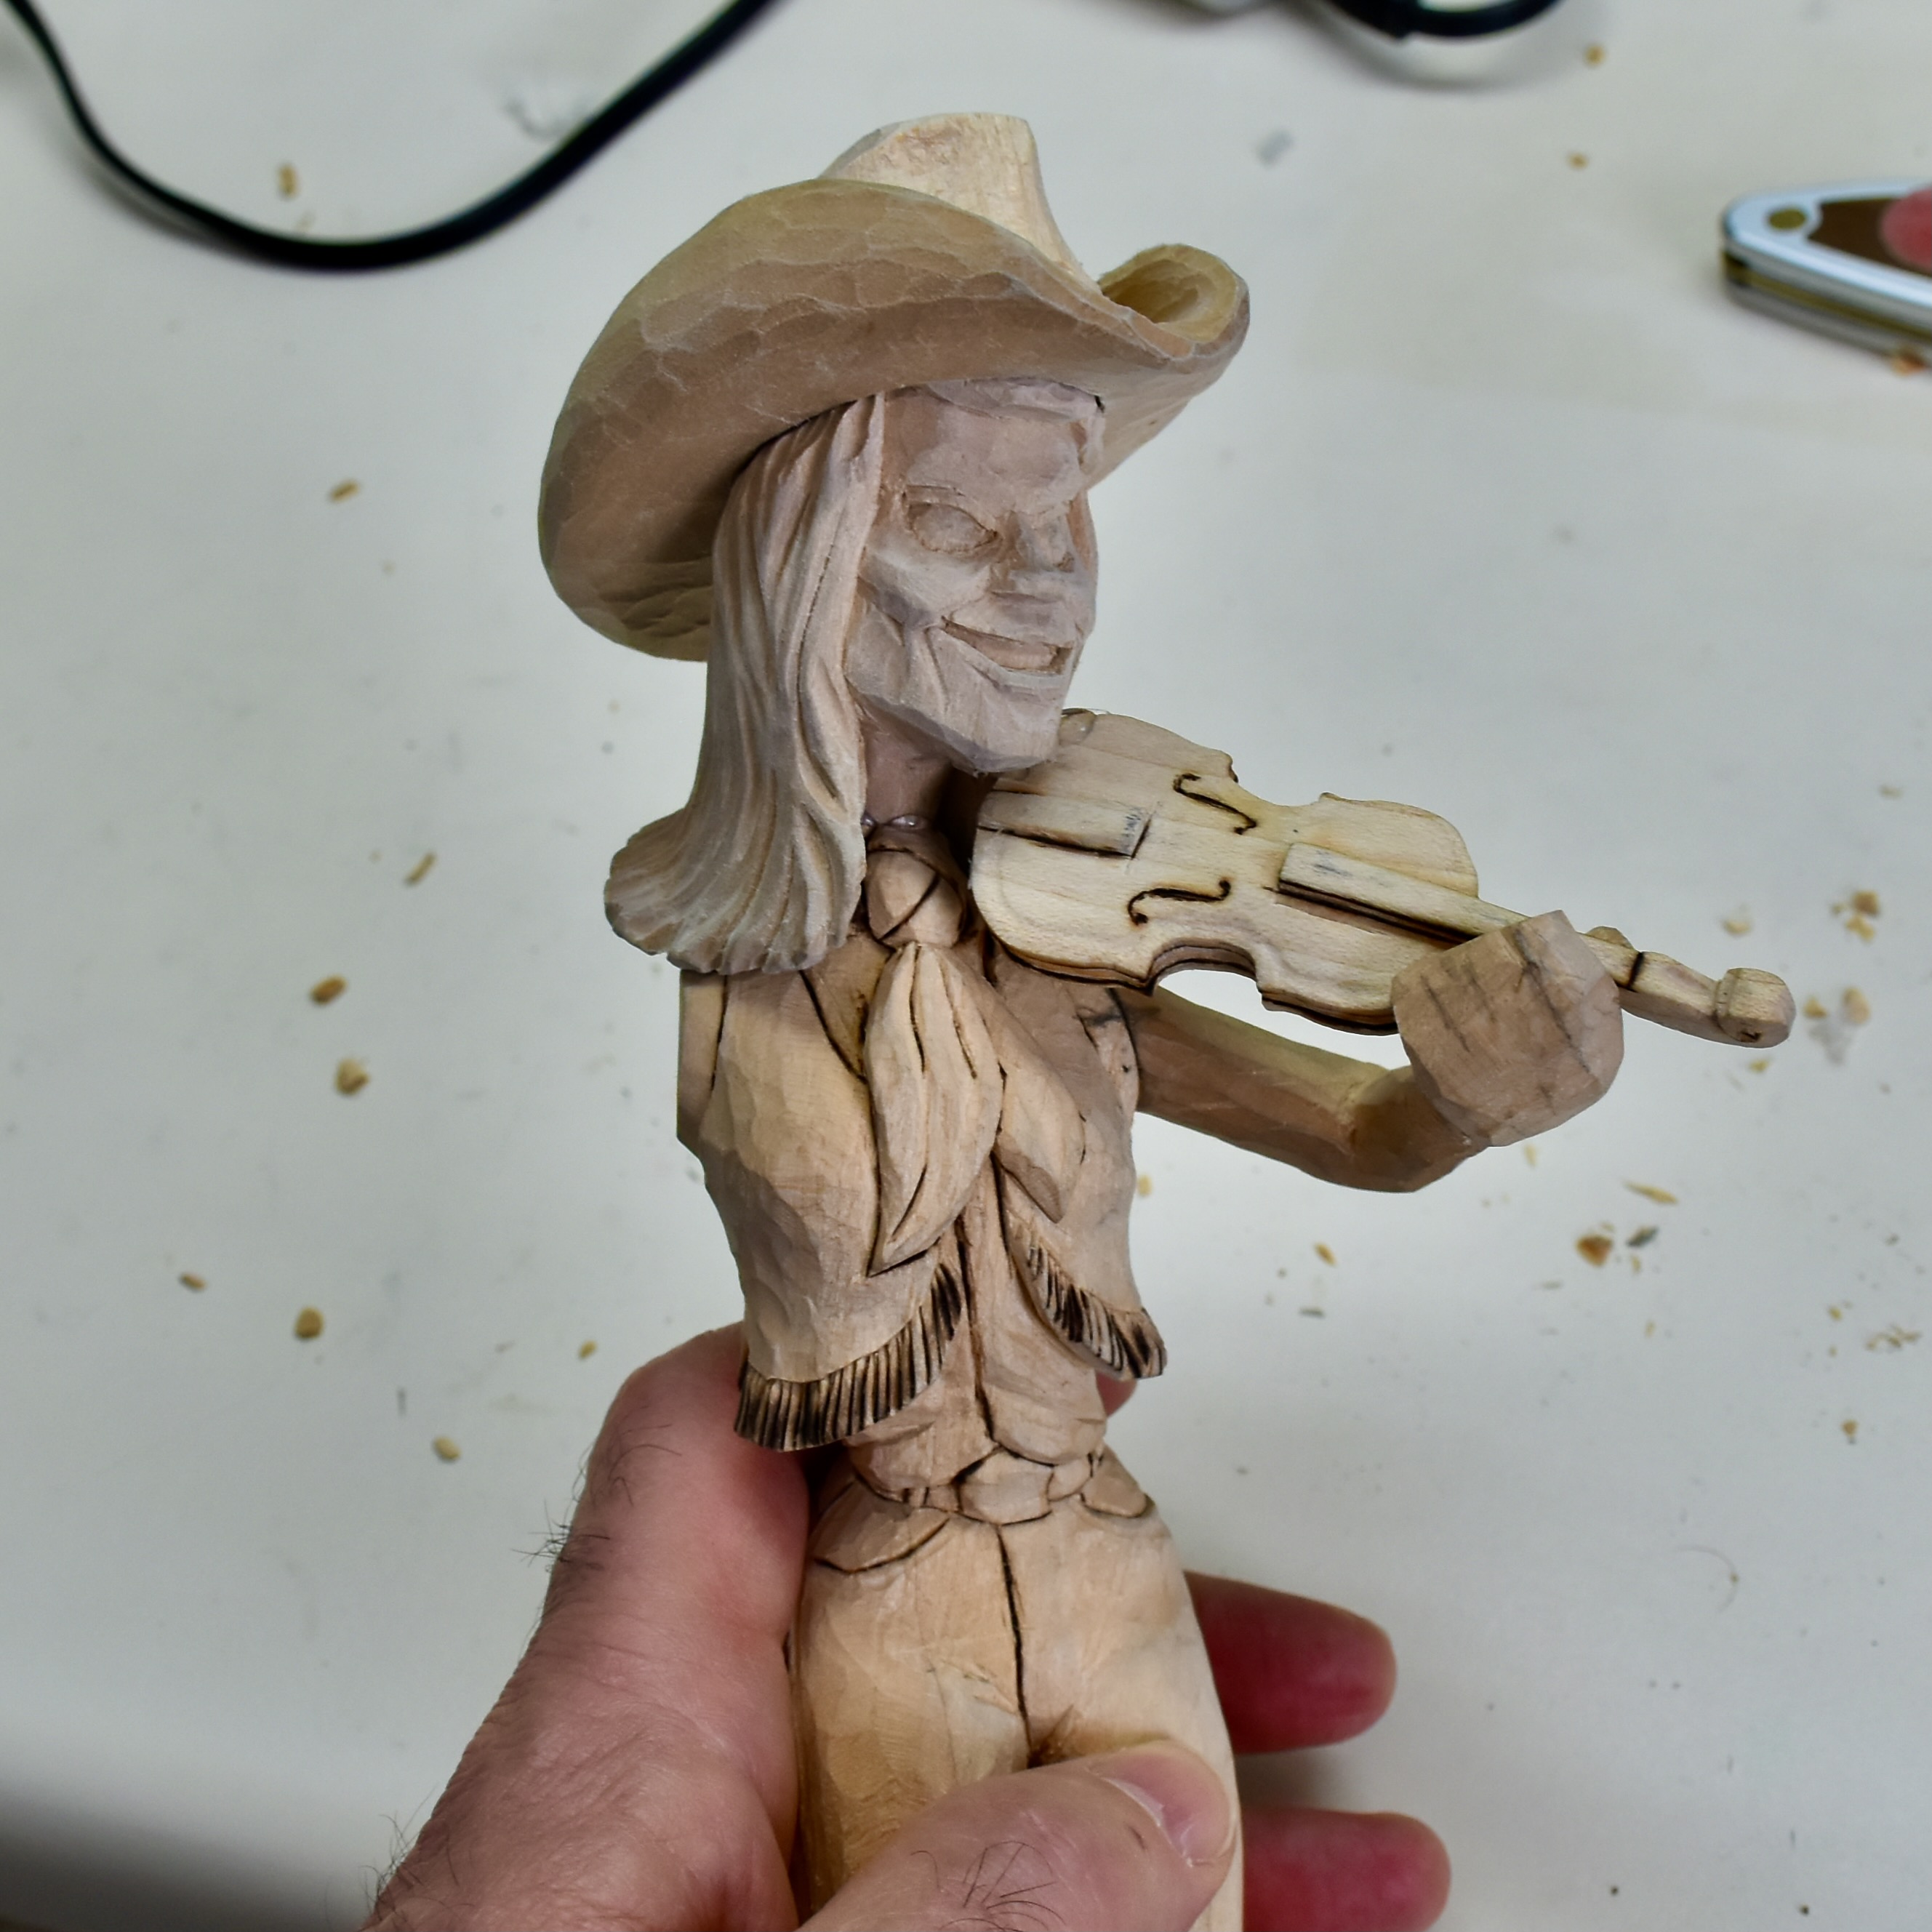
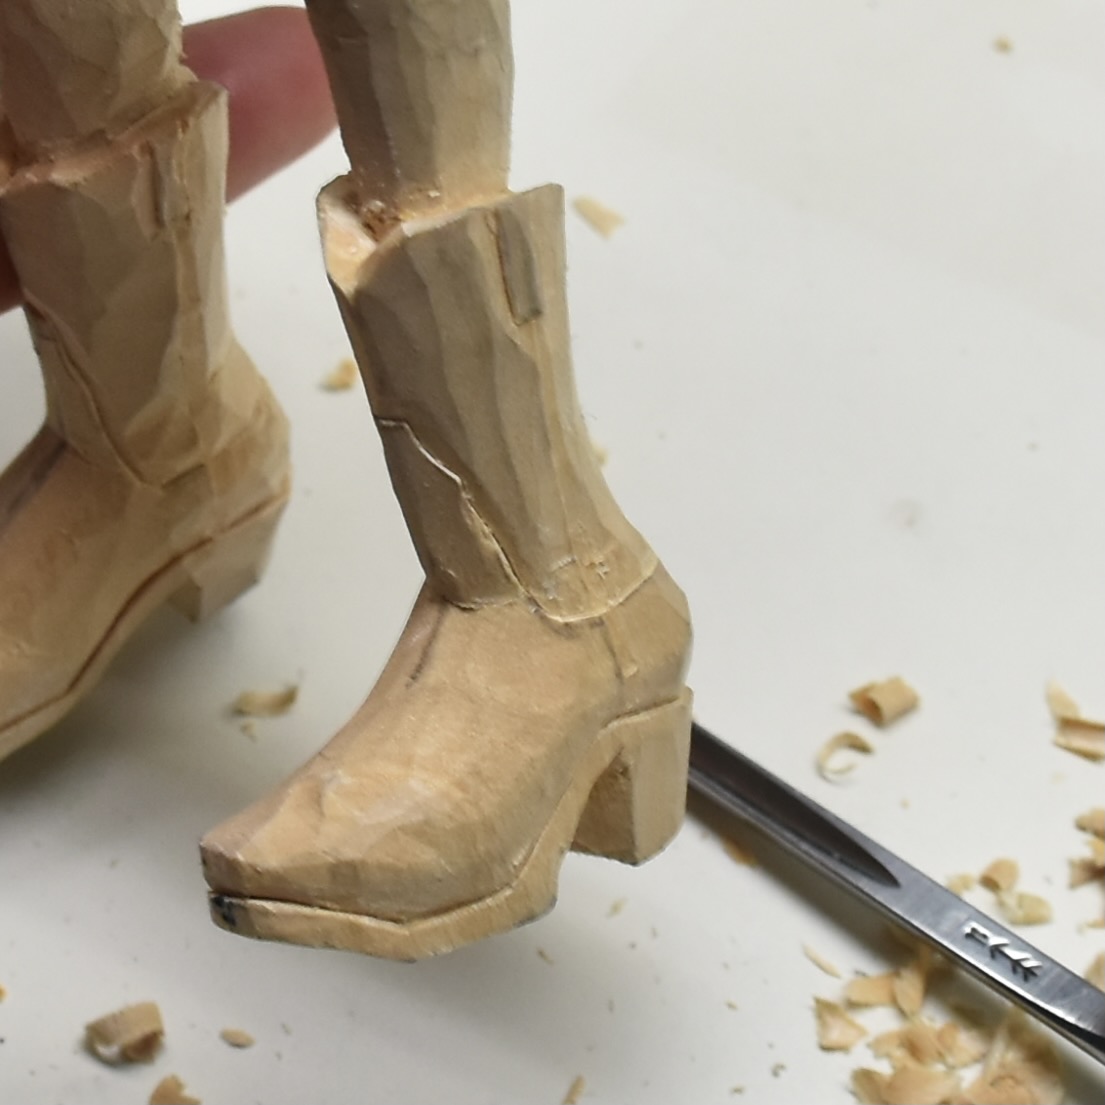
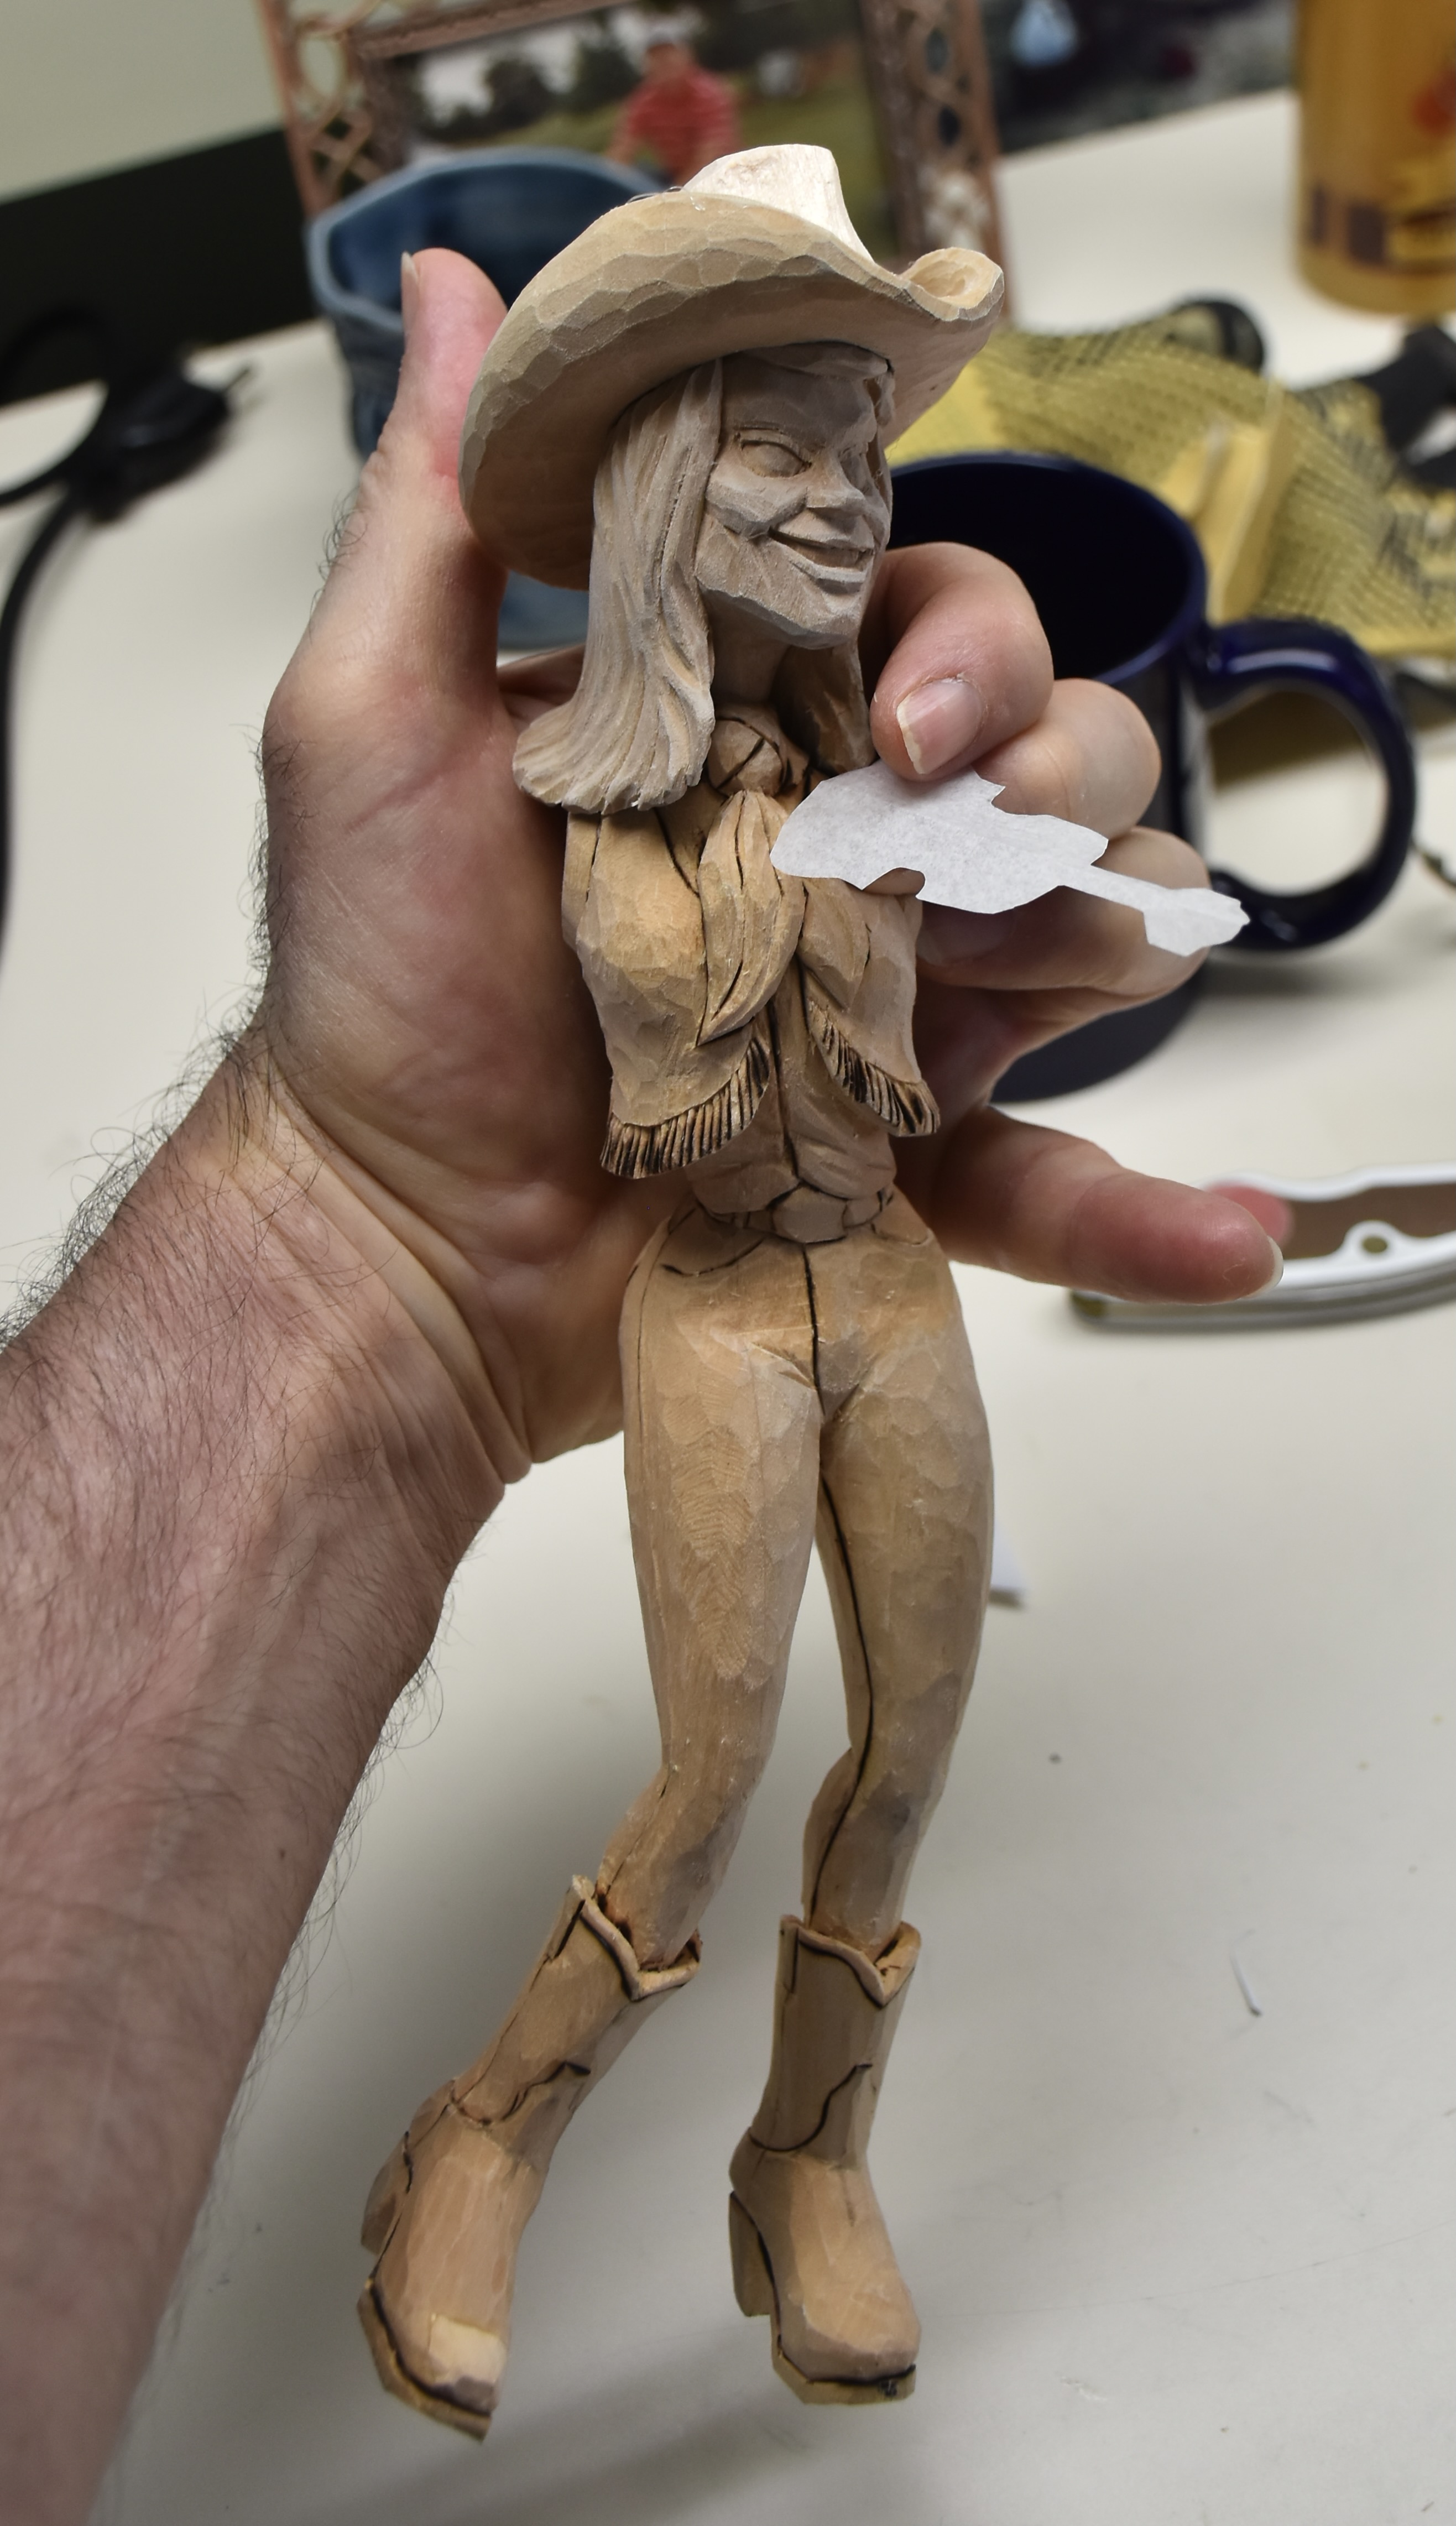
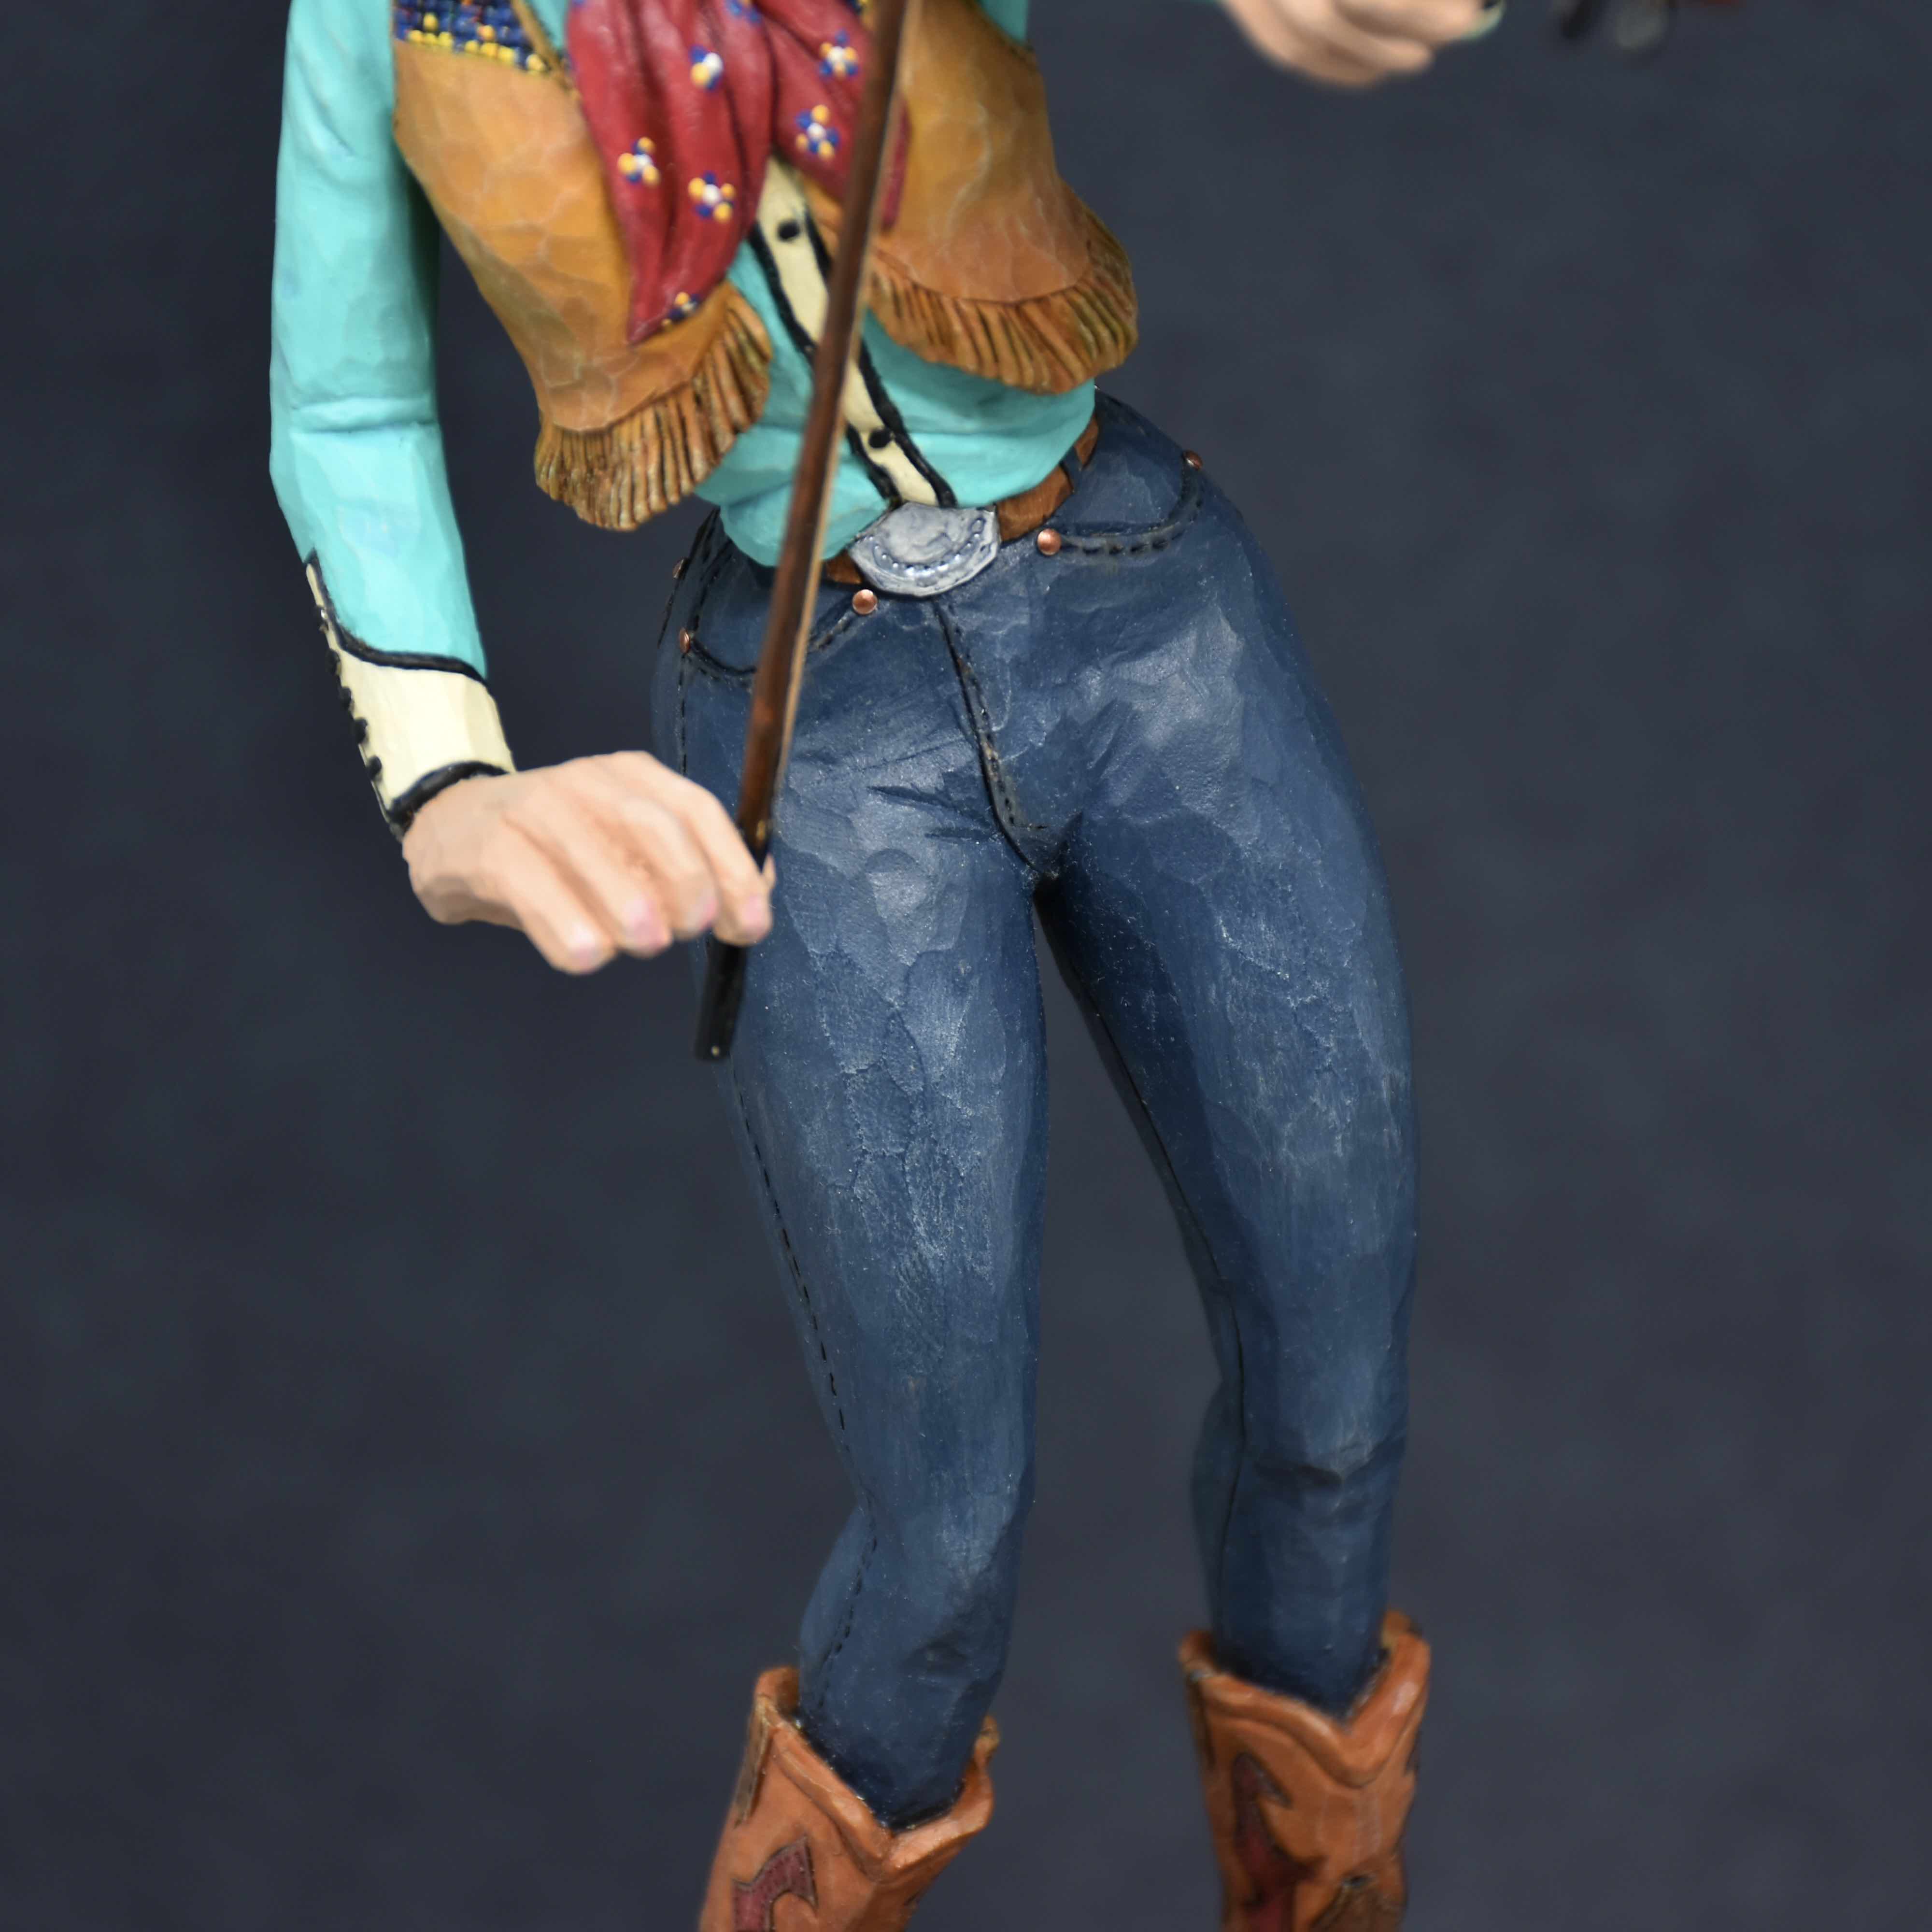
In general, I try my best to apply “washes”, or very thin coats of paint. Too thick an application, like directly from the container, would hide all of the detail work that you carve and certainly obliterate the wood burning. A good example in this carving is the blue jeans that the little gal is wearing. You’ll notice that the several wash coats that I applied provided ample colour but never was thick enough to hide the stitching that I had burned with the wood burning tool.

Where there are wrinkles in clothing, I add a bit of a darker tone in the valleys of the folds and wrinkles to provide a darker contrast. This makes the carving look more realistic ( take a look at the folds in your own clothing and you’ll see the darker tones ) and it also makes the wrinkles and folds look deeper. I follow Lynn Doughty’s advice and keep away from using black to darken colours…I always use a darker tone of the same colour and avoid greying-out that colour with black.

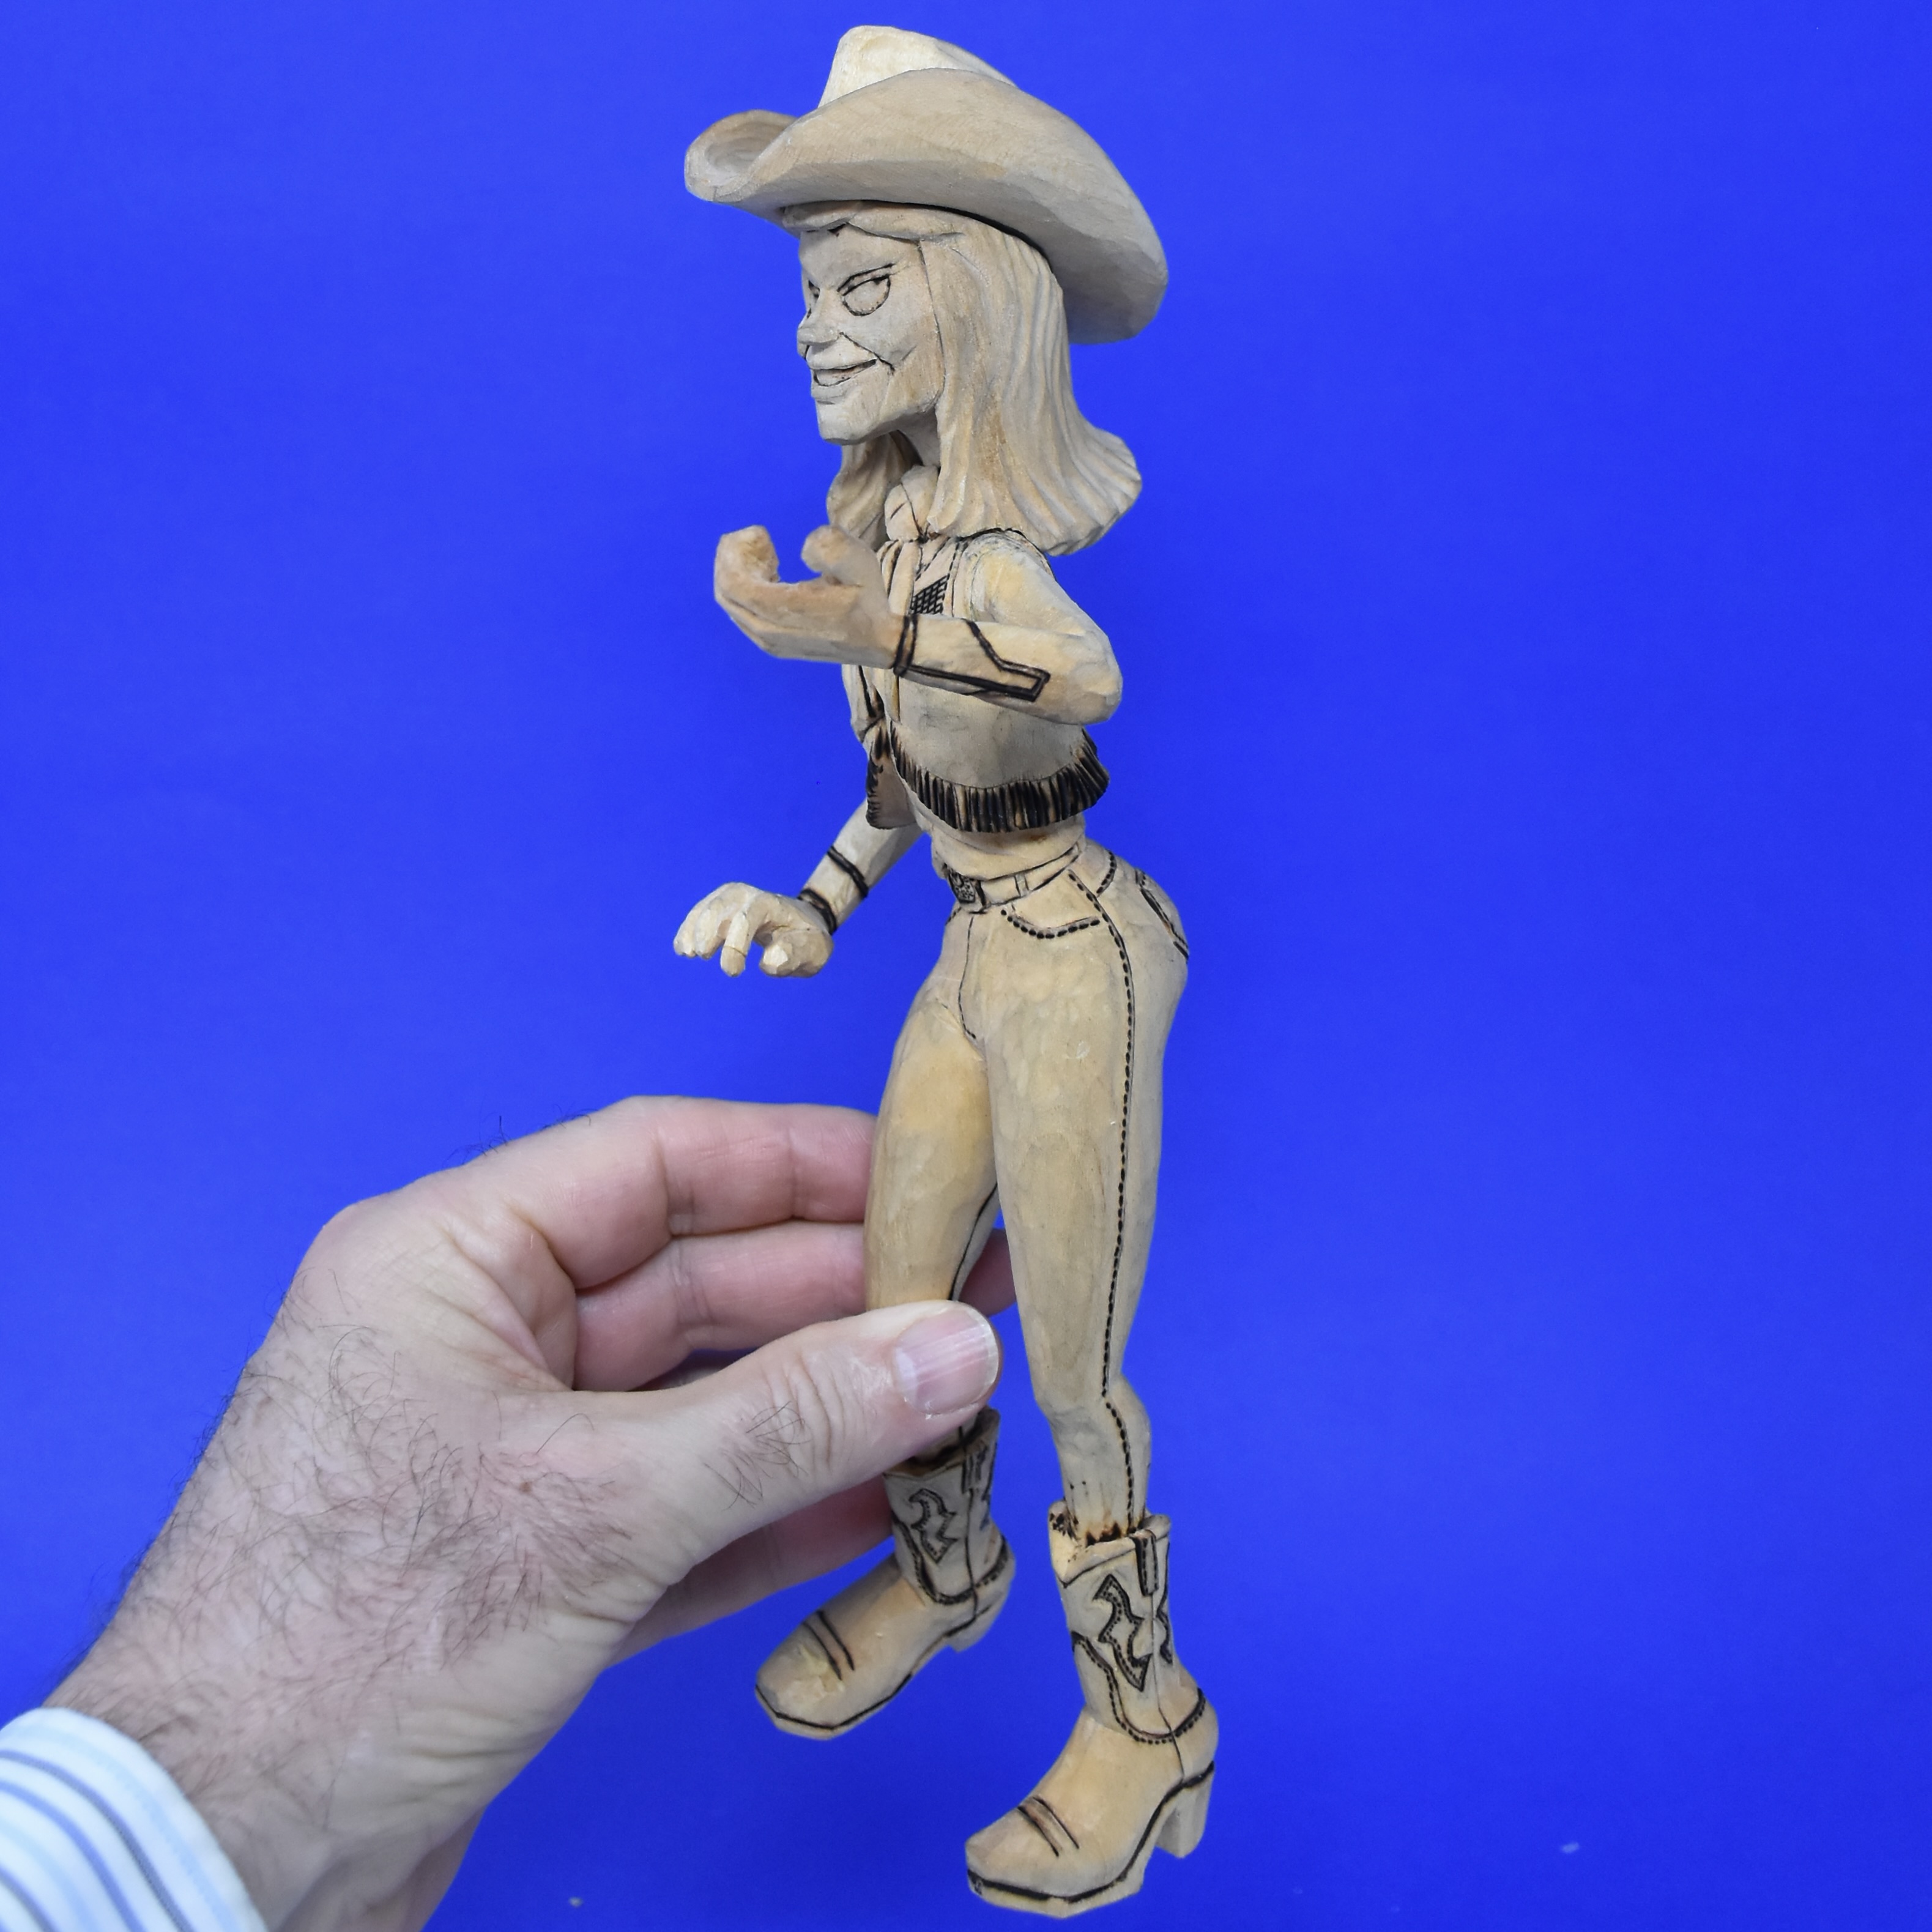
An additional of a small amount of white to shoulders, elbows and knees make things look nicely worn. In this case, I wanted her clothes to look pretty crisp so I just added the whitening to the jeans wherever you’d expect her designer jeans to be worn! Once everything is painted, I added some light dusting / dry brushing using a beige to add another dimension to the painting. A light, clear, satin urethane was used as a final finish.

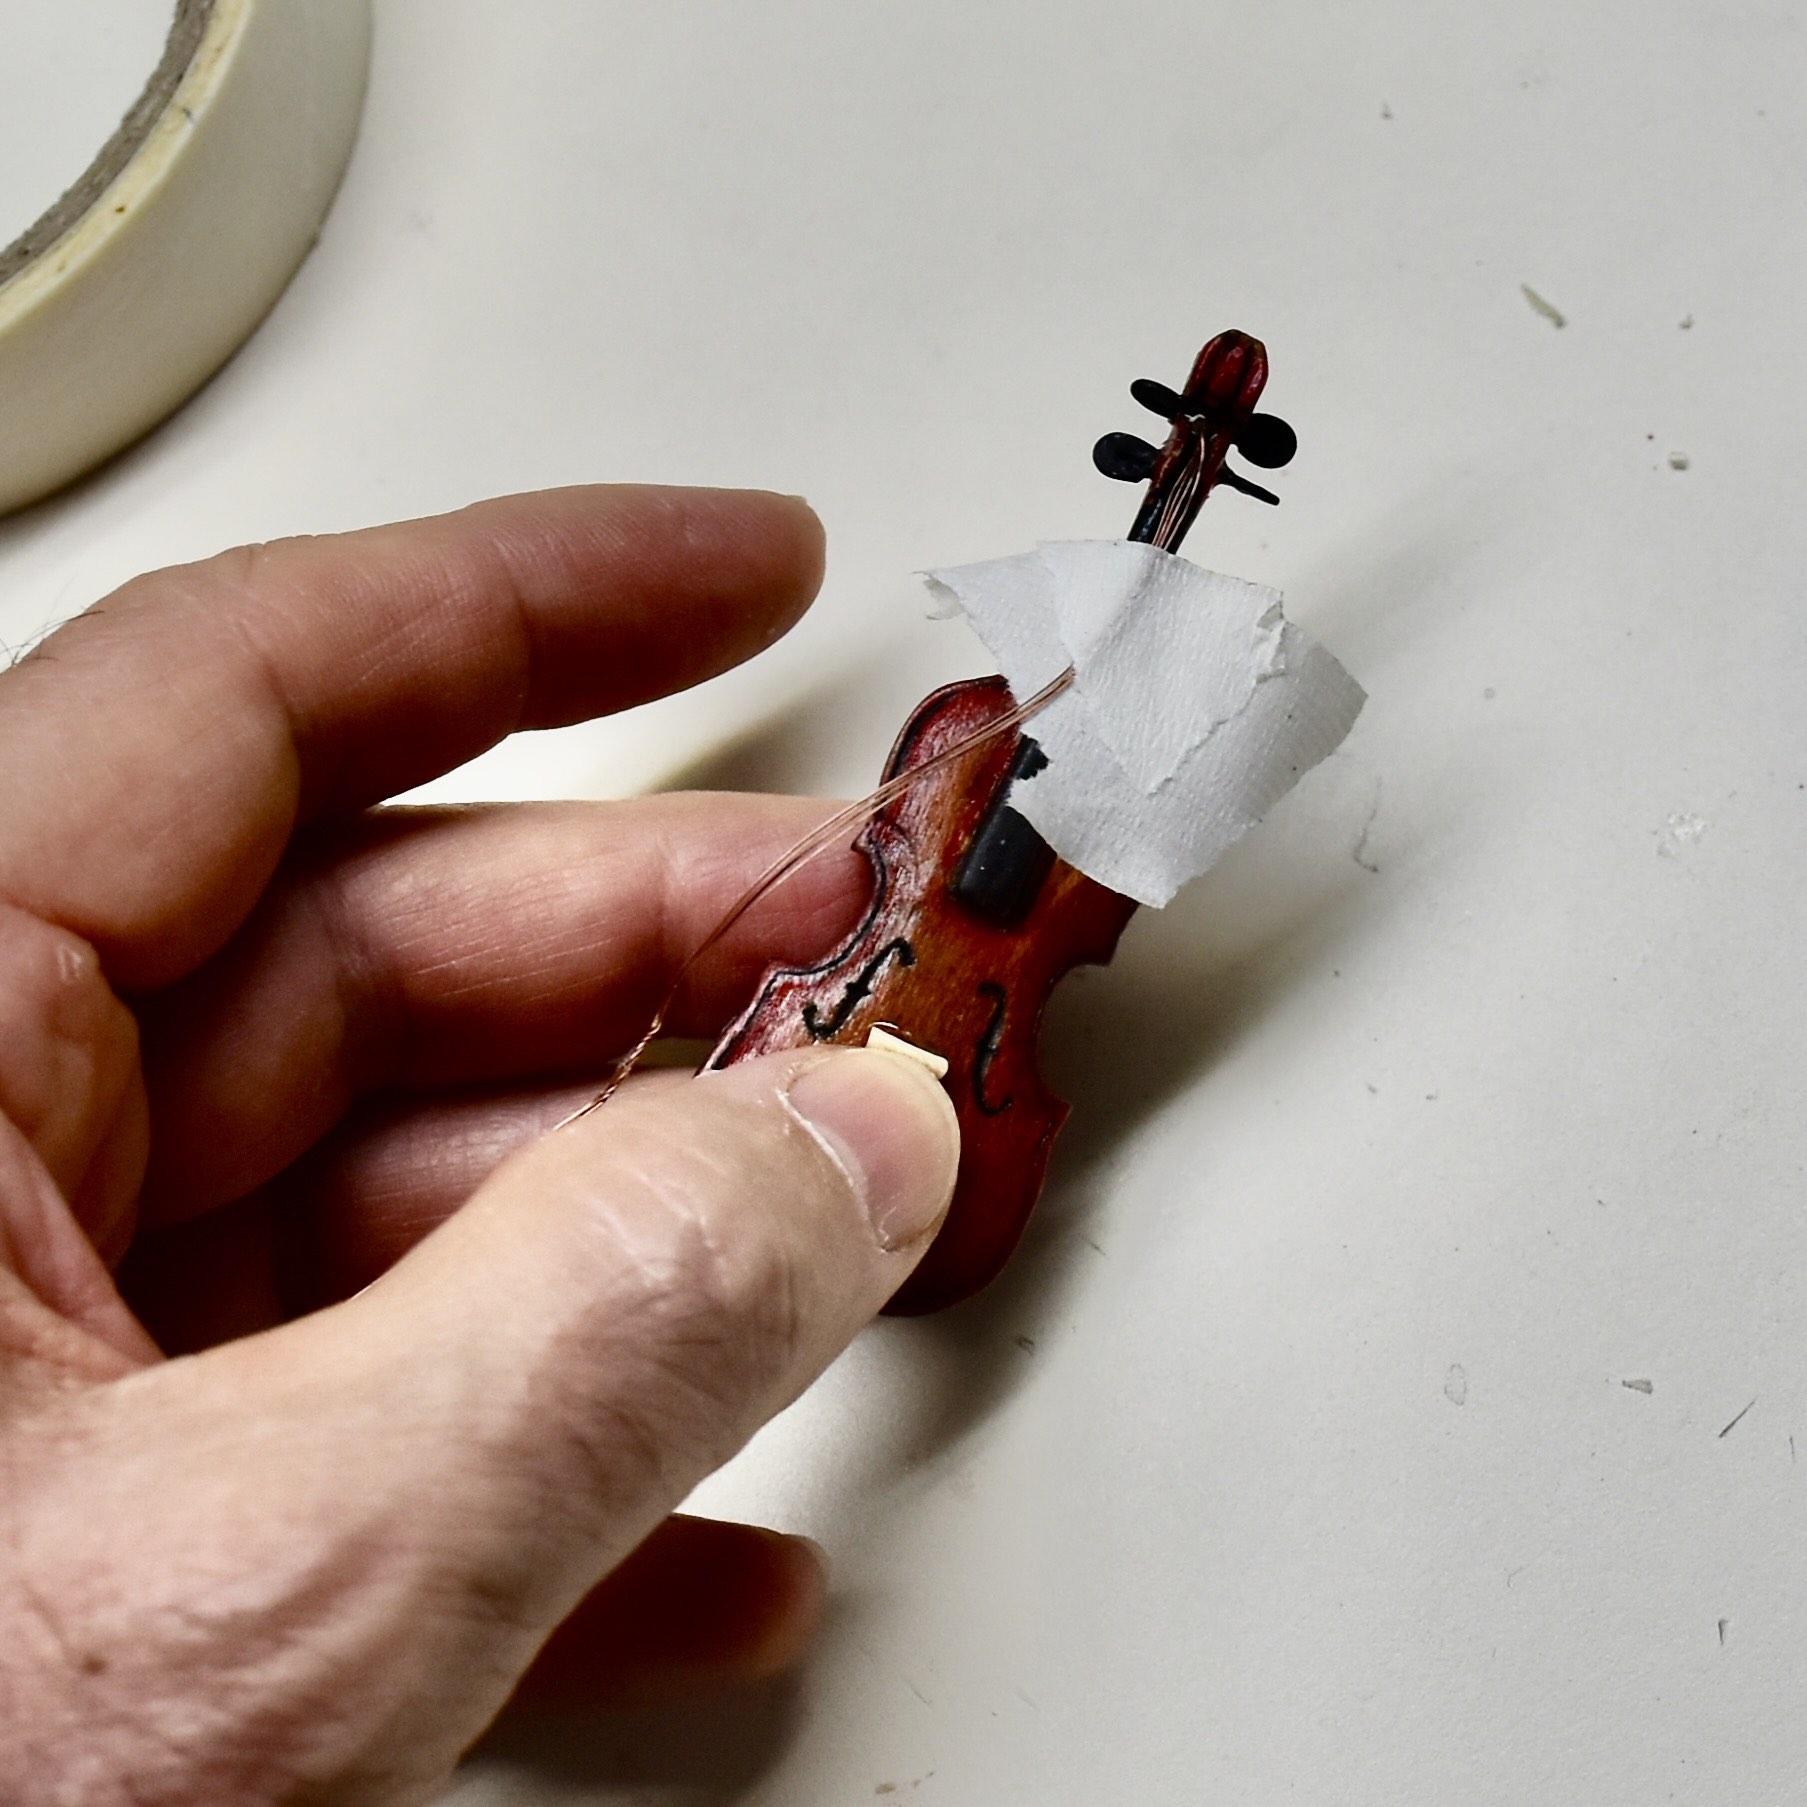
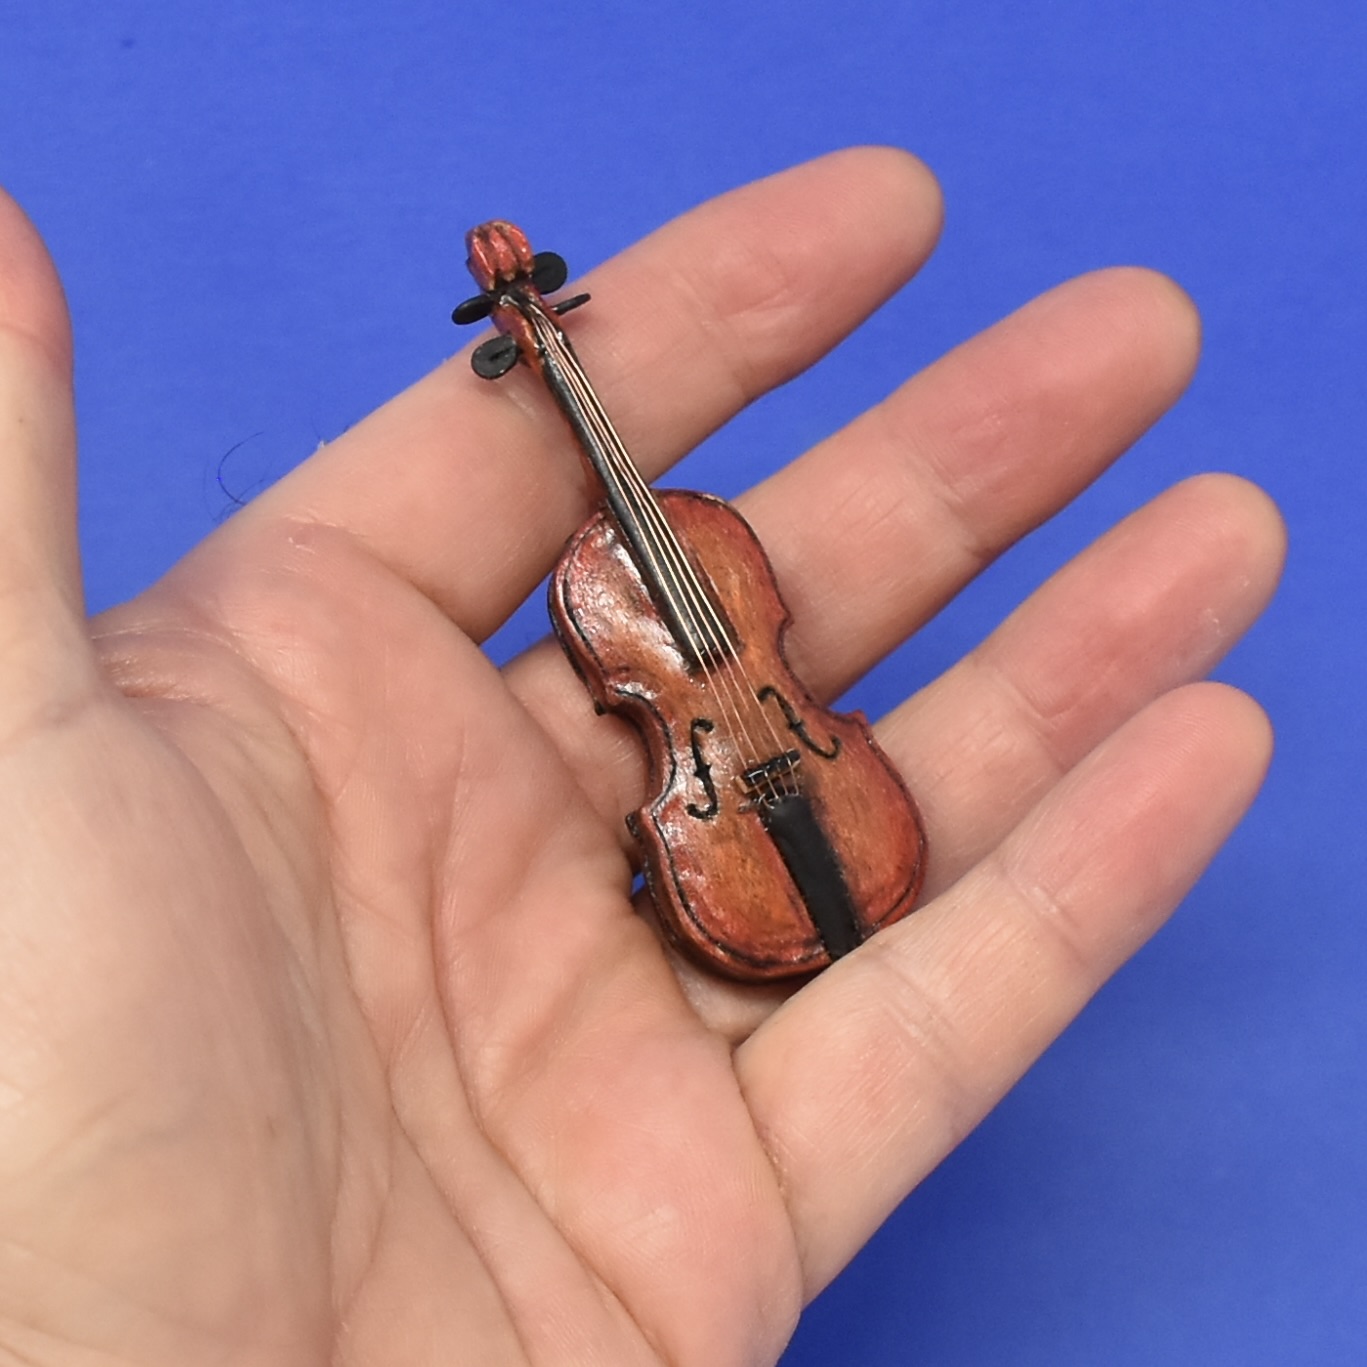
Just click on the photos, below, to expand them.

So, she’s complete! It was a fun carving project and I appreciate you following along with me.

Advertisement

Getting Ready for Paint

I used a wood burning tool with a razor sharp tip to add in some detail prior to painting.

The burning process is a really good way to get nice crisp lines and boundaries in your painting. As an example, I basically cross-hatched in some very fine squares to represent beading on this gal’s leather vest. Later, you’ll see how this cross-hatching basically made small valleys or boundaries for the painting process. Now just a drop of paint in any one of the tiny squares will flow no further than the boundary that was burned, making a nice crisp final painted pattern.

Similarly, a burned line around the belt loops, hat design and boot designs prevents the paint from bleeding from one section of the carving into the next.

Finally, the burning tool is great for adding detail lines representing seams and stitching. If you keep the paint thinned, the dark marking will show through the colour nicely for some added interest. With some very minimal burning, you can really enhance the painting process.

As usual, just click on the photo, below, to make it larger for viewing.

Final Details on the Fiddle

Much of the fiddle was finished on the previous step, but I did add some final touches.

The little gear/mechanism handles for tuning were made from household copper wire. I just curled the end of the copper wire over on itself and flattened those ends into a bit of a pancake shape. A very small gap would remain in the centre of the handle but, once I put some black paint on them, the little gap was filled. The other straight end of the copper wire got cemented with expoxy into four drilled holes in the head of the fiddle. The downside of cementing them in place is that our little gal will have to live with whatever tuning the original string arrangement produces!

Because the fiddle was carved from a piece of Maple, I started the painting by staining the wood with a Red Mahogany oil stain. I then followed up with red, orange and yellow acrylic paint to get the right colouring and shading that I was after. The fretboard and the backboard were painted black. It was all finished up with a couple of coats of gloss urethane to give it a shine.

The strings ended up being wire. I had considered a number of suggestions but I felt that fine wire was the way to go. I took some braided speaker wire and unwound four very fine wires. I twisted the four separate wires at both ends of the length that I needed, and epoxied one end into a hole drilled into the head of the fiddle. I cemented that with epoxy and spread the wires evenly across the fretboard by making small knife cuts into the end of the fret board and cementing the wires within those grooves.

I made a small channel into the backboard of the fiddle and cemented the opposite twisted end of wire strands into that channel. By stretching the wires reasonably and clamping them while the epoxy dried, it ended up being a nice, tight fit. A bit of black paint over the epoxied pieces finished up the fiddle.

Cowboy…err…Cowgirl Boots

Time for some detail on the boots.

I started by calling up some images on the computer and choosing a boot style that I thought would look nice on this carving. Some very minimal carving gave me the basic shape that I wanted and I carved in a bit of relief followed by some wood burning to show the upper boot from the lower boot leather as well as an indication of some boot straps. I basically used a ruler to make sure that I had the left and right boots the same height and width. Remember that the inside and outside of your footprint is different…take a look at the bottom of one of your dress shoes and copy that pattern for the bottoms of your boots. Making a pencil “etching” pattern of the bottom of one of the shoes, cutting it out from the paper and flipping it over to draw on to the other foot is a good way of ensuring that the boots are going to be the same size.

I drew up a little decorative pattern for the upper boot and cut that to make a paper pattern. Again, flipping it over and redrawing the pattern onto the boot created a uniform pattern completely around the boot. With a bit of initial wood burning followed by some slight and shallow carving around the wood burning, produced an elevated “leather” pattern. Some burned “stitches” and some very slight addition of creases in the leather completed the detail for the boots.

A Couple of Arms

Now that I had decided on the fiddle rather than the original banjo idea, I had to reconfigure what I needed to do with the arm position. Using a combination of the anatomical sketch of the girl that I started with for determining overall size of the limbs as well as the clay model that was still pliable, I sketched out a couple of arms and cut them out on the bandsaw. I made sure to add in some extra material as I wasn’t quite sure about the hand position…plus, I was thinking about adding a “frill” along the arms ( which I later decided against ).

I used the same method to attach the arm to the shoulder as I did with attaching the crown of the hat to the brim. I drilled a shallow 3/16″ hole in the arm and glued a dowel in place. I drilled the mating hole in the shoulder, marked the position of the arm that I wanted against the shoulder and then with some graphite “colouring” and mating of the two surfaces by cutting away the transferred “high spots”, starting mating the two surfaces to a tight fit. Following that, it was a matter a temporarily attaching the arm and fiddle with a hot-glue gun and working away at the arm and hand positions and detail.

The arm holding the bow was carved in the exact same way. Note the little pencil marking on the arm and shoulder. This helps you make sure that you’re positioning the arm in the same place every time you remove it to carve away a bit of the transferred graphite. This is a method that I learned from watching Lynn Doughty’s videos…check them out on Youtube and you’ll get a better sense of how this works.

Following this, I once again hot-glue gunned the parts in place to double check for positioning and fit. A bamboo meat skewer was my make-shift fiddle bow at this point. Next step will be some more detailing. I’m pretty happy with the way it’s looking at this point.

Adding Some Finer Detail

Now that I had the cowgirl form smoothed out with some “rough” detail, it was time to add in some finer detail.

I started with the boots and added in the heel and sole followed by some leather pattern at the front and top and a boot strap. I also added a more pronounced “v” shape to the front and back of the very top of the boot. None of this was done from my memory of what a cowboy boot looks like. I went to the computer and searched for “women’s cowboy boots” and selected one to model my carving after. Remember, also, to get the bottom of the sole right. Pick up one of your dress shoes from the closet and take a look at the bottom noting how the instep of the shoe curves differently from the outer side of the shoe. Once you carve the boot in a similar fashion, etch that onto a piece of paper and transfer the identical but opposite profile to the other boot. Now you have two boots of the same size!

My daughter, Emily, came up with the idea of some frill ( cowgirls surely use a better word than frill ) on the vest. So I marked where the frill would go, cut in a line to indicate the border between the frill and the vest and then used a gouge to make some random vertical cuts in the frill section to make it look like it was wavy rather than just hanging straight down. I could have used a v-tool, I suppose, to cut the individual frill but I used a knife instead. I eventually followed up with some undercutting with a gouge and will probably do a bit more later on to make the fringe look nice and thin. I think that it ended up looking kinda nice.

From there, I used a combination of some shallow knife cuts and a light use of a burning tool to add pockets, seams, folds in the scarf, belt line, etc.

At this point, I started to think about the exact placement of the arms. Of course, I had the clay model to refer to but I had to get the exact measurements for the arms to fit and look right against the banjo that she’d be playing.

So, I cut out a paper banjo to hold up to her…and, I hated it. No matter how I placed that darn banjo…I hated the way it blocked out her waist and the detail of the vest and frills. I had to go for something smaller…a ukulele! I cut out a paper ukulele…and, I hated it too. Whew! A fiddle then…and, bingo, the fiddle looked great to me and it only blocked out a bit of her scarf and shoulder.

So, back to the computer search to find a fiddle ( by the way, I learned that a violin and a fiddle are the exact same instrument ). I printed out the fiddle this time to the exact size that I wanted and cut that out as a pattern to bring to the bandsaw. After a bit a carving, it was ready to place under her chin temporarily with a dab from a hot glue gun.

I’ll note a couple of things. Because the fiddle will be eventually permanently glued to the head and arm as well as the hand, it represents a “structural” part of the carving to me…it has to be strong. For this reason, I made it from maple rather than basswood. Probably overkill, but that’s me. Also, note that I replaced a section of her right foot. I just didn’t like the way it originally turned out so I carefully cut out a chunk and even more carefully fitted and glued another piece of basswood in as a tight fit. Some carvers don’t like that sort of thing and view it as a bit of cheating some how. I think that it’s the only reasonable thing to do…if you don’t like something, why let the whole carving suffer when you can just make a quick change that you’ll never see?

Next step…create that arm holding the fiddle. I’m having fun with this carving.

Roughing and Detailing of the Body

Once I had the body cut out on the bandsaw, I began the roughing-in process. This is most often done with a knife but I also like to use a Foredom tool with a Typhoon bit to remove material quickly. A Foredom tool is like a Dremel tool with a flexible hand-held shaft and a Typhoon bit is a cutter that has many small carbide “pins” that cut away the wood. It leaves a very rough finish that you then follow-up with a knife to smooth things out and generally get the shape that you’re after. If you use this method, just be very careful as the cutter can do a lot of damage to you if it’s contacted. I wear gloves, heavy sleeves, a leather apron, safety glasses and a dust mask when roughing-in a carving in this fashion. You should too.

Note a couple of things in these photos…first, I always pencil in the centre lines and carve from one to the other…this ensures that I end up with rounded limbs and avoid just rounding off the square edges and thinking that it’s “round enough.” You’ll often see caricature carvings where arms, legs and bodies still have the squareness of the original bandsaw cut only because the carver didn’t picture the full centre lines and carve/round out between them. Second, as you can see in the third photo, I also keep pencilling in the joint markers ( in this case, ankle, knee and hip ) so that I maintain the right limb section lengths.

Because I wanted the head to rest at a bit of an angle and tight to the shoulders, I used the same graphite method of fitting as I did with the hat brim/crown and head carving. In this case, I knew that I didn’t have the shoulders in the final carved state but that I could go ahead and approximate what the shoulder would look like. By alternating between putting graphite on the shoulder and transferring those graphite marks to the underside of the hair ( and removing those marks ) and then doing the opposite…graphite on the underside of the hair and removing those marks left on the shoulder, I eventually got the head situated down and to the side. You’ll also see that I started to carve in a knot and scarf that would help hide the neck…and look nice, too.

With some carving, now with a knife and several sized gouges, I took away all of the roughened wood from the Typhoon process and started to get the shape that I wanted in the sculpture. In doing this, I took some measurements from the clay model that I had made as well as the paper patterns that I had developed and used those to make things fairly true to my original idea of sizings and shape. I didn’t try to absolutely replicate the clay model, but I did use it to refer to the general body position that I wanted.

Remember when you’re at this stage of your carving, be mindful of the direction of the grain and keep your tools extremely sharp so that your cuts will be accurate and crisp. Because the sculpture is becoming curved in different directions, the grain can fool you and all of a sudden you are cutting against the grain and wood is beginning to split rather than cleanly cut away.

And here’s where I am at this point…

Carving cleaned up with a knife and ready for detailing

A Bit of Sculpting

I’ve mentioned in the past that I have a group of people who meet monthly on the Zoom conferencing platform to talk about caricature carving. We call ourselves the True North Caricature Carvers ( TNCC ) …our farthest northern member is in Thunder Bay, Ontario, Canada and our least farthest northern member is in Brisbane, Australia! So, don’t read too much into the name…all are welcome!

Since I’m planning on using this little project to emphasize some of the things that we’ve been talking about, I’ve decided to do a clay sculpture as part of this project. I guess that you could argue that this particular carving is a bit static in it’s pose and wouldn’t necessarily need a starter-sculpture, but the sculpting is helpful when you could benefit from having a three dimensional model to carve against.

I started off by twining a couple pieces of copper wire together with my battery operated drill to make up the spine and legs as these two elements will need the greatest strength. I don’t know why but it’s somehow fun. The arms are simply one strand of copper. I used an anatomy guide that I found on Pinterest for the dimensions and soldered the copper in a couple of places so that the model would be nice and rigid. The copper came from a scrap box where I had some household copper wire leftover from a project…so, I didn’t have to cash a bond to afford the current price of copper wire!

I use a latex/water based clay to model the carving. The pro’s are i) it’s inexpensive, ii) easy to use, and iii) you can use it with your bare hands and clean everything up with water. The biggest con is that it dries, shrinks and cracks to pieces. The way around it is to drape some wet paper towels over the sculpture at the end of the day and cover it under a plastic grocery bag to retain the moisture/humidity. Once you’ve used it to make your wood carving, you can just let it dry and break away the clay and keep the copper form for your next similar pose.

The value of the clay sculpture is captured somewhat in these next photos. The first photo looked a bit static to me, so by just grabbing the clay and twisting and bending it a bit, it sort of came to life.

Then it was just a matter of smoothing things out with a wet paint brush and adding some detail. I didn’t go overboard with the detail but added just enough to give me an idea of what I wanted to do with the carving.

By taking a few photos of the front and side views and, after a few attempts, I was able to print these off at the size that matched the clay sculpture. I cut these paper templates out and transferred them to the basswood block that I would use and cut everything out on the bandsaw. The things that I liked least about the clay sculpture were the boots so I intentionally made them a little bigger on the paper template so I’d have more wood to play with. Also, note that I could have left the arms on as they’ll be well supported eventually by the banjo but I decided to attach them later to, again, give the TNCC another element of carving to talk about.

And that’s where I am with this project and that’s where we’ll leave things for now!…

Pickin’ and a-grinnin’

Well, we’ve been pretty busy with a whole lot of things…but the best pastime has been visiting and watching my little granddaughter grow. The less interesting items have included finally getting around to clearing out our basement of thirty years of collection and putting a fresh coat of paint on the house interior.

But, now it’s time to get to some caricature carving…so, here goes…

Some time ago, I carved a little female caricature head and have spent a fair amount of time just looking at her and trying to guess what she might become. It turns out…she’s a cowgirl and she can play a banjo!…or, at least, she’s going to learn real soon.

Lynn Doughty has a real neat way of adding a hat and I used that method once again. It starts with basically cutting away the head where the brim of the hat will rest, drawing in the side and plan view of the hat and then taking that pattern to the bandsaw.

What follows is shaping the brim and crown and using a piece of graphite to etch one side of two mating surfaces such that an impression is left of all of the “high spots” that need to be removed in order to get a tight mating surface. The dowel that you see is handy in that the two surfaces are always placed back in the exact same spot as you continue to transfer the graphite high spots to the adjoining surface. Without using the dowel, you’d be chasing the high spots all over the place as the two mating surfaces keep landing in different spots. It’s a quick and brilliant method of getting a nice tight seam, and, in the case of hats, leaves the impression that the hat surrounds the head rather than just sits on top of it. Thanks Lynn!

I start with the hat brim. After I’ve cut out the plan view, I tack the pieces back together with a bit of carpenter glue so that I can cut the side view with a flat surface to run along the bandsaw table. Once it’s cut out and I break away the previously tacked pieces of wood, I begin gouging out the top of the brim and I also shape the underside. Notice that the grain of the wood is running front to back.

Using the “graphite transfer” and locating-dowel-method, I slowly carve away the high spots until the head sits nicely within the brim of the hat. The crown is cut with the grain preferably running top to bottom ( I find it easier to carve this way. ) With the dowel now drilled up through the brim and into the crown…the head, brim and crown are all aligned and will stay that way while you graphite the top of the brim and let the high spots transfer to the bottom of the crown. Now, just cut away the high spots marked on the bottom of the crown until you are happy with the fit.

Add in a little band around the crown, use a nail brush and hand soap to scrub away all the left over graphite and then sit this part of our little gal aside while we consider the body posture.

Post Navigation

%d bloggers like this: