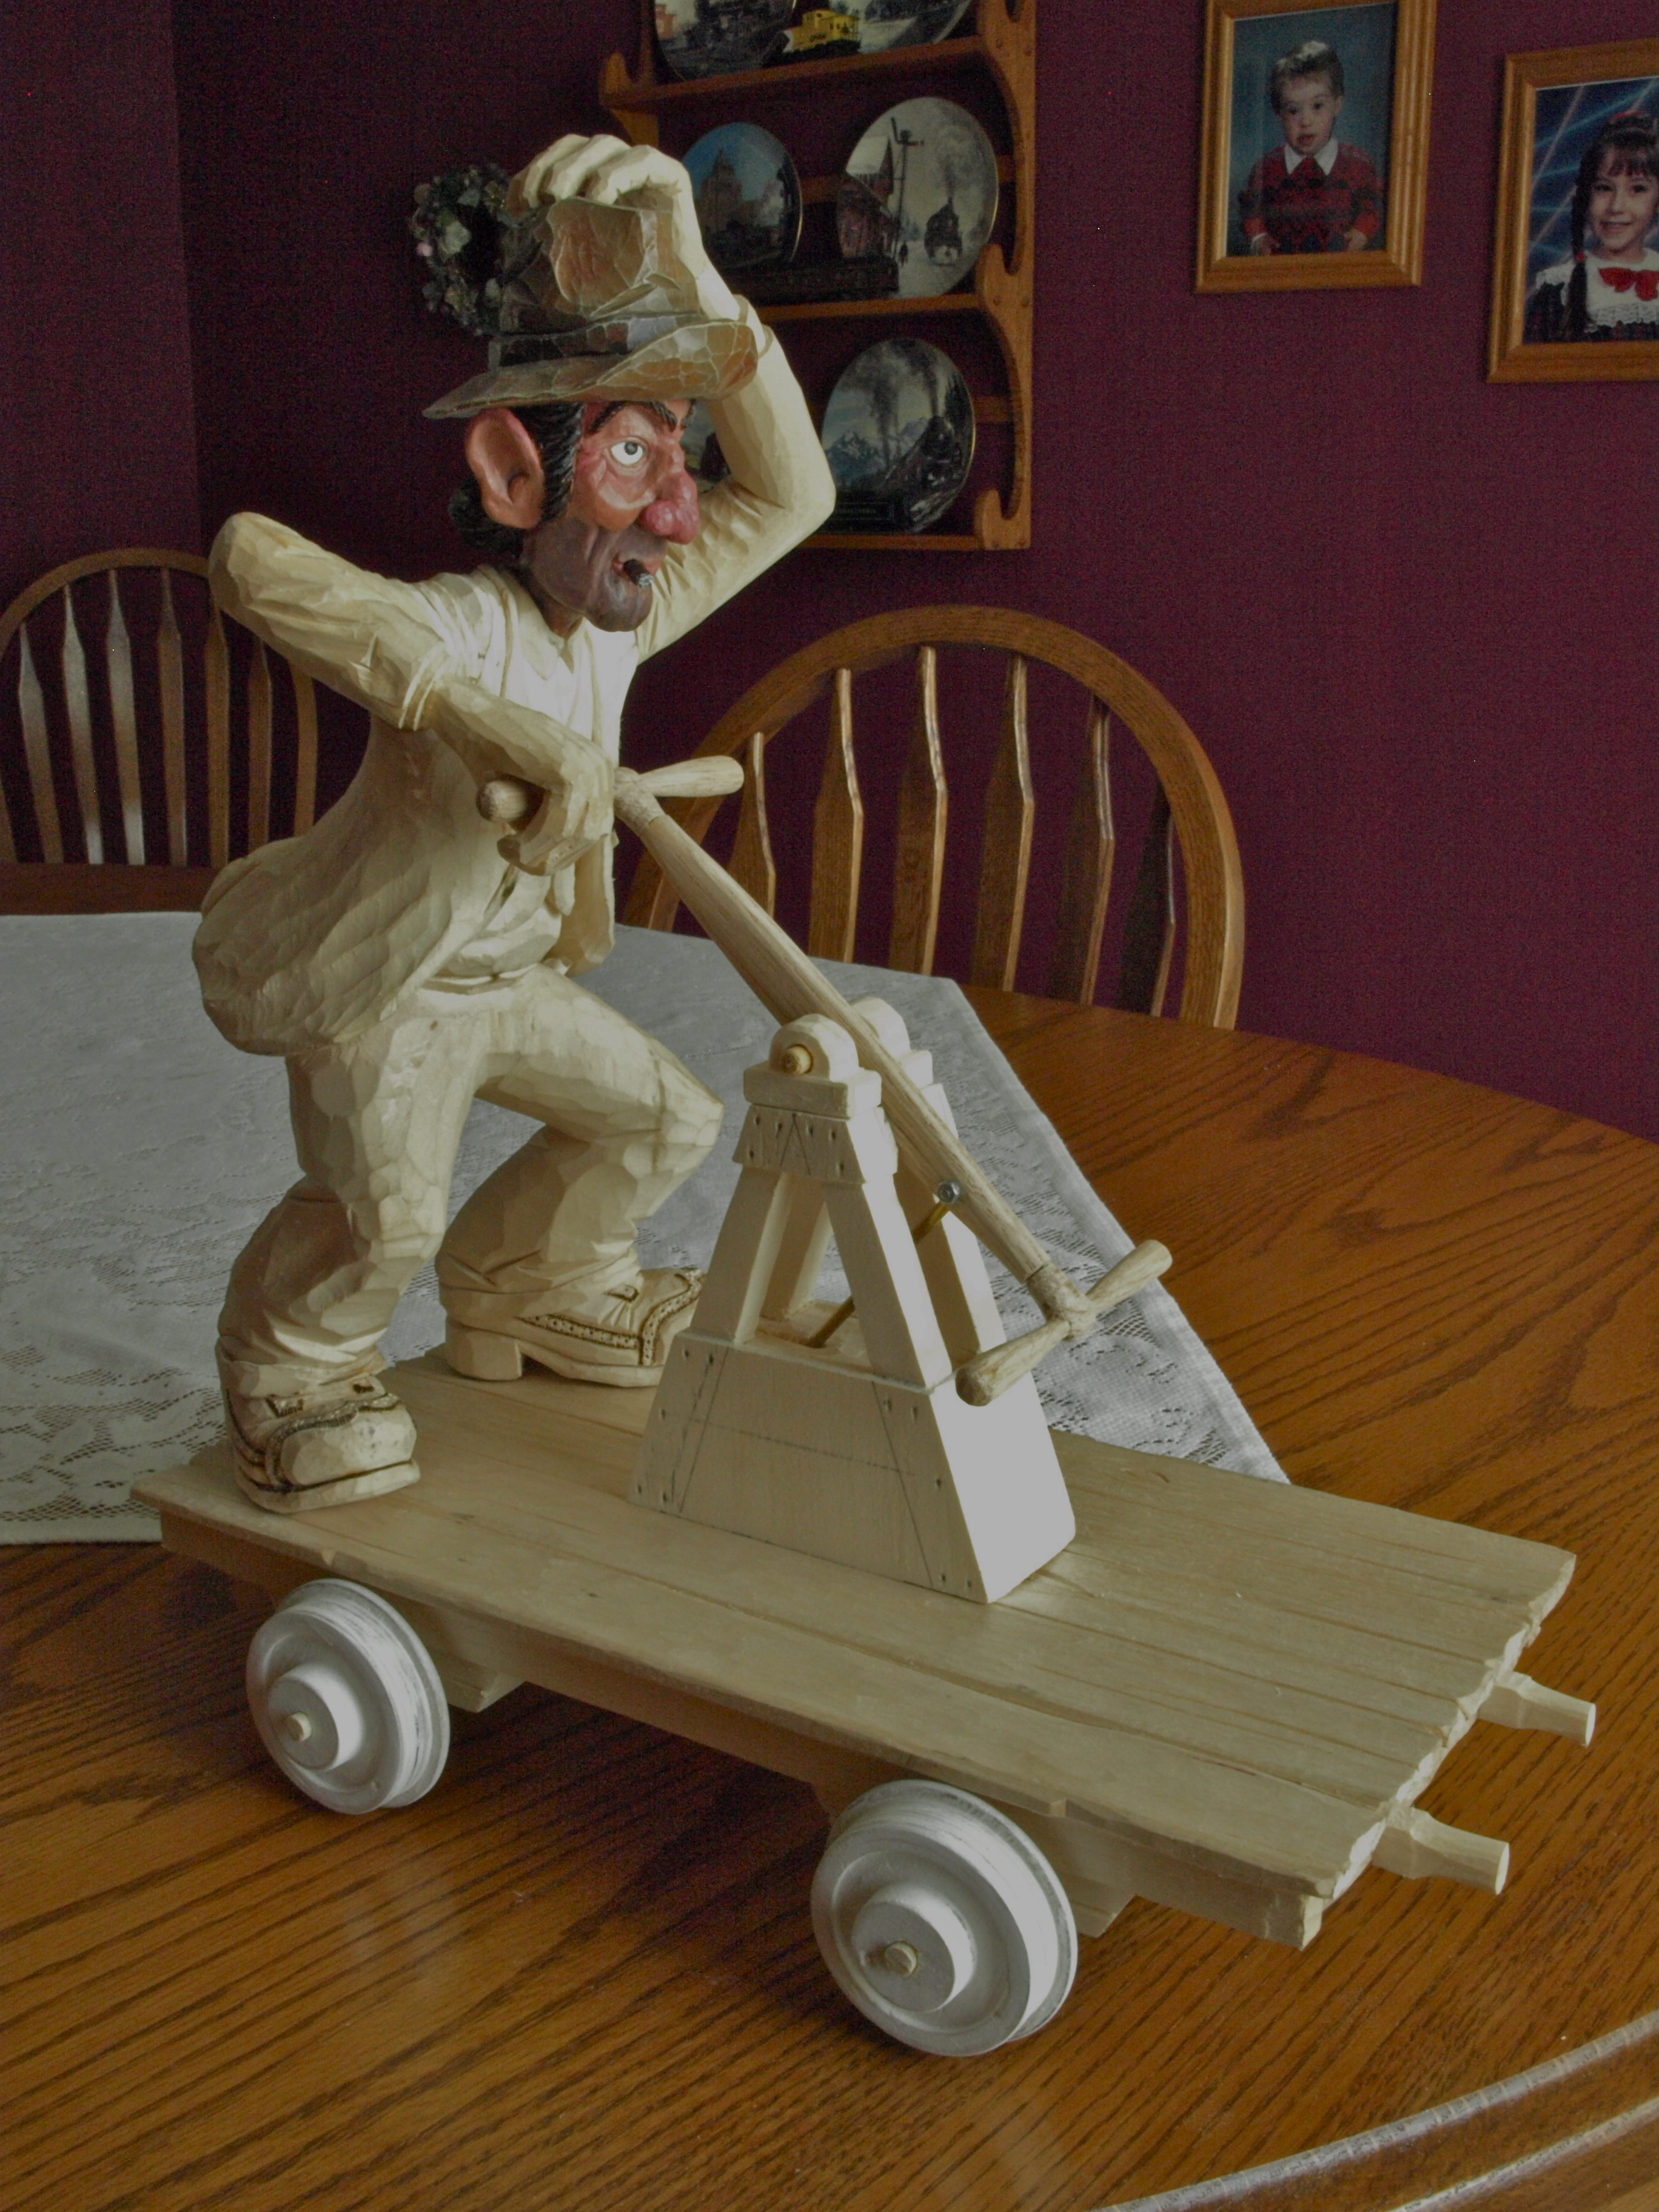
Kingston Pembroke Railway
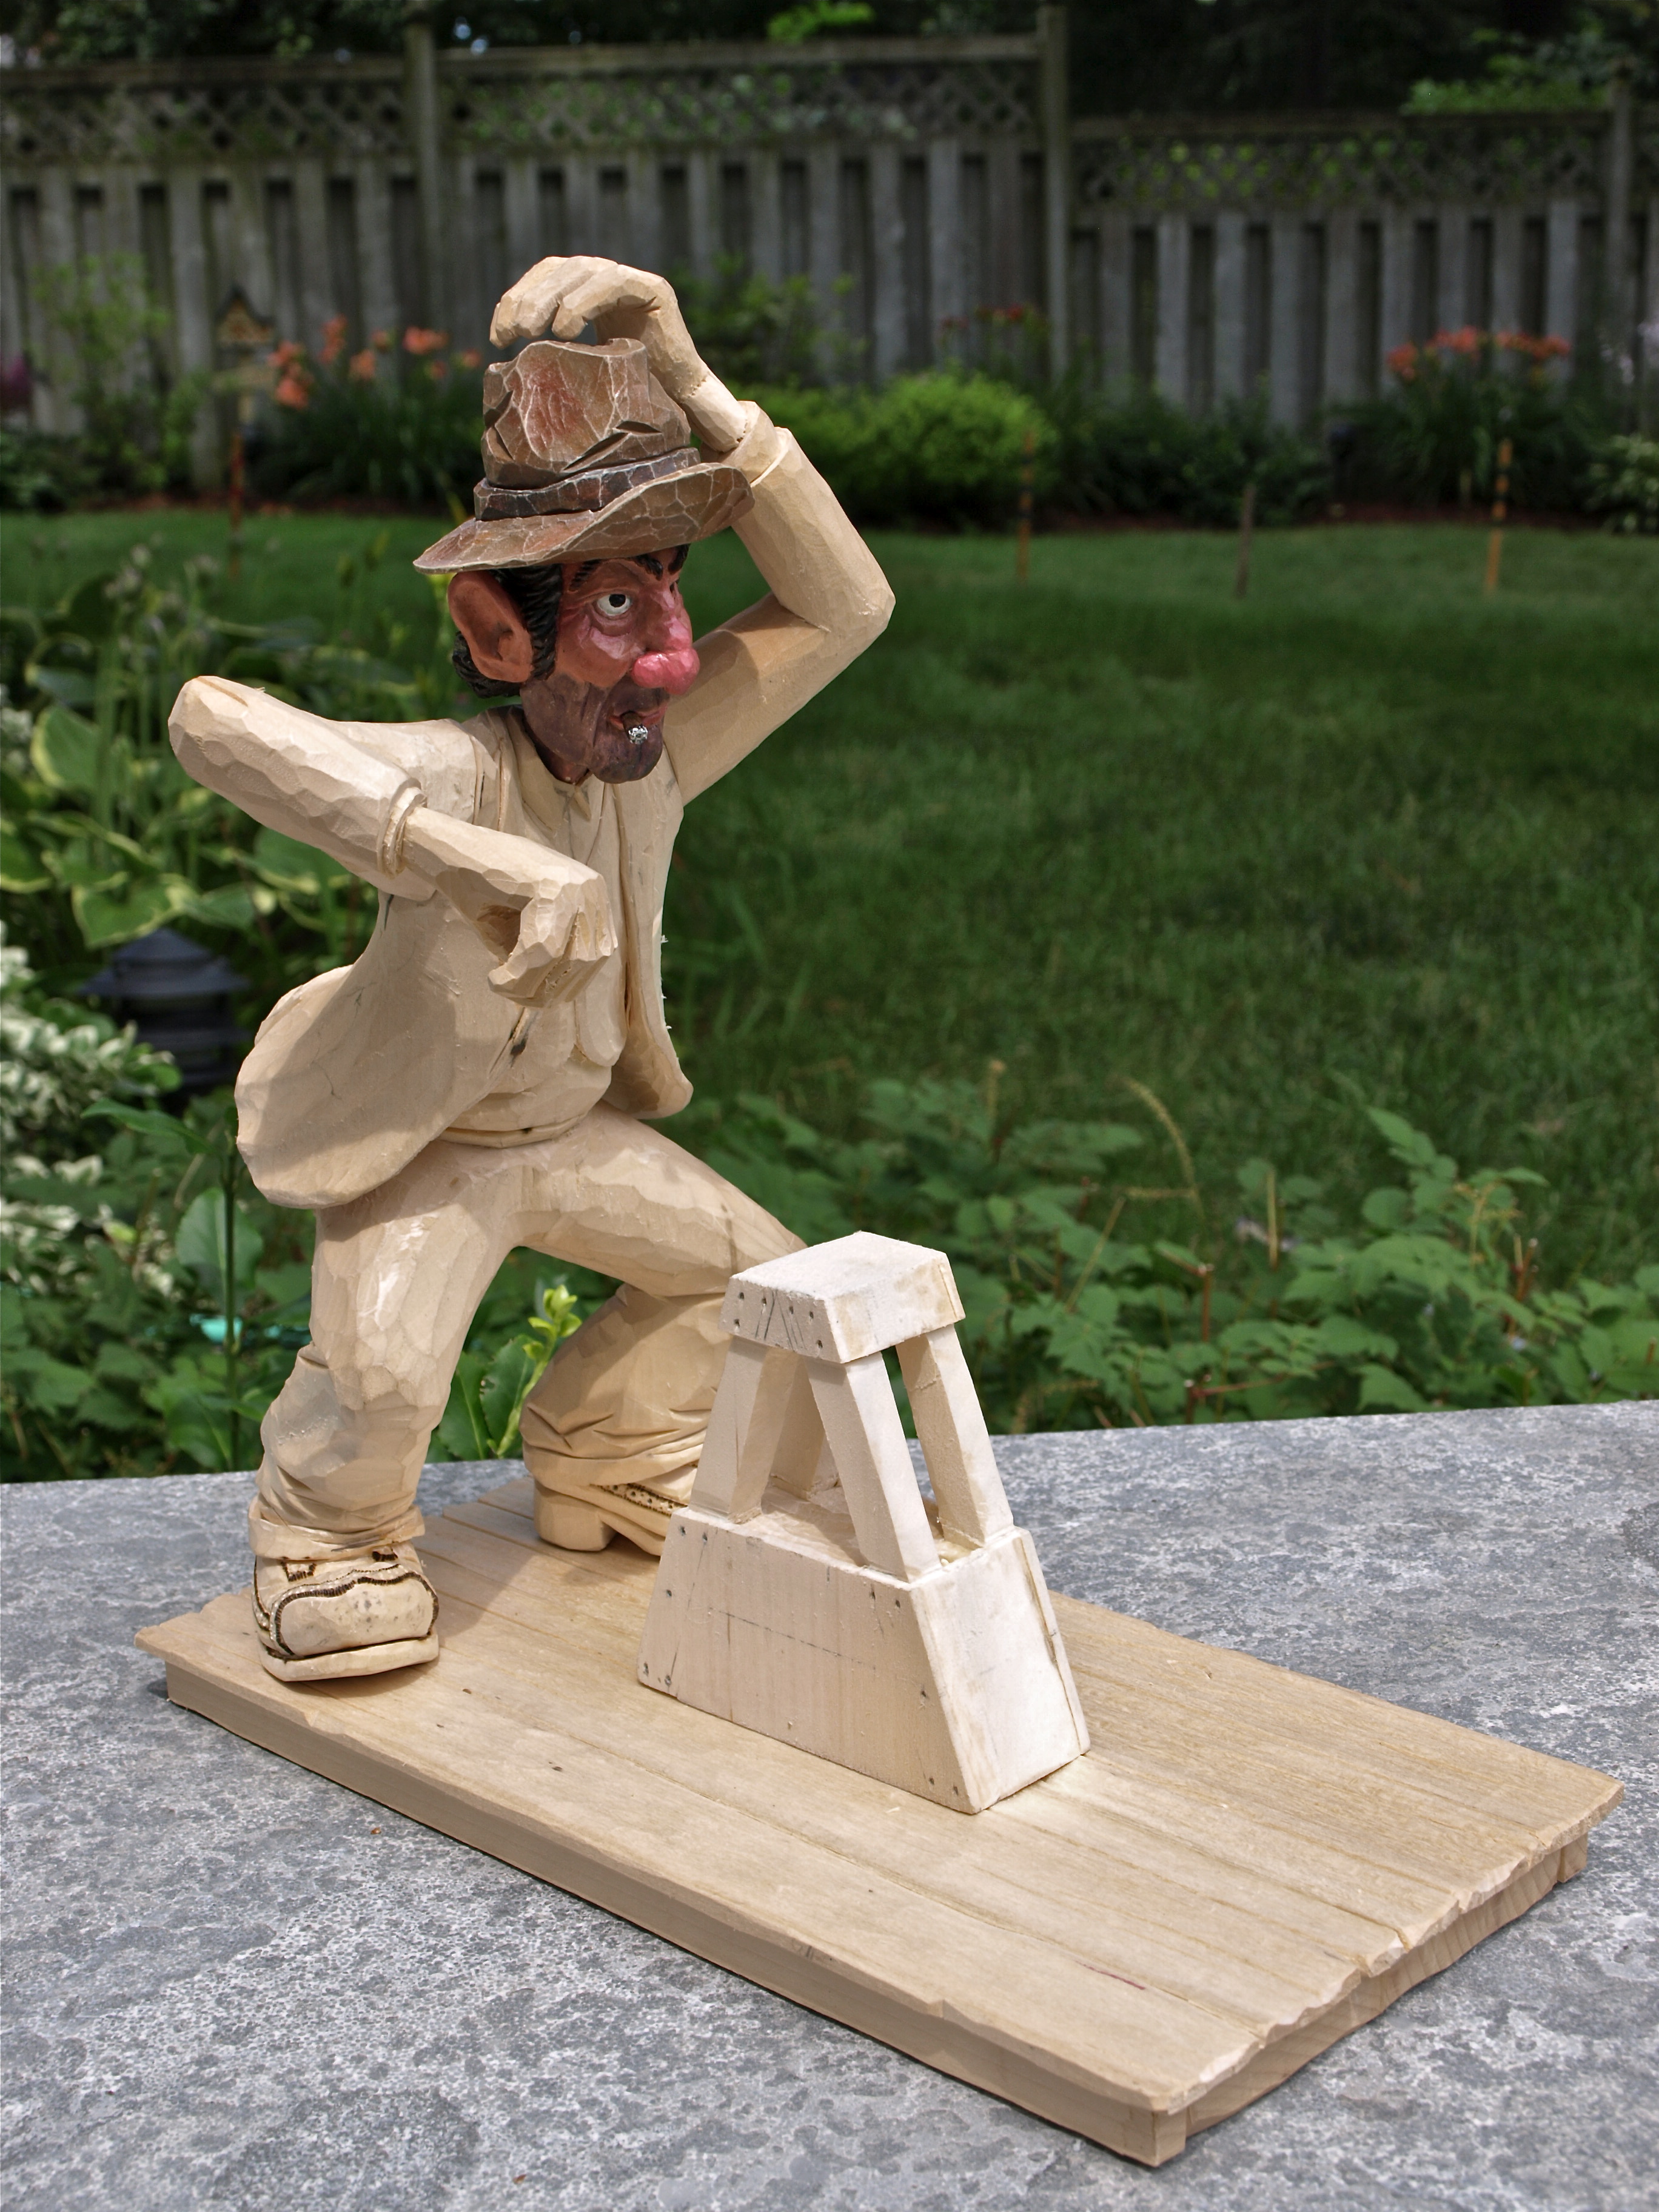
The pump-car got a paint job started yesterday. Originally yellow in colour, you can see that it’s been out in the weather for a while ( just like Ned ) and looks a bit worse for wear. The weathering with browns and greys was actually a lot of fun. I’ve started putting some nail holes in the floor boards and will add some rusted-looking nails in a while.
Still a bit more to do on the pump car but I did add a weathered looking “Kingston Pembroke Railway” logo on the sides of the pump car. I used old “Letraset” letters ( remember those? ) which are transferred onto the wood with a bit of rubbing. Following that, I took a sharp knife and removed some portions of a few of the letters to make it look weathered as well.
The Kingston Pembroke Railway was a line that existed in the late 1800’s up to the mid-1900’s and served a wide area around where I live. Known as the K&P it was often referred to as the “Kick and Push” railway…which might give us a hint as to its reliability at the time.
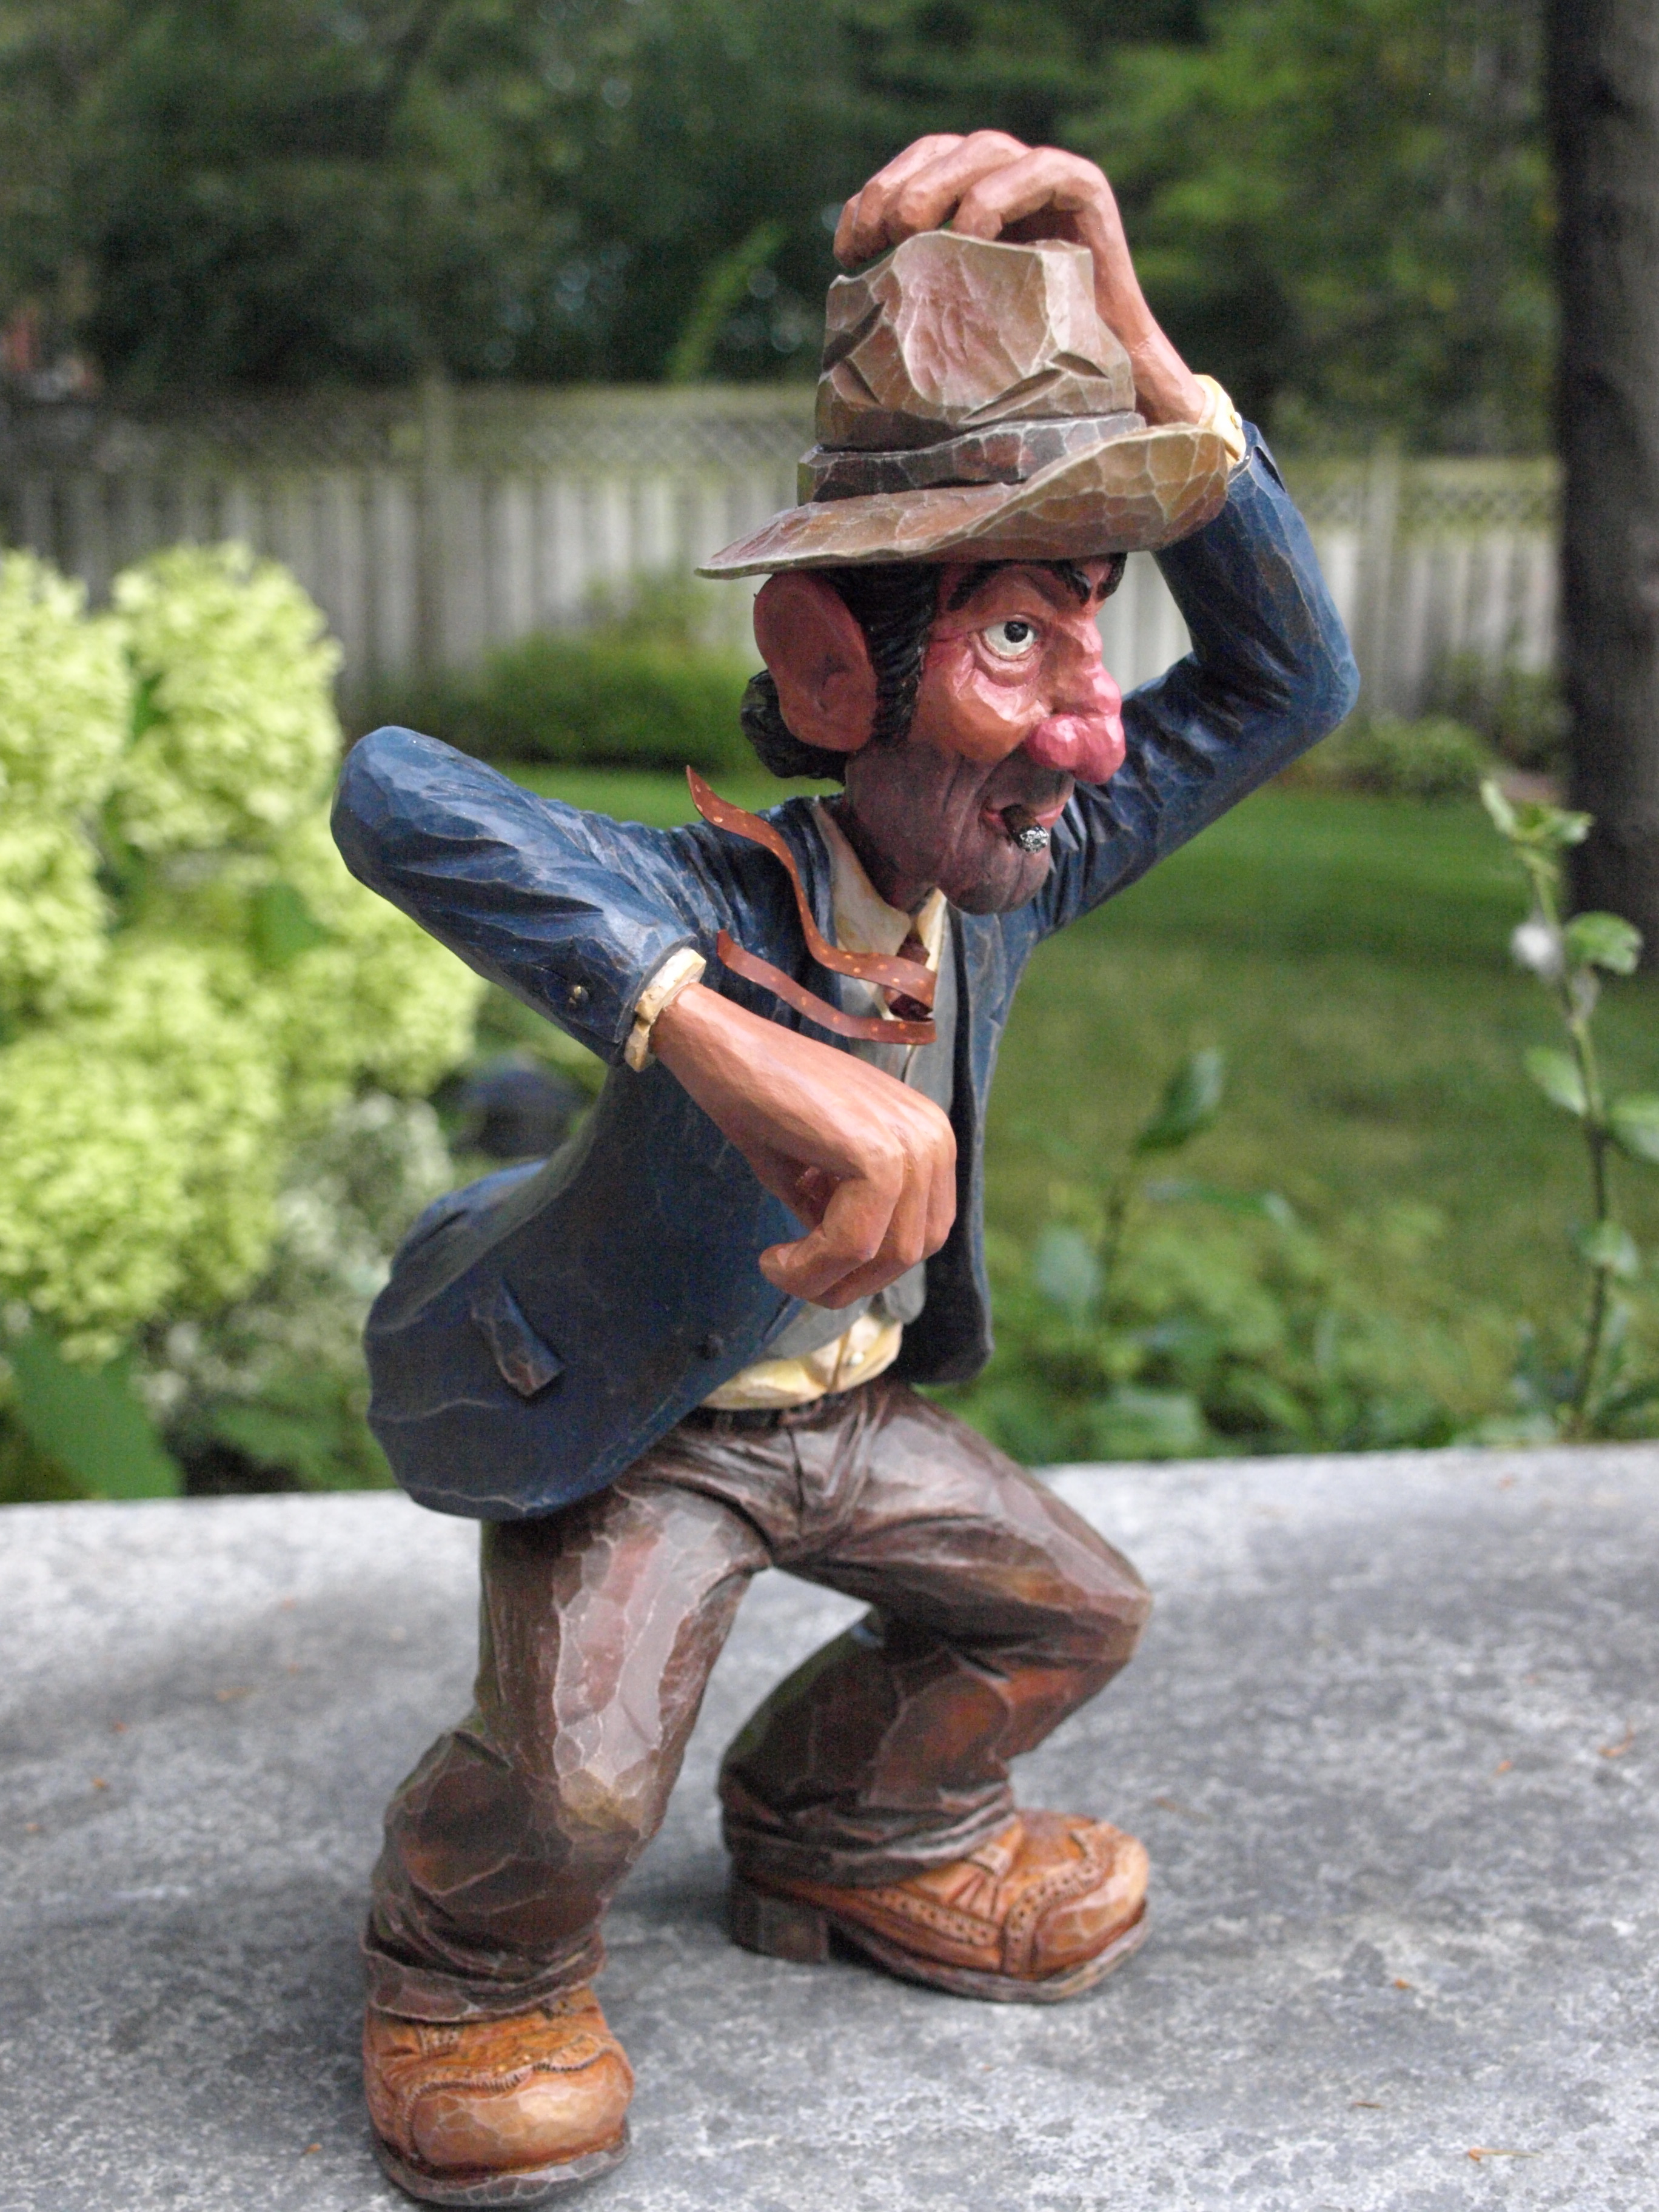
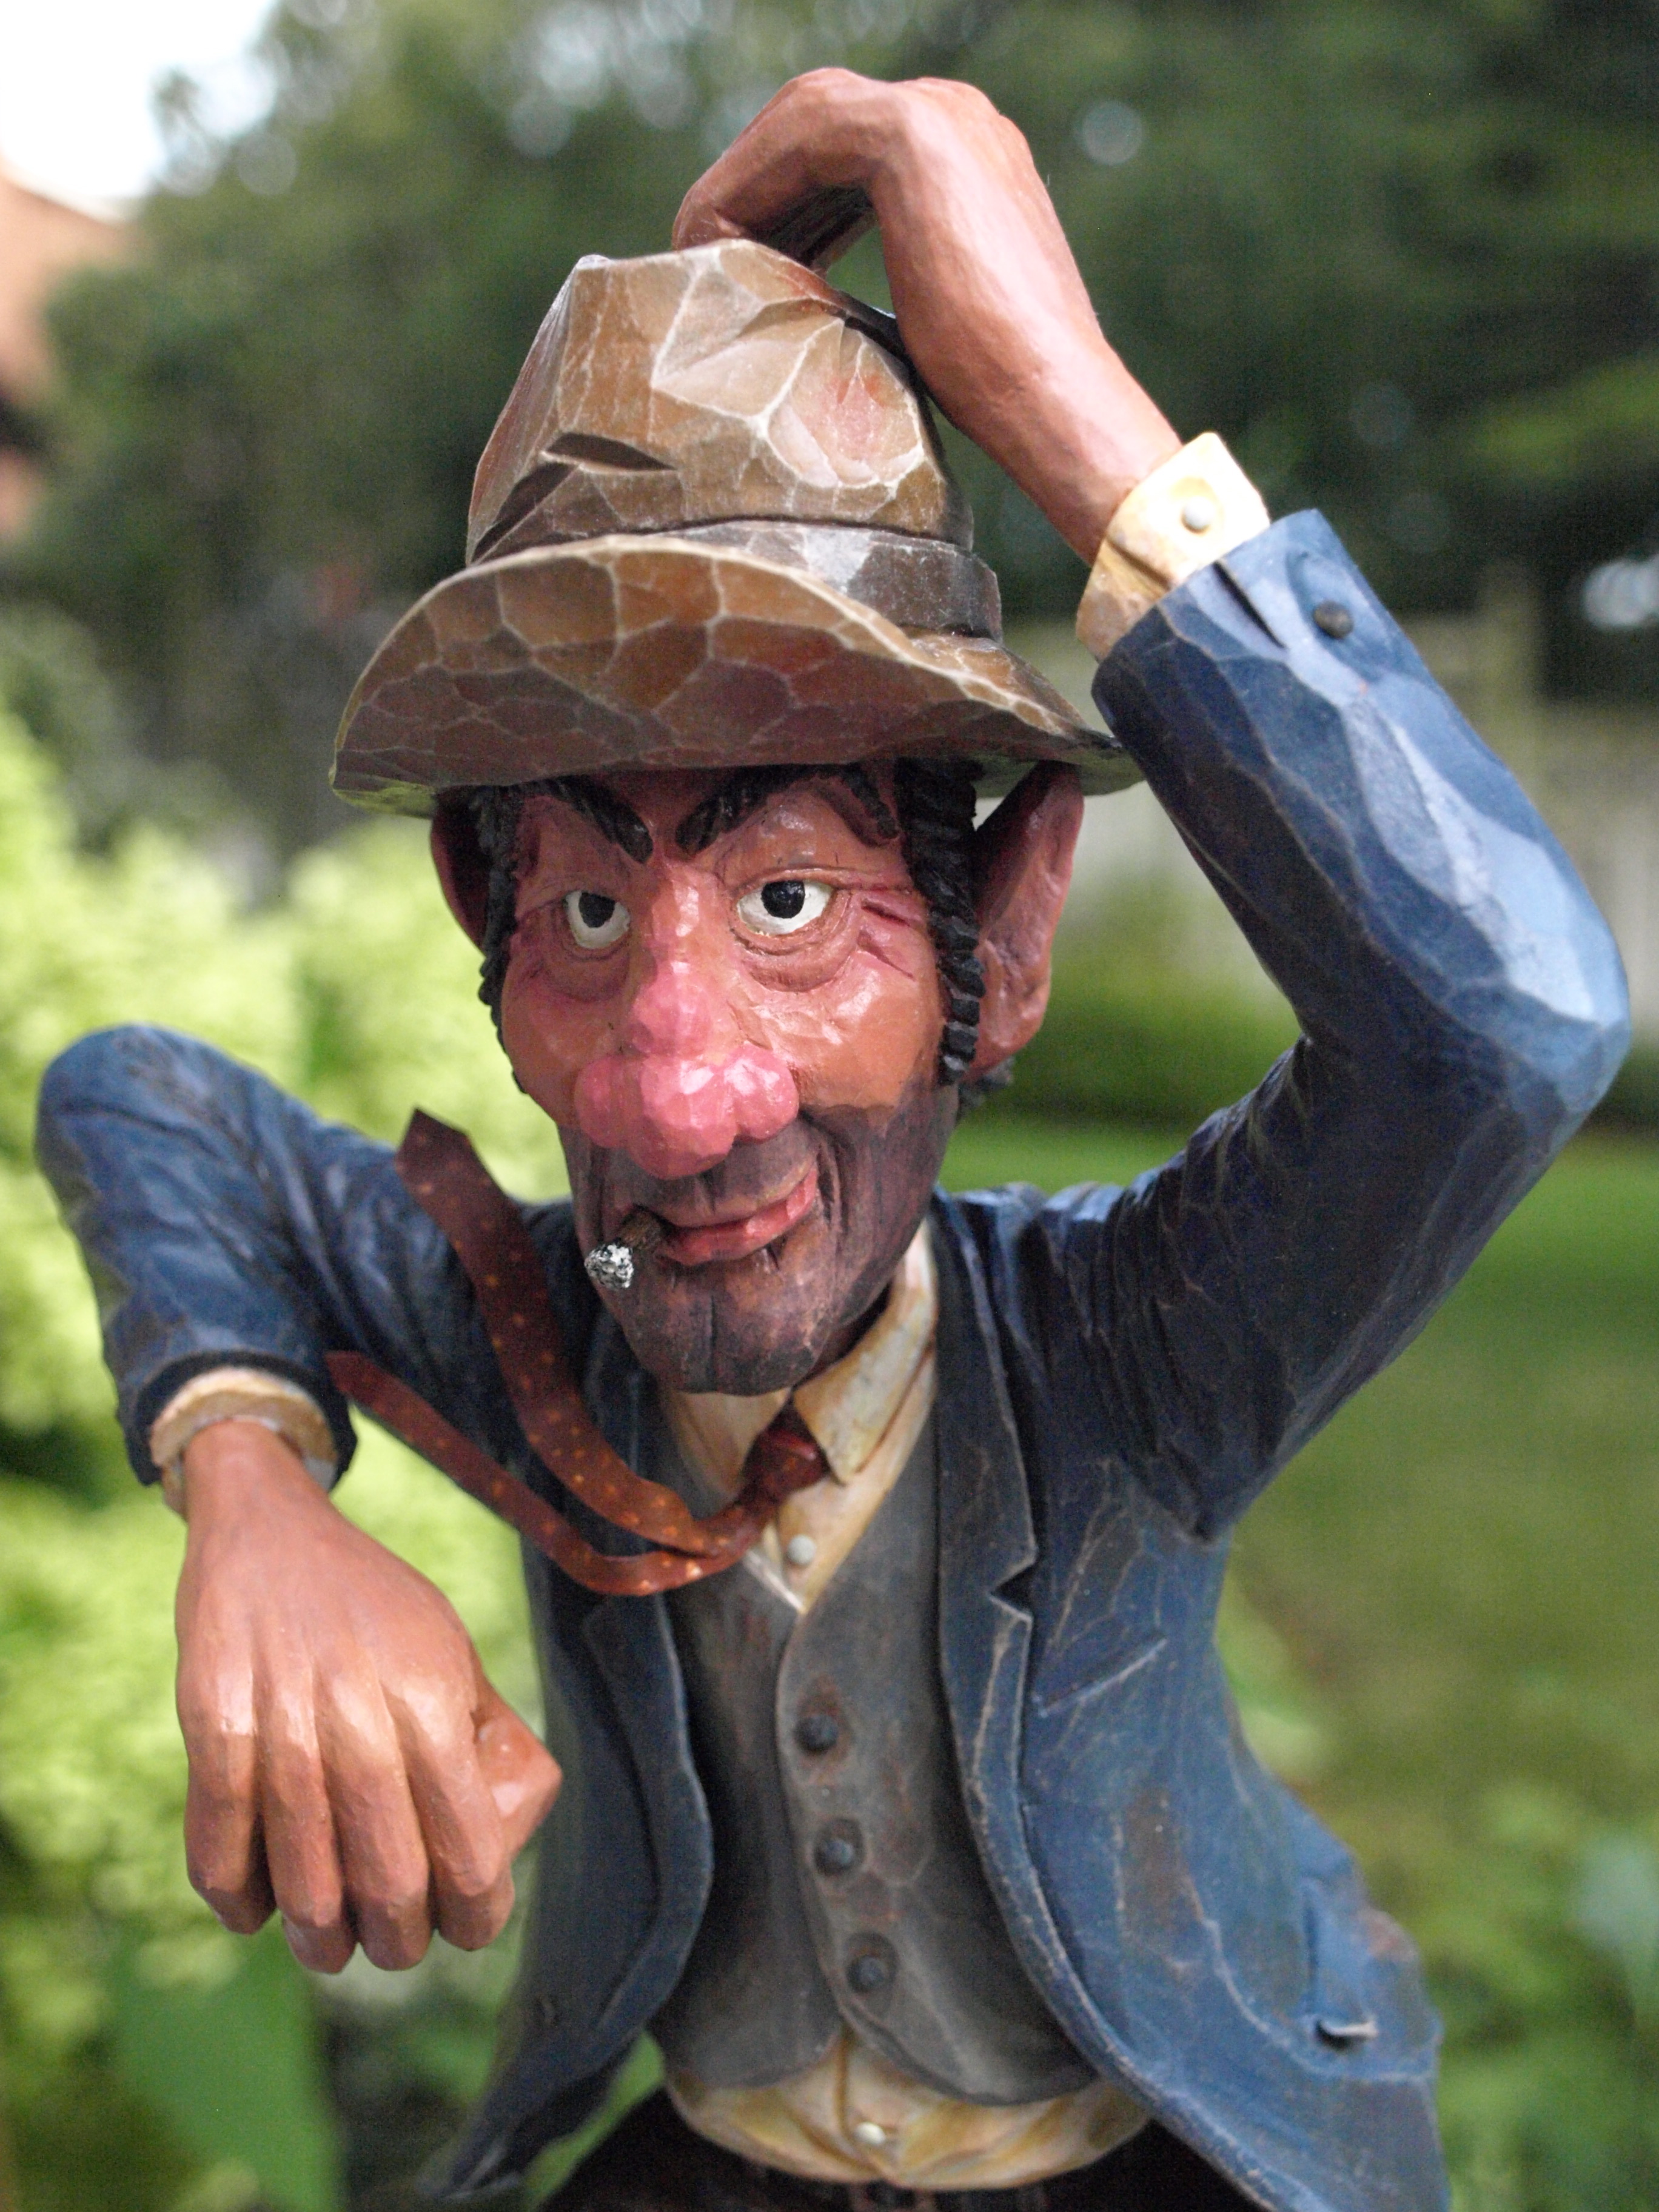
The other fun item that I added, and which is a bit difficult to see in these photos, is a Canadian Pacific brochure from the 1930’s. I found this on the web and reduced it down, printed it on photo paper and backed it up with a small piece of house flashing ( metal ). Ned’s holding it in his left hand. Across the top of the brochure it says ” Across Canada “. A fun little extra touch.
More updates to come soon.