
Positioning the Rider
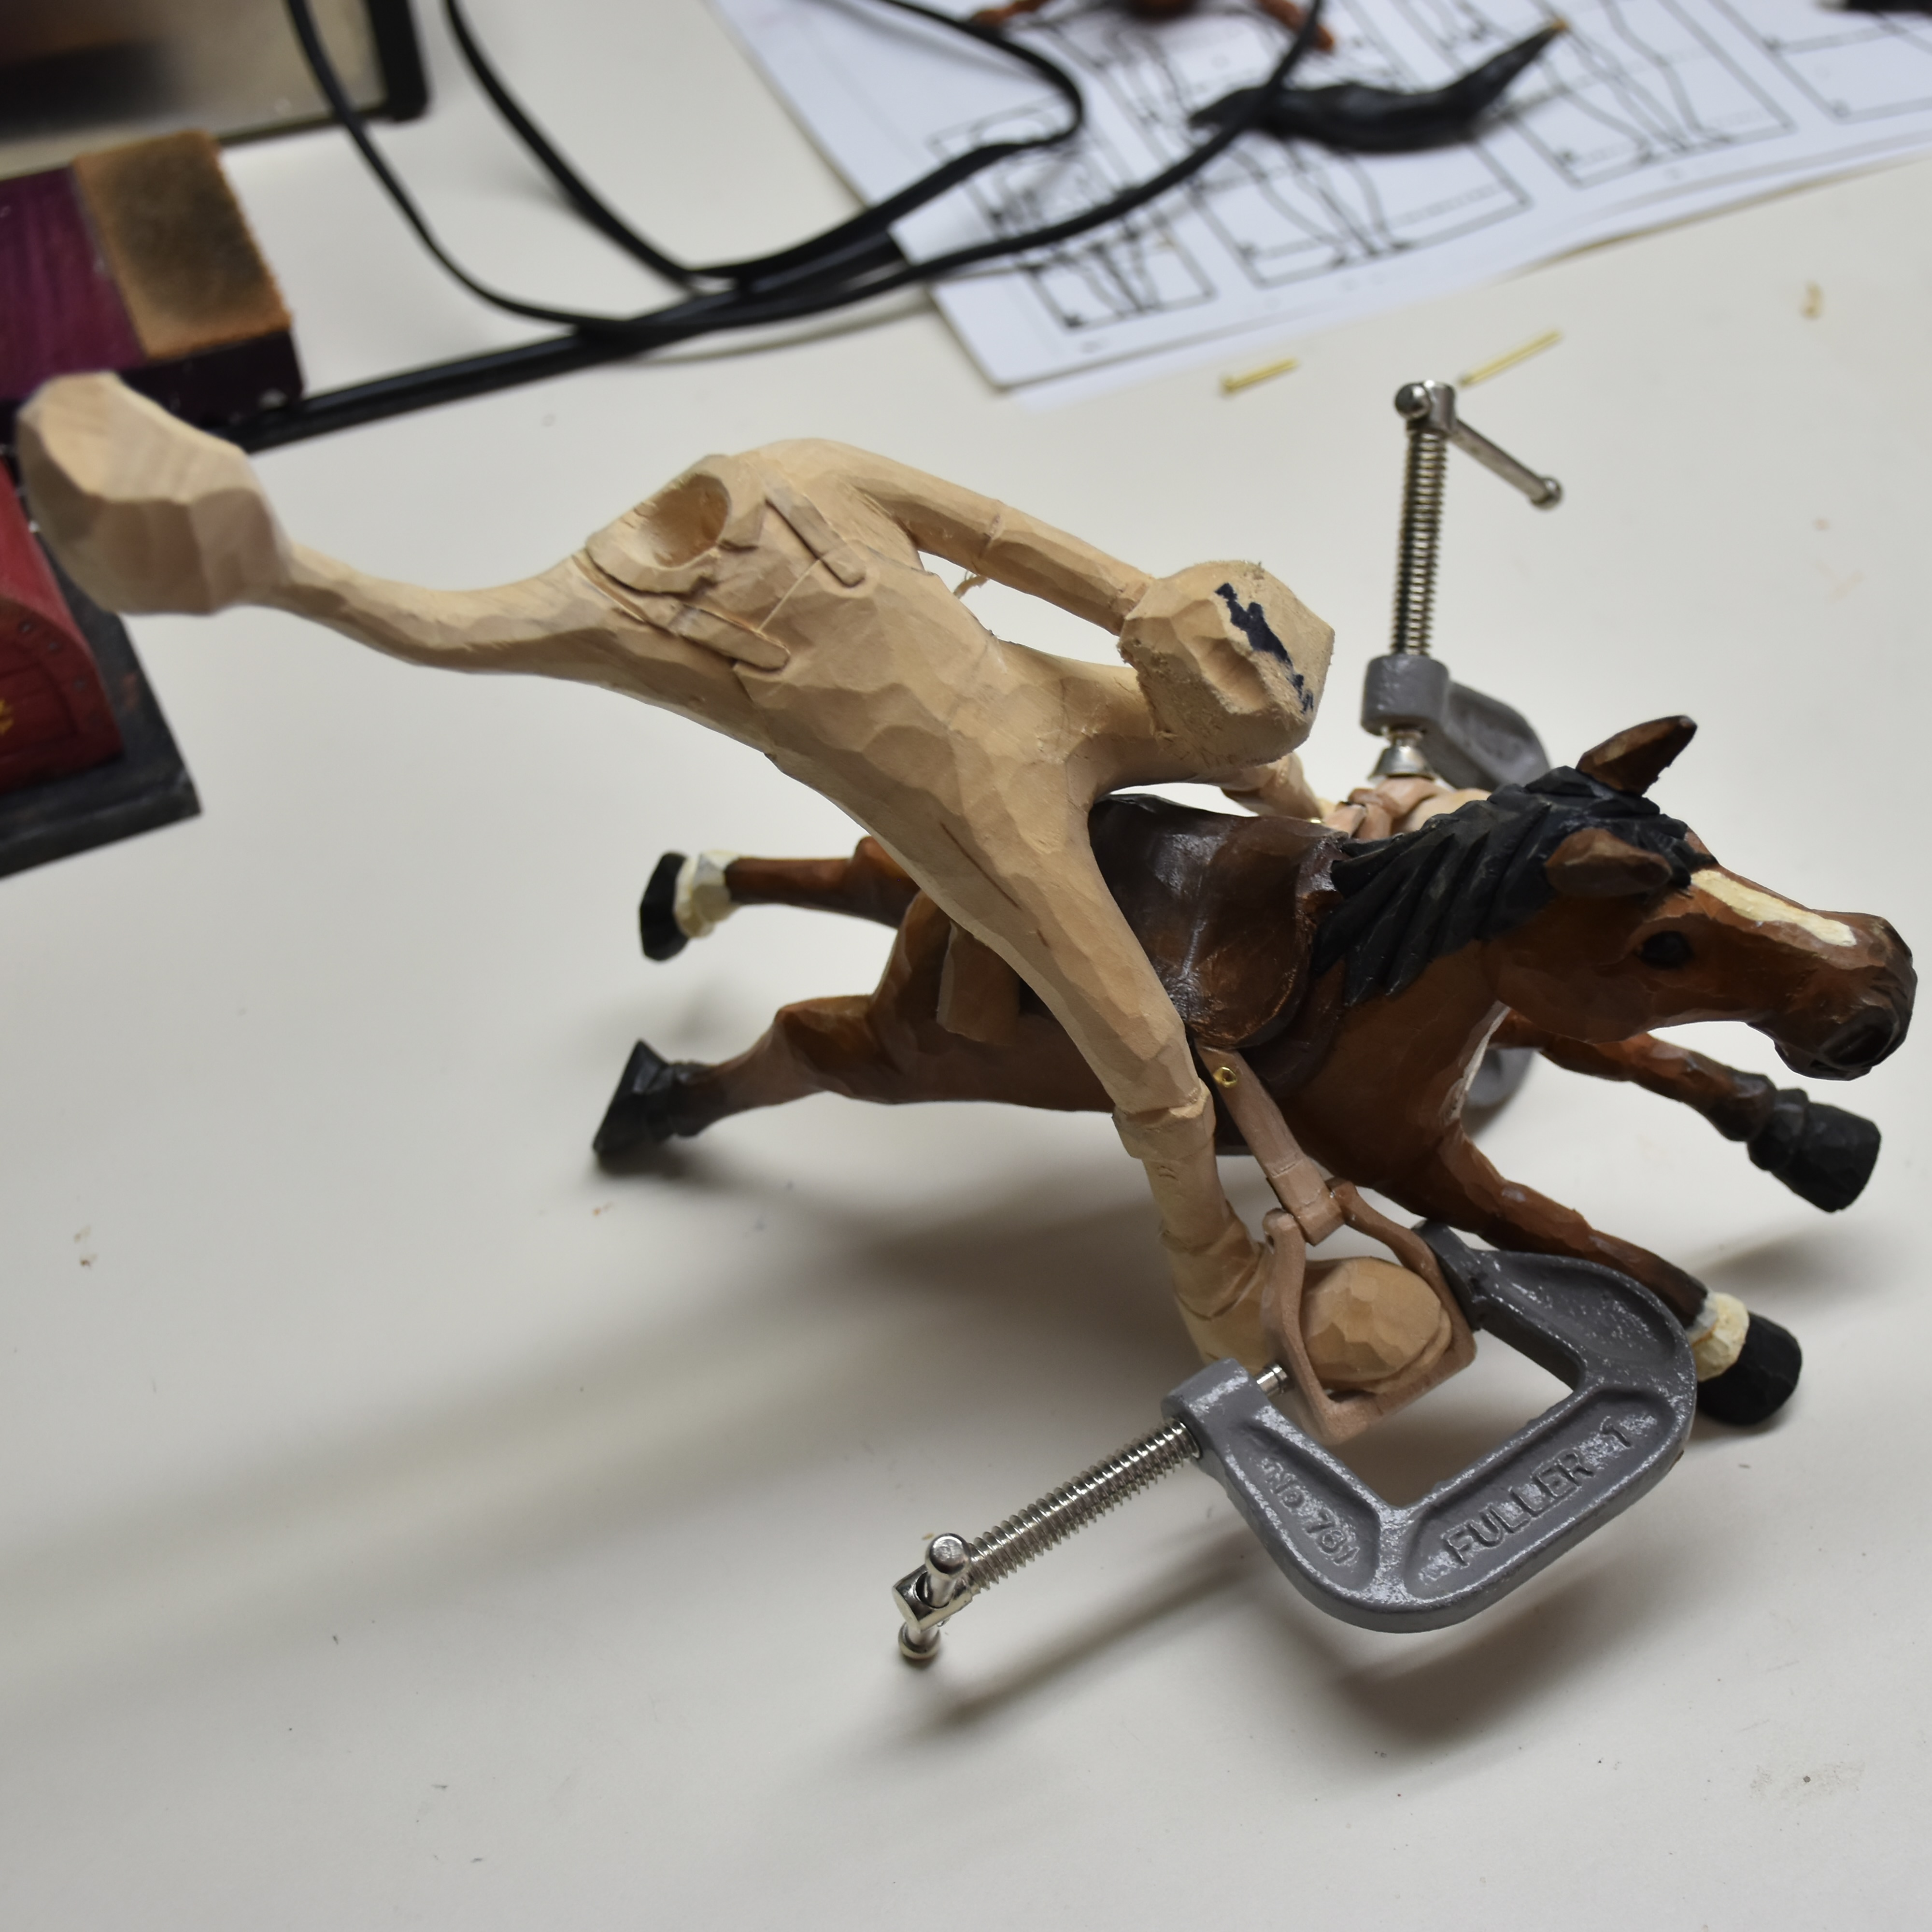
Now I was at the point that I needed to start making some decisions as to the positioning for the body of the girl rider. I wanted to get as much motion in this carving as possible, so I went with a body position that you would see in a rodeo rider on a bucking bronco!
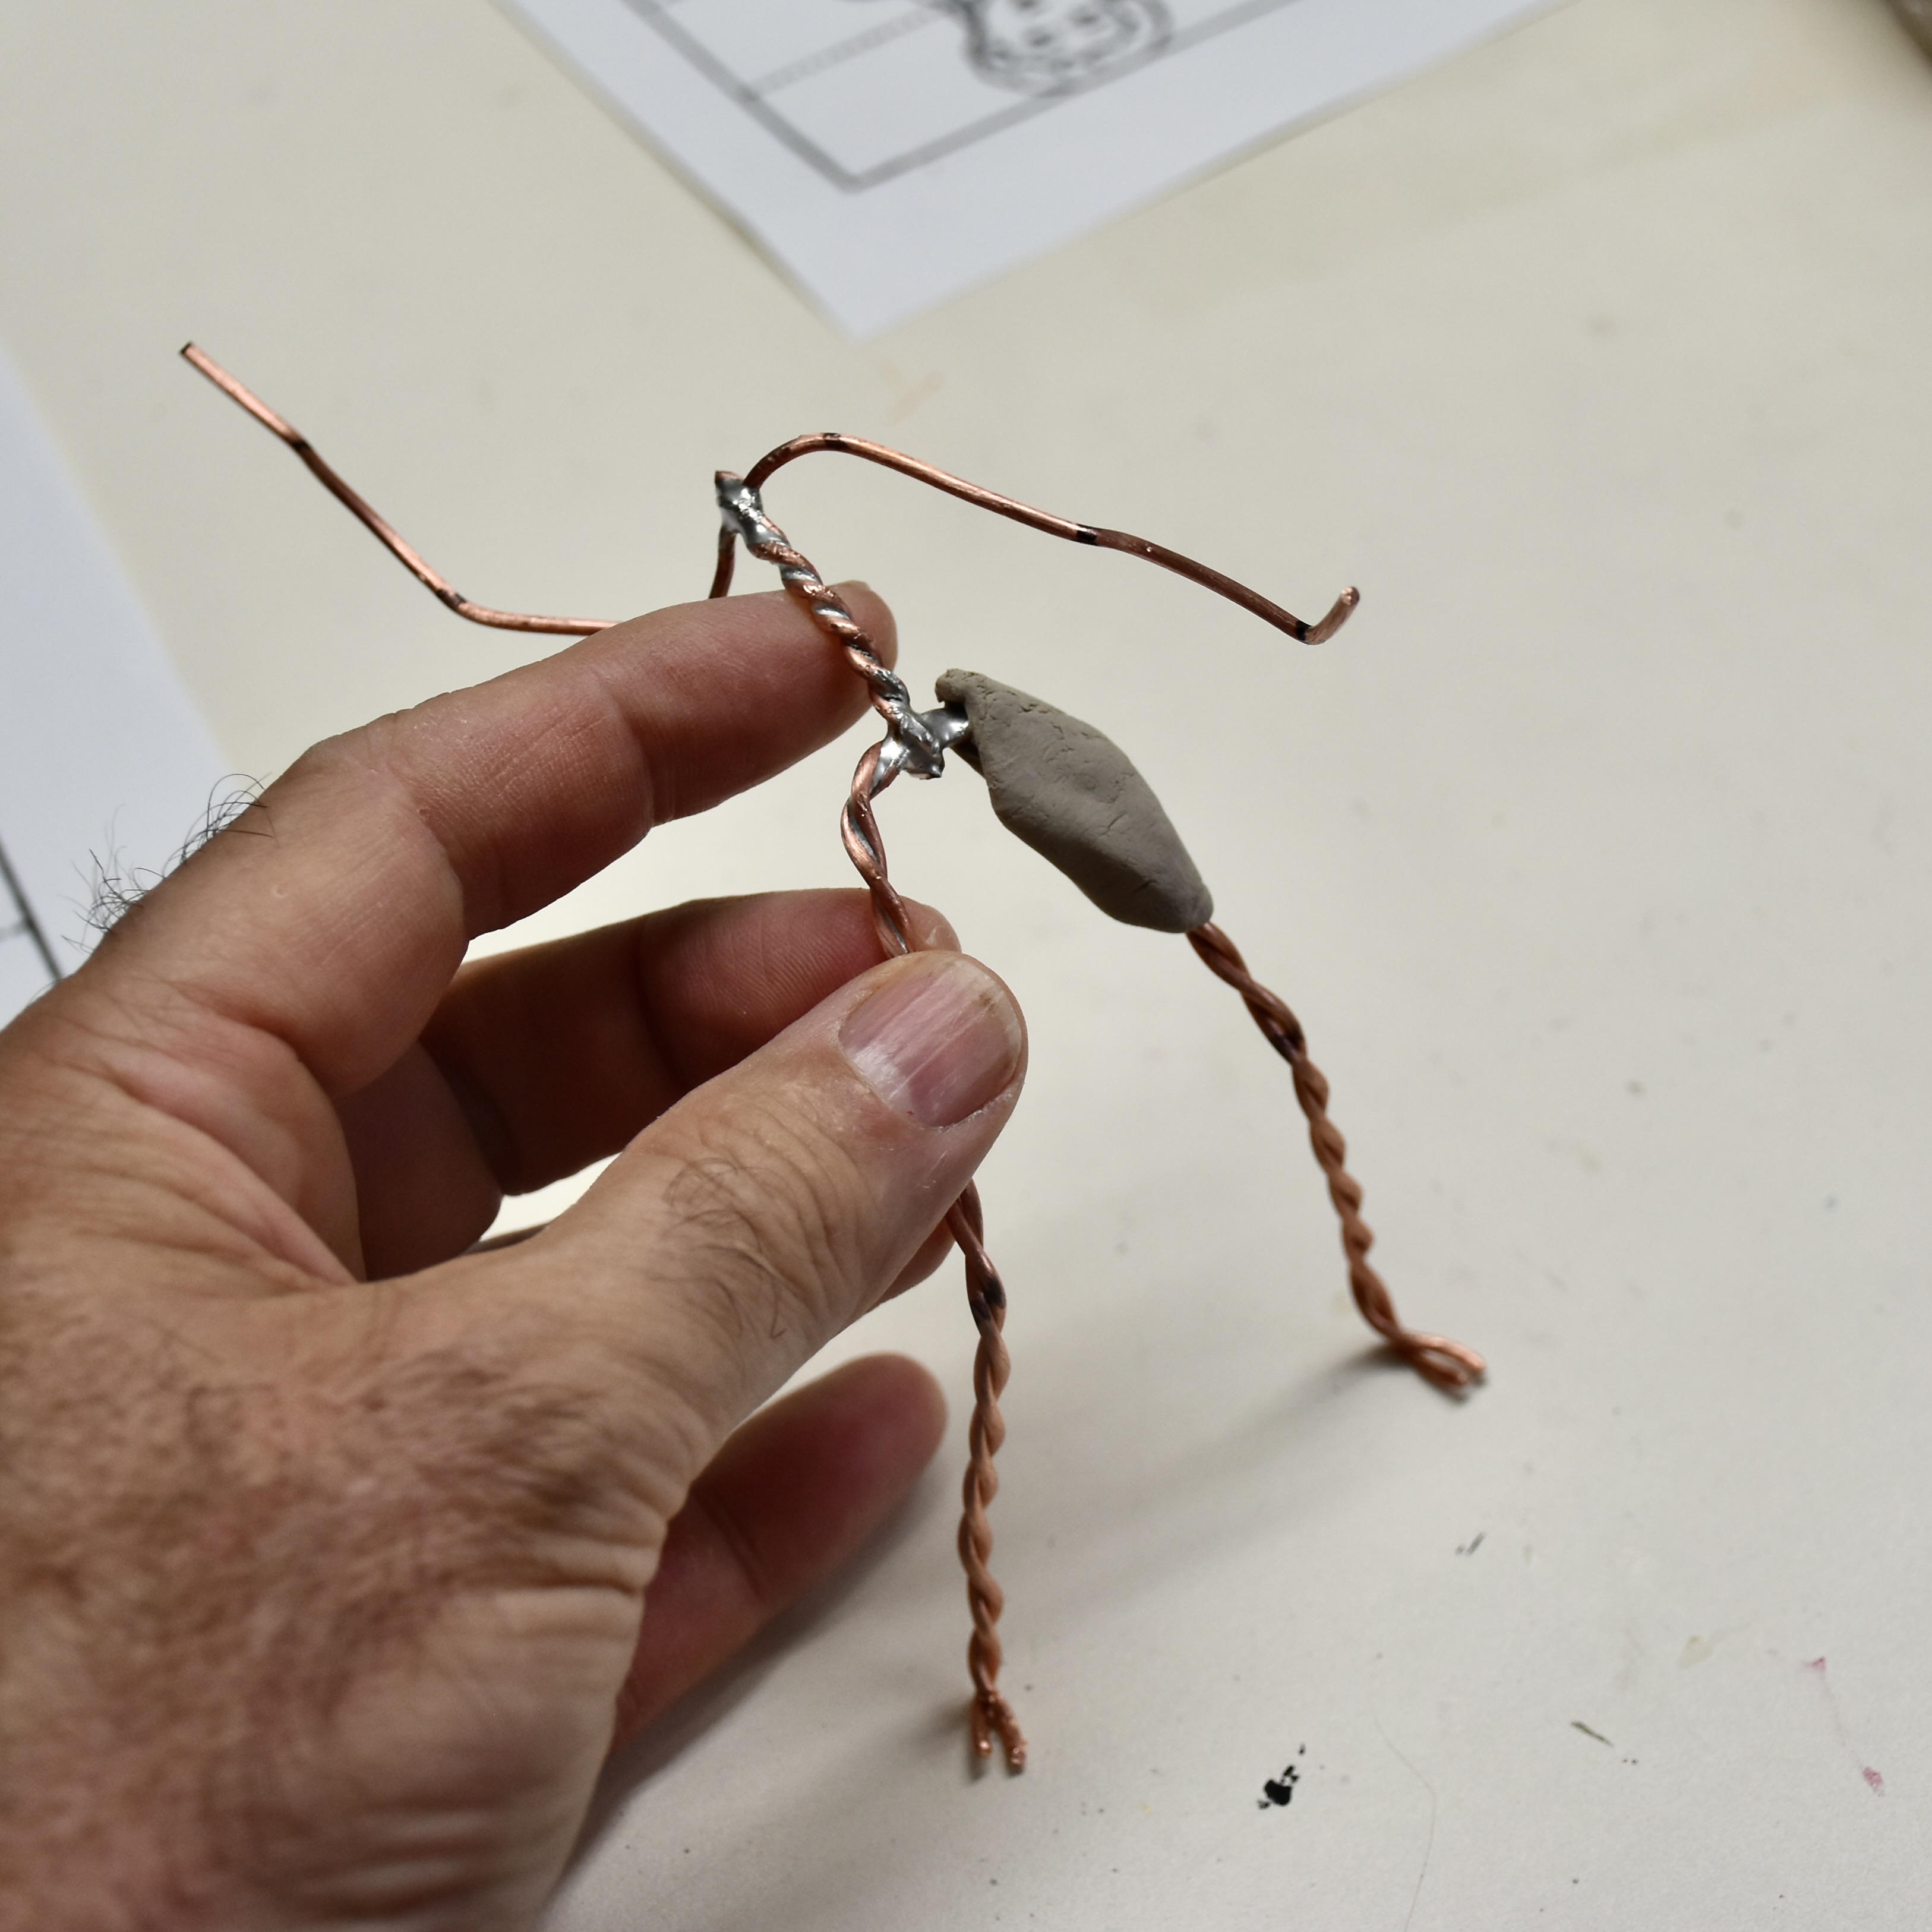
I found some body proportions measurements for a young girl off of the web and put together a copper wire wound skeleton that I could build a clay model around. I soldered the hip and shoulder connections so that it would be nice and strong and allow me to bend things around to my liking without the worry of something breaking or not holding its shape.

Adding clay and building up the body outline is done a “pinch” at a time. With a bit of practice, you’ll find that you can build the body outline, position it and bend it around to its best position within an hour. Following that, a couple of quick photos front and side, sizing on the printer and printing out a template to transfer to basswood…and you’re ready for the bandsaw. The last photo, below, was taken after I spent a few minutes very roughly shaping the square-ish cutout from the bandsaw.


As I began trimming down the girl’s outfit to a denim overalls look, I started to worry a bit about the strength of the carving. In particular, I wanted her standing and leaning way back on the stirrups and off of the saddle…and there was no way that I was going to make the stirrups rigid enough and rigidly attached enough to her feet and to the horse for that to work. What I arrived at was the need to have her bottom off of the saddle but attached to something. So, I stole an idea from Lynn Doughty’s caricature horses ( thanks Lynn ) and added a rolled up blanket which would be just large enough for her bottom to rest on. The bottom of the blanket roll fits the contour of the horse’s back and the back of the saddle nice and tightly so that I can be sure that I’ll have a good glue joint.


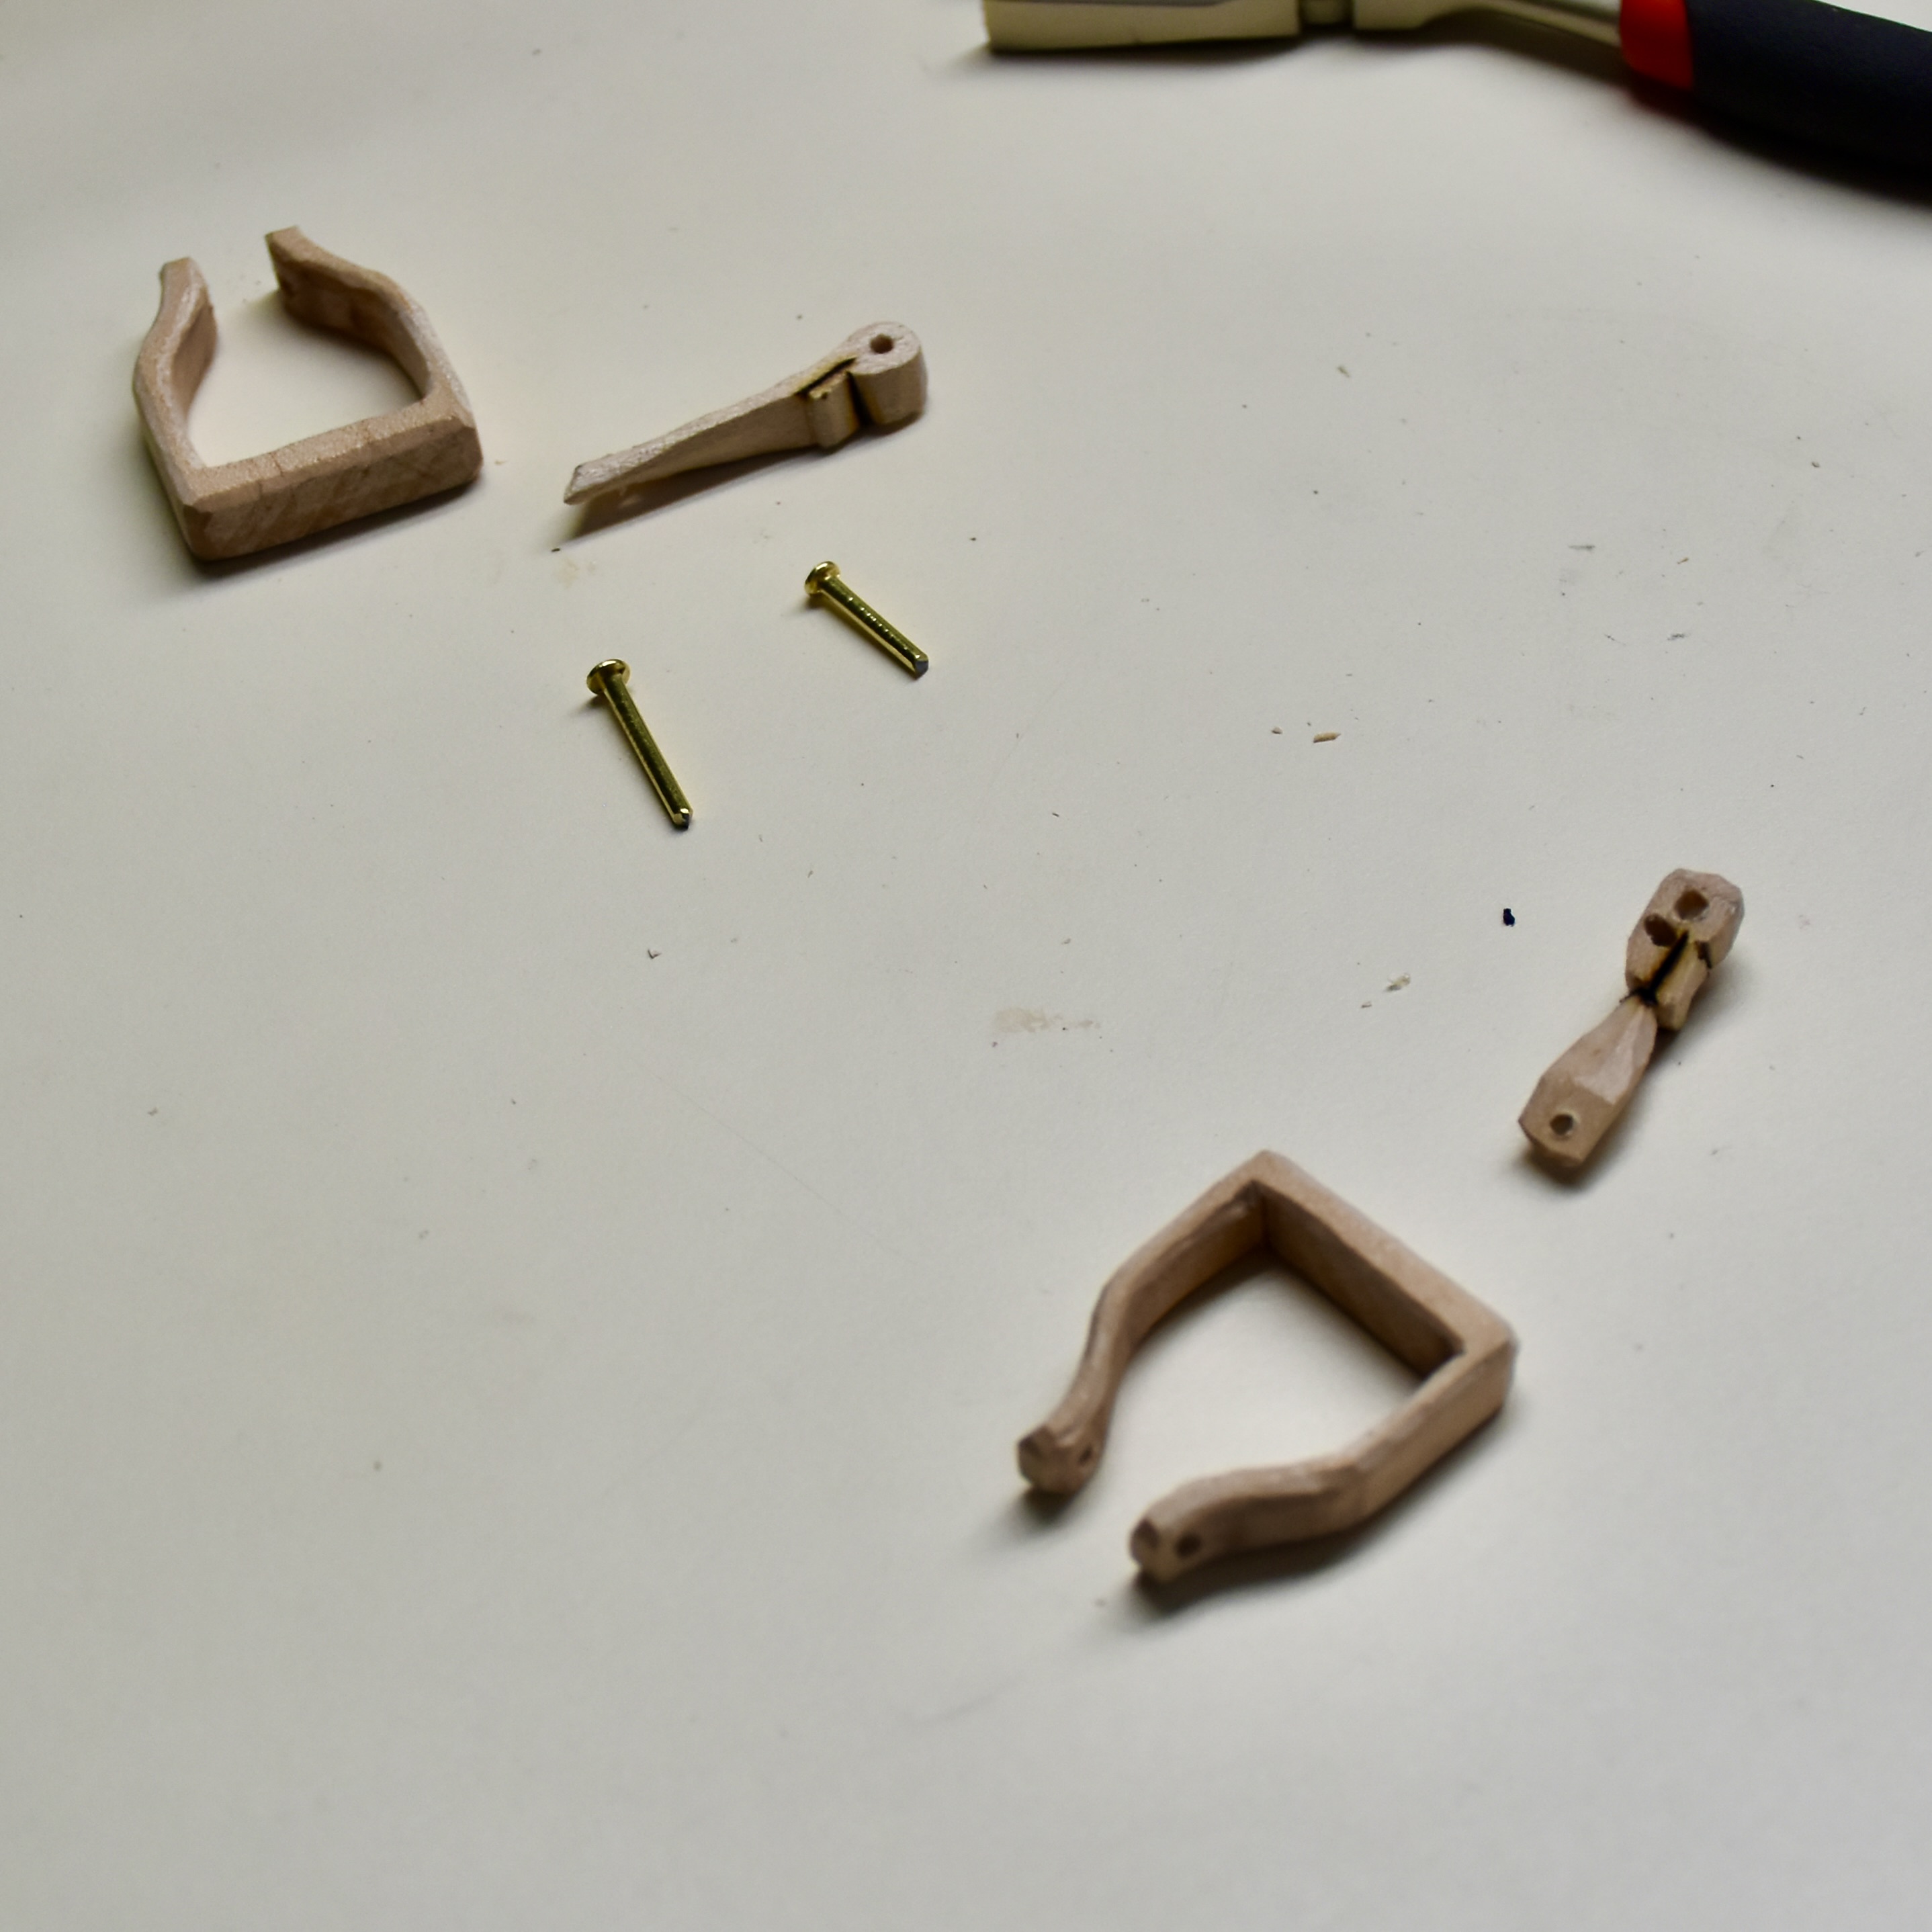
Now for the stirrups and the positioning of the somewhat carved body. I’ll start by saying that I’ll not make the stirrups in two pieces ever again. I had it in my mind that I’d need to articulate the stirrup and the stirrup leather to fit the position of the legs. After too much work in making the separate parts, drilling the stirrup for a nail “hinge” and then gluing everything together…I realized that I would have been just as well off by making the two pieces in one straight piece. I did enjoy carving the stirrup leather, though, as it had an interested half twist to transition from the saddle to the stirrup. When the girl’s feet are glued to the now solid stirrups and her bottom is glued to the blanket…things should be pretty strong.
A bit of painting with acrylics followed by a satin urethane finish and we’re ready to add the final detail to the girl’s body! Slow but sure…stay with me!

