
A Bit of Sculpting
I’ve mentioned in the past that I have a group of people who meet monthly on the Zoom conferencing platform to talk about caricature carving. We call ourselves the True North Caricature Carvers ( TNCC ) …our farthest northern member is in Thunder Bay, Ontario, Canada and our least farthest northern member is in Brisbane, Australia! So, don’t read too much into the name…all are welcome!
Since I’m planning on using this little project to emphasize some of the things that we’ve been talking about, I’ve decided to do a clay sculpture as part of this project. I guess that you could argue that this particular carving is a bit static in it’s pose and wouldn’t necessarily need a starter-sculpture, but the sculpting is helpful when you could benefit from having a three dimensional model to carve against.
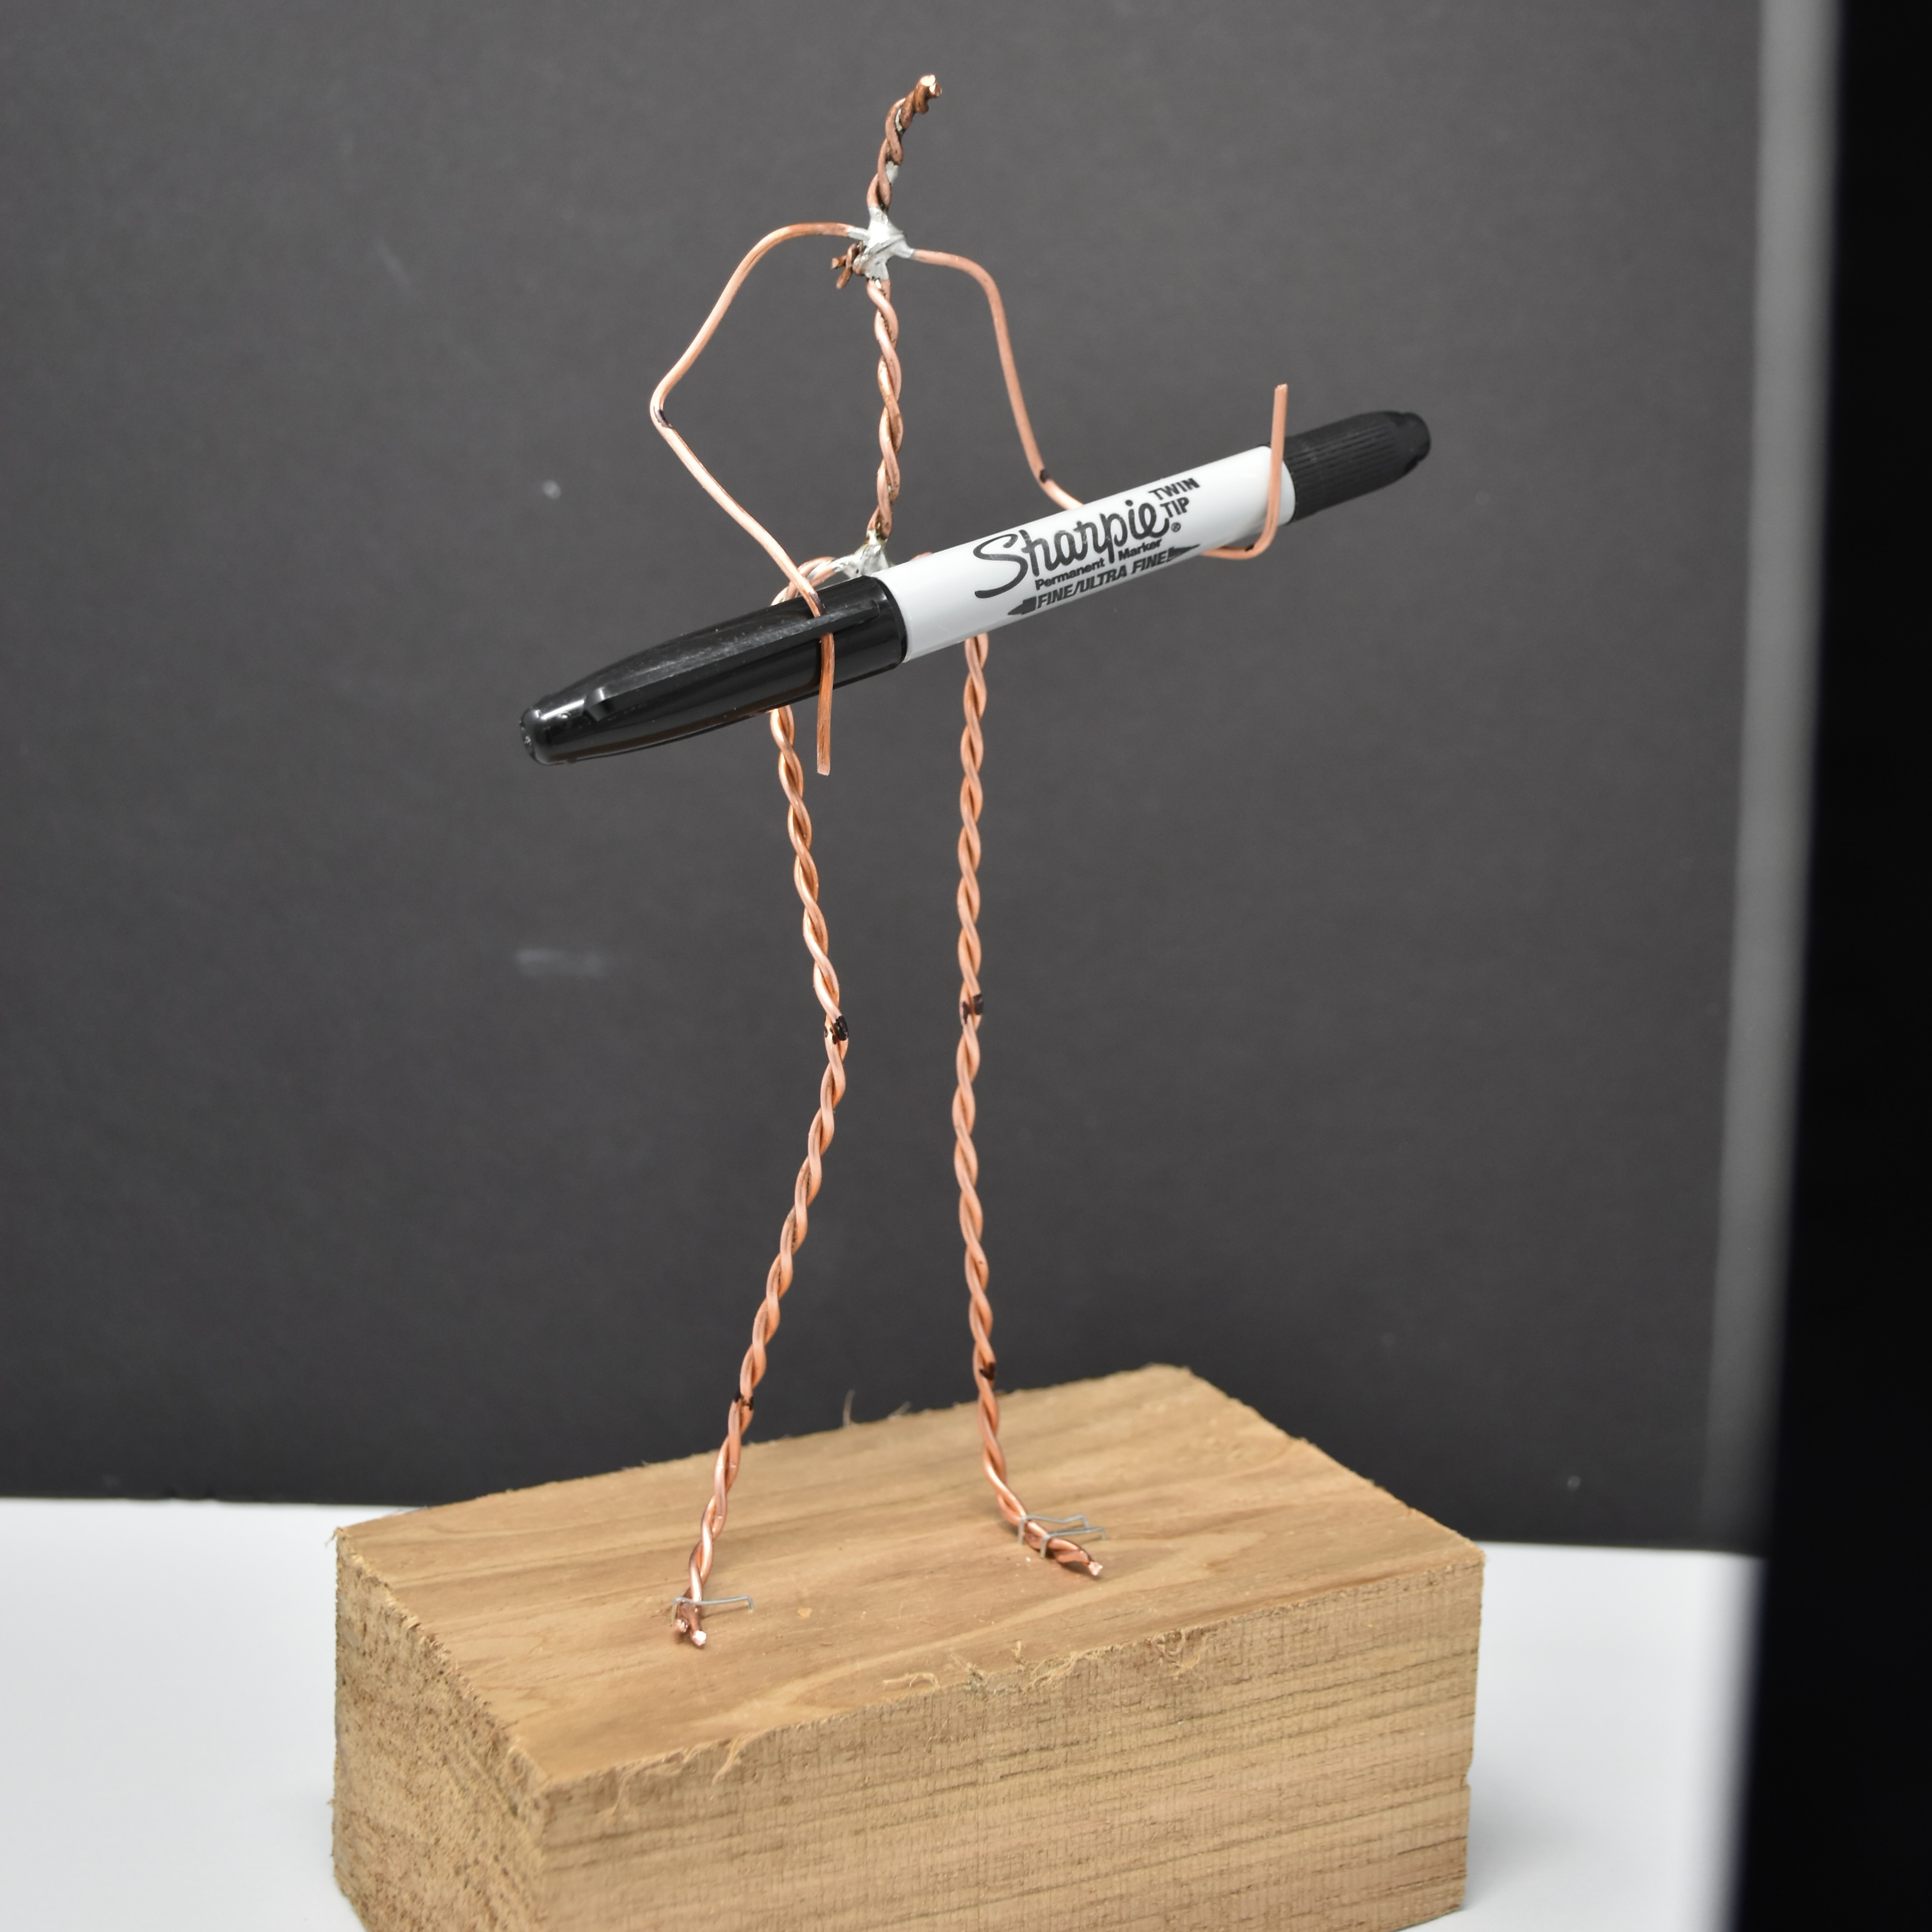
I started off by twining a couple pieces of copper wire together with my battery operated drill to make up the spine and legs as these two elements will need the greatest strength. I don’t know why but it’s somehow fun. The arms are simply one strand of copper. I used an anatomy guide that I found on Pinterest for the dimensions and soldered the copper in a couple of places so that the model would be nice and rigid. The copper came from a scrap box where I had some household copper wire leftover from a project…so, I didn’t have to cash a bond to afford the current price of copper wire!


I use a latex/water based clay to model the carving. The pro’s are i) it’s inexpensive, ii) easy to use, and iii) you can use it with your bare hands and clean everything up with water. The biggest con is that it dries, shrinks and cracks to pieces. The way around it is to drape some wet paper towels over the sculpture at the end of the day and cover it under a plastic grocery bag to retain the moisture/humidity. Once you’ve used it to make your wood carving, you can just let it dry and break away the clay and keep the copper form for your next similar pose.
The value of the clay sculpture is captured somewhat in these next photos. The first photo looked a bit static to me, so by just grabbing the clay and twisting and bending it a bit, it sort of came to life.
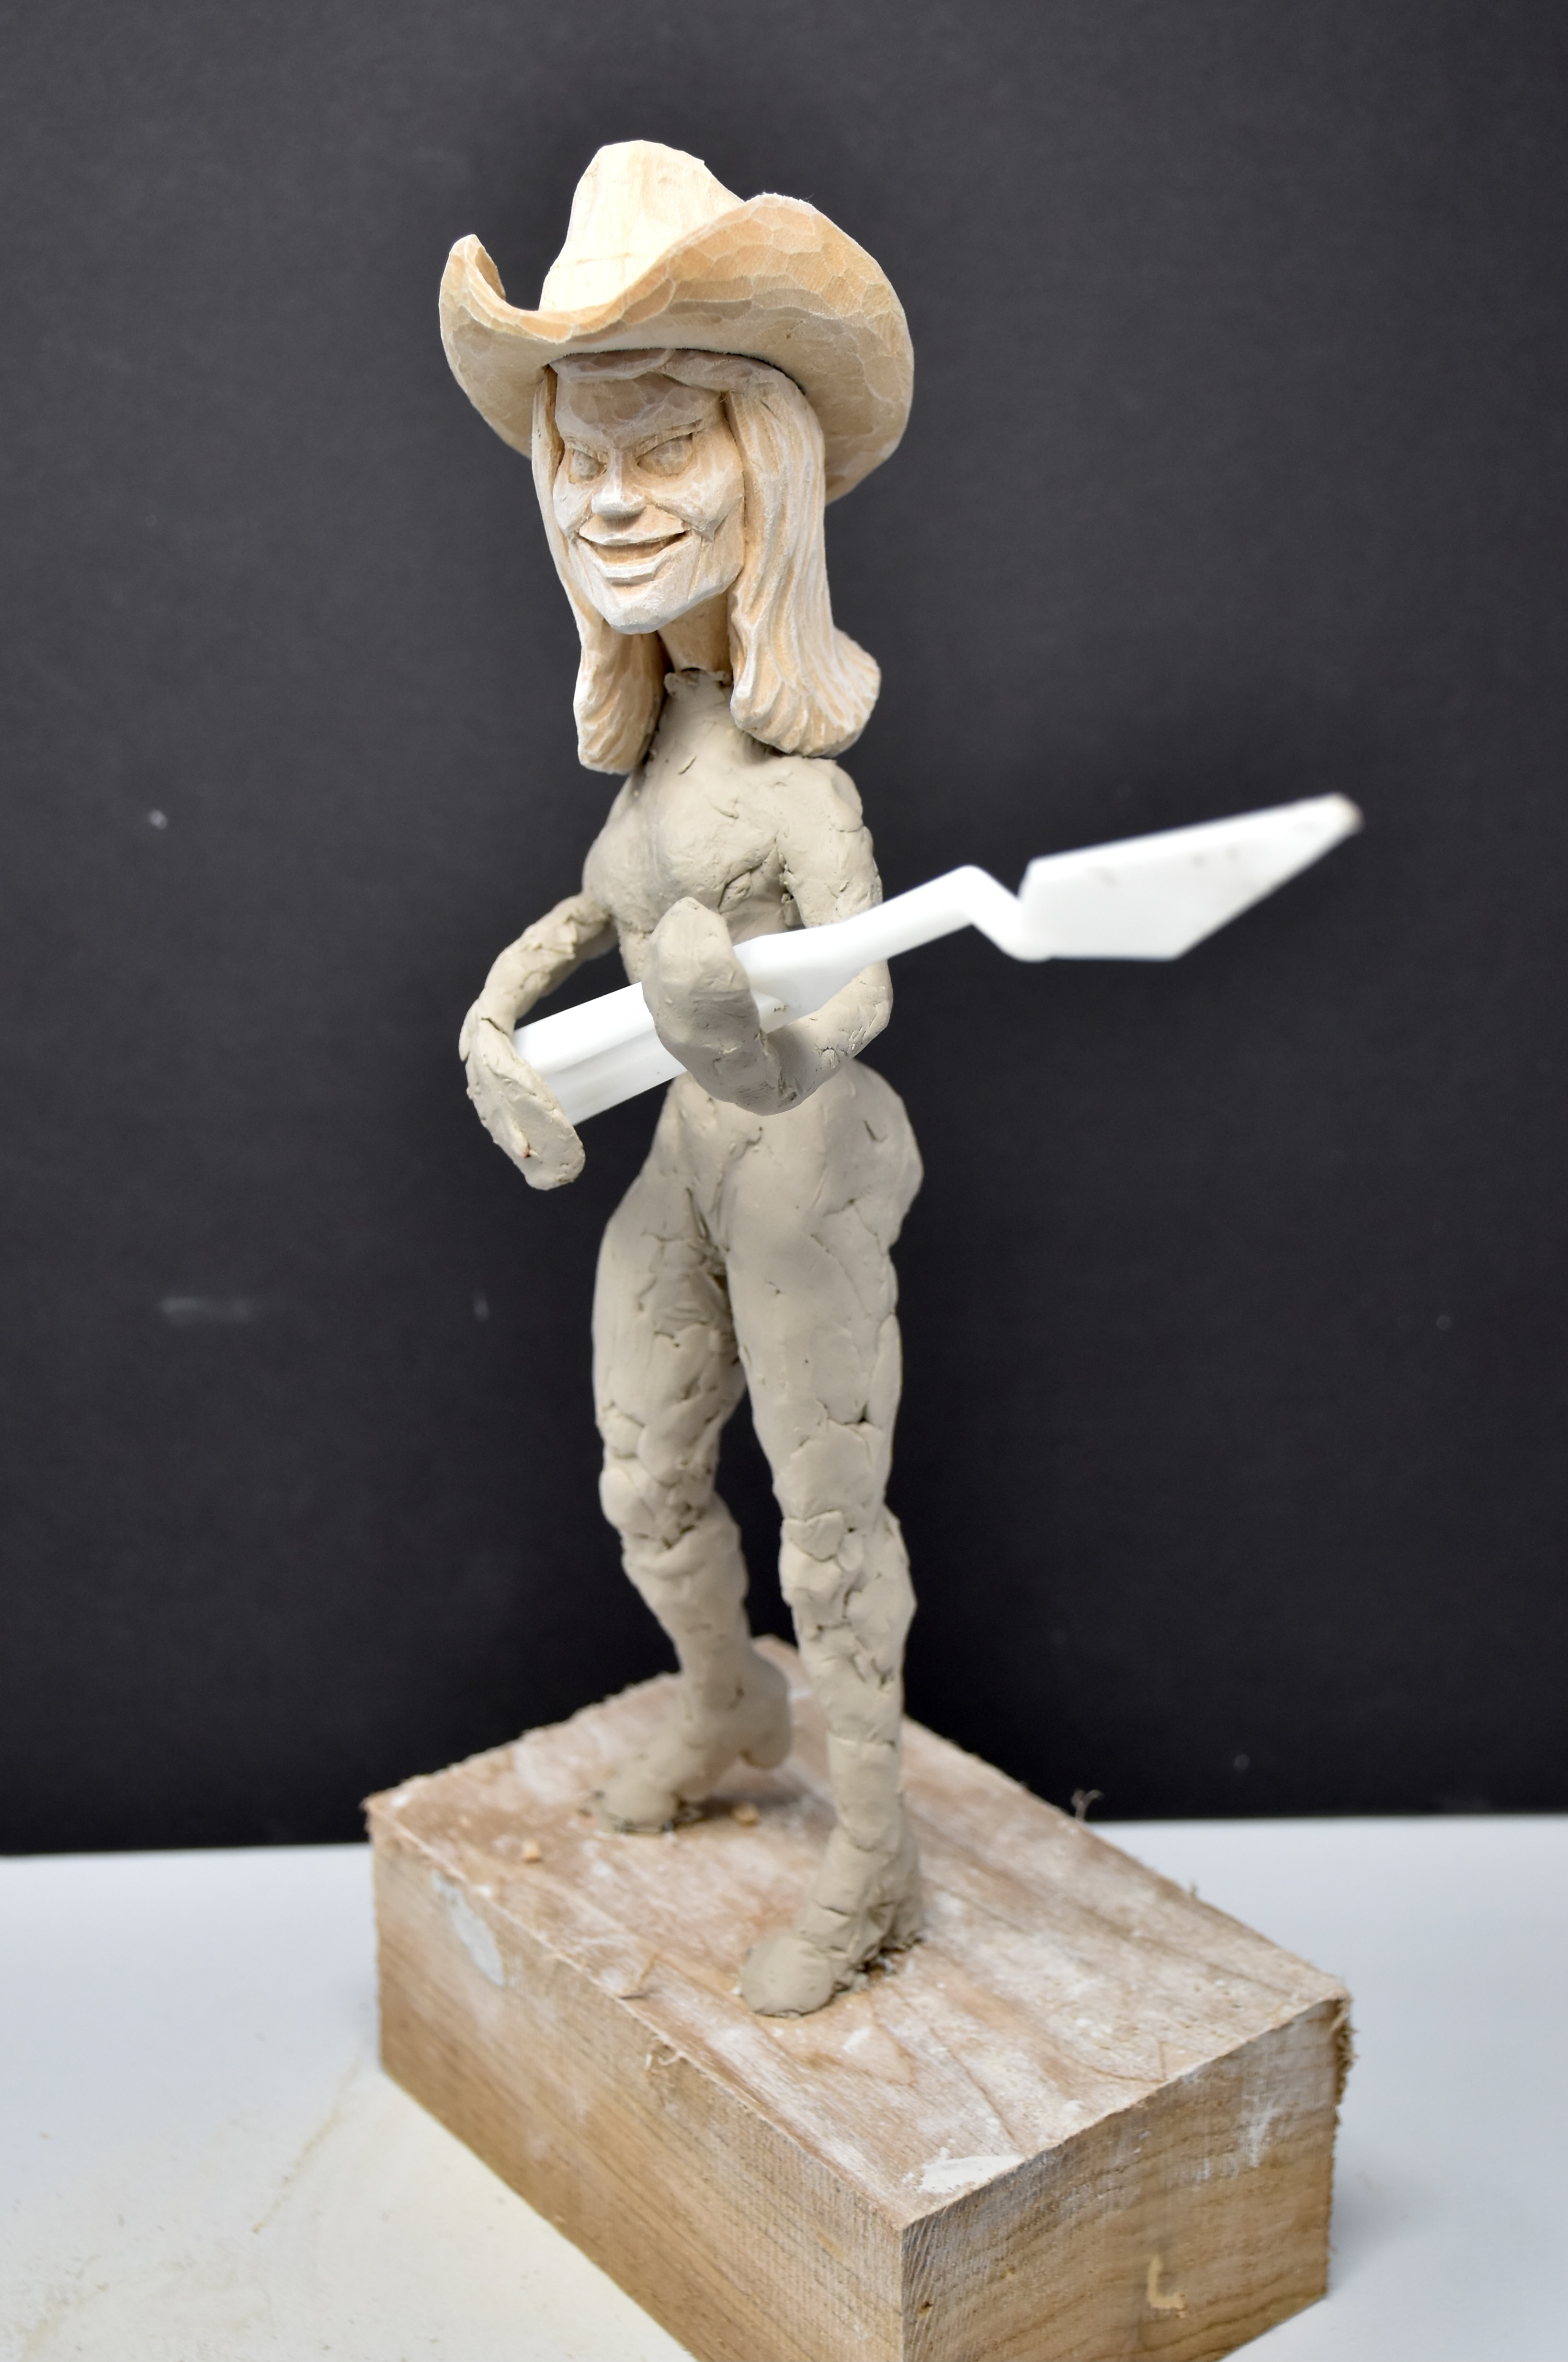

Then it was just a matter of smoothing things out with a wet paint brush and adding some detail. I didn’t go overboard with the detail but added just enough to give me an idea of what I wanted to do with the carving.

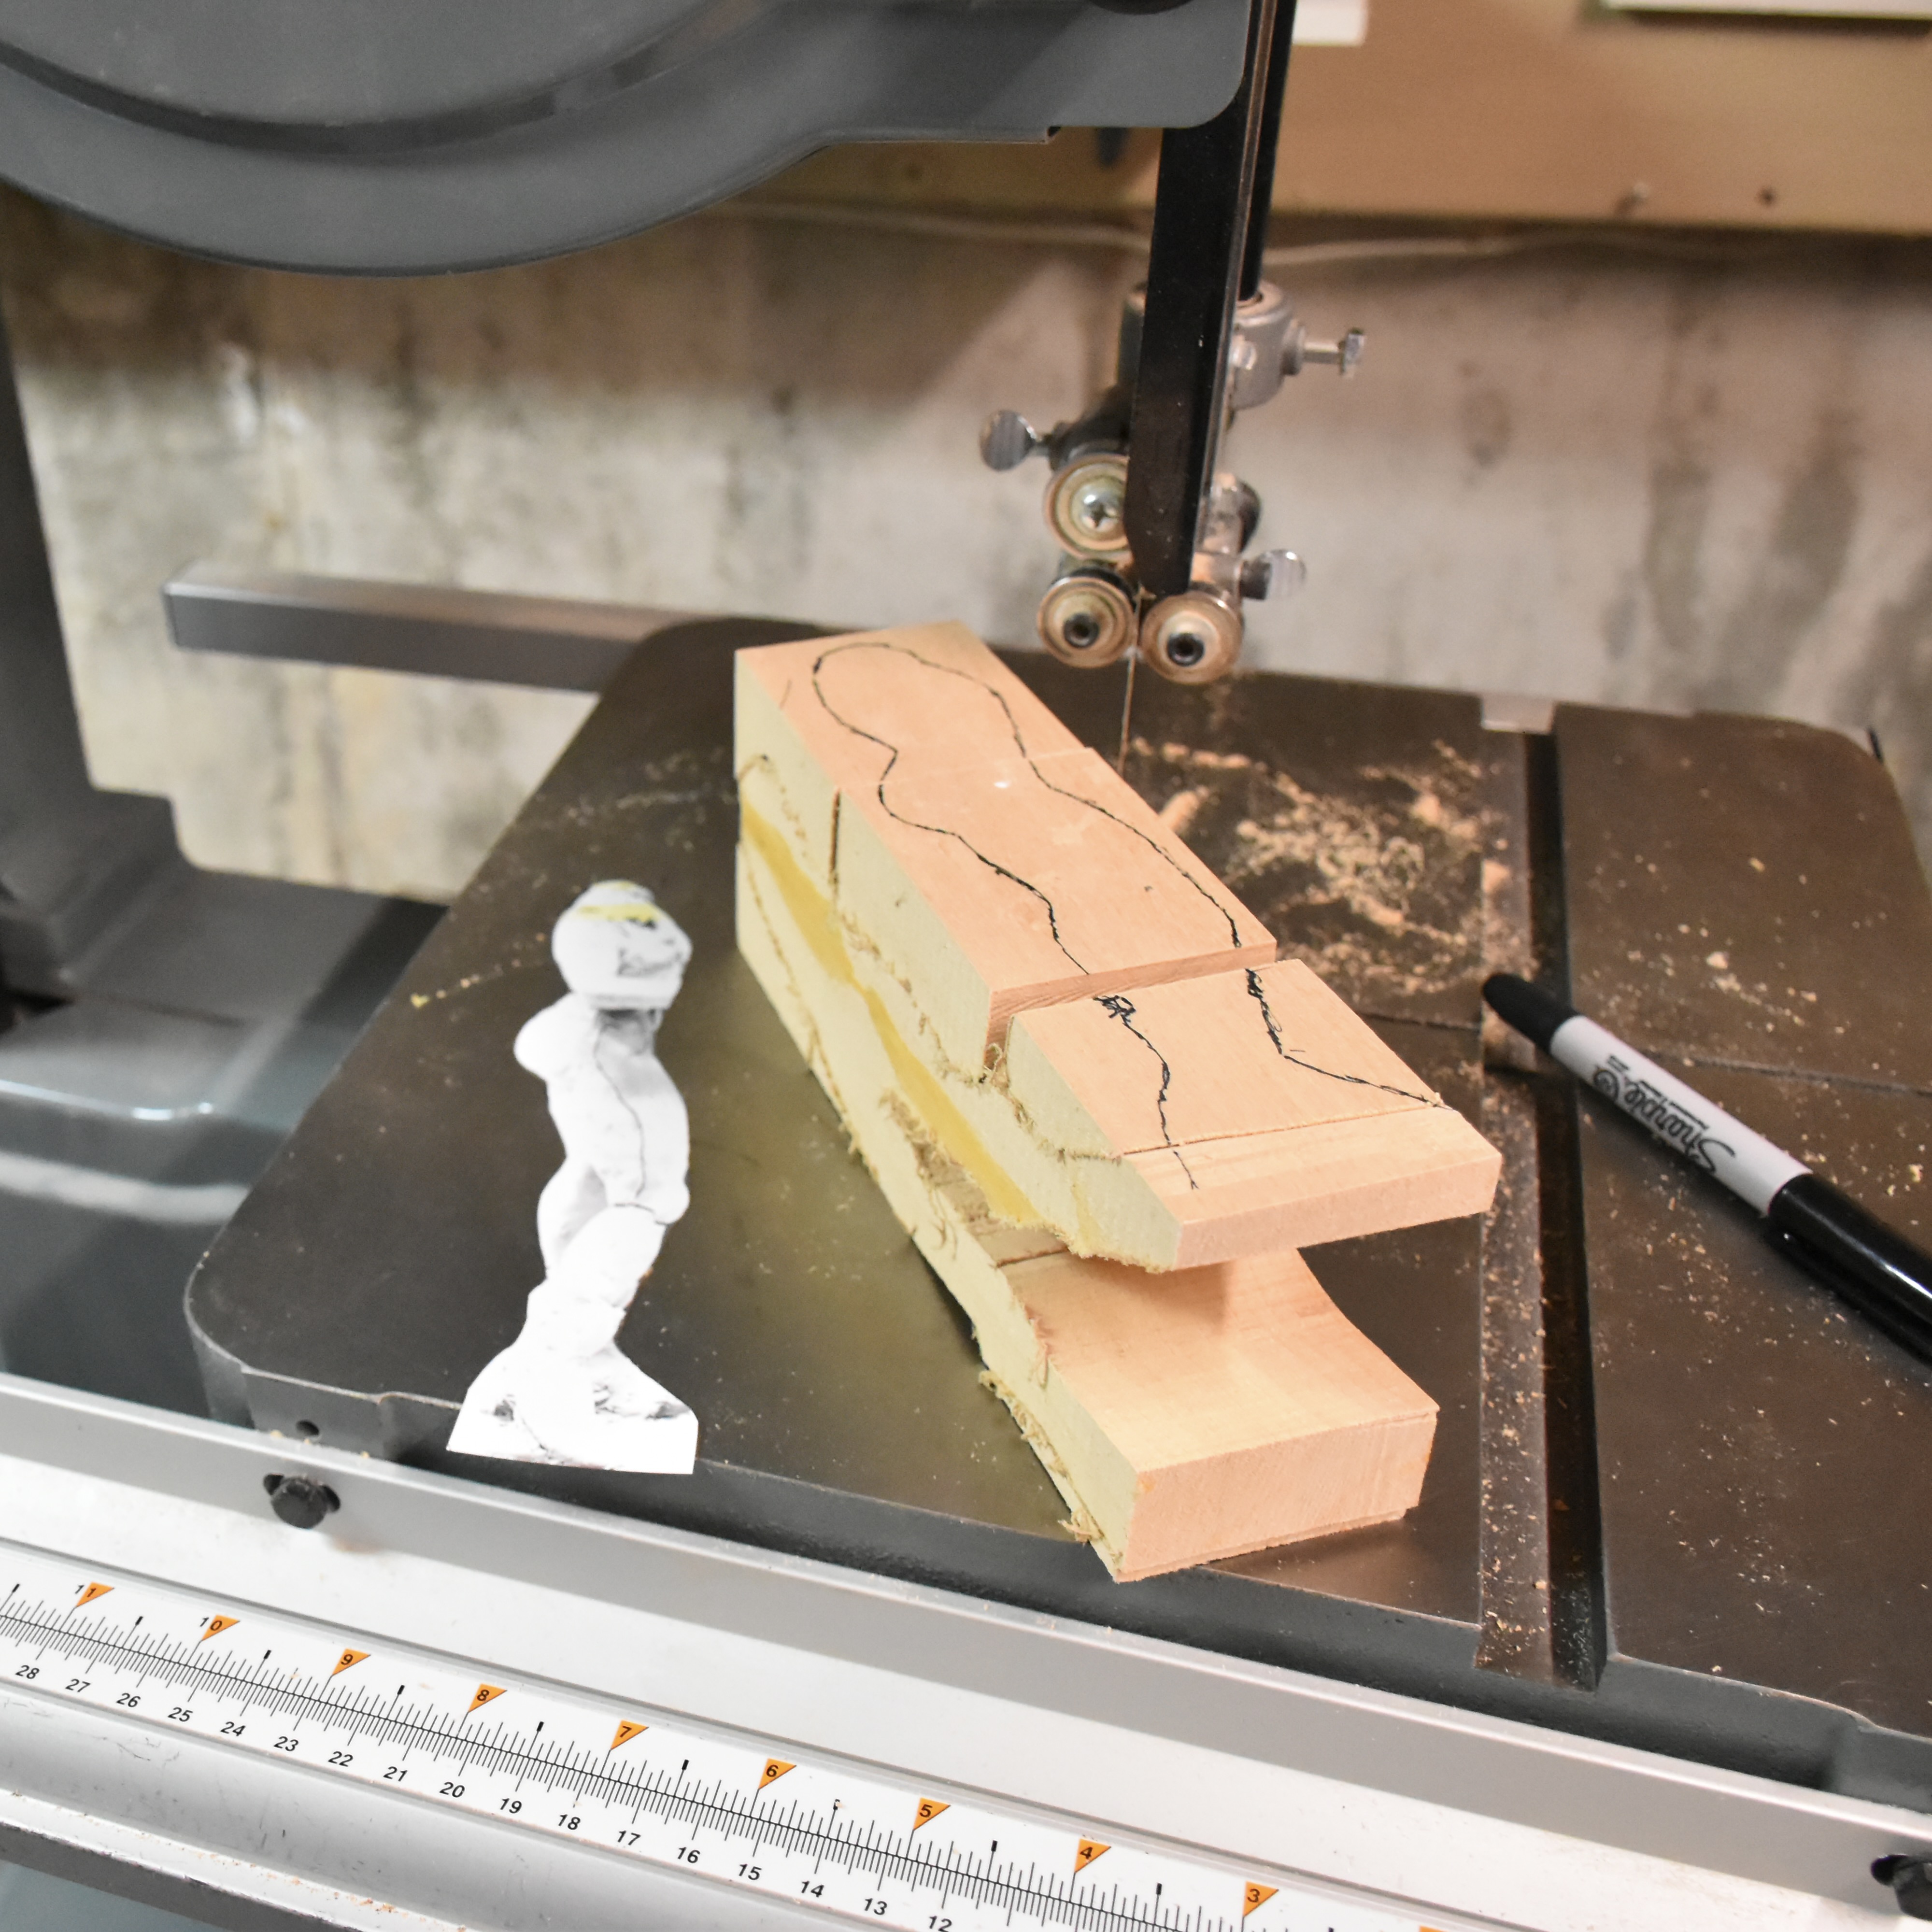
By taking a few photos of the front and side views and, after a few attempts, I was able to print these off at the size that matched the clay sculpture. I cut these paper templates out and transferred them to the basswood block that I would use and cut everything out on the bandsaw. The things that I liked least about the clay sculpture were the boots so I intentionally made them a little bigger on the paper template so I’d have more wood to play with. Also, note that I could have left the arms on as they’ll be well supported eventually by the banjo but I decided to attach them later to, again, give the TNCC another element of carving to talk about.


And that’s where I am with this project and that’s where we’ll leave things for now!…

I enjoyed your article gave me ideas for my next carving shock I’ll start w a clay model
LikeLike
Great! Look around for different types of clay that suit your style. I know that a number of carvers use a clay that forms long term without shrinking if you want to keep the sculpture past the carving phase.
LikeLike