tributesinwood

Wood Carvings by Mark Sheridan

A New Tool For Christmas!

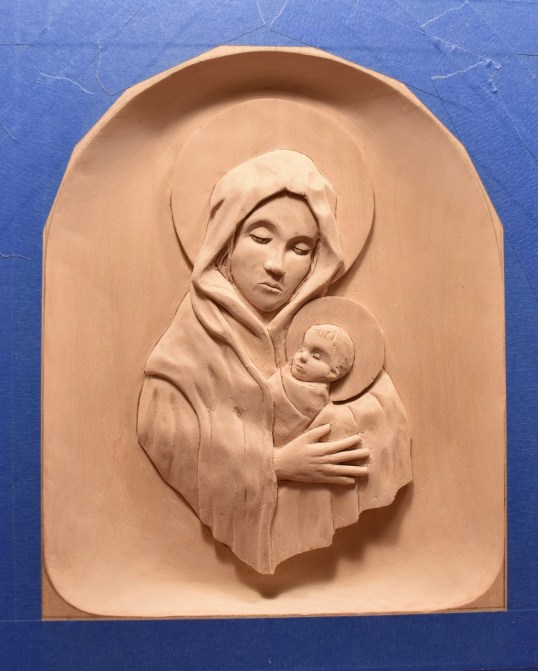
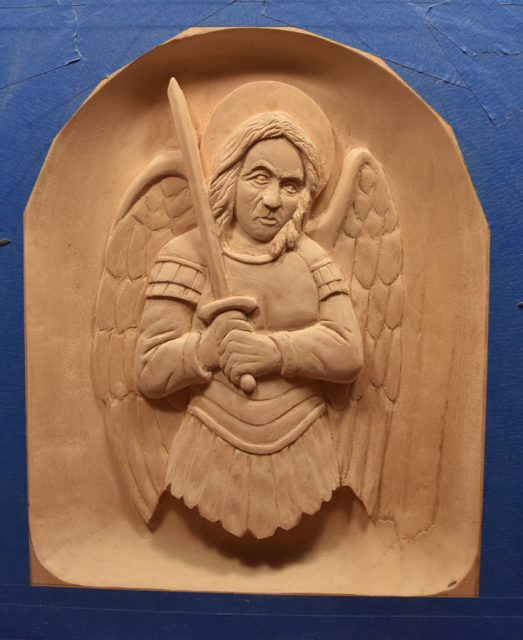
Here’s the semi-finished version of Michael with some fine sanding completed.  I can see that I’m going to want to do a few touch ups before I call this panel figure complete, but I’m pretty happy with the way that it’s turning out.  As you know, I don’t typically sand my carvings but I’ll be finishing this particular carving in a fashion that’s more traditionally seen in churches.


dsc_1854

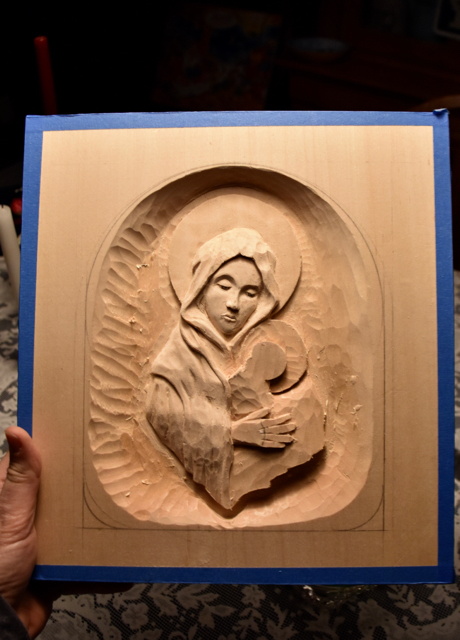
And here’s the start to the next panel where I was able to use the tool that I found under the Christmas tree!  Actually, I already had the Dremel tool…but, when I was at the last carving show, I spoke with a friend who did a lot of incredible relief carvings and he mentioned how he uses a router base made for the Dremel.

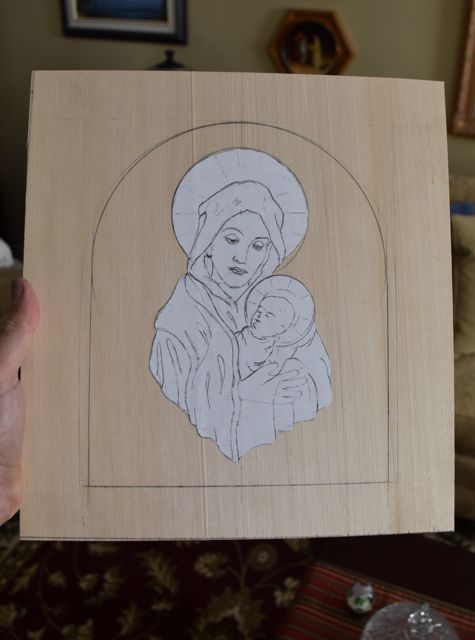
After doing a bit of research, I decided that the best base for my needs would be the one manufactured by Lee Valley.  It’s definitely pricier than some, but the higher quality of the base is obvious.  What this does is allow me to set the depth of the 1/4″ bit and plunge down to trace along the lines of the drawing that I’ve glued in place on the face of the wood.  It saves a bit of time and makes very accurate cuts.

Tomorrow, I’m going to use it to outline the hands, loaf and chalice to gets some depth around those figures as they will be the highest figures carved into the relief.

I wish each of you all of the best in 2017!


Just Prior to Final Sanding

Here’s what Michael looks like prior to some final sanding.  I added my version of the feathers on the underside of the wings with some chisel work followed up by ruby cutters on a Foredom tool.  Ruby cutters are fine stones that provide some cutting along with a satin finish to the wood.  I used these tear-drop shaped cutters so that I wouldn’t have to cut each in by hand and likely leave some knife and chisel marks.

I’m still working a bit on Michael’s face, as well.  I’m looking for a not too kindly but not too frightening expression!

I haven’t really been doing too much carving over the Christmas holiday.  Instead, I’ve been enjoying Emily’s company during her visit home.  Tomorrow, she’ll be heading back which will send me back into the workshop to finish some fine sanding.   Following that, I’ll set this panel aside and begin the third panel of the chalice box with the image of Jesus holding a chalice and loaf.

dsc_1763


Some Carving, Some Wrapping

Yes, I did manage to do a bit of Christmas wrapping between carving.  I’m not saying that I’m a great carver, but I can safely say that I’m a better carver than I am a wrapper ( not to be confused with rapping, which I couldn’t…I wouldn’t… do if my life depended on it ).

Here’s Michael moving along…

dsc_1300

Archangel Michael

It’s time to start carving Michael into the second panel of the chalice box.  This one will be a bit more interesting as, of course, there are wings to carve!

I started, again, by using a router with a 1/4″ dado bit to carefully route completely around the outline of the carving to a depth of 5/8″.  The router that I have is variable speed and I used a very slow setting on the router and took a few passes rather than a single plunge of 5/8″ to avoid burning the wood.  From there it was just a matter of using gouges to chisel away the wood to meet the routed channel that I had created.

I then picked the two highest spots…the left hand and the nose…and made sure that all of the other features sloped away from those two spots while checking the clay model that I had done earlier.

But…I have a bit more Christmas shopping to do tomorrow so I’ll have to put Michael away for a short while.

dsc_1269


Some Final Sanding

Here’s the sanded version of Mary with Child.  After carving, I used progressively finer grades of paper from 180 to 320 grit to get to this point.  Before I put a final urethane finish on this, I’ll do some final finishing with finer grades of sandpaper.

I’m pleased so far!

dsc_1266

More Detail

Here’s another quick update on how this project is going.  A little bit more detailing left and some final sanding and I’ll be on to Archangel Michael as another panel on my chalice box project.  I should mention that all of the blue masking tape is just to protect the wood from dings while I do the carving.

The carving has been very enjoyable and I’m really only using a few chisels for the work.  The only “special” chisel that I’ve used is a bent style ( much like a spoon ) to be able to scoop out along the archway on the top and bottom where access is limited.  A nice project and certainly being done at the right time of year!

dsc_1259

Saturday Progress

Well, not a whole day on Saturday…but a few hours work, anyway.  The real event today was watching “Scrooge” with my son, Paul.  Now this is the “real” Scrooge starring Alistair Sims.  I’ve been watching this since I was a kid at Christmas and it’s a tradition for Paul and I to watch it as well.  Kind of scary and not very Christmas-y really…but it’s tradition!

Here’s the work that I completed today and I’m really enjoying the way that it’s shaping up.  As you can see, I’ve started to use and will continue to use sandpaper following the chisel work on this carving to provide a fine and smooth finish to the piece.

dsc_1258

Roughing-In

Here’s some initial roughing-in of the image of Mary with child.  It’s coming along pretty nicely.

Even though I knew that I would be carving it about 5/8″ deep and that the clay model was roughly that depth, it still looks surprisingly deep when it’s carved into the wood.  The recessed arch that the image rests within probably has something to do with it looking like a deeper relief carving than it actually is.

I think that the finished carving is going to look pretty sharp.

dsc_1251

Let the Carving Begin…

I picked up some very nice 1 1/8″ thick basswood and am ready to begin carving.  I was originally intending to carve into the built box, but am going in a different direction with it by carving into the individual sides and then gluing it together as a box later.

I cut out the exact size that I needed for one of the box sides and glued a copy of the drawing that I made directly onto the wood.  My plan is to cut around and into the paper copy as I produce the relief carving using a combination of chisels and Foredom tools.

When the figure and archway are carved and sanded, I’ll use my radial arm saw to cut the sides and bottom of the basswood at a 45 degree bevel.  Each side and the box bottom cut with the 45 degree bevels will make the gluing surfaces for the box construction.  This way, each glued edge will be hidden and not show any end grain.

That’s my plan…if you have a different idea, let me know.

dsc_1250

A Gifted Spartan

For those of you who are also on Facebook, you’ll have already seen these photos of the Spartan that I began carving some time ago out of an Elk antler.  Well, I needed to wait until I gave this little guy to my Mom this weekend as a Christmas gift before I posted the finished pictures here…she follows tributesinwood.com but is not a Facebook follower ( a very smart woman ).

This carving was finished using the Foredom tool bits ( similar to Dremel ) that I started with and then I added a bit of burnt umber to the carving and wiped most of it away to highlight the deeper relief.

Mom was pretty happy about what she calls her handsome man.  I wasn’t completely sure whether she meant me or the Spartan, but I’m guessing that it was the Spartan.


Post Navigation