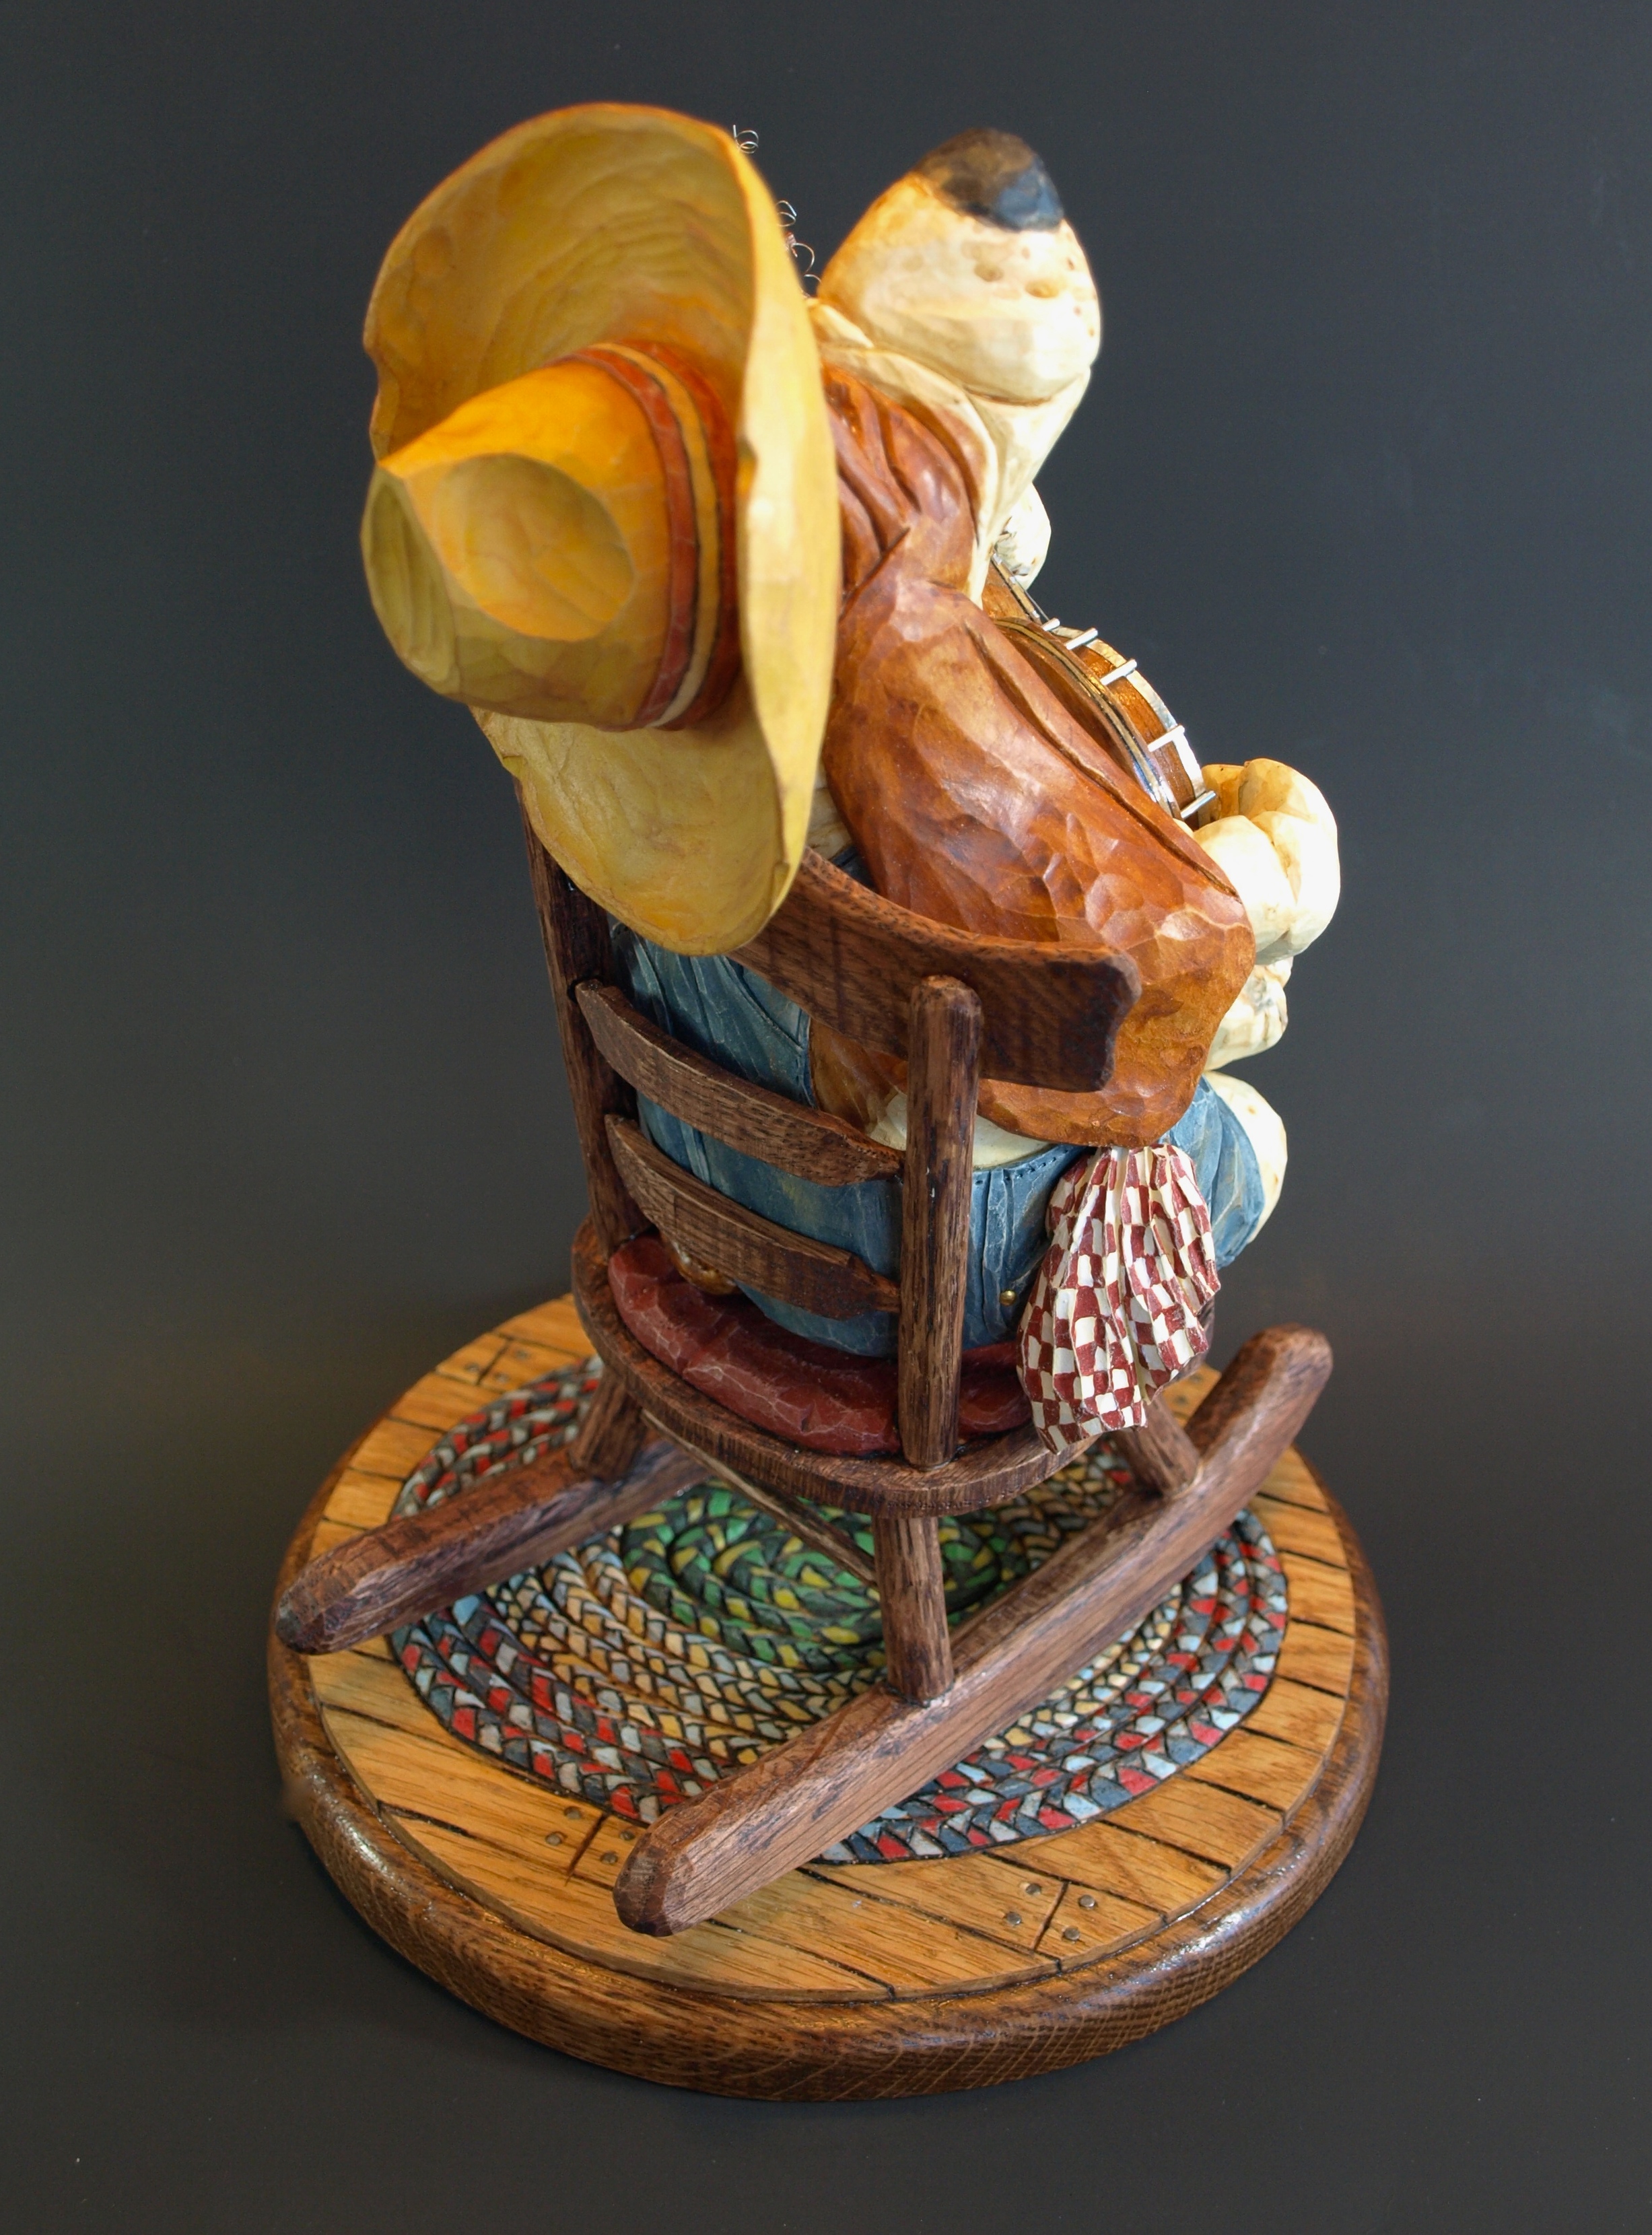
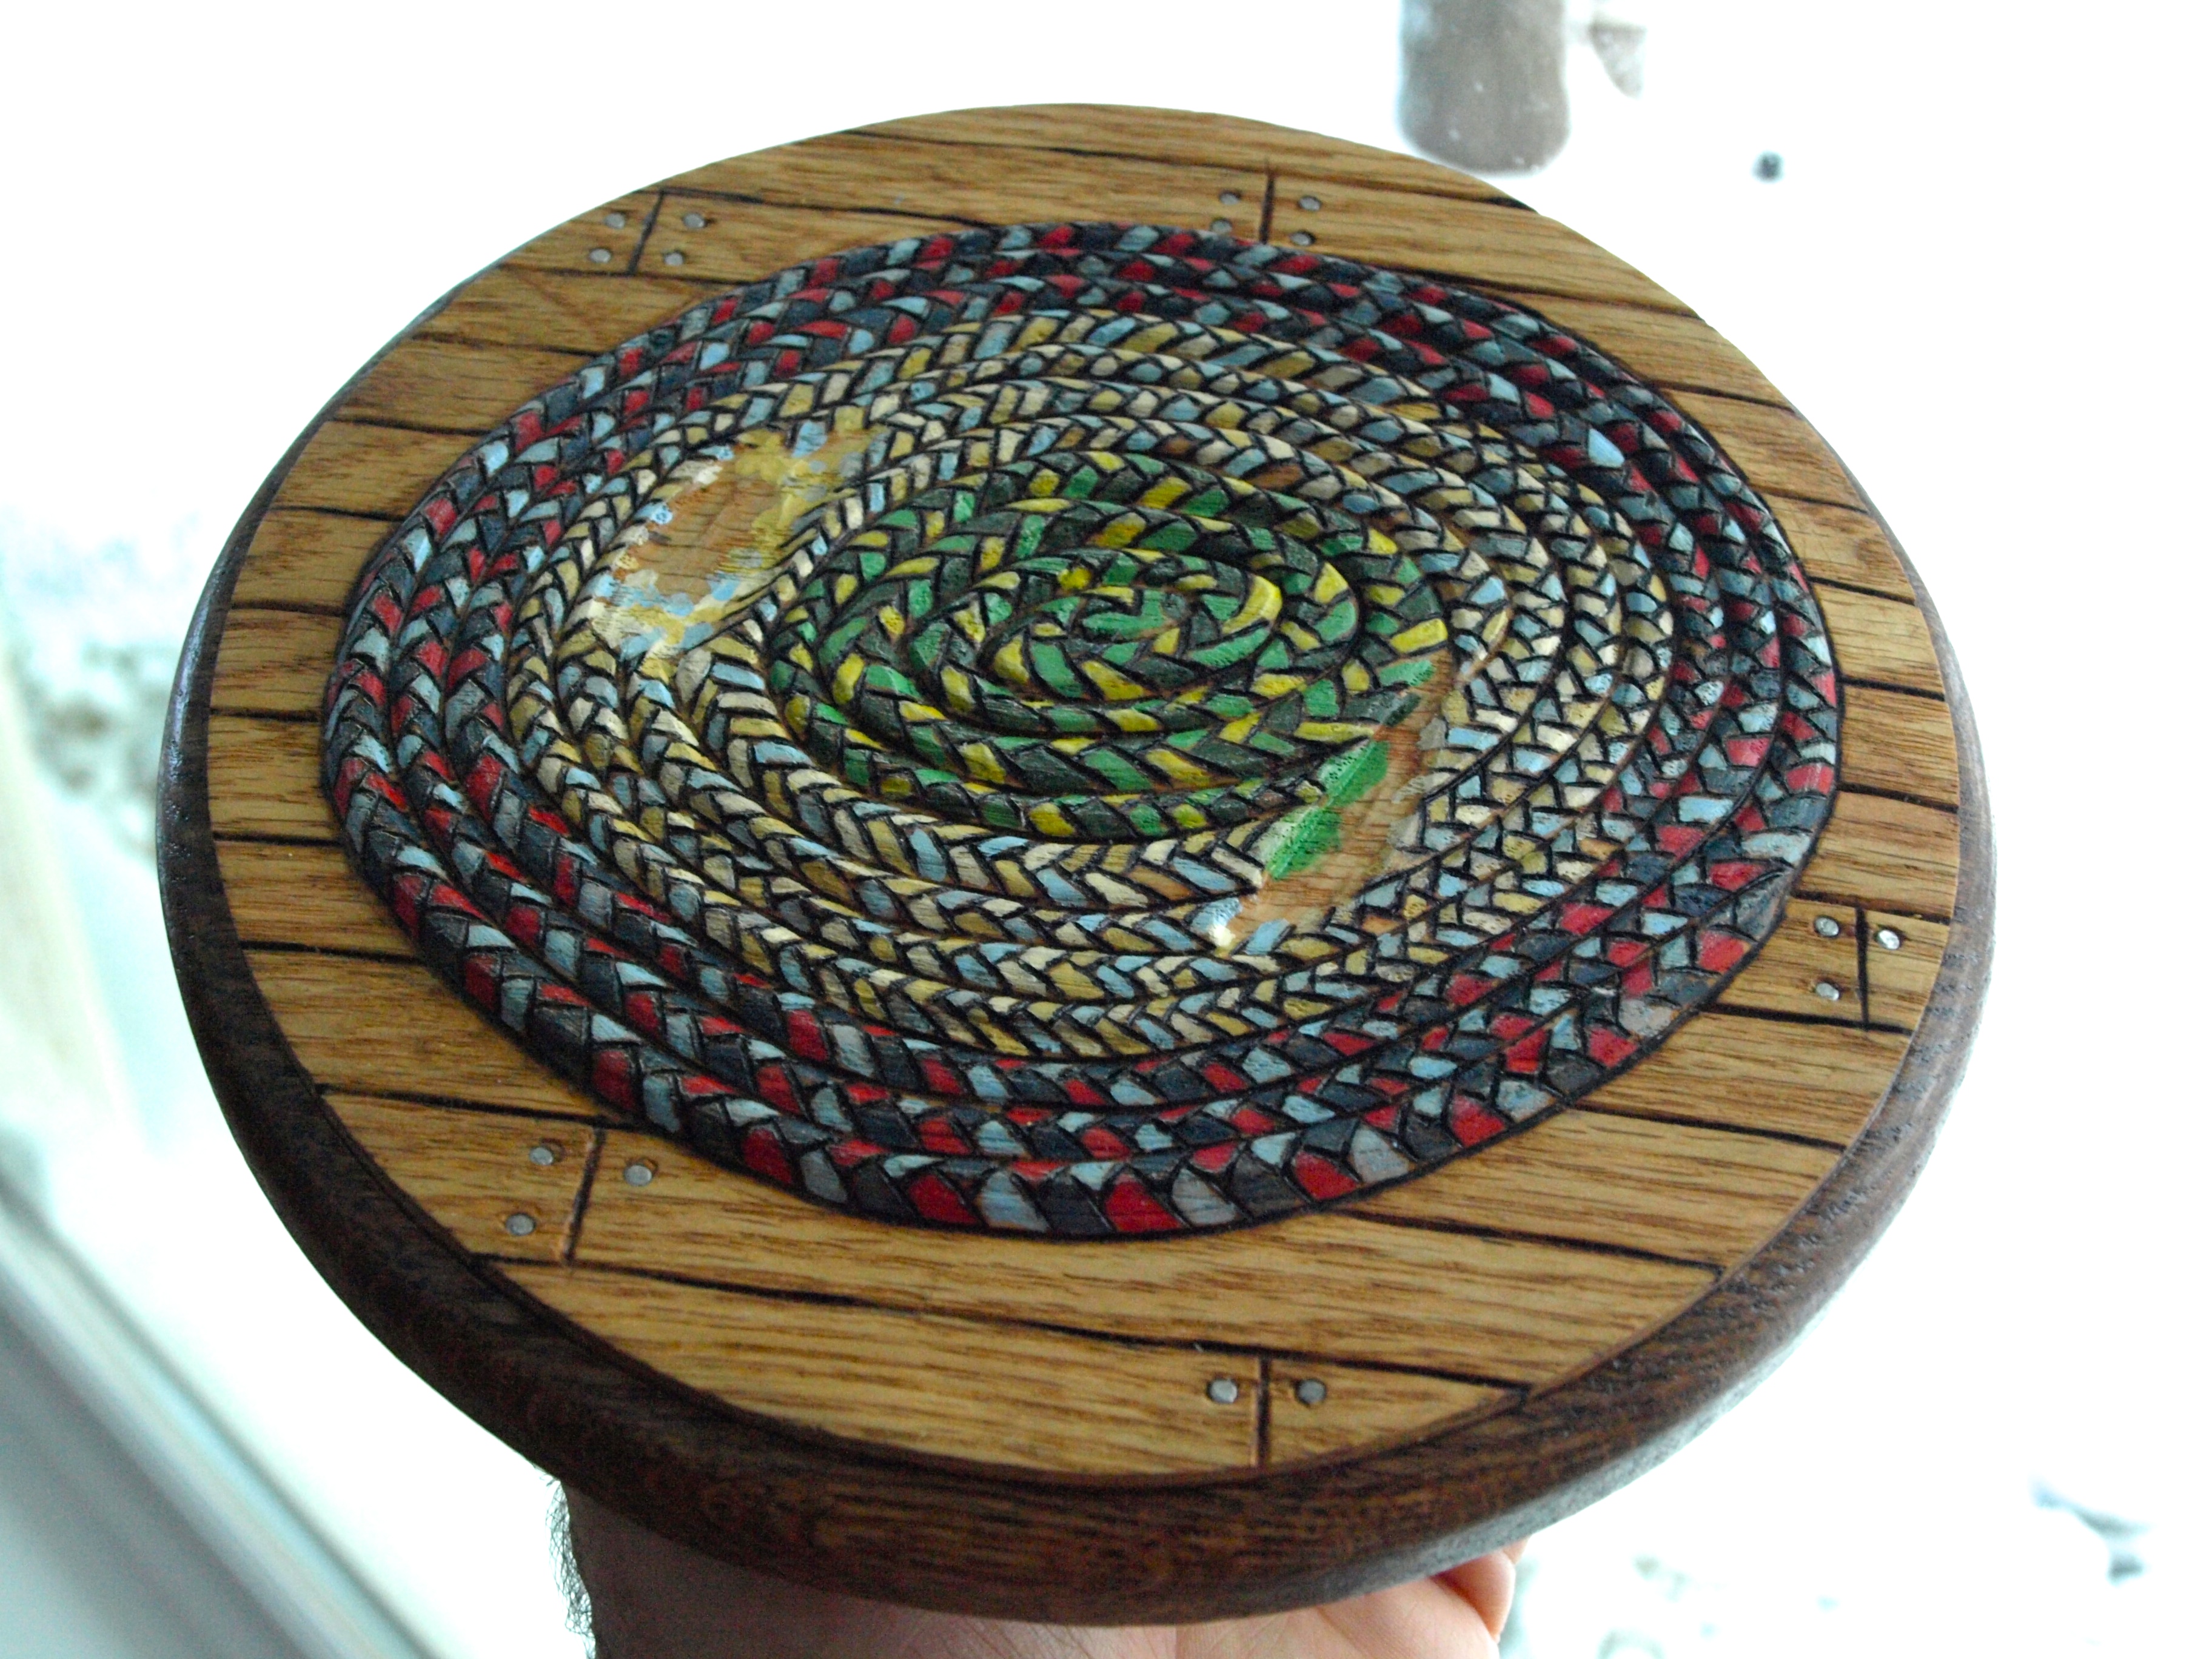
Braided Rug
The braided rug where the three little dogs will sit came together pretty nicely.
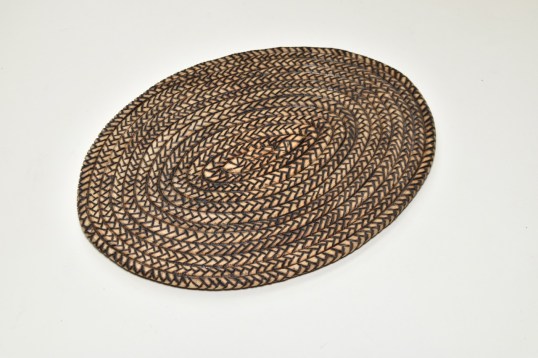
It’s nothing more than a thin layer of basswood, maybe 3/16″, in which I made some spiral cuts with both a v-tool and followed up with a burning tool tip to clean things up a bit. The individual braided part was created using a burning tool tip. I guess you’d call it a herringbone pattern and it’s pretty simple to do but it takes a bit of time. If you make a rug like this, just remember to give yourself enough room between spirals as you’ll need the room for the burned-in pattern.

Once that was done, I used three alternating colours to paint the patterns. You don’t have to actually switch between colours…just paint one “braid” or block, skip two and then paint the next braid until you’re finished with that colour. The other two colours will follow the same pattern and eventually fill in all of the braids.
I actually used a three colour combination of blues, greens and reds. Just pick a dark, medium and light colour in each of the blue, green and red combinations and start painting. Water down your acrylic paint and you’ll find that the paint flows nicely over the braid that you’re painting and the burned line keeps it from flowing beyond that braid.
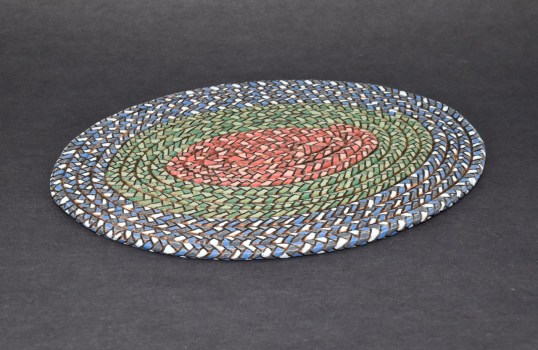
The final touch was to do some dry brushing with a light beige colour just to pick up the high points and add a little more interest. So, this was just using a fanning motion lightly over the carving with a large brush loaded with little and almost dry paint. I think that without the dry brushing, the rug would look a little too new and a bit plastic looking. I’ll add a urethane finish for the final touch a bit later.