tributesinwood

Wood Carvings by Mark Sheridan

Archive for the tag “carving caricature”

Roughing-in a Ruffian

This ruffian is going to slowly turn from clay into a basswood carving.  Although I could still add a little more detail to the clay as guidance for the carving, I started to rough-in the body of my hockey player.

I actually didn’t have a piece of basswood quite deep enough so I glued two pieces together.  Between some work on the bandsaw, a bit with a handsaw and some shaping with the Foredom tool equipped with a Typhoon carbide bit, the basic shape of the arms and body hanging over the penalty box boards is coming to life.

The only thing I’m fighting at this point is the nice weather and getting outside to enjoy the yard-work!  Maybe a remote shop on wheels that I can park on our patio is the way to go.

A Fine Time for Hockey

I know that my timing isn’t the greatest with the Stanley Cup just wrapped up and the summer temperatures finally here…but I’m going to finally finish my carving of the penalty-serving hockey player that I started some time ago.

I’ve taken a few days off of carving as I was visiting my Mom in Niagara Falls these past few days and did a “bit” of gardening around her house.  So, I’m back at carving, well sculpting, and resting my sore muscles a bit.

Right now I’m sculpting where I’ll want the wrinkles in the jersey along the back shoulders and will return to the front shoulder pads this weekend.   Still needs work but when I get that done…it’s on to carving!

The Painting Begins

Buford’s hat got a bit of paint last night.

I used Asphaltum brown in several washes ( light, watered-down coats ) to build up the colour in the hat.  I followed that up with a black head-band and then some dry brushing with a colour of Butterscotch.  Remember that the dry-brushing is basically loading up your paint brush with the desired colour and then removing most of the paint onto paper towels before lightly brushing the carving with a light back and forth motion…think of it as a feather soft brushing of the carving.  If you use a fat enough brush and a light touch, this leaves only a hint of colour on the highest points of the carving and leaves a sense of dust or wear.

As a final touch, the acrylic paints were covered with an acrylic satin finish and wiped dry with a paper towel.  Lynn Doughty gives several good examples of this process on his Outwestwoodcarving site.  I tend to start first with a light coat of white gesso as a primer directly on the wood but will try Lynn’s method of painting with acrylics directly on the wood at some point.

I think that the hat is looking pretty good and will suit this little hound cowboy…not quite a villain type but, out on the range, he ain’t no push-over either.

OLYMPUS DIGITAL CAMERA

A Pretty Serious Wrangler

I’m having some fun with this little hound.  He’s turning out to be a pretty serious looking wrangler…someone’s who has seen his share of cow thieves.

With one eyebrow raised higher than the other in a suspicious gesture, eyes rolled off to one side looking for banditos and a thinner, more weather worn, face than I’ve carved for Bassets…he’s clearly a working, and hard working, dawg.

Oh…did I mention the droopy smoke hanging out of his mouth?  This carving is going to make a nice scene.

OLYMPUS DIGITAL CAMERA

The Cowboy Hat

Now that the head is at least roughed in for our little cowboy hound, it’s time to start thinking about a hat.  The hat is made in two pieces along the same lines as described by Lynn Doughty on his website OutWestWoodcarving.  Basically, the side view of the brim was outlined on a piece of basswood with the grain of the wood running from the front to the back of the brim.  After cutting out this profile, an elongated oval was cut ( looking from the top of the hat ) so that I ended up with the cut-out shown in the second photo, below.
OLYMPUS DIGITAL CAMERA

OLYMPUS DIGITAL CAMERA


Following that, I took a little bit off of the top of the hound’s head to make a flat area to sit the hat upon.  Using the method of applying some pencil lead to the top of the head and slowly chiseling away the impression of the lead that’s left on the hat, I ended up with a depression on the bottom of the hat brim that made a nice tight fit on the head.  This might seem a bit unnecessary to you, but you’ll find that having this depression makes the hat sit nicely on the head in a way that leaves you with the impression that the hat is fully covering the head and not just sitting on top of it.

OLYMPUS DIGITAL CAMERA


The crown of the hat was pretty simply made…just a quick cut out of an almost rectangle on the bandsaw and then some knife carving to get the rounded shape from the top view.  I say, rounded, but it actually is round with a bit of a point at the front.  That just seemed to look about right to me.  Then, I just used the same method of applying pencil lead to the brim and let it rub off onto the bottom of the crown so that all of the high points were highlighted by the lead markings.  A few ( actually, quite a few ) swipes with a shallow gouge removed those lead marks and ended up with the crown sitting nicely on the brim.  I should also mention that I added a hat band using a carving knife and a quick pass with a burning tool.

Hope you like things so far.


OLYMPUS DIGITAL CAMERA


OLYMPUS DIGITAL CAMERA

Roughing in the Head

The Wrangler Hound is starting to take some shape.  The general outline of his head was marked out on a piece of basswood and cut away on the bandsaw.  I intentionally cut the outline a little bit larger than I expect the carving to be when it’s completely so that I have room to cut in some deep wrinkles and folds that these little Basset Hound carvings end up having.

OLYMPUS DIGITAL CAMERA

I started off using a Typhoon bit and the Foredom tool to move some wood away quickly and do some general shaping.  I’ve mentioned before that Typhoon bits are very aggressive carbide tipped bits.  If you decide to use this method of blocking in your carving, you need to wear the appropriate protective gear…safety glasses, gloves, leather apron and either leather or very heavy sleeves.  Of course, you can use your regular knife to accomplish the same thing.

The roughed-in surface after the shaping with the Foredom tool and a bit of refining with a carving knife is looking like this.  Next step will be to cut a flat section along the top of the head and add in a weathered, droopy, cowboy hat.

OLYMPUS DIGITAL CAMERA


OLYMPUS DIGITAL CAMERA


Photo-Op for a Country Hound

Our little Country Hound is finished and has now sat patiently for his photo-op.

I’m pretty pleased with the way that this little carving  has turned out.  Thanks to Lynne for her ideas on this carving as I would not have come up with this composition on my own.  It was fun to carve and complete.

I’ll put some additional photos on the Flickr site ( link at the side of this page ) a little bit later today.

OLYMPUS DIGITAL CAMERA

OLYMPUS DIGITAL CAMERA

OLYMPUS DIGITAL CAMERAOLYMPUS DIGITAL CAMERA

The Base Takes Shape

Well, I decided on a circular base as I mentioned in the last post…so, this morning I did the routering and spent a bit of time carving an oval “braided” rug and a few hardwood slats into the top of the base.  I’m just in the process of using a wood burning tool to show the braiding in the rug cord.  I think that once it’s finished and painted it’s going to look pretty good.

OLYMPUS DIGITAL CAMERA

OLYMPUS DIGITAL CAMERA

In non-carving news, Rosie and I got a bit of snow-frisbee in today.  We also learned a new trick…snow angels…kinda like a normal “roll-over” trick but done in the snow!

OLYMPUS DIGITAL CAMERA

Happy New Year!

Well, I have to admit that we didn’t make it quite to midnight last night…but, we did watch a countdown from last year off of Youtube  ( I know that’s cheating ).  That, combined with a nice dinner and a little bit of wine ( just for the record, Paul’s drinking apple juice…I’m not ) rounded out New Year’s Eve just right for us.

OLYMPUS DIGITAL CAMERA

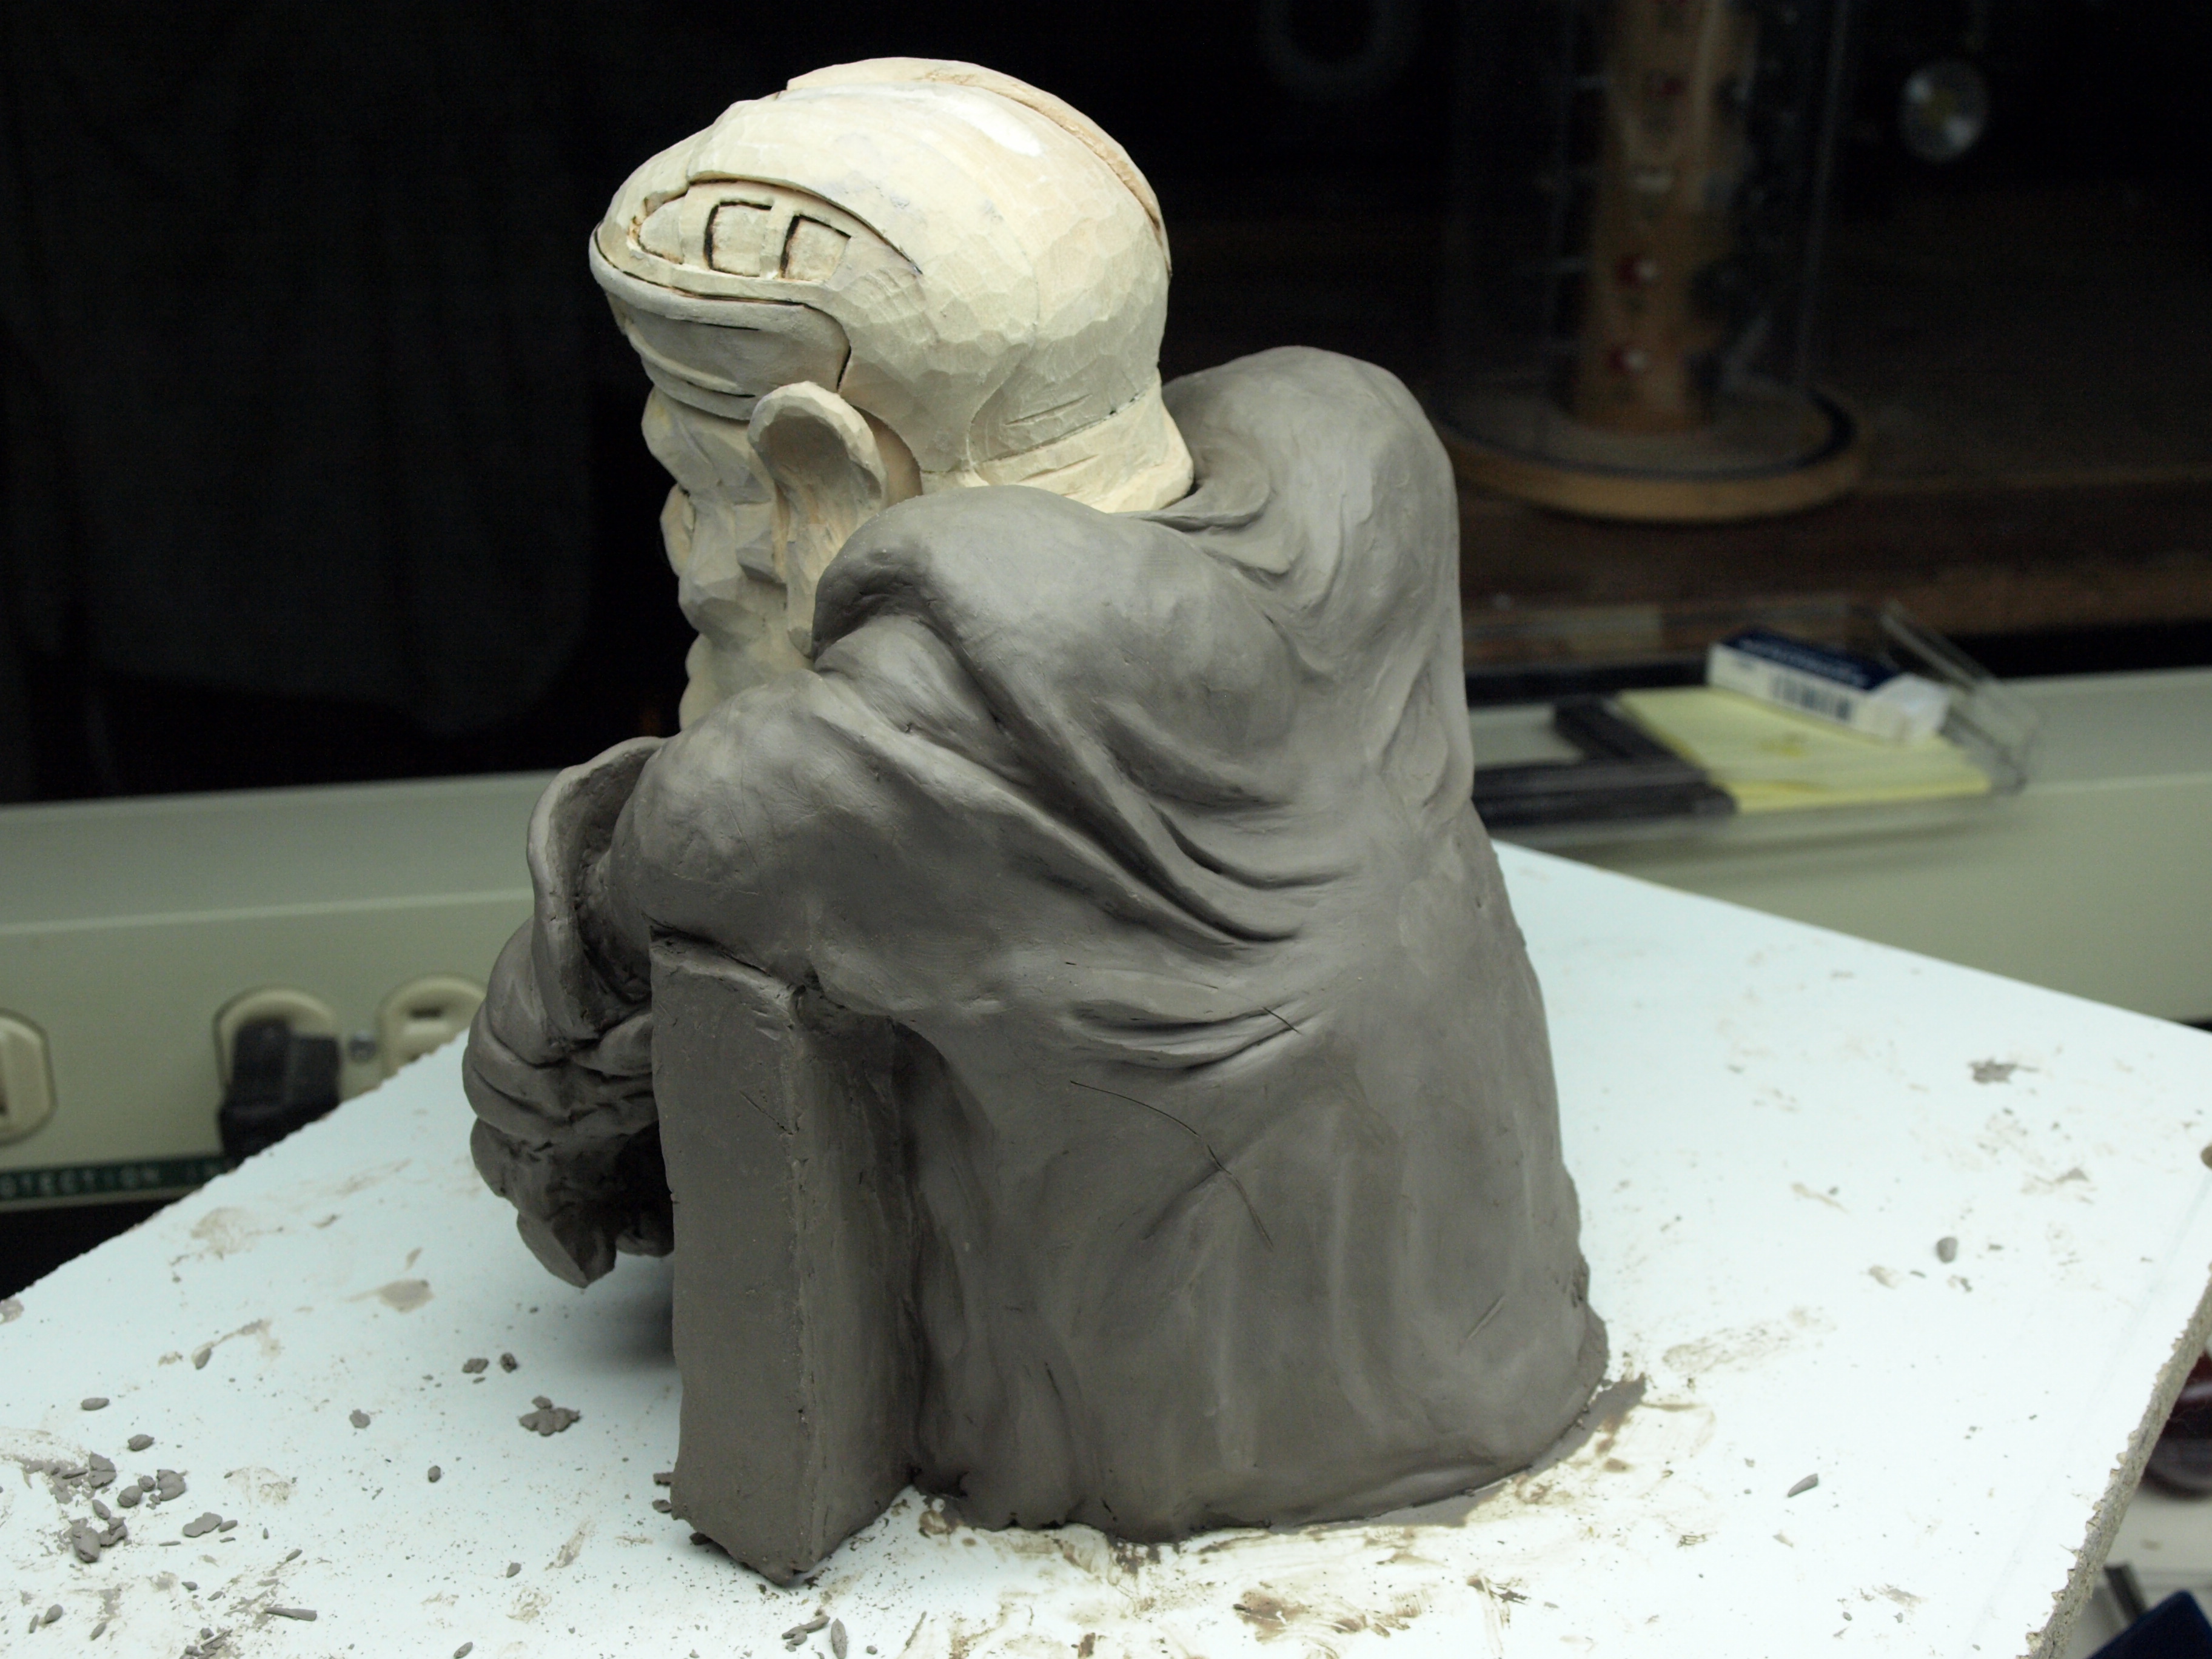
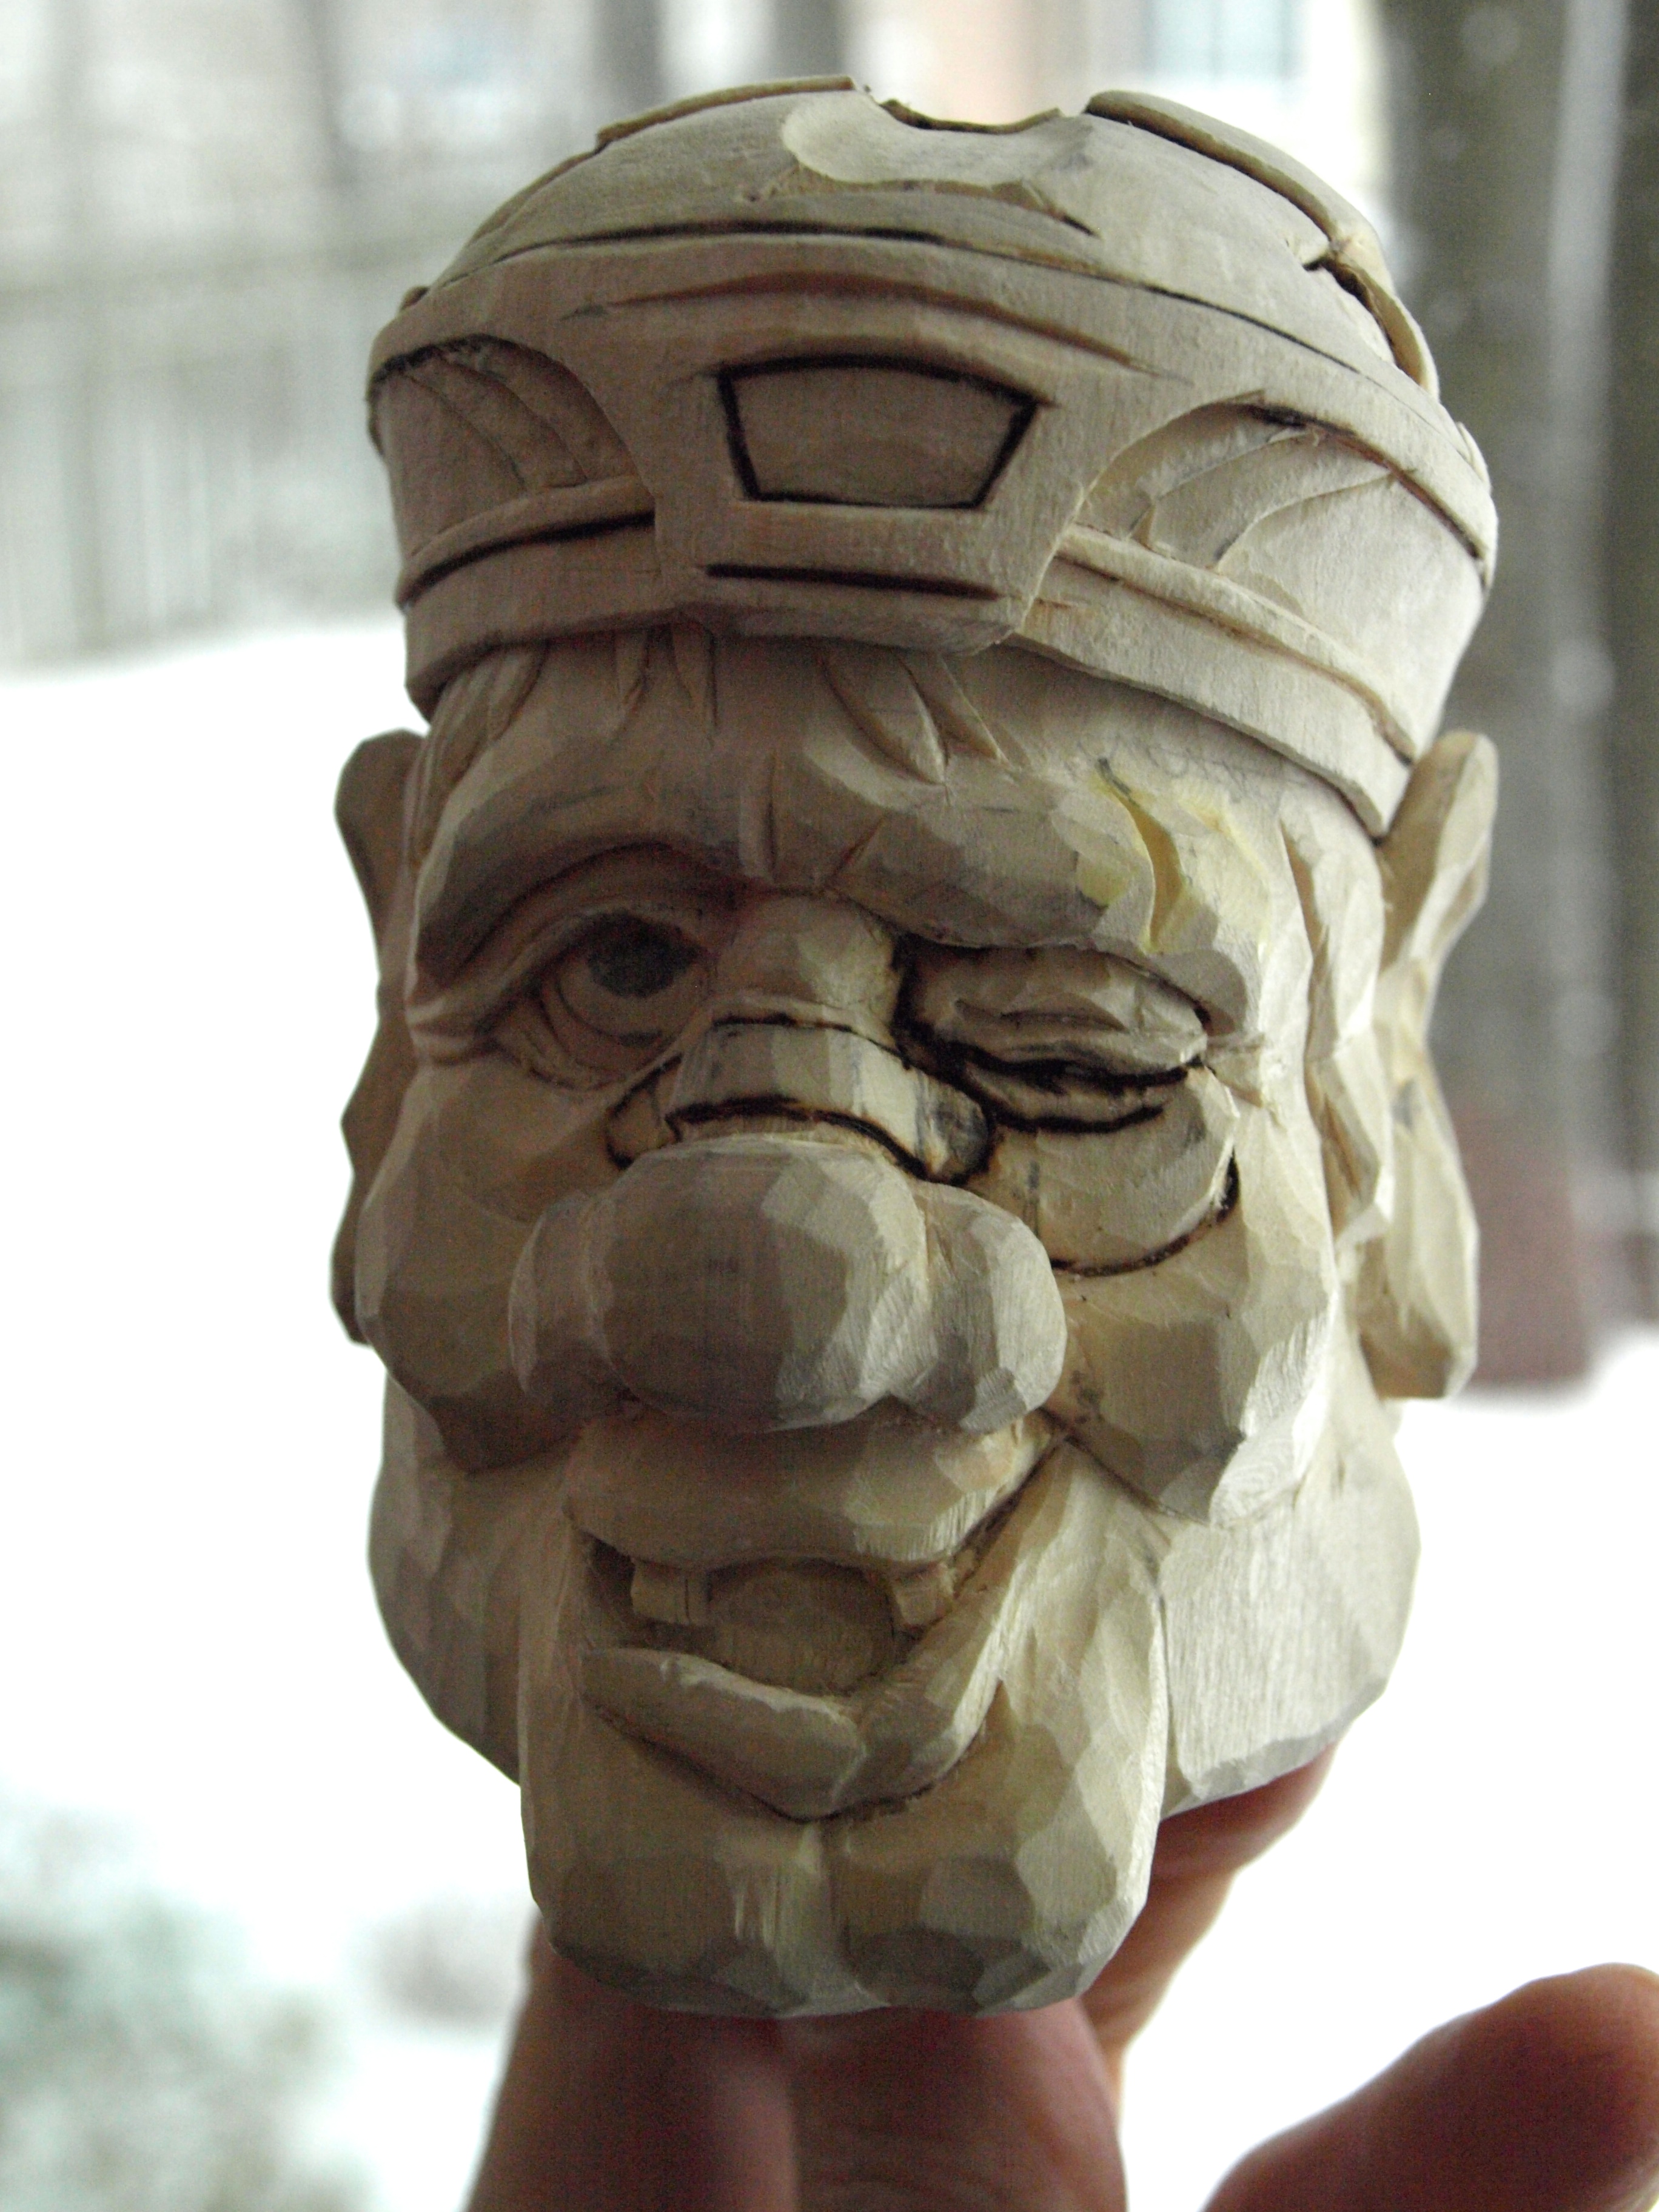
As you can see from the background on my progress photo of my little penalty box hockey player, we’re getting our fair share of snow today following a pretty green ( actually, more barren than green ) Christmas.

He’s coming along nicely.  I actually sanded the helmet down a bit…something that I don’t normally do with my carvings.  In this case, I thought that the helmet in particular would just look a little nicer with a smoother finish.  His face is coming along as well and I probably won’t do a lot more on it until I fit it to his shoulders, which are yet to be carved.

OLYMPUS DIGITAL CAMERA

OLYMPUS DIGITAL CAMERA

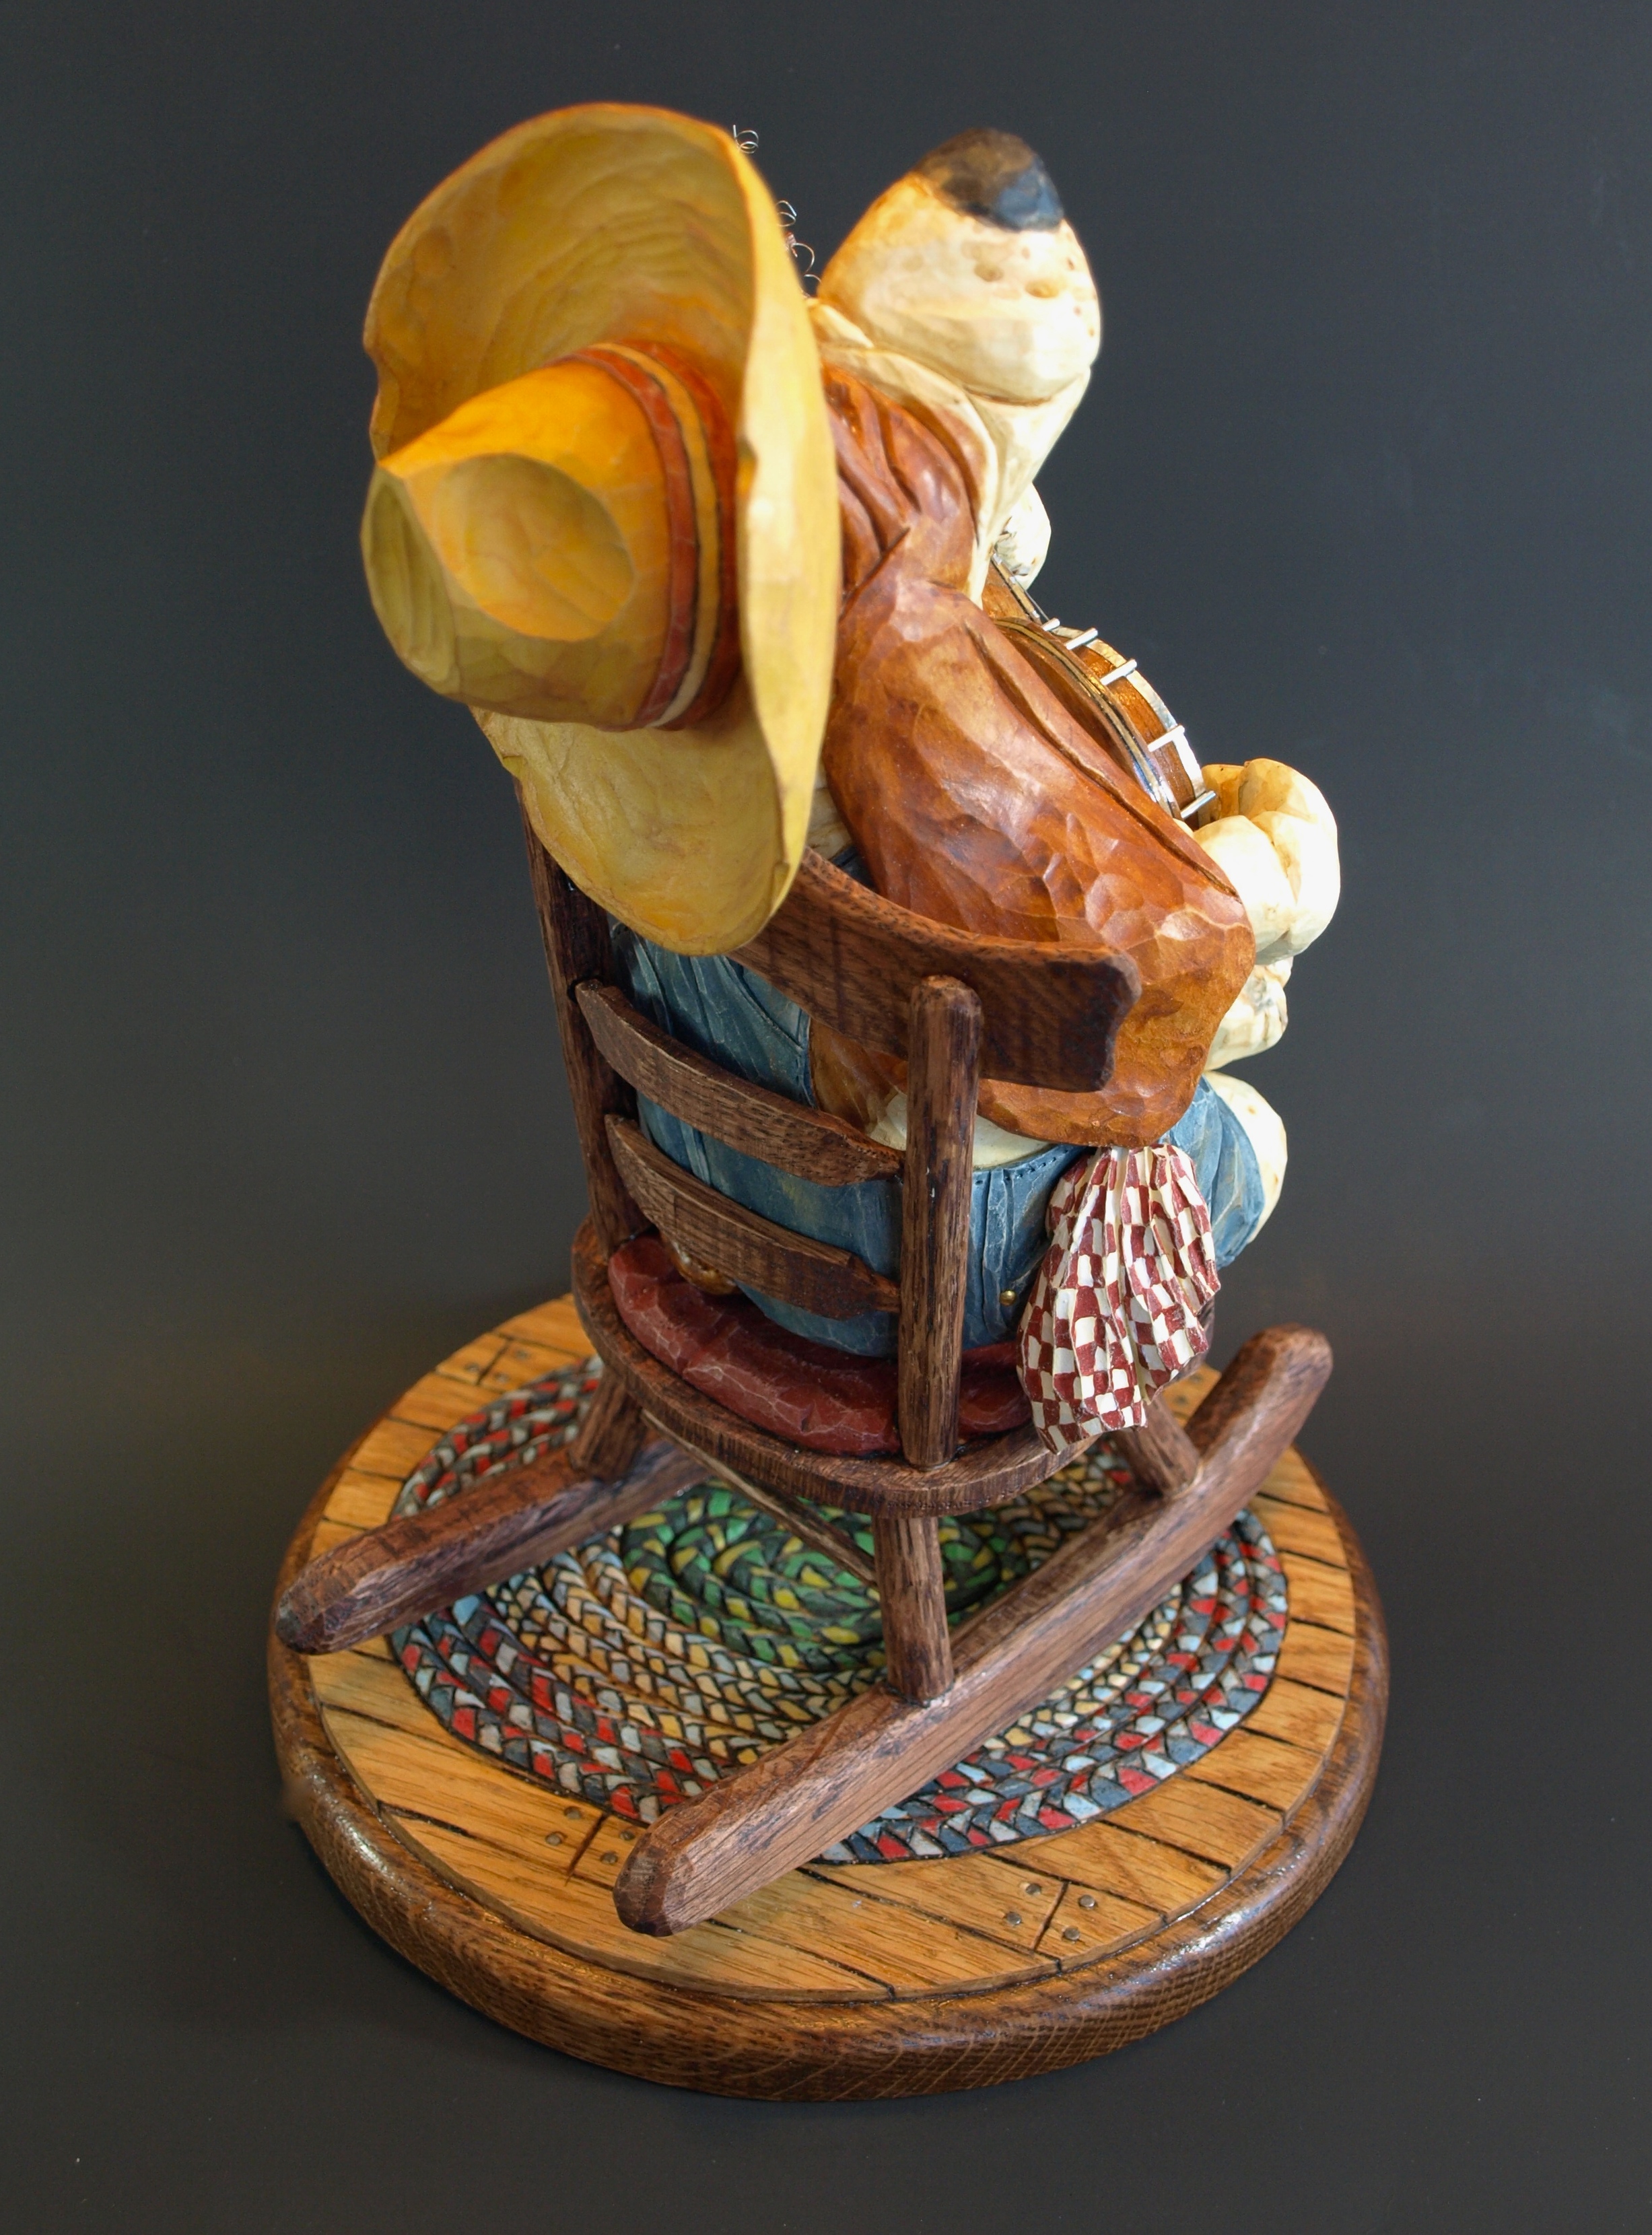
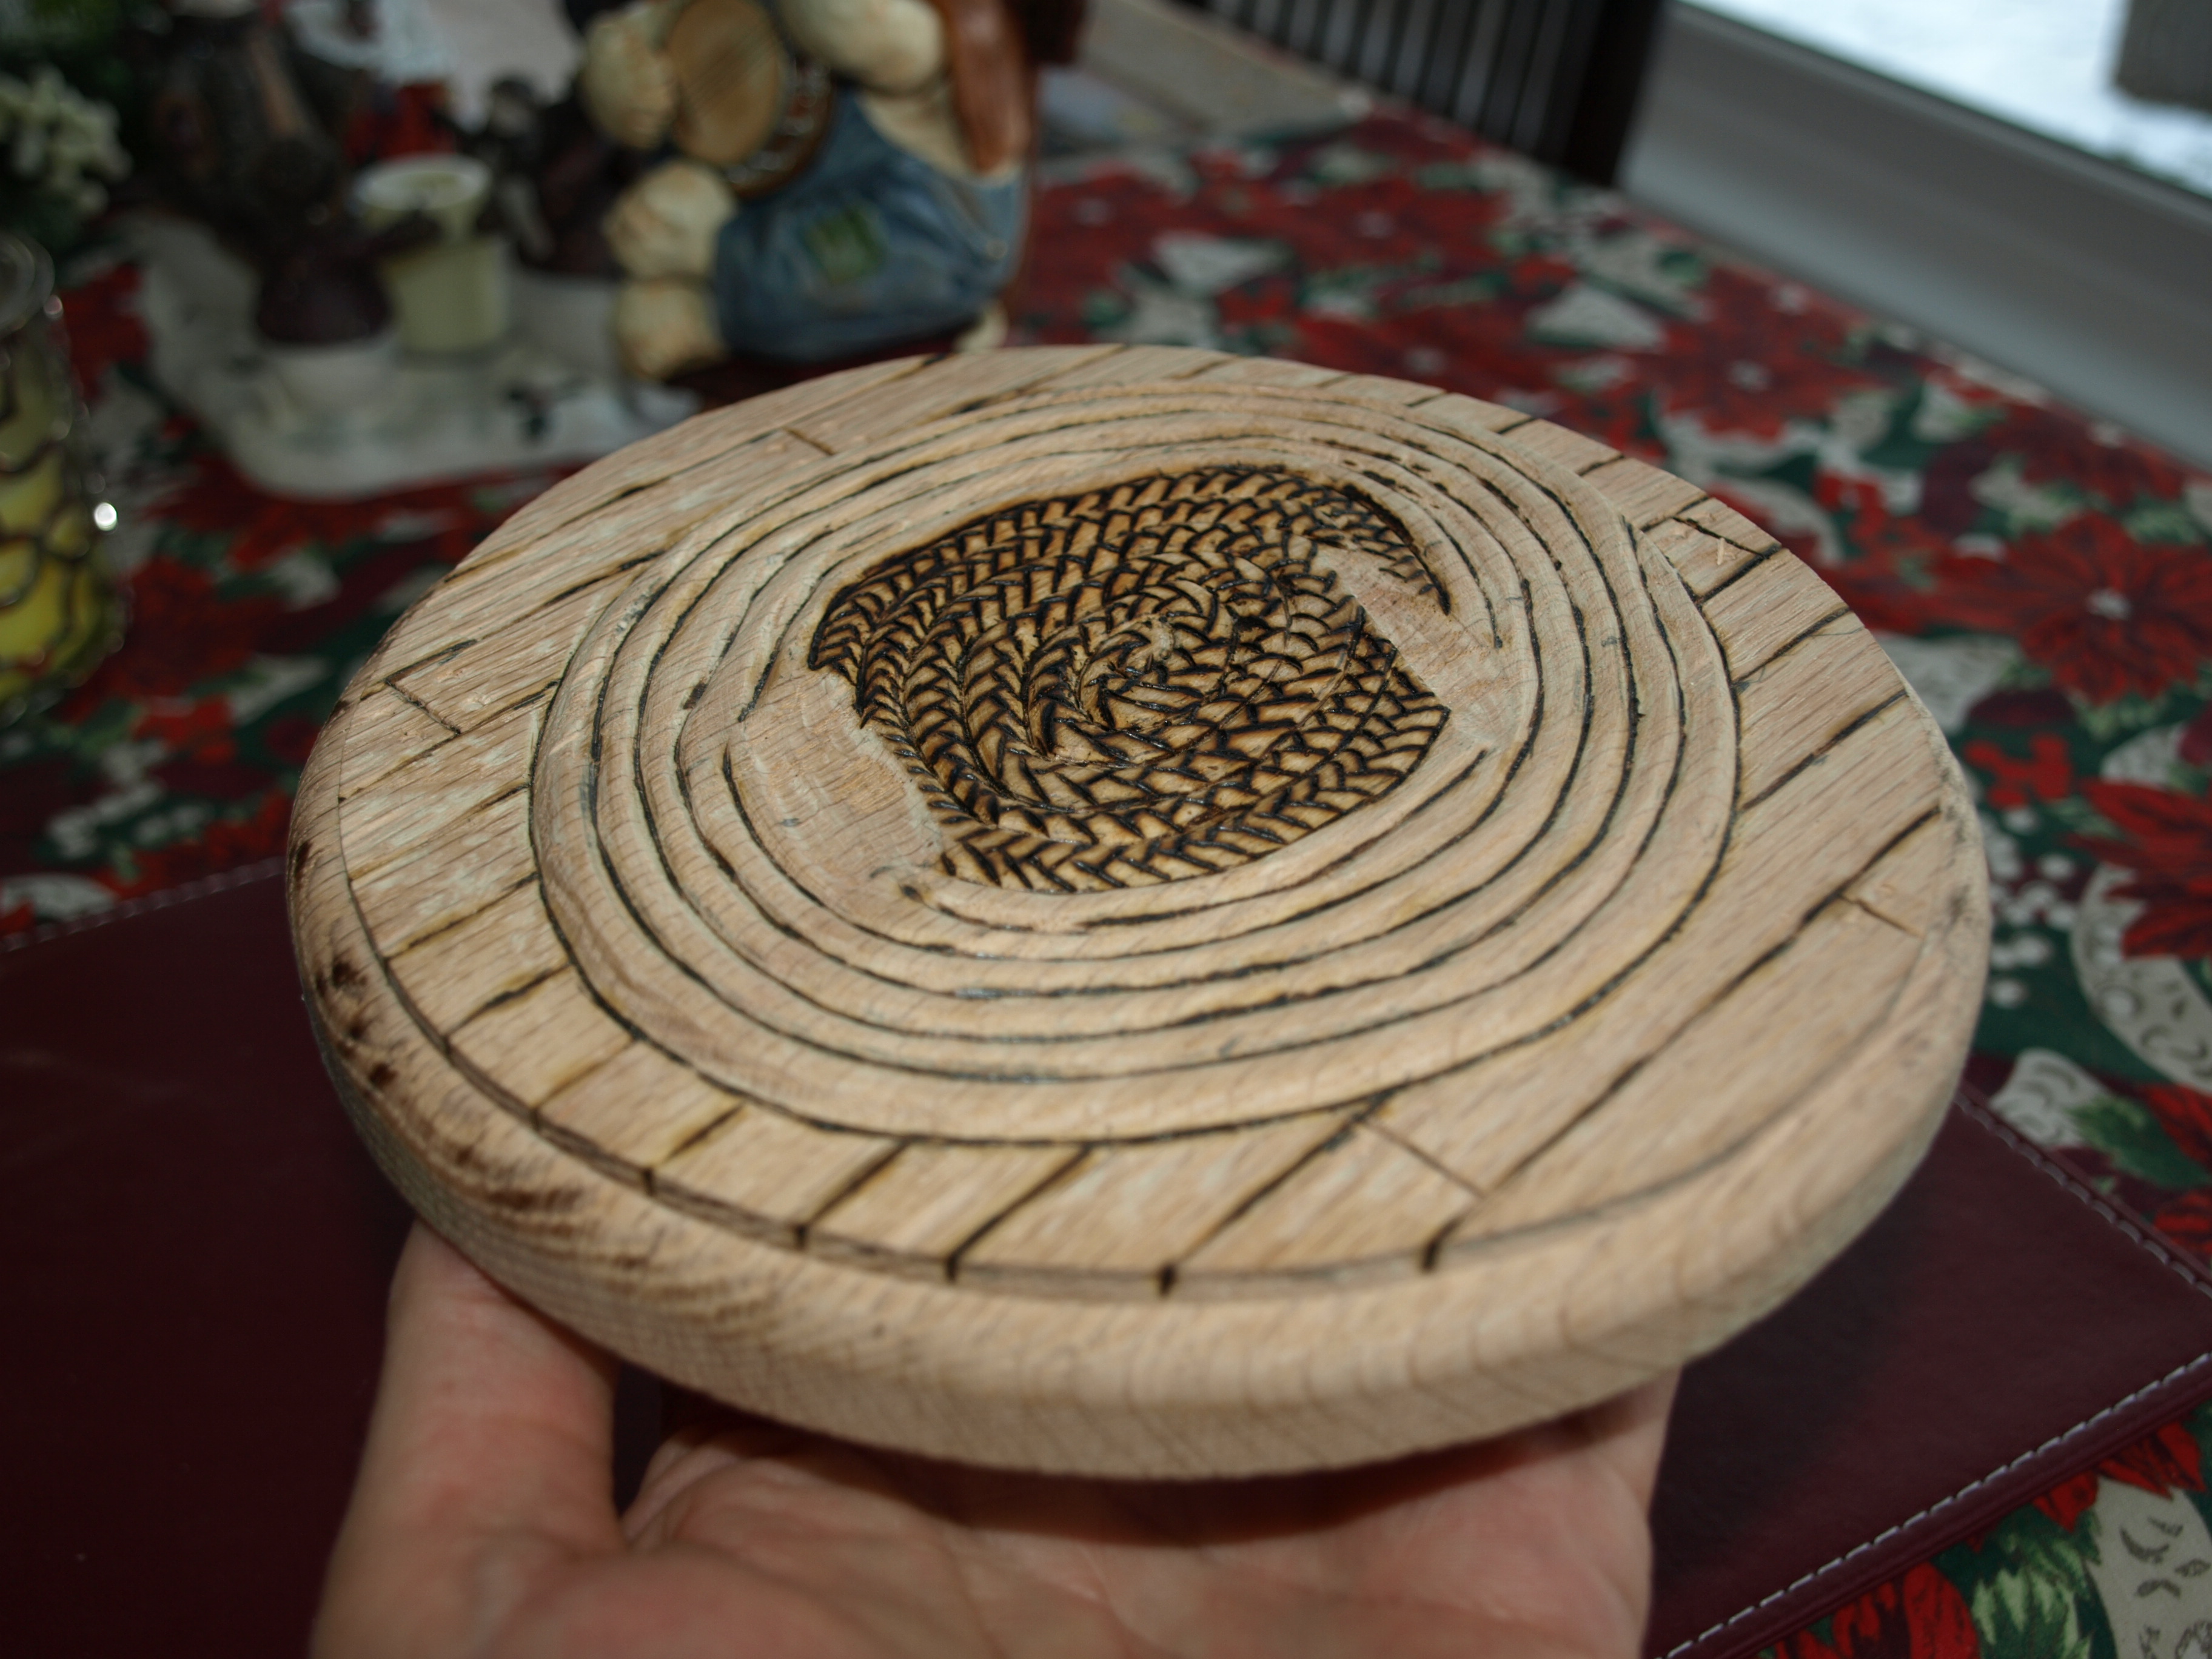
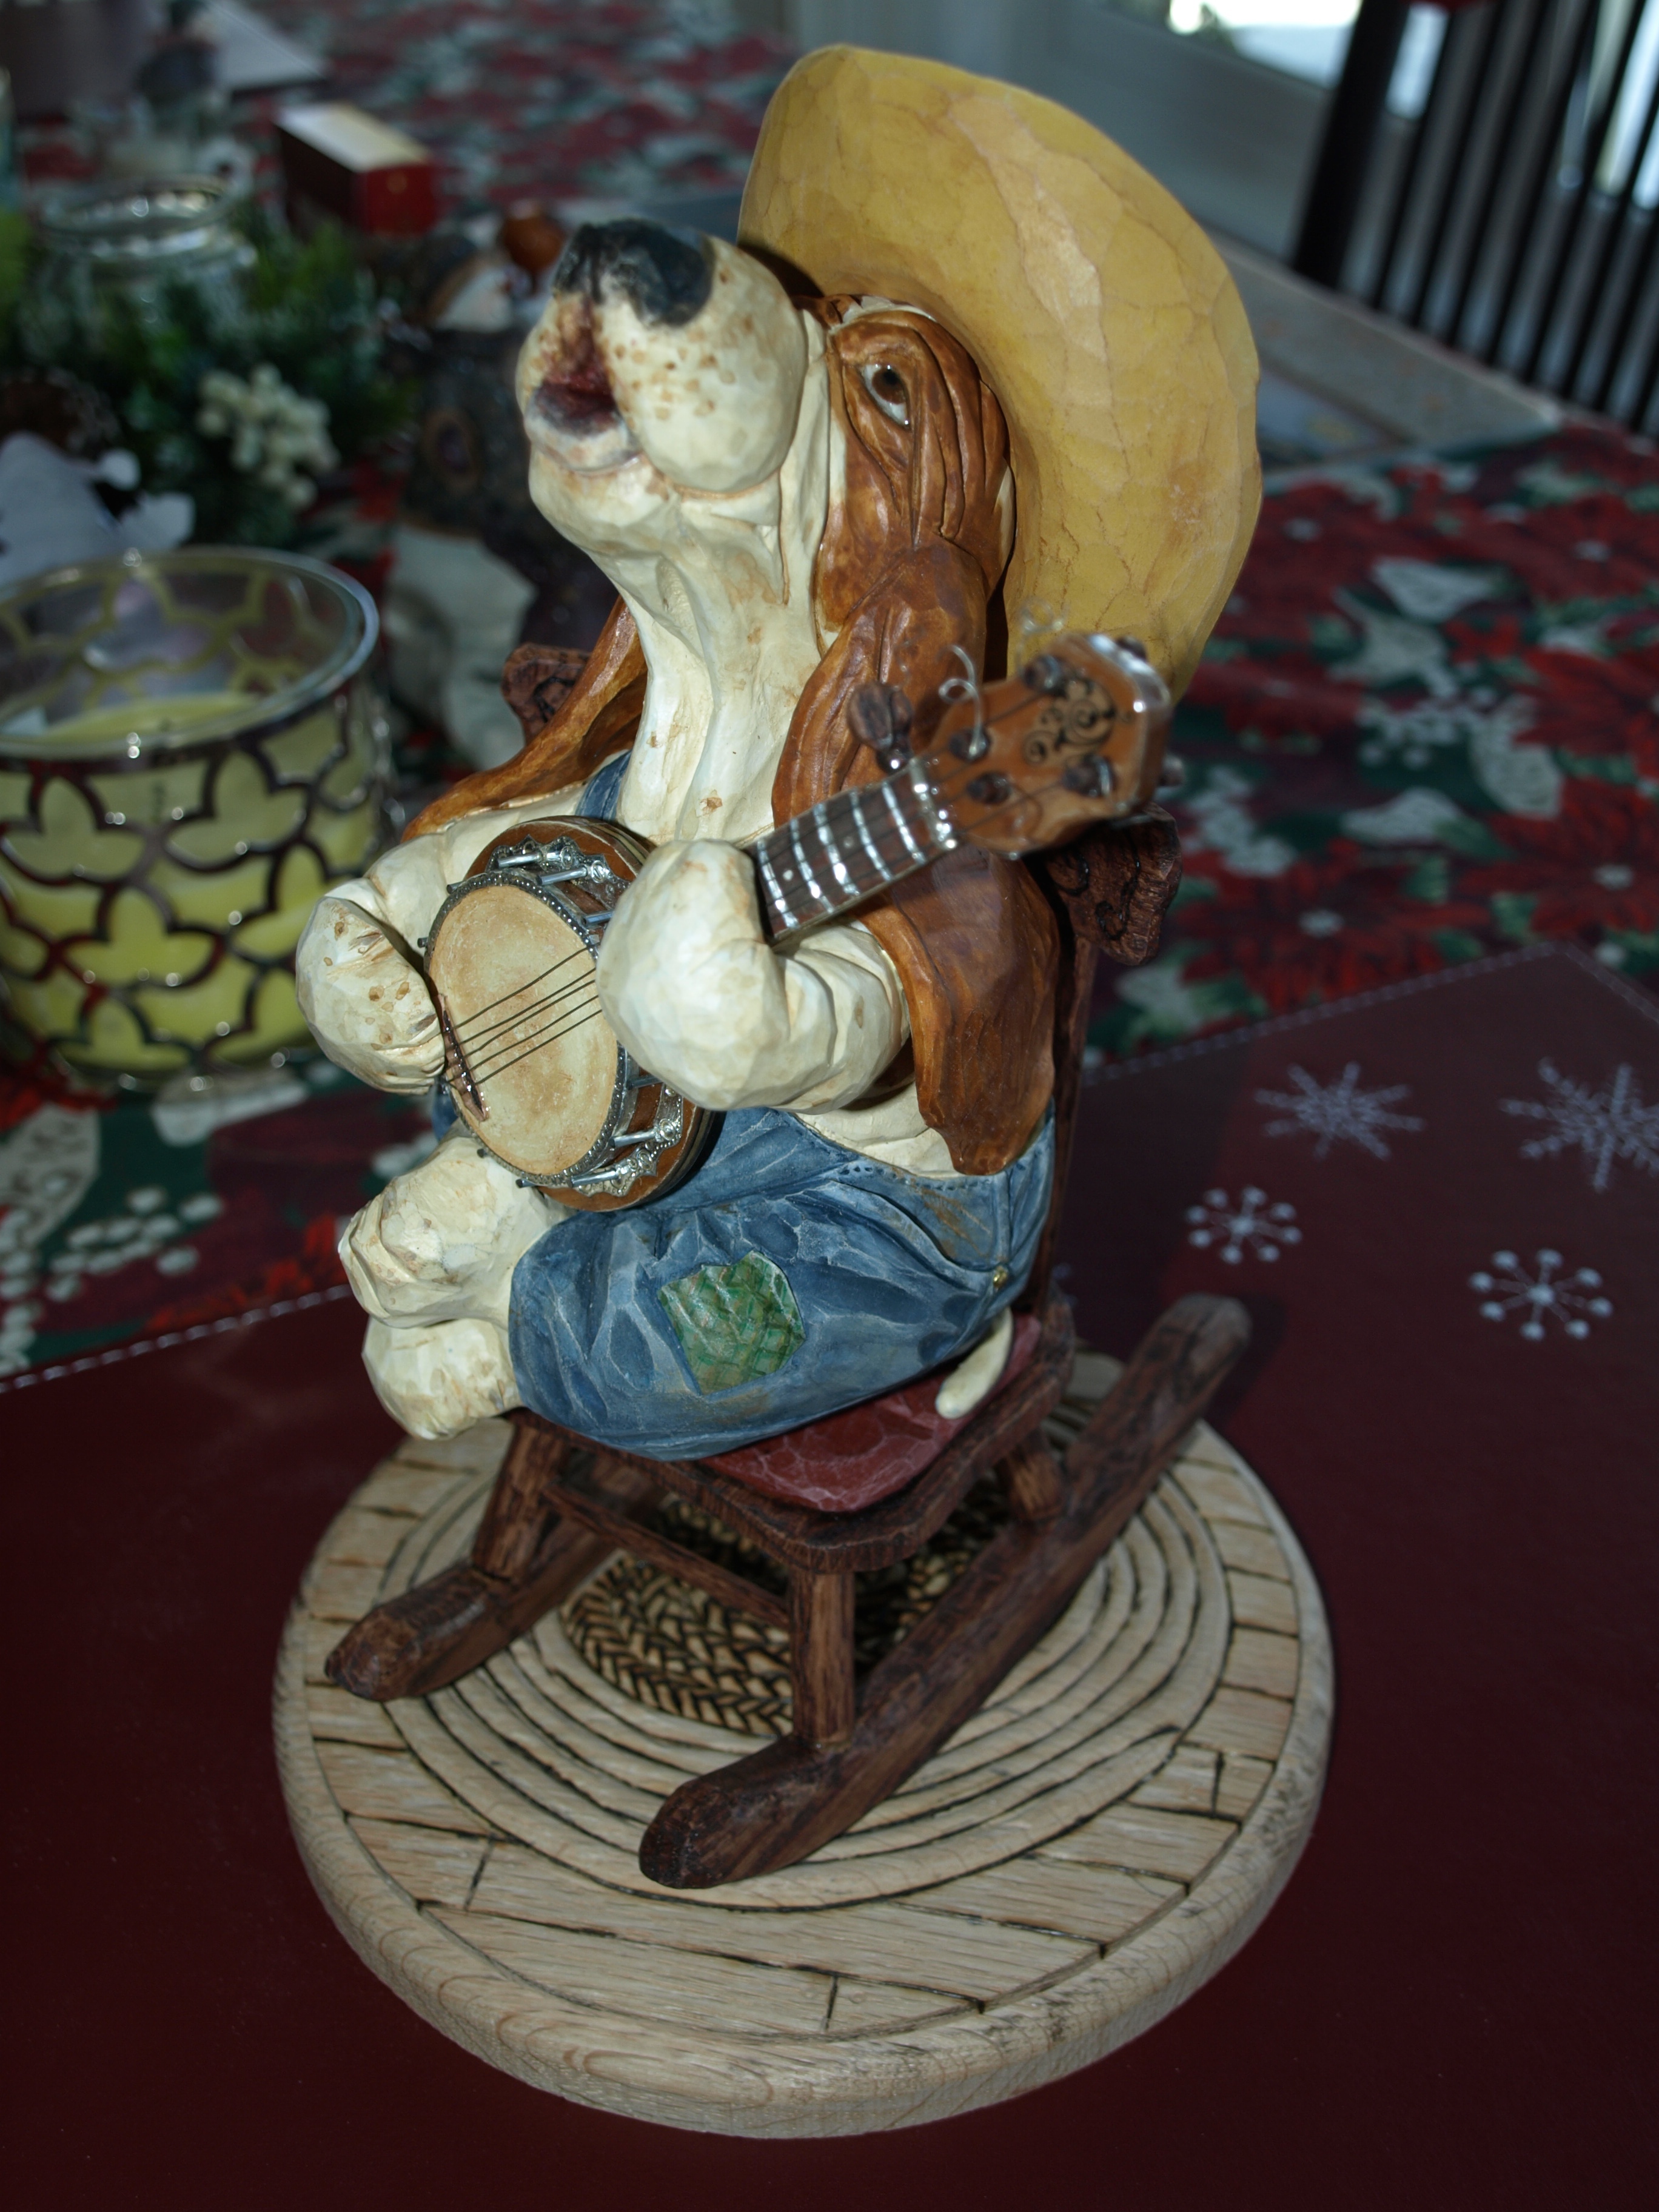
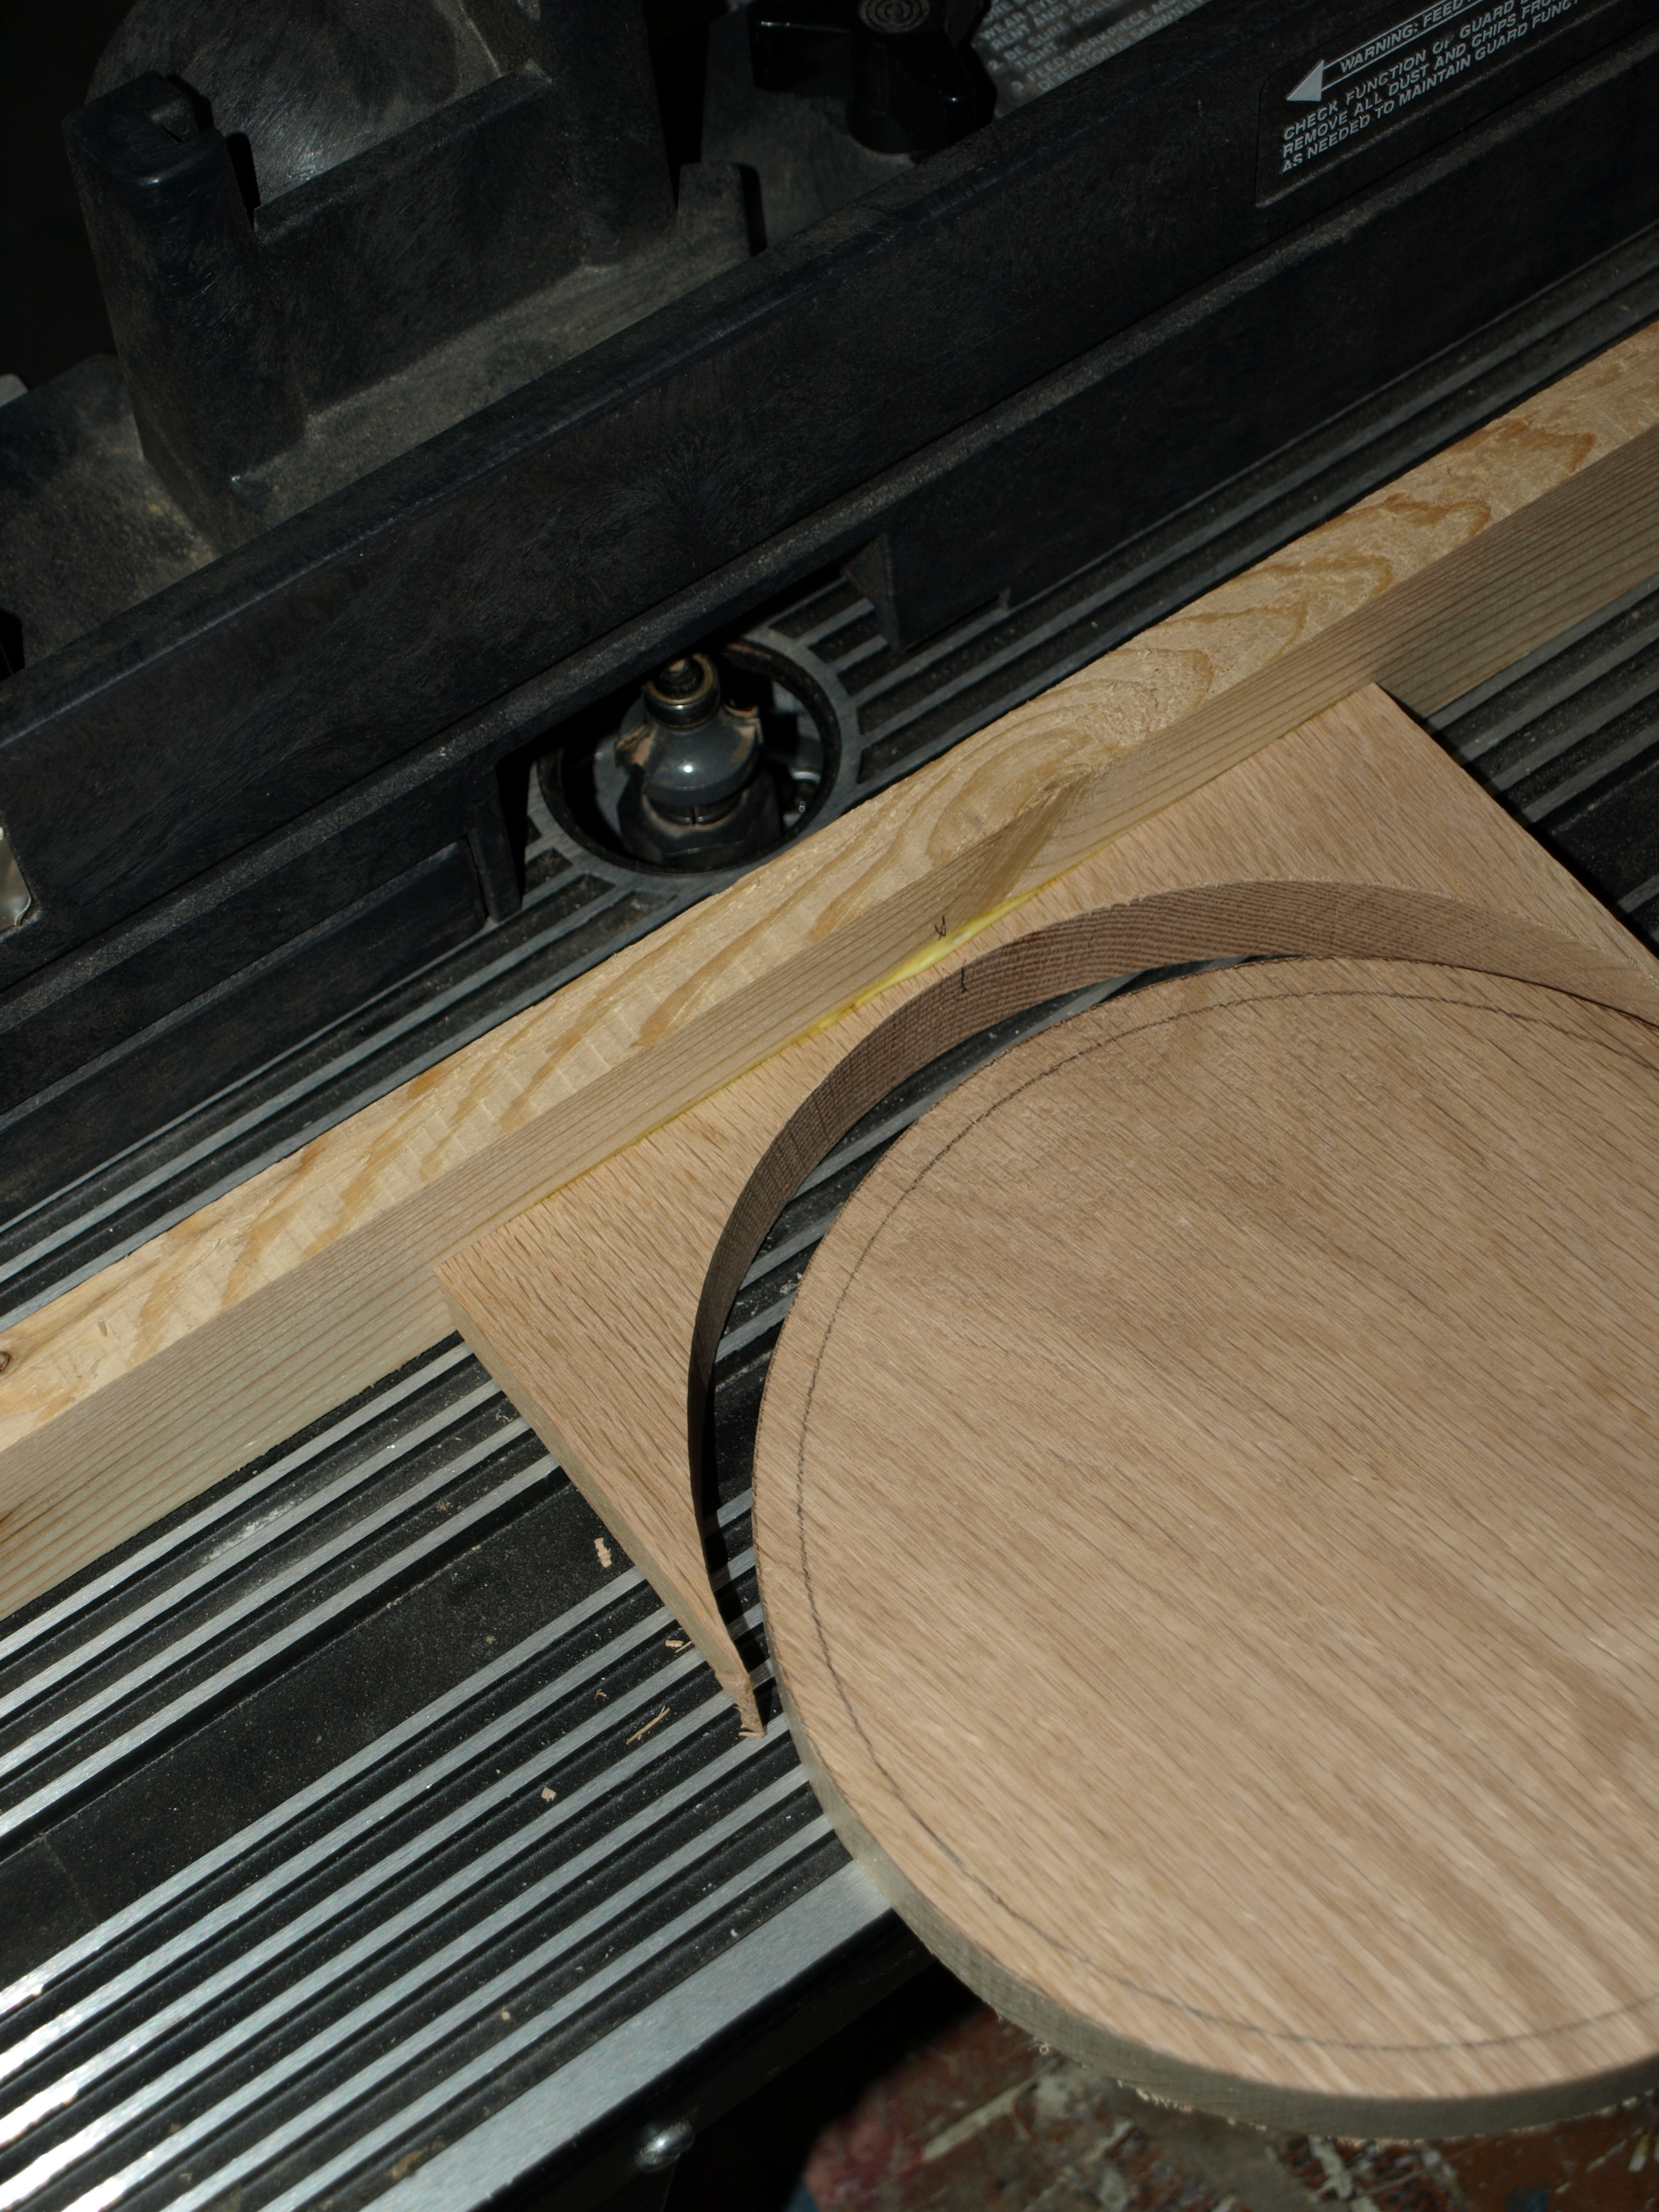
The little Country Hound is making some progress today as well.  I decided on a circular base and will be routering a nice edge on the base today sometime.  It took a bit of thinking but I finally made up a little fence out of the portions of the base that I cut away to form the circle.  That fence will get a slot cut into the centre to accommodate the router bit, then I’ll just place the circular base in that “holder” and carefully turn the base within the fence and let the router do it’s work.

OLYMPUS DIGITAL CAMERA

Well, that’s about it for now.  We wish each of you all of the best things in 2015 and I thank each of you for being interested in and following my projects and inspiring me to try new things.  That meant a lot to me in 2014.  Mark.

Starting the Base

The Country Hound carving is now finished, has been glued together and has received a light coat of urethane to protect the acrylics.  I like the way this carving is turning out.

The base has been cut from a piece of oak and I’m just getting a sense of how I’d like it to look.  I’m picturing that rocking chair sitting on a wood floor with a throw rug.  I’m going to play around with that for a little while and see what turns up.

For now, here’s how it’s looking.

OLYMPUS DIGITAL CAMERA

OLYMPUS DIGITAL CAMERA

Post Navigation