
Ready for a Finish
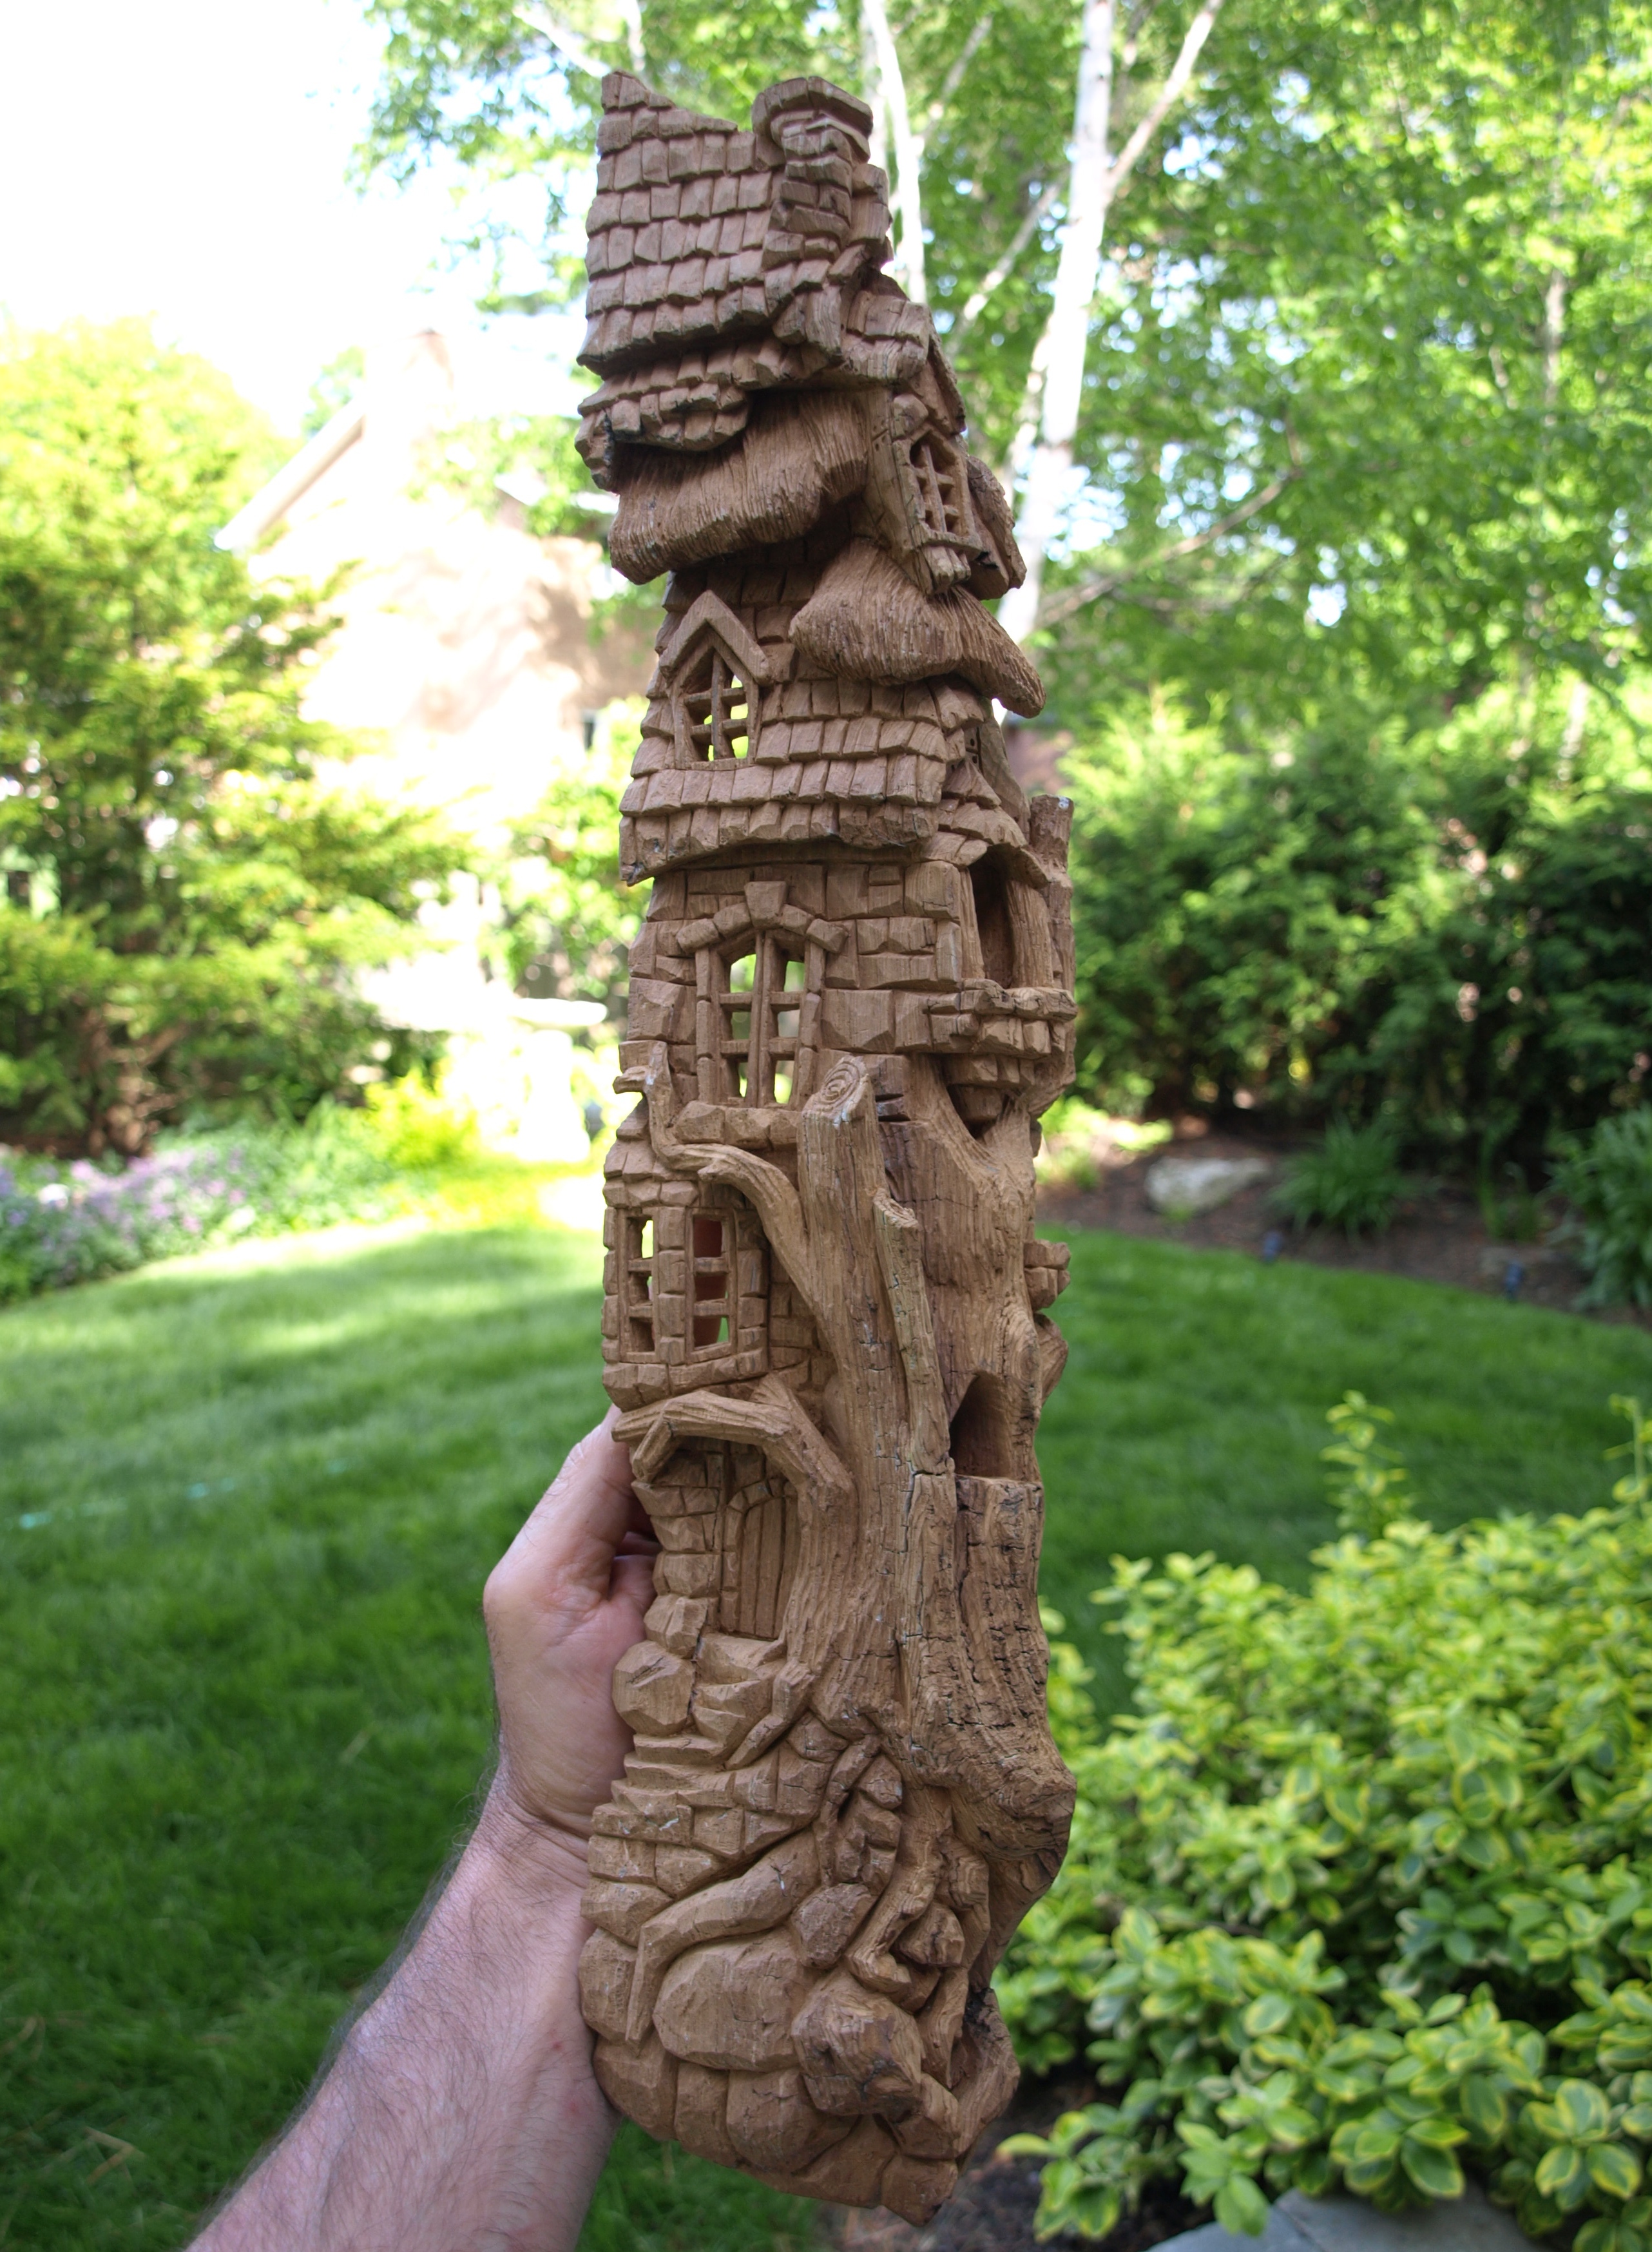
Here’s the final carving prior to putting a finish on the bark.
I hollowed out all of the windows, doors and crawl-ways and then went over the entire carving checking to see that I hadn’t missed anything obvious. I had…a couple of rows of shingles needed to be completed. Then I took a very fine sandpaper and lightly went over the carving just to get any stray slivers of bark that were hanging around.
Finally, I took a blowtorch ( outside ) and on very low fire burned the inside of the chimney to give it a charred look. I’ll take a picture of that later to show you. If you try this, be sure that the torch is burning as low as possible as you don’t want to over-burn your carving. Also, be careful to point this low flame at the chimney top and not any adjacent shingle, etc. ( I wasn’t careful enough and had to carve a few charred shingles to clean them up ).
Tomorrow, I should have a bit of time to put a clear satin urethane finish on the carving which will deepen its colour quite a bit.
By the way, that green stuff in the background is proof that Canada does have a summer ( but it’s too short! ).


Looks awesome!
LikeLike
The cabin is a stunning piece,I love it.
LikeLike
Thanks Cheryl and Lynne. I should have some finished photos up tomorrow. Then it’s off to Emily’s house to hang on the wall beside “Castle Cottonwood.”
LikeLike