tributesinwood

Wood Carvings by Mark Sheridan

Archive for the category “Cottonwood Cabin”

The Finished Cabin

I applied some clear satin urethane to the carving and found that the urethane soaked nicely into the bark leaving a darker colour and a very satin, almost flat, finish.  I like this finish, but if my daughter, Emily, wants something with a bit more gloss I’ll put a second coat of urethane on the carving later on.  I also added a couple of door-knobs ( which are the rounded ends of a pop-rivet ) and painted them black.

All done!  I’ll get all of the photos I’ve taken of the cabin on the Flickr Site ( the link is to the right of this page ) shortly.

Is it too late in the season to go back to my Hockey Player and complete that carving now?

Advertisement

Ready for a Finish

Here’s the final carving prior to putting a finish on the bark.

I hollowed out all of the windows, doors and crawl-ways and then went over the entire carving checking to see that I hadn’t missed anything obvious.  I had…a couple of rows of shingles needed to be completed.  Then I took a very fine sandpaper and lightly went over the carving just to get any stray slivers of bark that were hanging around.

Finally, I took a blowtorch ( outside ) and on very low fire burned the inside of the chimney to give it a charred look.  I’ll take a picture of that later to show you.  If you try this, be sure that the torch is burning as low as possible as you don’t want to over-burn your carving.  Also, be careful to point this low flame at the chimney top and not any adjacent shingle, etc. ( I wasn’t careful enough and had to carve a few charred shingles to clean them up ).

Tomorrow, I should have a bit of time to put a clear satin urethane finish on the carving which will deepen its colour quite a bit.

By the way, that green stuff in the background is proof that Canada does have a summer ( but it’s too short! ).

Hollowing Out Windows

Time to create a hollow in behind each of the windows and open doors.  I use a Typhoon bit ( carbide Foredom bit ) to quickly hollow out the bark from the back of the carving.

I start by using either a slim ( drill bit-like ) Foredom tool or a drill to bore a hole in the centre of the window panes.  This initial boring gives you a depth to shoot for when you begin hollowing out from the other side of the bark…ie. when the hollowing is deep enough, you begin to see the holes which you drilled from the other side.  This, of course, is a helpful clue to make sure that I don’t hollow out too deeply and inadvertently remove the entire window.

After that initial hollowing, I use a knife to clean up the window panes.  If you try this, just be sure to leave enough wood depth on the window structure to give it strength.  I usually shoot for about 3/16″.

It’s coming along.

Nearing Completion

I spent a few more hours on the cabin yesterday and probably won’t get at it too much today with some running around we need to do on a typical Saturday.  Beautiful day in Kingston today.

I carved some additional branches and another entranceway with stairs.  I added some roots wrapped around some loose boulders and rocks in the soil and I gave some of the bark of the tree texture with a small gouge chisel.  I’m looking forward to hollowing out in behind the windows to give it some additional depth.

A pretty quick carve and very enjoyable.  If you haven’t tried bark carving, give it a try.  I still like Peggy’s comment that it’s like doodling on a piece of paper with no firm plan in mind…if the bark looks like a particular item ( a branch, rock, window ), then that’s what you go with.

P5232639

More Progress on the Cabin

I’ve now started on the tree that is supporting some portion of the cabin.  I have a few branches as well as the main trunk that all support some block and brick-work as part of the cabin structure.  I also included a few gremlin sized holes in the tree trunk that lead to passages to who knows where.

Also included is a waterfall.  I had added a waterfall in an earlier bark carving of the the Cottonwood Mill and liked it so much that I thought I’d do a second waterfall for the cabin.  The white of the bark and the ridges in the bark really look like a waterfall to me.  I added just a little cavity in the block-work to make it look like the water is originating from there.  I’m not sure exactly where all that water is coming from…but we won’t worry about that too much.

Hope that you are enjoying the photos.

Tree Top Cabin

I carved a bit more of the cabin this afternoon…on the patio…in the sunshine!  Nice and relaxing.

You can see an additional window, some stone block-work and a bit of a terrace with two tree trunks holding up the shingled roof above.  As I’m carving, I’m getting ideas for how to carve the large tree trunk that the cabin is perched upon.  I can picture some ladders and various entrances and exits that wind their way up the tree and into the cabin.  Should be fun.

Again, if you’re interested in carving bark you’ll enjoy the fun of just carving whatever comes into your head.  The bark can be rather fragile, so you’ll just want to ensure that you use a sharp knife and chisels and that as many of the cuts as possible be of a slicing nature rather than a pushed blade that could break off a piece of the bark.  No matter how careful you are, you will break off some small pieces of bark and you can either modify your carving and carve around the break, or use a bit of white glue to place the bark back into position.  I usually just modify what I had in mind for that particular piece that broke off.

A Long Weekend Project

Yep, it’s a long weekend in Canada.  Now that I’m recently retired it has a bit less impact, but fun just the same.  The holiday is actually Queen Victoria Day, which we used to call “fire-cracker day” when I was a kid because we got to light off fireworks and fire-crackers in the backyard.  I still have a faint scar on one of my fingers from a fire-cracker gone bad!  It’s a holiday that’s been around for a long time, starting back in 1854 on Queen Victoria’s 35th birthday and before the Confederation of Canada.  Not planning any fireworks in the backyard but I’ll work on my bark carving on and off through the weekend.

The cabin is coming along with the roof pretty much completed.  I chose to combine some shingles with a couple sections of thatched roofing.  It’s looking pretty good.  I’ll need to get my thinking cap on to complete the rest, but I’m picturing some wood structures, some large stone block work and at least one large tree trunk.  We’ll see what turns up.

Cottonwood Cabin

And now for a bit of a departure from caricature carvings and a return to bark carving.  I’ve completed two other bark carvings that you can check out in previous posts…the Cottonwood Mill and Castle Cottonwood.

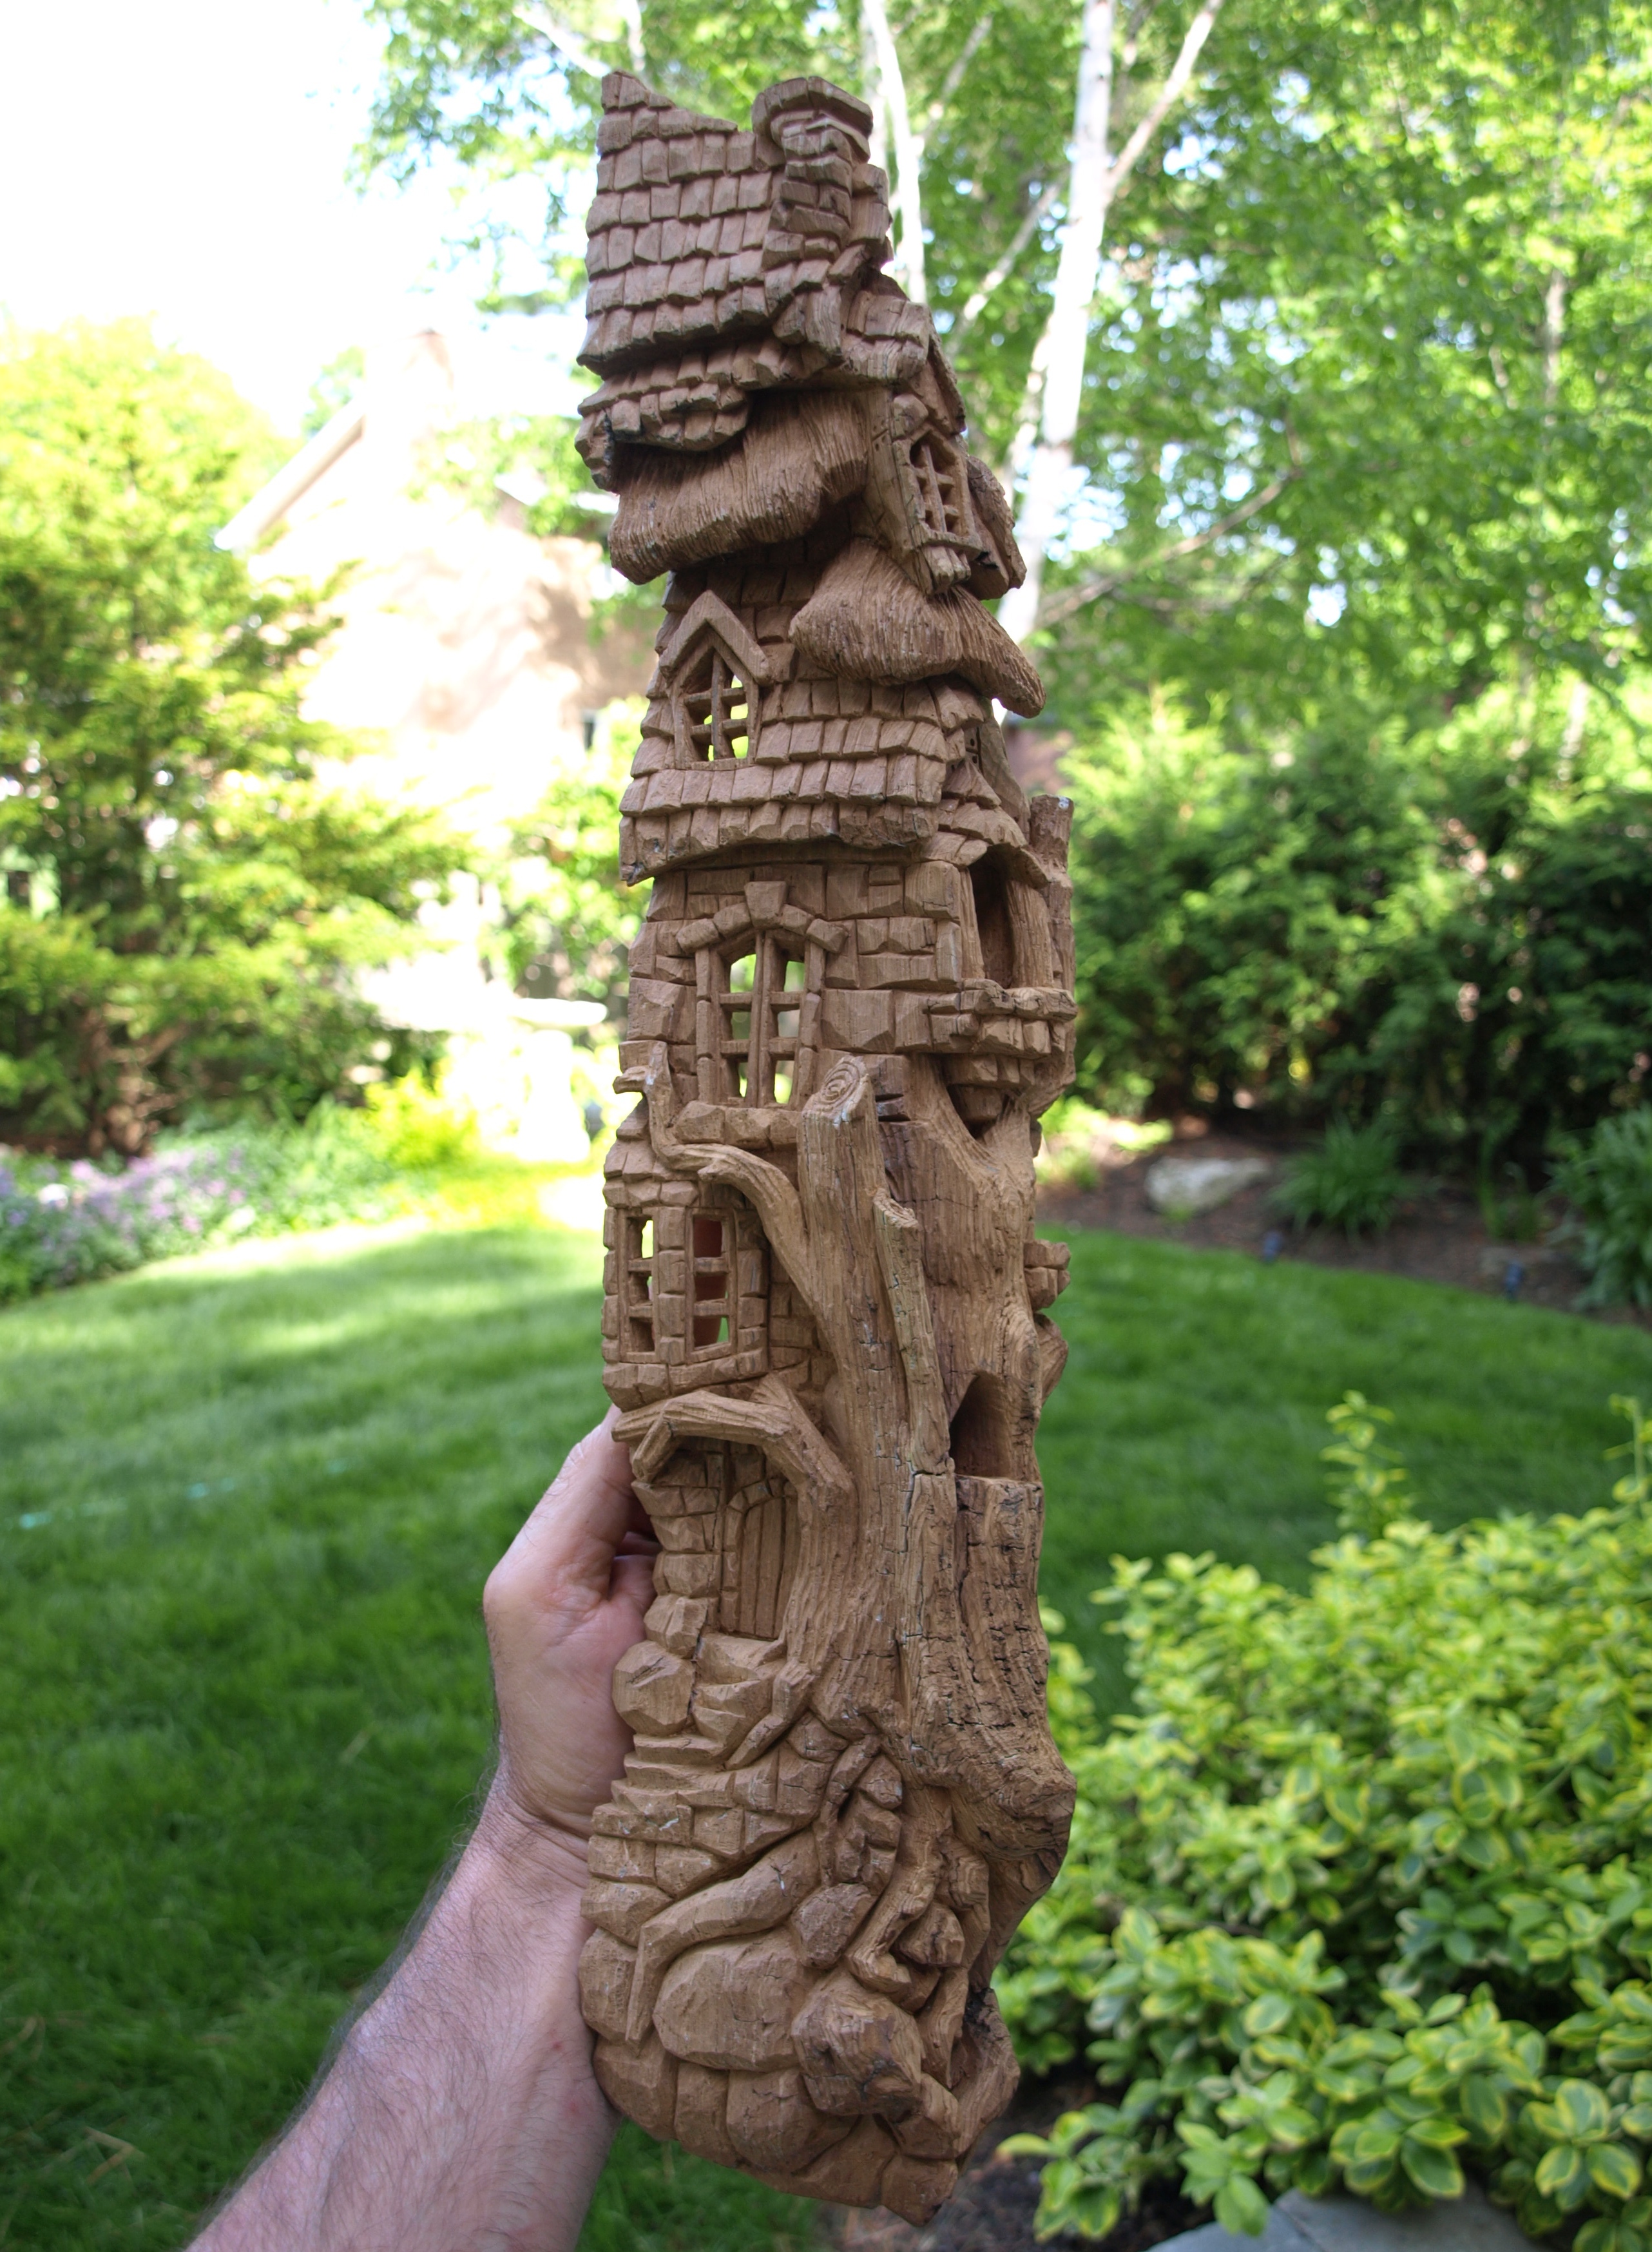
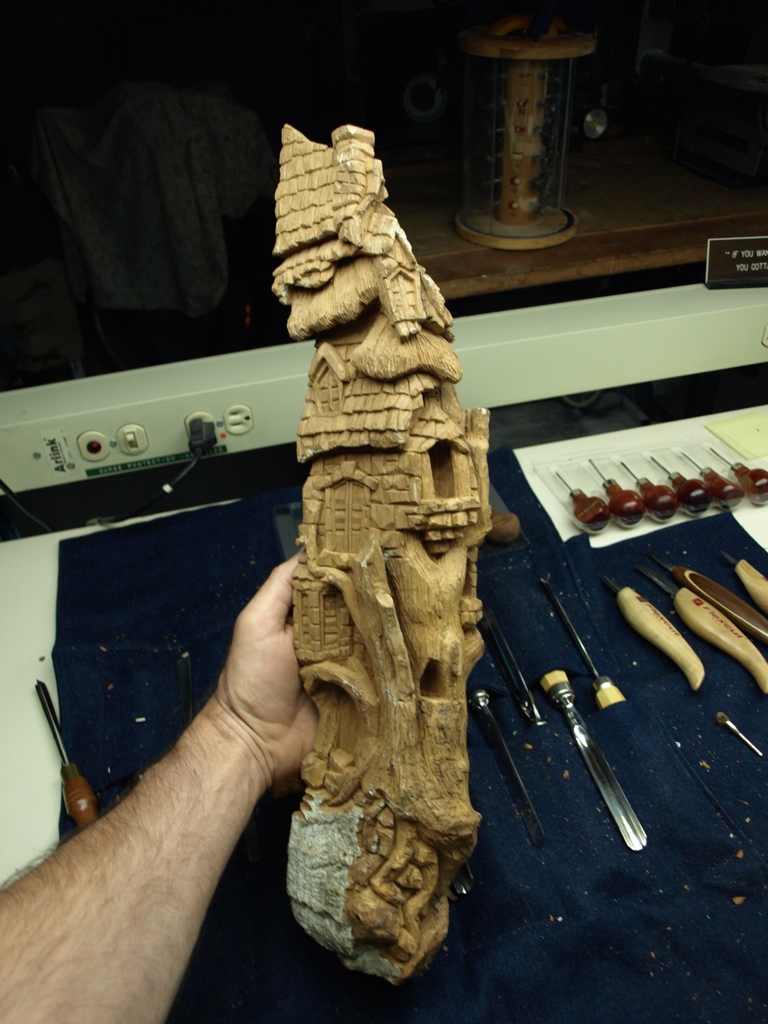
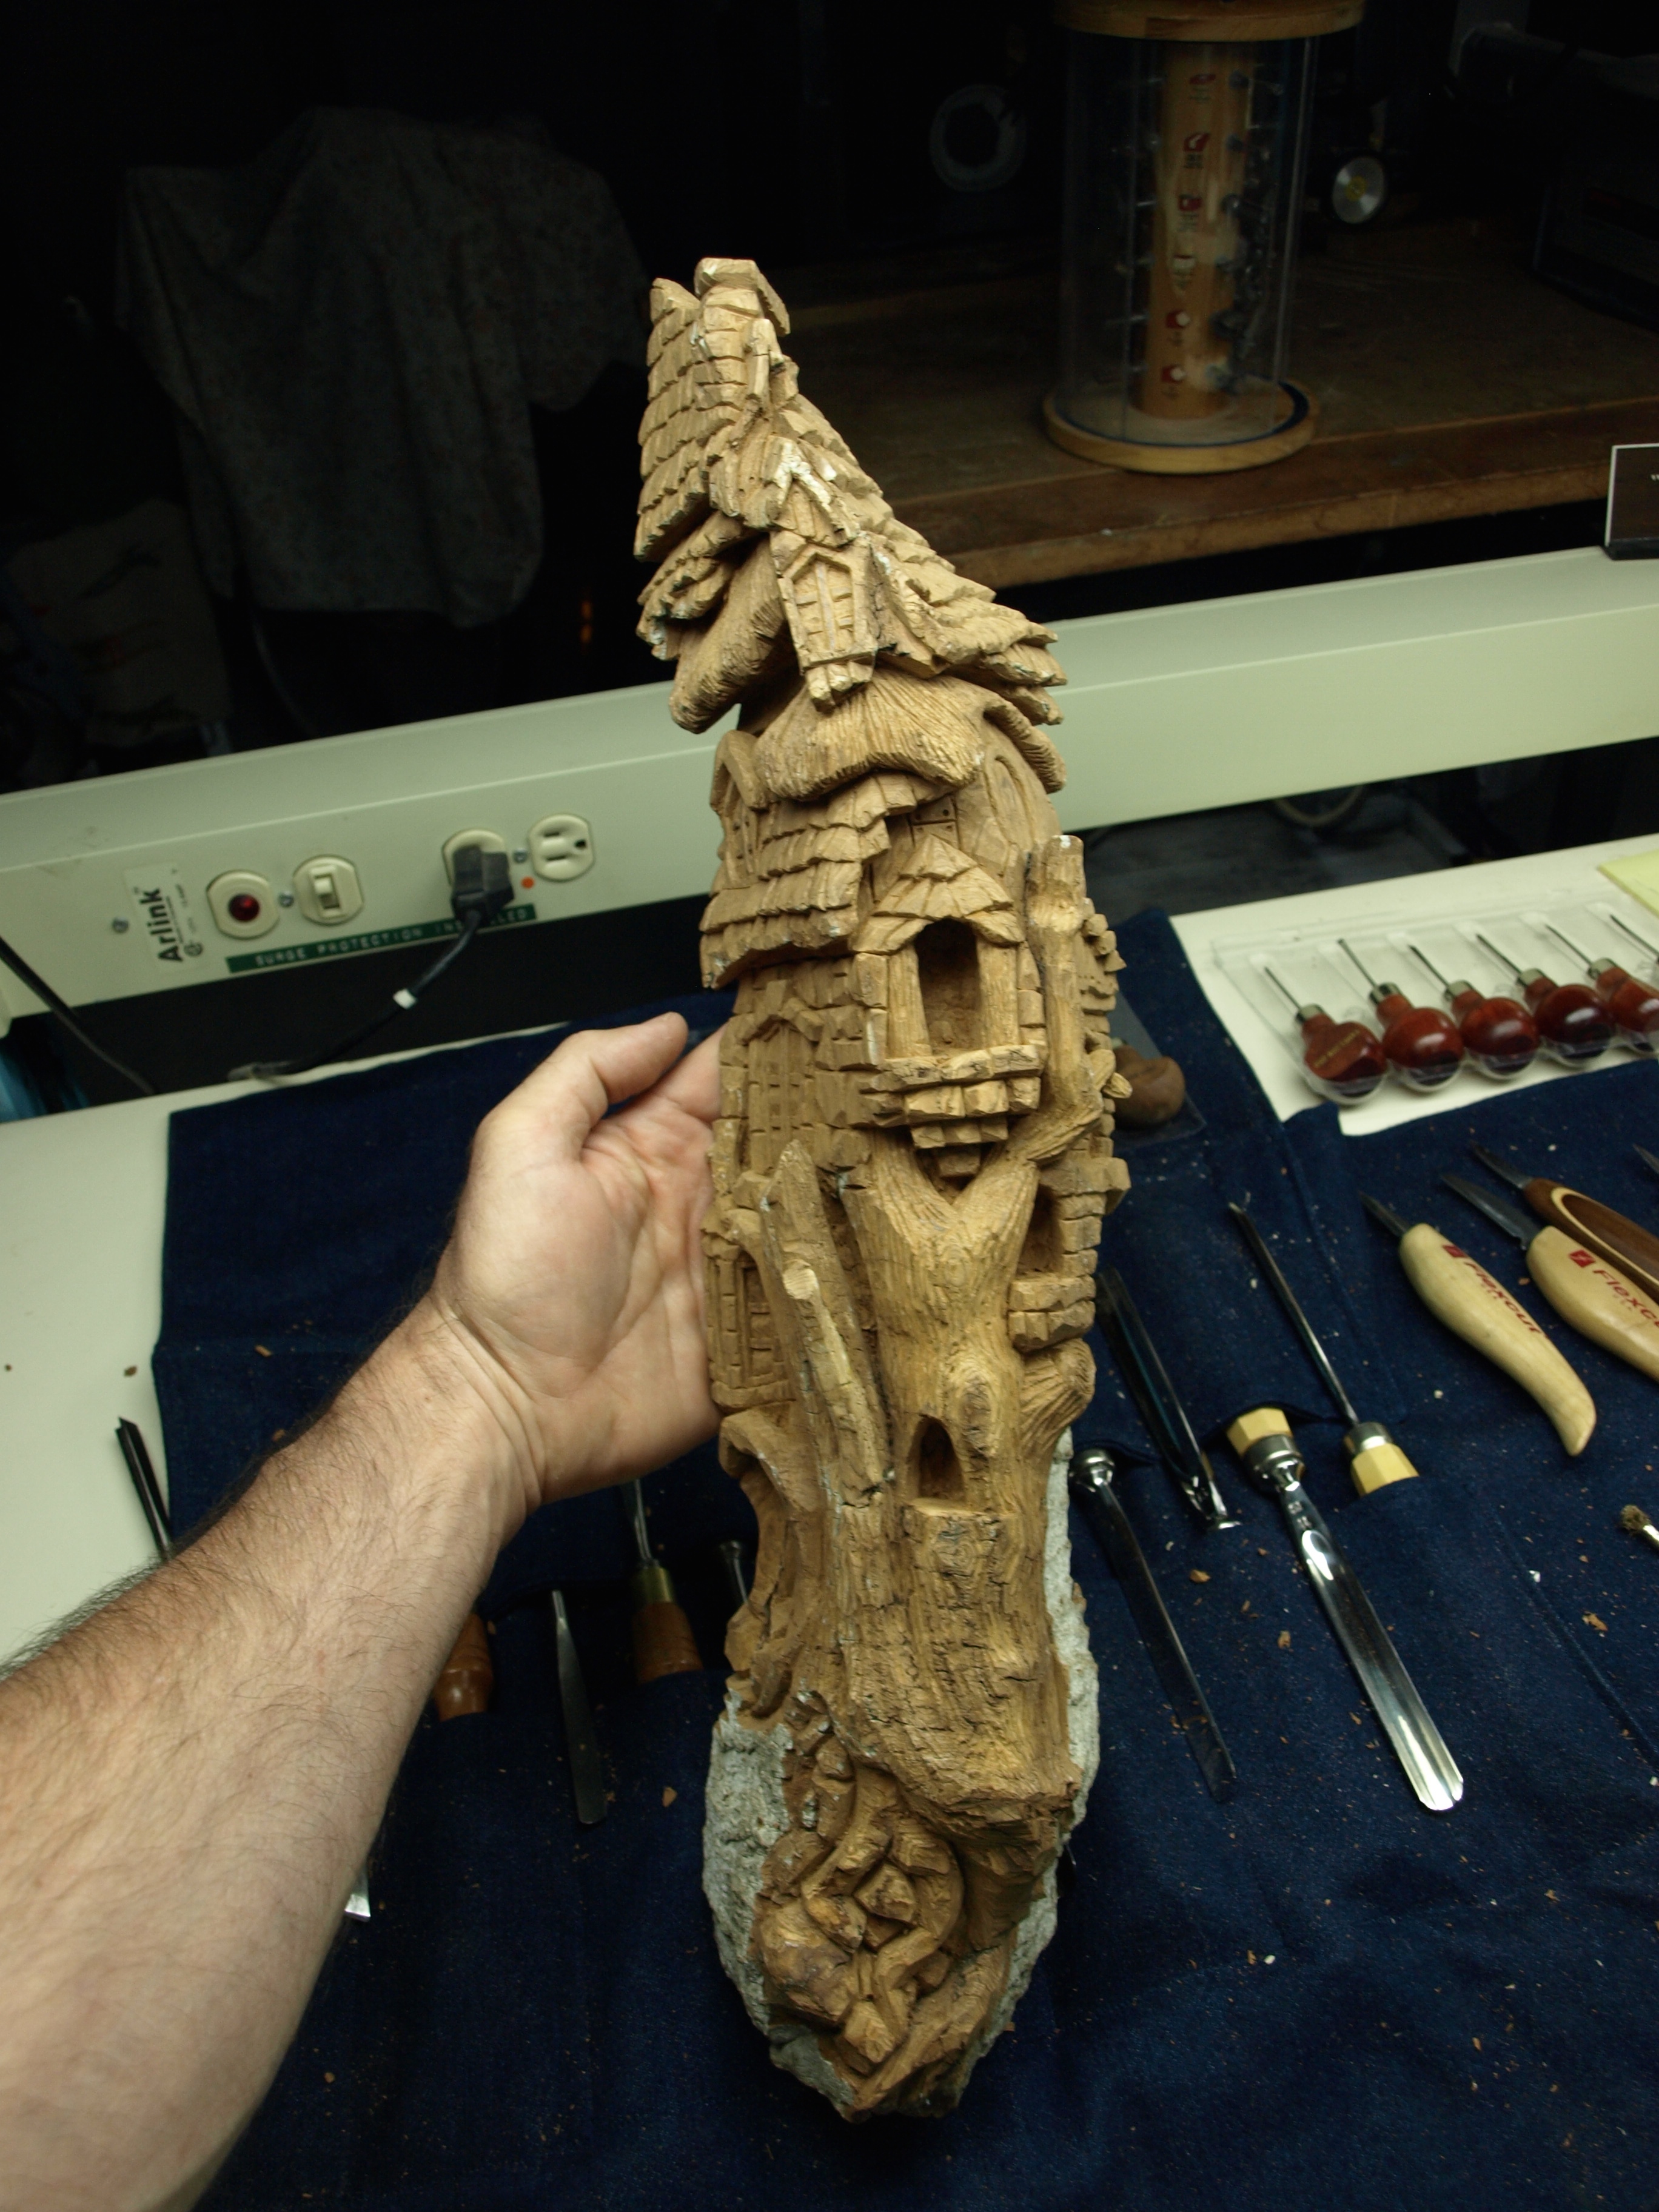
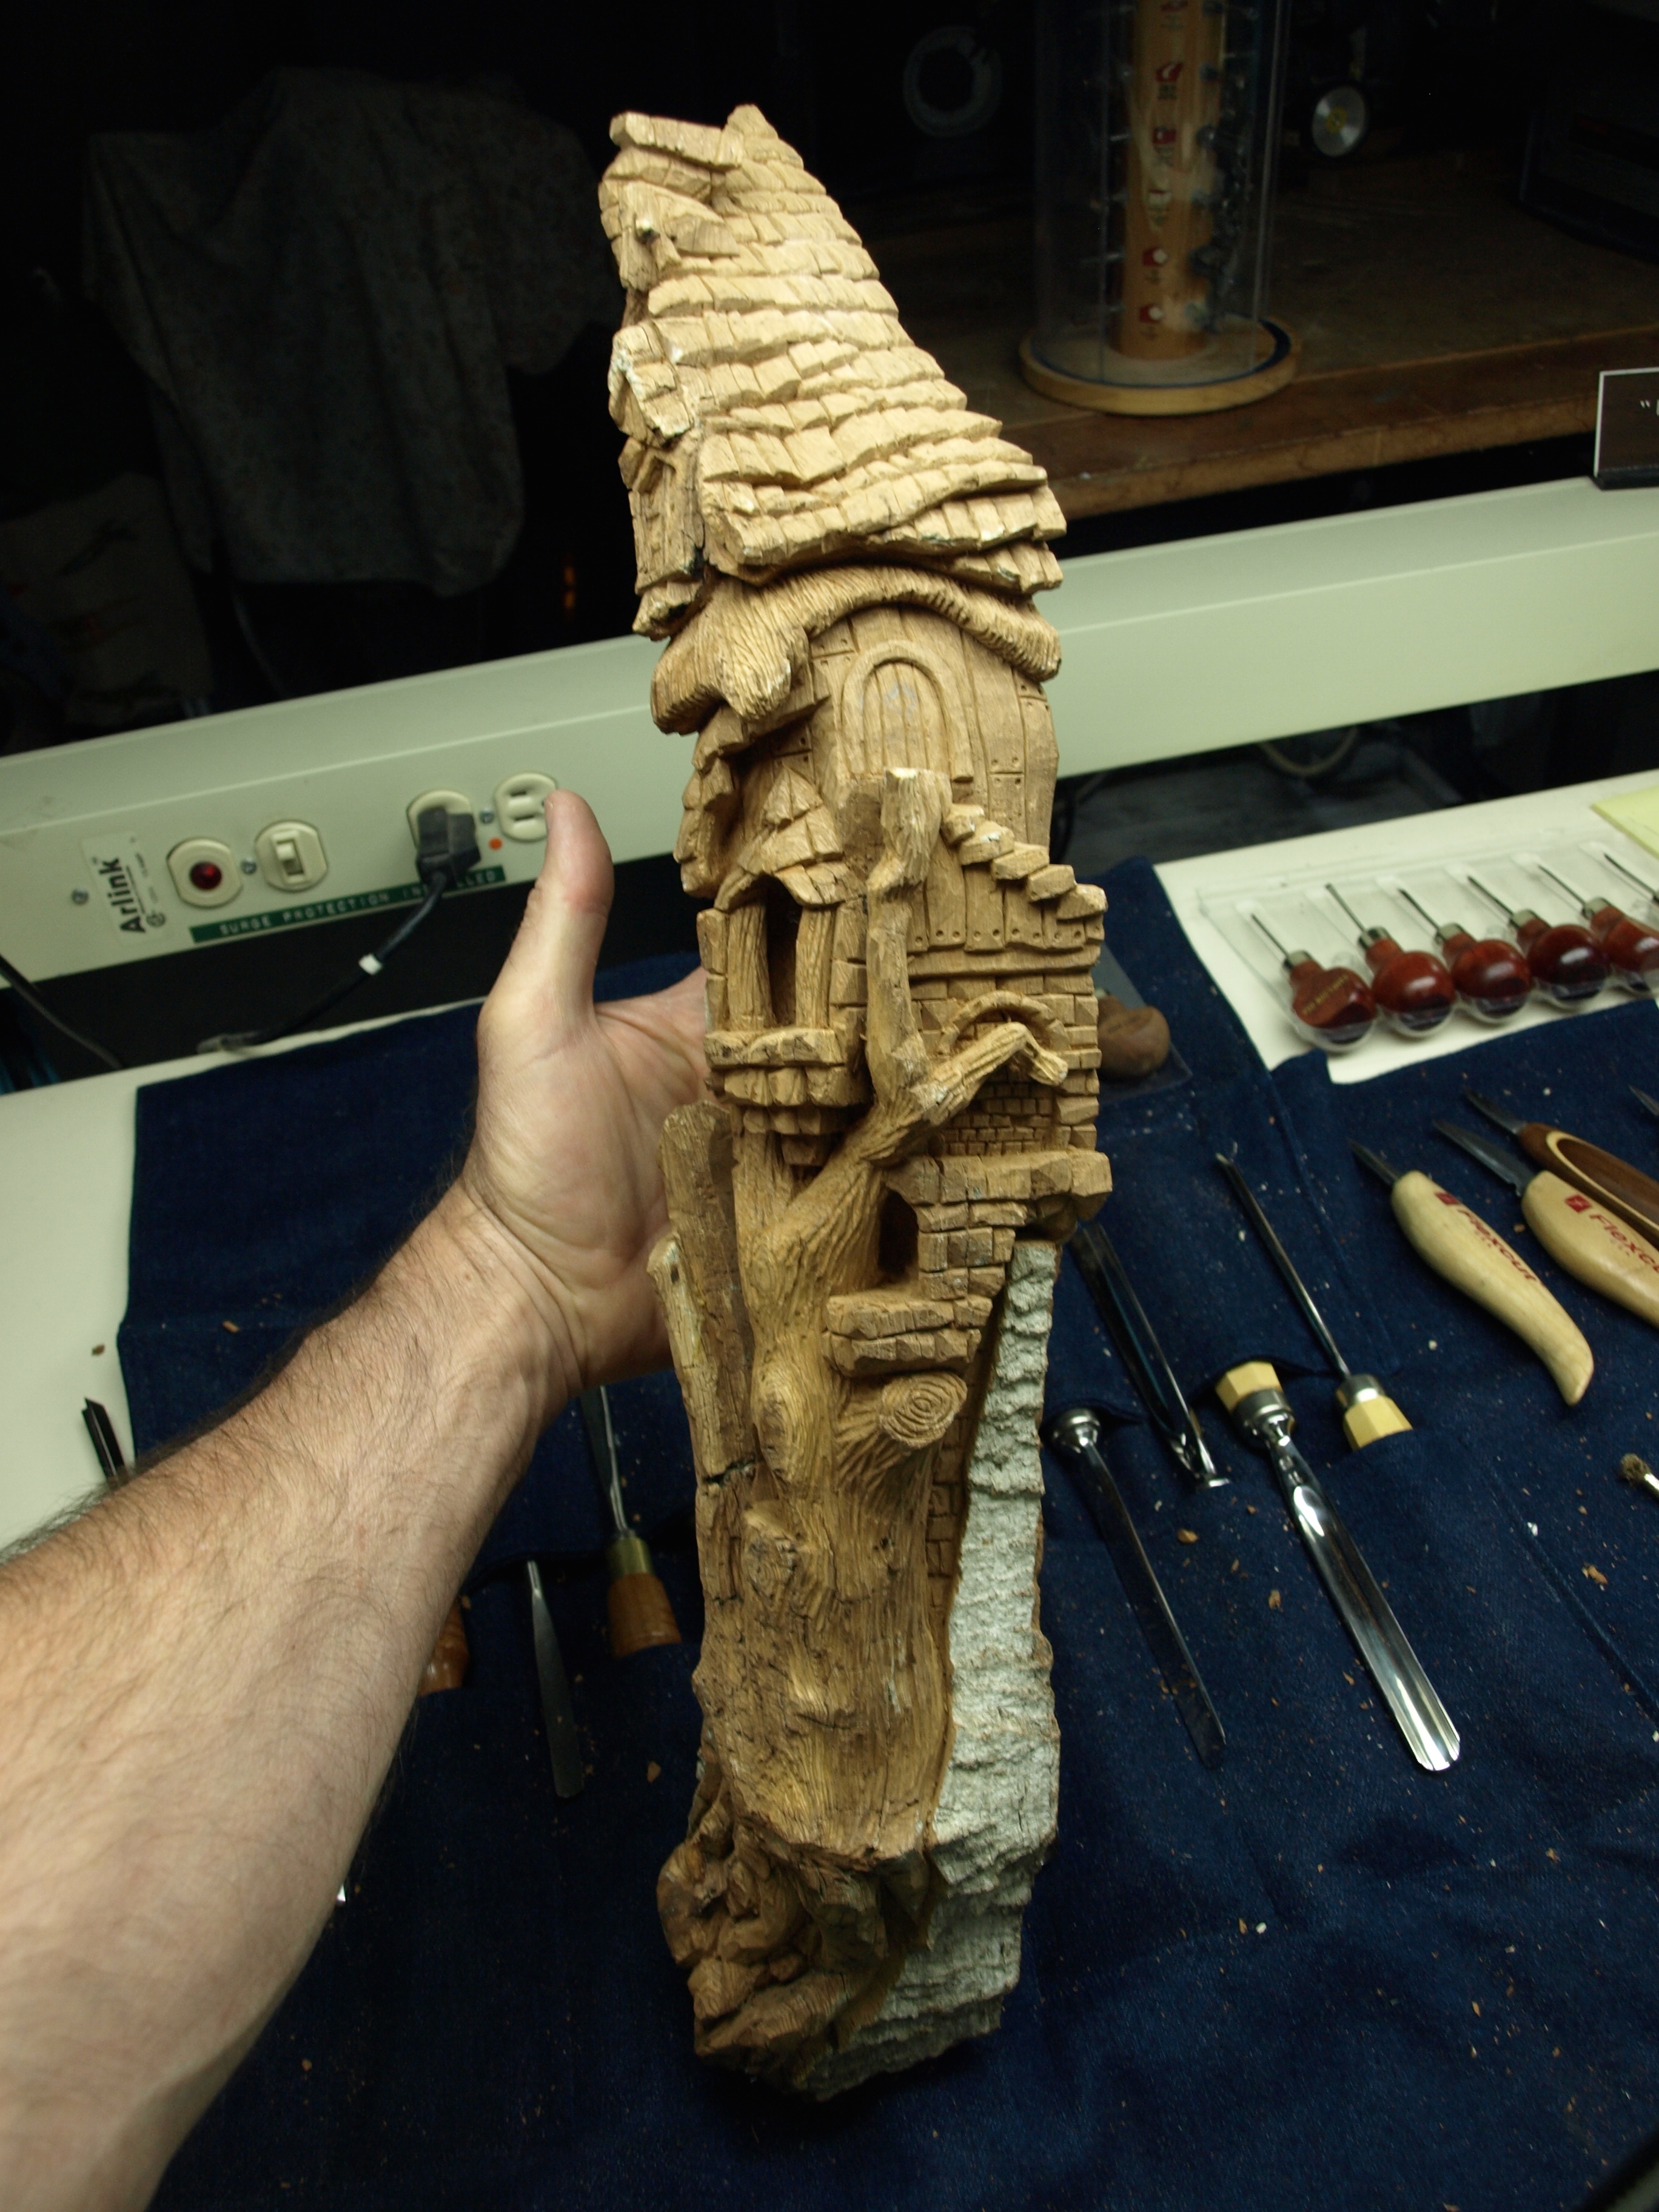
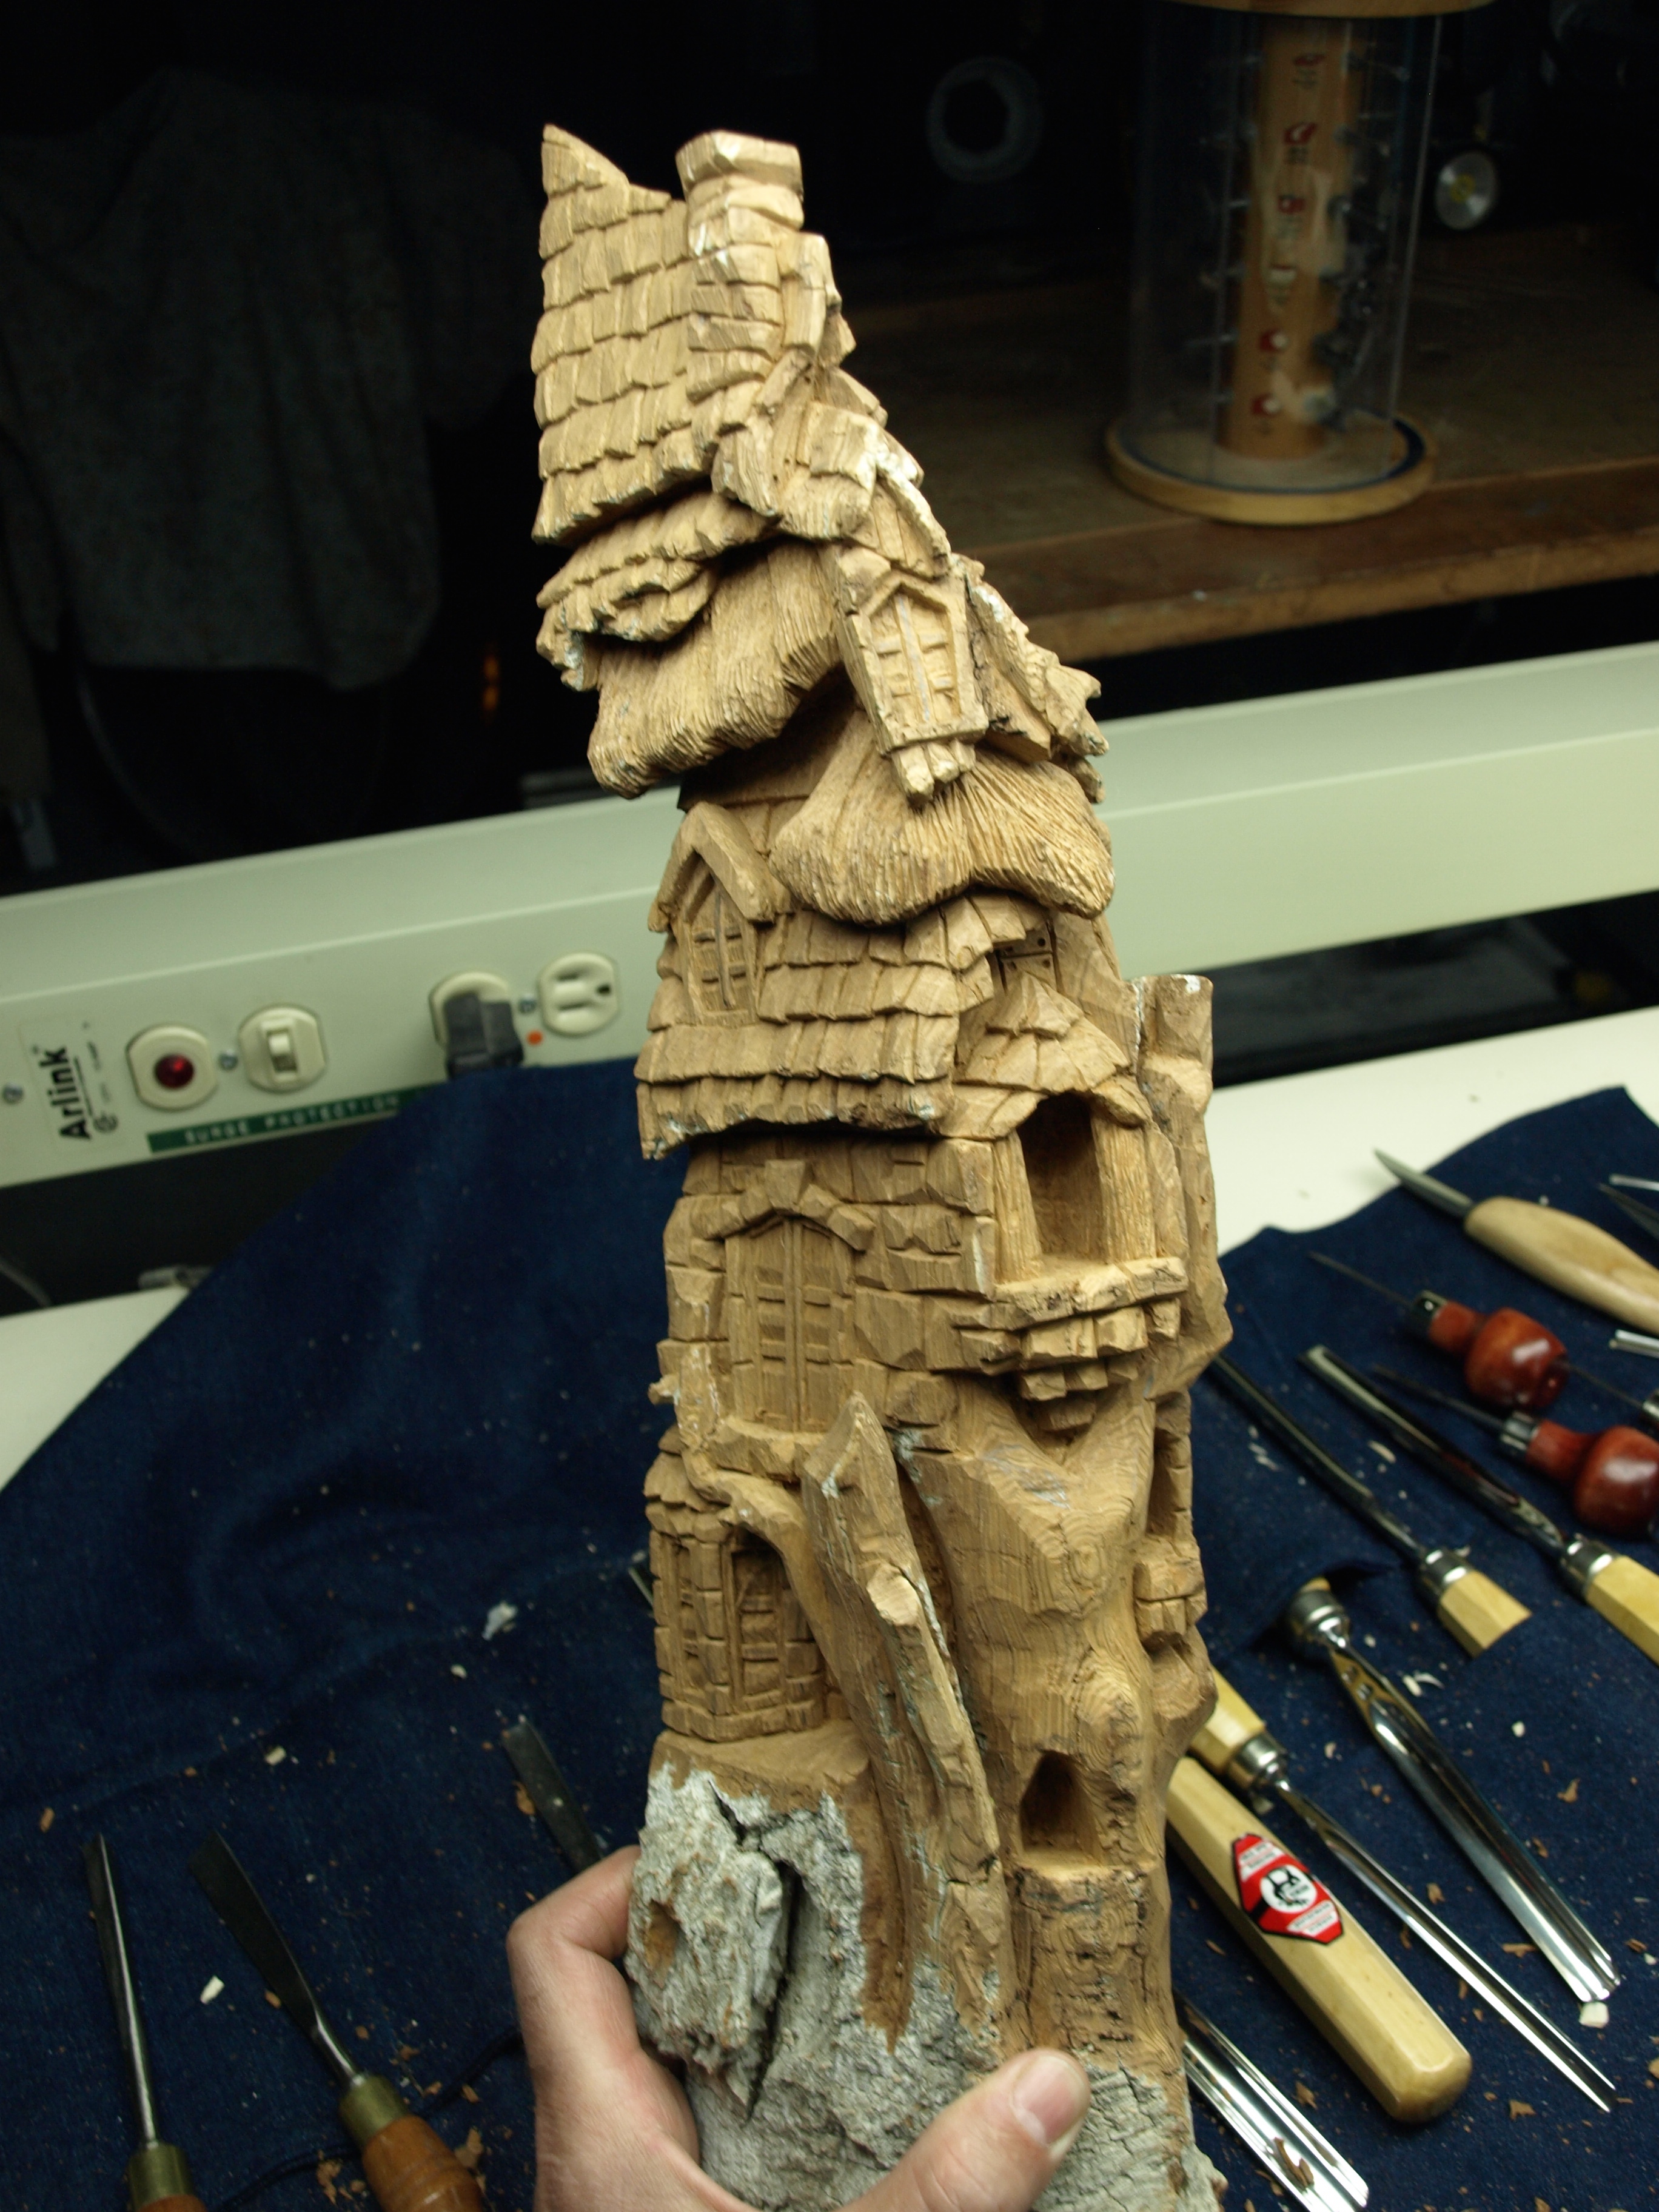
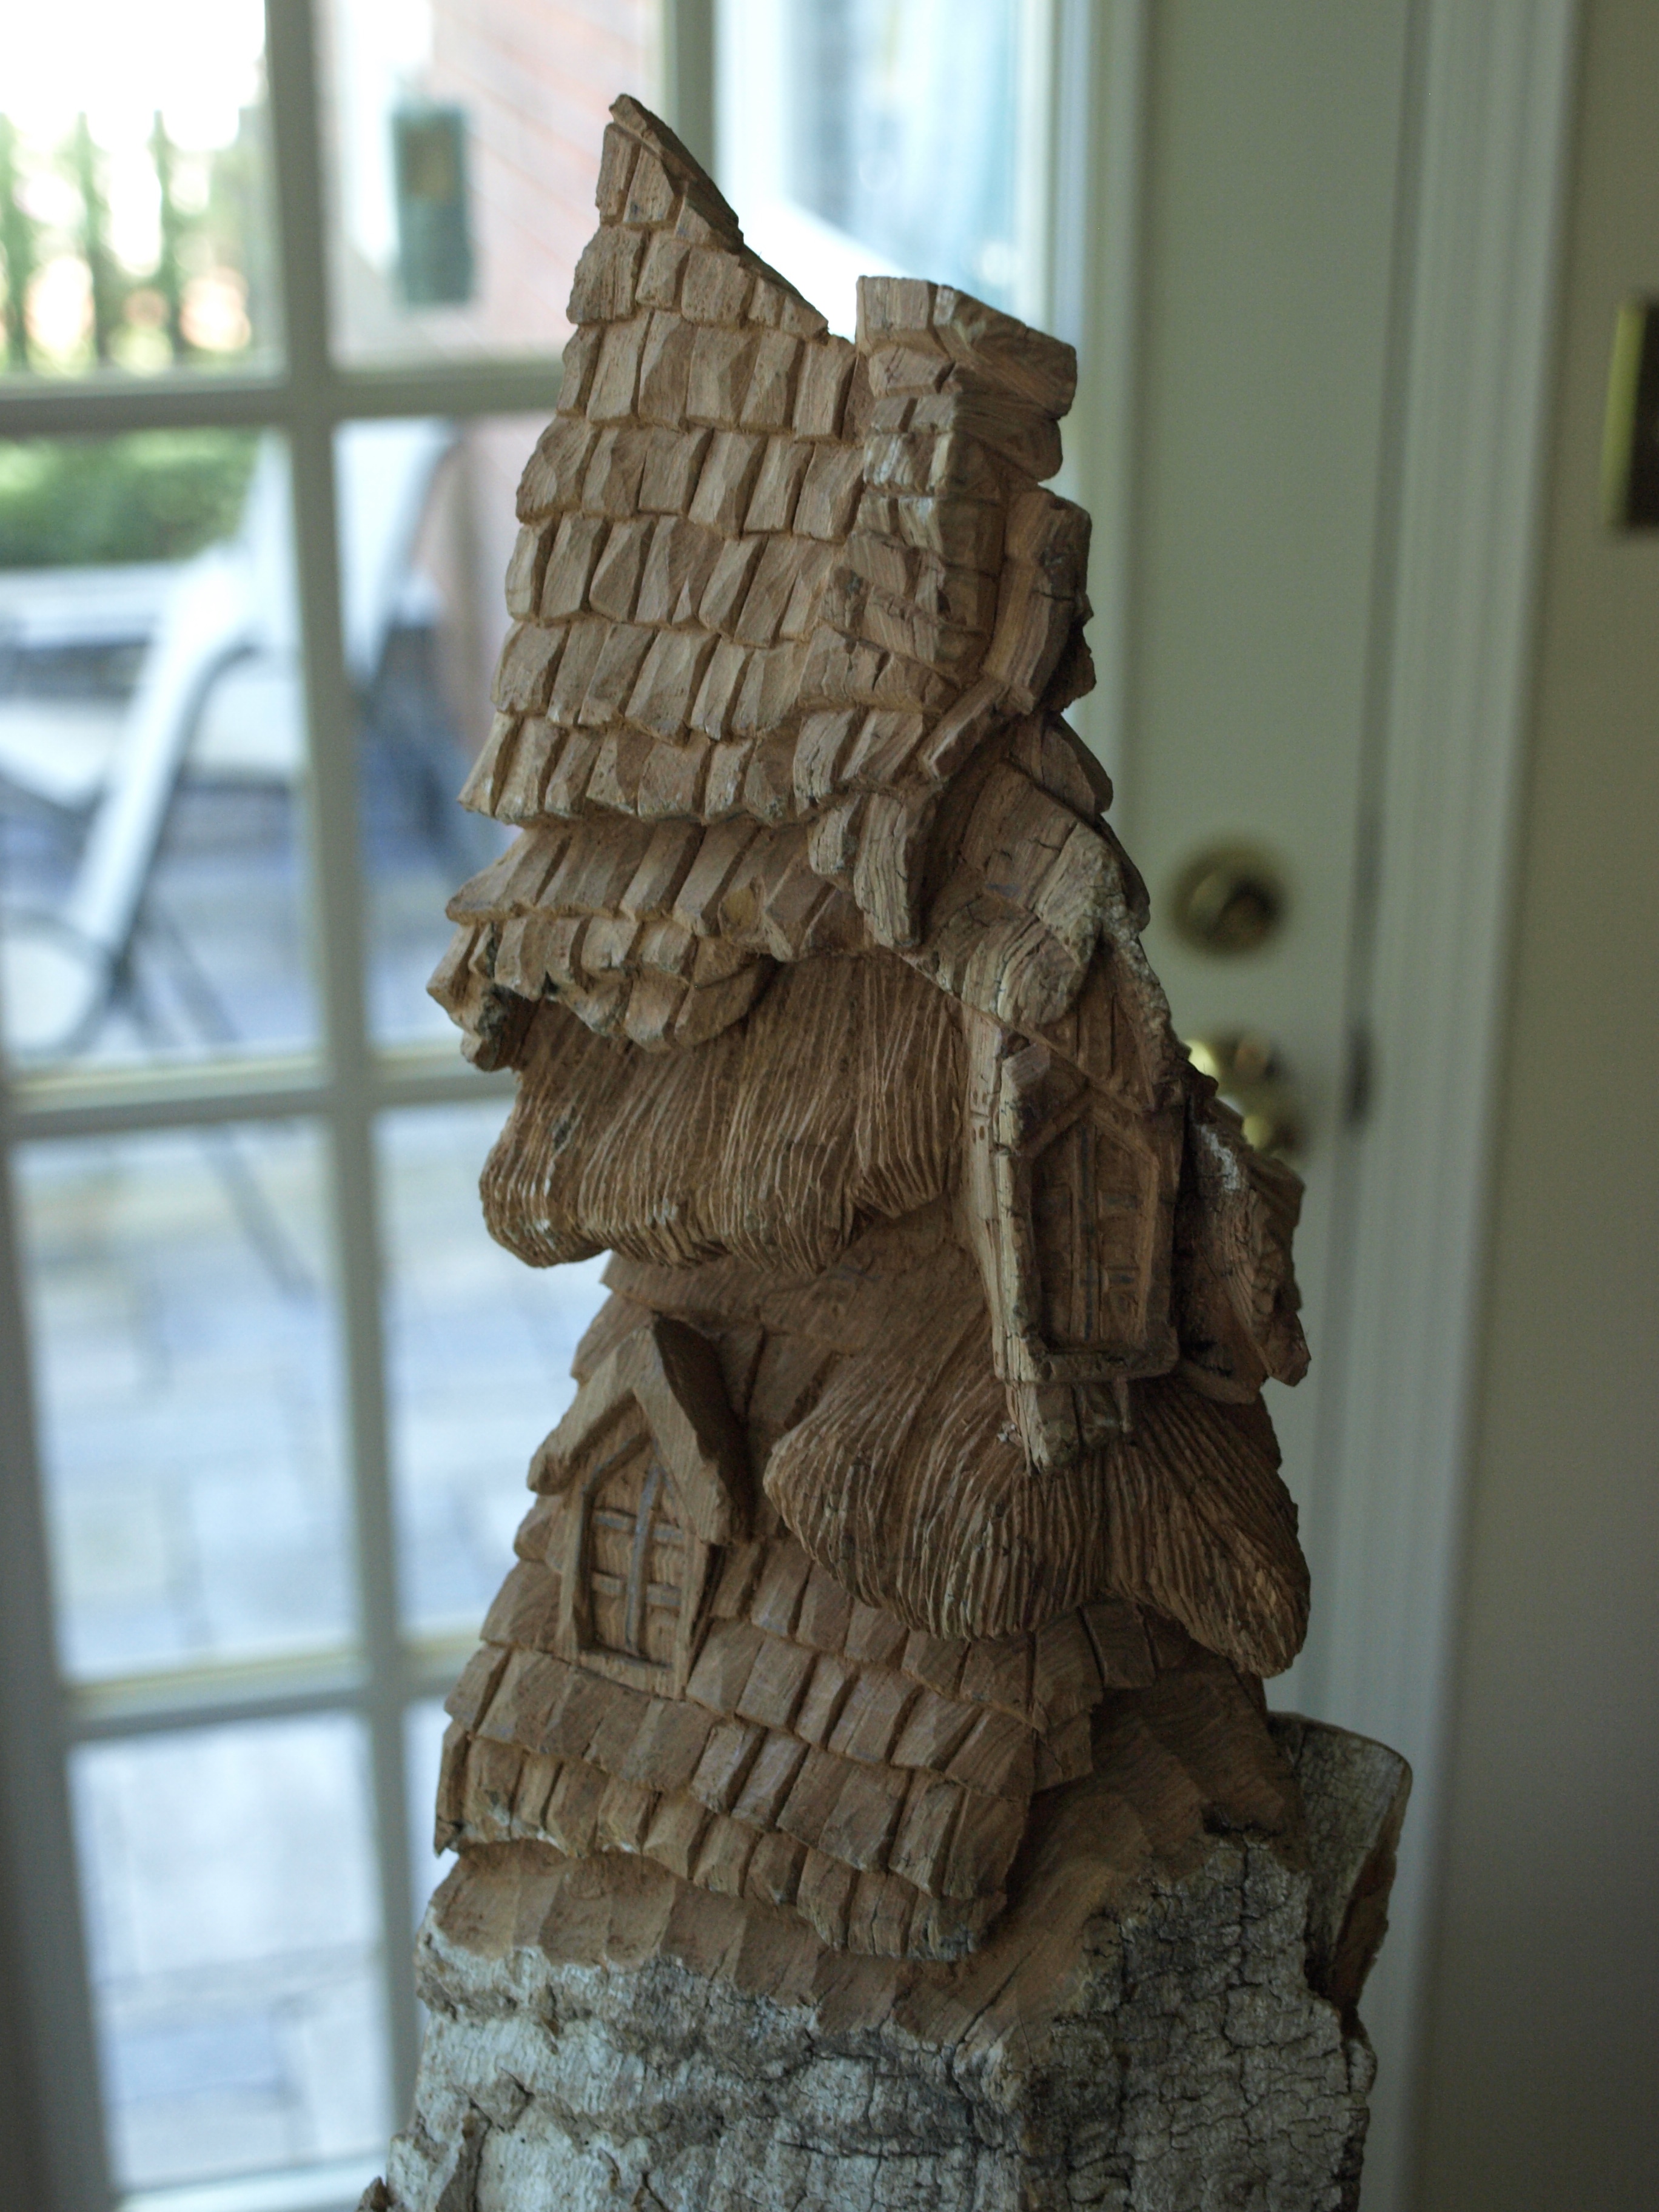
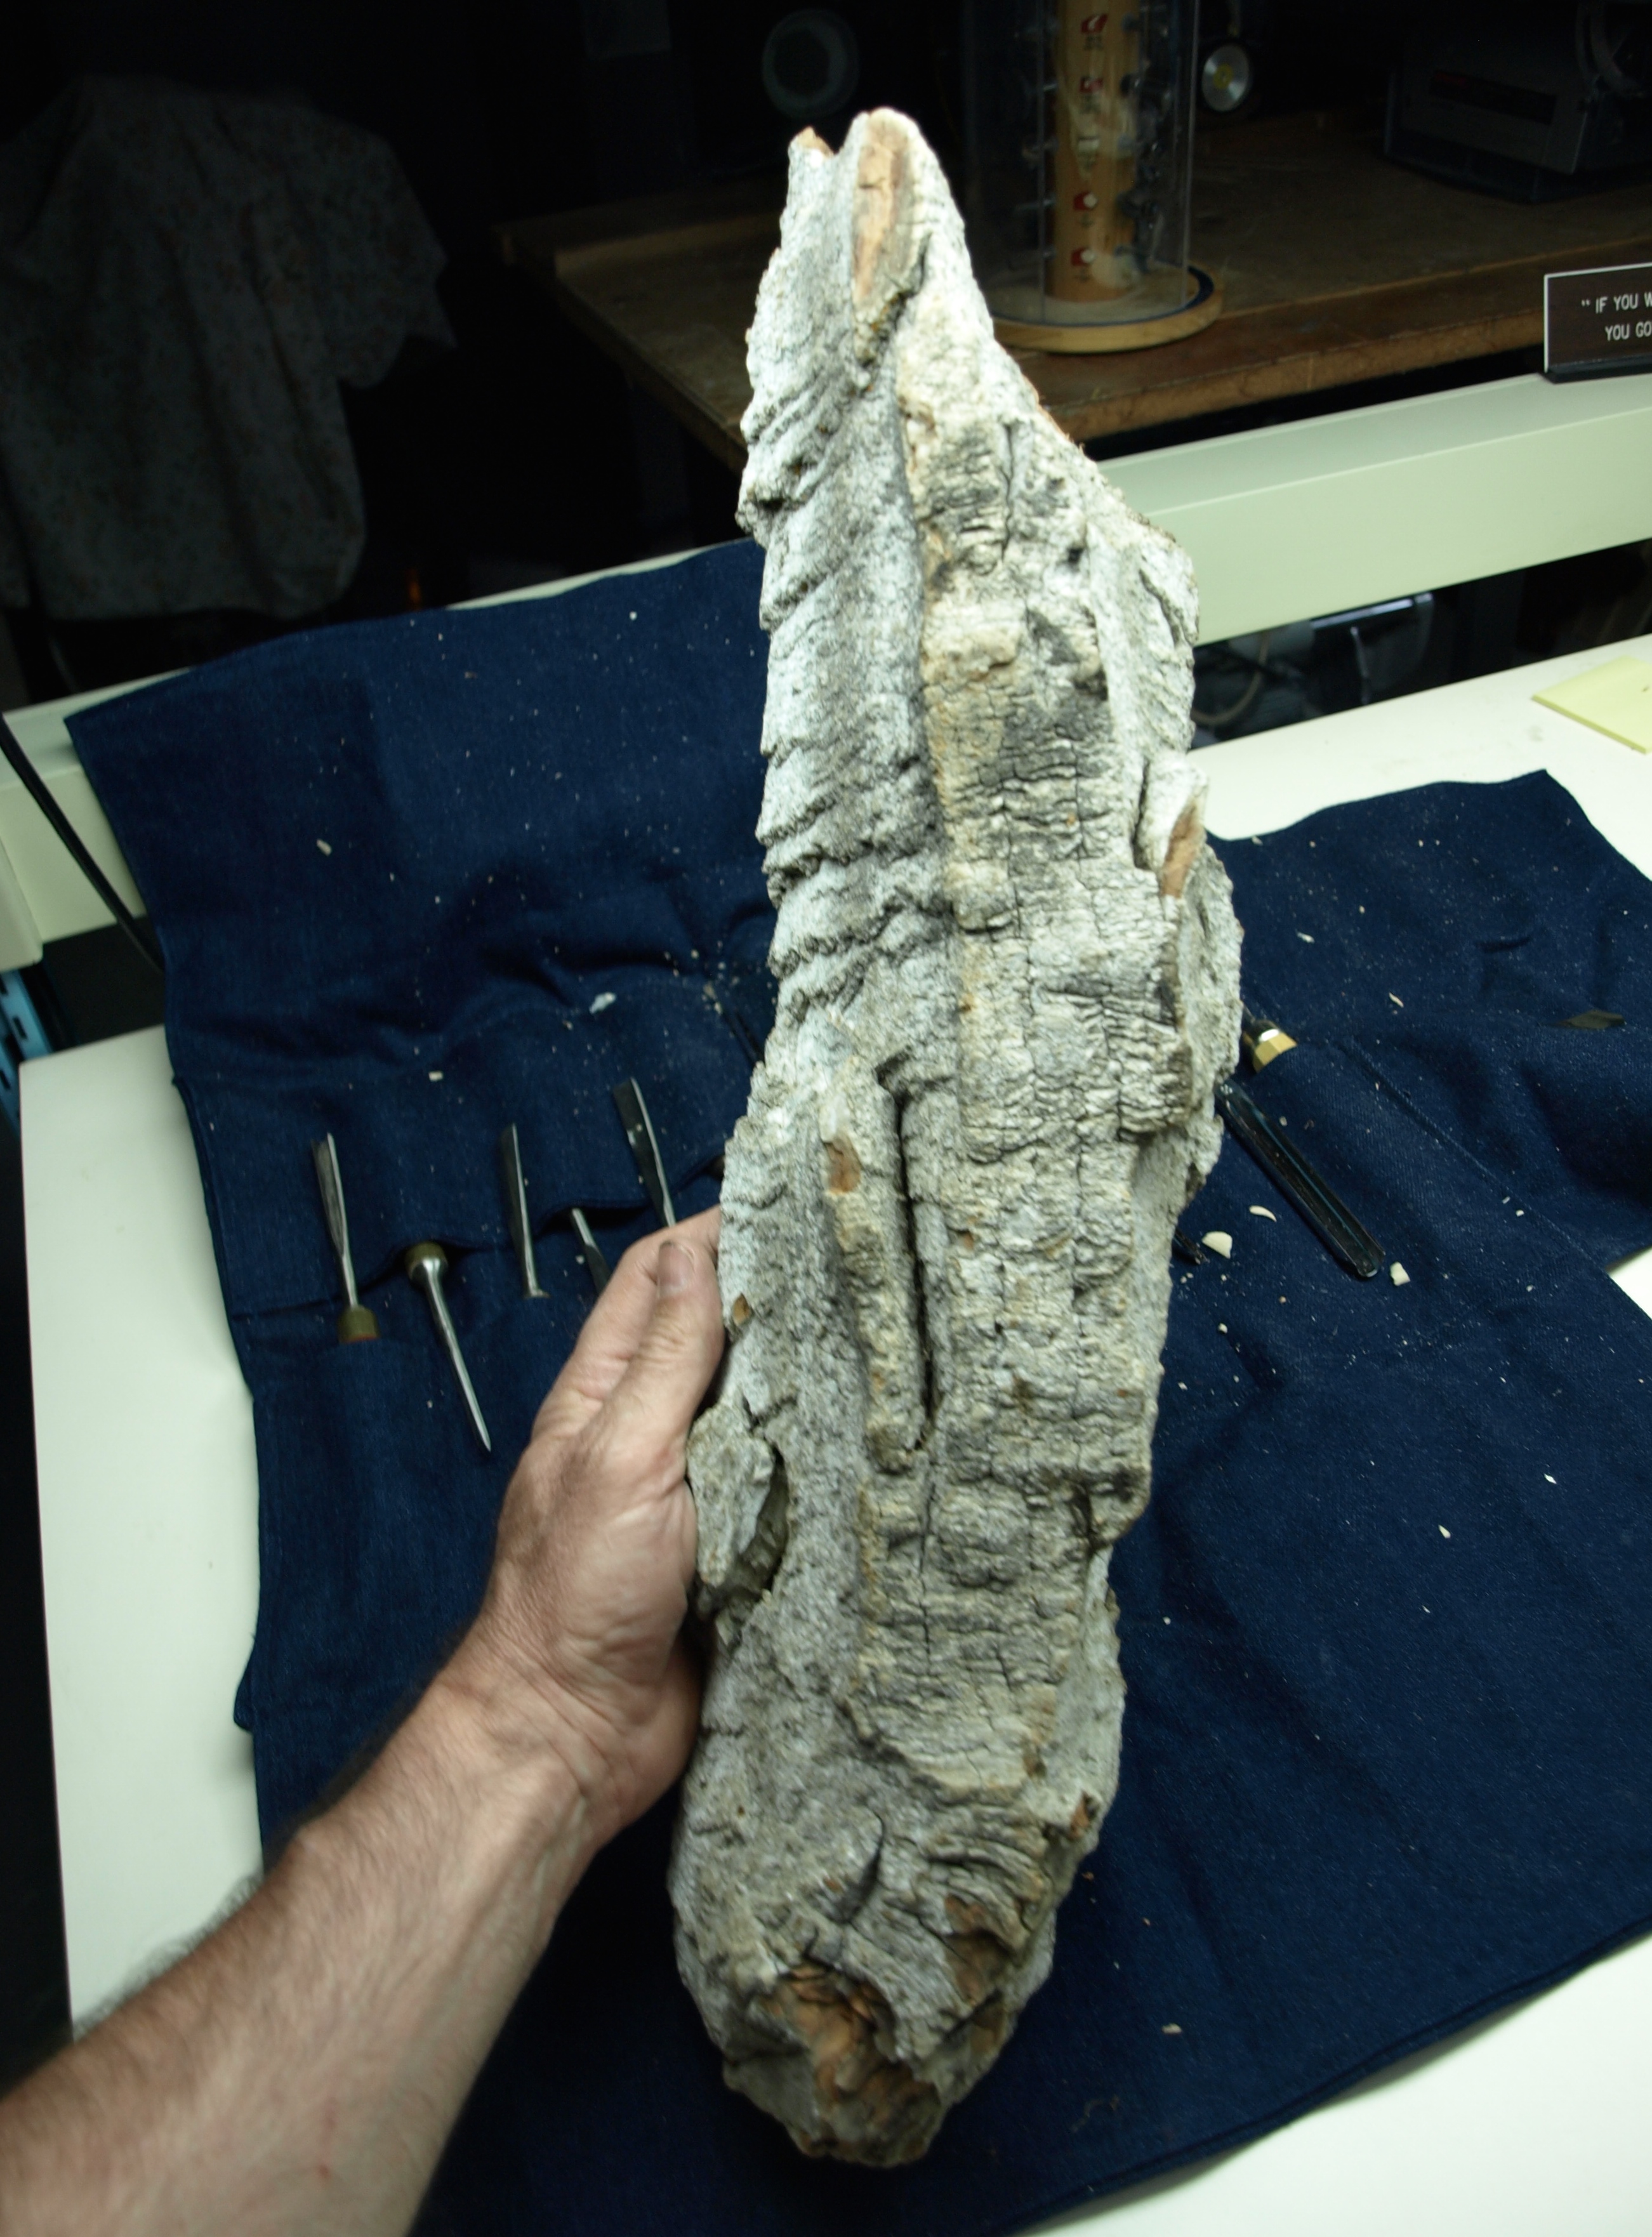
This one is already taking on the characteristics of a cabin in the woods.  In this case, the cabin is actually going to be on the woods in that it’ll be on the top of an old rotting tree surrounded by rock cliffs.  Hey…you take a look at the bark and try to imagine what’s inside it’s basic shape…and that’s what was there.

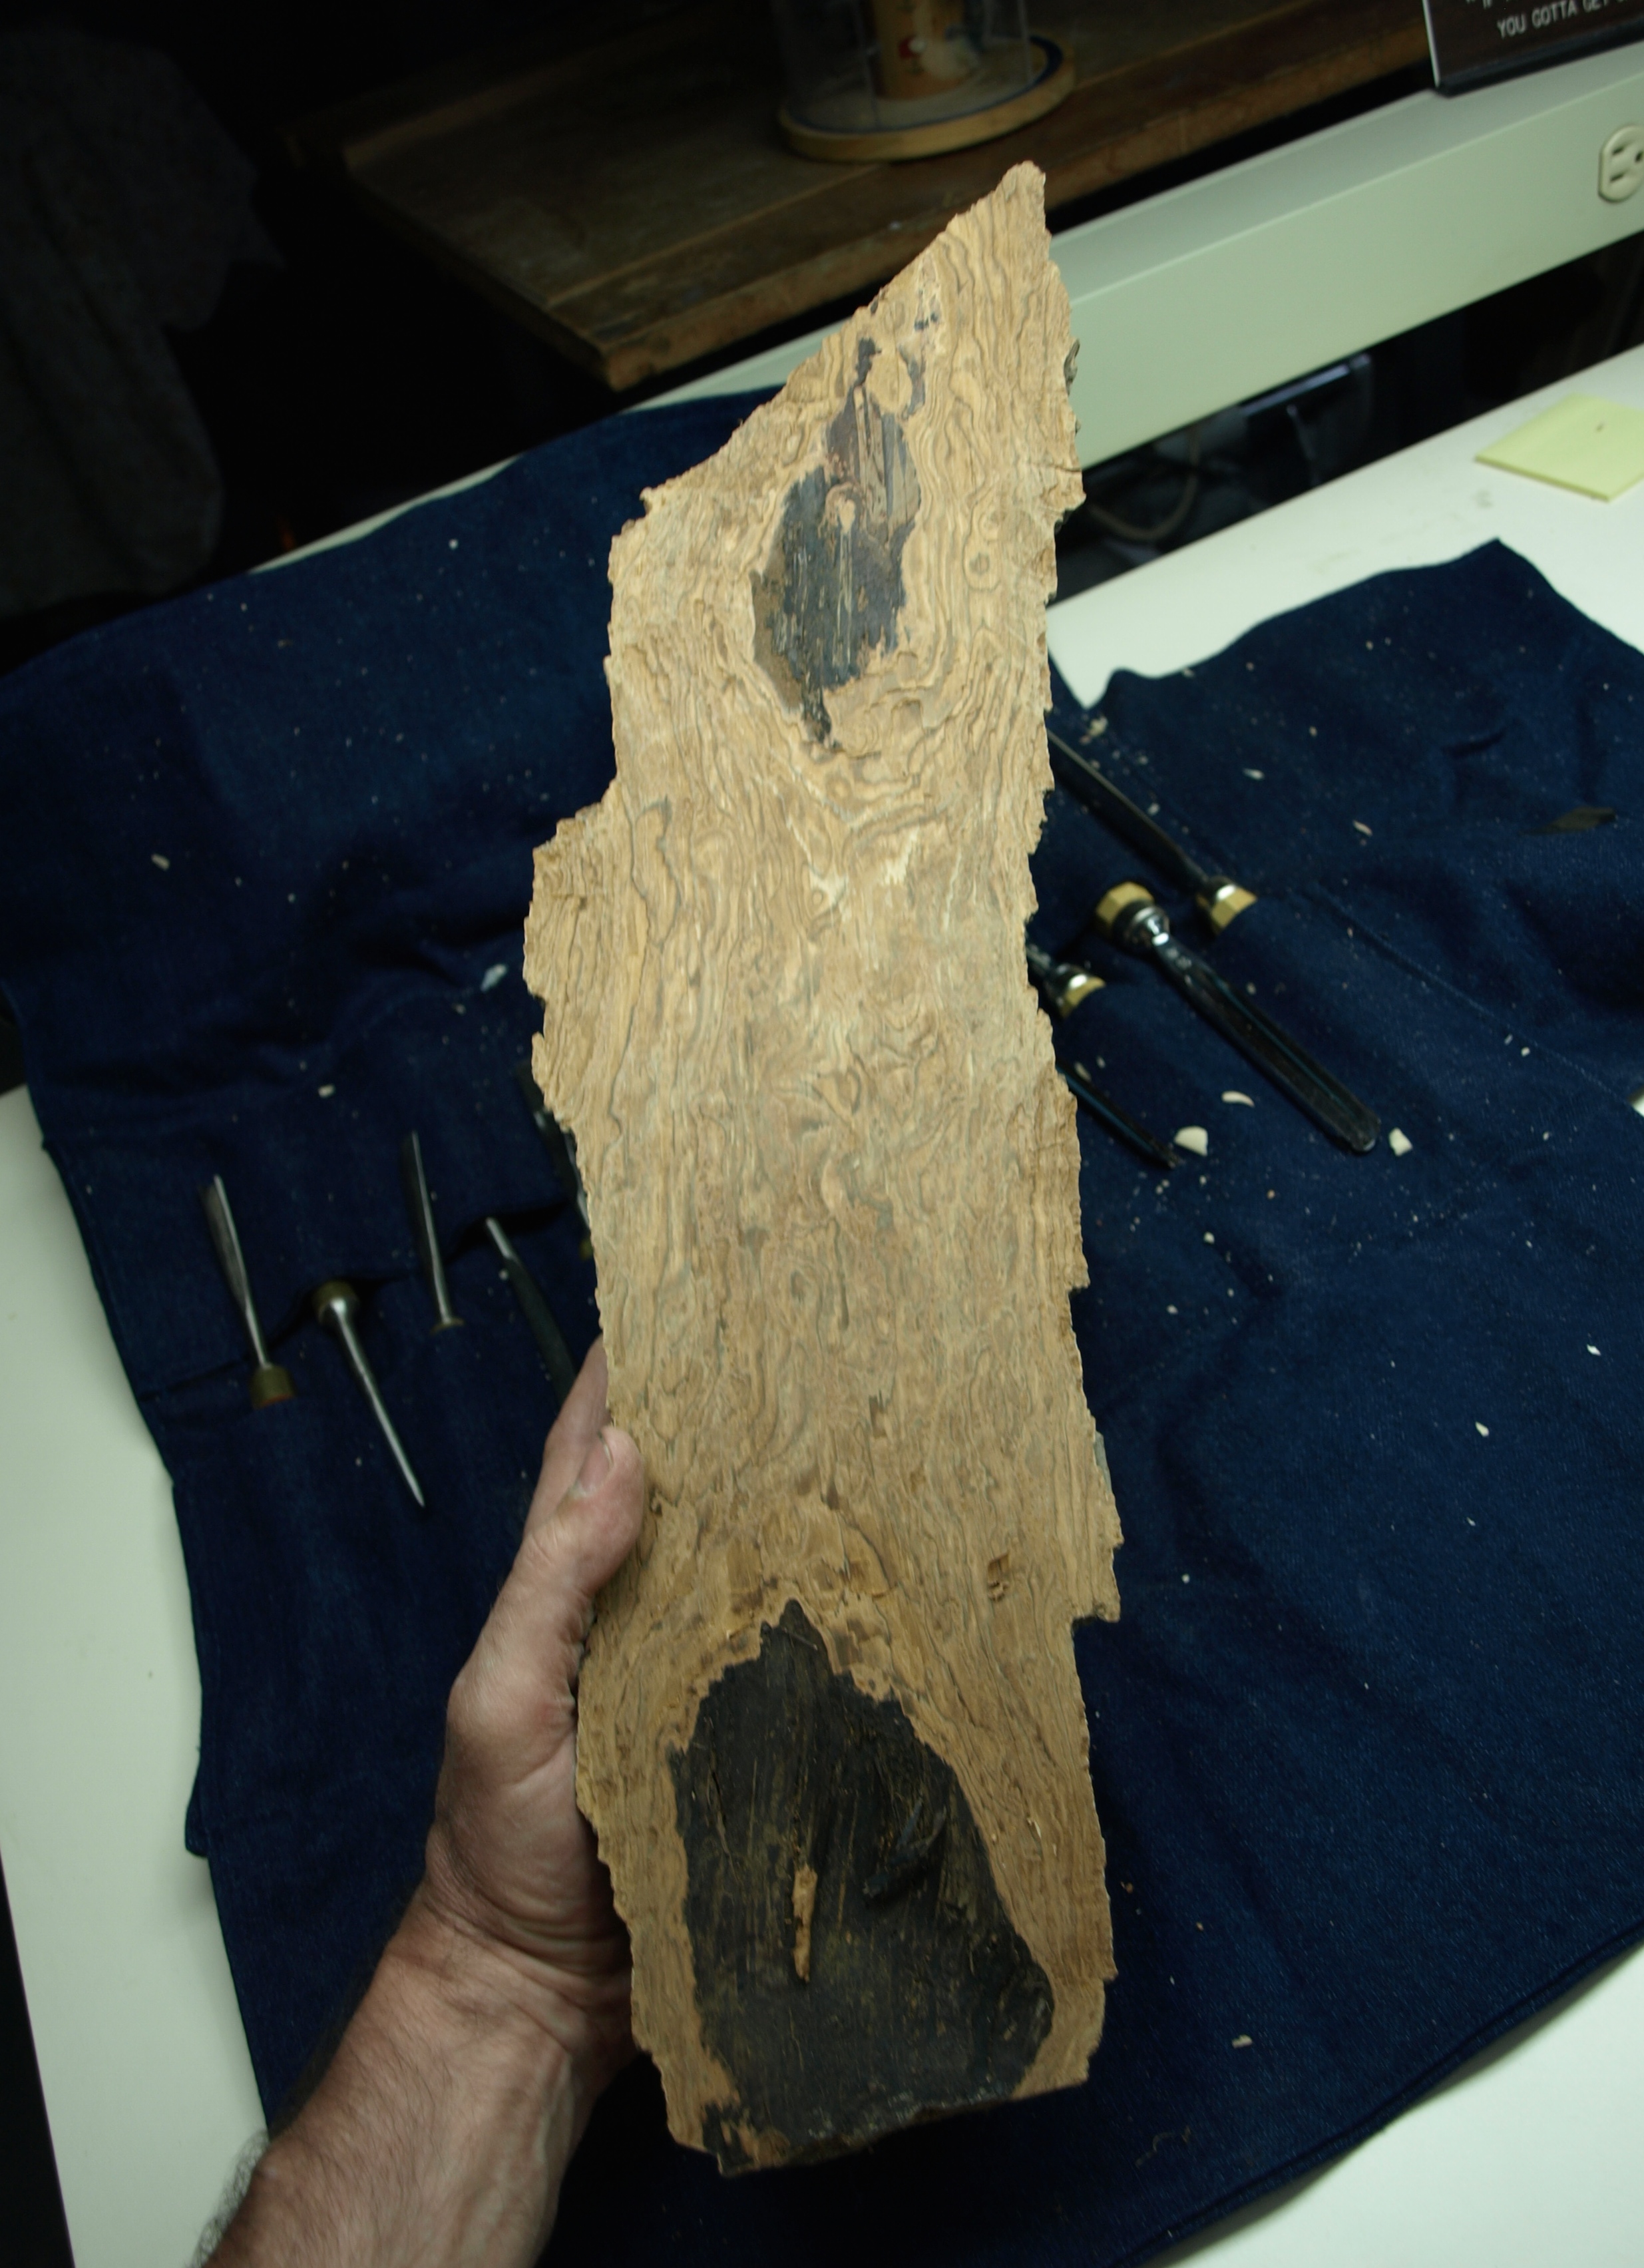
I should mention, that the “back” of the bark, or the piece against the tree, is first planed down a bit to get a flat rather than a concave surface so that when it’s finished as a wall hanging the carving sits flat against the wall.

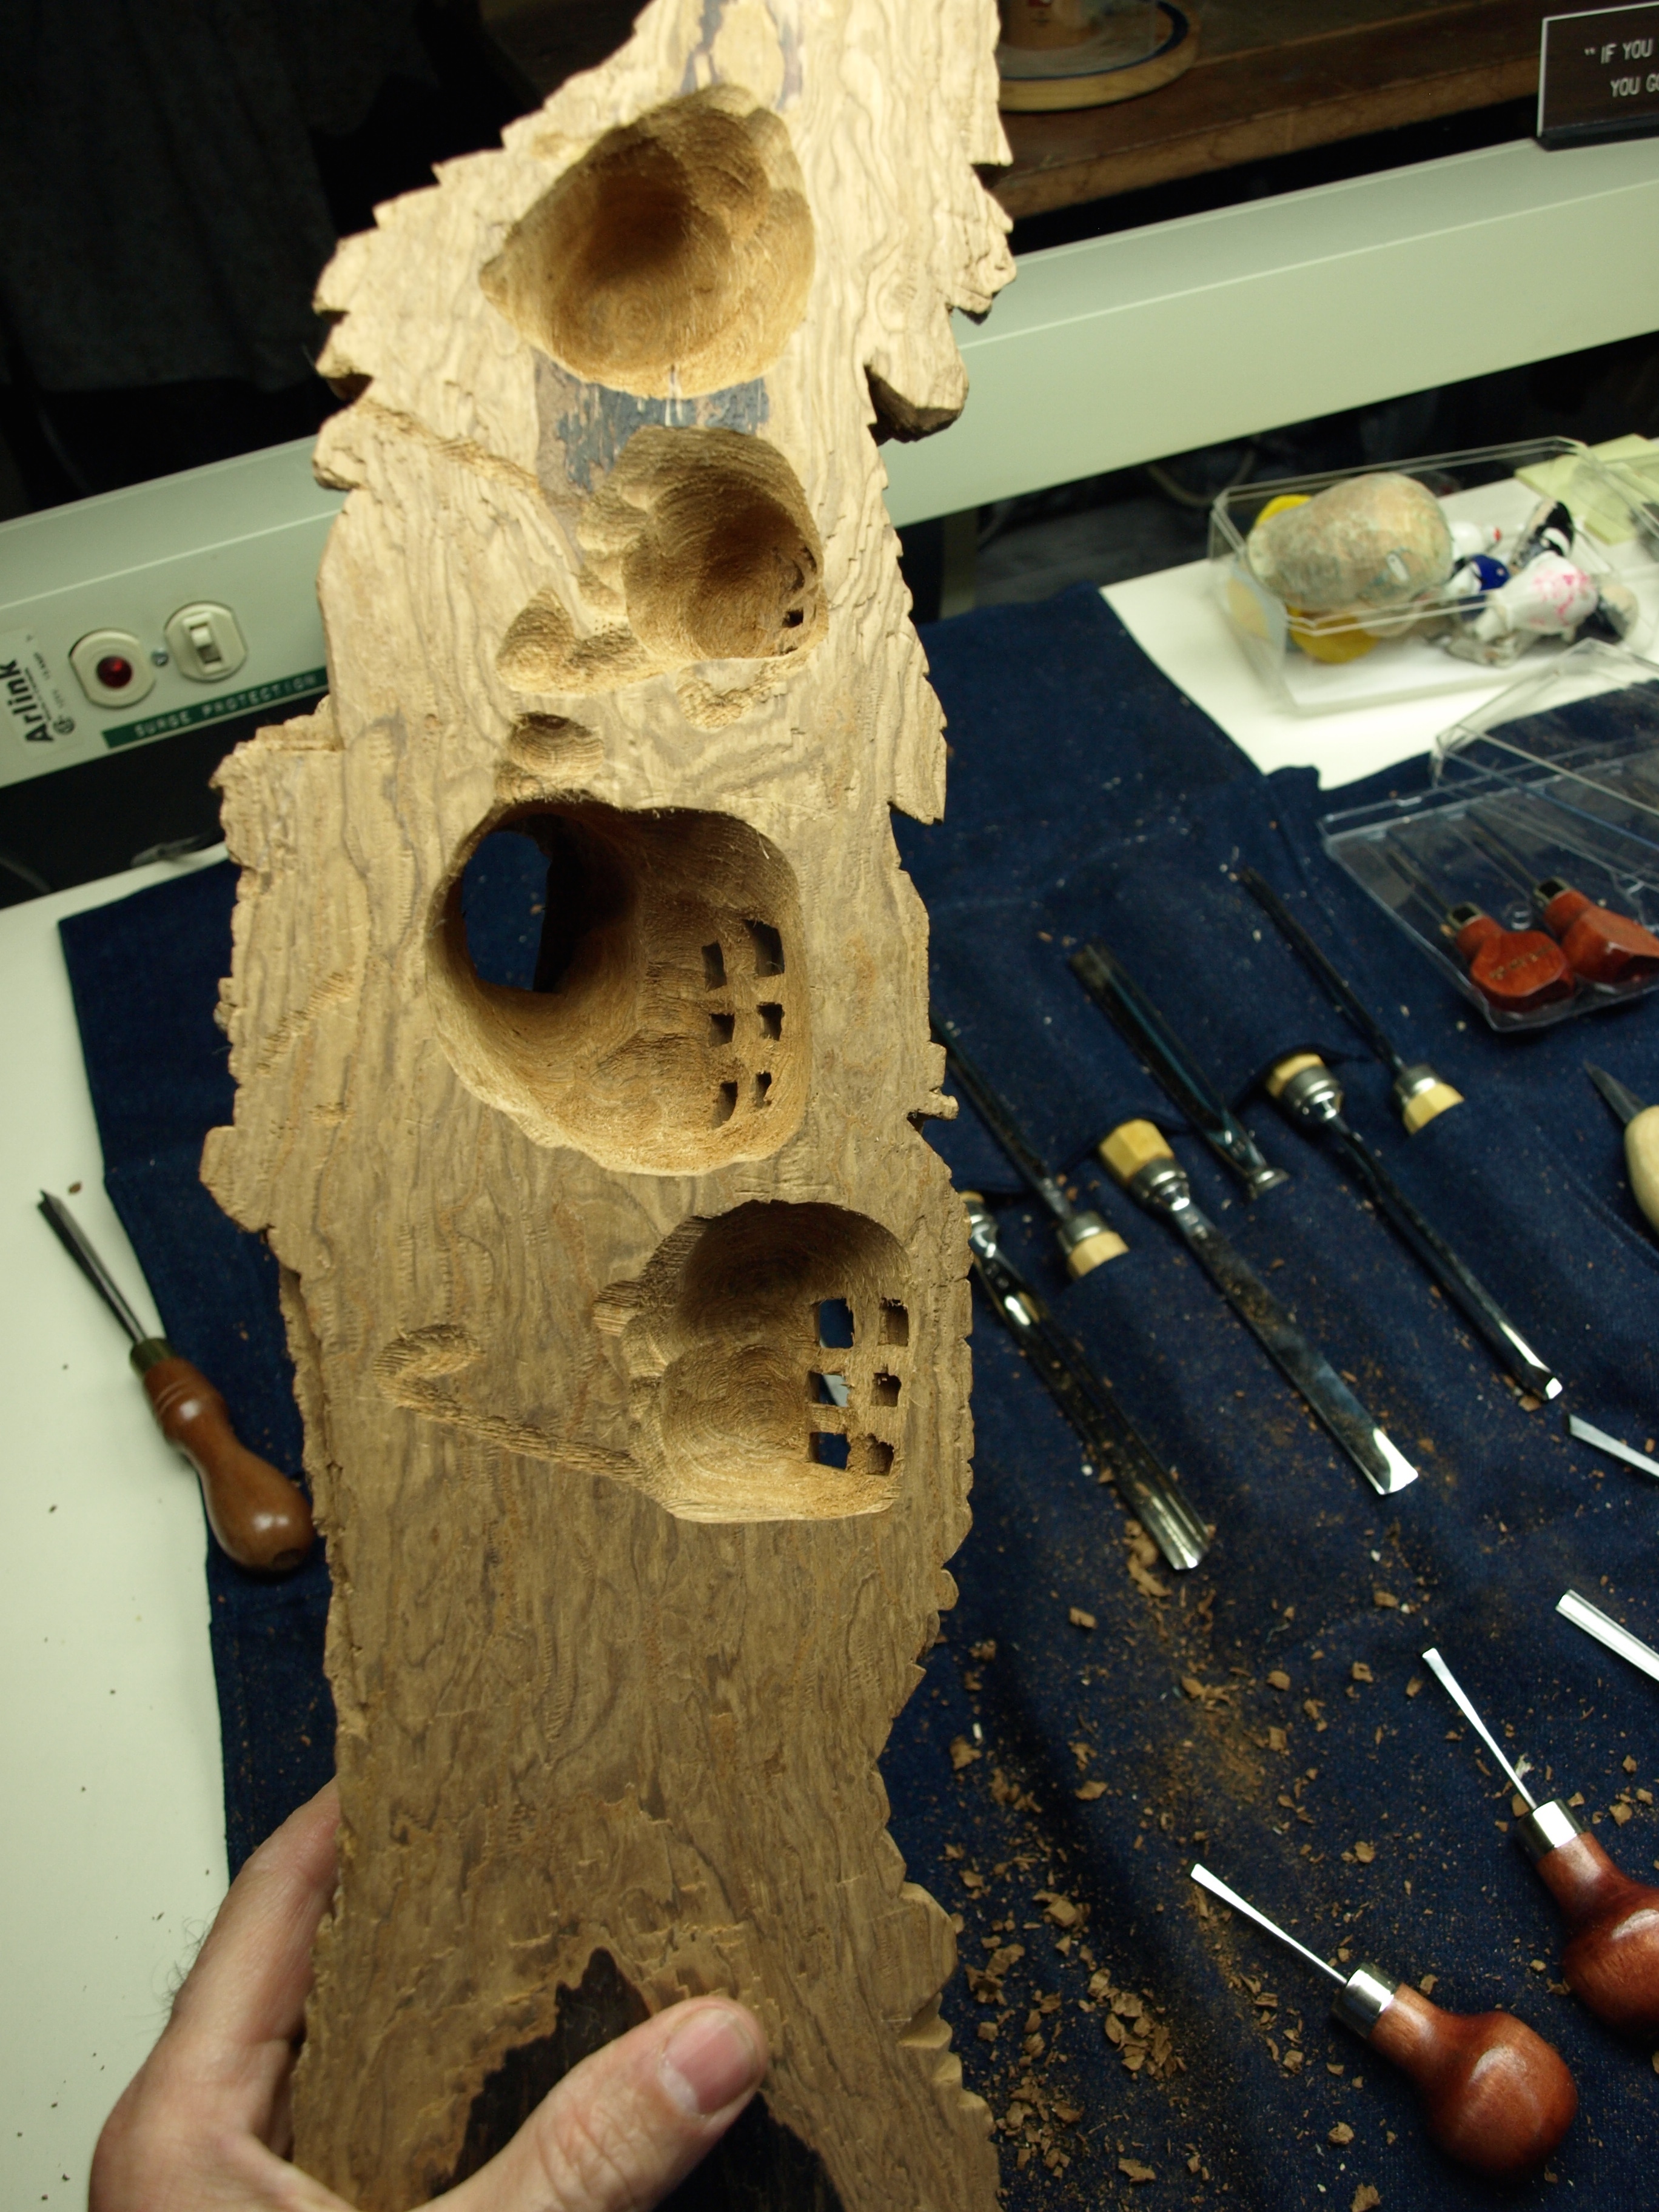
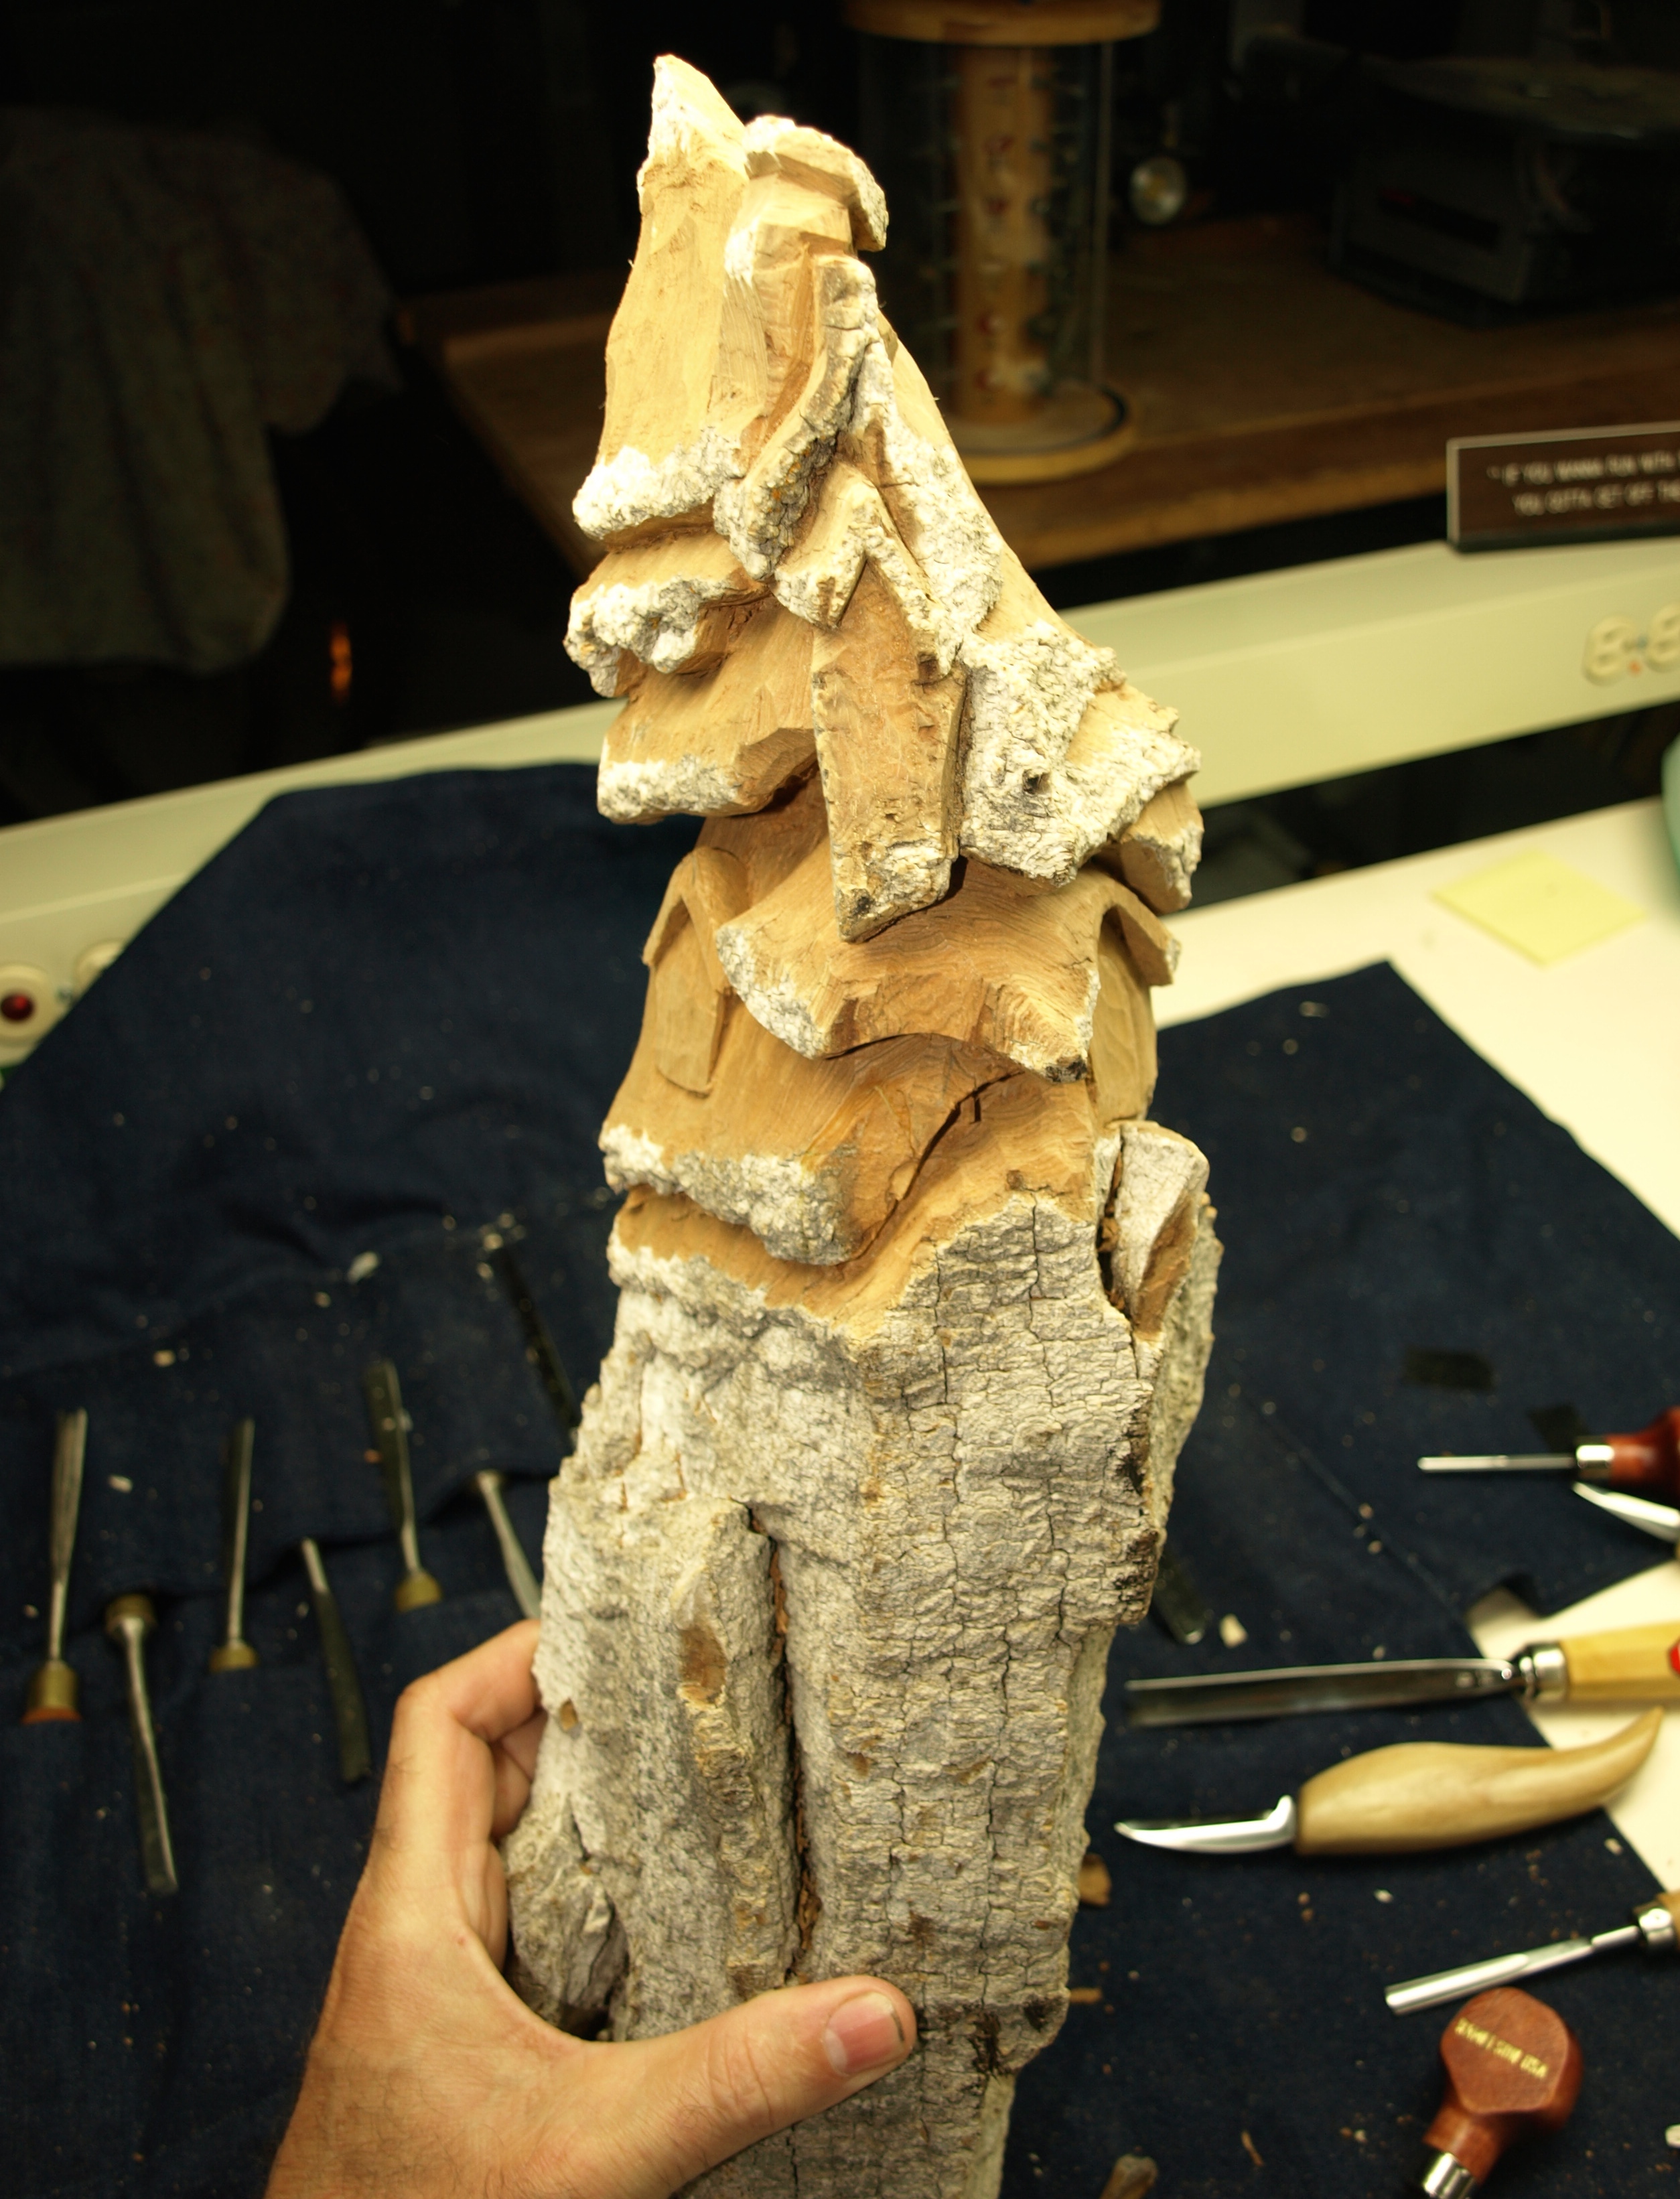
Peggy looked over my shoulder as I started this one yesterday and came up with a pretty good description on how I approach bark carvings when she said “It’s like doodling.”  And I guess it is…you start with a basic idea and just start carving one piece and let that lead you to what the next piece is going to look like.  No prior sketch or hard plan, just an idea that evolves as you carve and as you clumsily break pieces off ( Cottonwood bark is a bit fragile ).

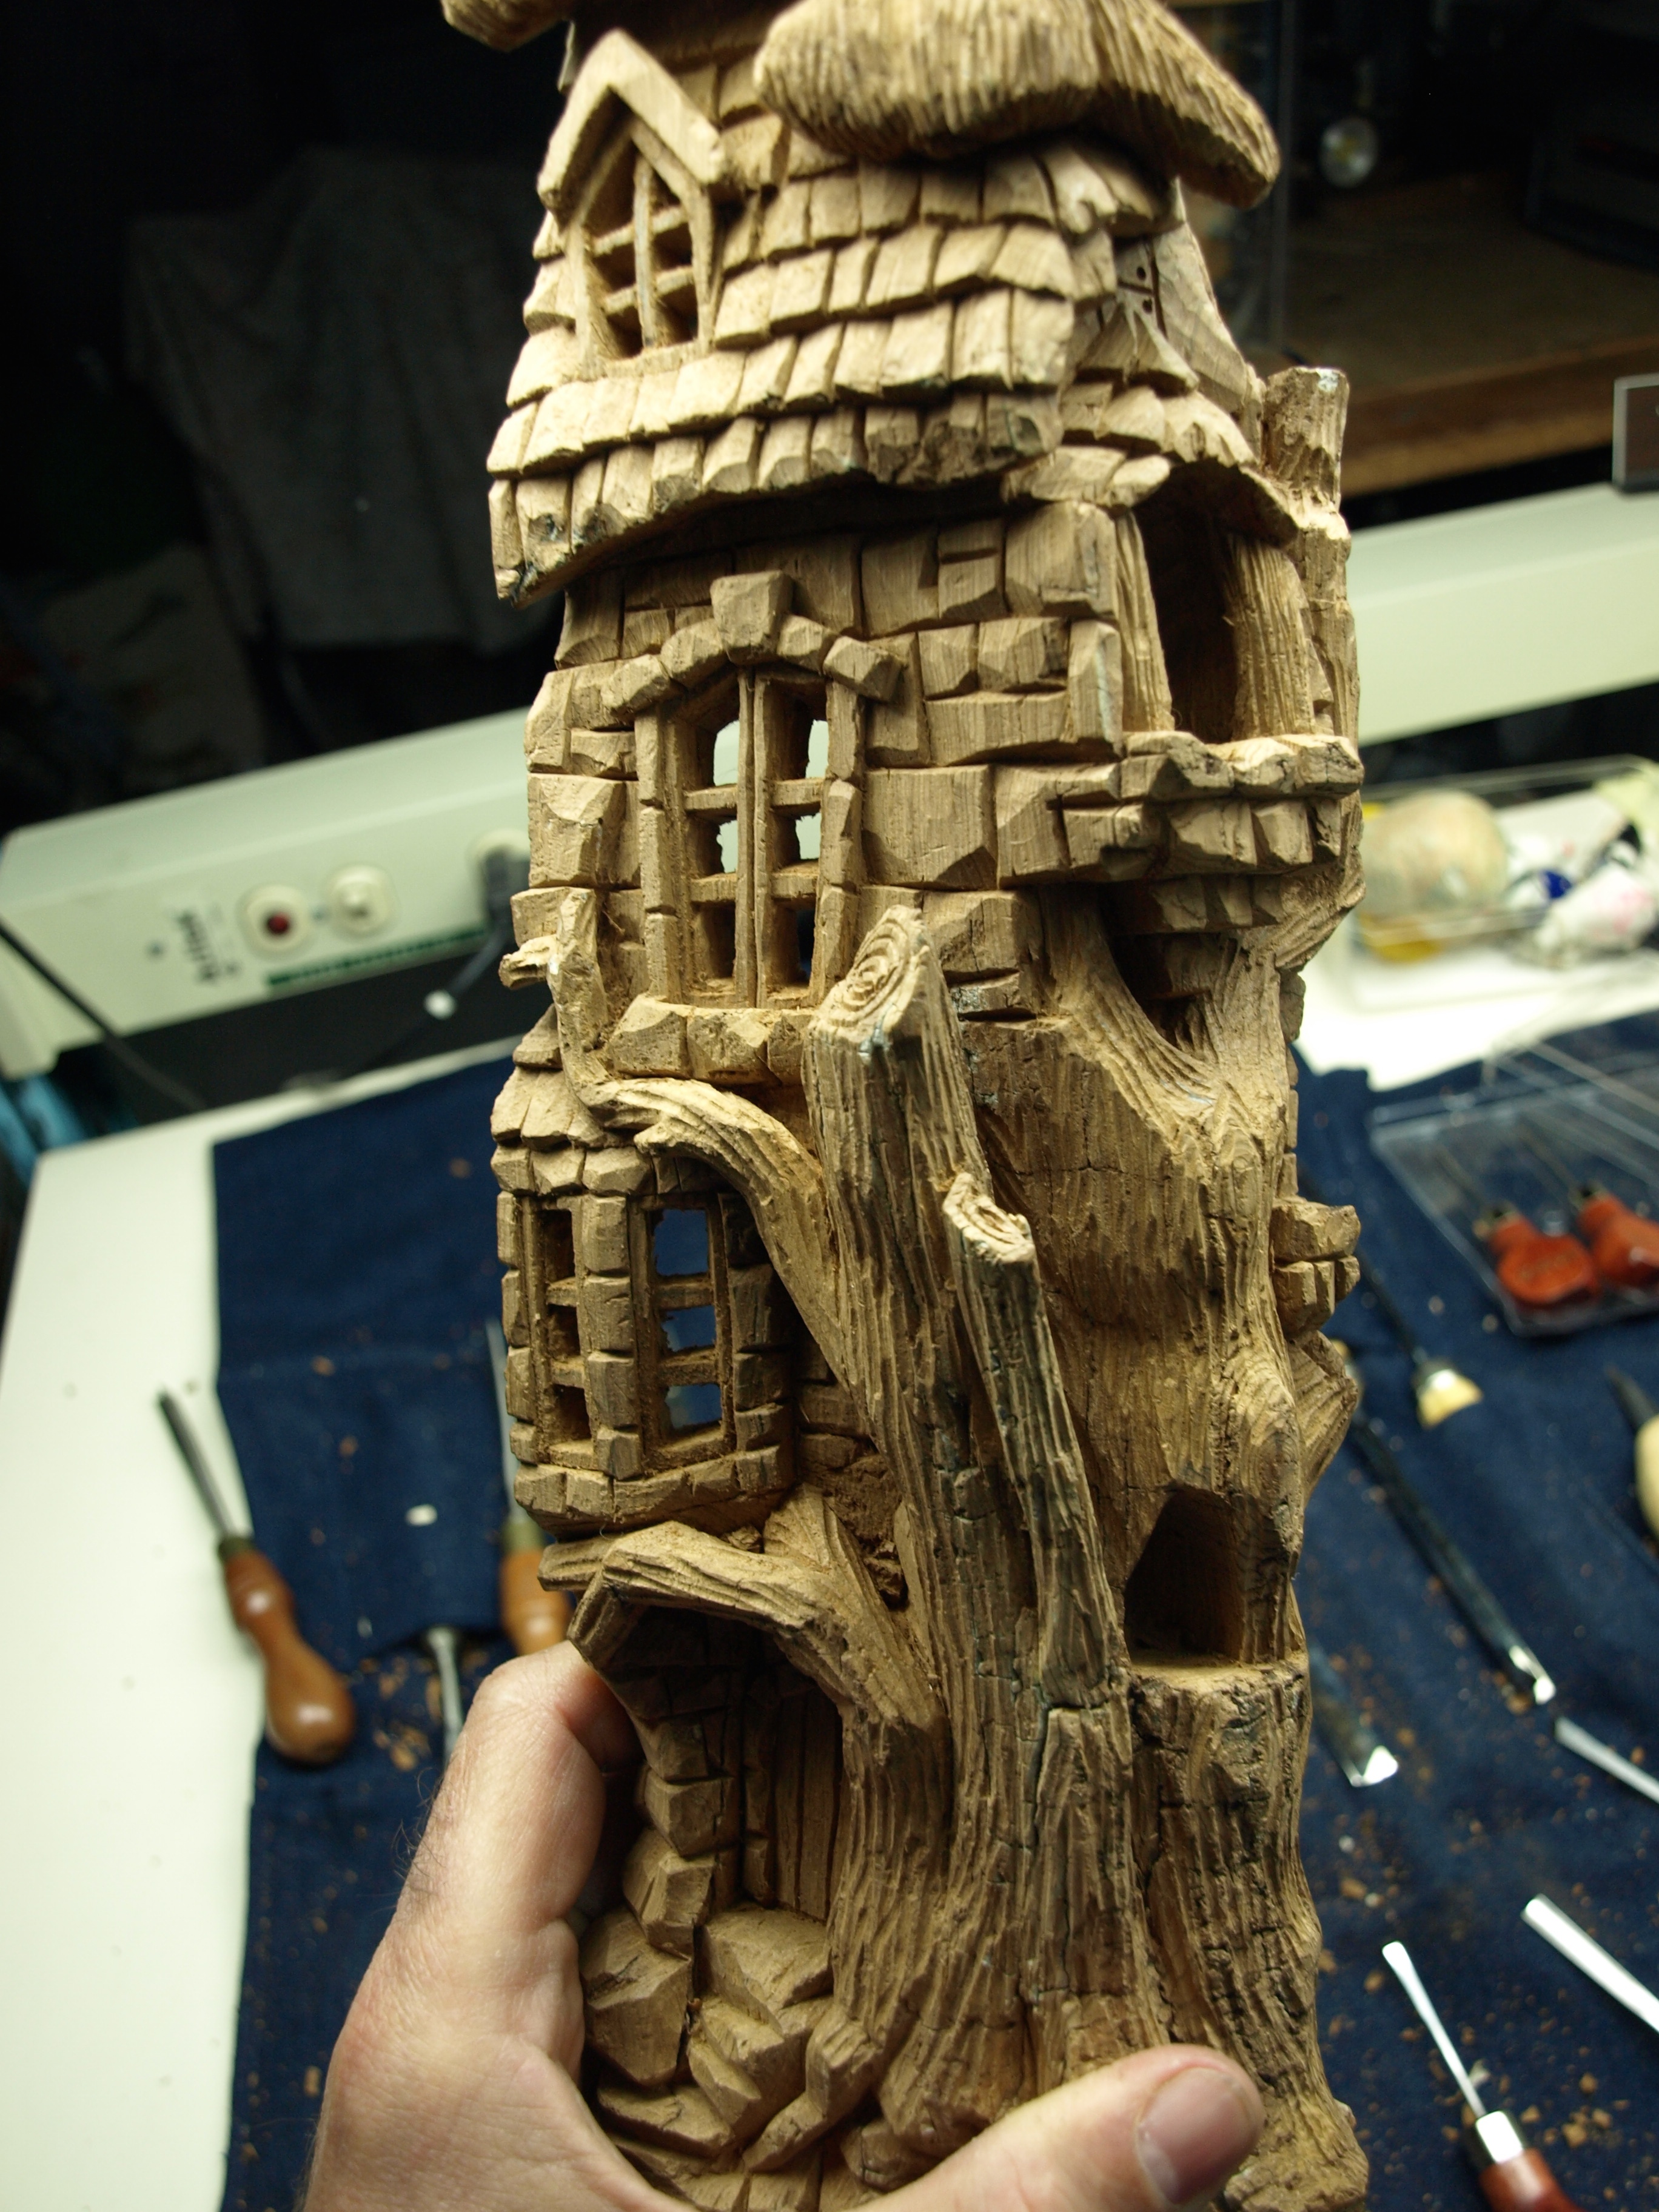
So, given that, I started with just roughing in the roof line and a few doors and windows.  Today I’ve done a bit more on the cedar roof shingles and detailed in one of the dormer windows.  Kind of mindless, relaxing carving and a break from pulling weeds.

Post Navigation

%d bloggers like this: