tributesinwood

Wood Carvings by Mark Sheridan

Archive for the tag “Bark Carving”

Lighthouse Bark Carving

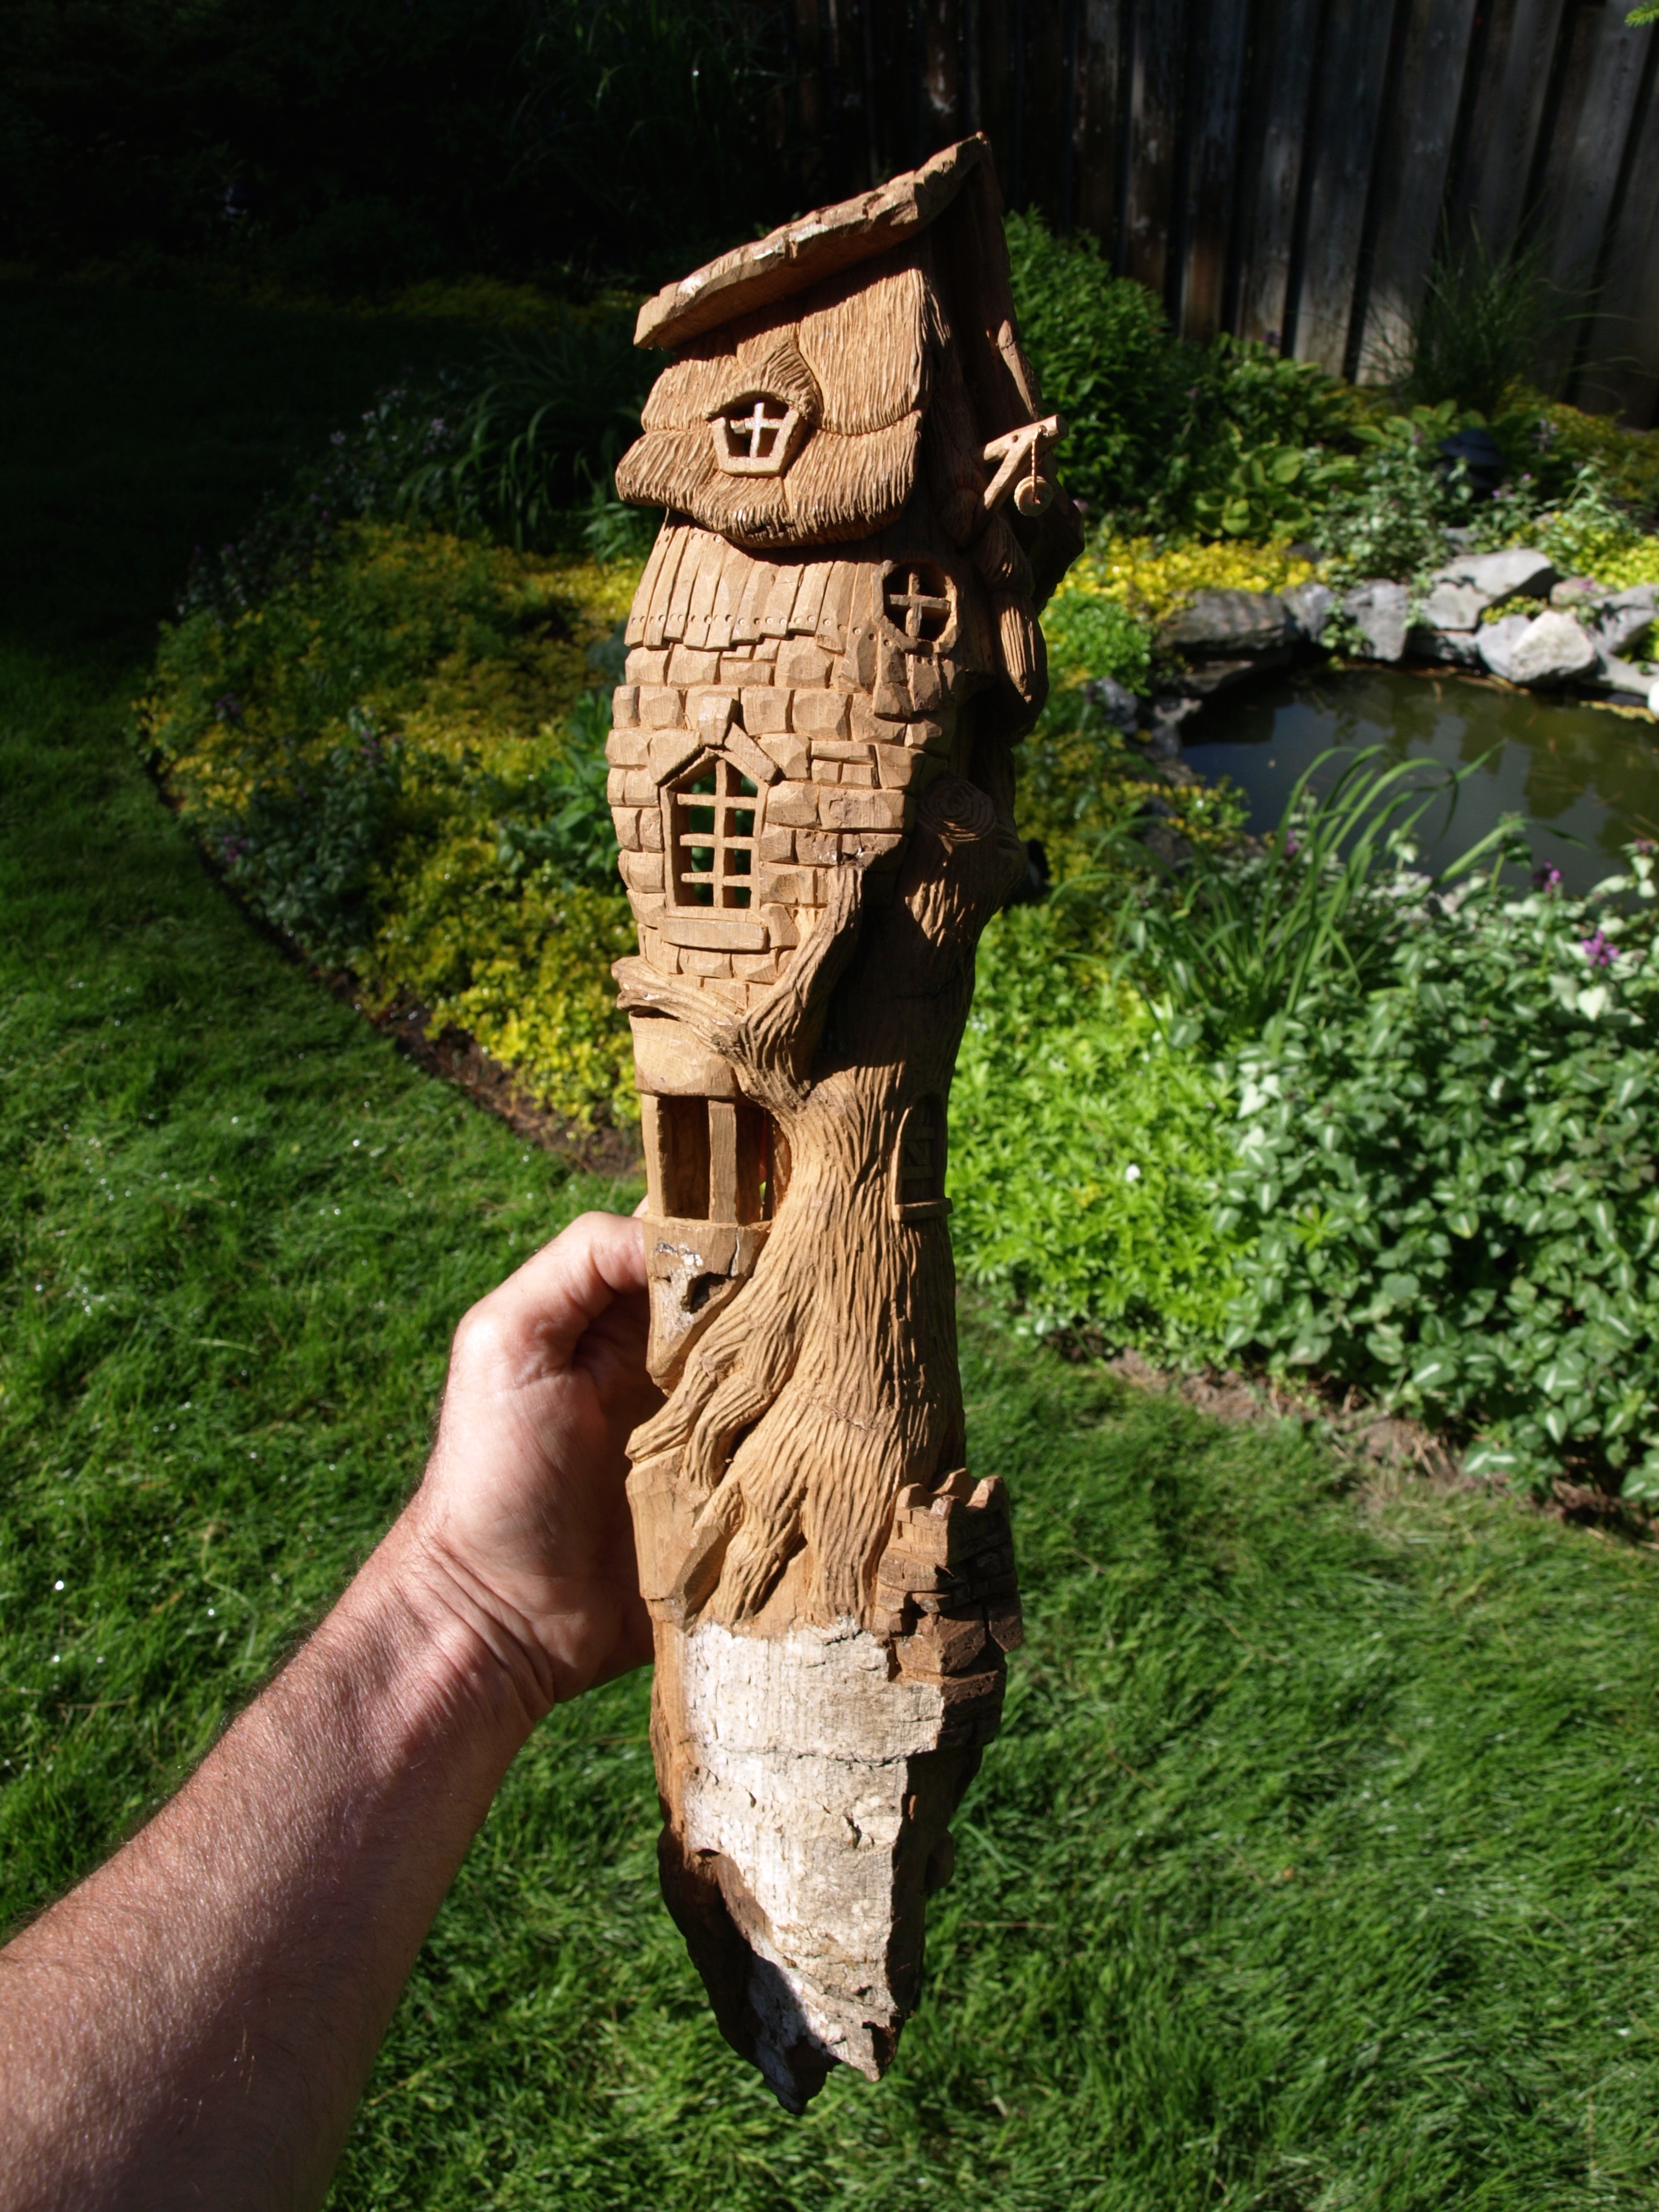
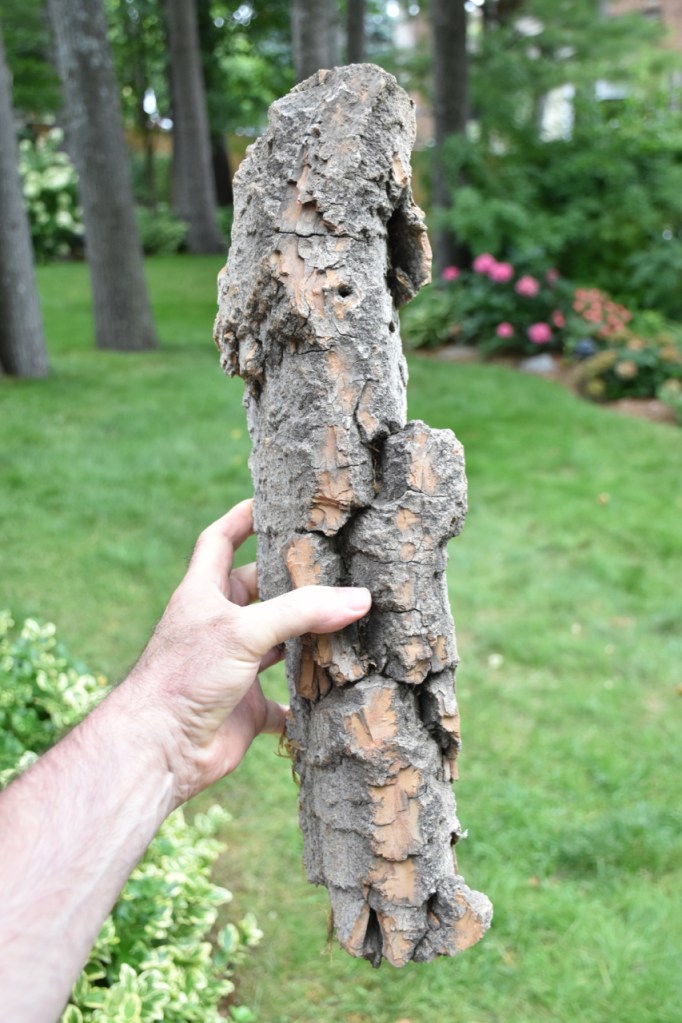
I’ve done a few Cottonwood Bark carvings that have incorporated lighthouses and I think that this may be my fourth or fifth. On this one, I decided to use some Cottonwood Bark from the west coast that was considerably thicker than I’ve used in the past. It turned out that the bark was quite a bit harder than the one’s that I’ve carved so far, so I made good use of a Foredom tool with a Typhoon ( carbide ) bit for the initial roughing out.

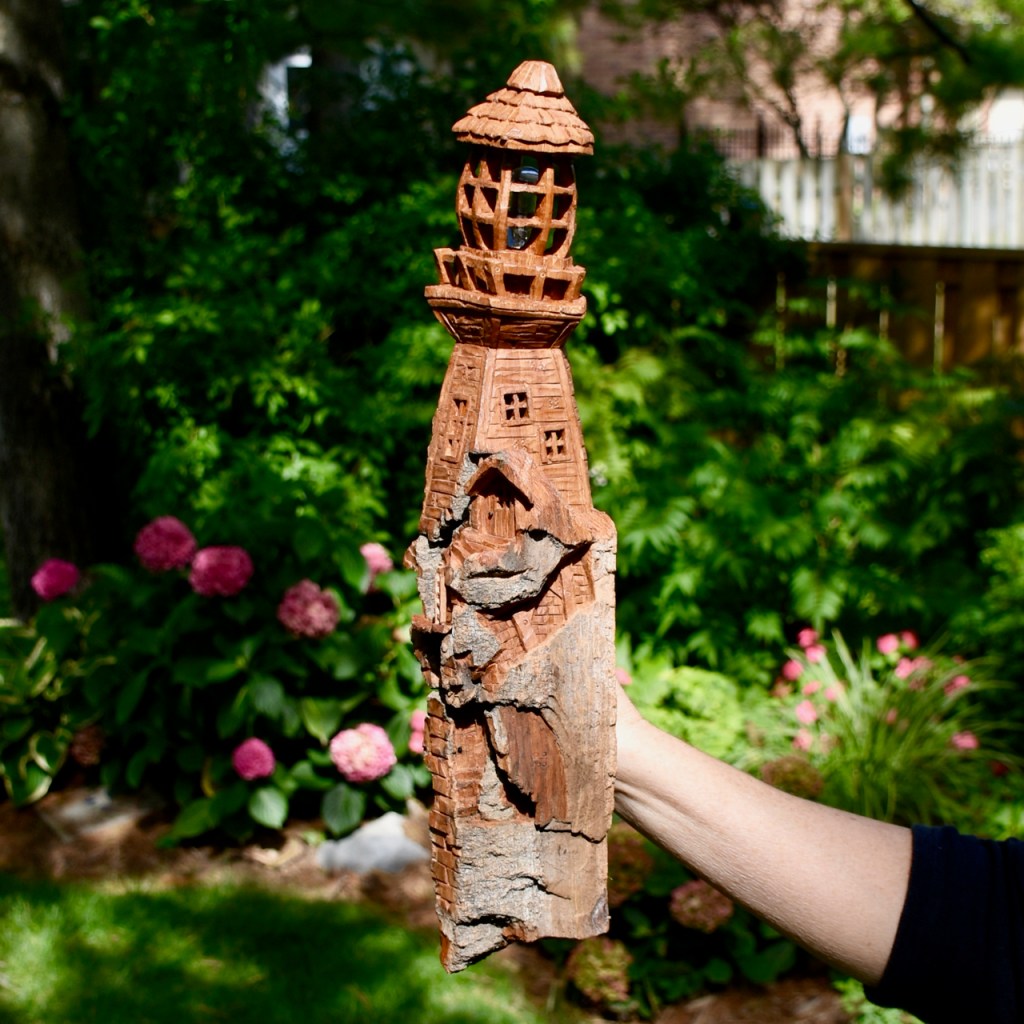
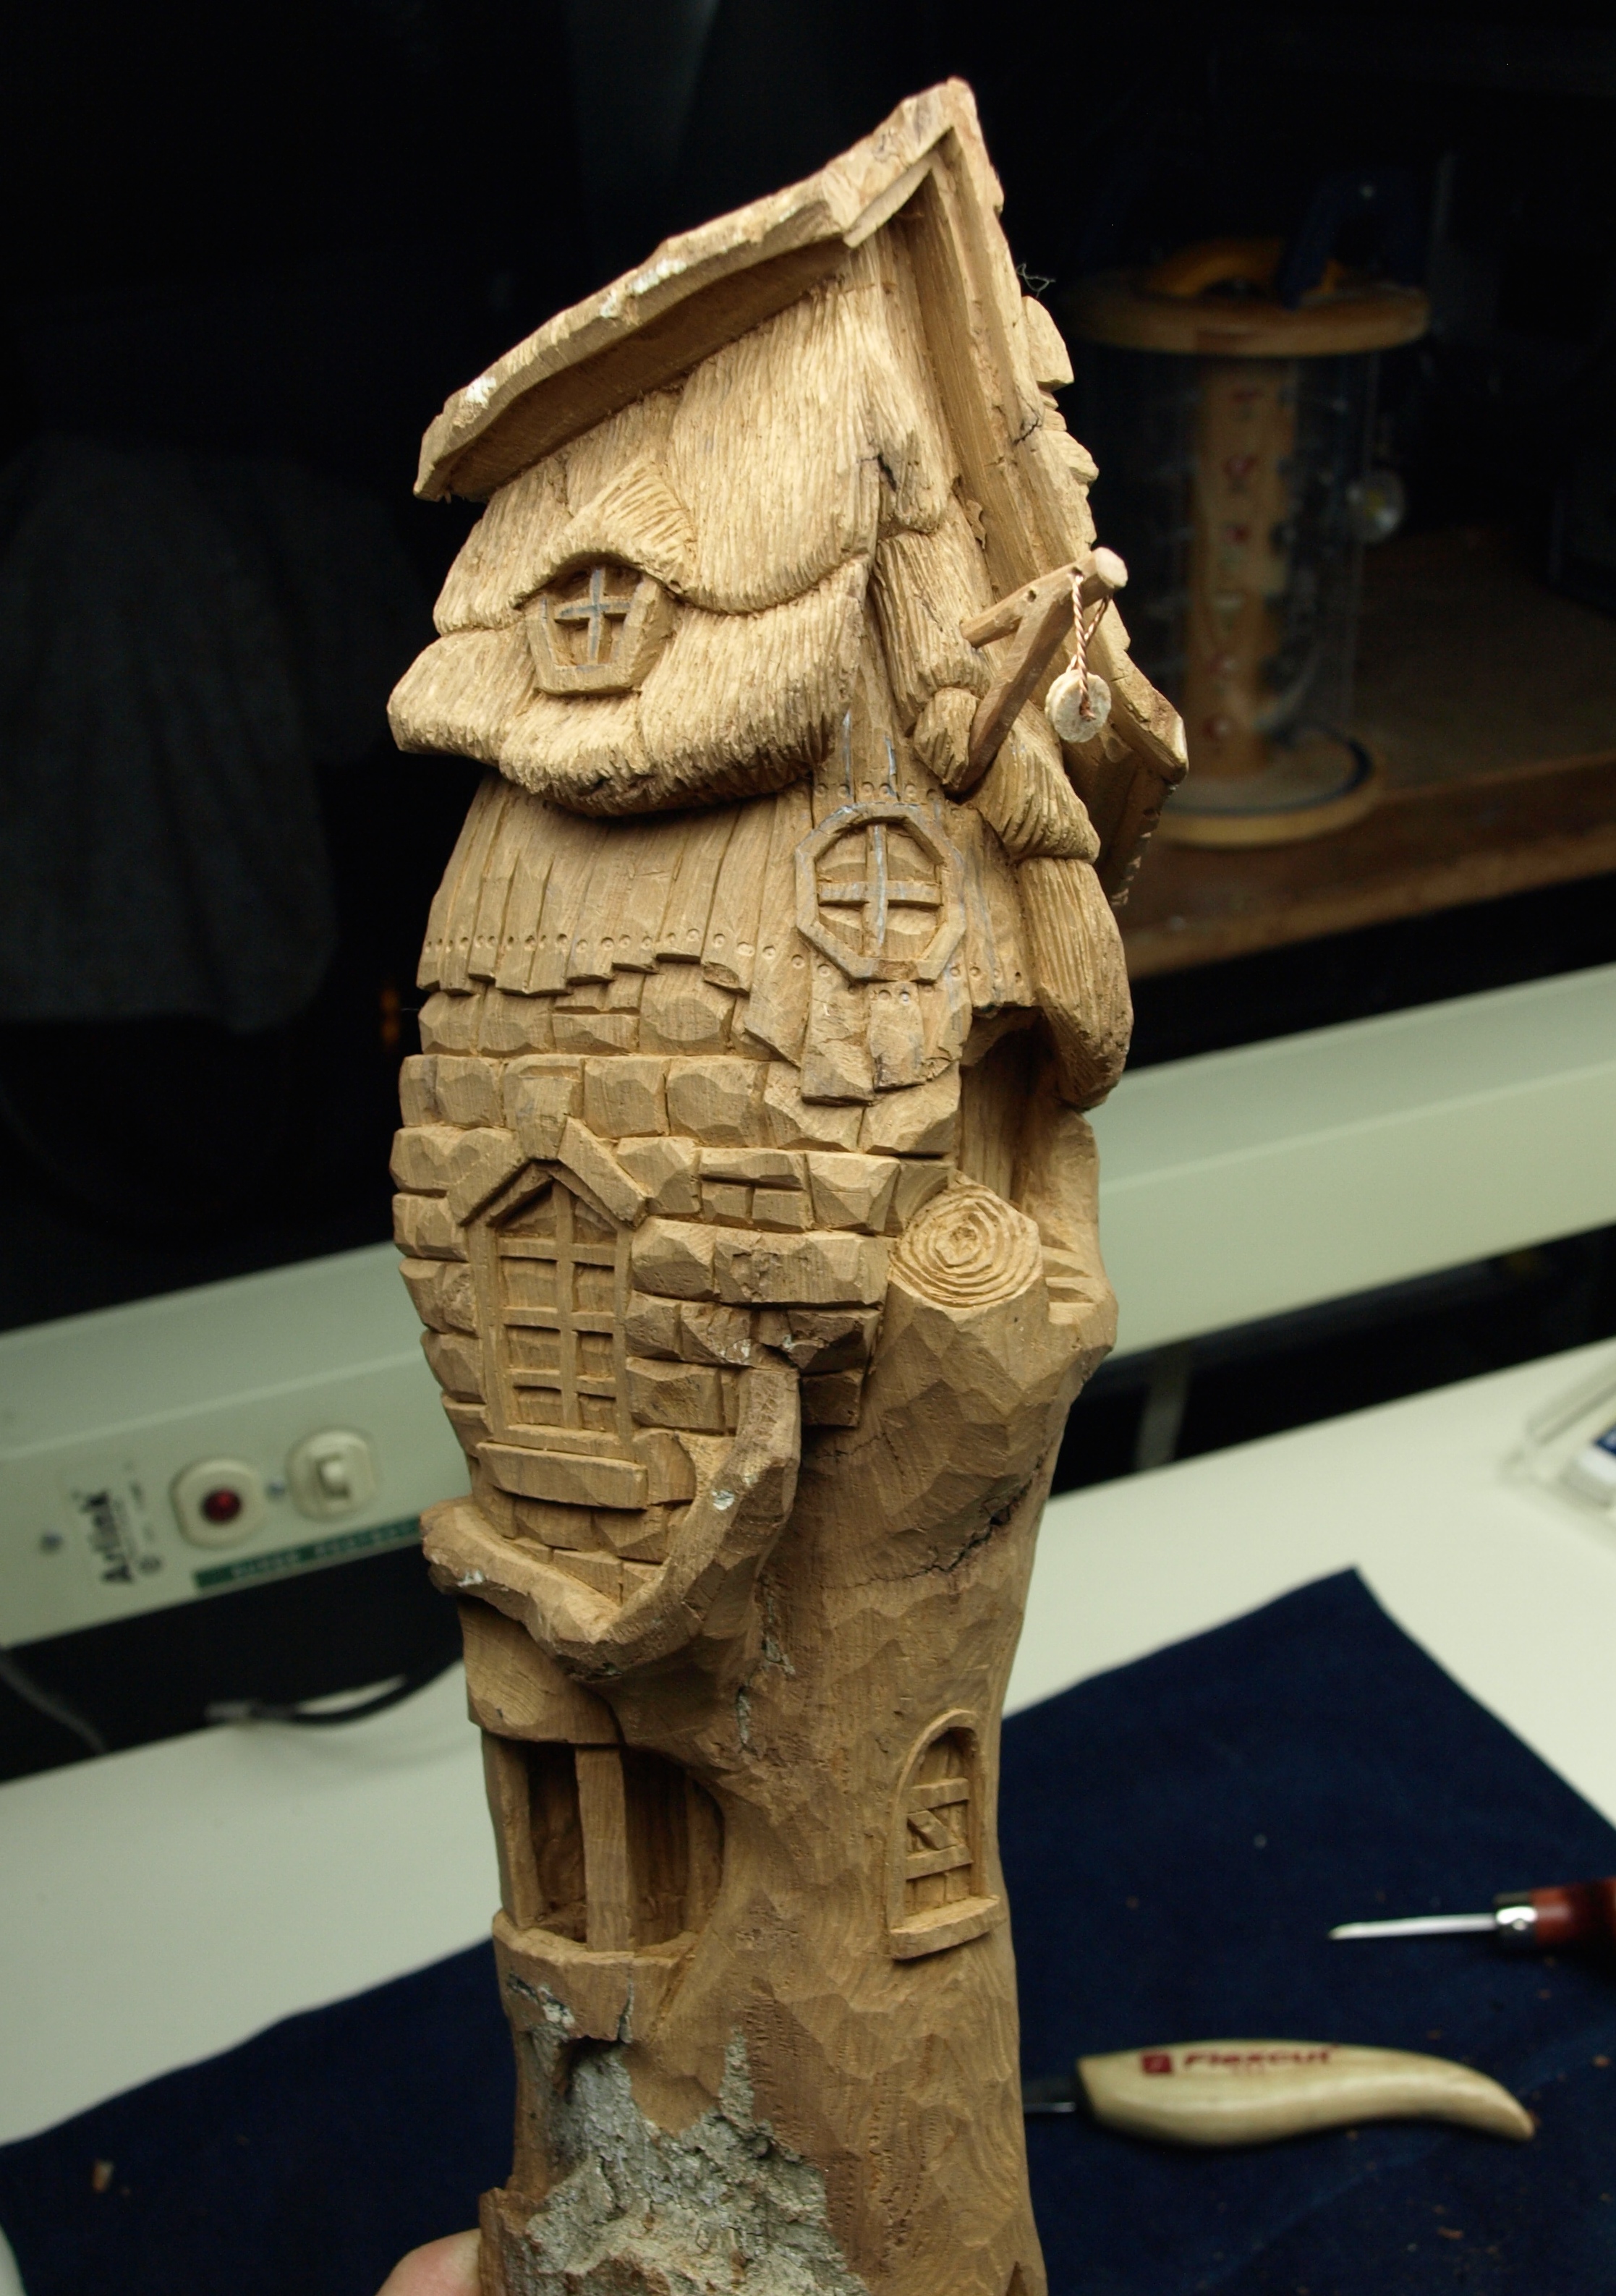
Does this look like a lighthouse to you? You have to squint a bit…

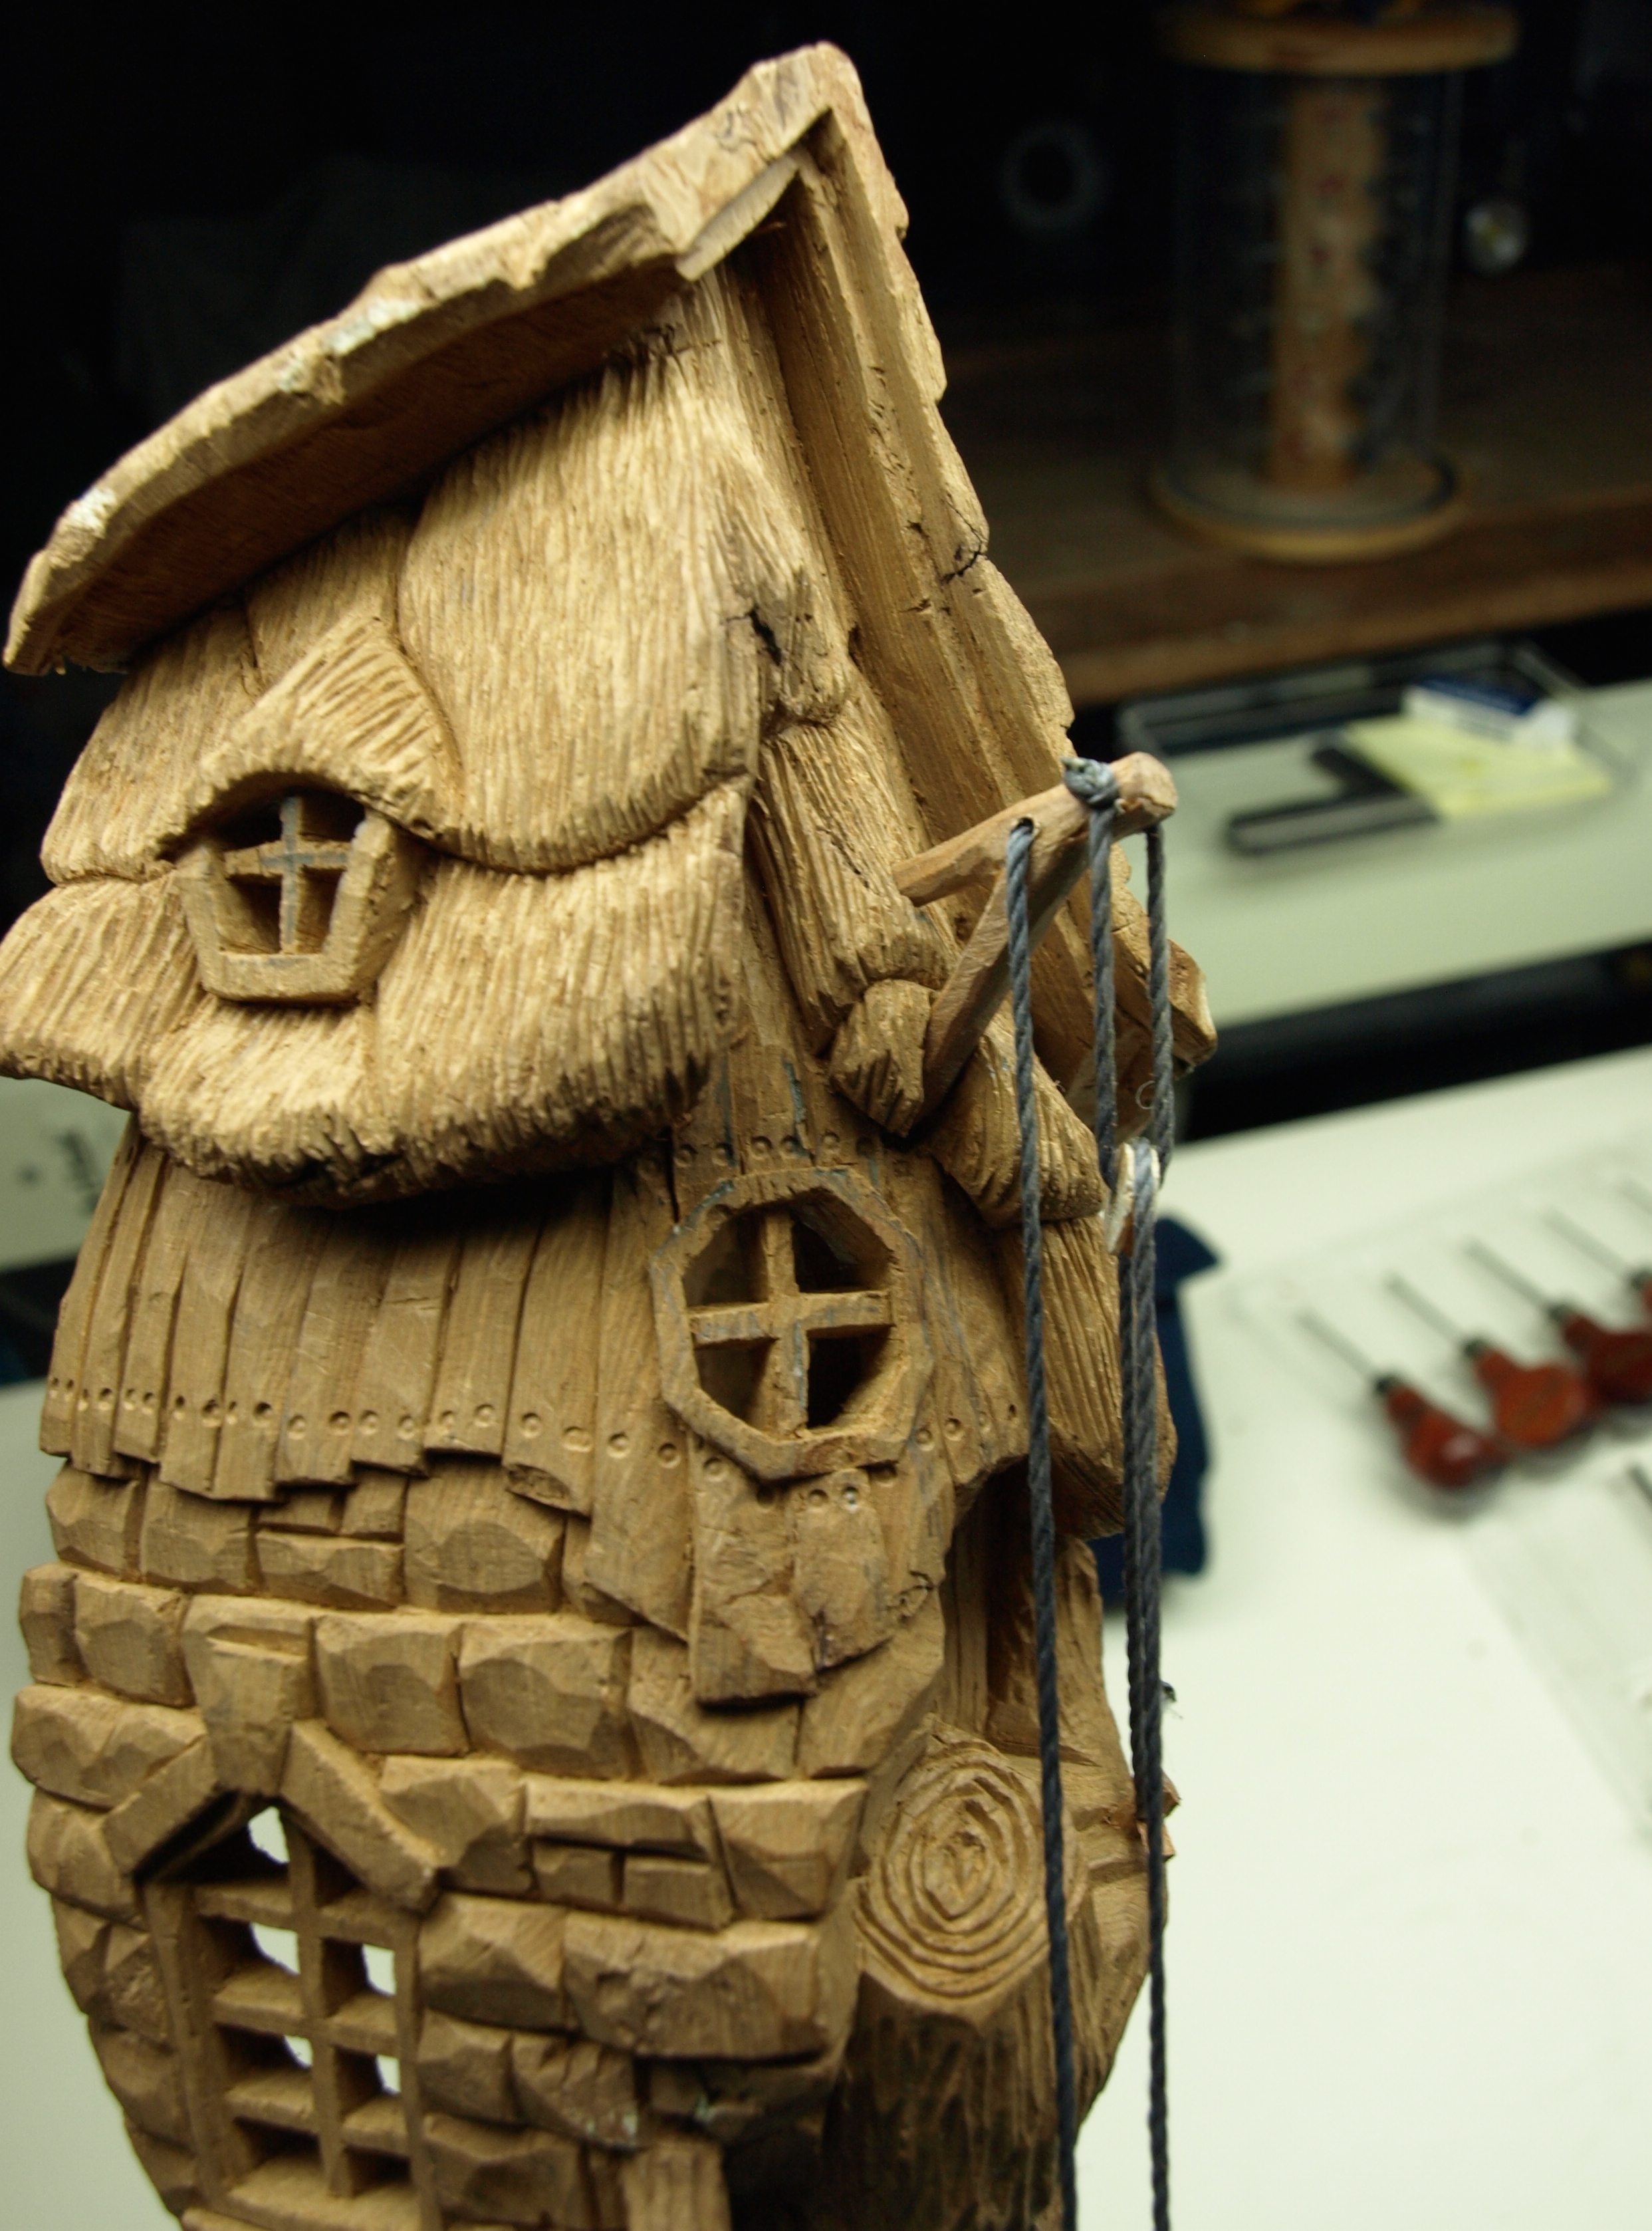
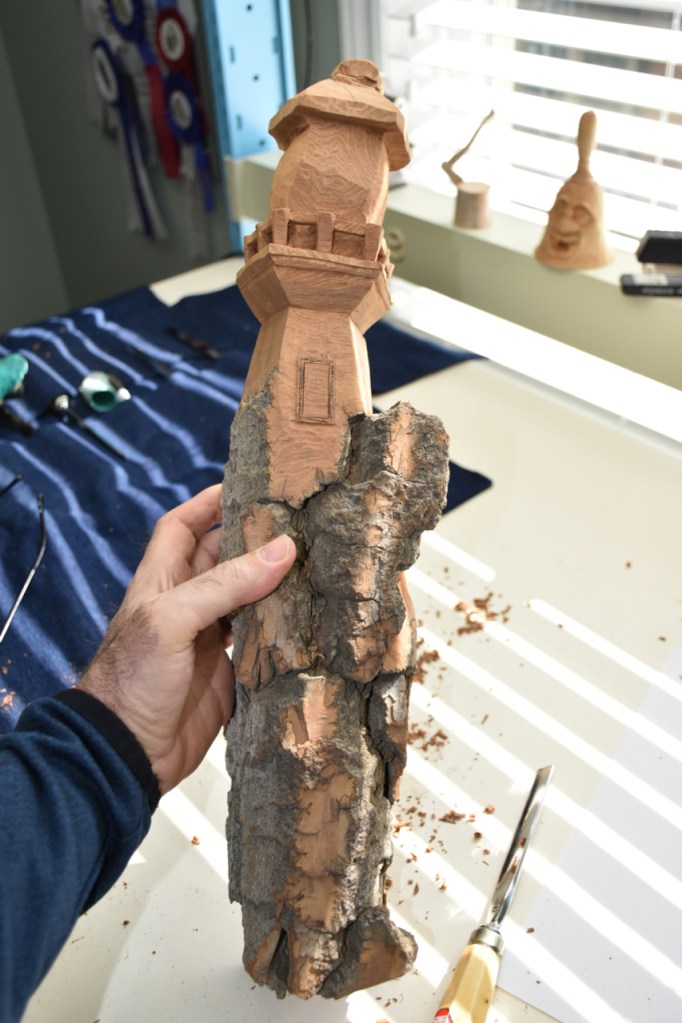
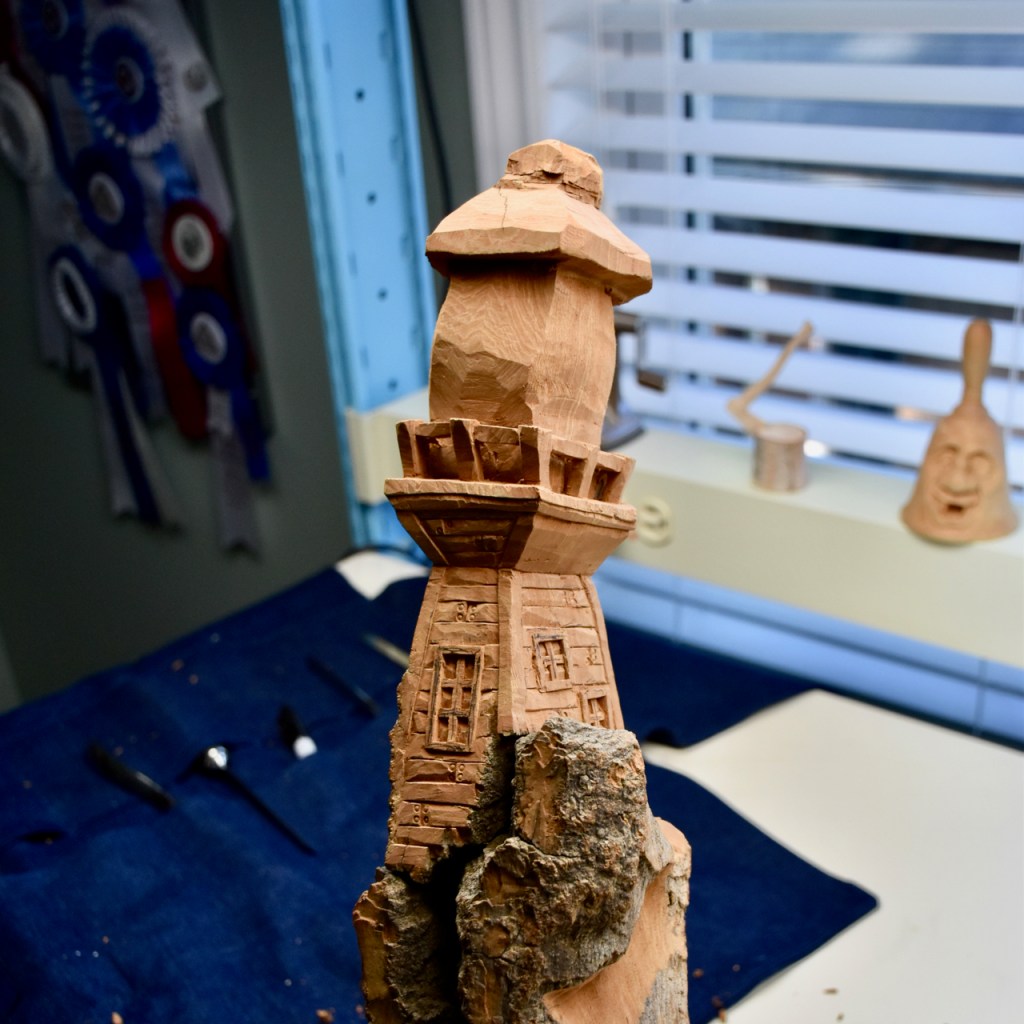
The Typhoon bit is a very aggressive bit made up of multiple carbide “pins” that remove material in a hurry. If you ever try one out, be sure to protect your body, eyes, hands and arms with protective gear. I started with the hexagonal outline of the lighthouse and then followed up with a very shallow profile gouge to smooth things out. The horizontal planks were made with a combination of knives, gouges and a nail punch to imprint some “nail holes” where needed in the resulting siding. I left some wood to make a bit of a railing and then marked out and hollowed out the lighthouse lens and added some shingles to the lens house.

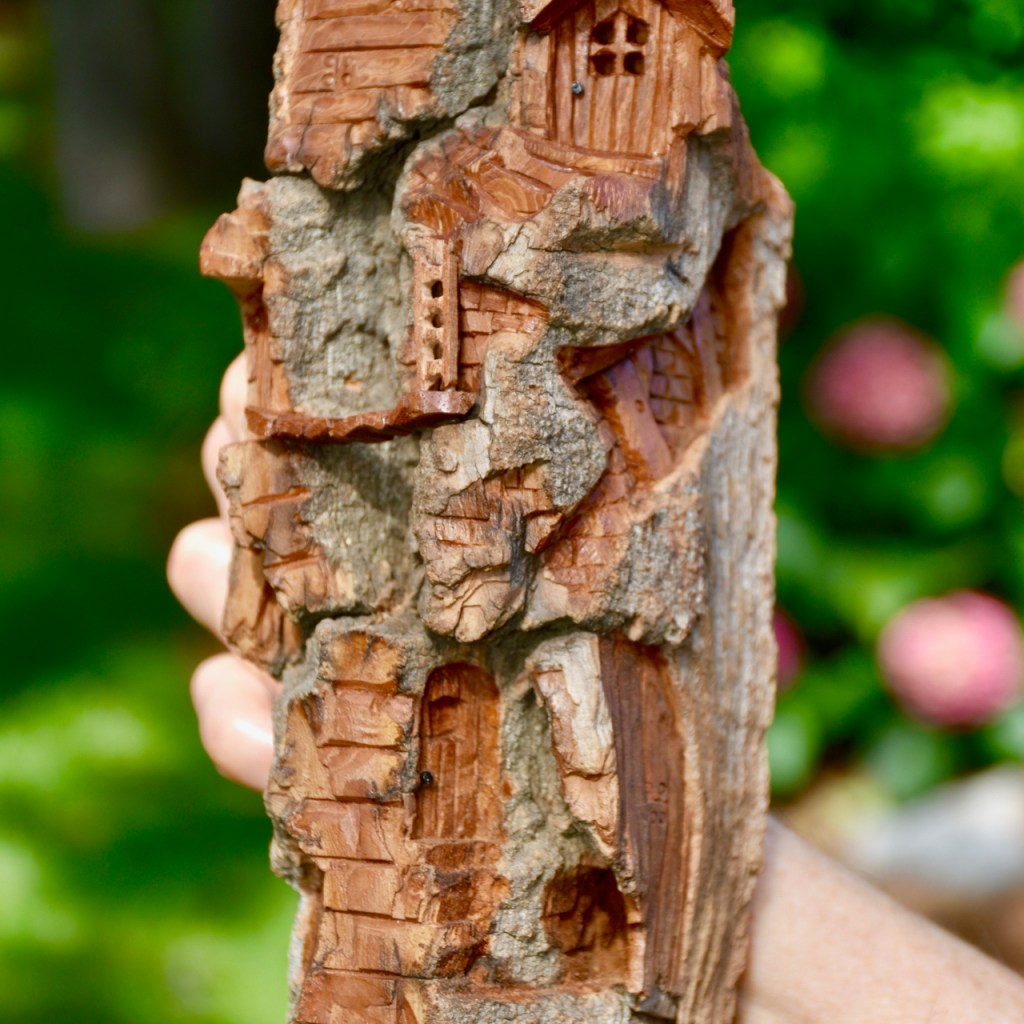
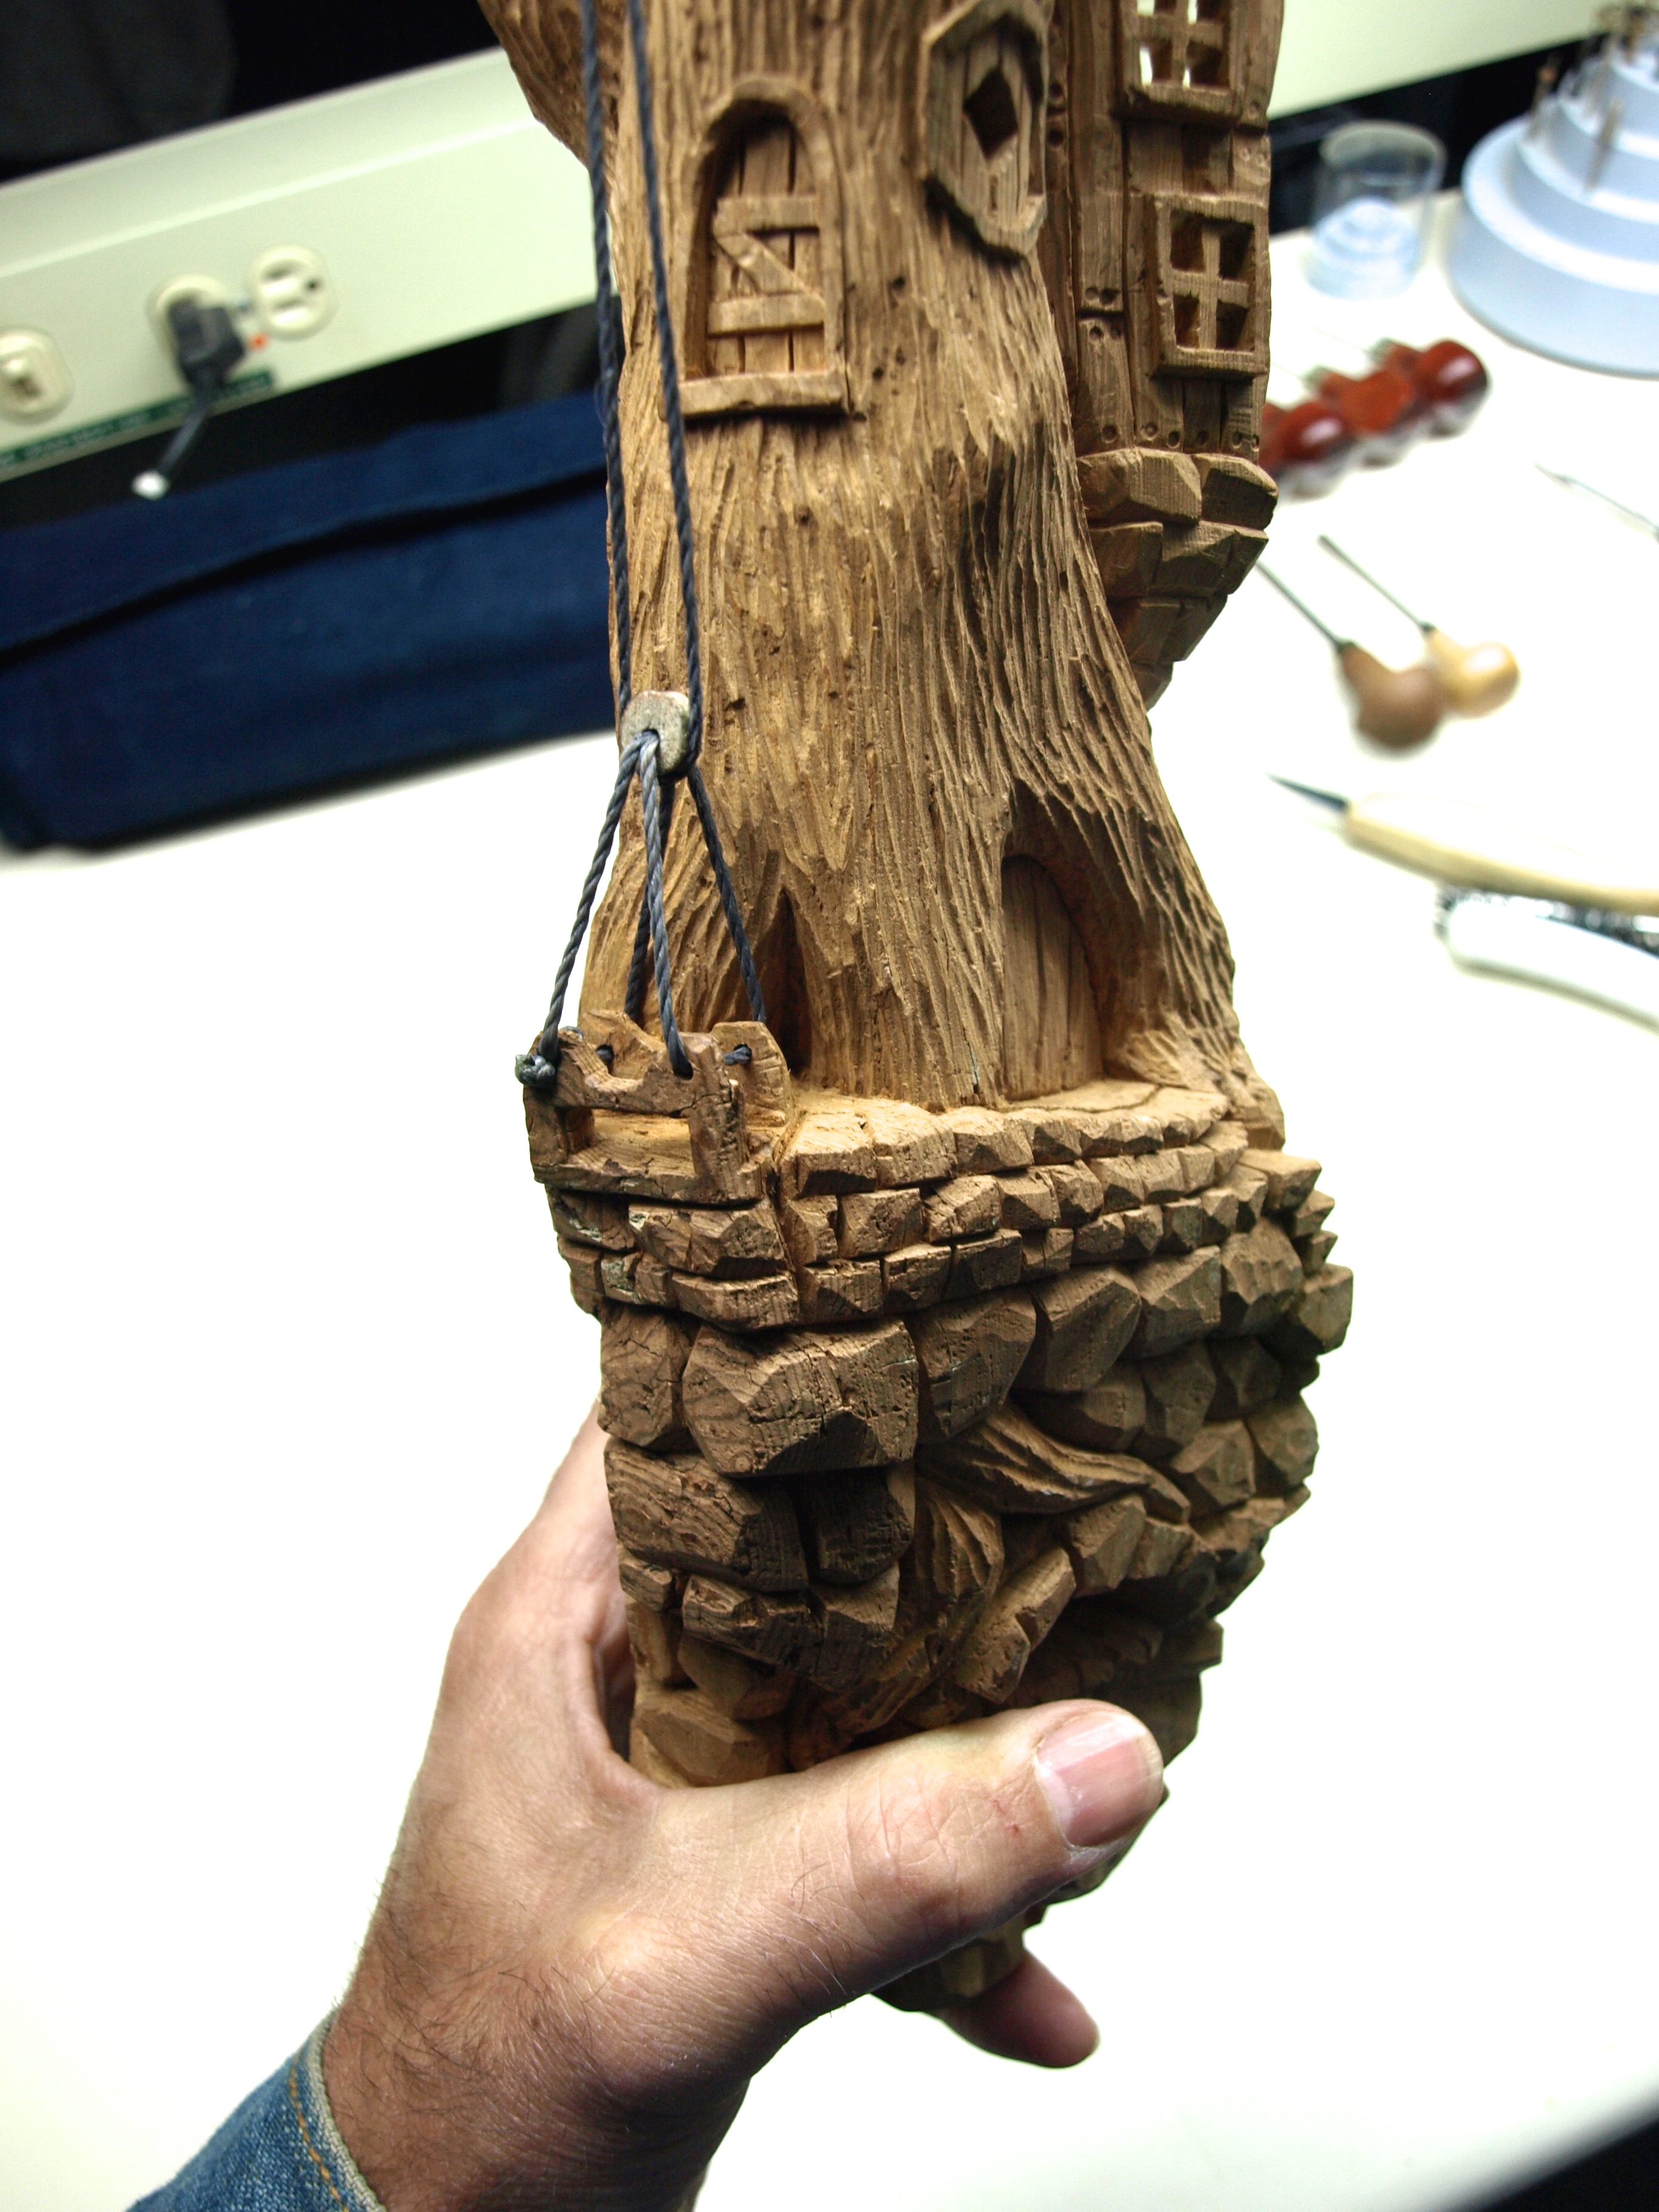
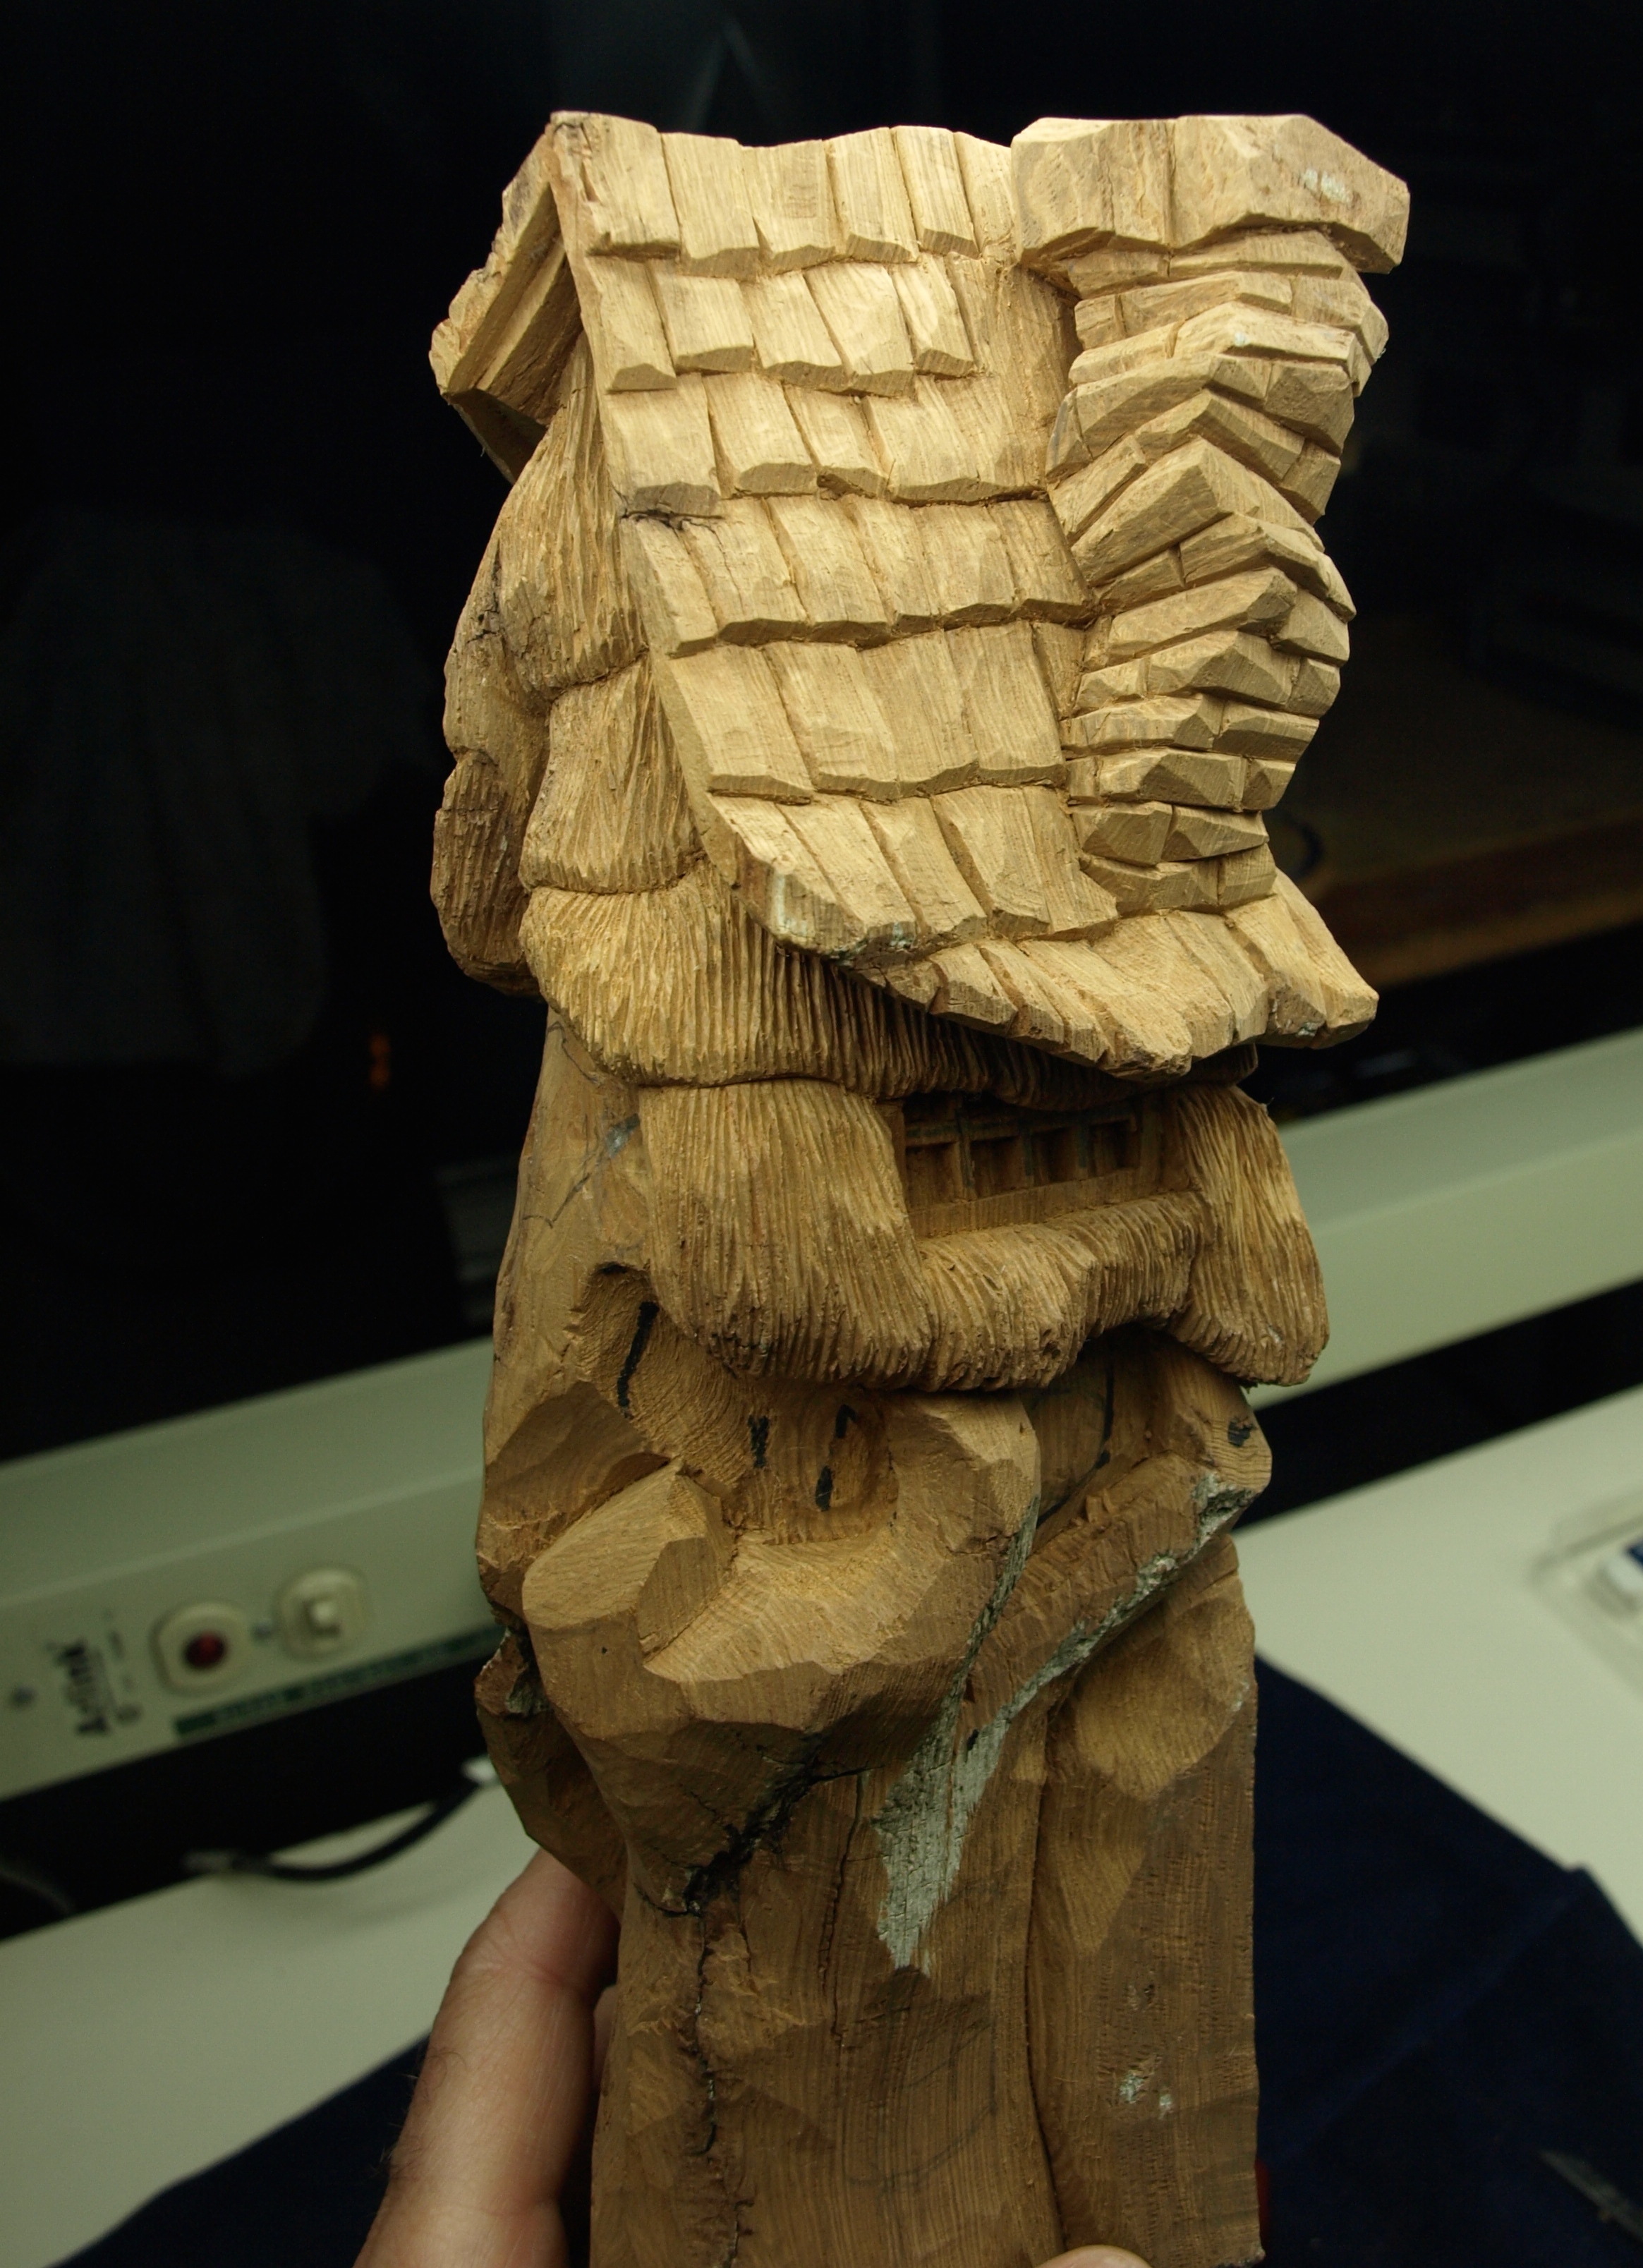
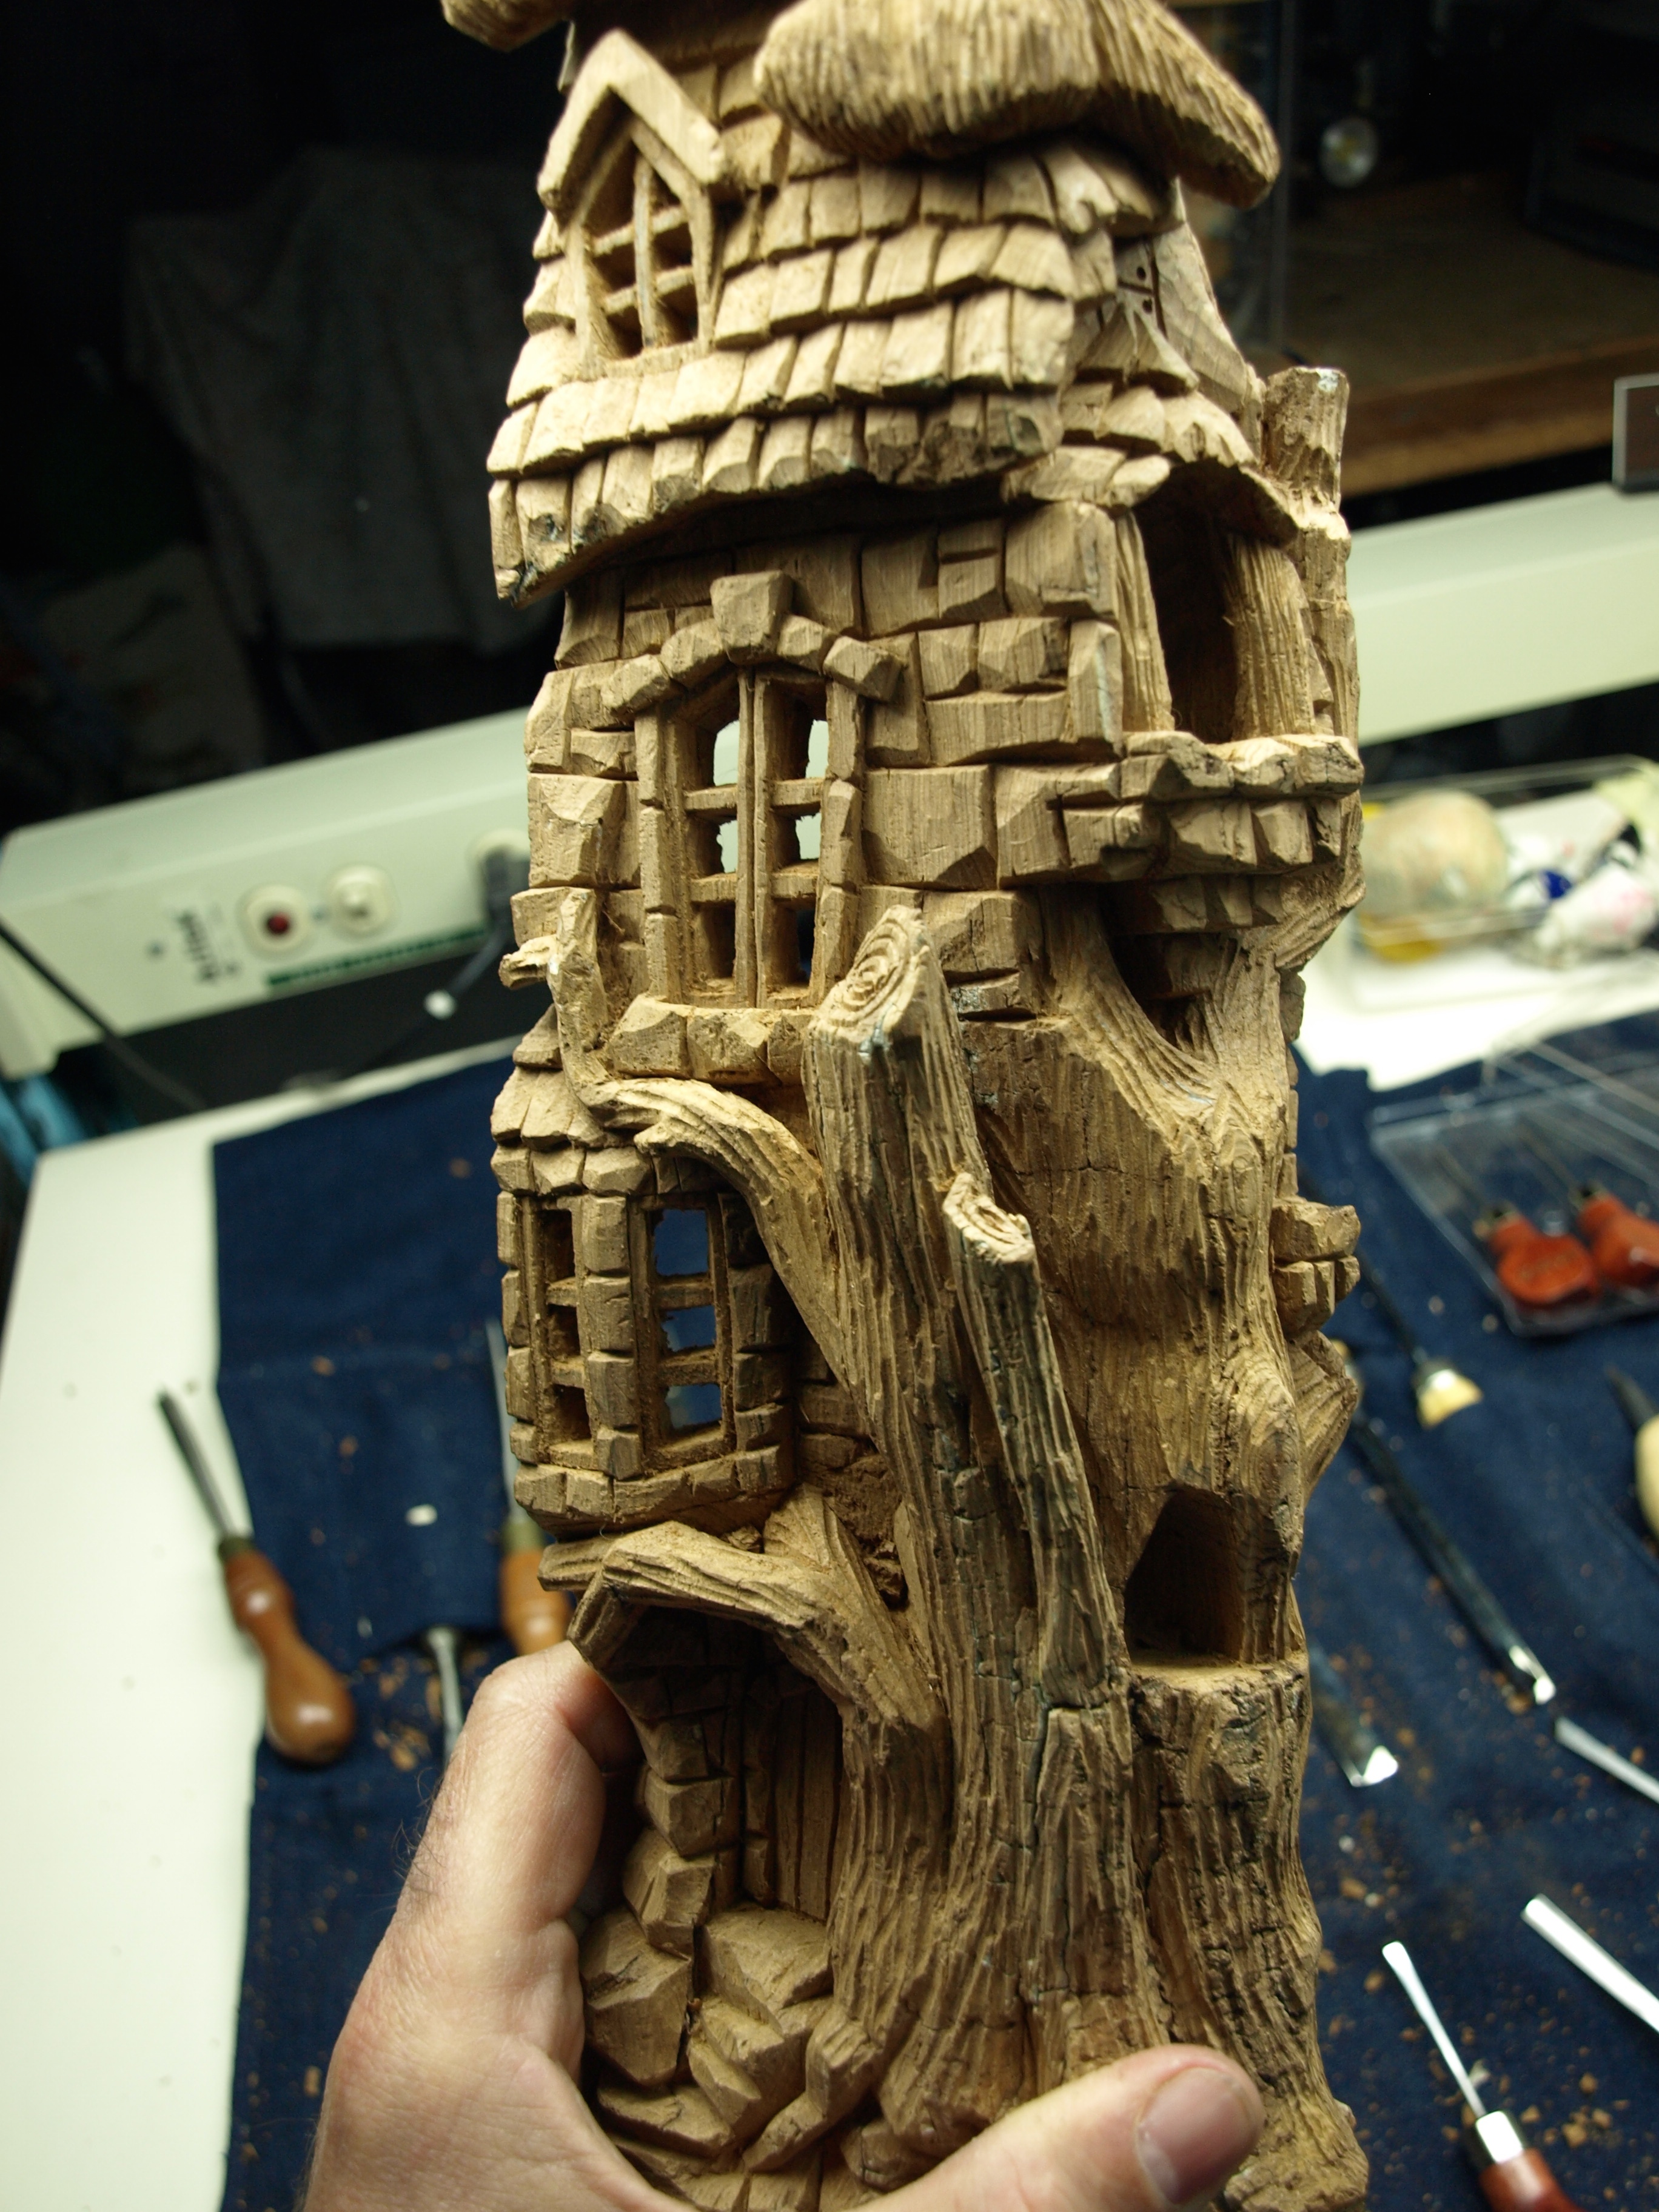
Then I just got carried away and forgot to take some more pictures along the way…sorry about that! I added some entrances and alcoves, some additional windows and a combination of wood columns and various size bricks and blocks that kept the structure solid on the rocks on which it was built. When you do this, just have fun with it.

I don’t try to make things too straight as the various odd angles just add to the interest in the wood. Keep your tools very sharp and try to slice the bark rather than use a blunt pushing action that could tear or break the bark. If you do break a bit of bark away, either carve around the void or just glue the piece back in place with some white carpenter’s glue.

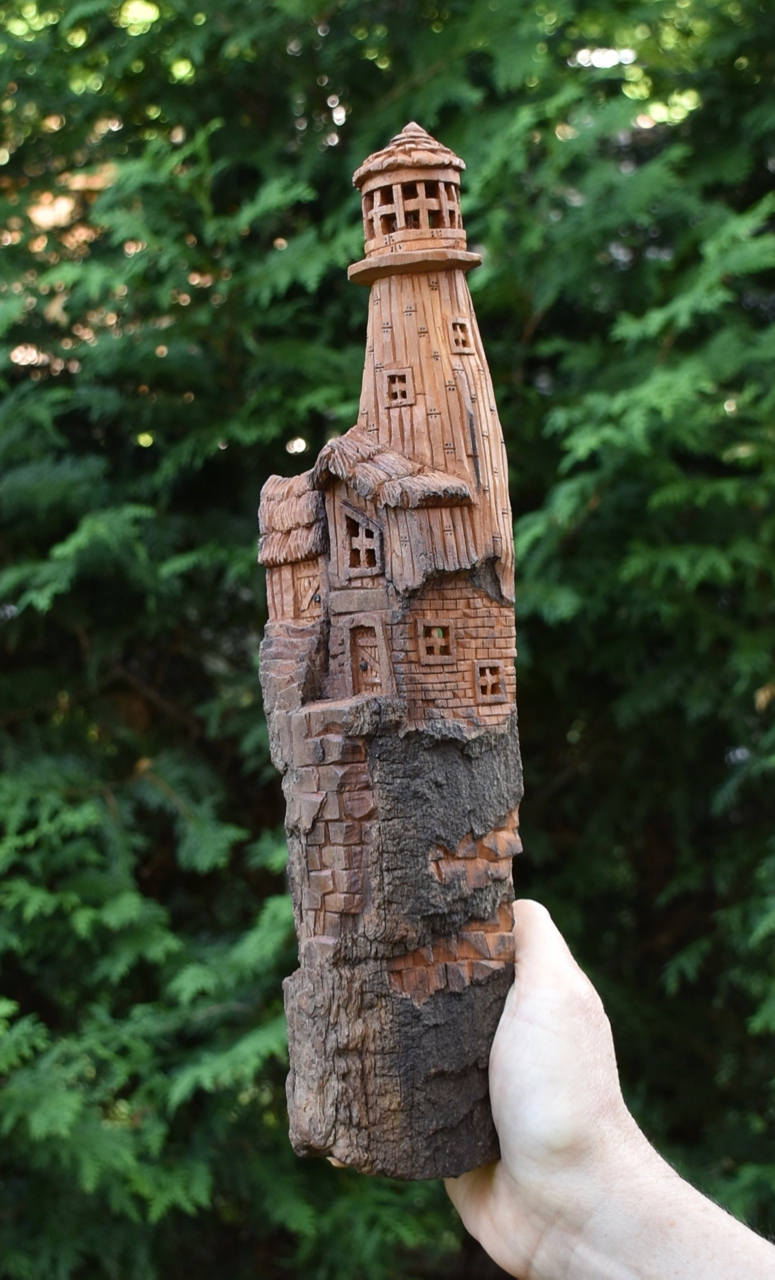
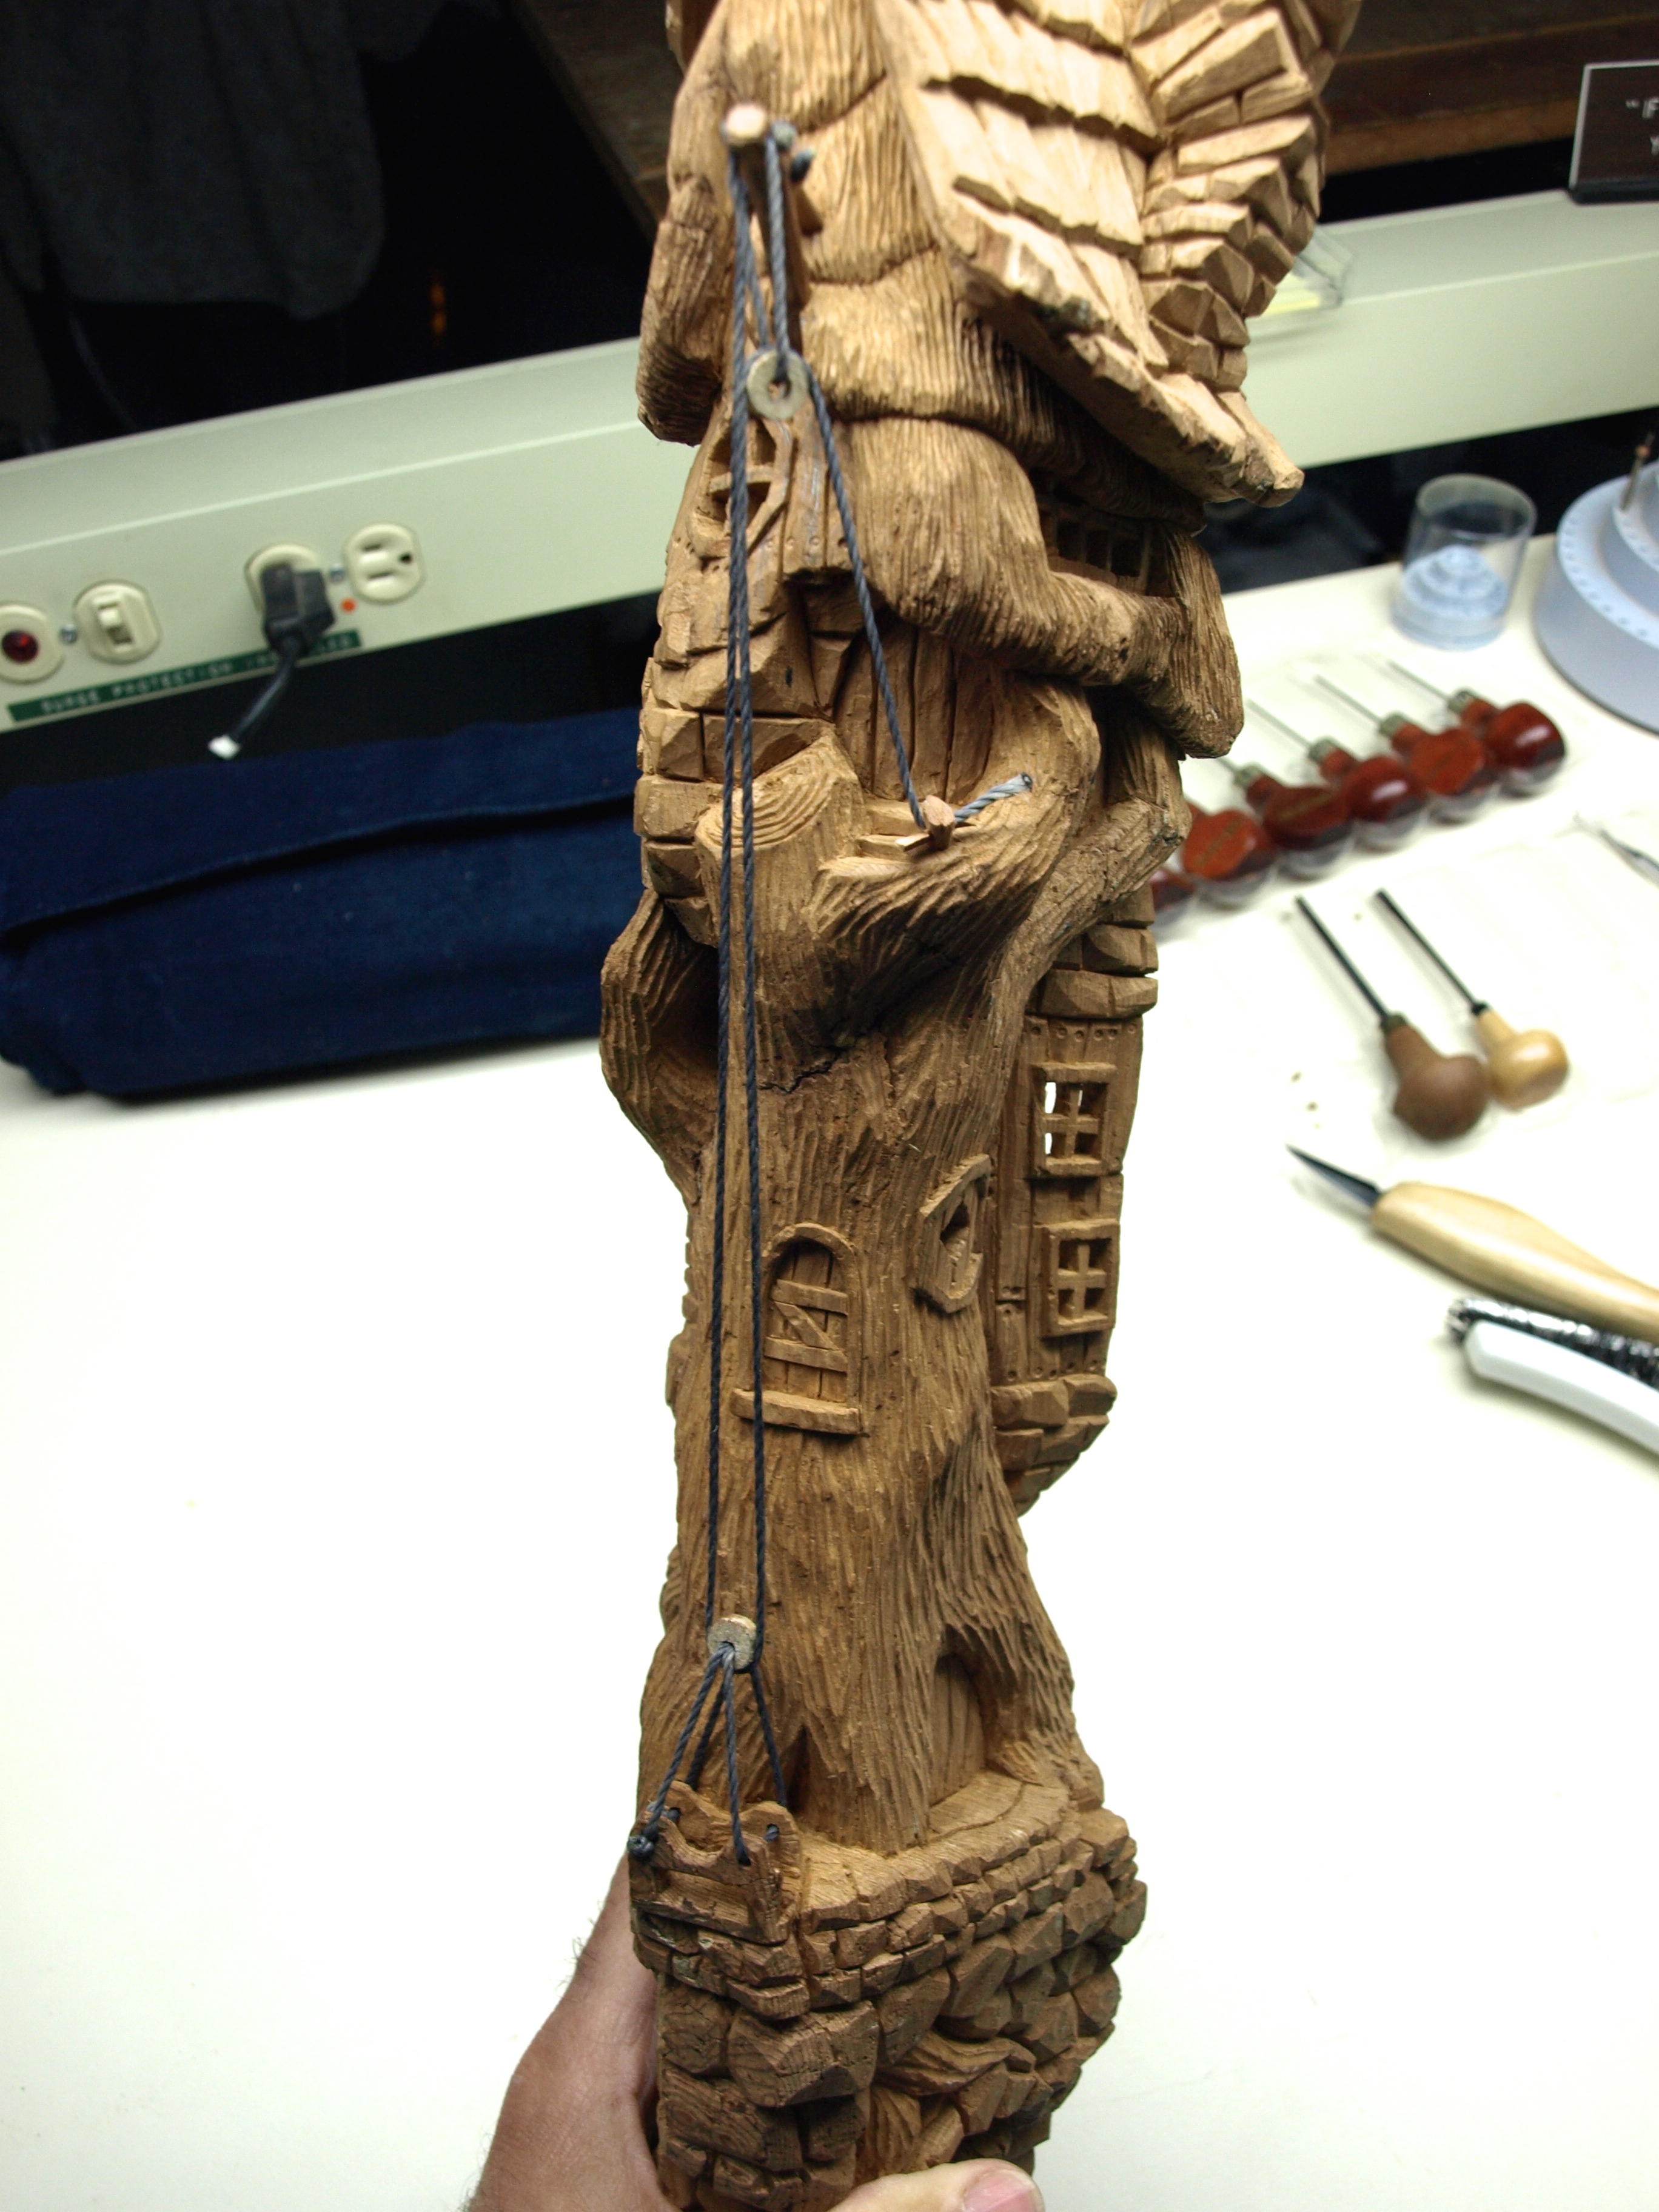
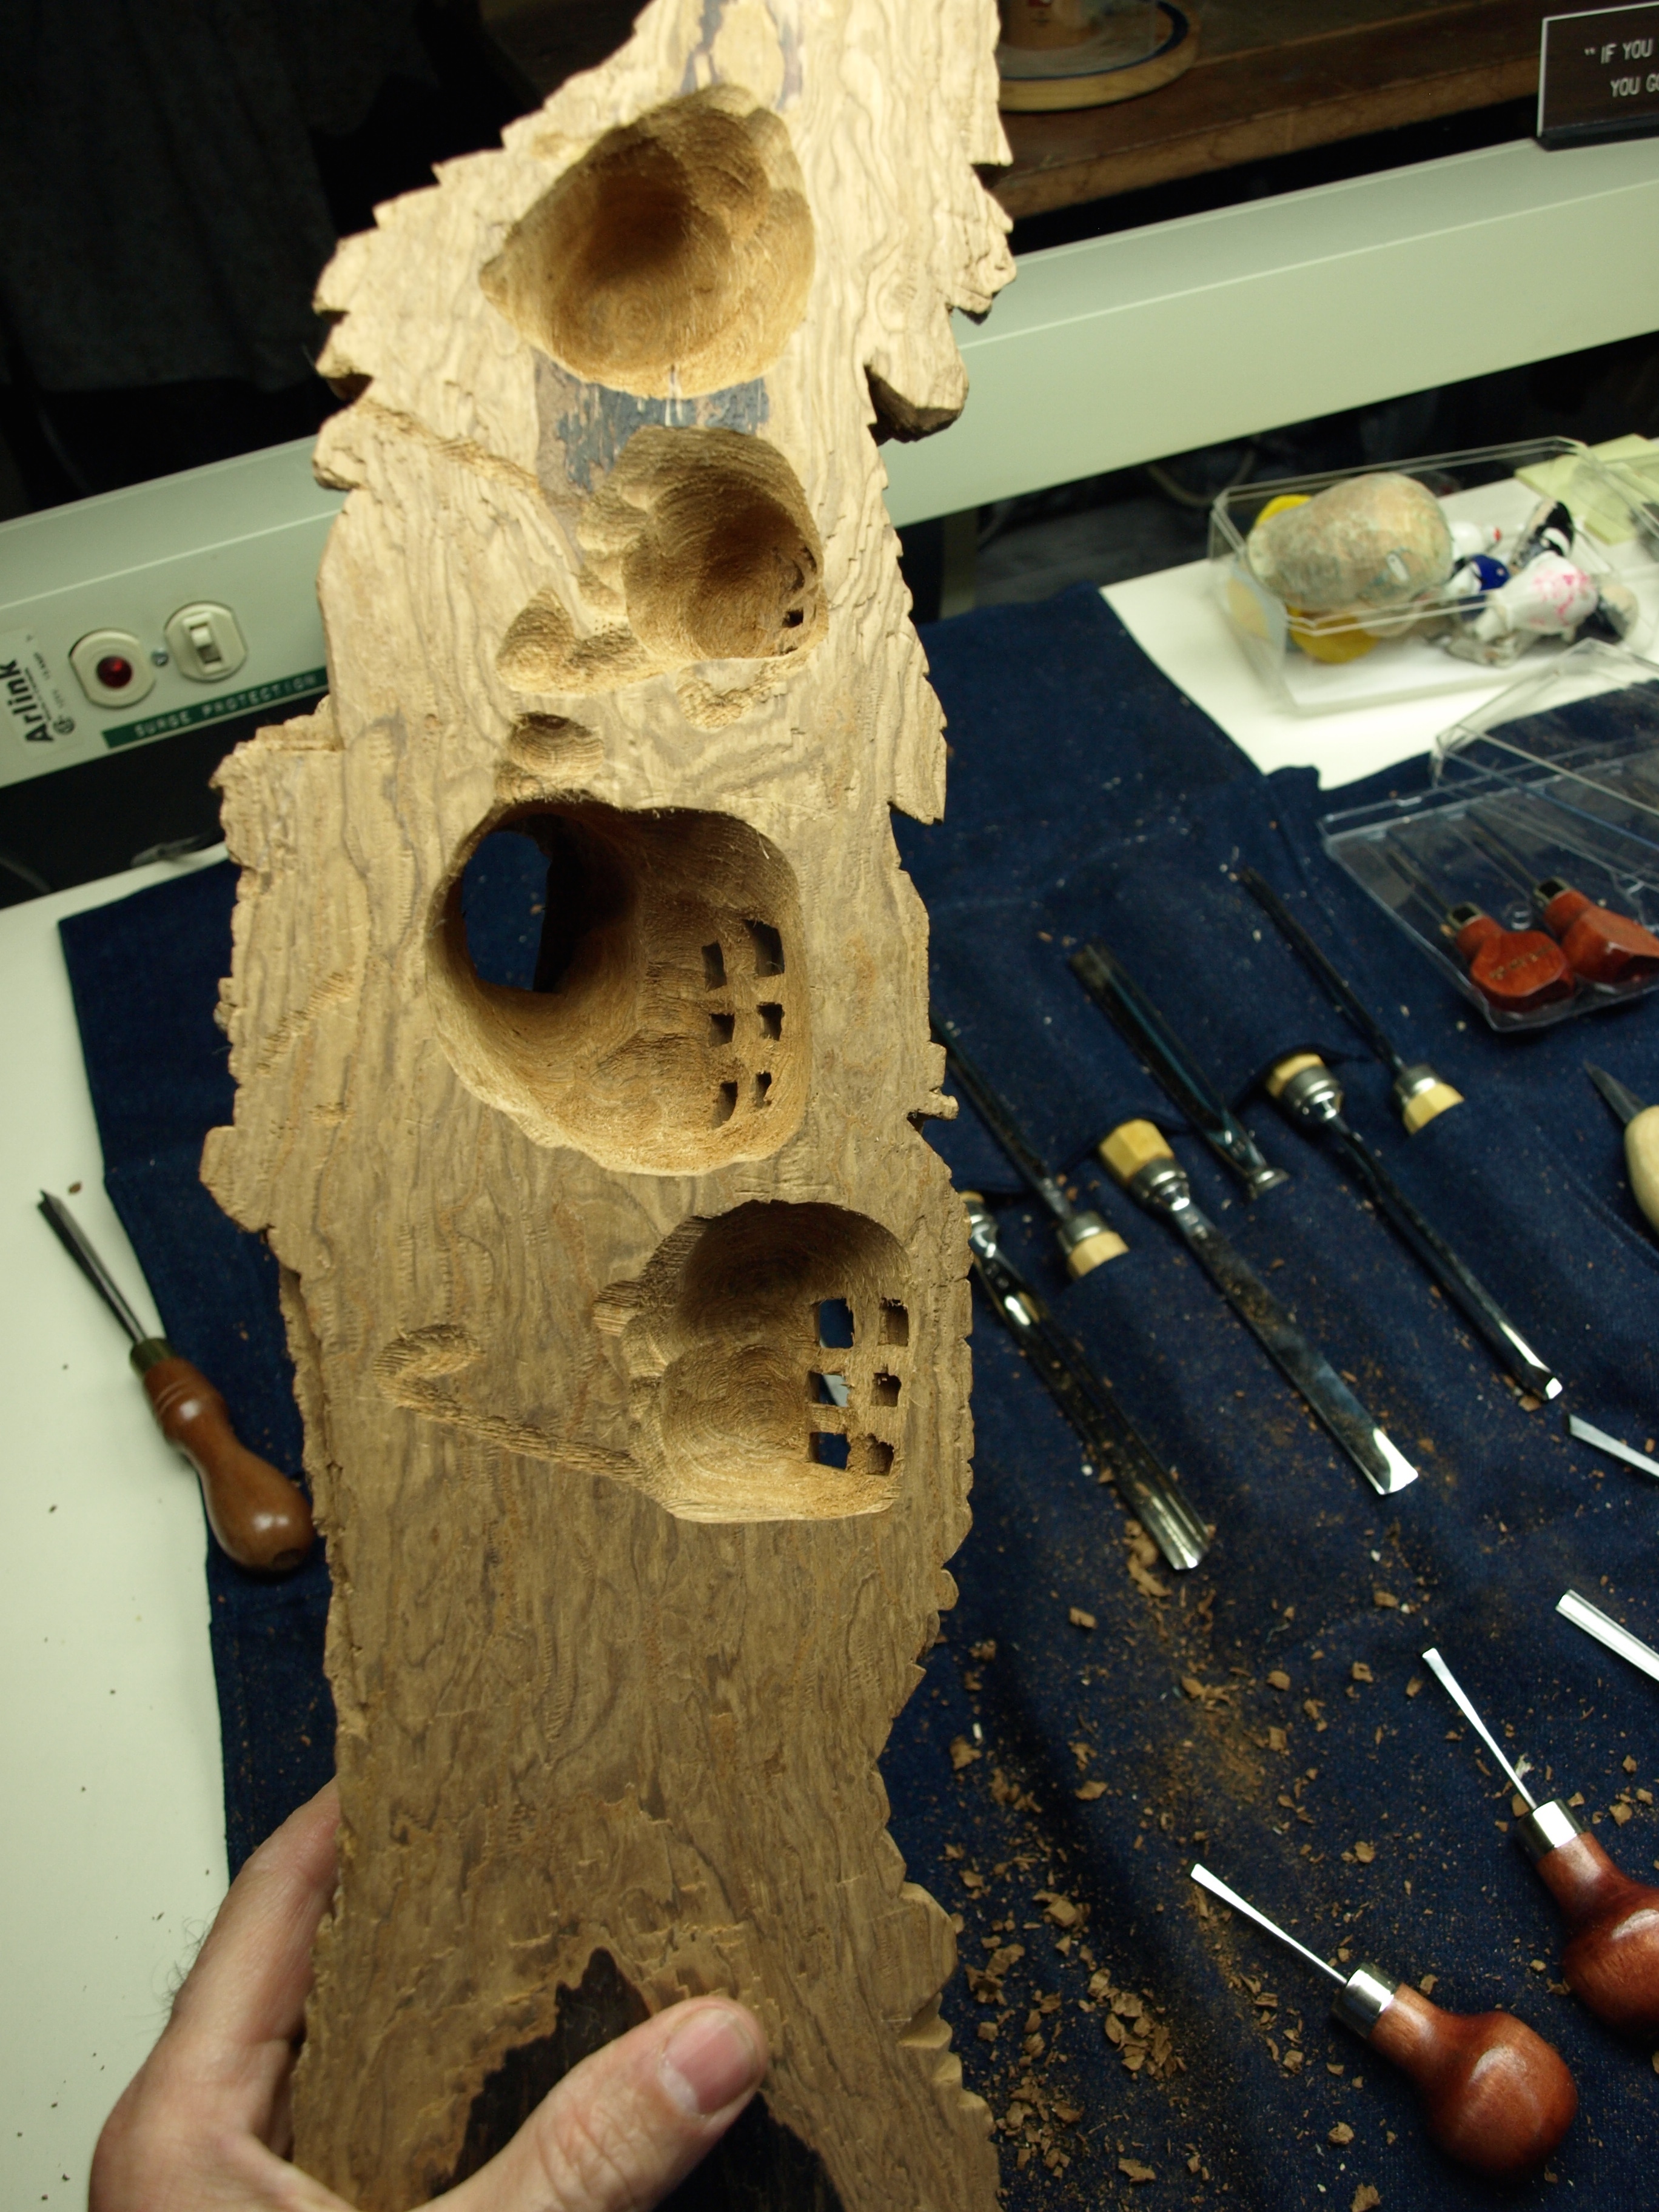
I hollowed out the back of the carving at the window locations so that you could see through the windows. Once the carving is hanging on the wall, the hollowing just leaves a nice impression rather than being really light and open. For the first time, I epoxied an old lamp bulb inside the lens house. Nope…it doesn’t light!

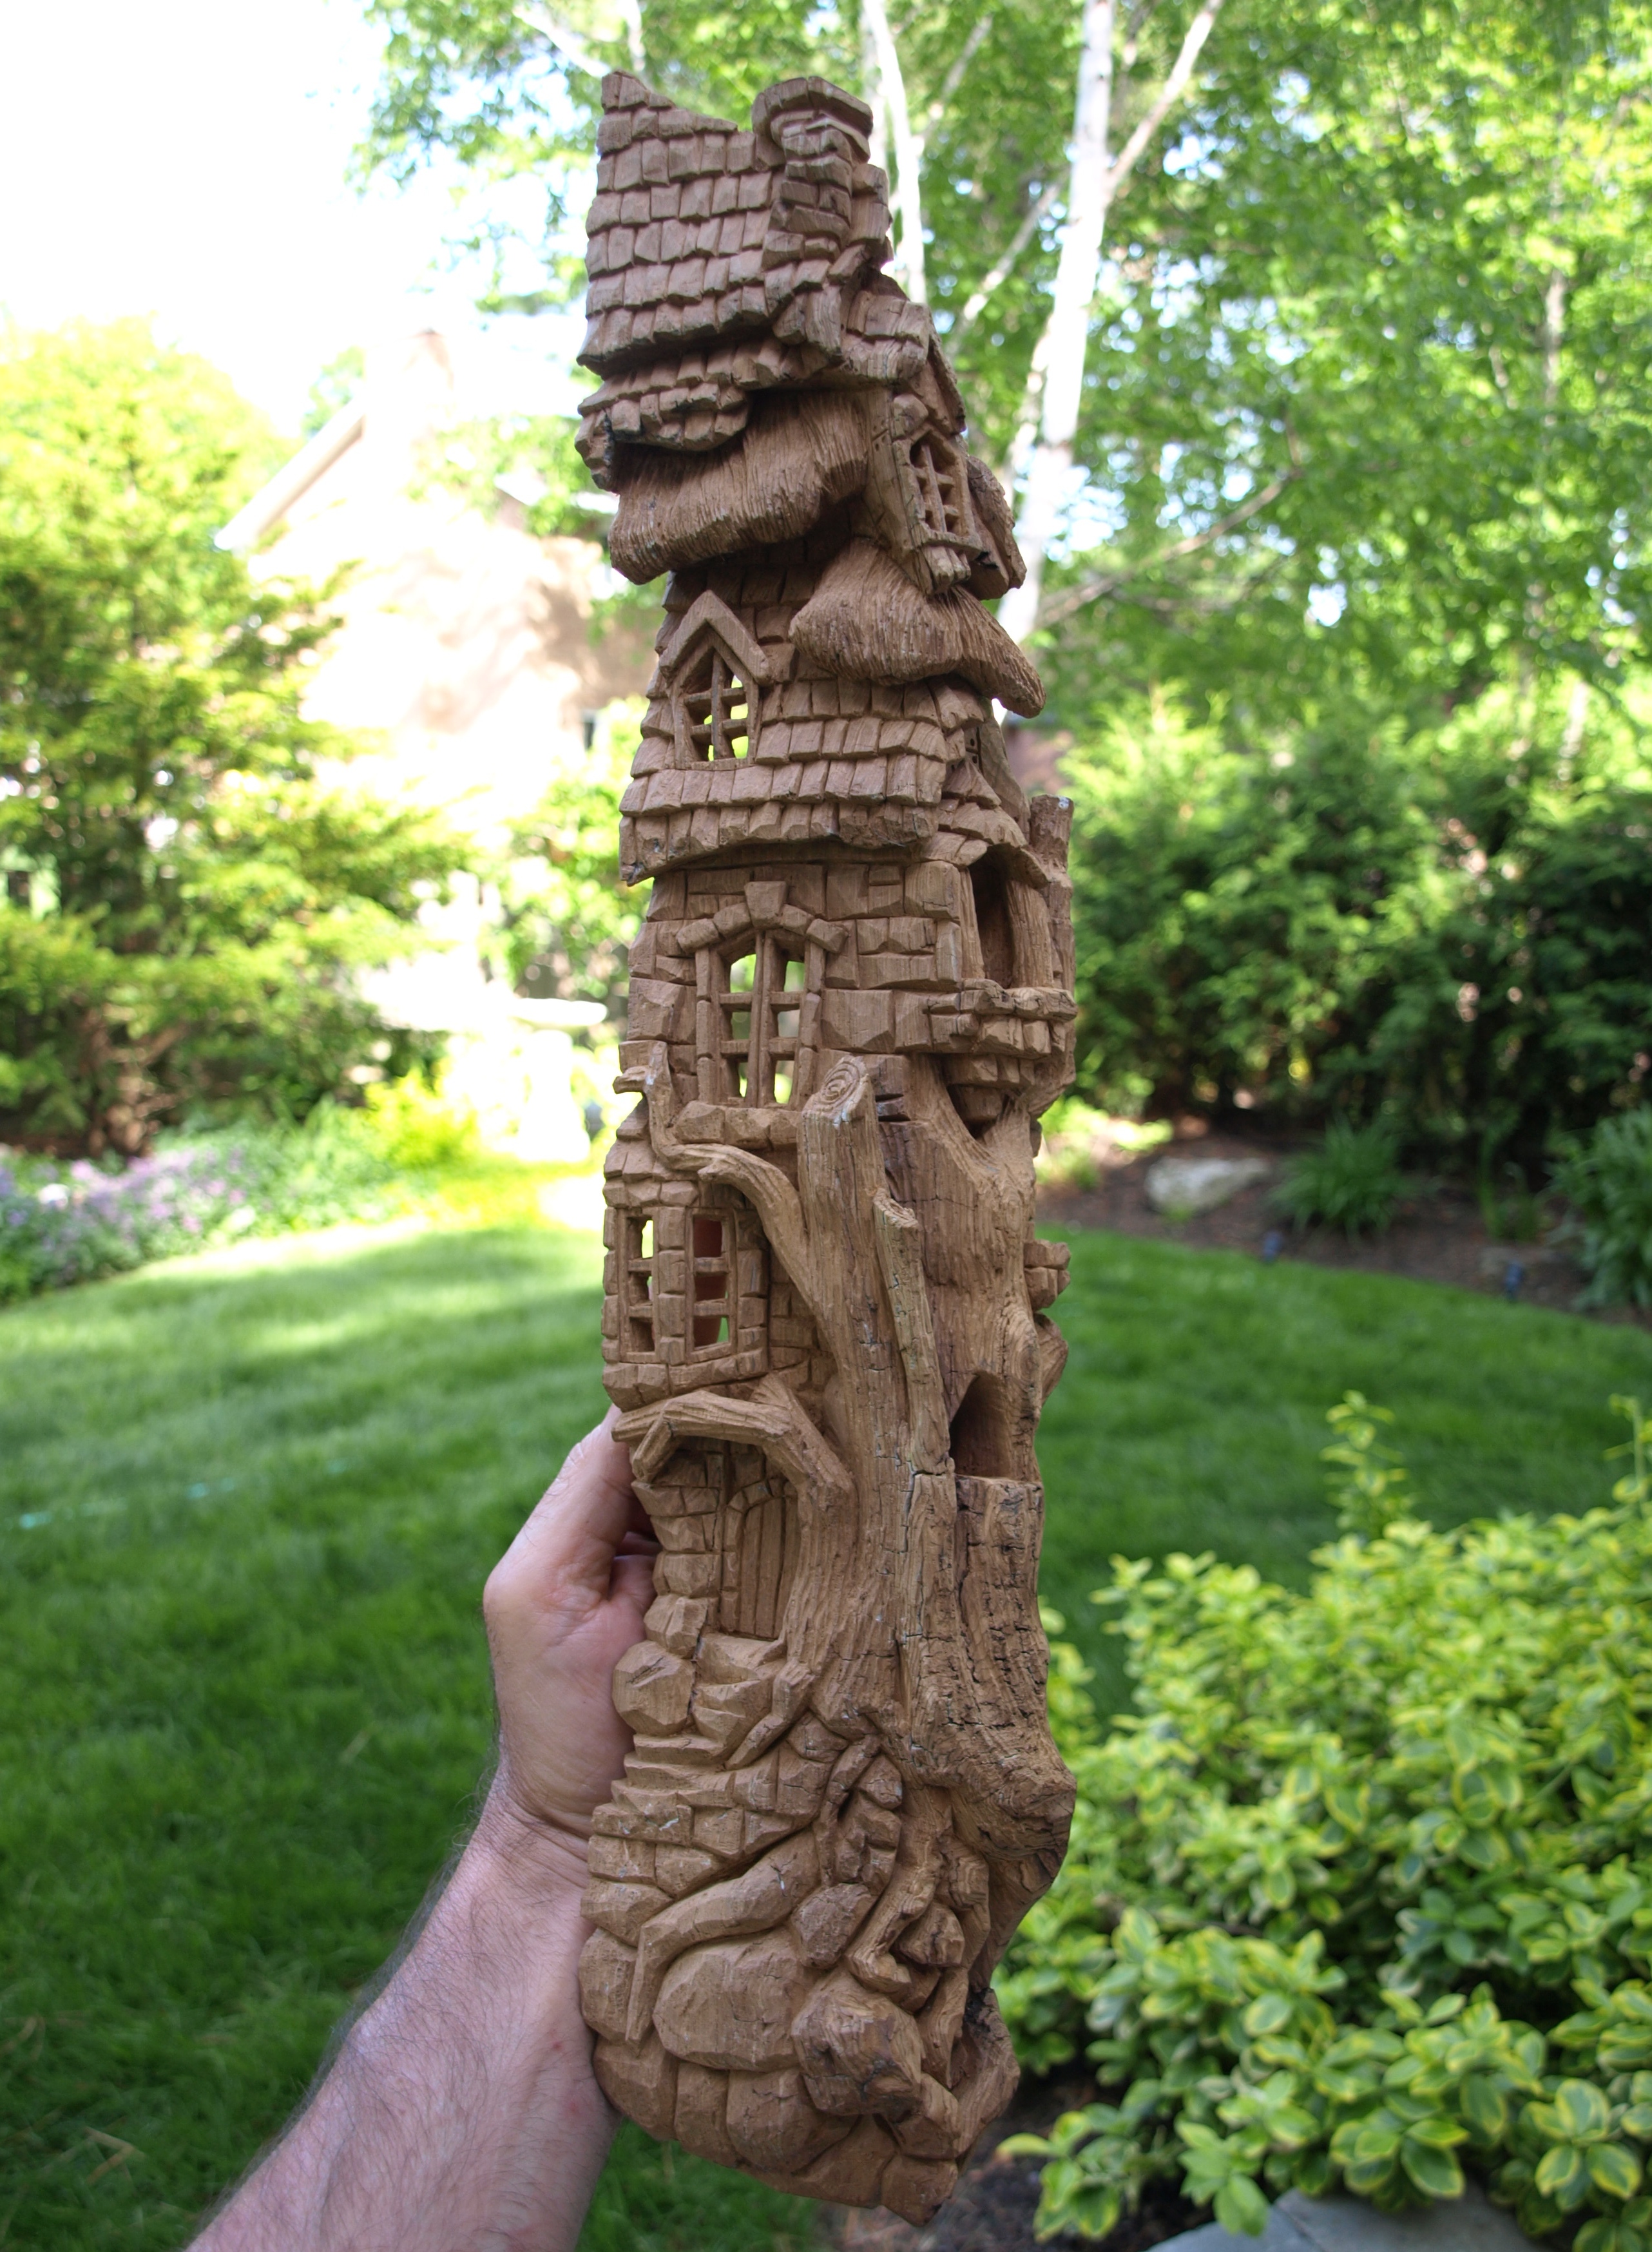
Anywhere that was carved and where the bark was removed, I applied a single coat of clear satin polyurethane with a small brush. This coating automatically adds a nice softly darkened colour to the wood. I prefer to keep the polyurethane away from the uncut, “raw” bark as it darkens it a bit too much for my liking.

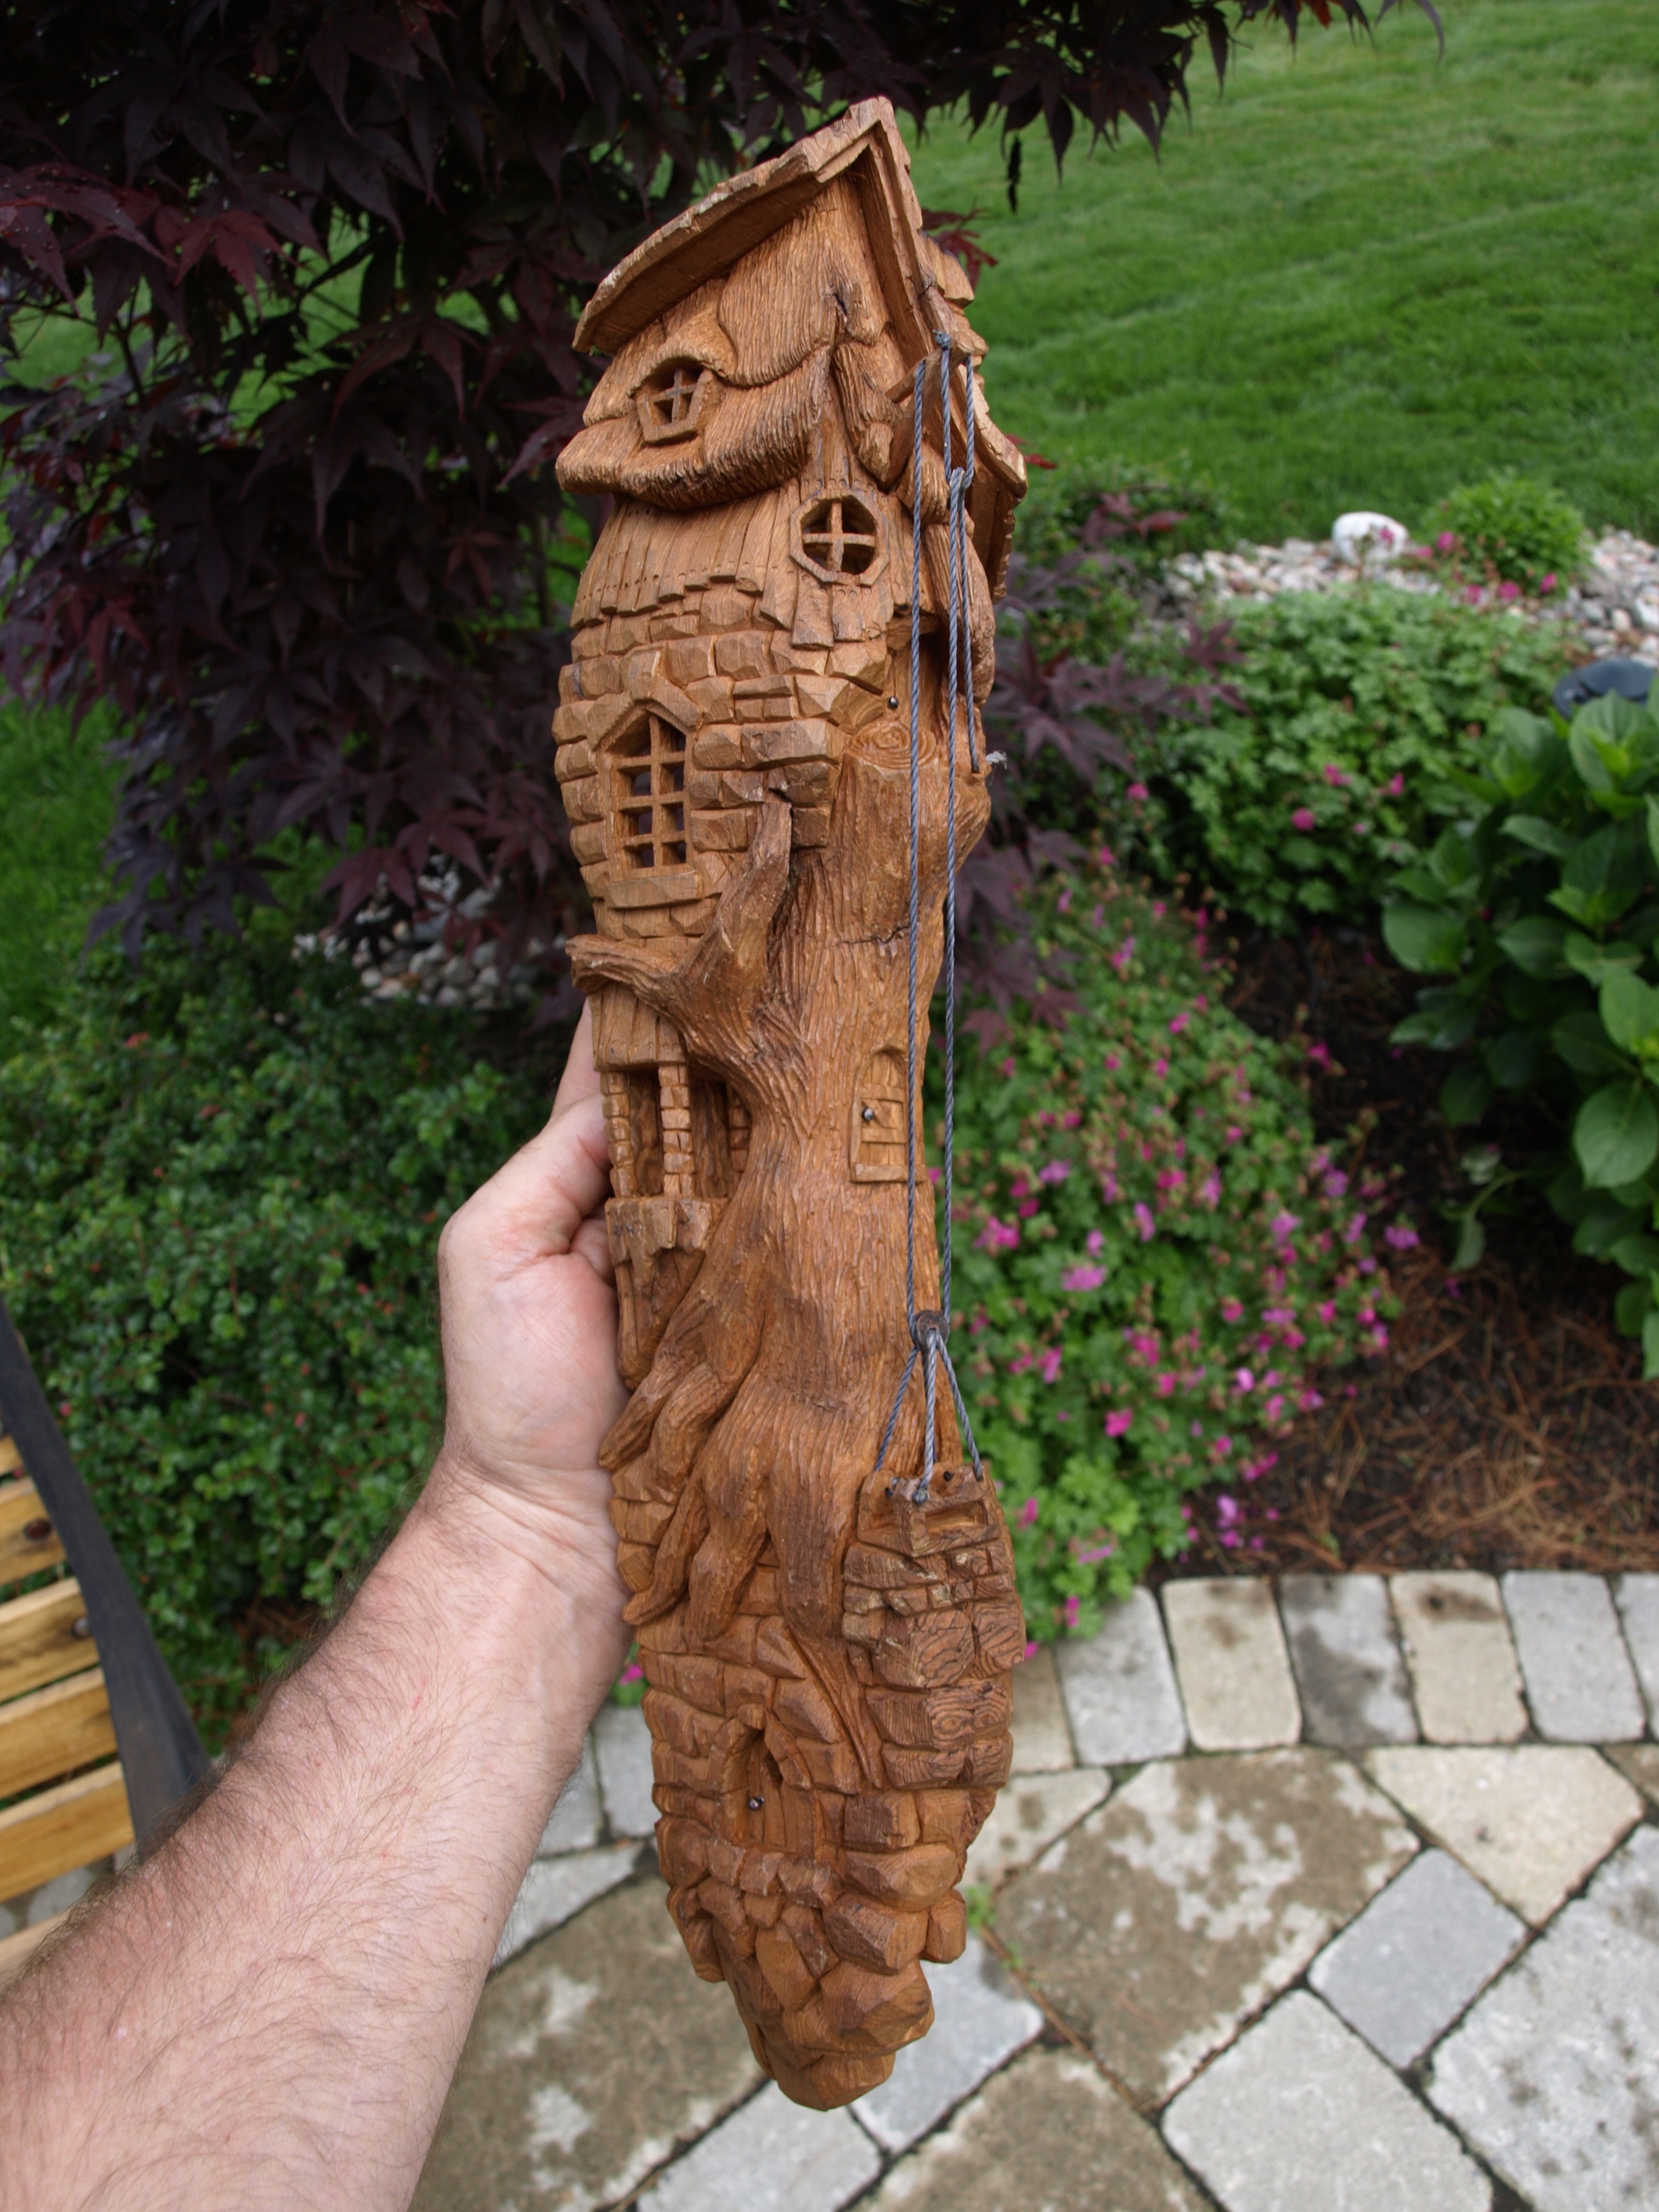
And here’s how it turned out…You should be able to click on the lower grouping of pictures to make them appear bigger.

Advertisement

Cottonwood Lighthouse

Ok…so, this is the last of the Cottonwood carving for a little while…but, I absolutely needed to do a lighthouse…

DSC_0652DSC_0654DSC_0655

A Completed Cottage

Here’s a couple of photos of the completed cottage.  Once again, I used a single coat of satin finish polyurethane all over the carving.  The fact that the first coat soaks into the bark leaves a very matted surface, which I like for this type of carving.  I could put a second coat on but it would leave it just slightly glossy even though the polyurethane is a satin finish.

The door knobs are the rounded ends of pop rivets.  I just pulled the sleeve off of the end of a pop rivet, cut off an inch or so of the rod and tapped them into drilled holes in the bark.  A quick coat of black acrylic and a touch of copper penny acrylic finished them off nicely.

What do you think?

Ready for a Lift

The pulley and basket system is ready for it’s first lift.  I wonder what those little dingbats will need to stock up on first?

The pulleys are made from “slices” of a dowel that I had hanging around the shop and have grooves cut into their circumference to hold the rope.  The rope is masonry twine, which was bright white until I put black shoe polish on it.  The basket is just carved into the bark and the jib that hangs over the door is carved from cherry.

The “rope” was fed through drilled holes and knotted and then the knots were melted with a burning tool so that they wouldn’t come undone.  The end rope that the dingbats will use to hoist the basket up with is fastened to a peg just outside the door.

A Sunny Day at the Bark Cottage

A beautiful day today in Kingston and Rosie and I spent a couple of hours enjoying the backyard…carving, weeding, barking at squirrels, etc.  Here’s a couple of pictures from our afternoon.

I’ve hollowed out the back of the carving with the Foredom tool so that I could open up the window panes.  I used the same process as the last time…drilled out the window pane with a small bit, hollowed out the back until I was able to see the drilled holes and then used knives and chisels to clean up the square panes.  I’ve also used a small gouge to create the look of bark on the tree and have added some blocks, boulders and a tunnel entrance to the bottom of the carving.

A bit more work on the base and then adding the rope and pulleys for the freight elevator and we’ll be ready for a finish to be applied.

Freight Elevator

I suppose that if you live at the top of a tree, in addition to a veranda and several entrances with hidden winding staircases and ladder ways, at some point you’ll need a freight elevator to get the really heavy stuff unloaded to the upper floors.

Well, this cottage has a freight elevator in the making.  Along with some extra doors and windows that I’ve added today, I started on a little jib and pulley that will eventually be hooked up via rope-work to the small basket at the base of the tree house.

No, it won’t actually work…maybe on the next one.

A New Bark Cottage

We called the last one a Cottonwood Cabin, so we’ll go with Cottonwood Cottage with this one.  Why am I carving another bark cottage/cabin?…because Emily has one and Peggy wants one too.  Plus, I like carving them.

Here’s what the bark looked like when I started out.  I wanted to do something similar to the cabin that I just finished, so, right off the bat, that rectangular portion on the top right started looking a lot like a chimney to me.

This time around, I did some quick blocking and shaping with the Foredom tool along with a Typhoon bit.  I blocked in two stepped roof lines ( one for shingles and the other for a thatched roof ) and the start to a tree with several limbs wrapping around the cottage.

You’ll definitely need a good vacuum system to catch all of the dust that this Typhoon bit on bark produces.  That bark is very light and if your system isn’t picking it up as soon as it comes off of the block, you’ll be in the doghouse.

Once that rough shaping was complete it was just a matter of using the knives and chisels to start shaping the cedar shingles and, below that, the thatched roof.  I added a few windows for interest and plan to add several more as I go.

Stay tuned for more!

The Finished Cabin

I applied some clear satin urethane to the carving and found that the urethane soaked nicely into the bark leaving a darker colour and a very satin, almost flat, finish.  I like this finish, but if my daughter, Emily, wants something with a bit more gloss I’ll put a second coat of urethane on the carving later on.  I also added a couple of door-knobs ( which are the rounded ends of a pop-rivet ) and painted them black.

All done!  I’ll get all of the photos I’ve taken of the cabin on the Flickr Site ( the link is to the right of this page ) shortly.

Is it too late in the season to go back to my Hockey Player and complete that carving now?

Ready for a Finish

Here’s the final carving prior to putting a finish on the bark.

I hollowed out all of the windows, doors and crawl-ways and then went over the entire carving checking to see that I hadn’t missed anything obvious.  I had…a couple of rows of shingles needed to be completed.  Then I took a very fine sandpaper and lightly went over the carving just to get any stray slivers of bark that were hanging around.

Finally, I took a blowtorch ( outside ) and on very low fire burned the inside of the chimney to give it a charred look.  I’ll take a picture of that later to show you.  If you try this, be sure that the torch is burning as low as possible as you don’t want to over-burn your carving.  Also, be careful to point this low flame at the chimney top and not any adjacent shingle, etc. ( I wasn’t careful enough and had to carve a few charred shingles to clean them up ).

Tomorrow, I should have a bit of time to put a clear satin urethane finish on the carving which will deepen its colour quite a bit.

By the way, that green stuff in the background is proof that Canada does have a summer ( but it’s too short! ).

Hollowing Out Windows

Time to create a hollow in behind each of the windows and open doors.  I use a Typhoon bit ( carbide Foredom bit ) to quickly hollow out the bark from the back of the carving.

I start by using either a slim ( drill bit-like ) Foredom tool or a drill to bore a hole in the centre of the window panes.  This initial boring gives you a depth to shoot for when you begin hollowing out from the other side of the bark…ie. when the hollowing is deep enough, you begin to see the holes which you drilled from the other side.  This, of course, is a helpful clue to make sure that I don’t hollow out too deeply and inadvertently remove the entire window.

After that initial hollowing, I use a knife to clean up the window panes.  If you try this, just be sure to leave enough wood depth on the window structure to give it strength.  I usually shoot for about 3/16″.

It’s coming along.

Post Navigation

%d bloggers like this: