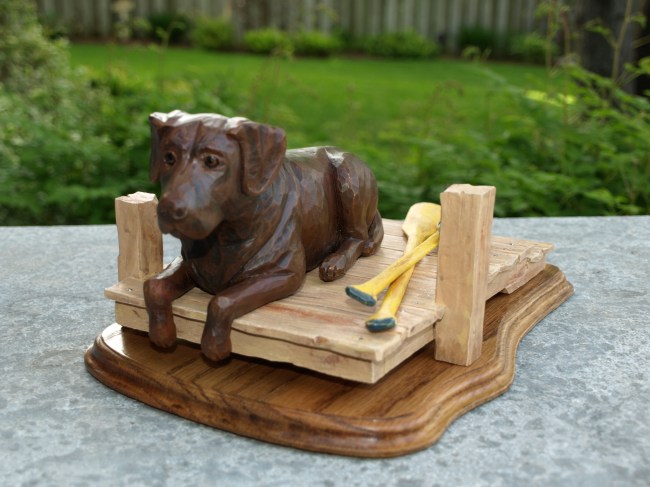
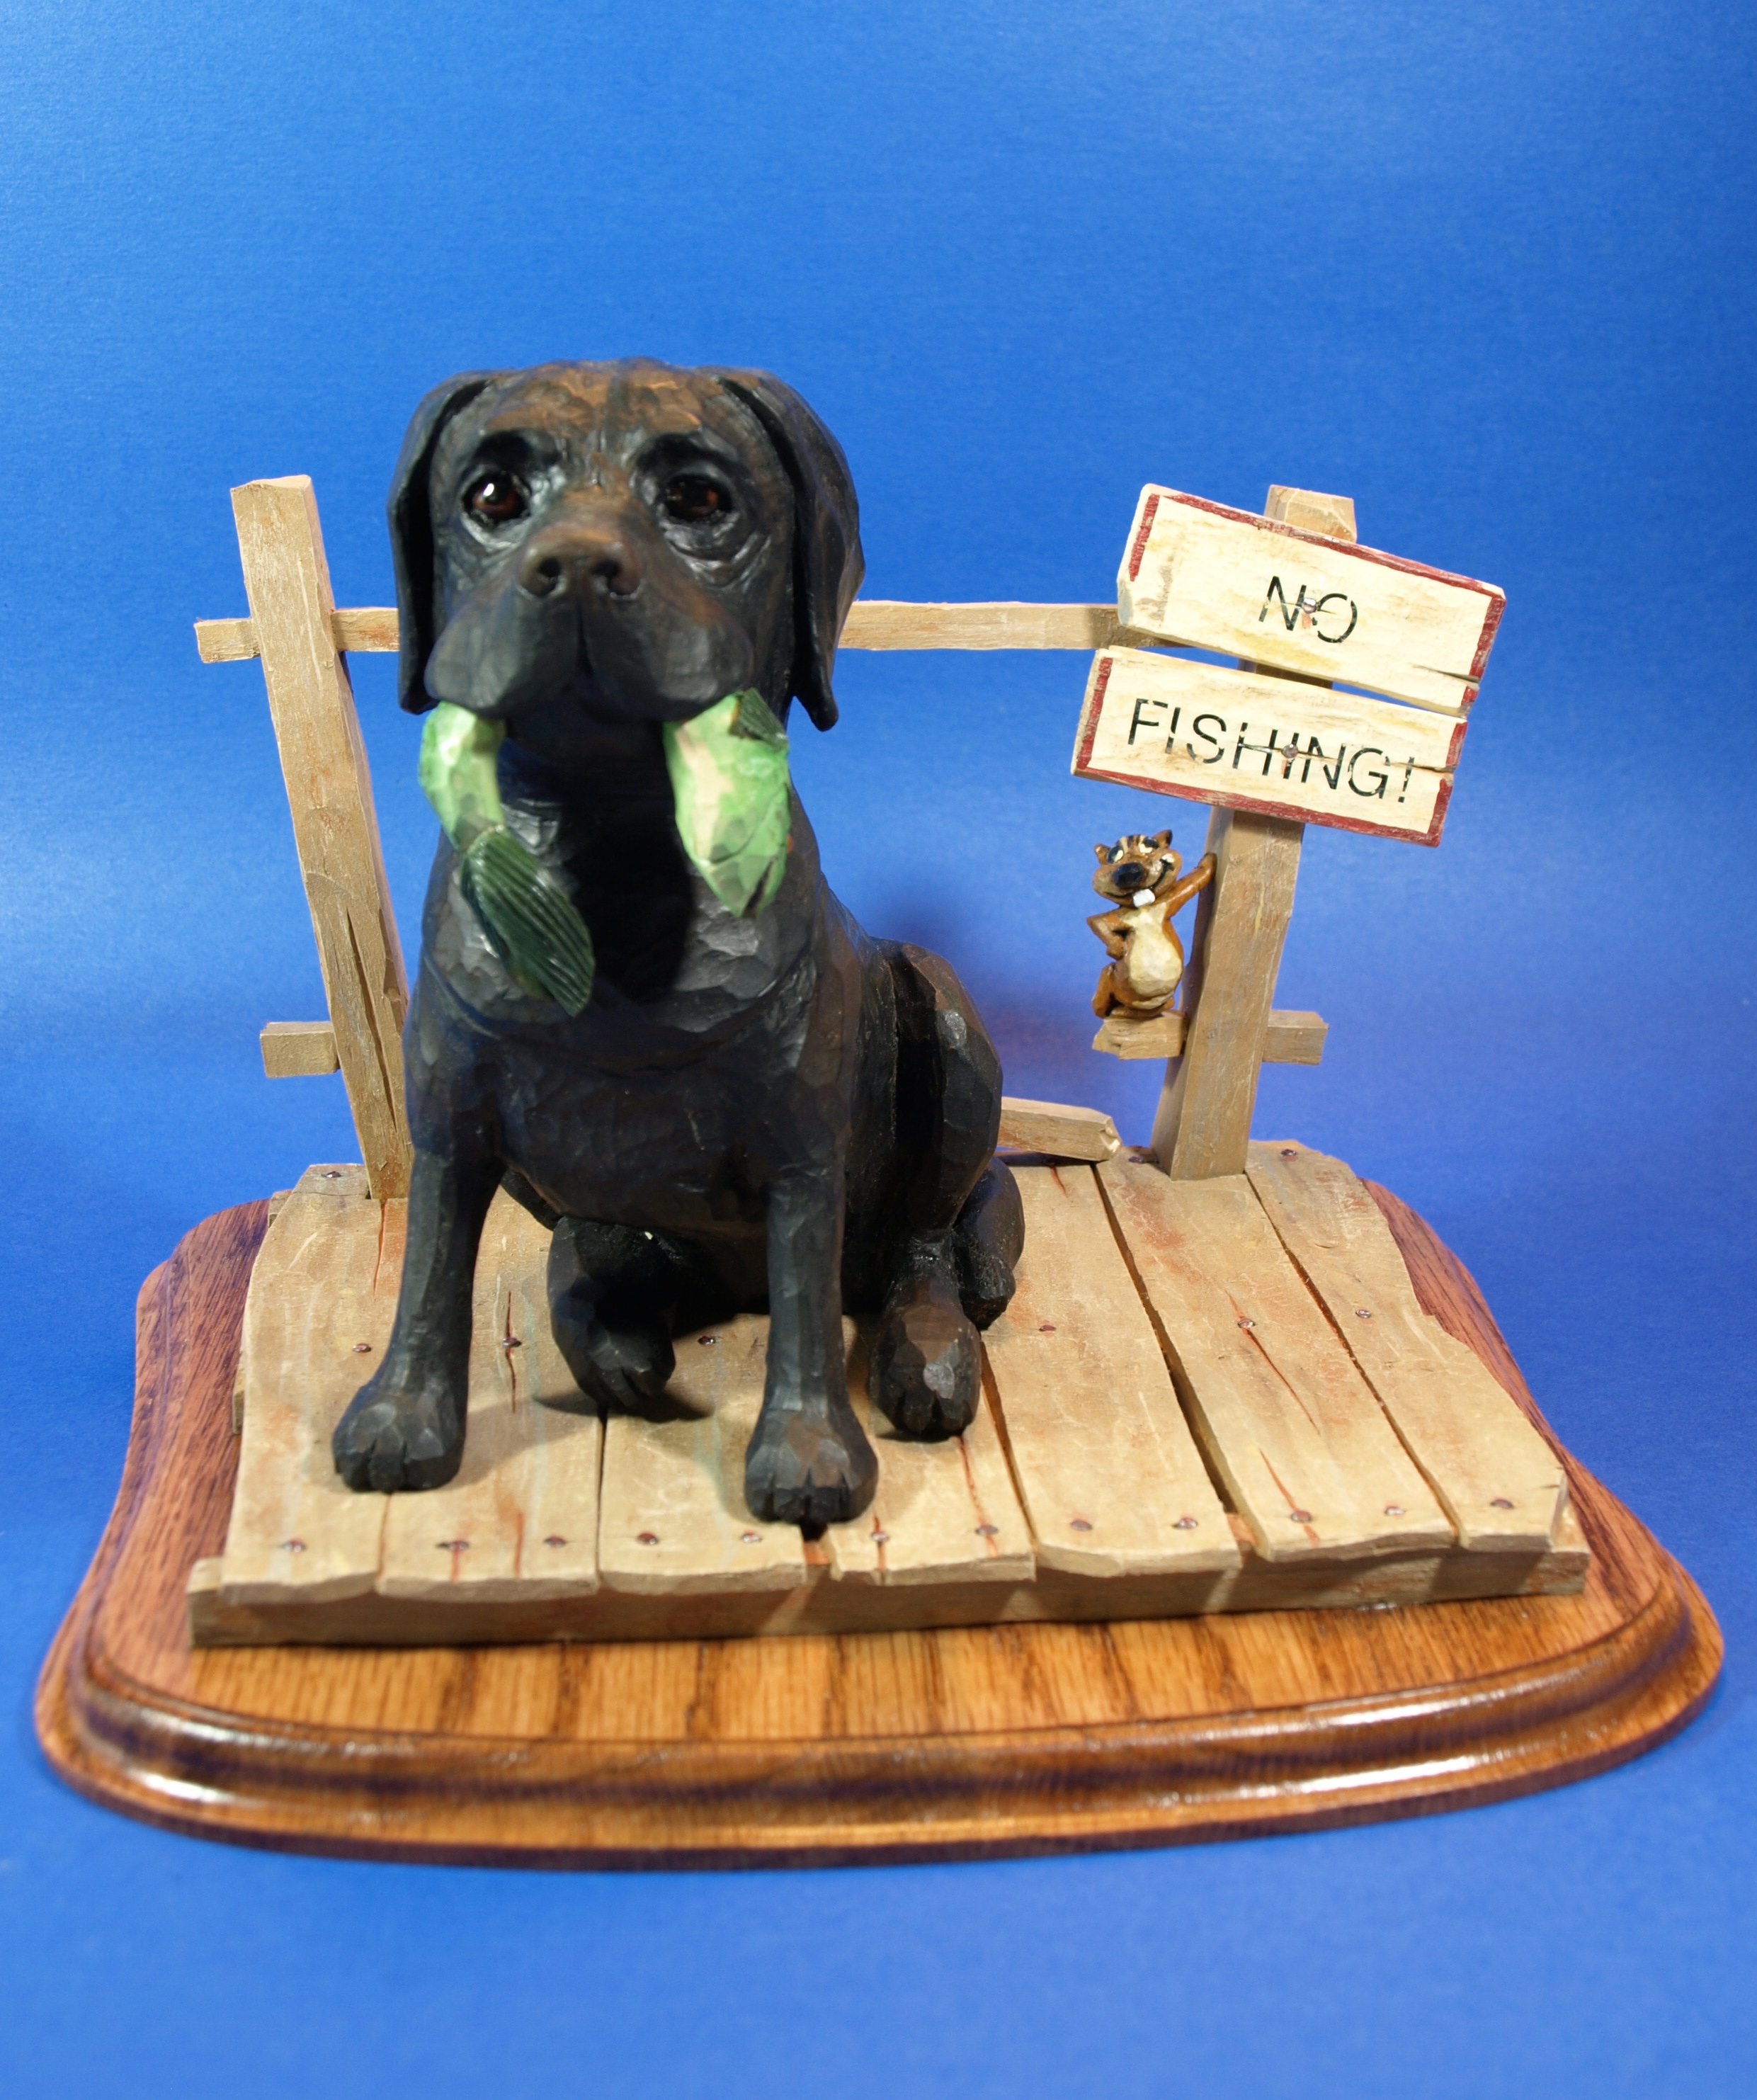
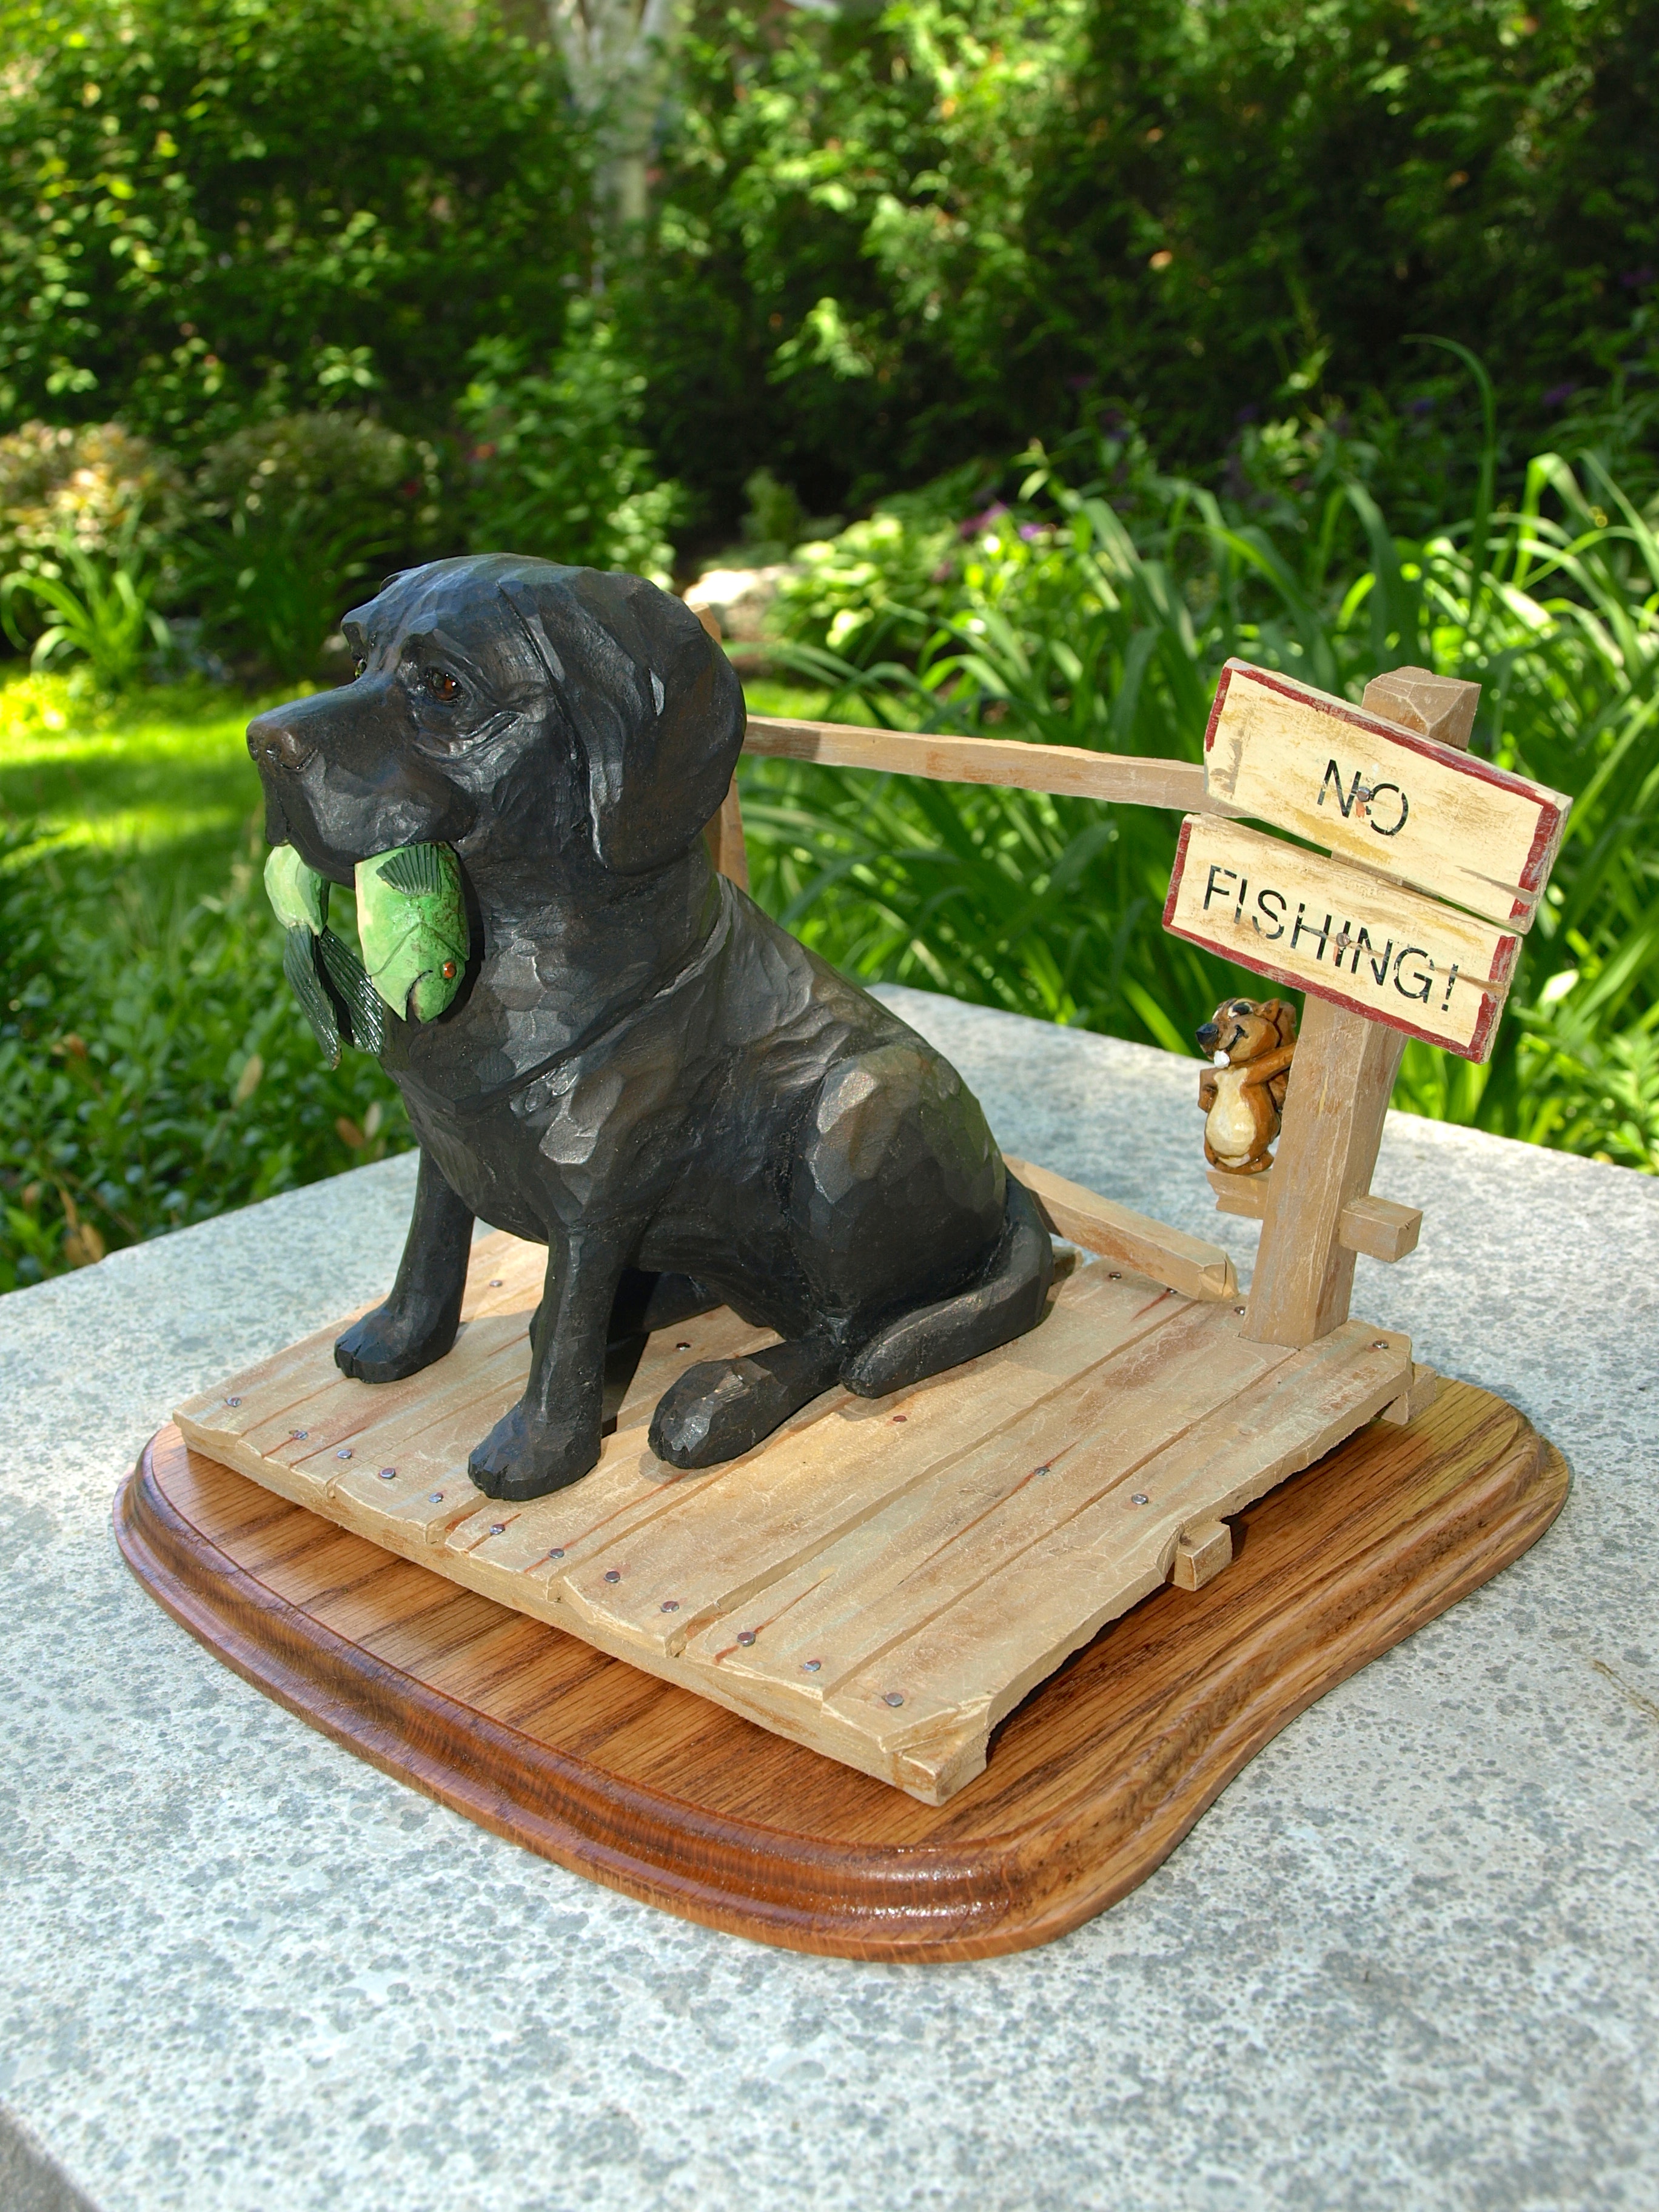
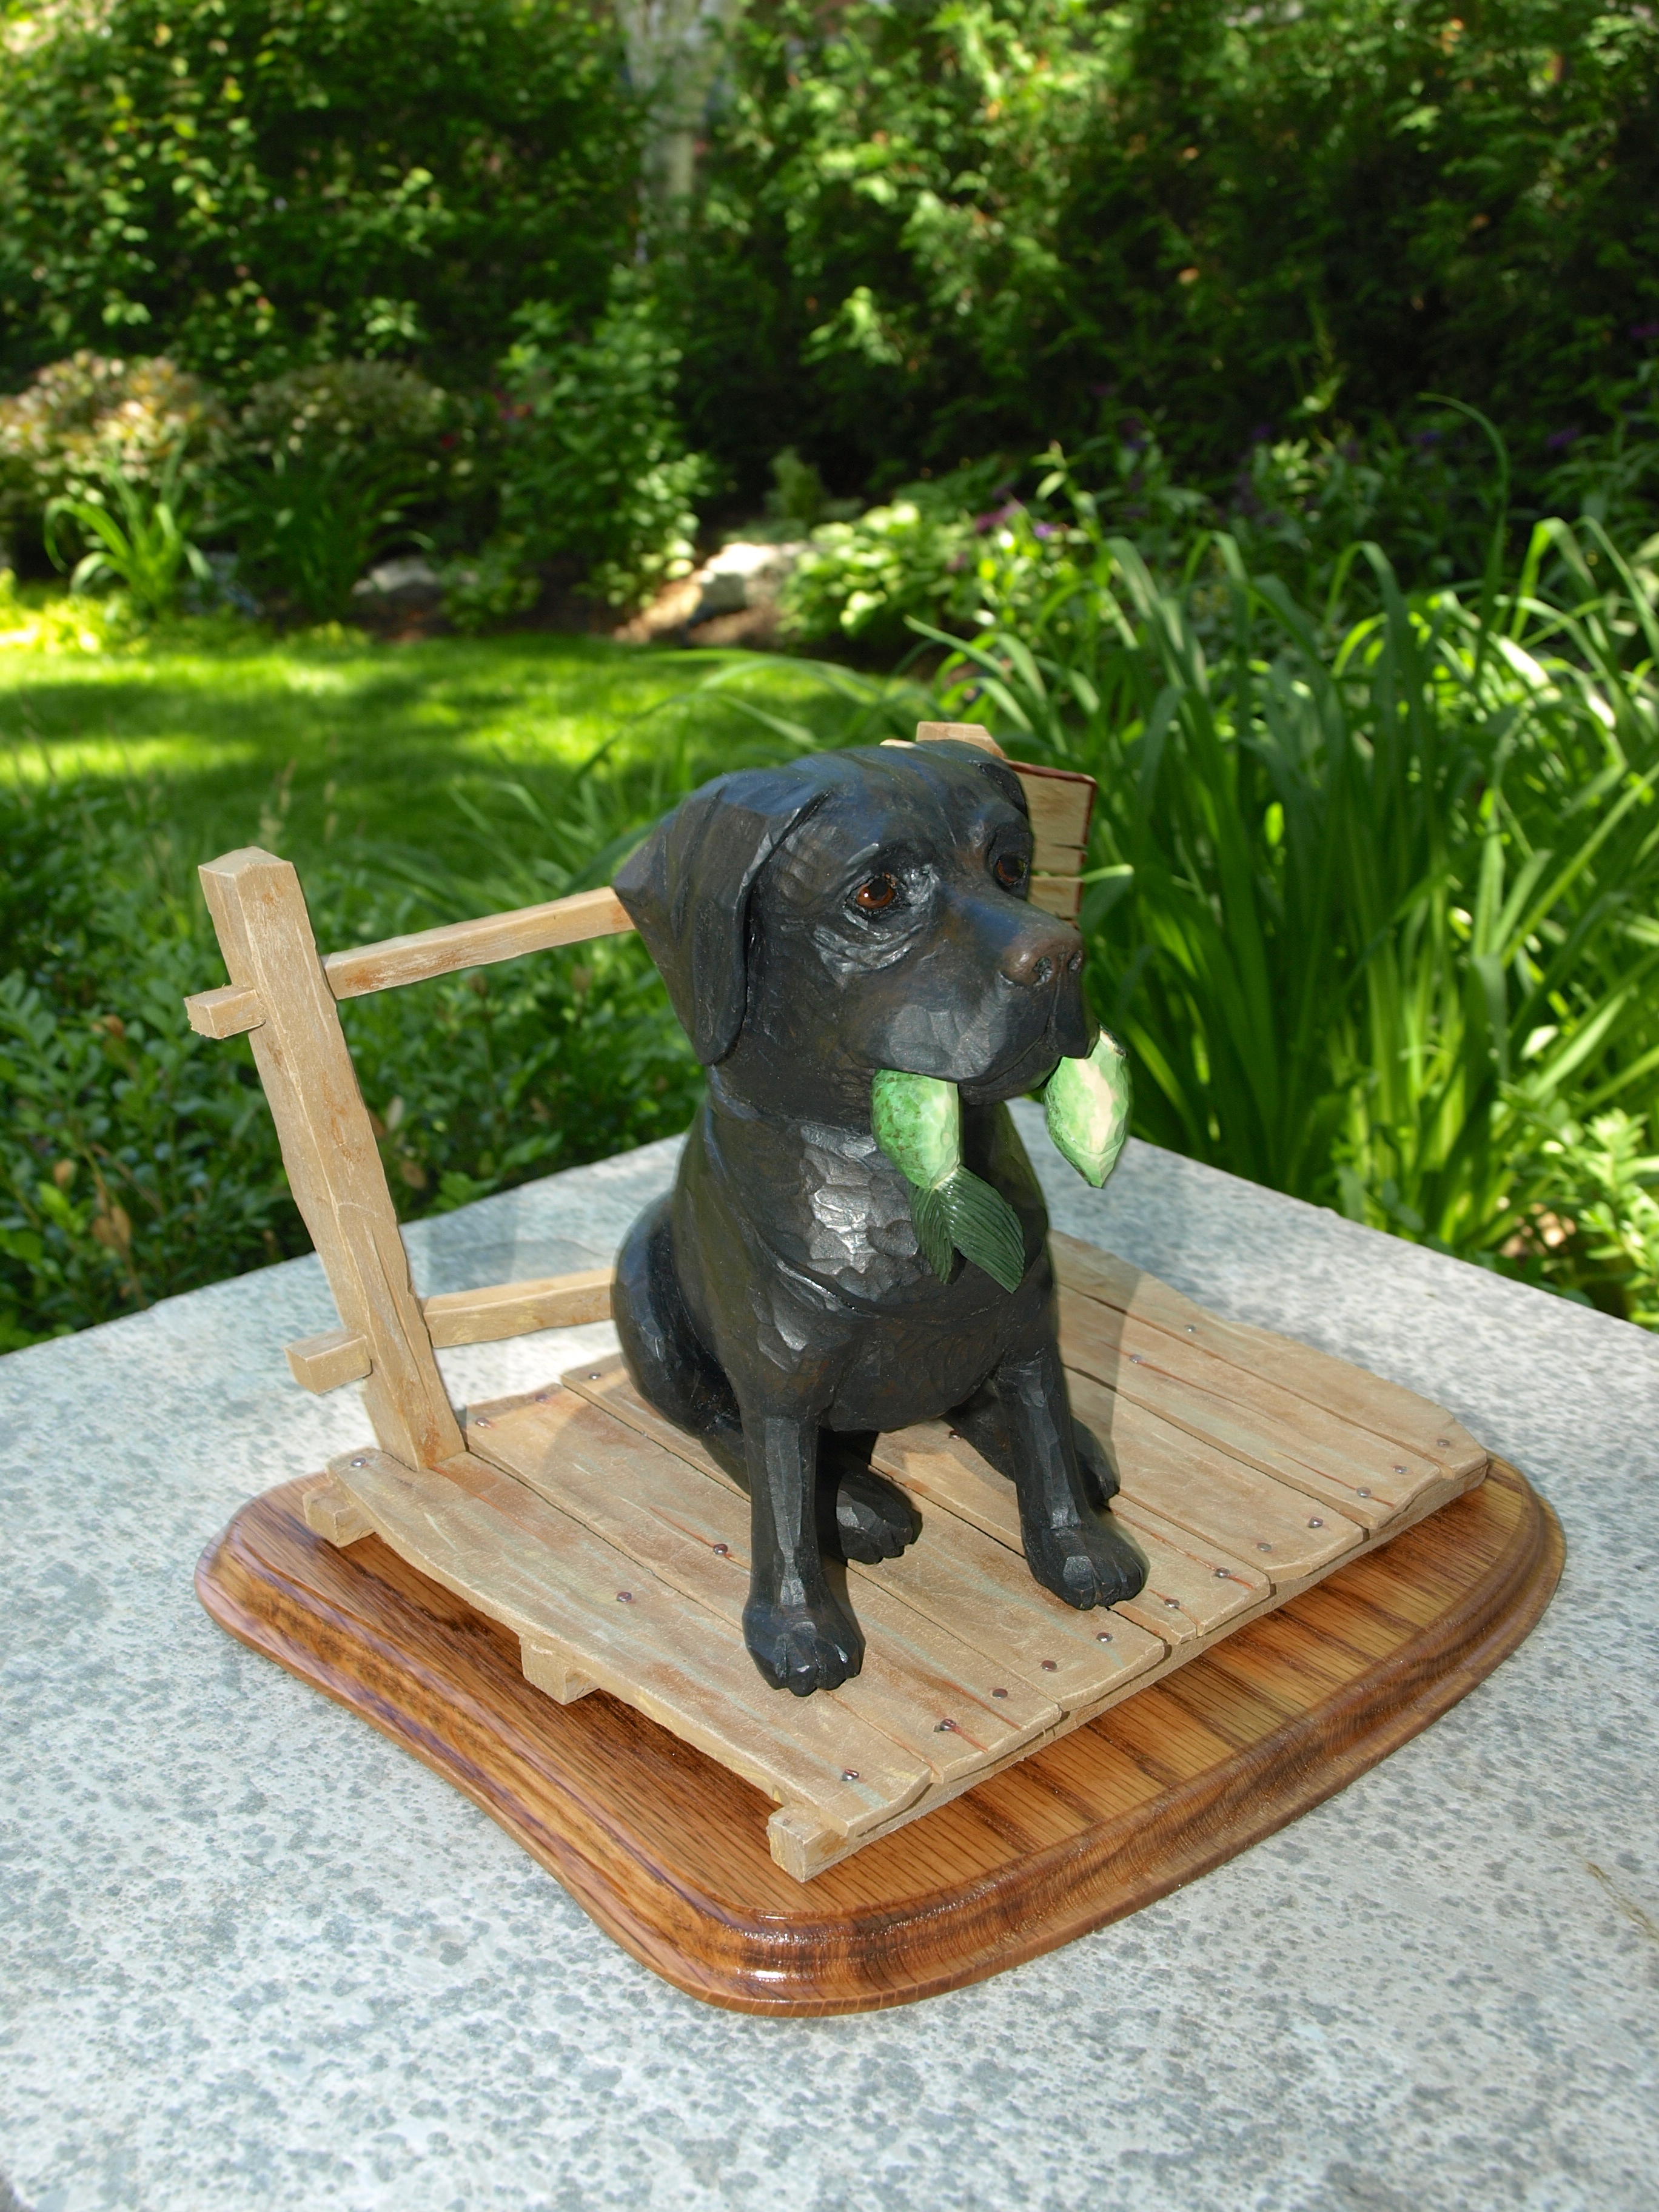
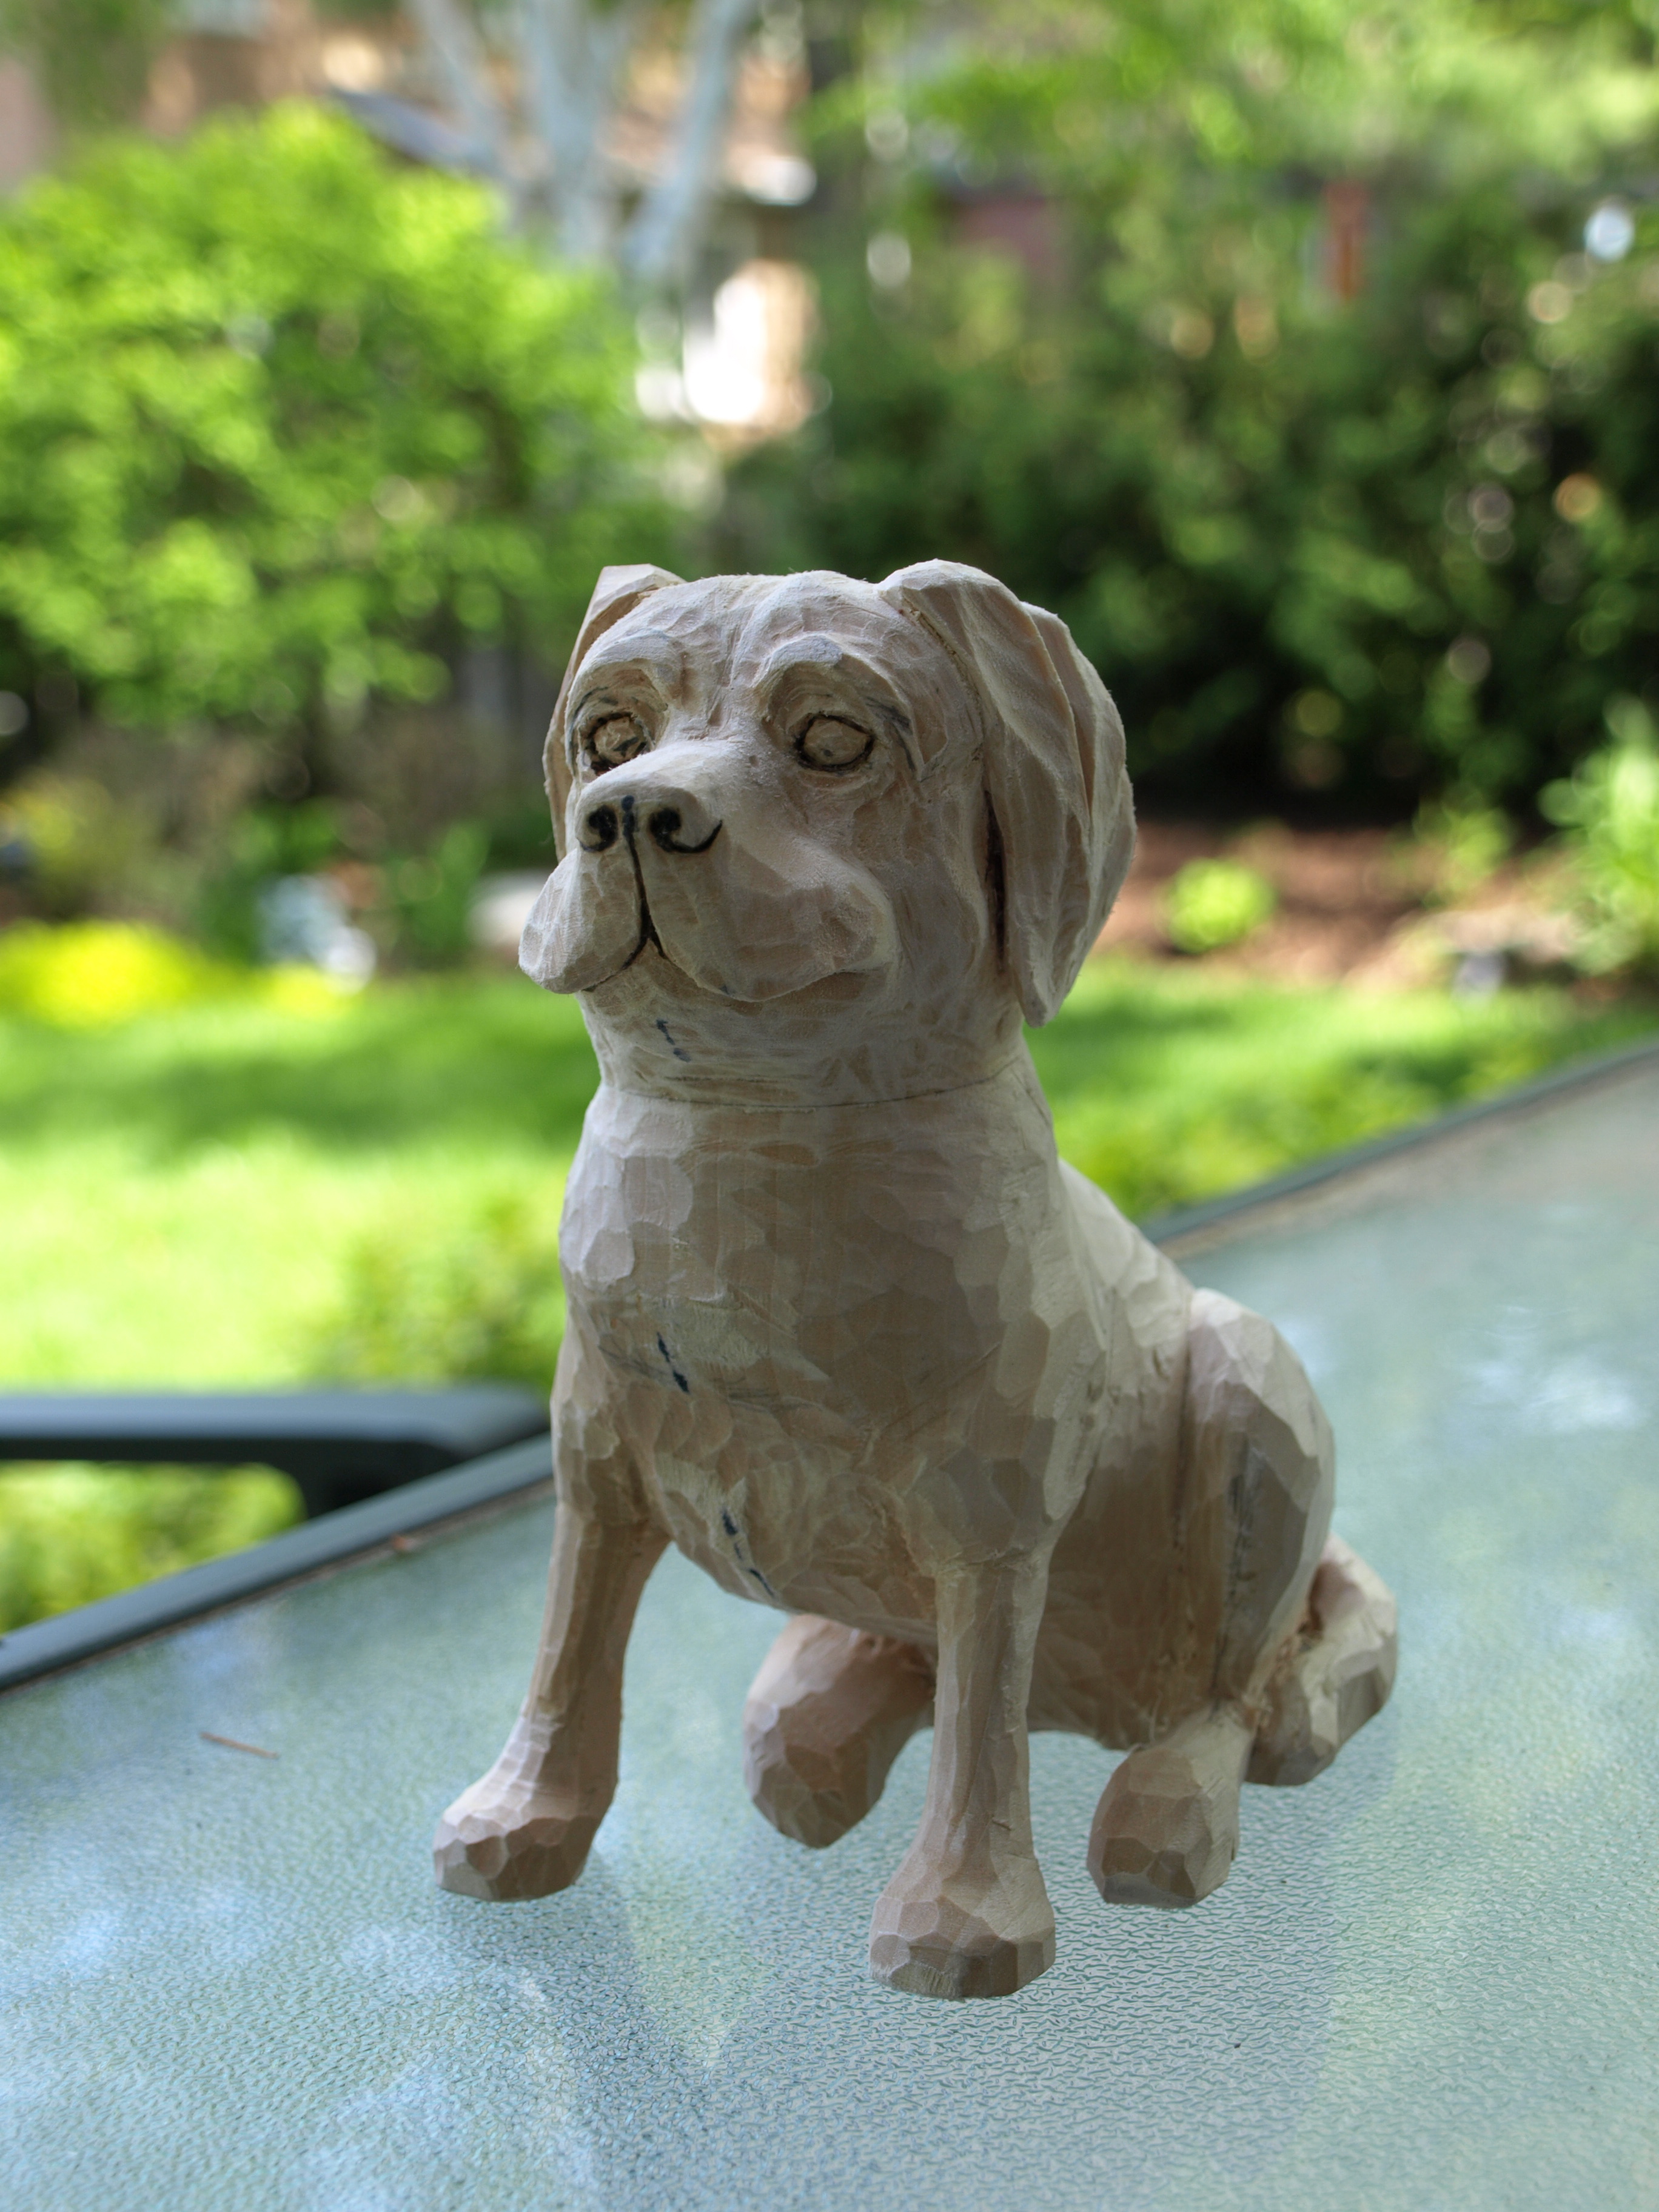
The carving that I did of “Toby” has turned out to be a pretty popular little dog. One individual kindly left a request for some more information on the carving of Toby…so, I’ll try to do that with this particular post. Of course, if there is anything in particular anyone would like to know about my carvings, just ask.
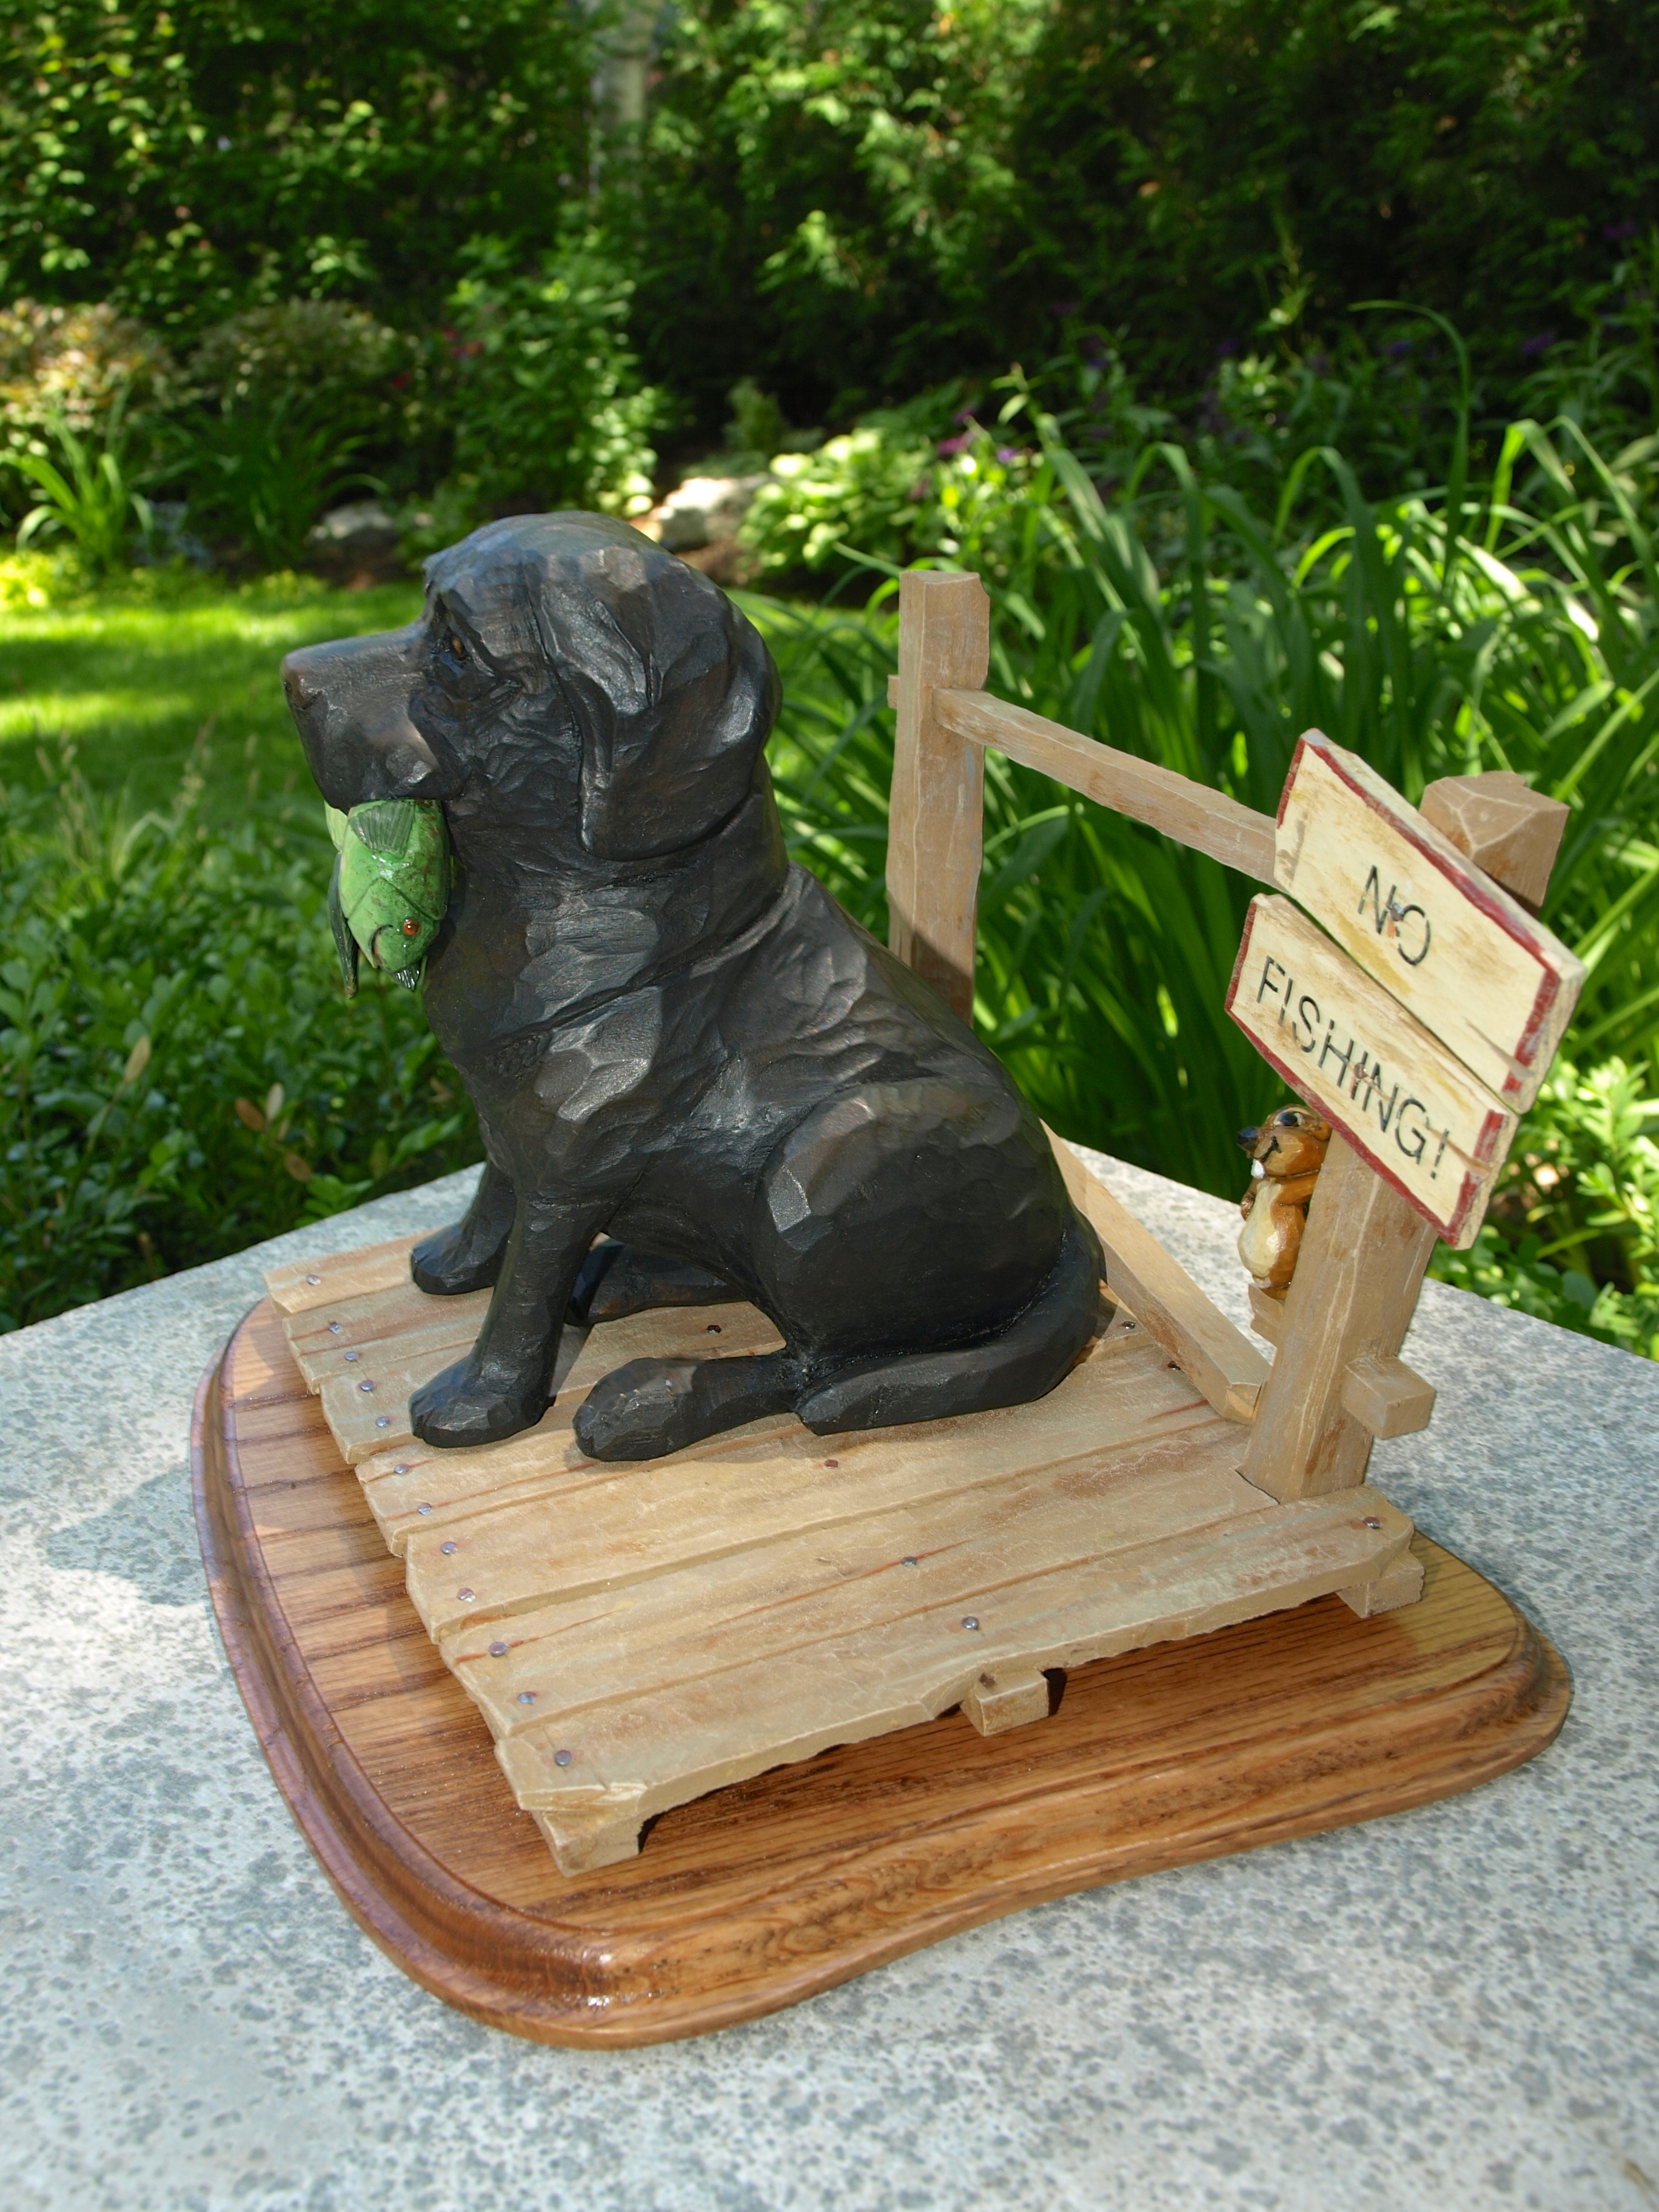
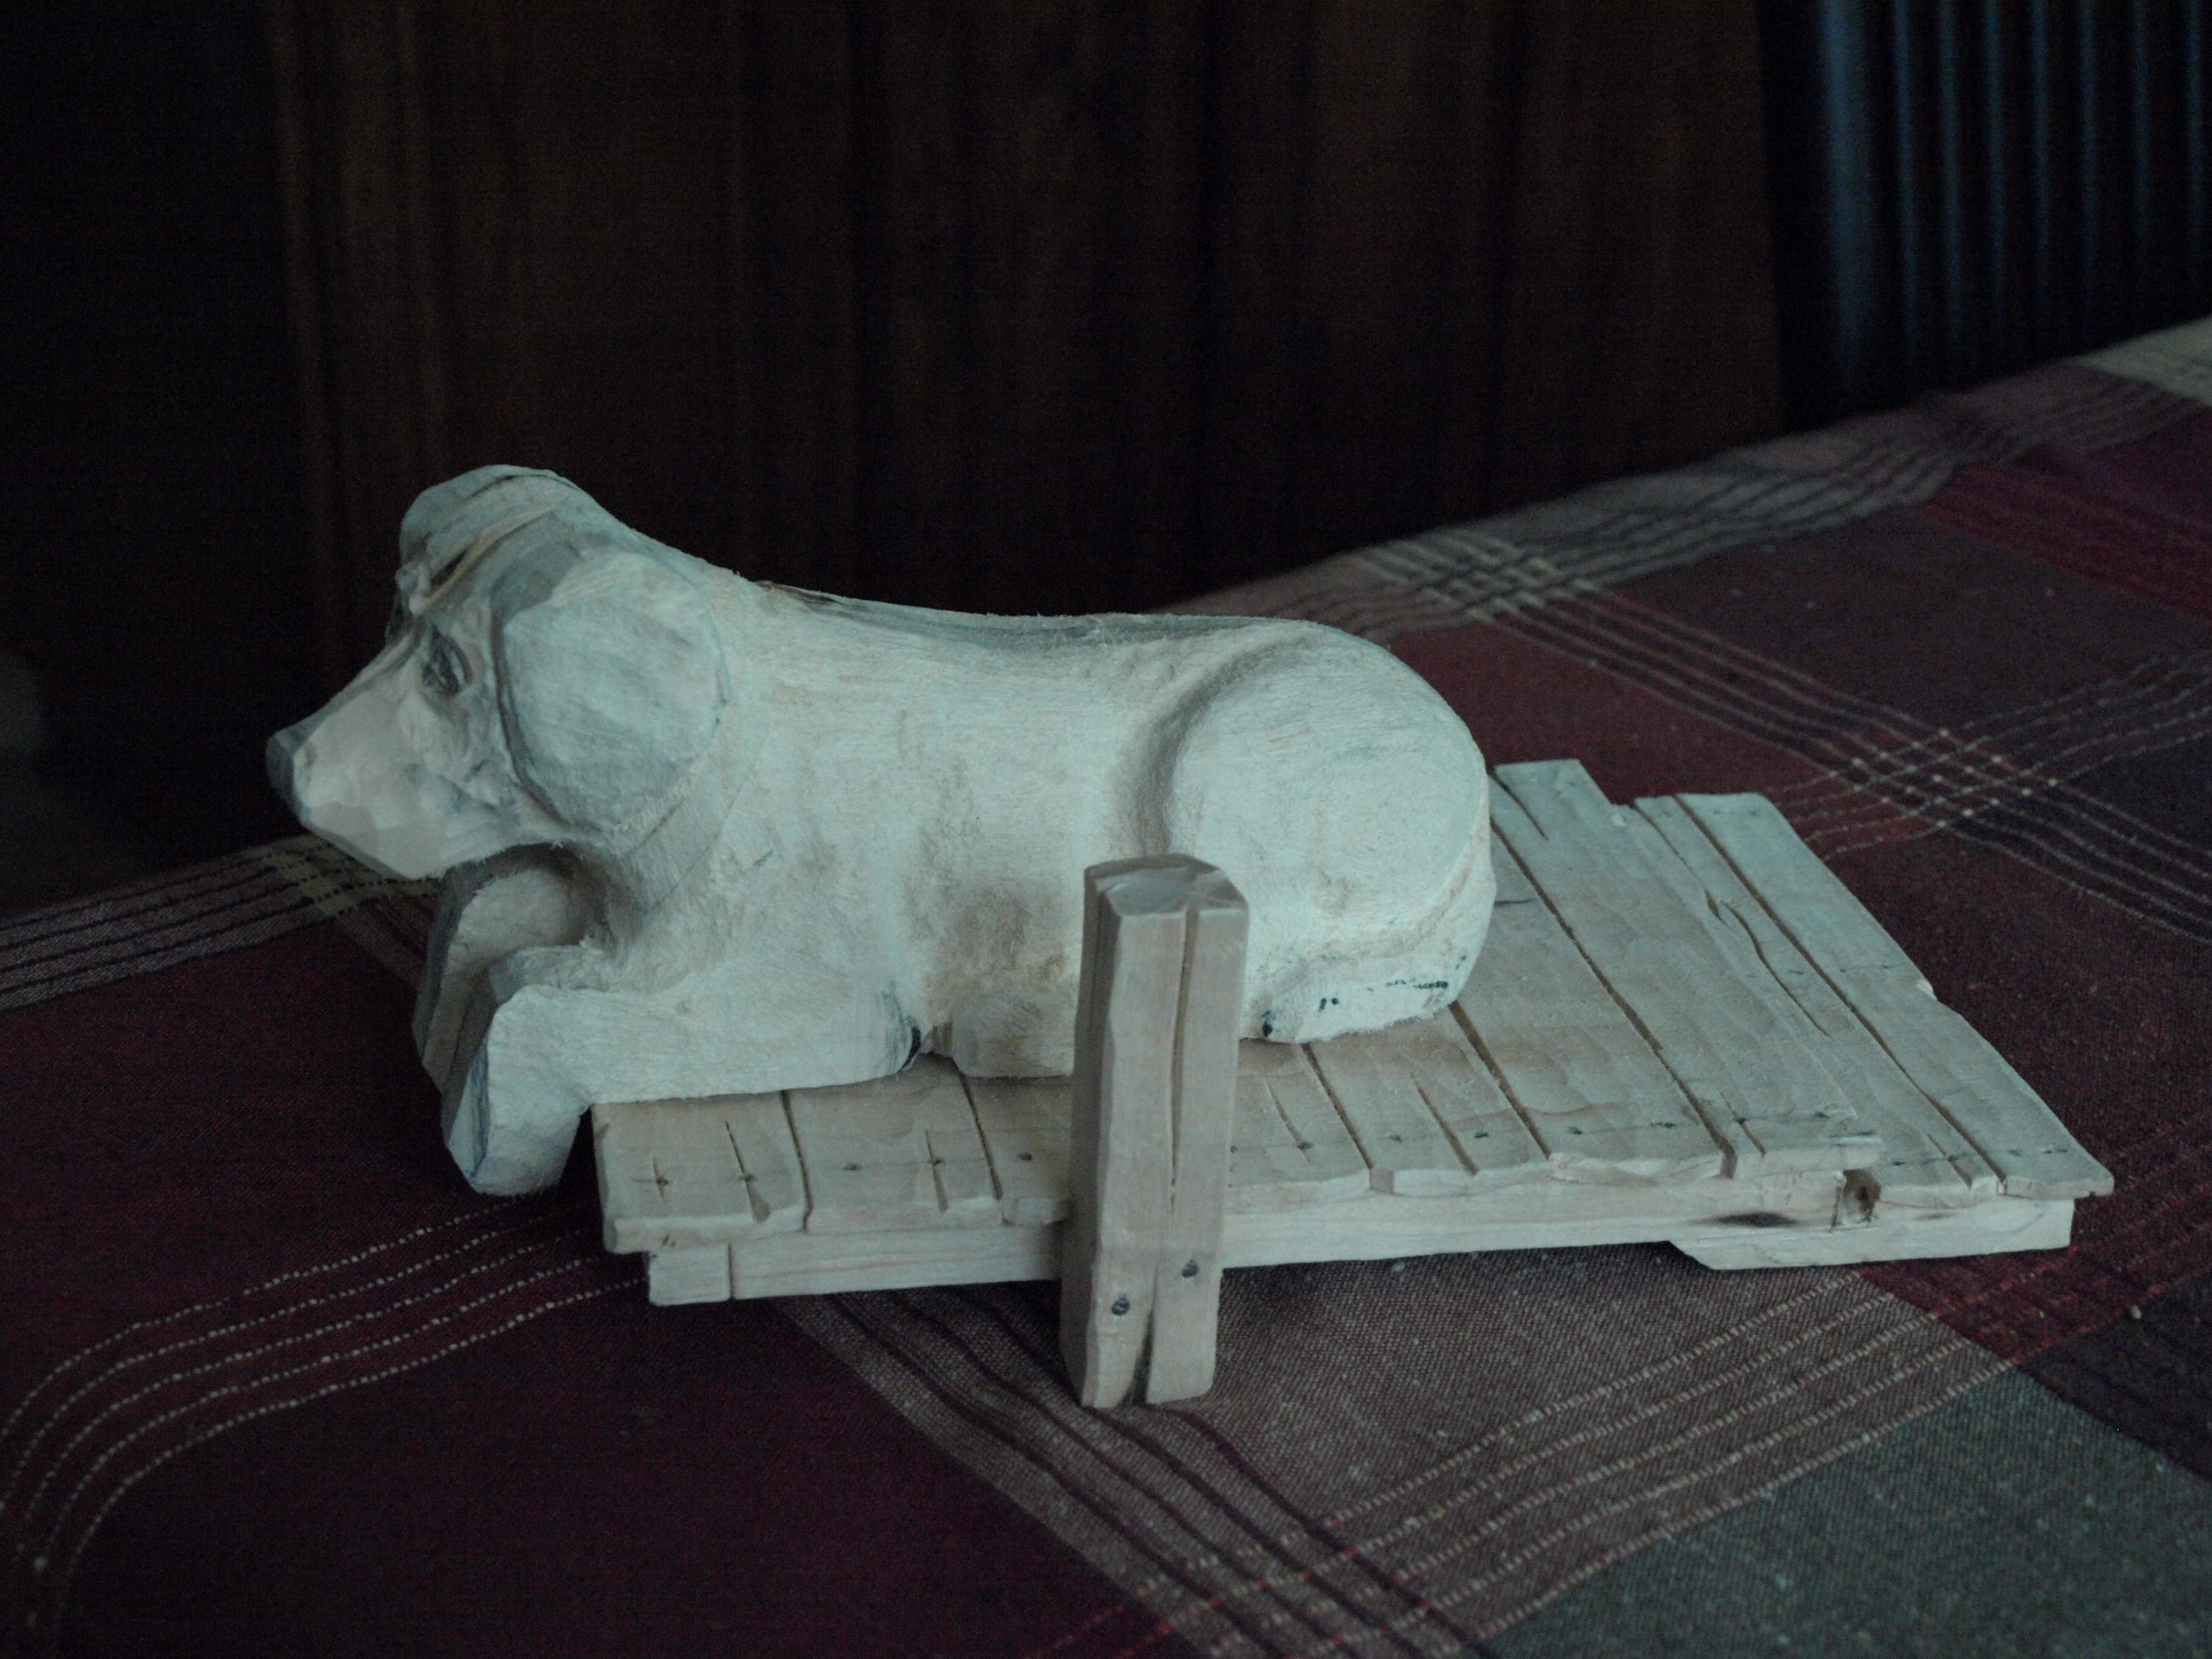
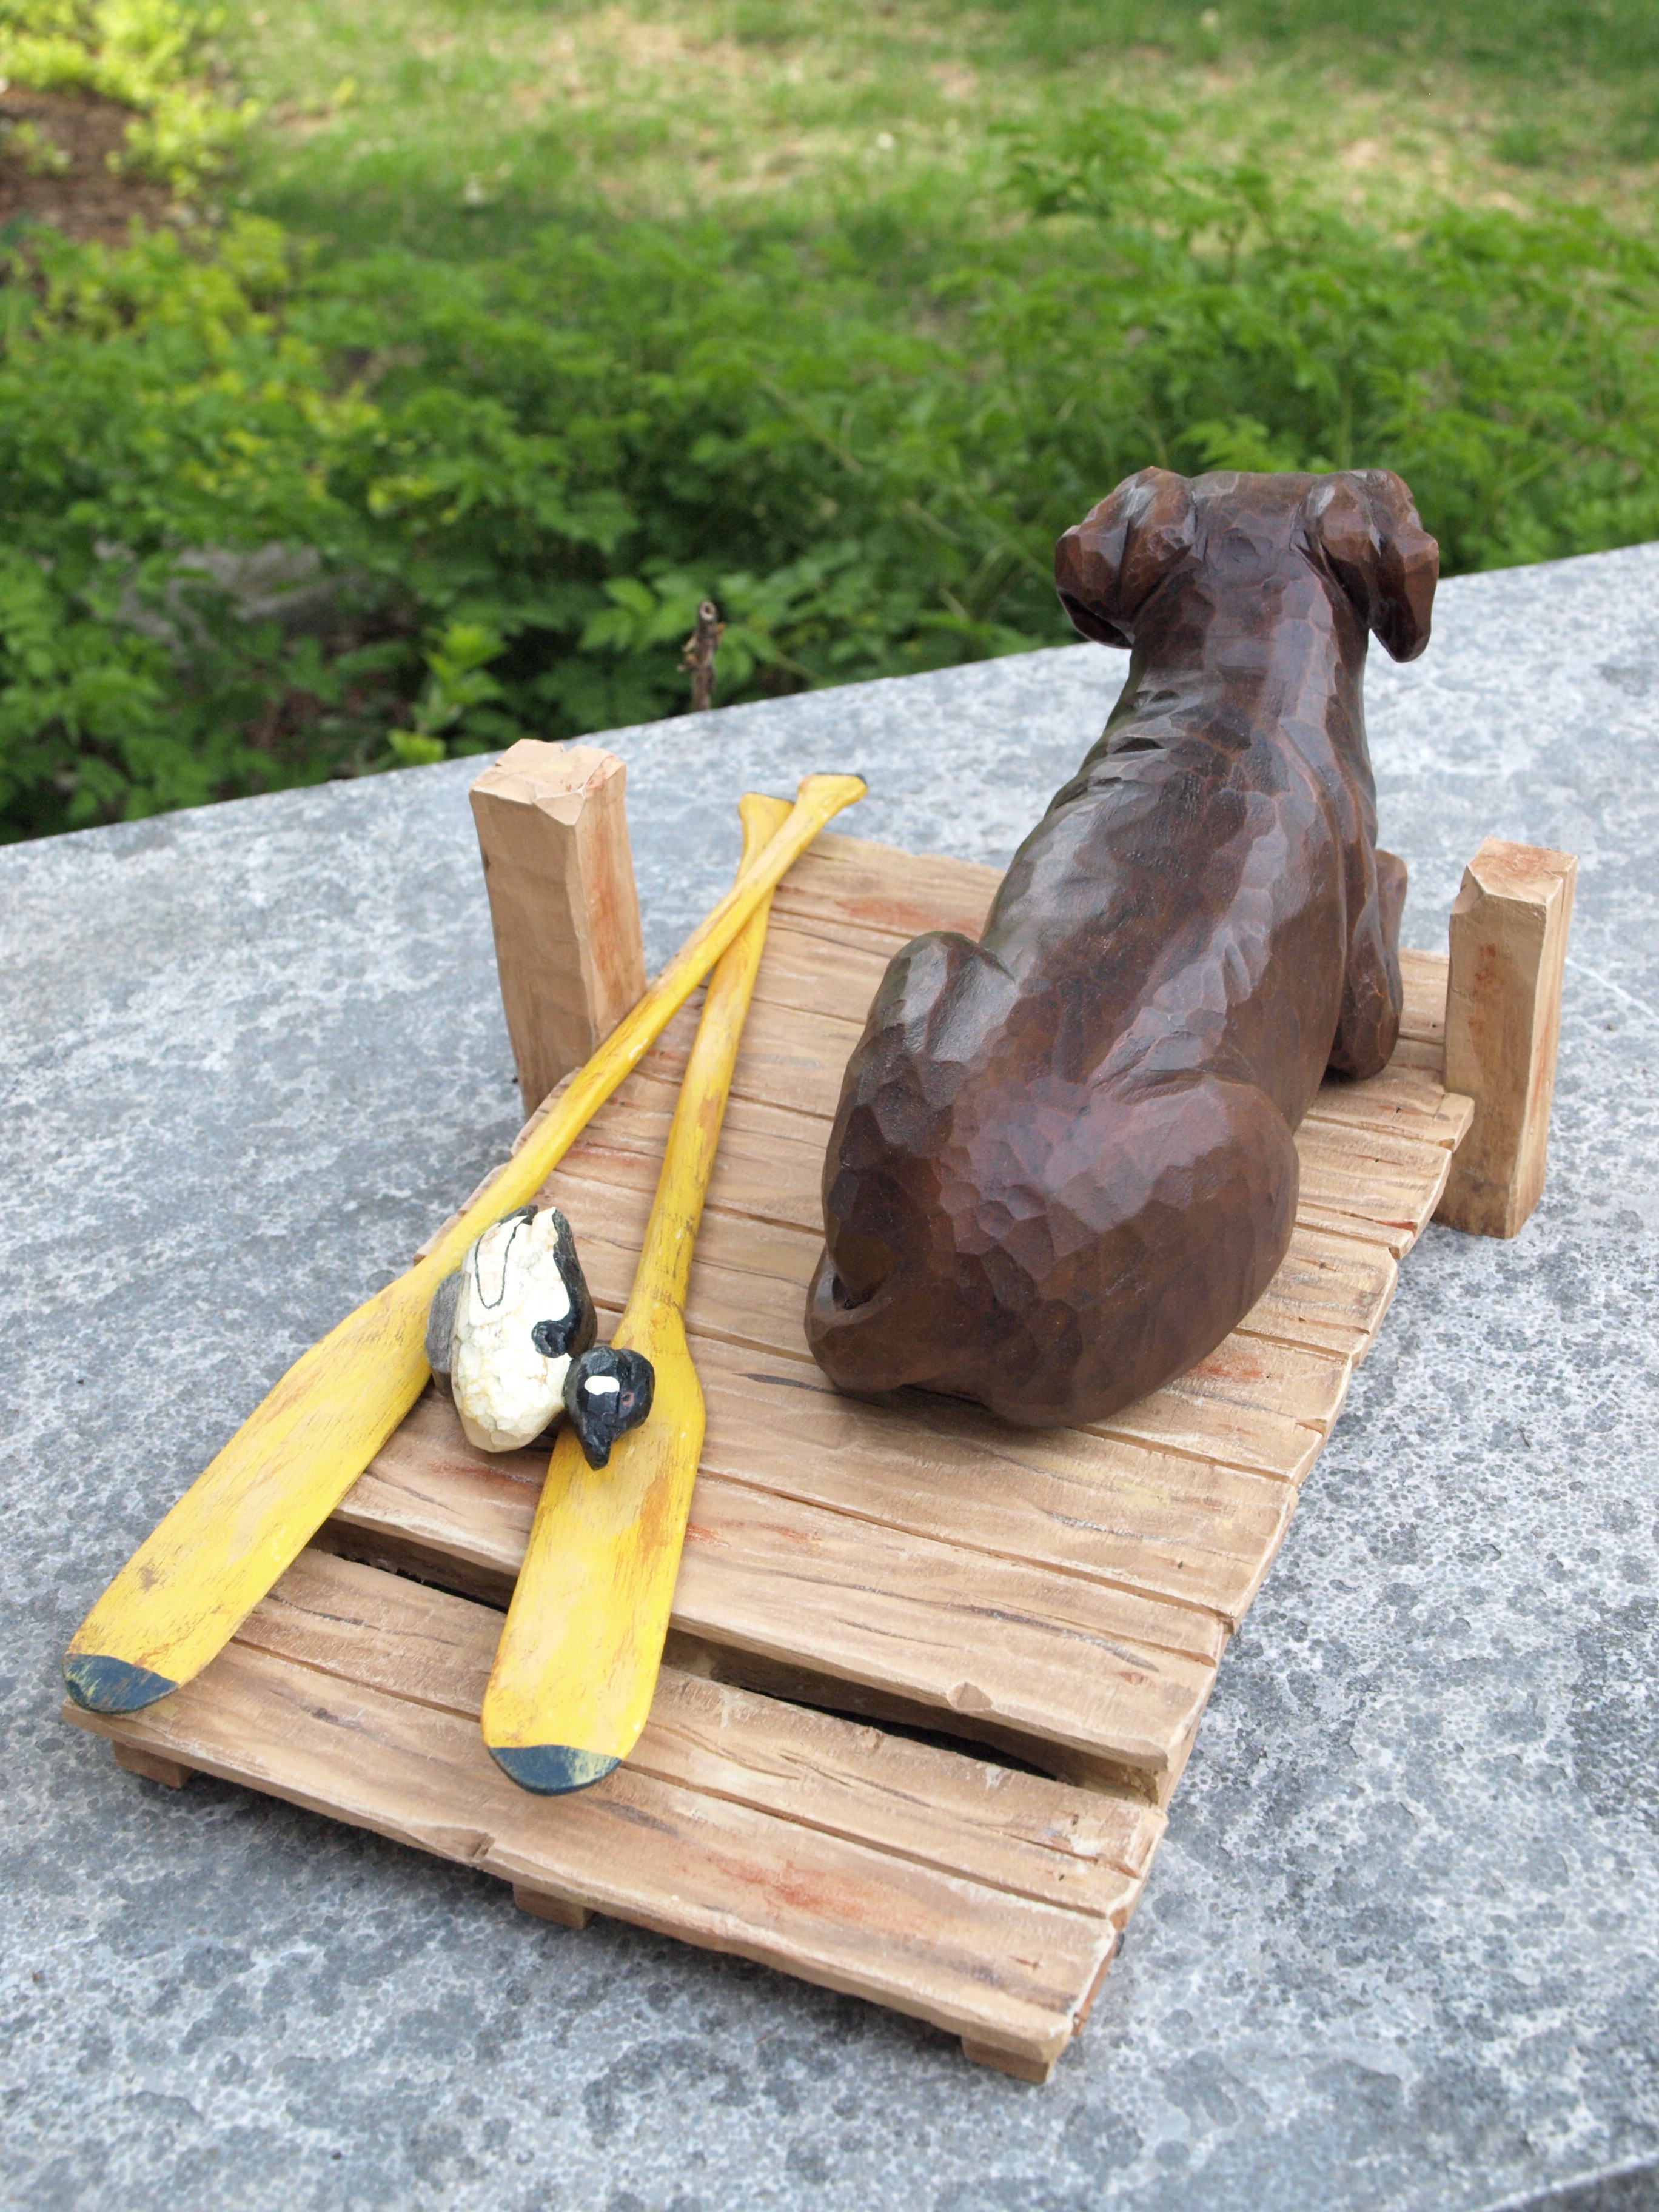
“Toby” is a friend’s Chocolate Labrador Retriever. She was looking for something that resembled Toby but was kind of mid-range between a caricature and a true rendering of her dog. From several photos that she sent me, we agreed on a sketch that I made that included her Lab laying on a favourite dock ( I received a good photo of the dock colouring, as well ) looking out over the water.
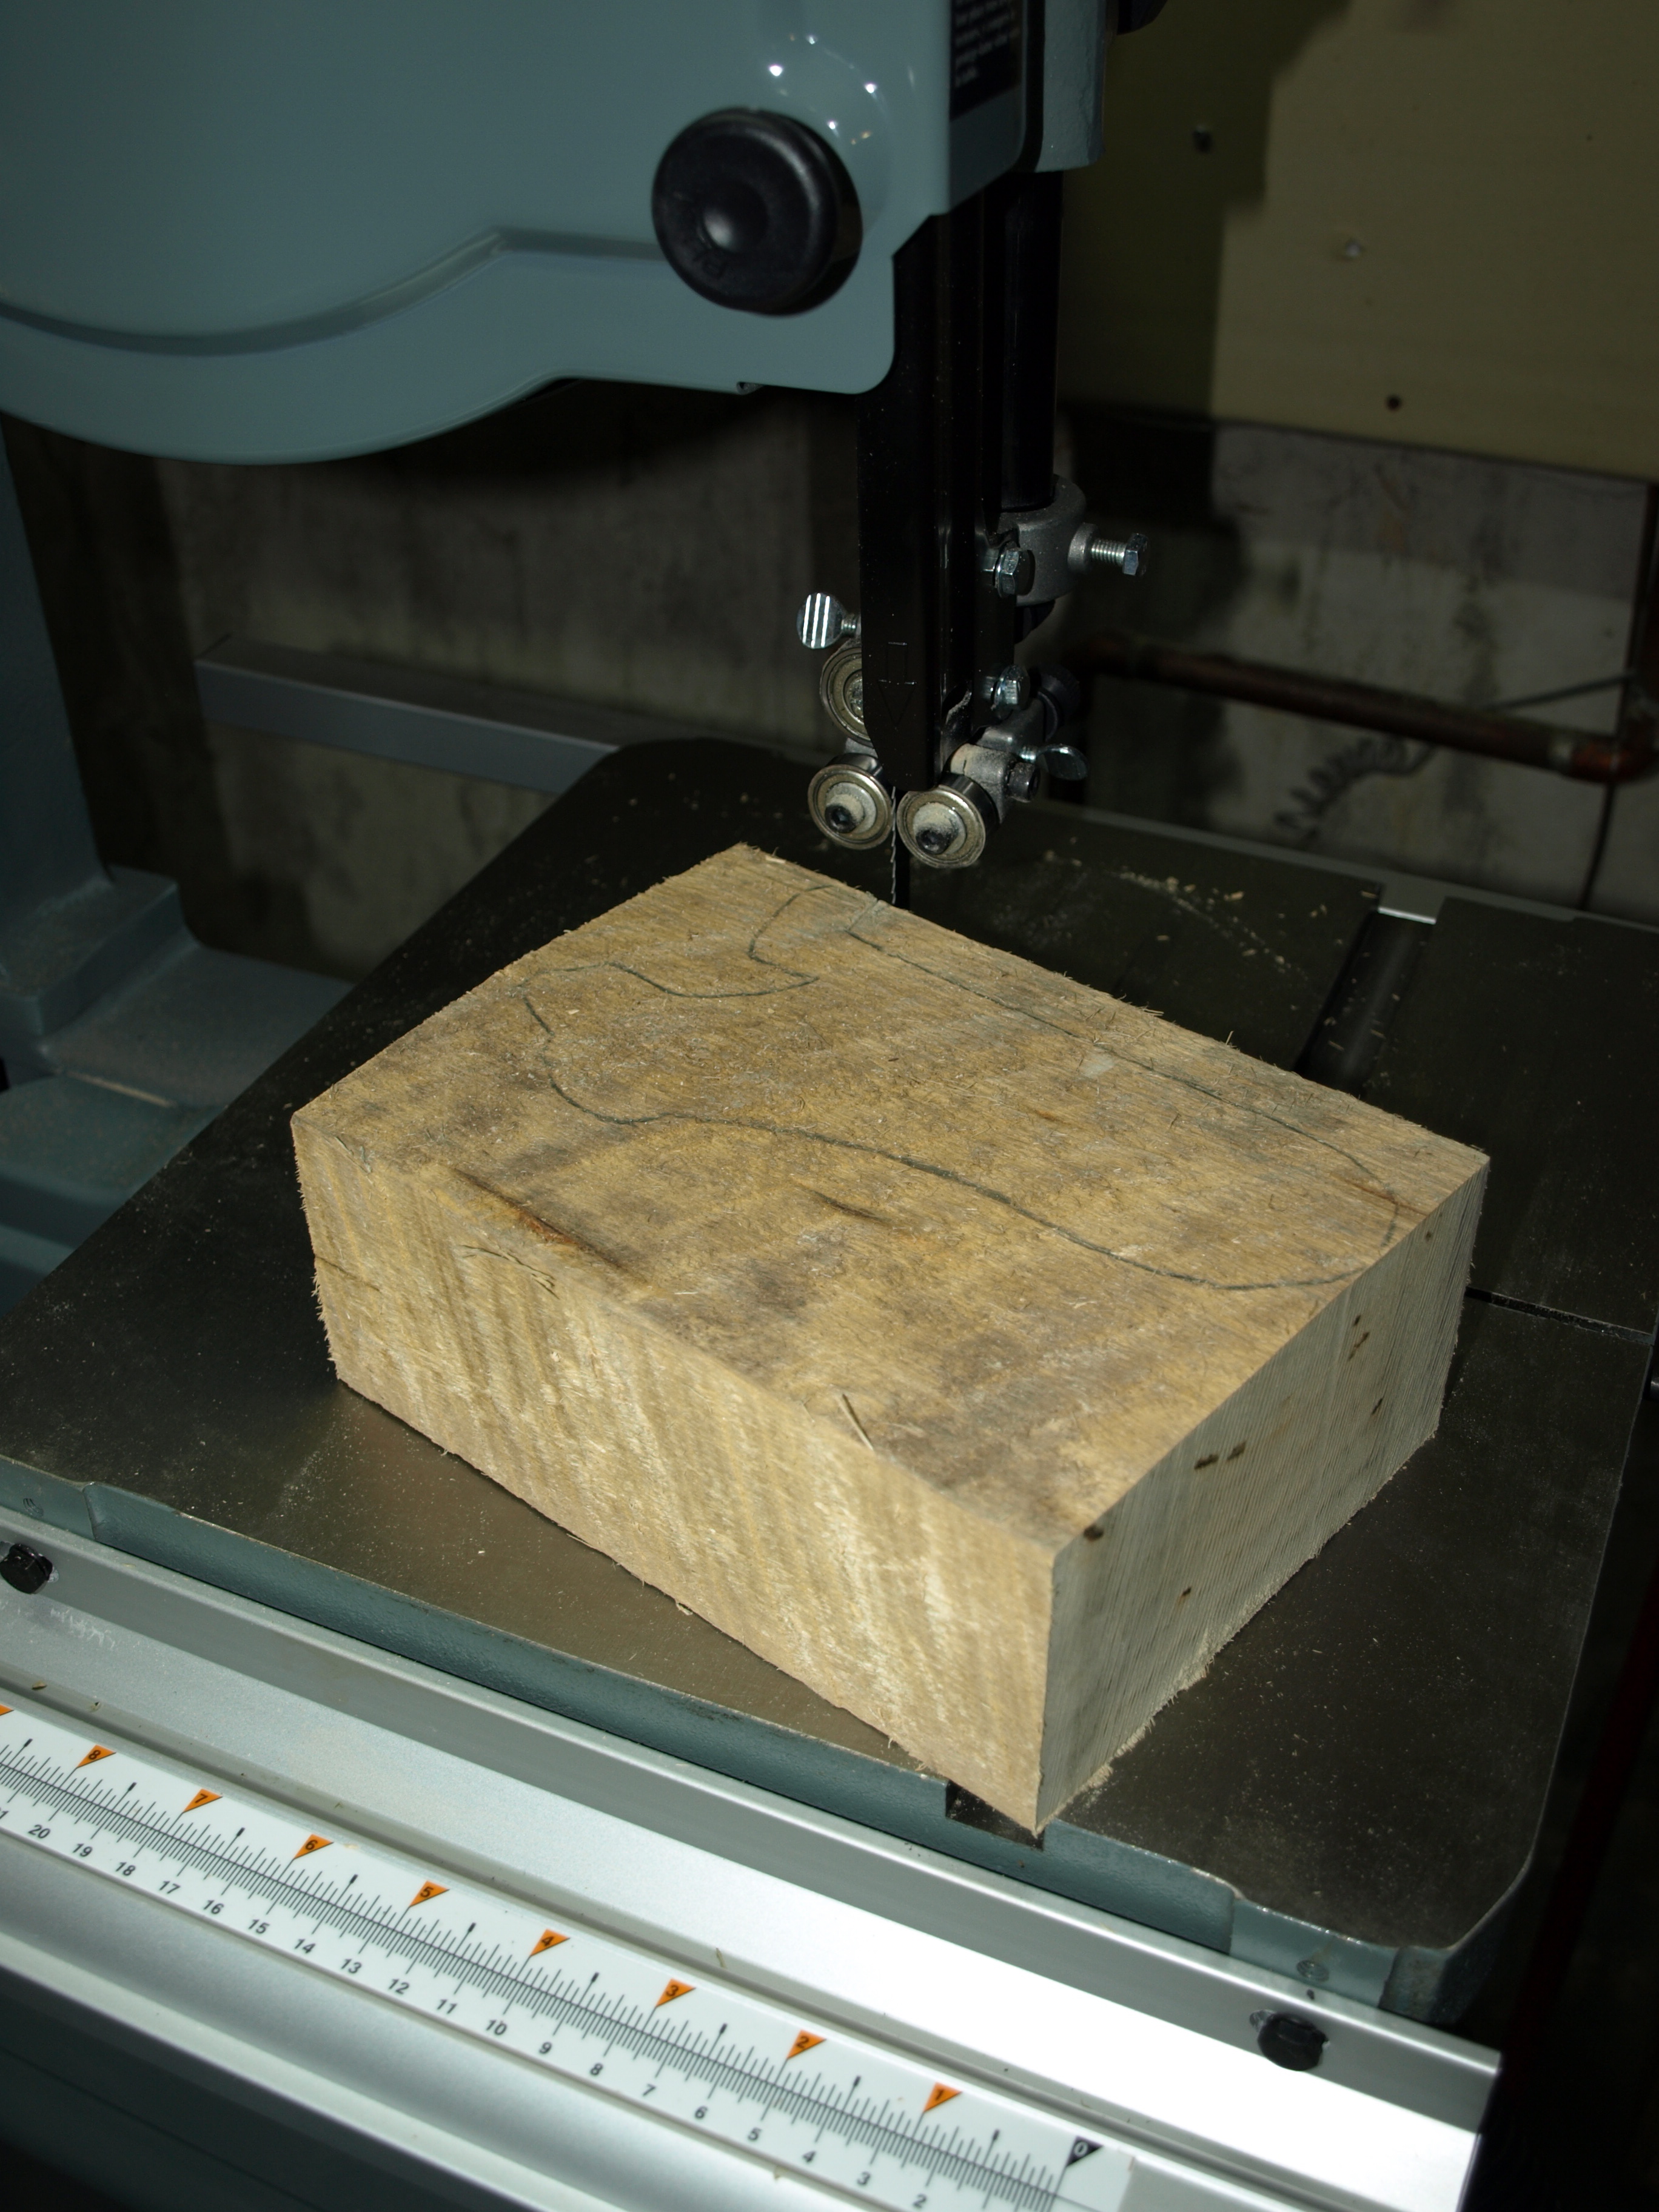
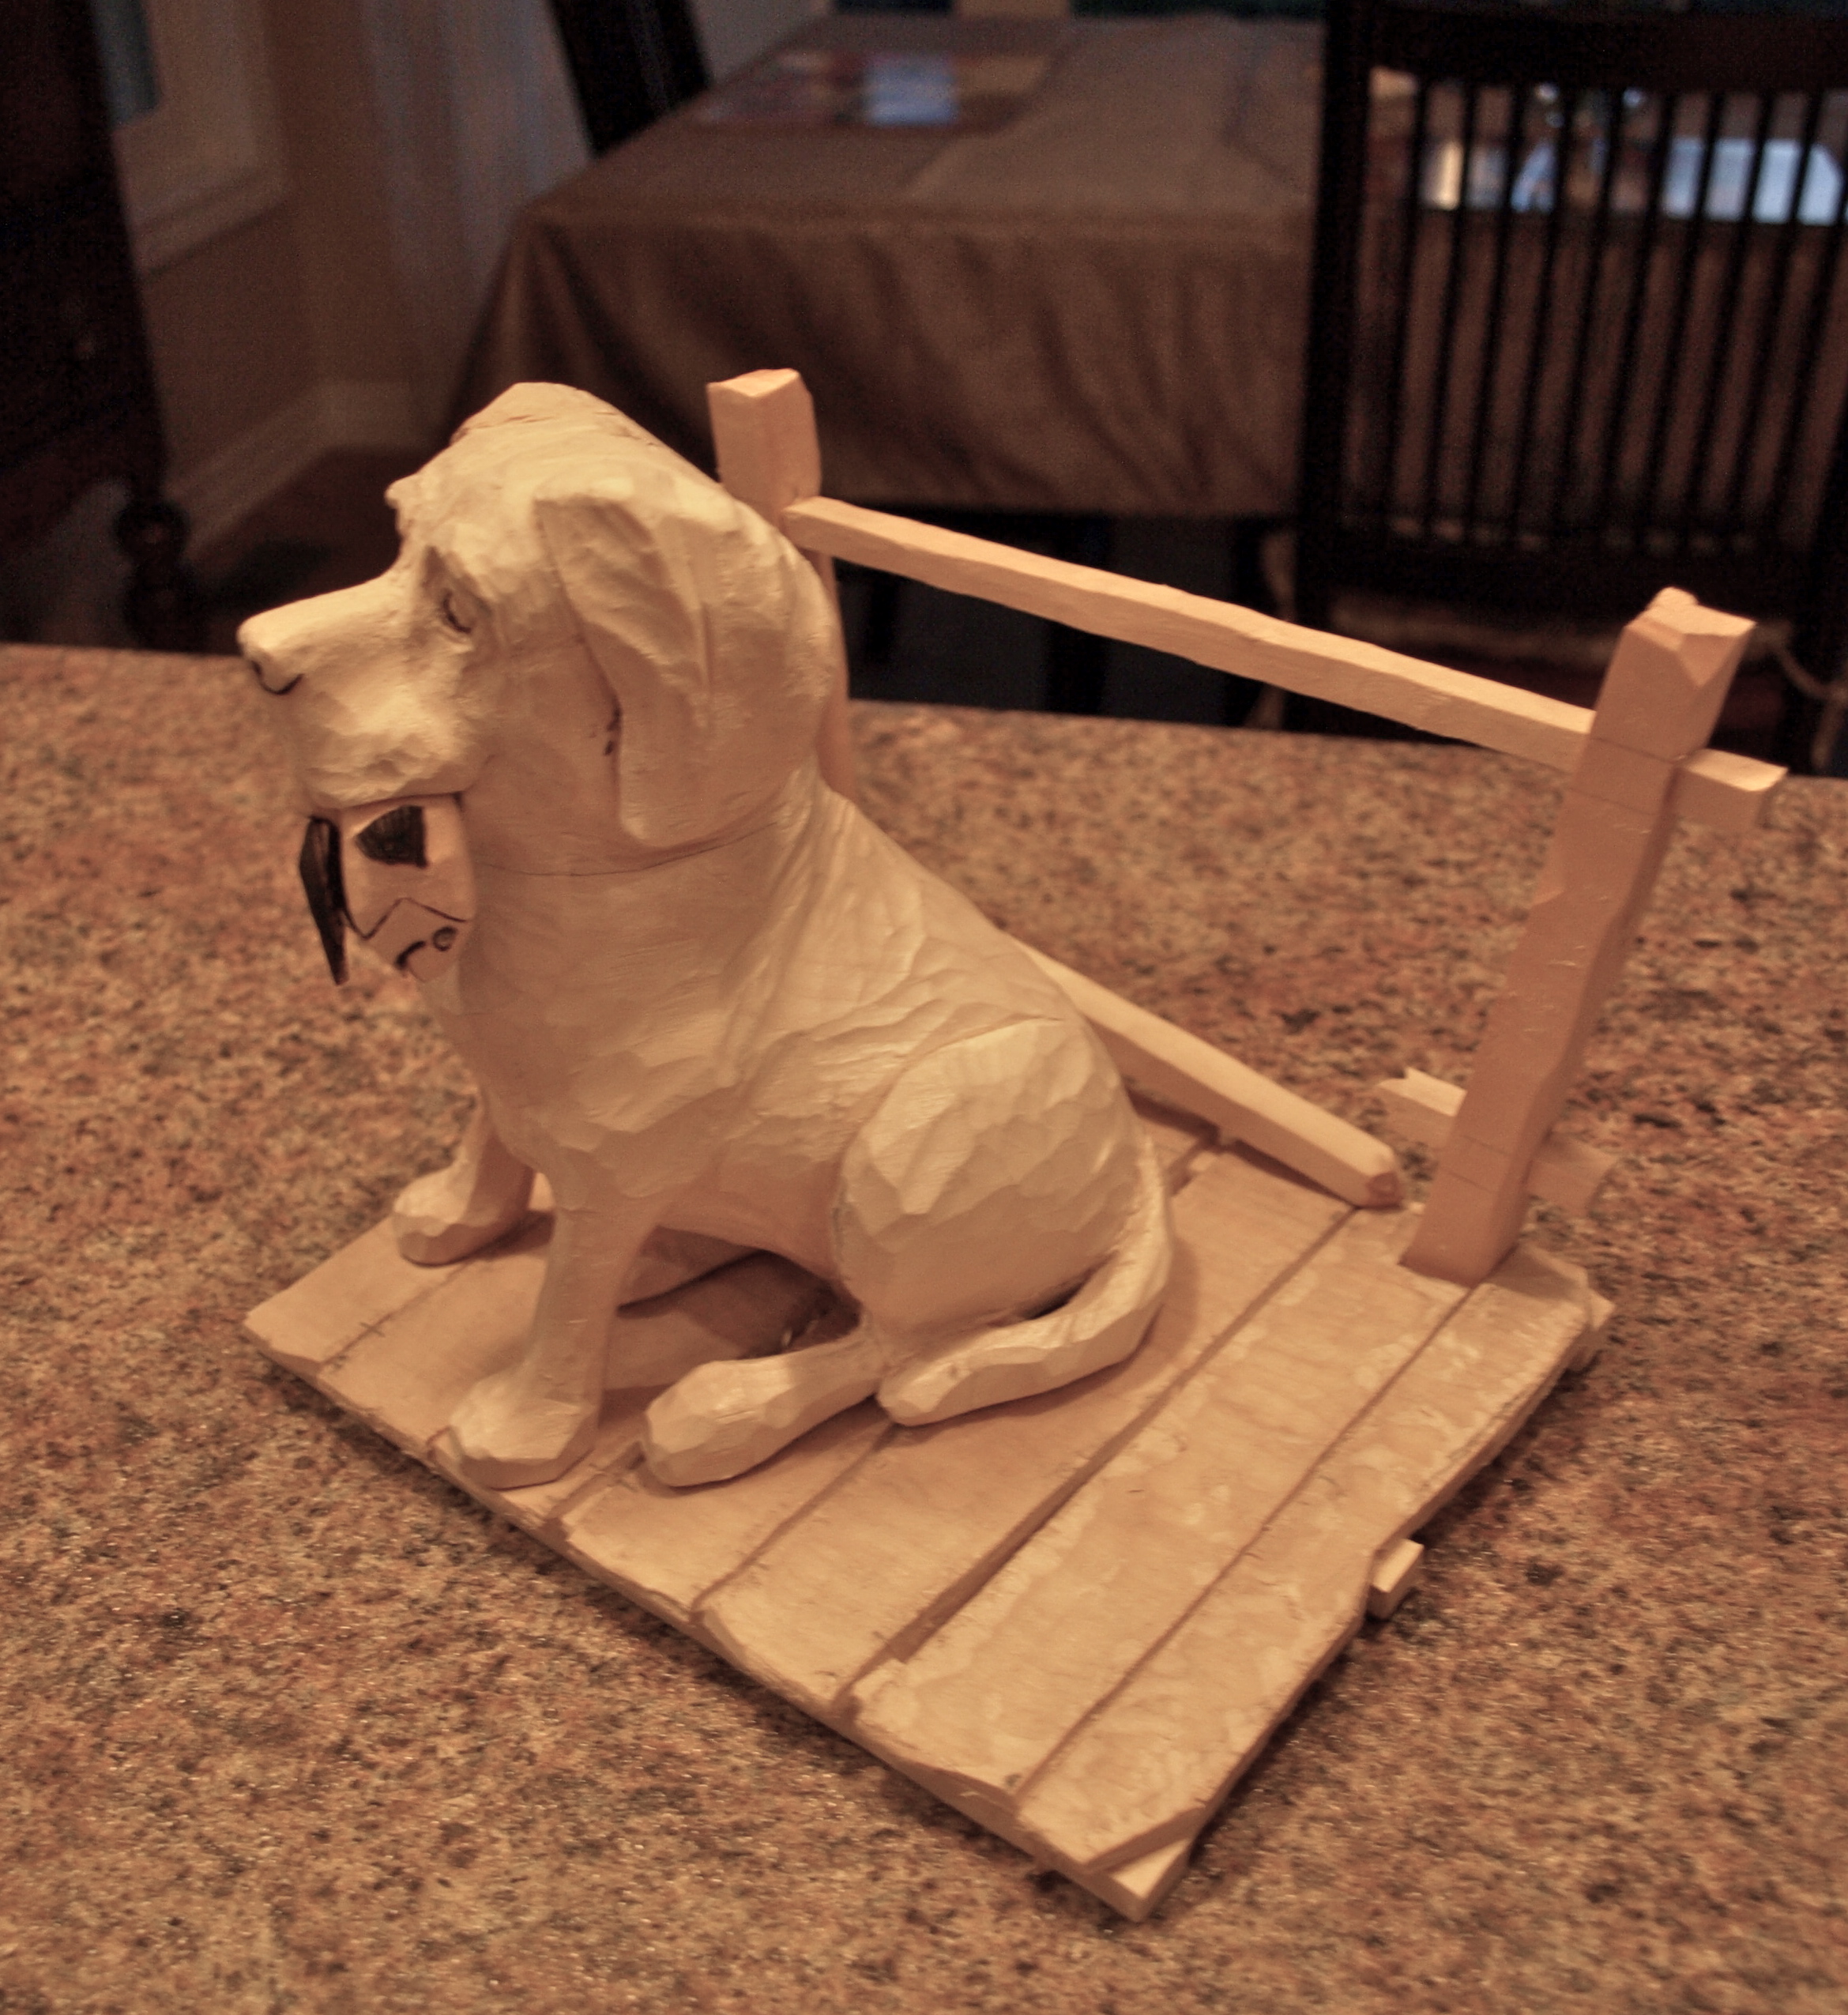
A side view of my drawing, as seen on this photo, was cut out of basswood on my bandsaw. “Toby” was about 5″ by 3″ tall and the grain of the wood was oriented along the length of the dog figure. It’s usually quite important to get the grain direction right as you do not want any weak, slim sections that could break across the grain. In this case, the weakest section would be the downward sections of the front legs, but since the two legs were eventually to be against the dock, they were afforded some protection from possible breakage.

Following cutting out the side view, the top view was pencilled on the carving, and then again back to the bandsaw for some additional cutting. In this case, the bottom piece that I cut out of the side view and below the front legs was saved and lightly glued back in place before the cutting of the top view. This gave the dog figure a stable base to rest on the bandsaw table while that cut was being made. A word of caution…don’t ever try to cut something on the saw that does not have a stable horizontal base as the saw blade will catch the piece and turn it rapidly…and possibly turn your hand as well toward the blade. A real no-no.

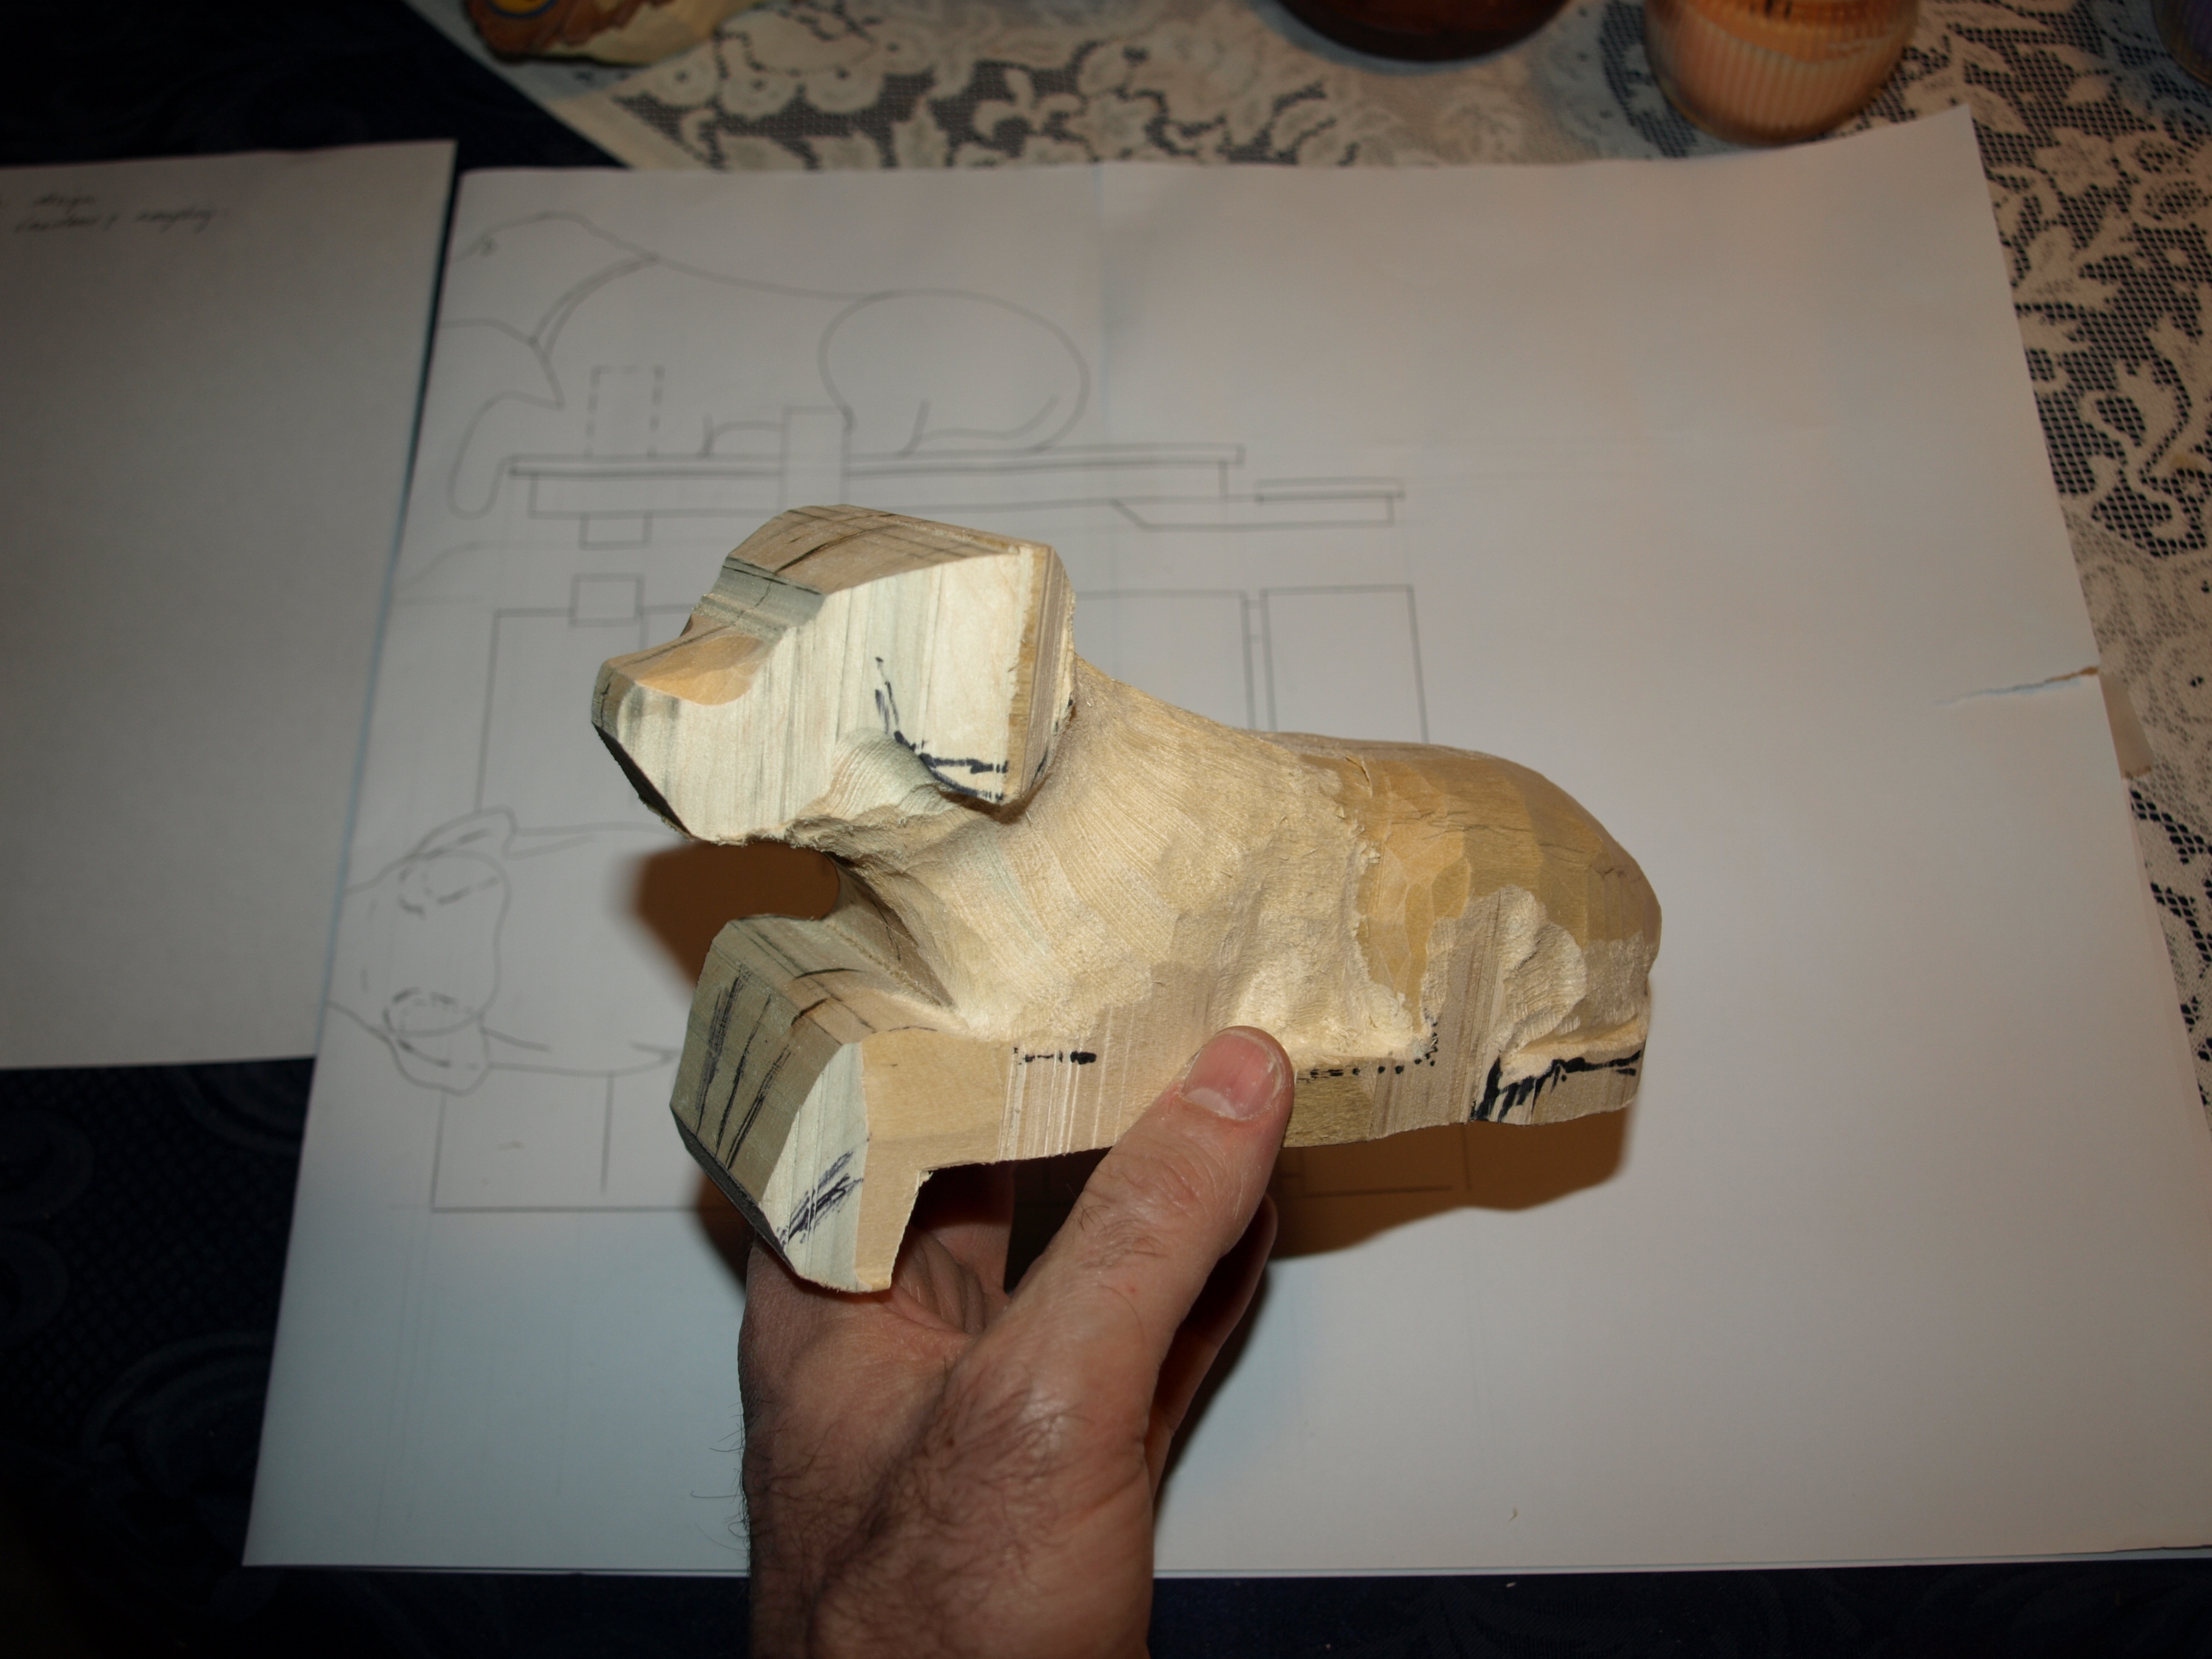
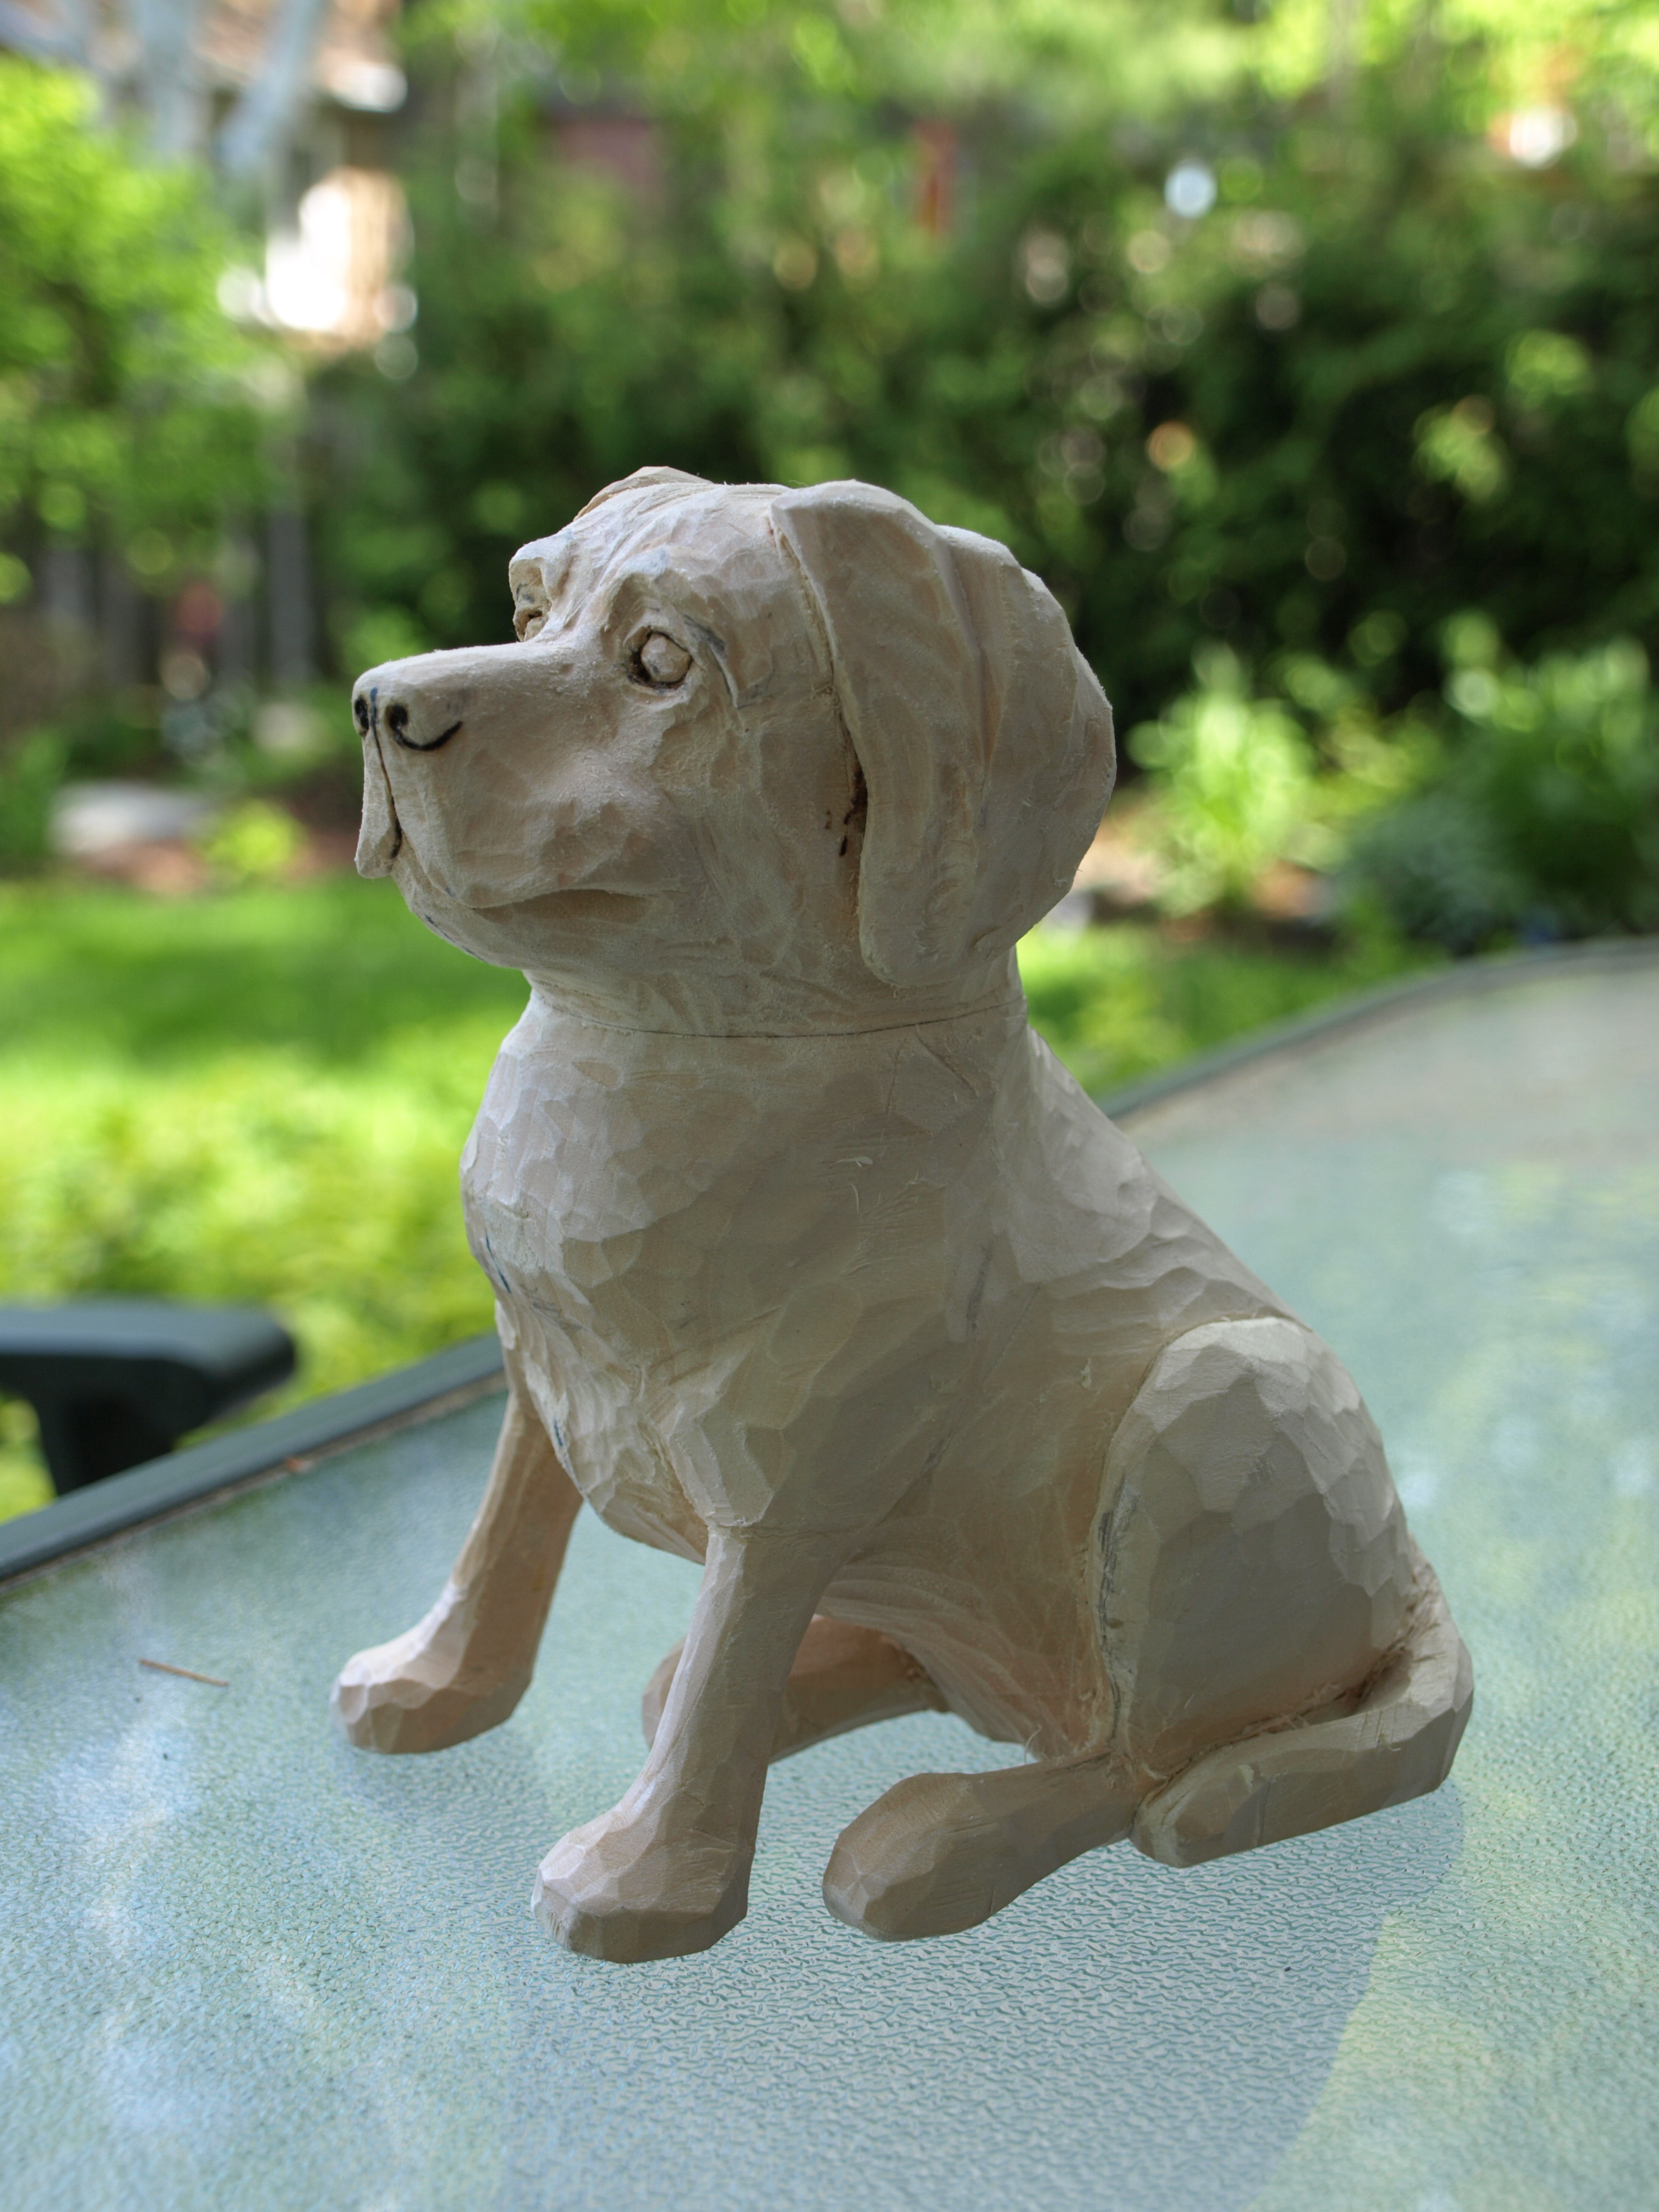
Just to get the general shape, I used a combination of a Foredom tool and a roughing carving knife. A Foredom tool is a rotary tool with a flexible shaft and hand piece on the end. Something like a Dremel tool…which would work just fine as well. The bit that I used for this kind of roughing was a carbide tip tool that looks like a teardrop with a bunch of tiny wires sticking out of it. This bit is commonly called a typhoon bit and is a very aggressive cutting tool. I’m very careful with this tool to say the least…I wear safety glasses, a dust mask, a leather apron across my stomach and chest and heavy gloves on each hand. This might sound a little extreme to you, however, if this bit ever were to touch your skin or a fingernail it would remove an 1/8″ of you before you could react. Gear up to protect yourself.

The dock was made in just three pieces…the main section and two upright posts. The dock is just a slab of basswood with some undercutting to produce a stair and the sense of planks extending over what would be the 2×6 structure of such a dock. Slats were cut at about 3/4″ intervals to make the planks and then I used a gouge chisel ( concave…like a spoon ) between the slat cuts to dish the planks a bit to make them look like they were warped with age. You can also make out in this photo that I cut additional grooves, like I did with the slats, randomly in a number of the planks to make it look like the wood had cracked irregularly over time. Finally, I used a smooth finishing nail to make some shallow nail holes. Later, I used a wire cutter to cut the nail heads plus about a 1/4″ of nail and hammered ( gently ) these short sections of nail into the holes.
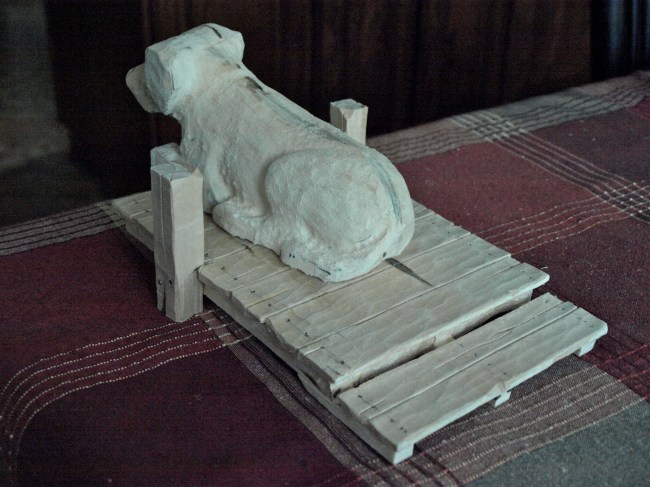
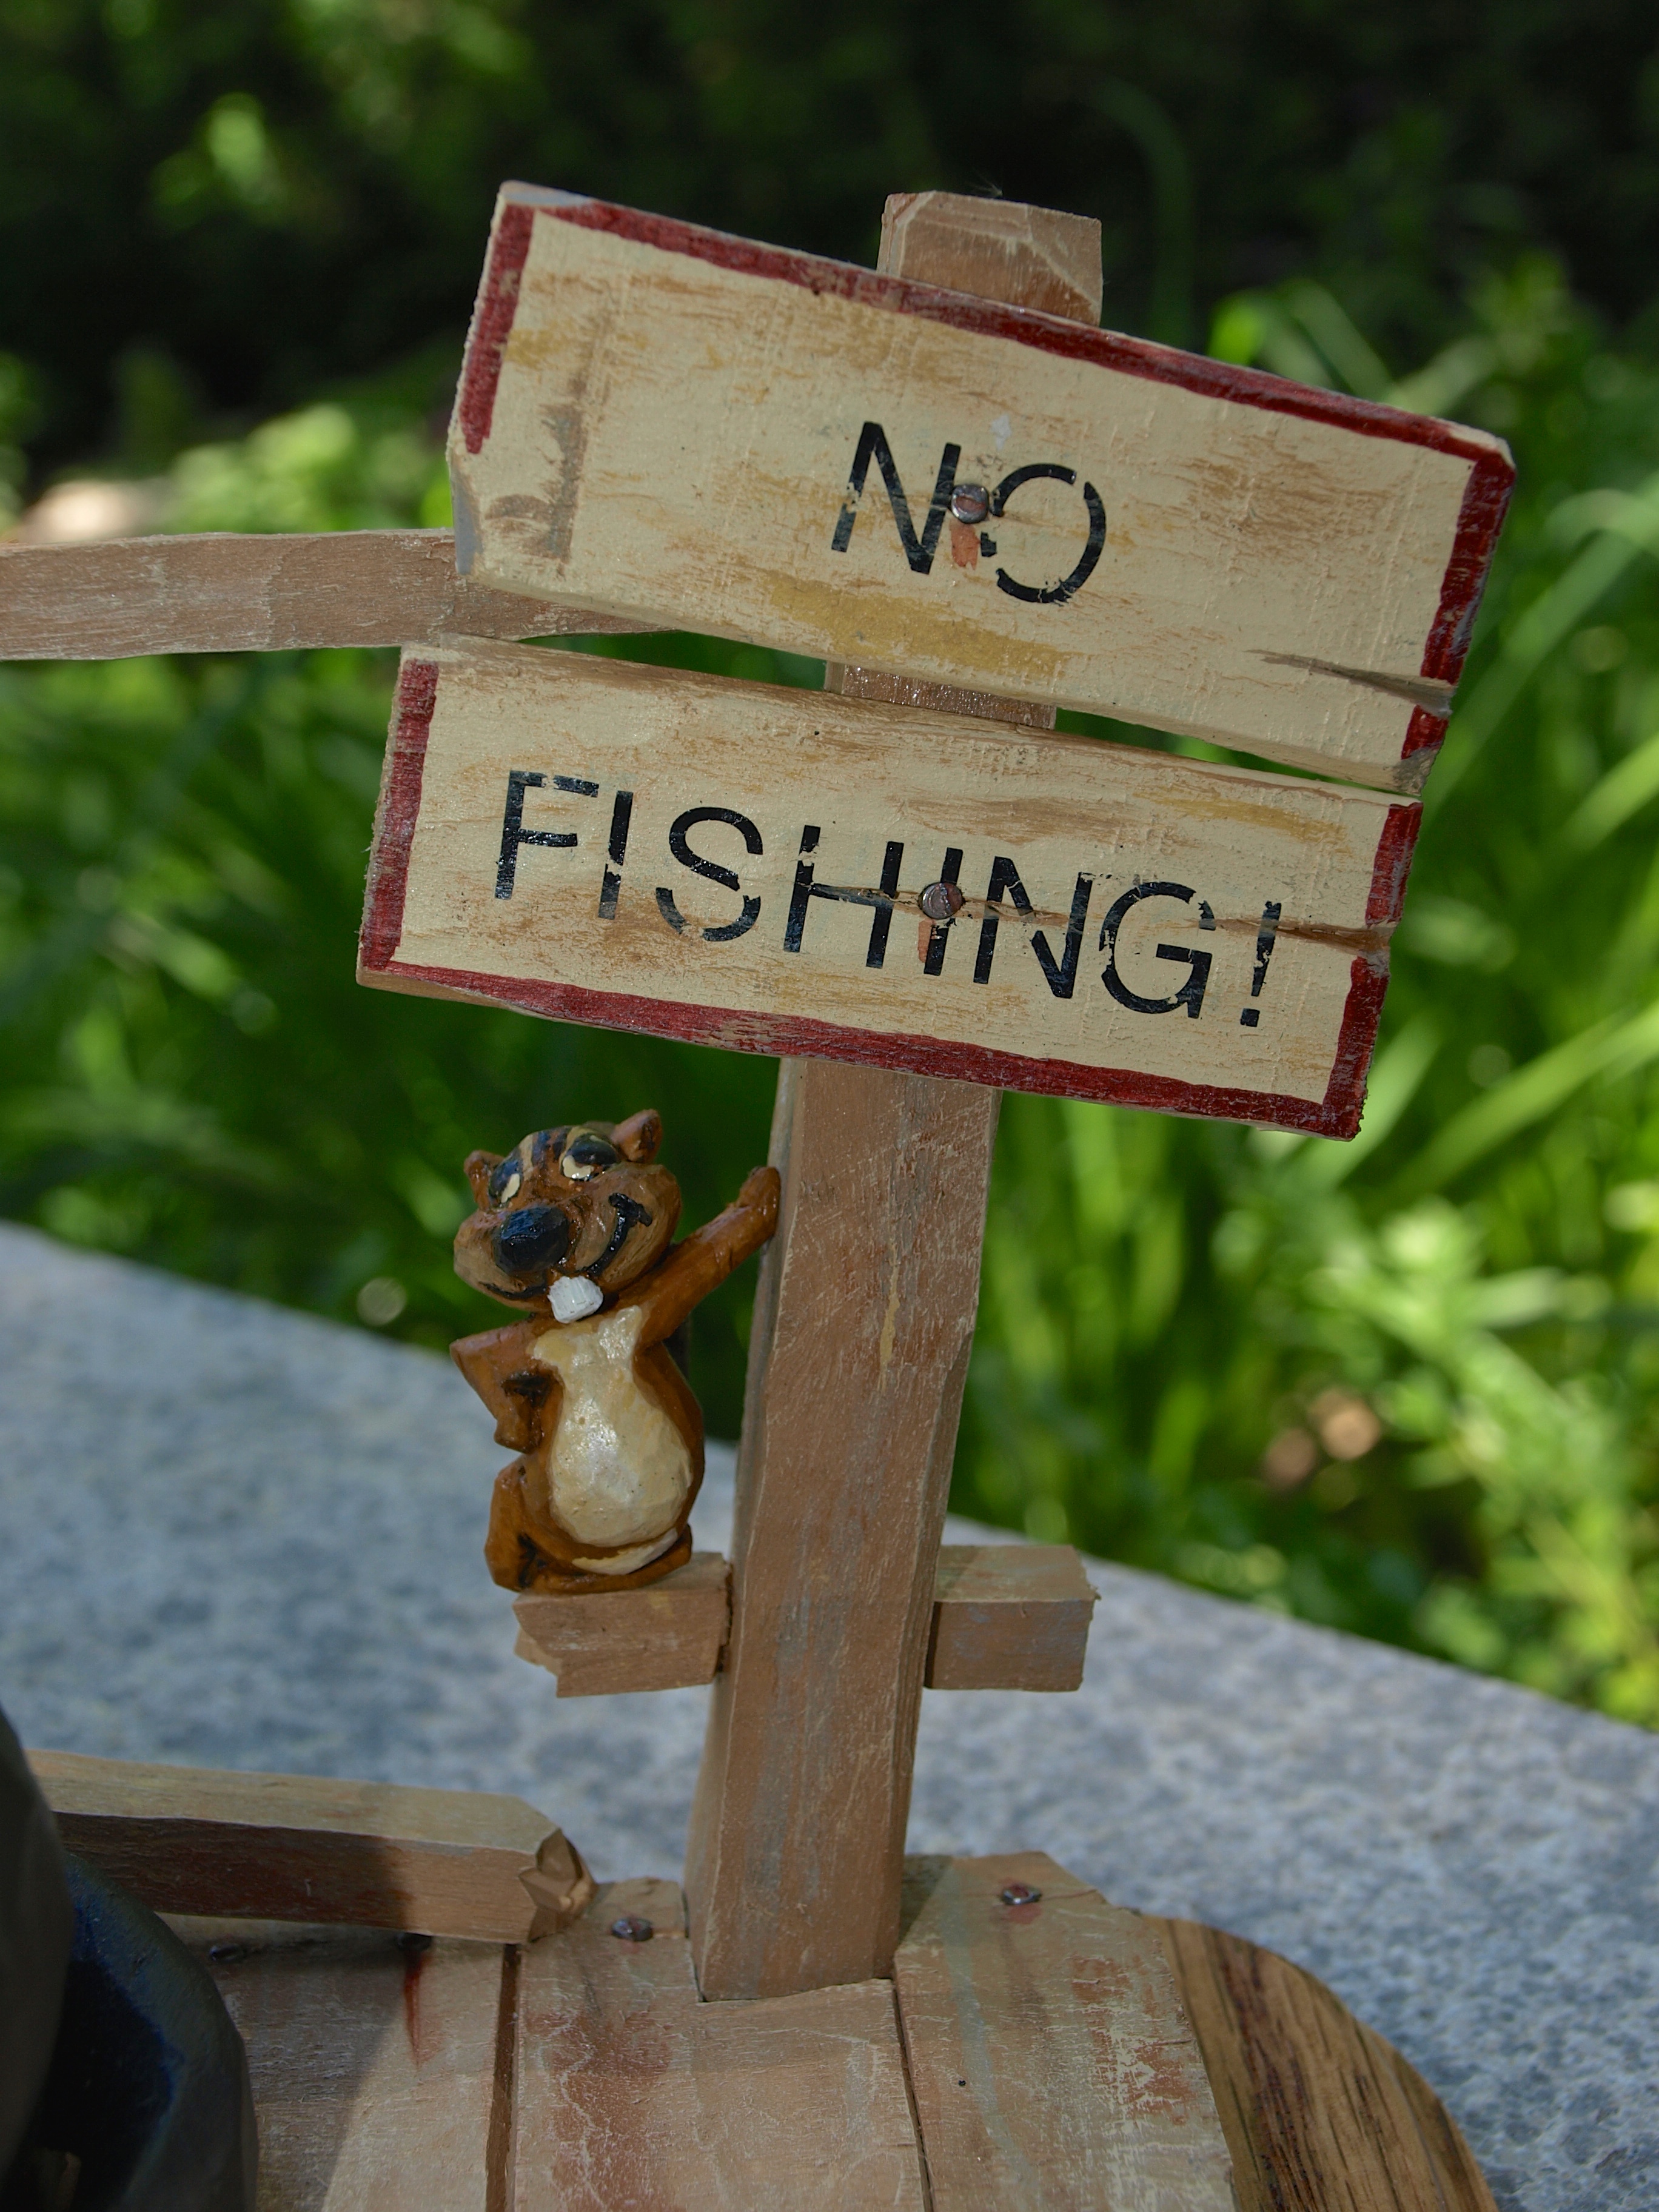
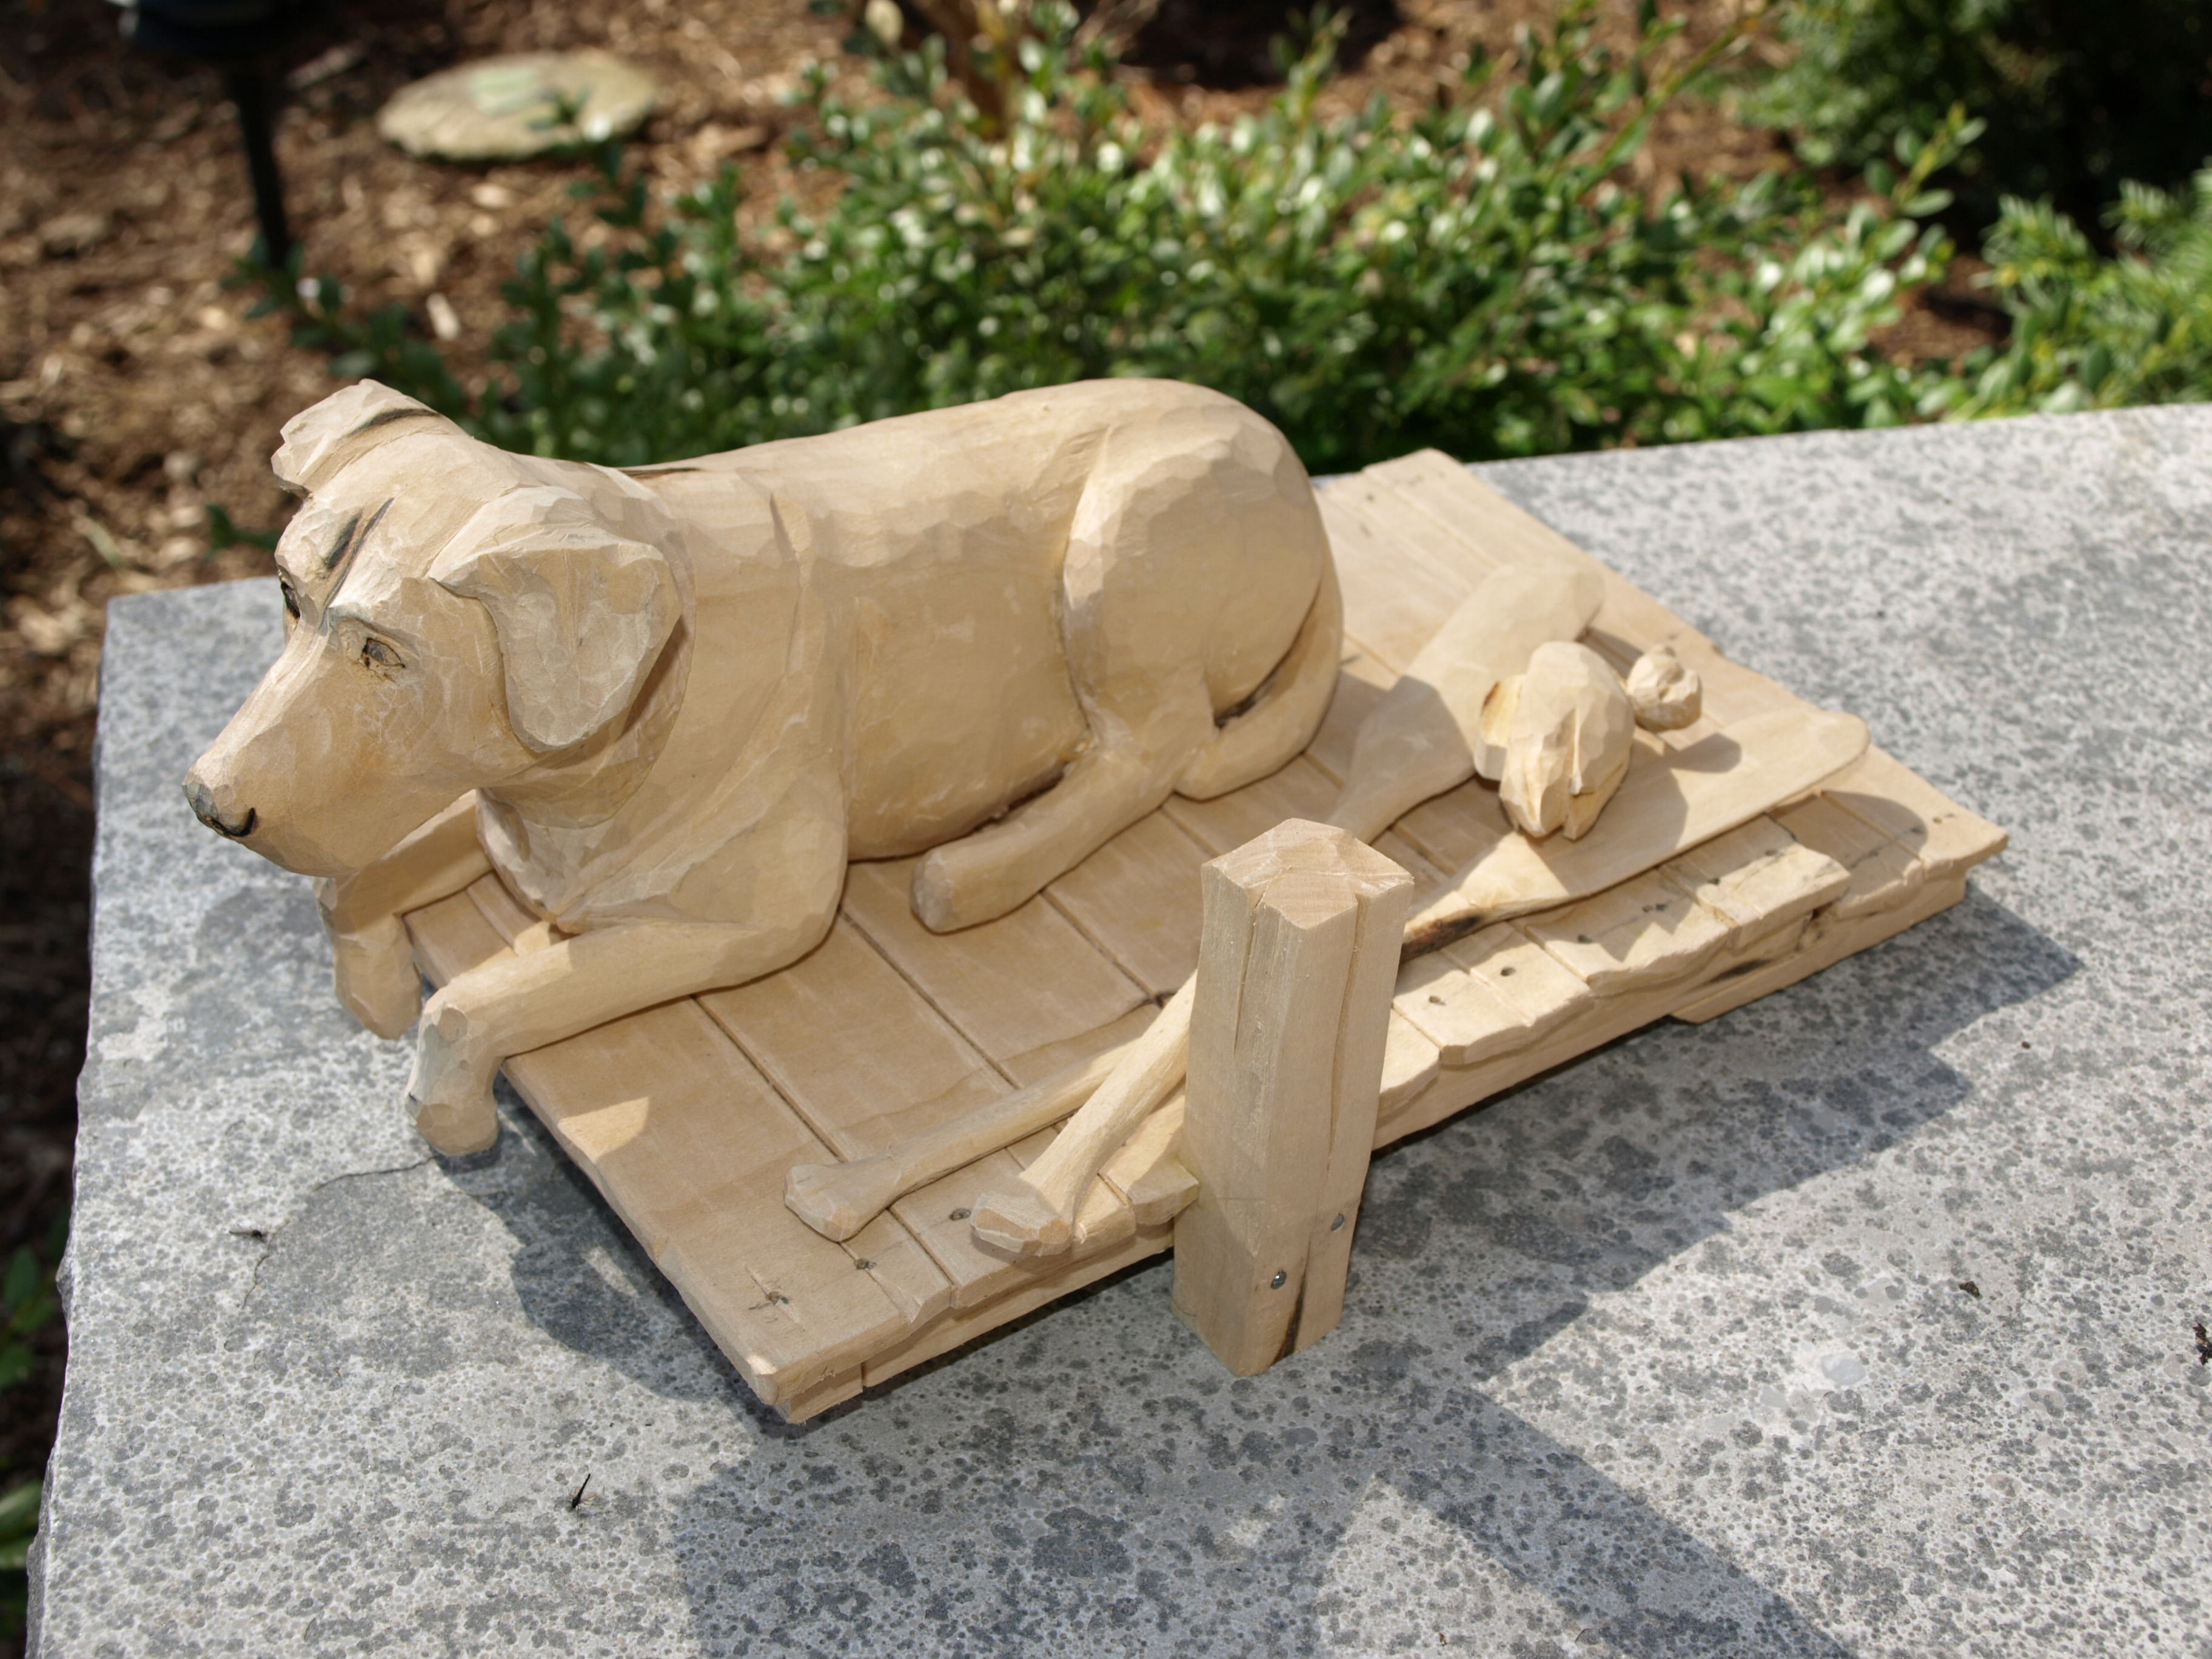
Once I got to this point and set everything out, I decided that I wanted something additional in this carving as the single figure laying down didn’t look balanced. I started by carving a coil of rope but ended up not liking that look. Interestingly, that was the second time that I had carved a nice coil of rope only to end up not using it. What I did end up with was a couple of canoe paddles and a working decoy. I wanted to get the dimensions approximately right so I looked up the average standard length of a Labrador and the average standard length of a canoe paddle and scaled them together as reasonably as I could get.

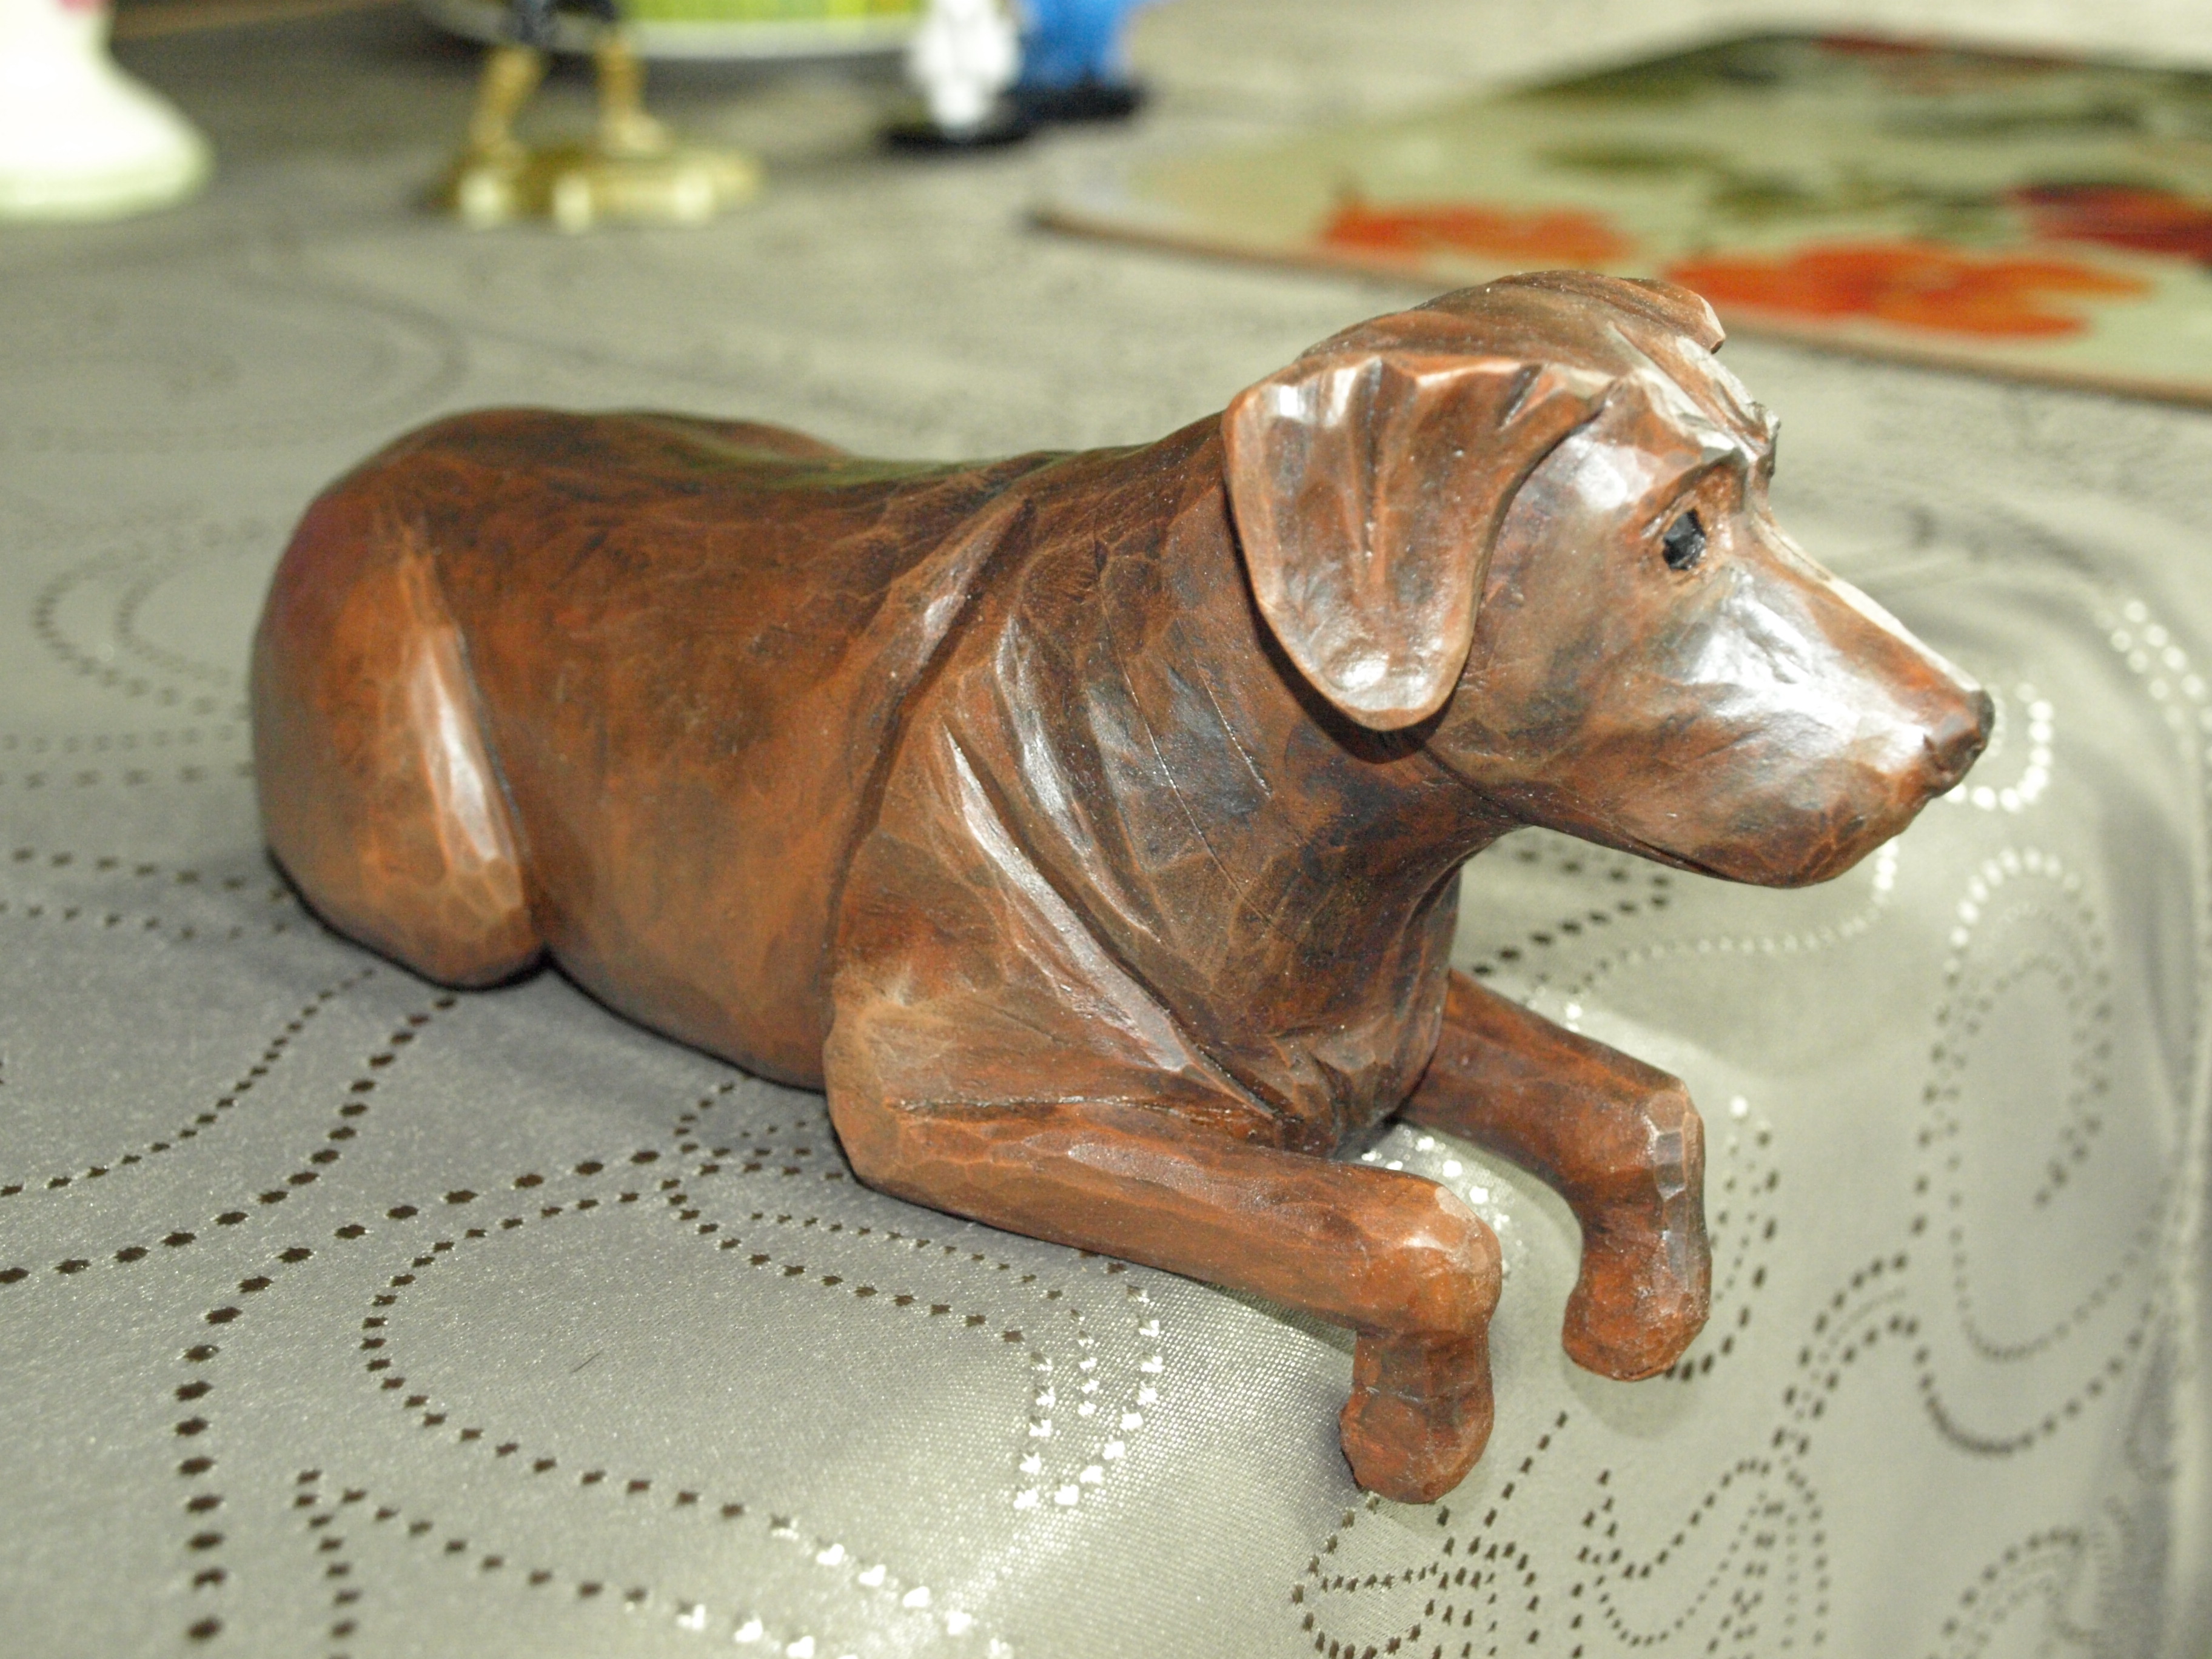
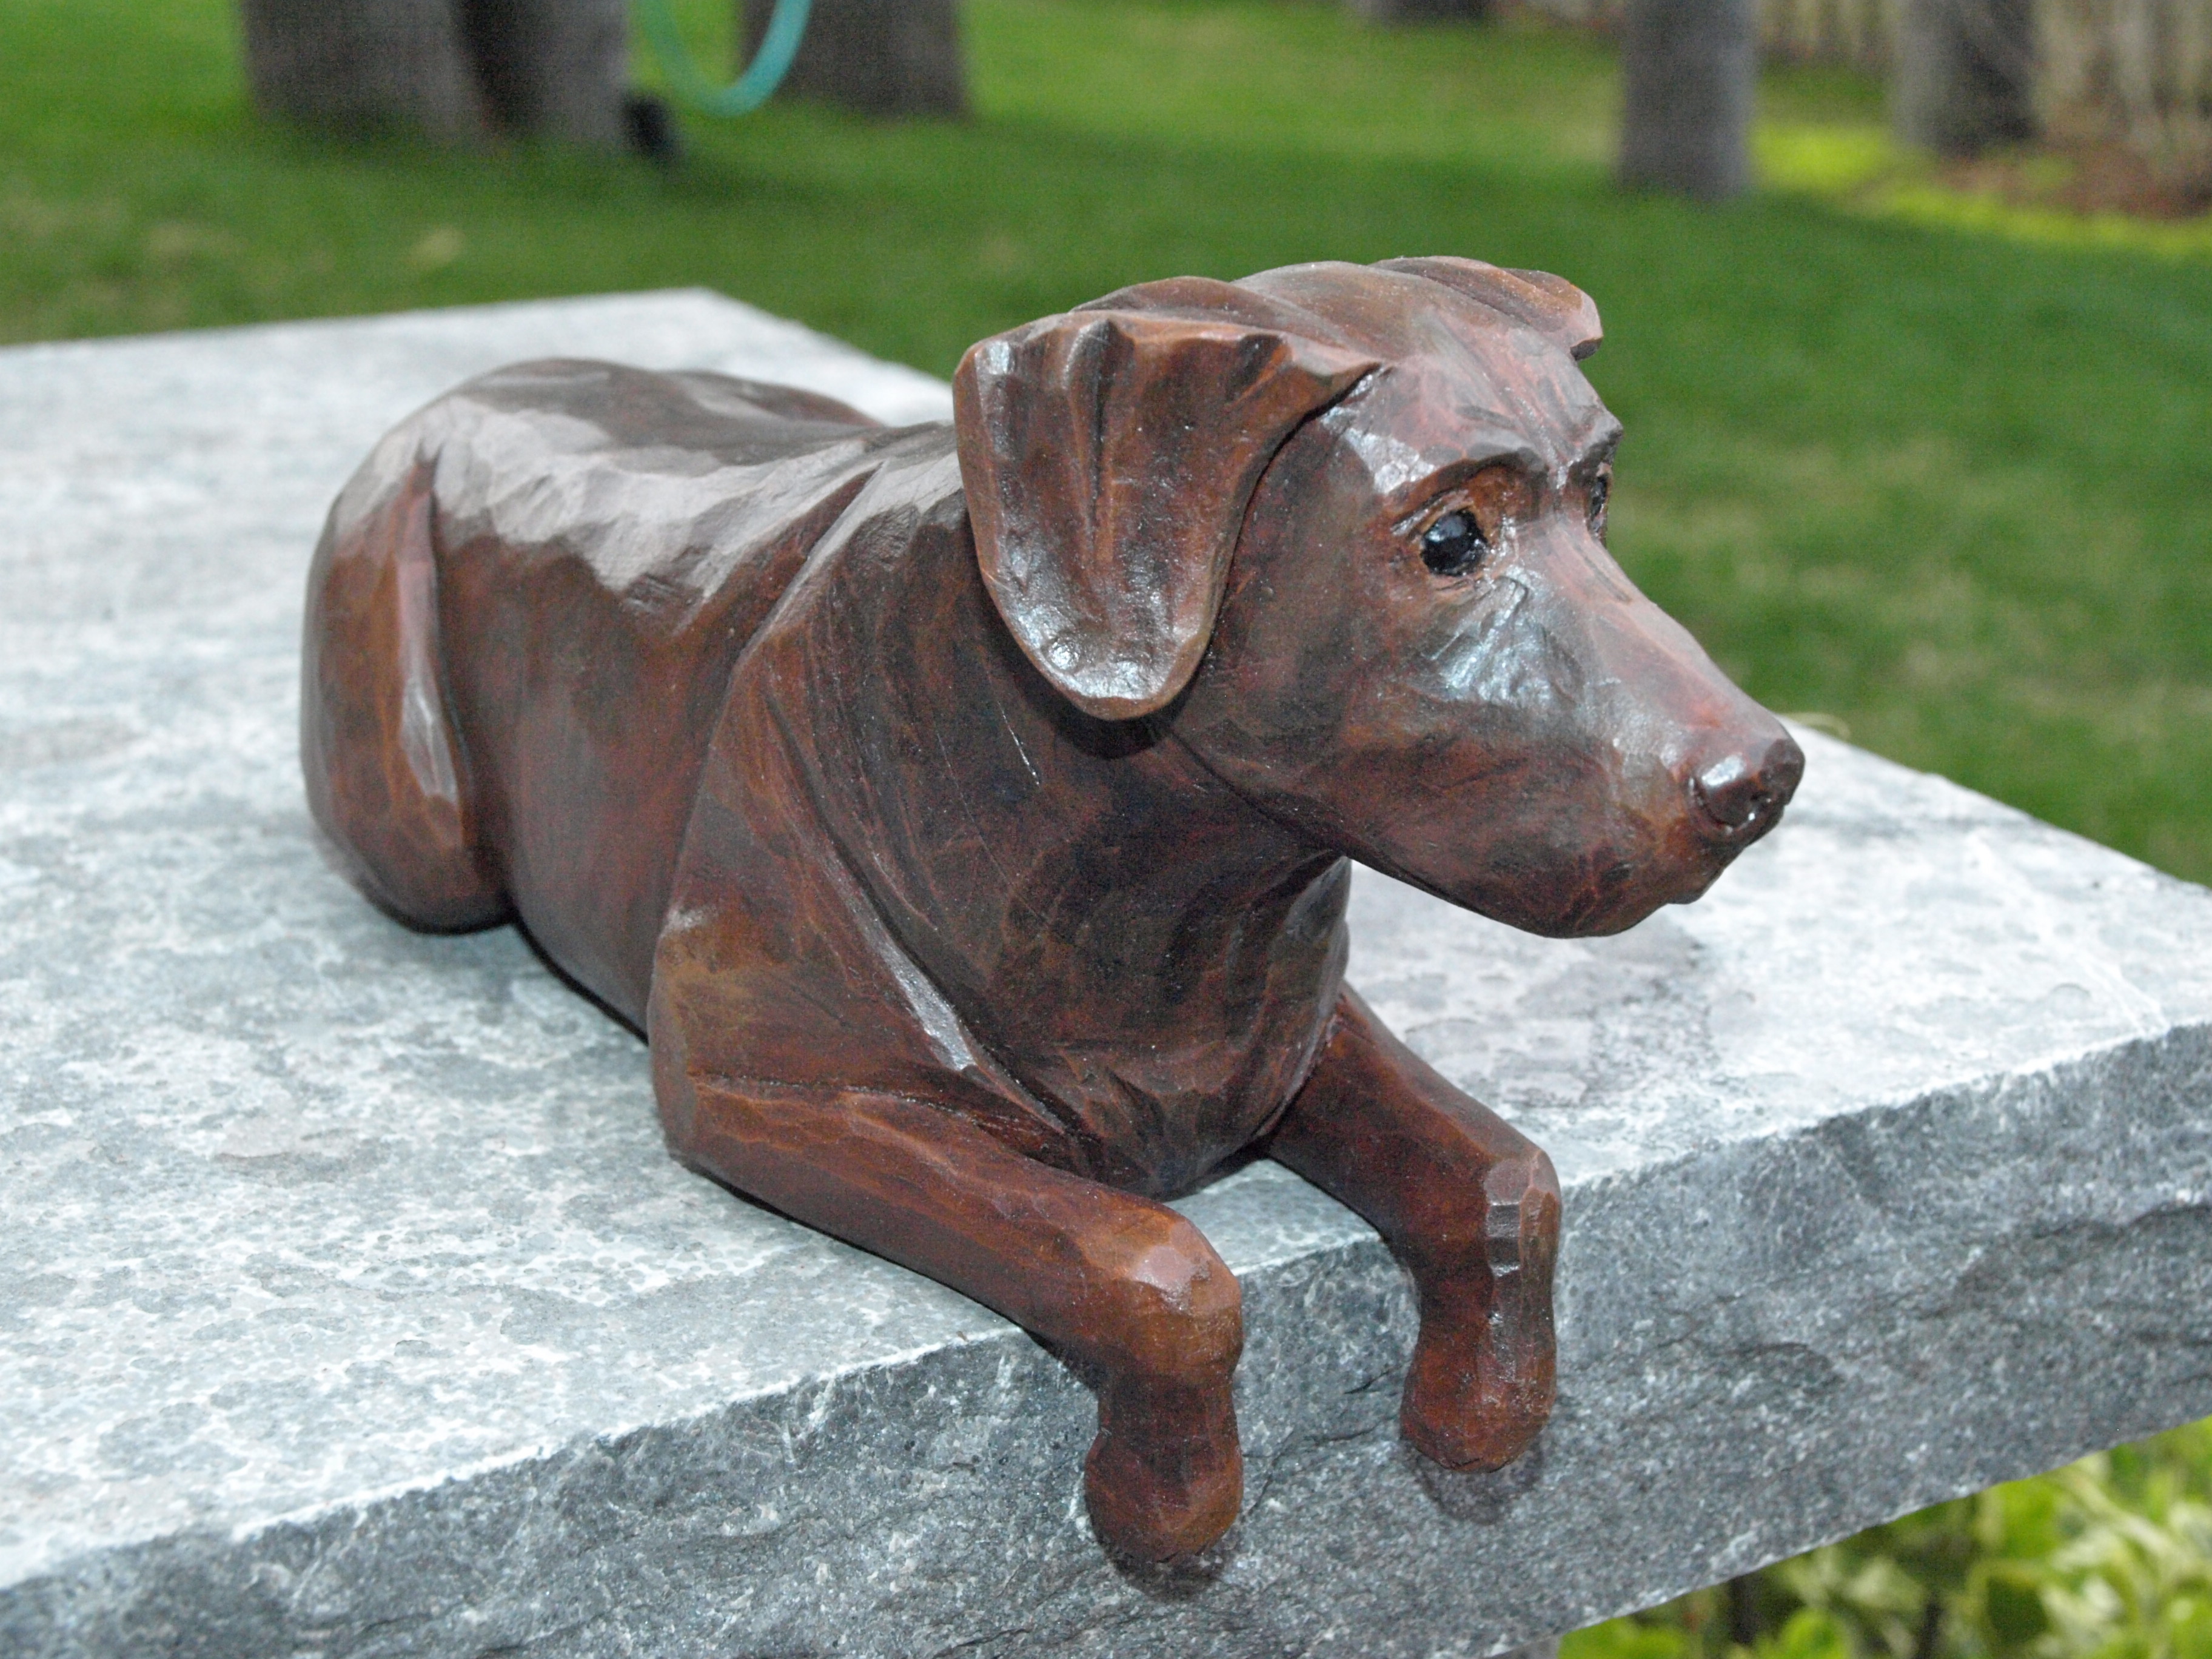
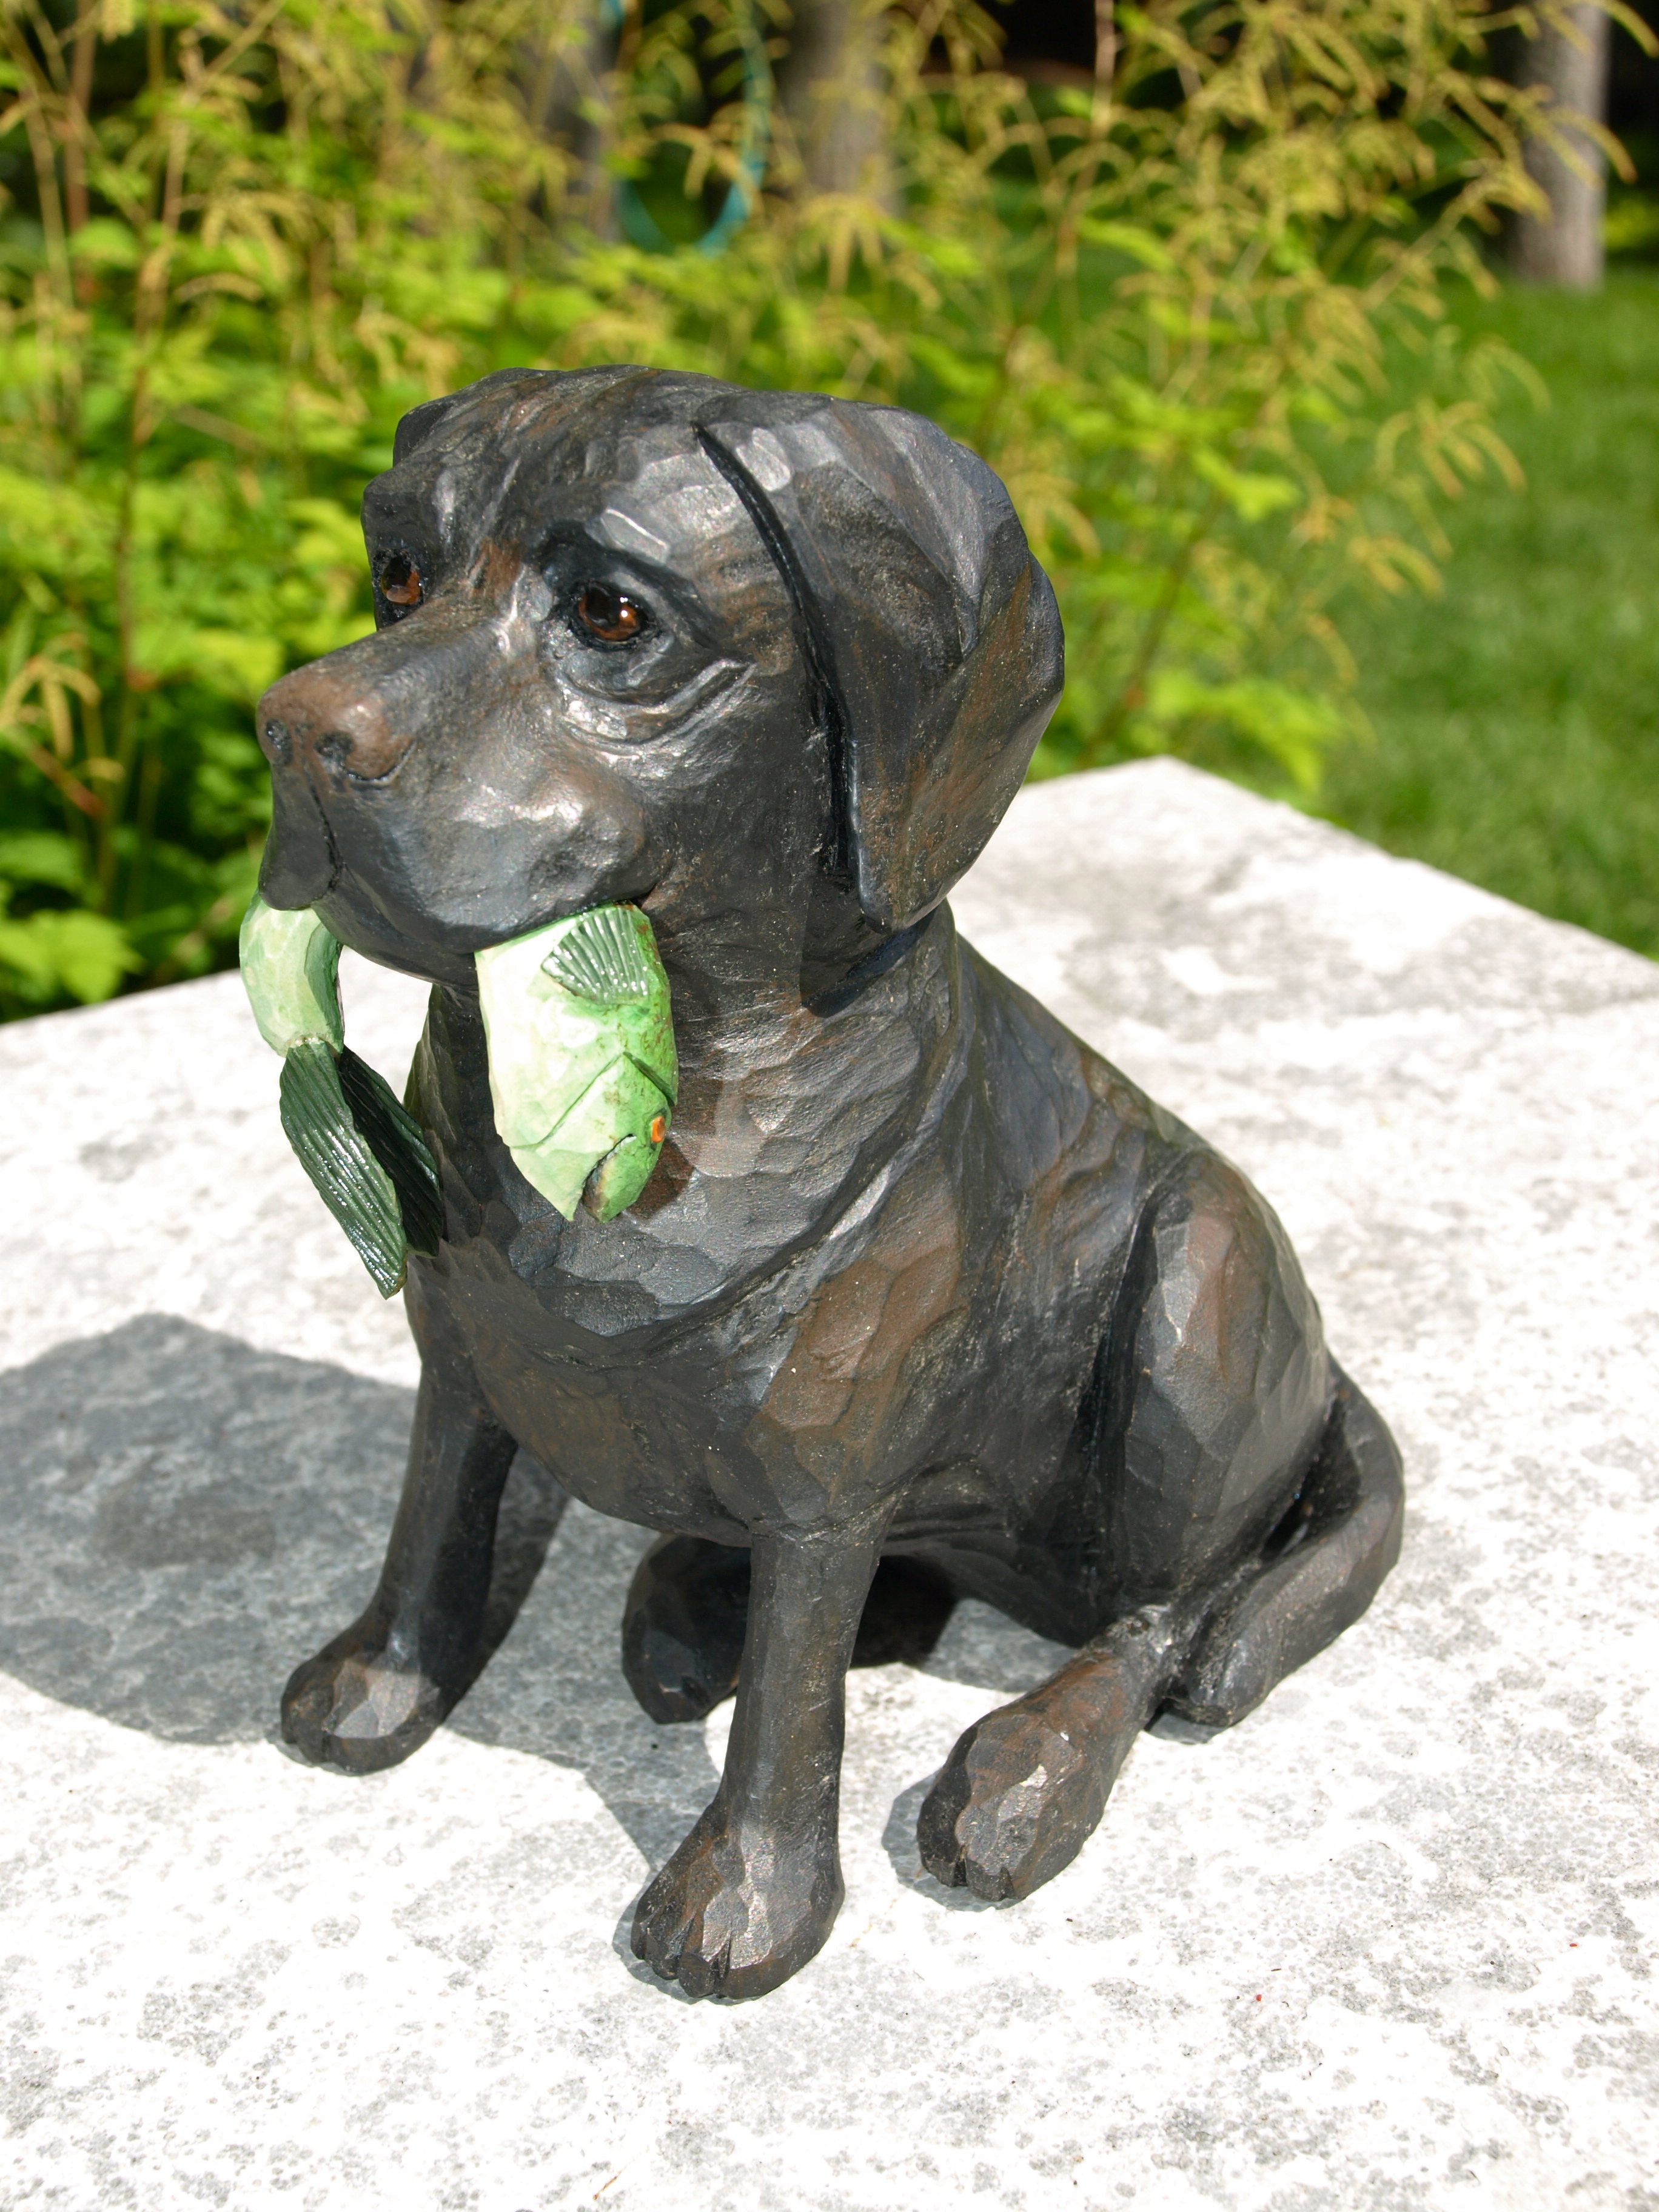
Then it was on to the painting. I had several photos of “Toby” and noticed that his colouring changed with lighting as he had a number of shades of brown with black in his coat. So, I started with a milk chocolate base of acrylics…a solid coat across his body with this colour. Then, I added some asphaltum (brown ) in more of a “wash”. What I mean by that is that I watered down this colour considerably and layered a coat of this very translucent asphaltum over the milk chocolate base. By using a hair dryer between coats, you can lay five or six coats of this wash on pretty quickly. The net result is that the wash finds the low points of the carving and desposits its colour in these points. The photo, below, picks up the result of that. A light coat of satin urethane followed.

After continuing to look at the carving, I decided that I wanted it a bit darker. I very lightly “sanded” the carving with #0000 grade steel wool, vacuumed it completely, and added several more wash coats with asphaltum ( brown ) mixed with black. This did the trick for me from a colouring perspective. I gave the carving another coat of satin urethane immediately wiping the urethane off again with a paper towel. This later method of final urethane coat is a tip that I picked up from Lynn Doughty on his website ( the link is at the right of my page ). It’s a method that ensures that the urethane doesn’t end up too, too shiny.
You’ll also notice that I painted an iris on the eyes using milk chocolate. If you take a look at a Labrador, and most dogs, their eyes are all dark with a large black pupil. You can only really see the whites of their eyes if you have them look way up or pull their eyelids down a bit. Finally, I added some clear two part epoxy to each of the eyes with a toothpick to give them a glassy look. That turned out nicely…the light shines off of those glassy eyes and gives you the feeling that they’re watching you.

The painting of the dock, paddles and decoy were pretty straight forward. Again a variety of acrylic colours. You want to avoid just adding a single colour to anything…use the full palette of colours available to you. As an example, the canoe paddles started with school bus yellow and blue tips/ends. Then I literally scrubbed some yellow ochre and raw sienna onto them…I really mean scrubbed…just a little of the colour on your paintbrush and then with the tip of your finger on the hairs of the brush, “scrub” the paint into a small patch on the carving. Don’t be too careful, just put it anywhere. Then I took an ivory colour and after taking most of the colour off of the hairs of the brush with a paper towel, I “fanned”…just barely touched…the paddles all over just enough to deposit the ivory colour on the highest parts of the carving. All of this was again followed with a coat of urethane wiped off with a paper towel immediately.
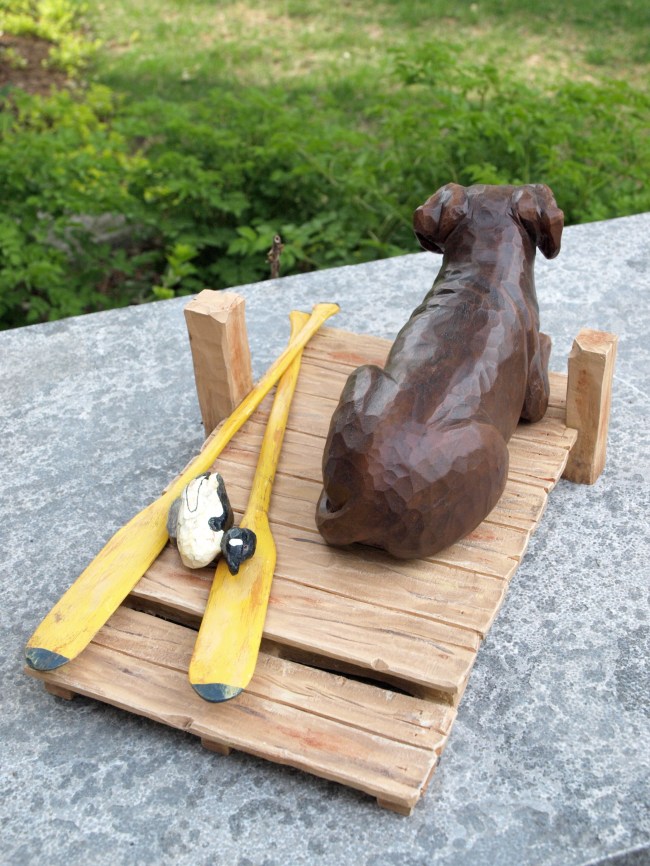
I like an irregular base on these types of carvings…they just look nicer to me. The base is simply 1/2″ oak with a routered edge, stained and coated with urethane. Screws are countersunk from the bottom of the base into the dock, which has some two part epoxy as well. All of the other pieces are two part epoxied onto the dock.
Hope that you found that helpful and interesting. If I missed something that you would be interested in understanding, just let me know.