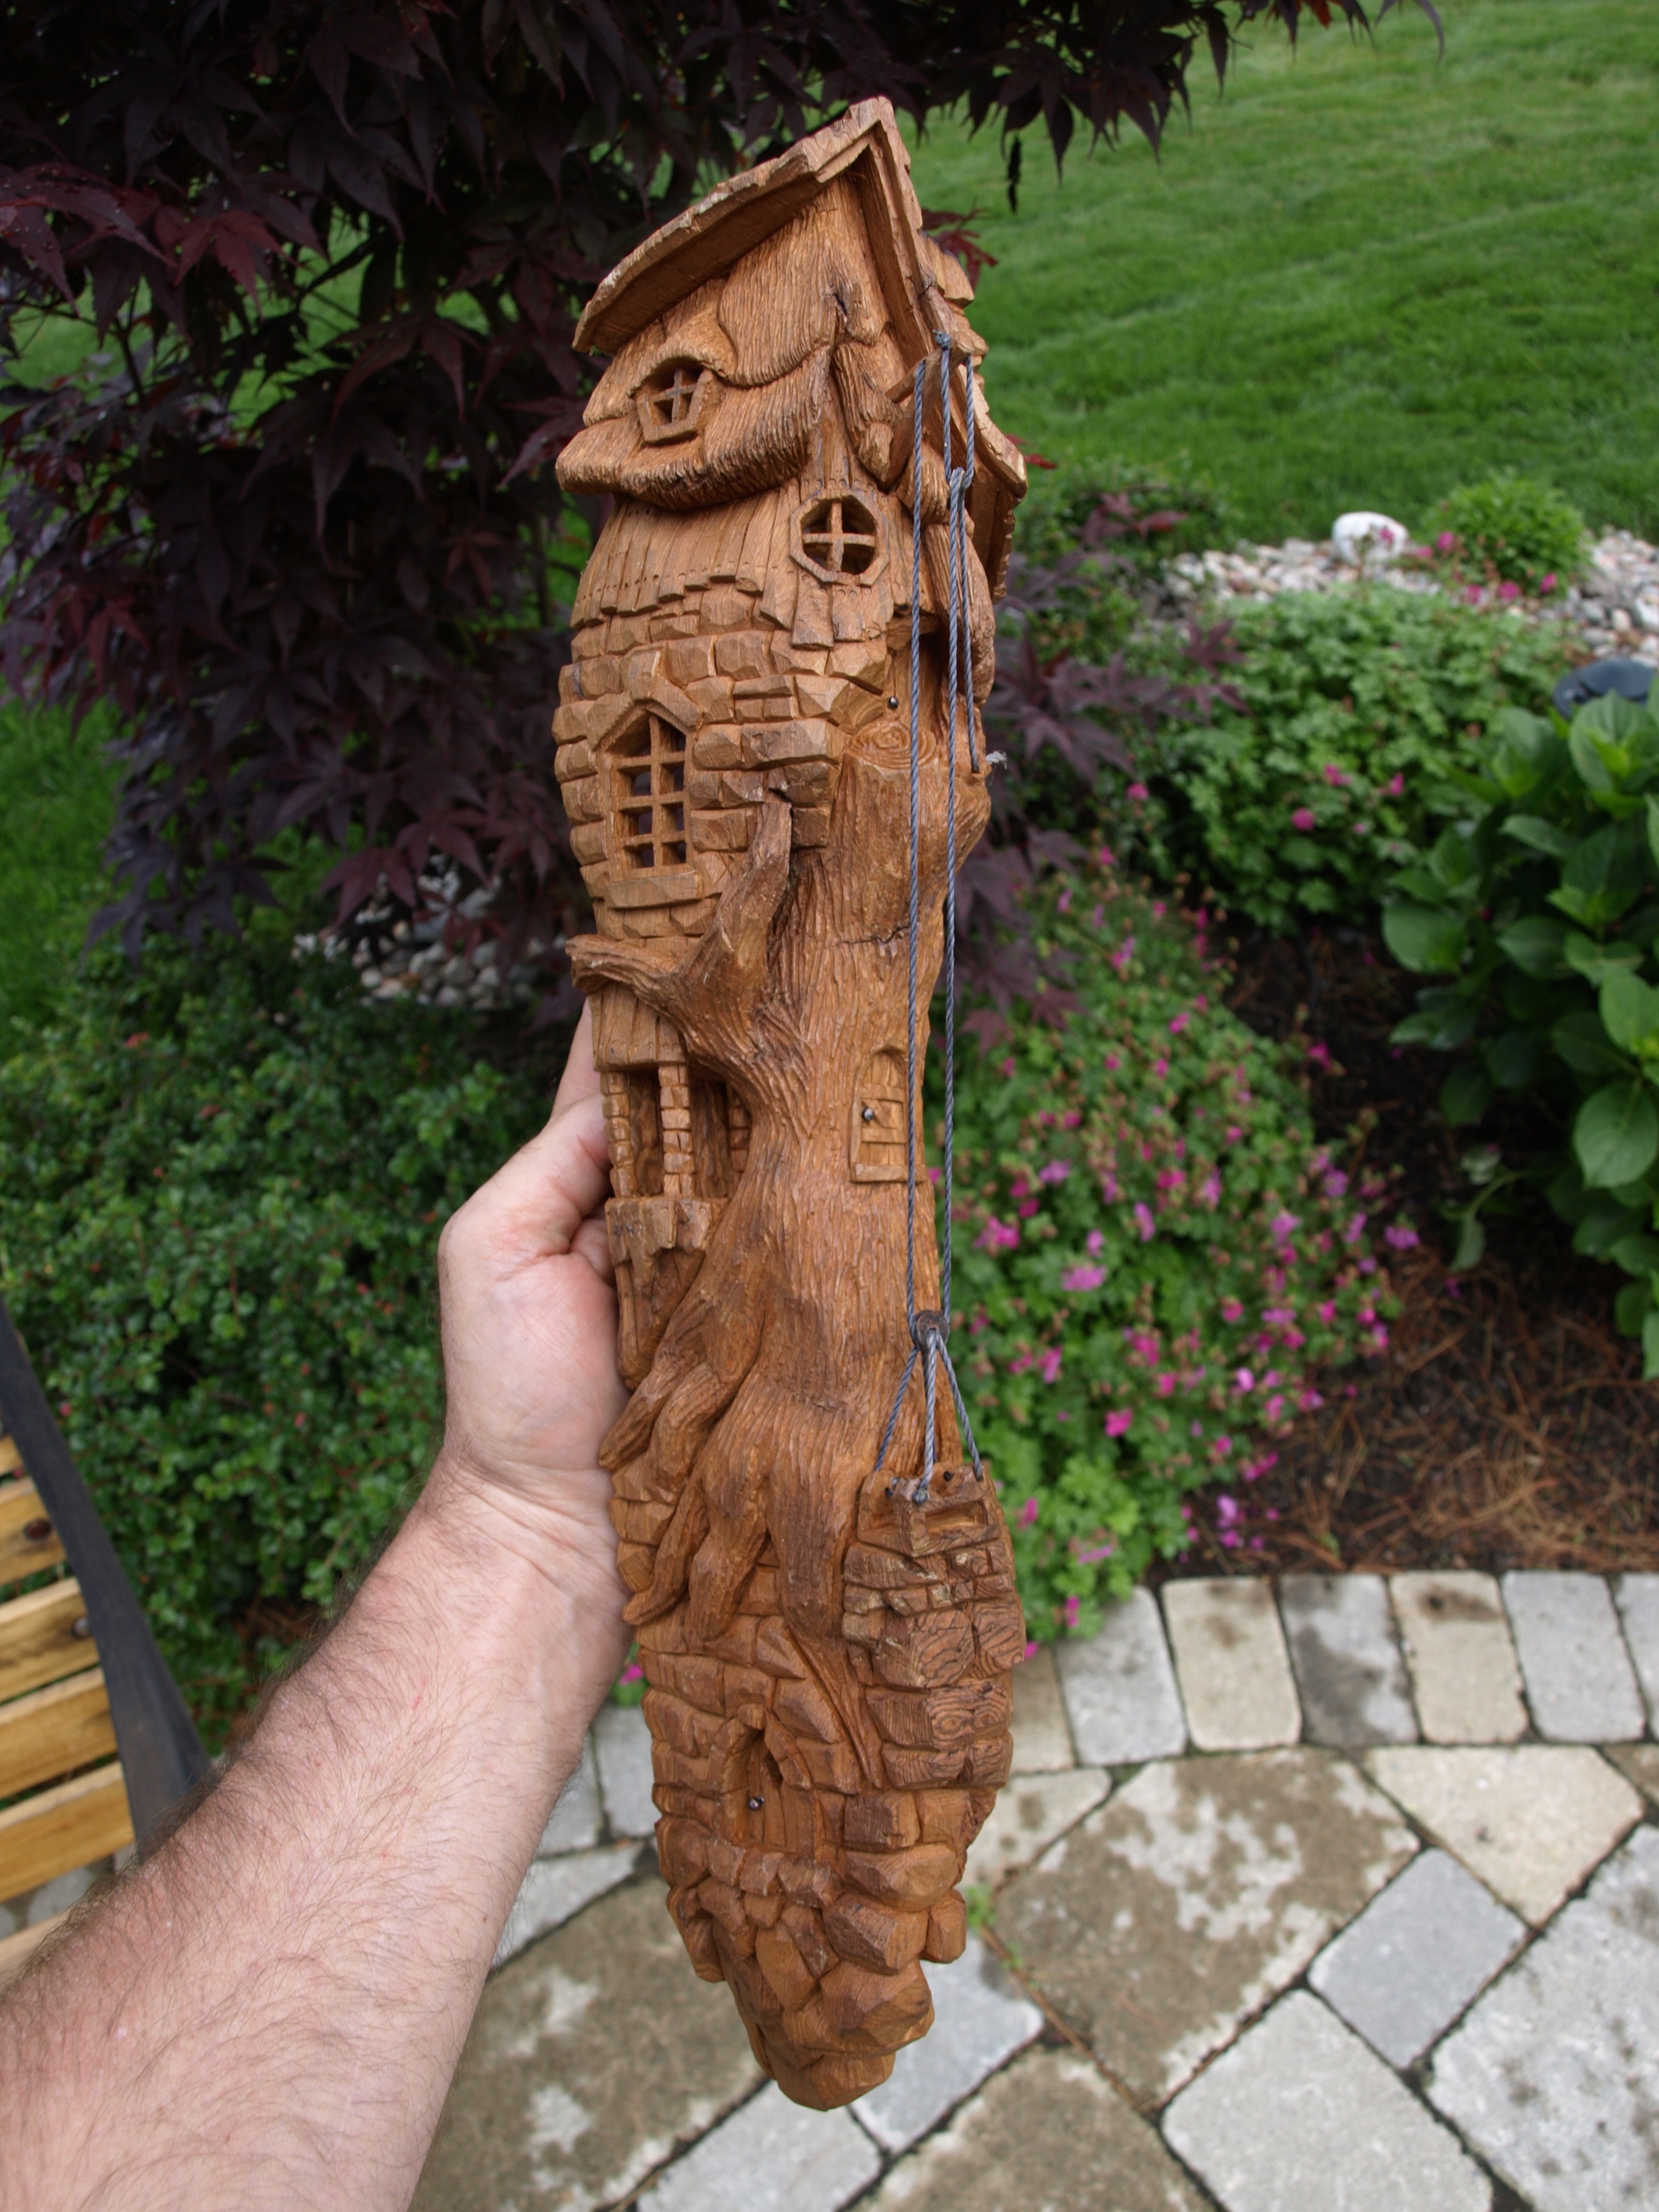
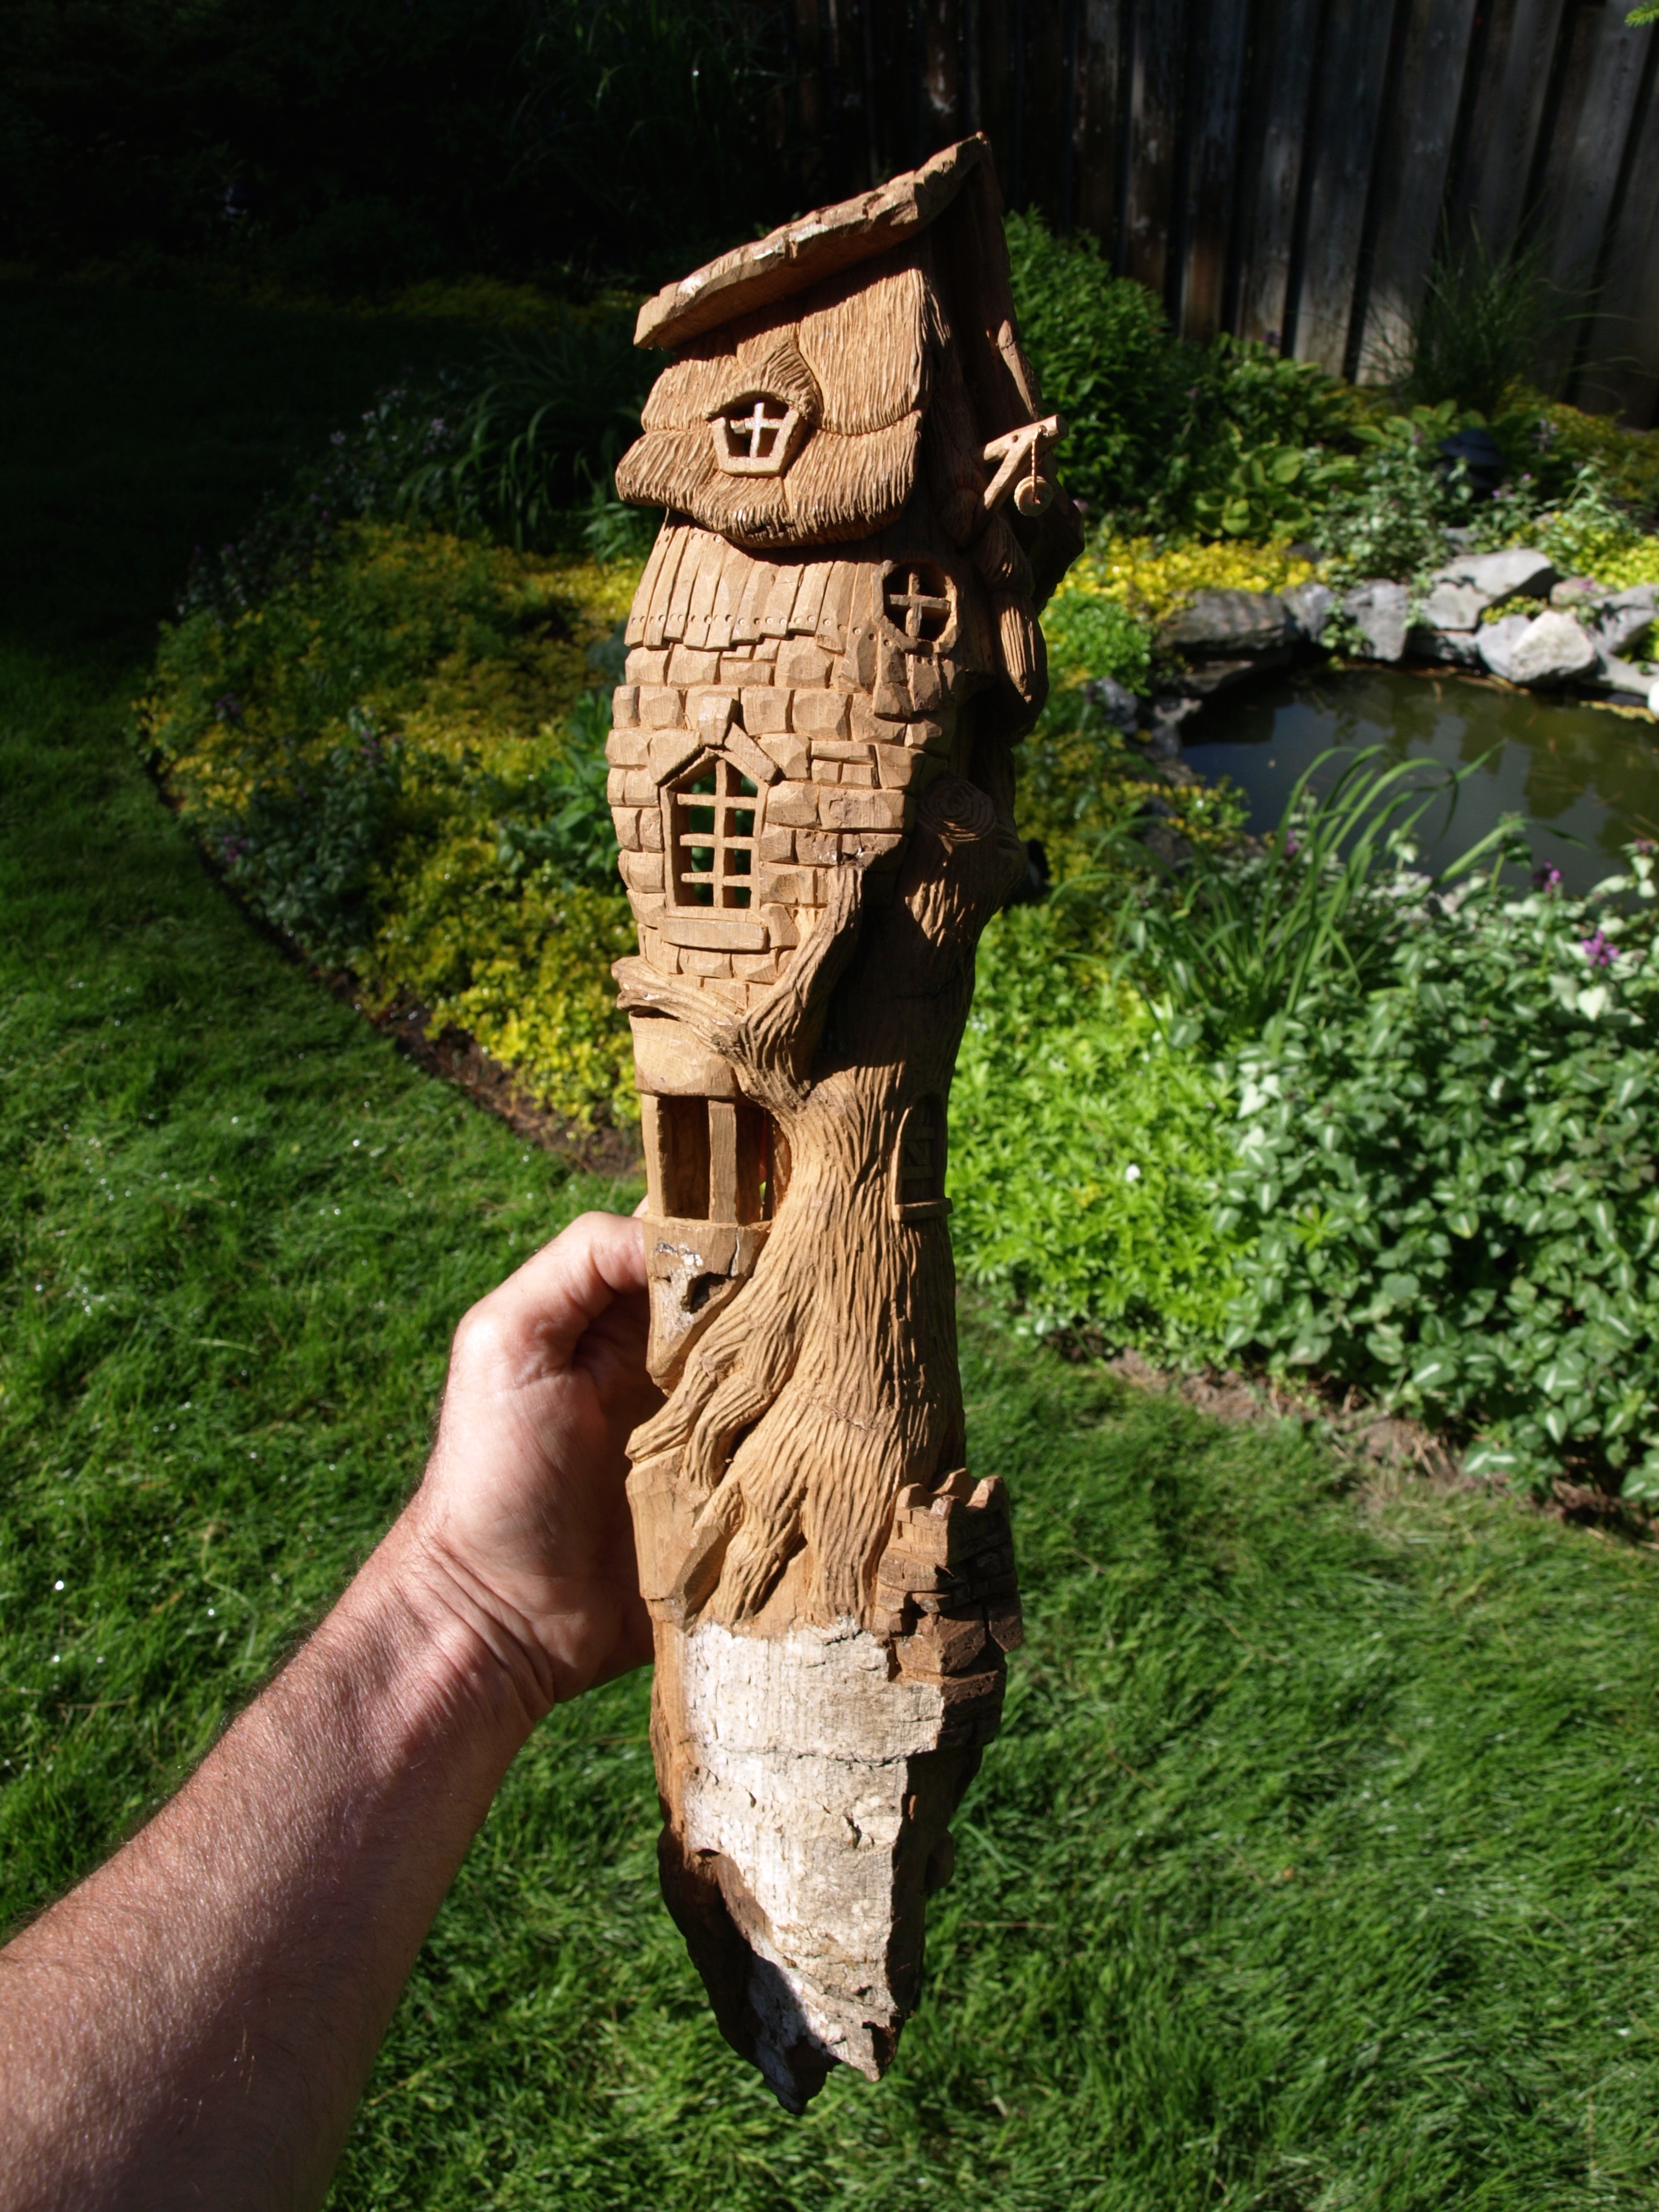
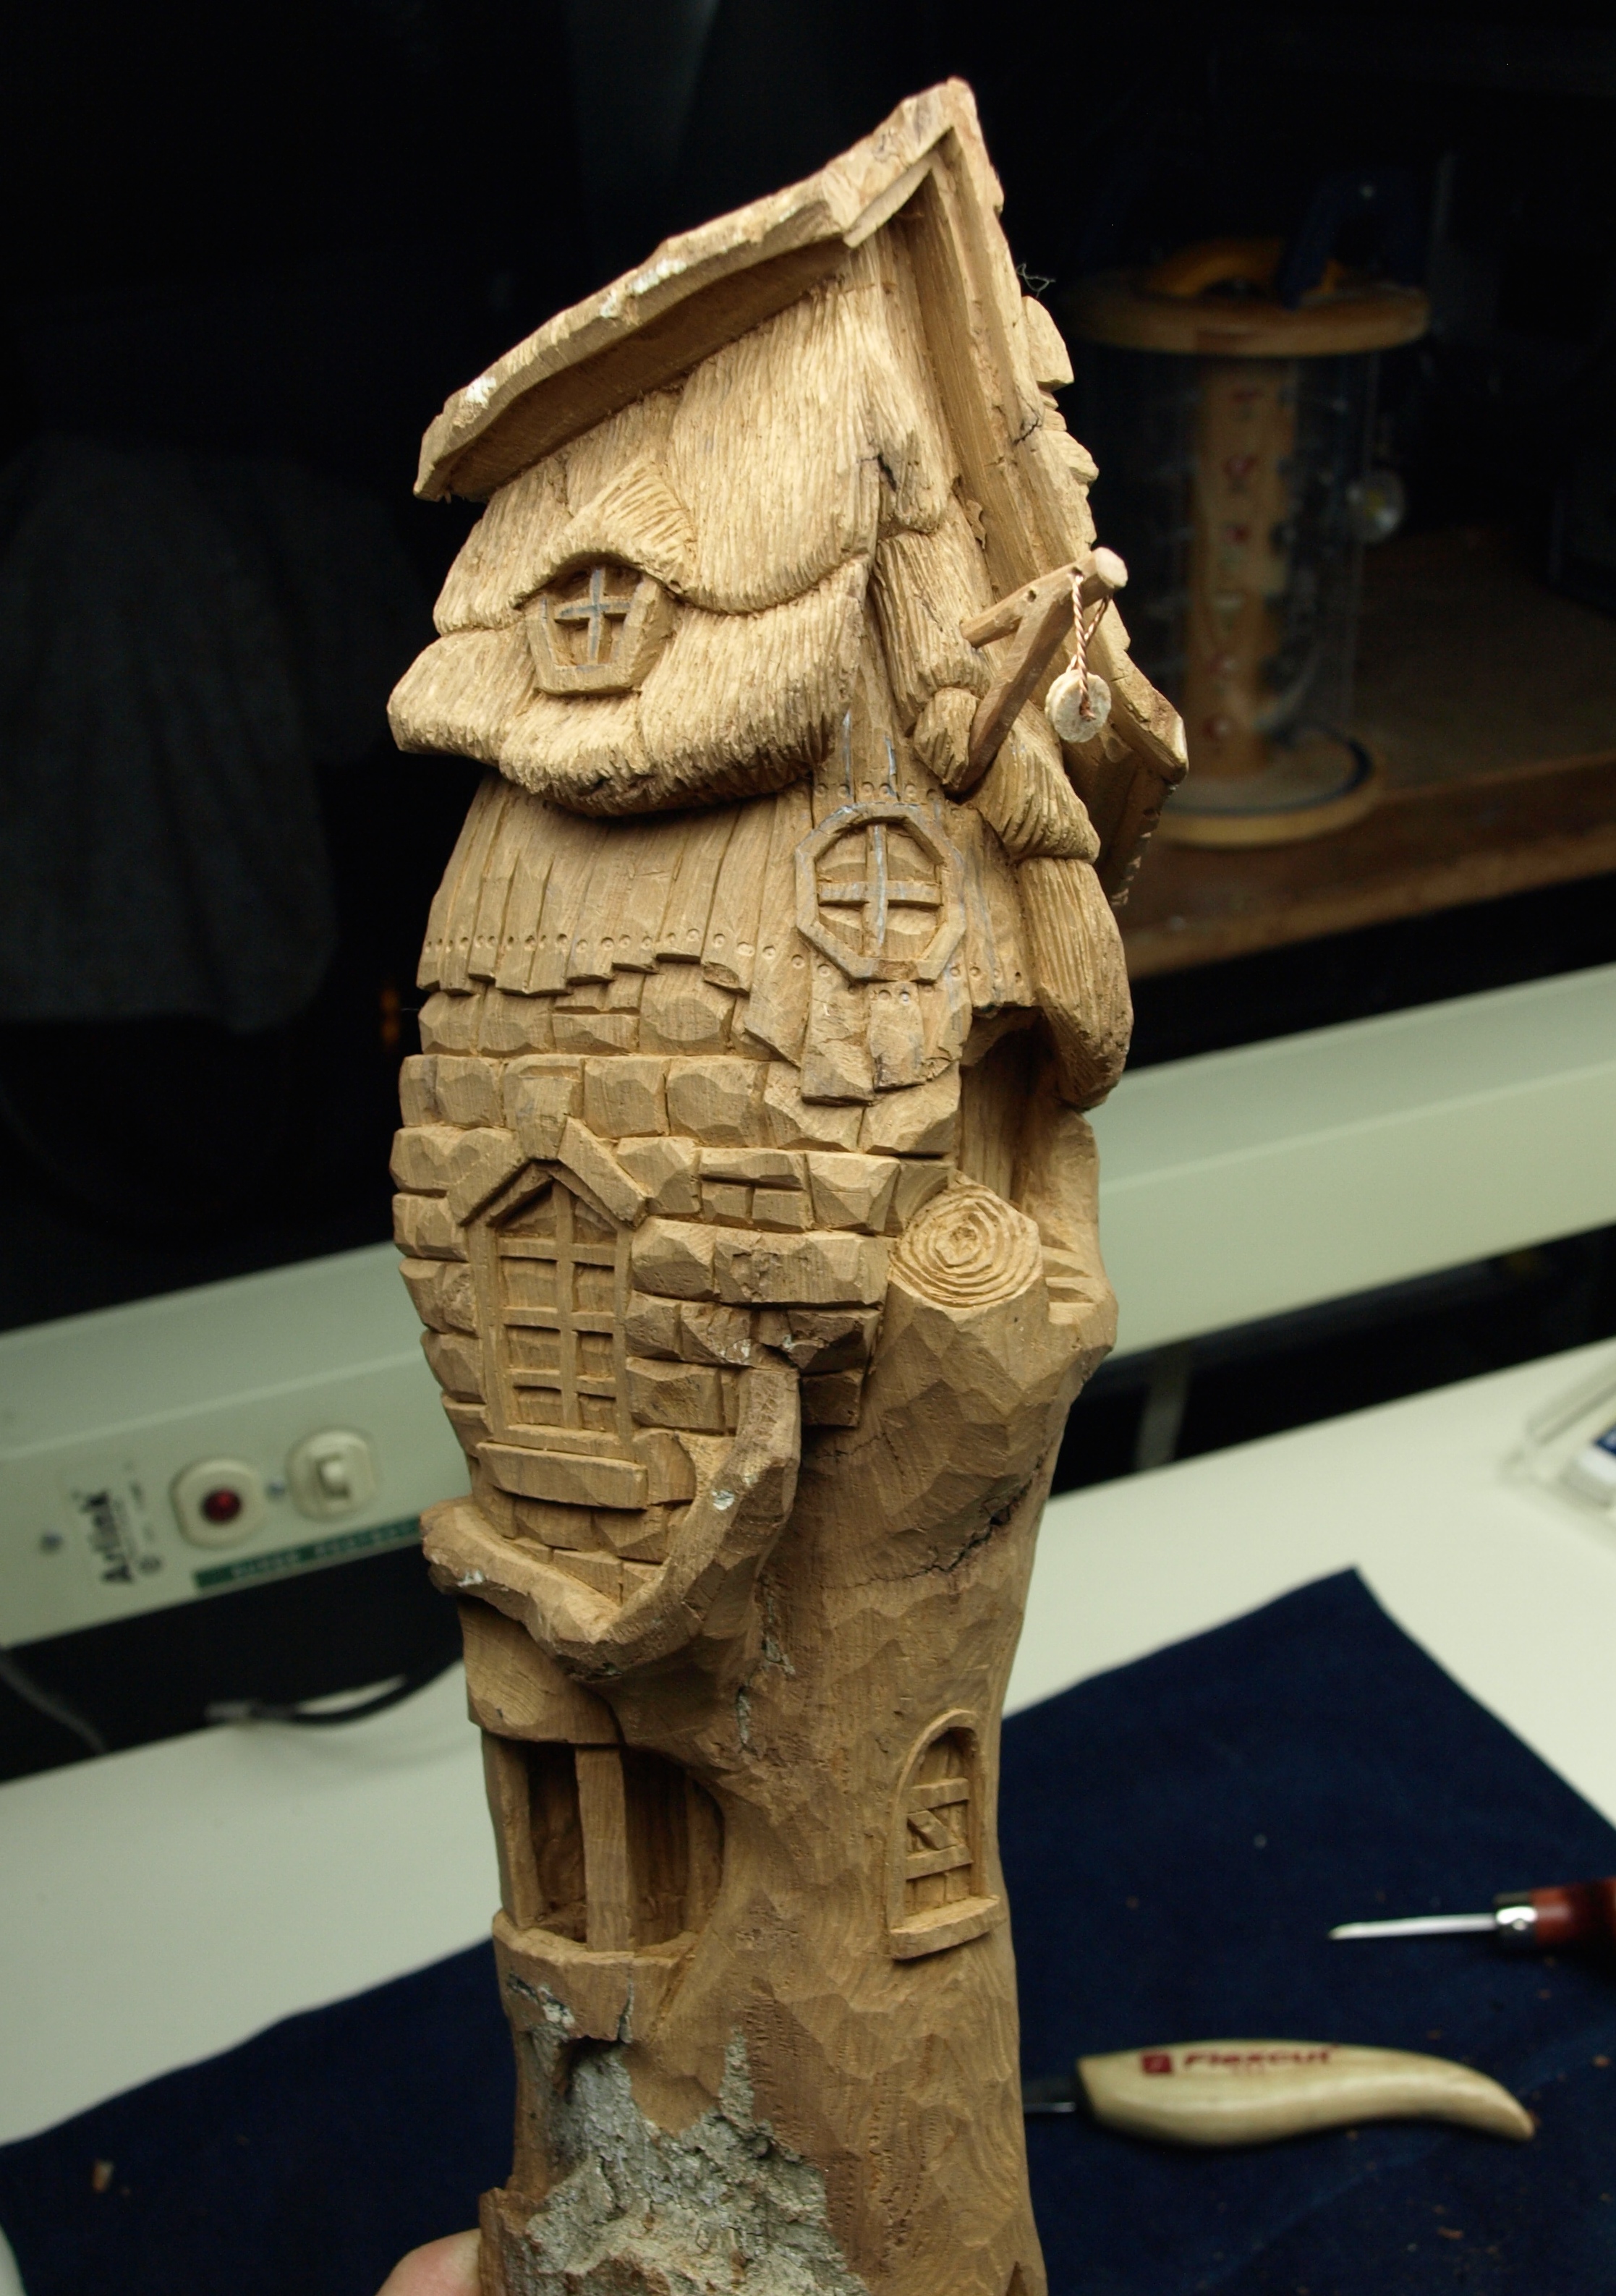
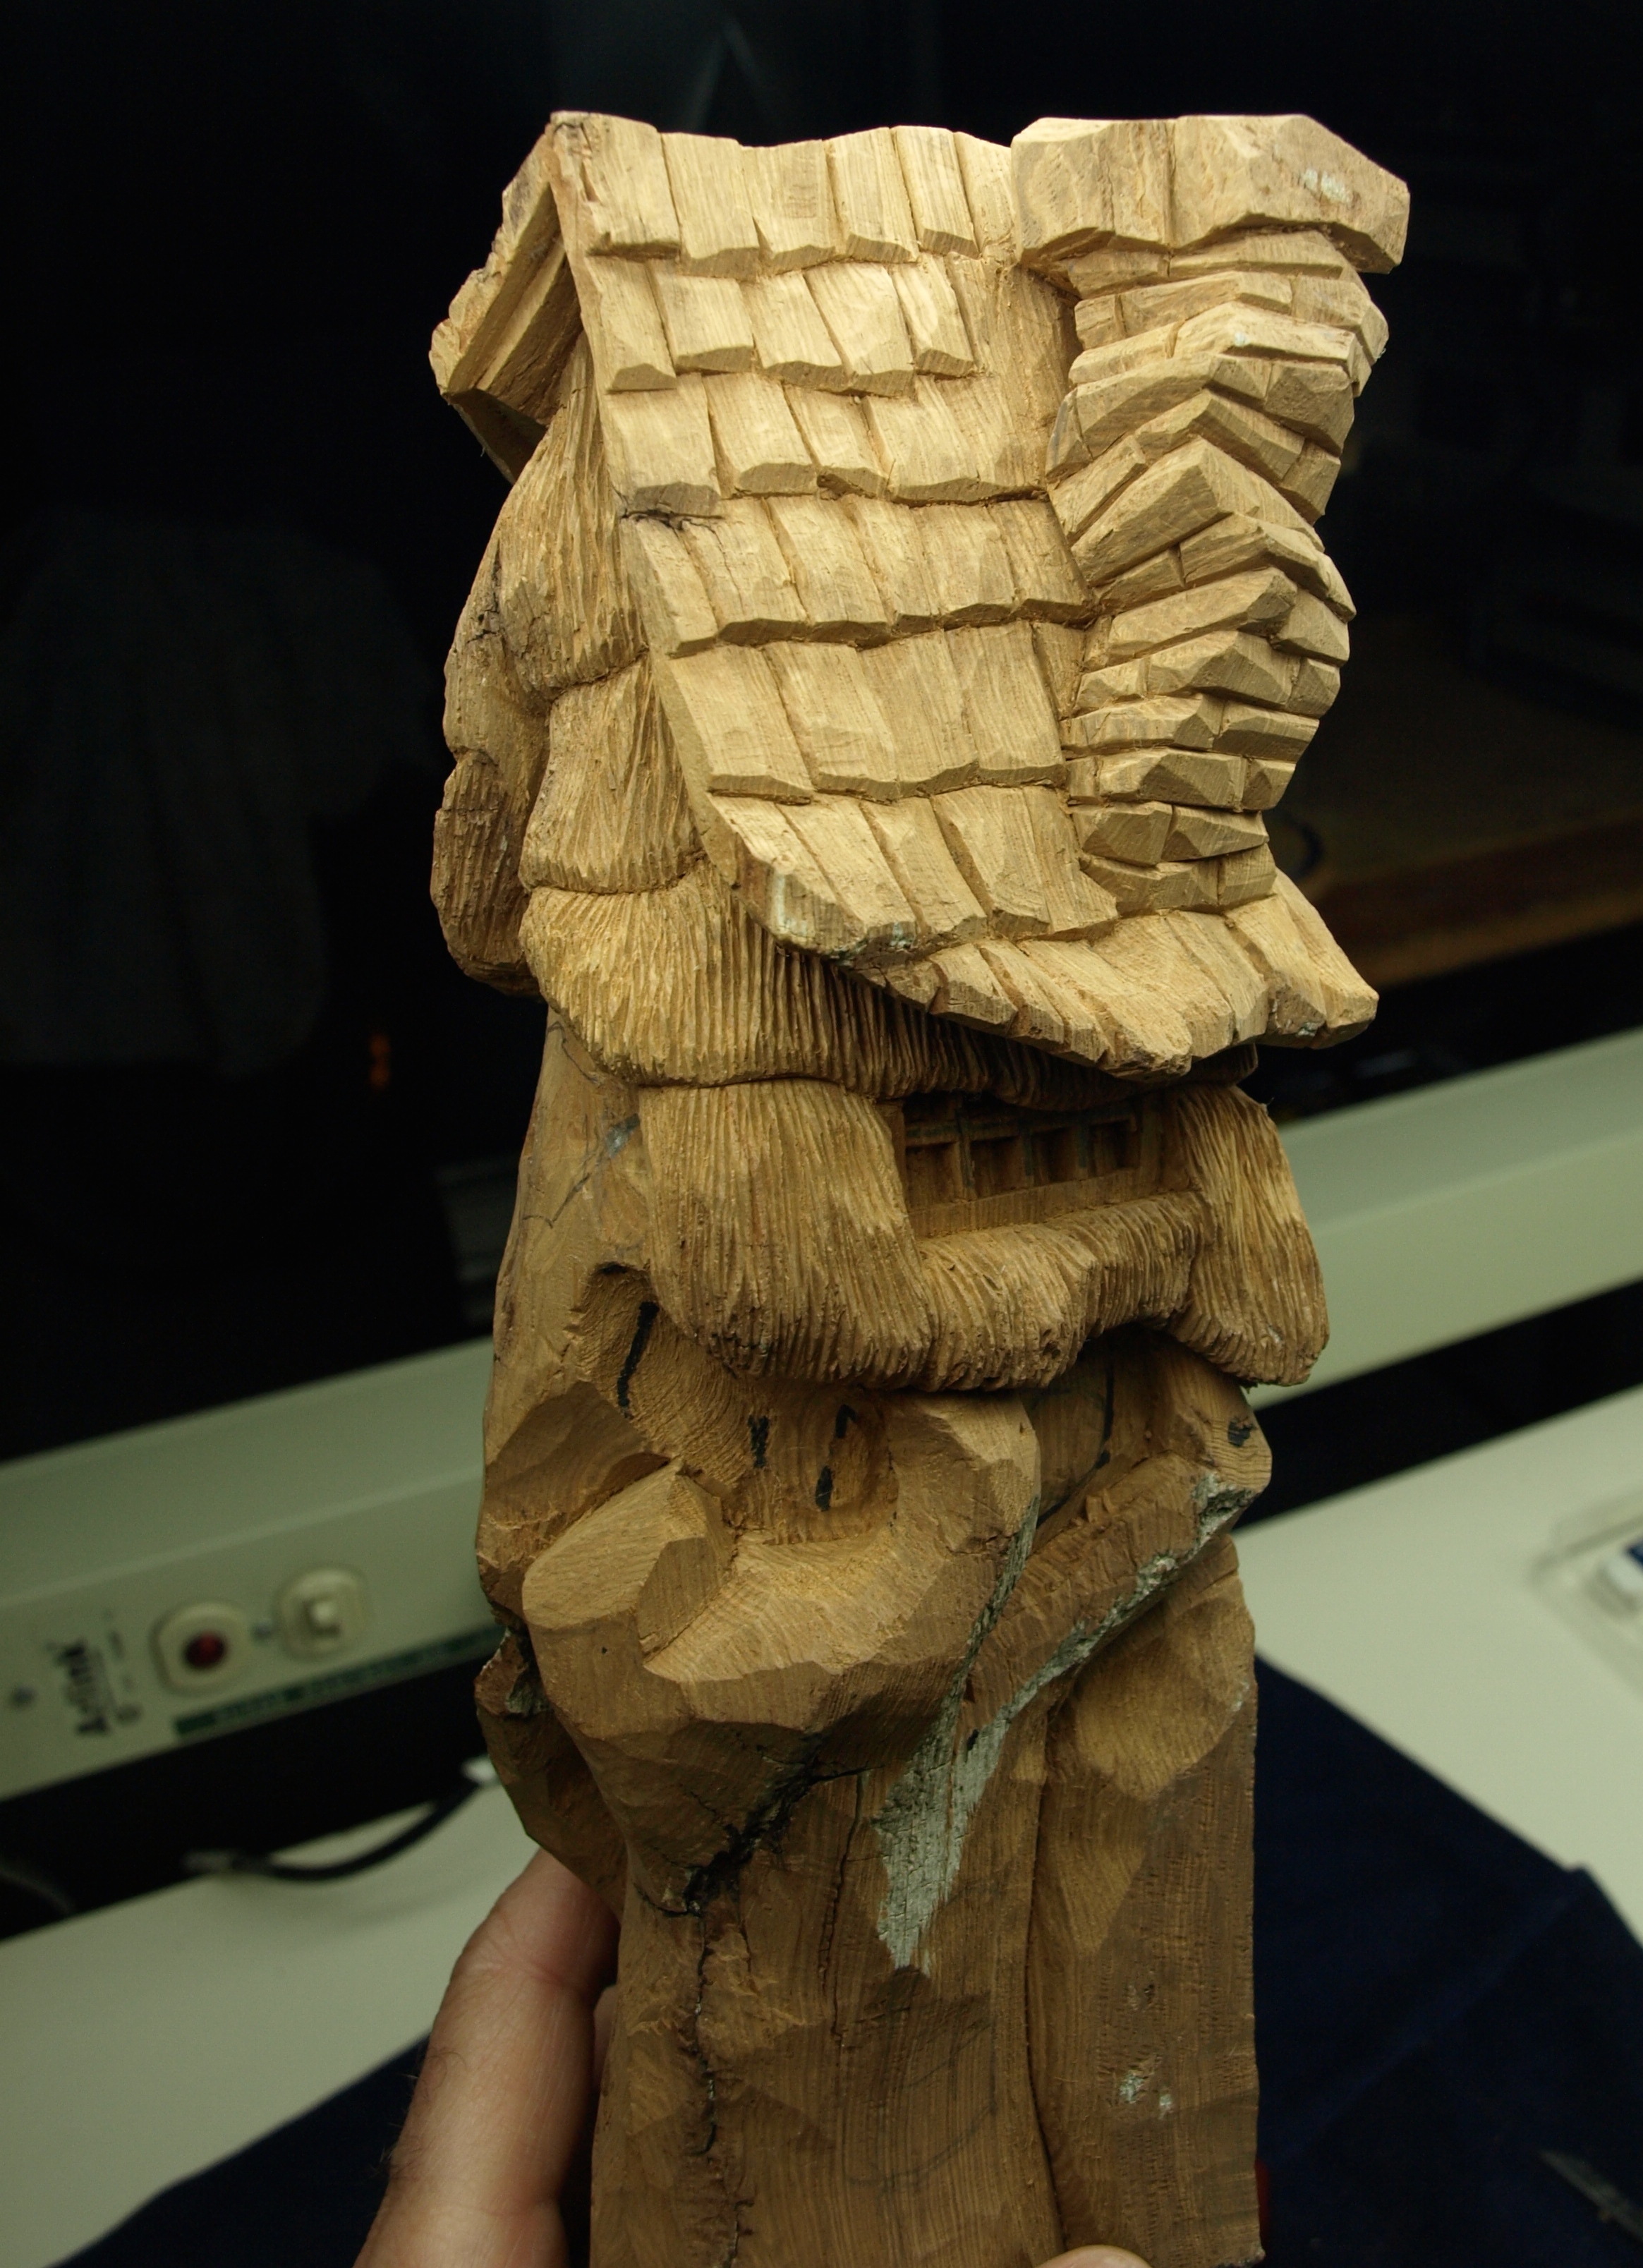
tributesinwood

Wood Carvings by Mark Sheridan

Archive for the category “Cottonwood Cottage”

Cottonwood Villa

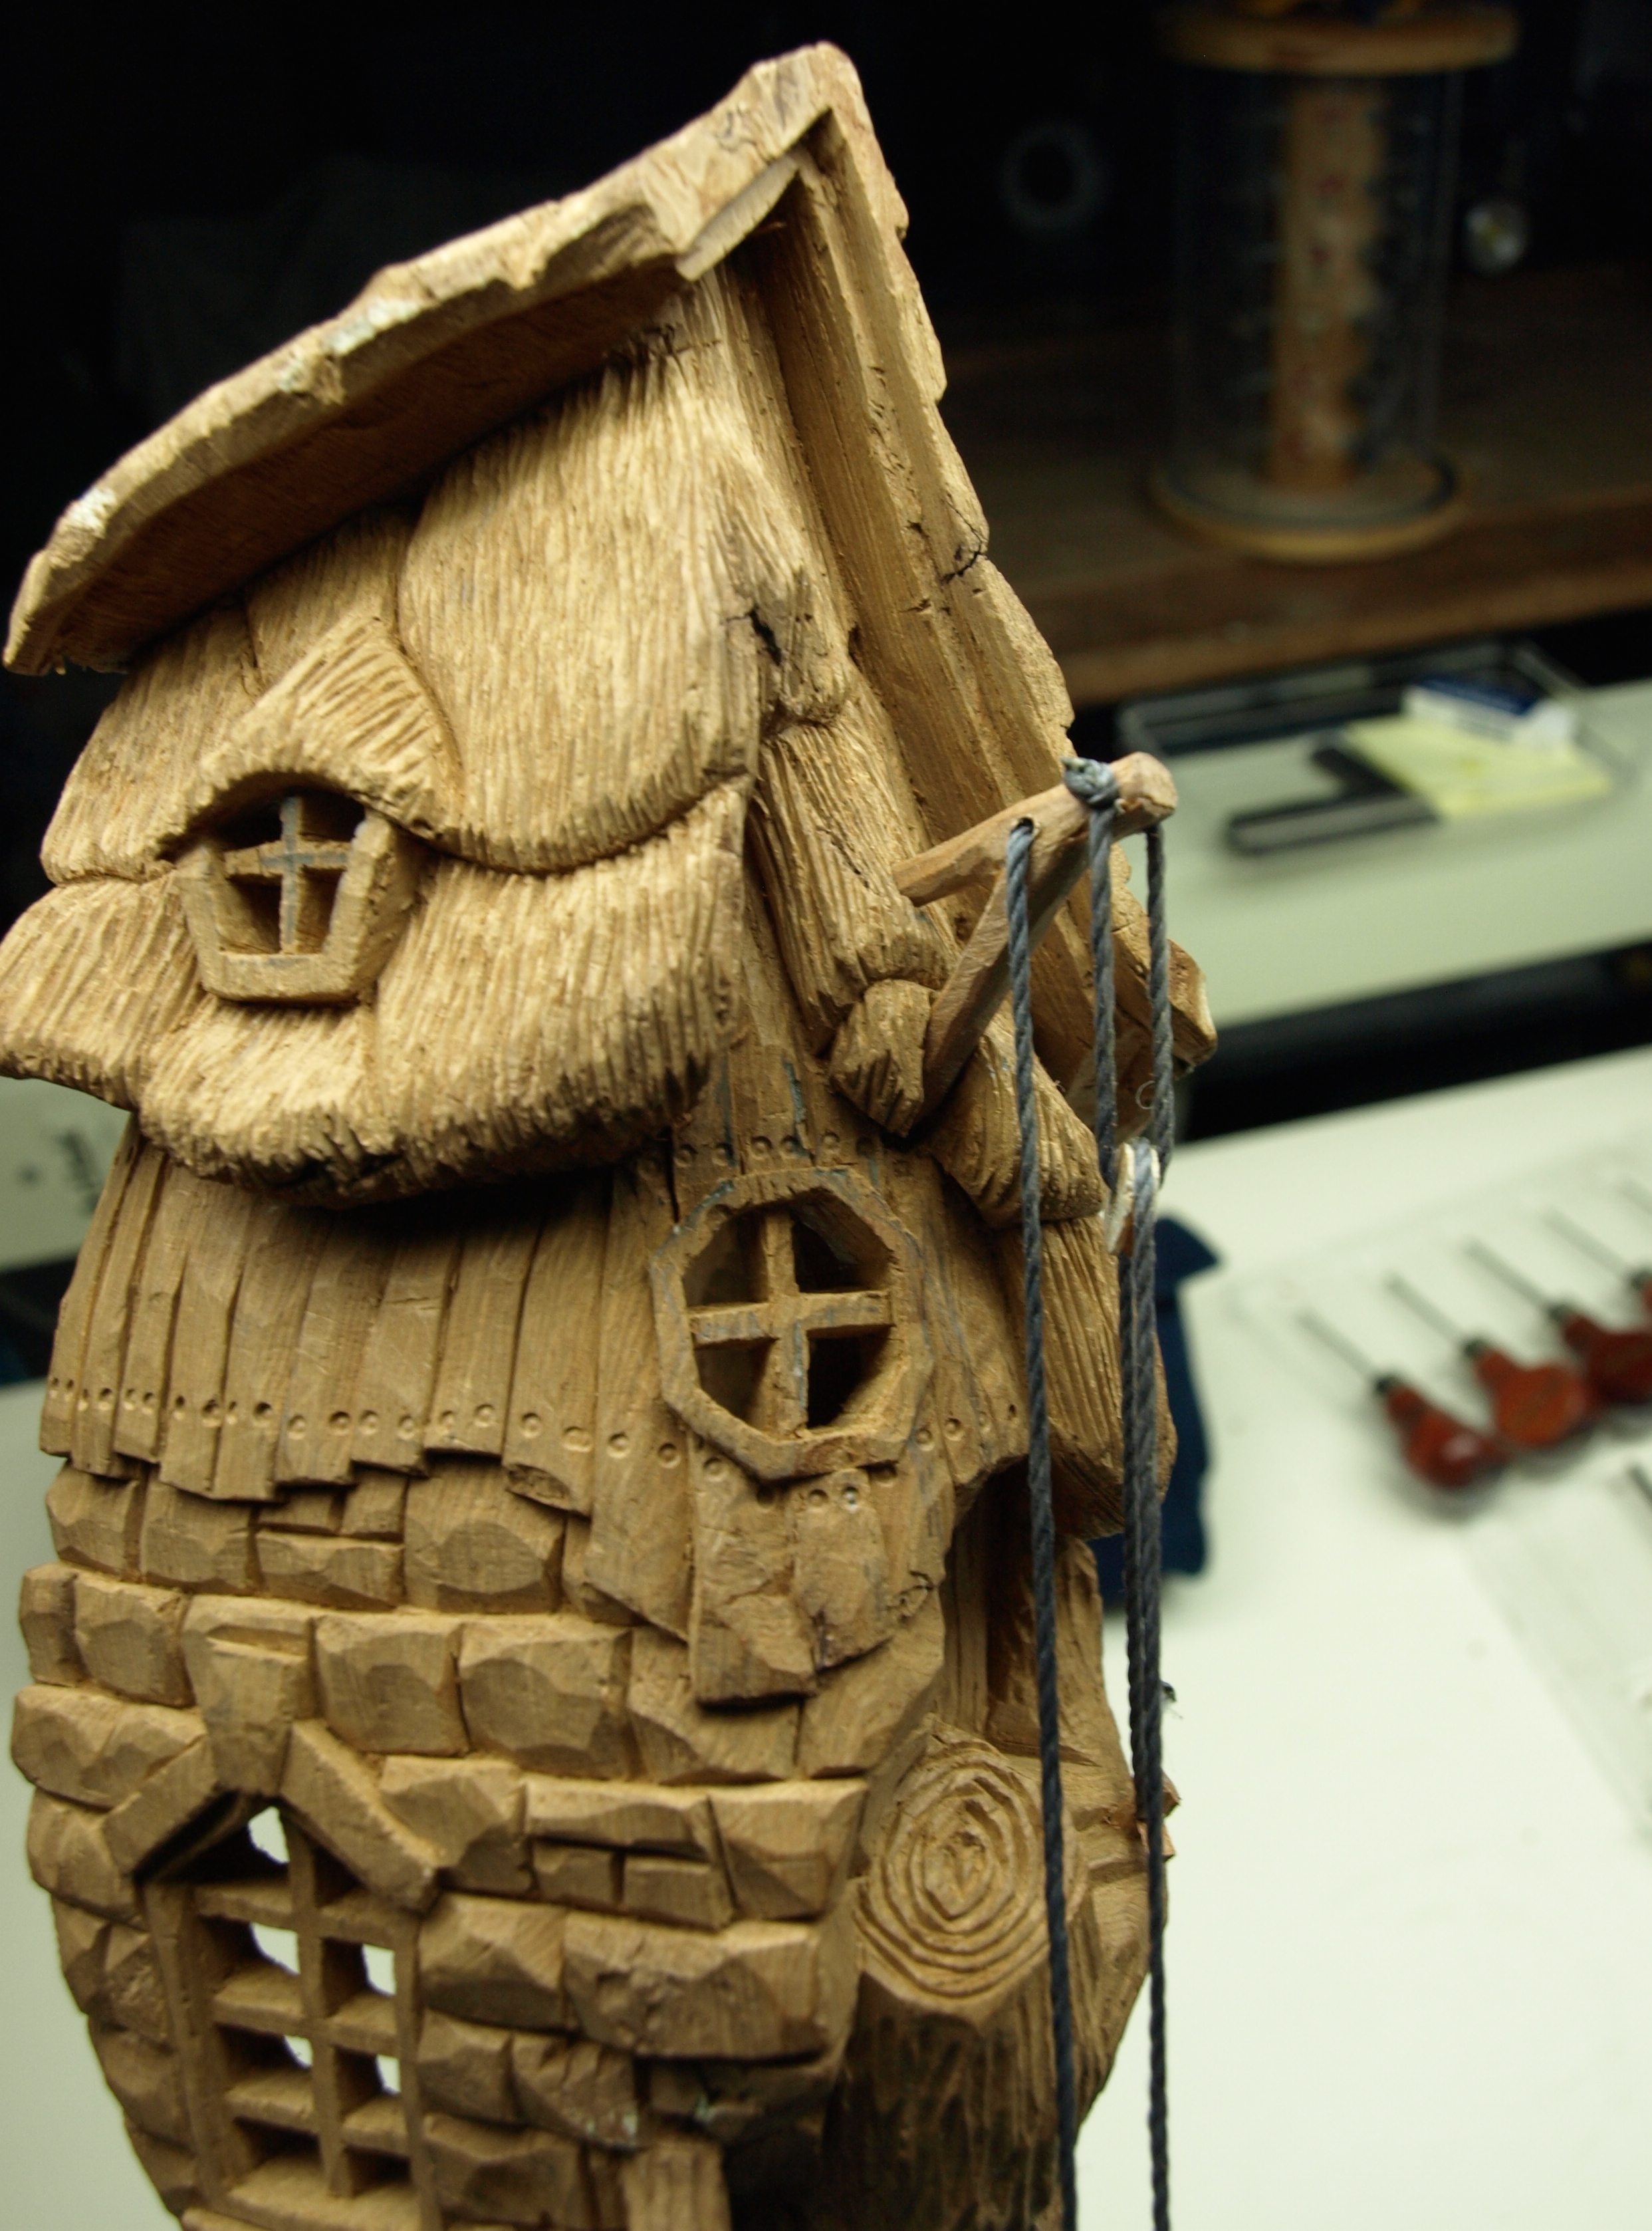
Last fall my neighbour brought me a basket of Cottonwood bark from a tree at his cottage.  I didn’t realize that there were Cottonwood trees in Ontario.  The bark is a bit different from the same tree bark that I’ve carved from western Canada, but the general “carve-ability” of the bark is the same.

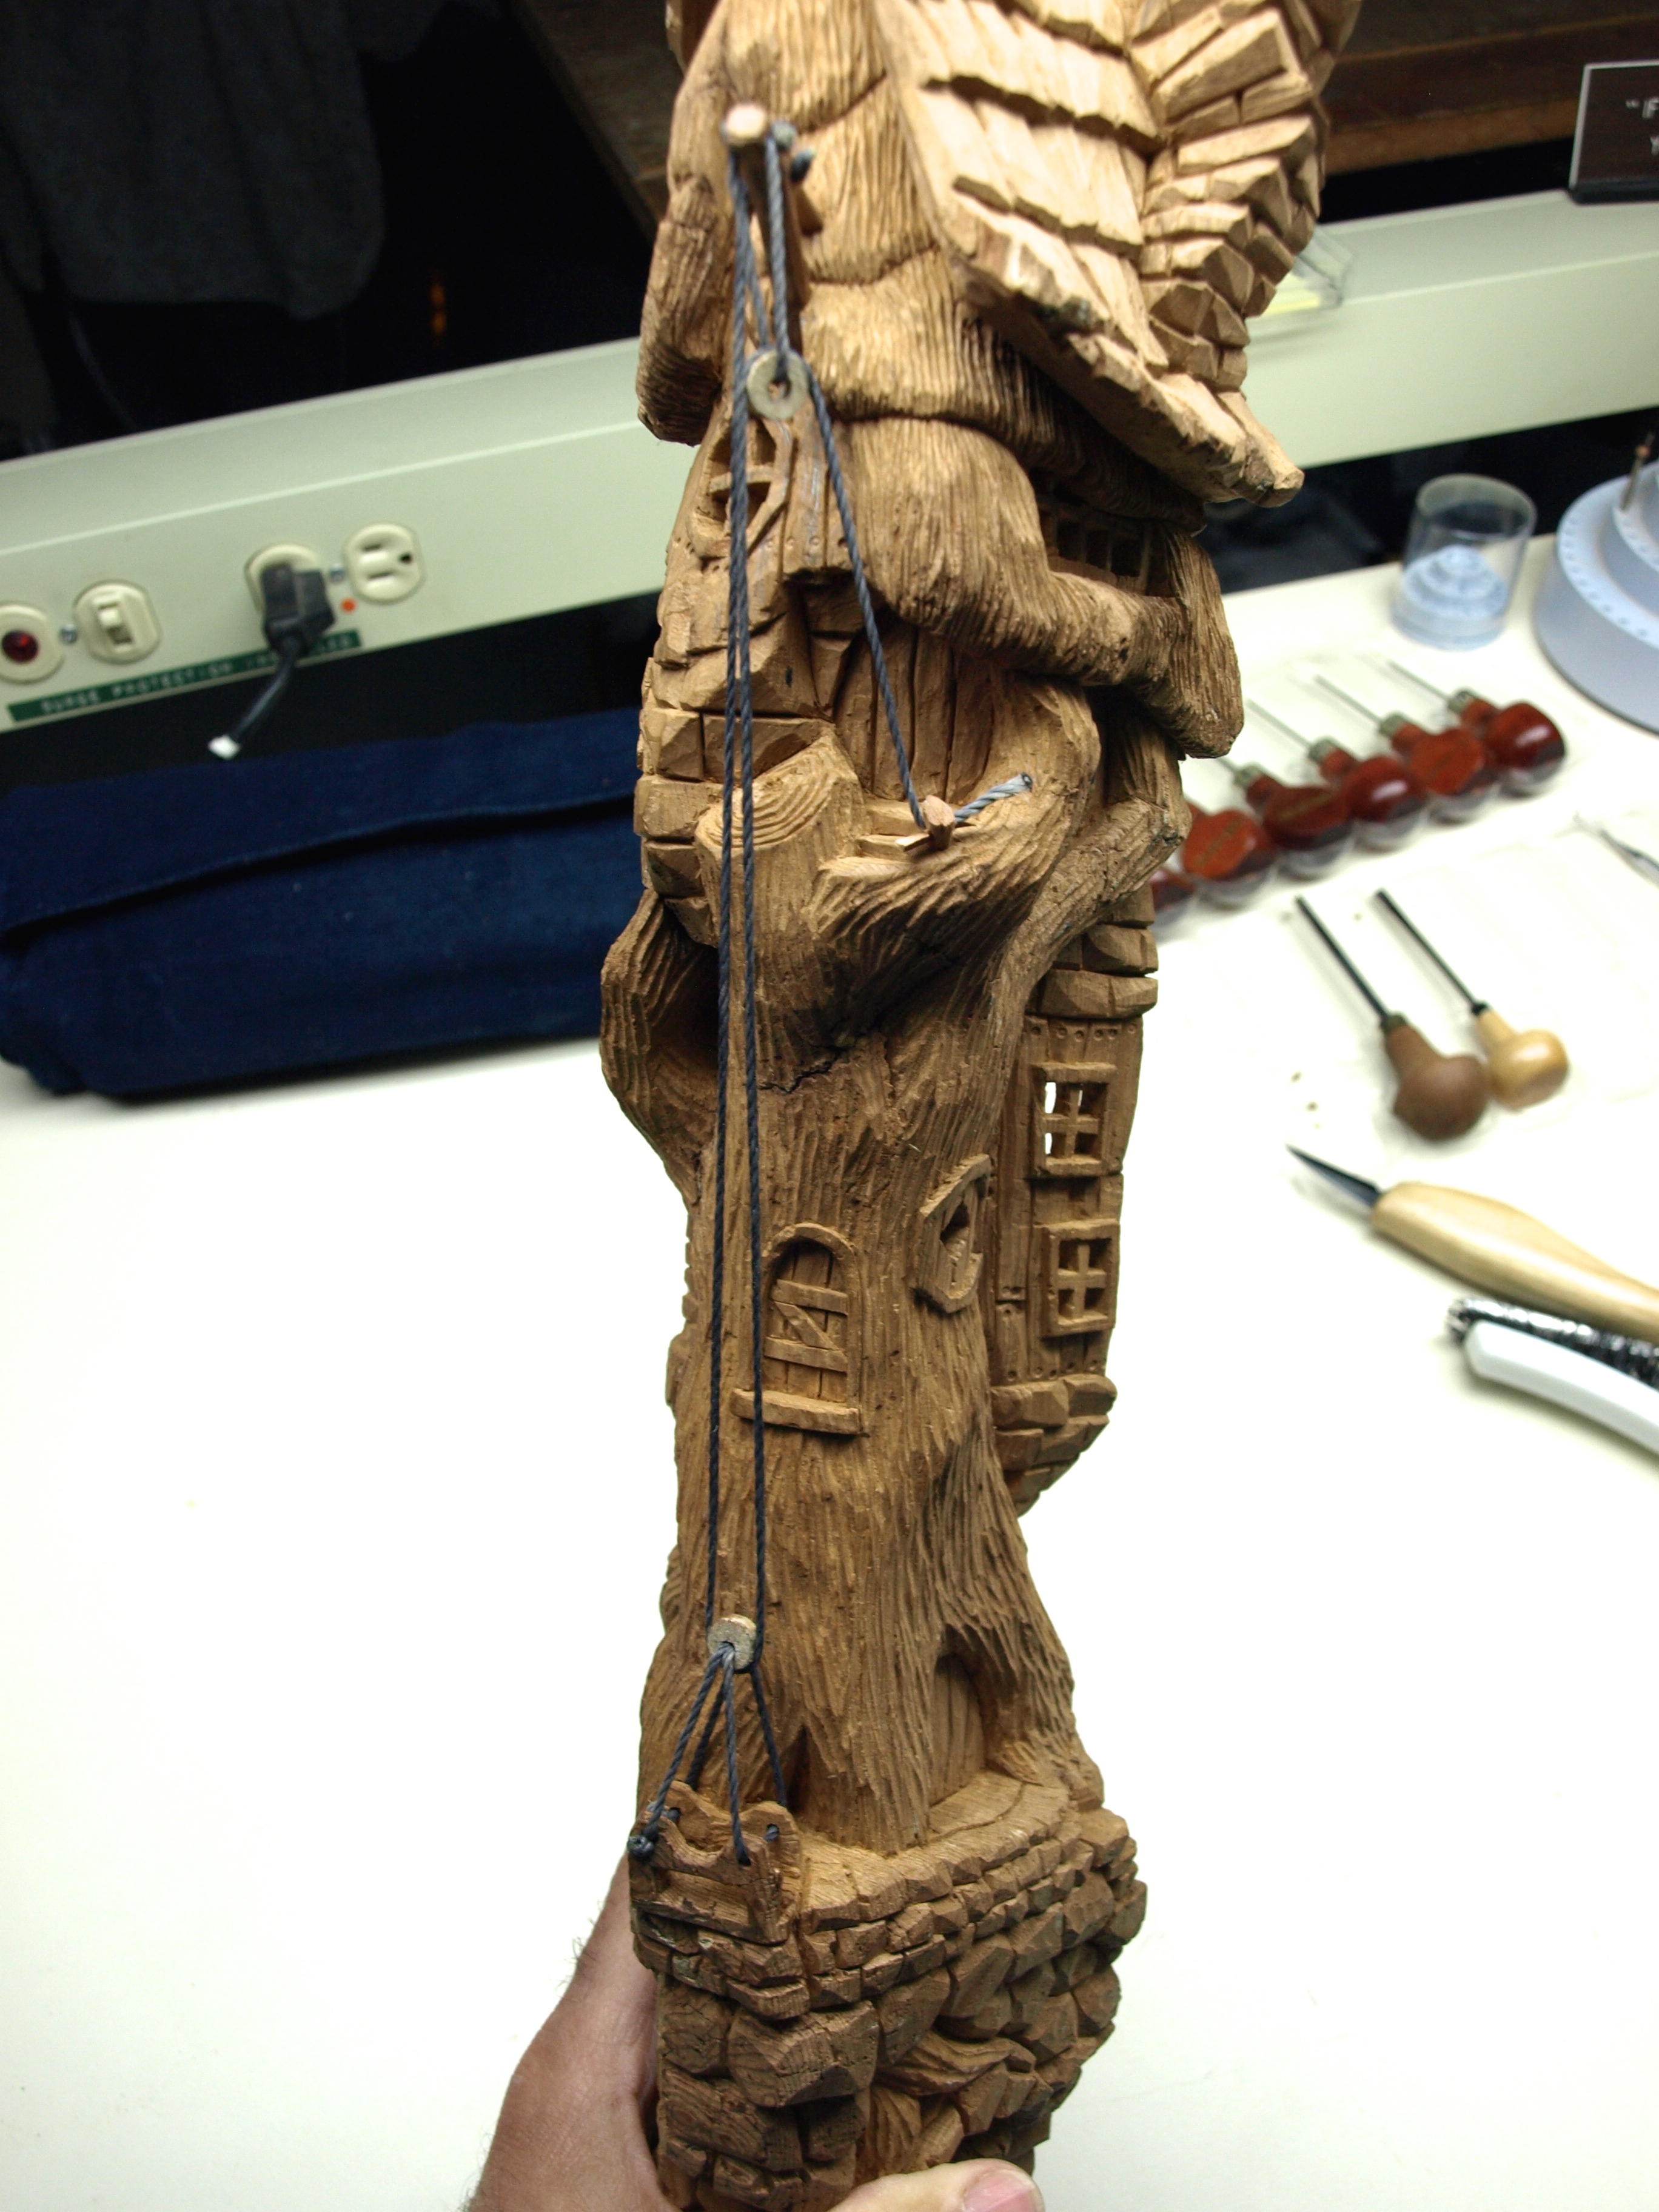
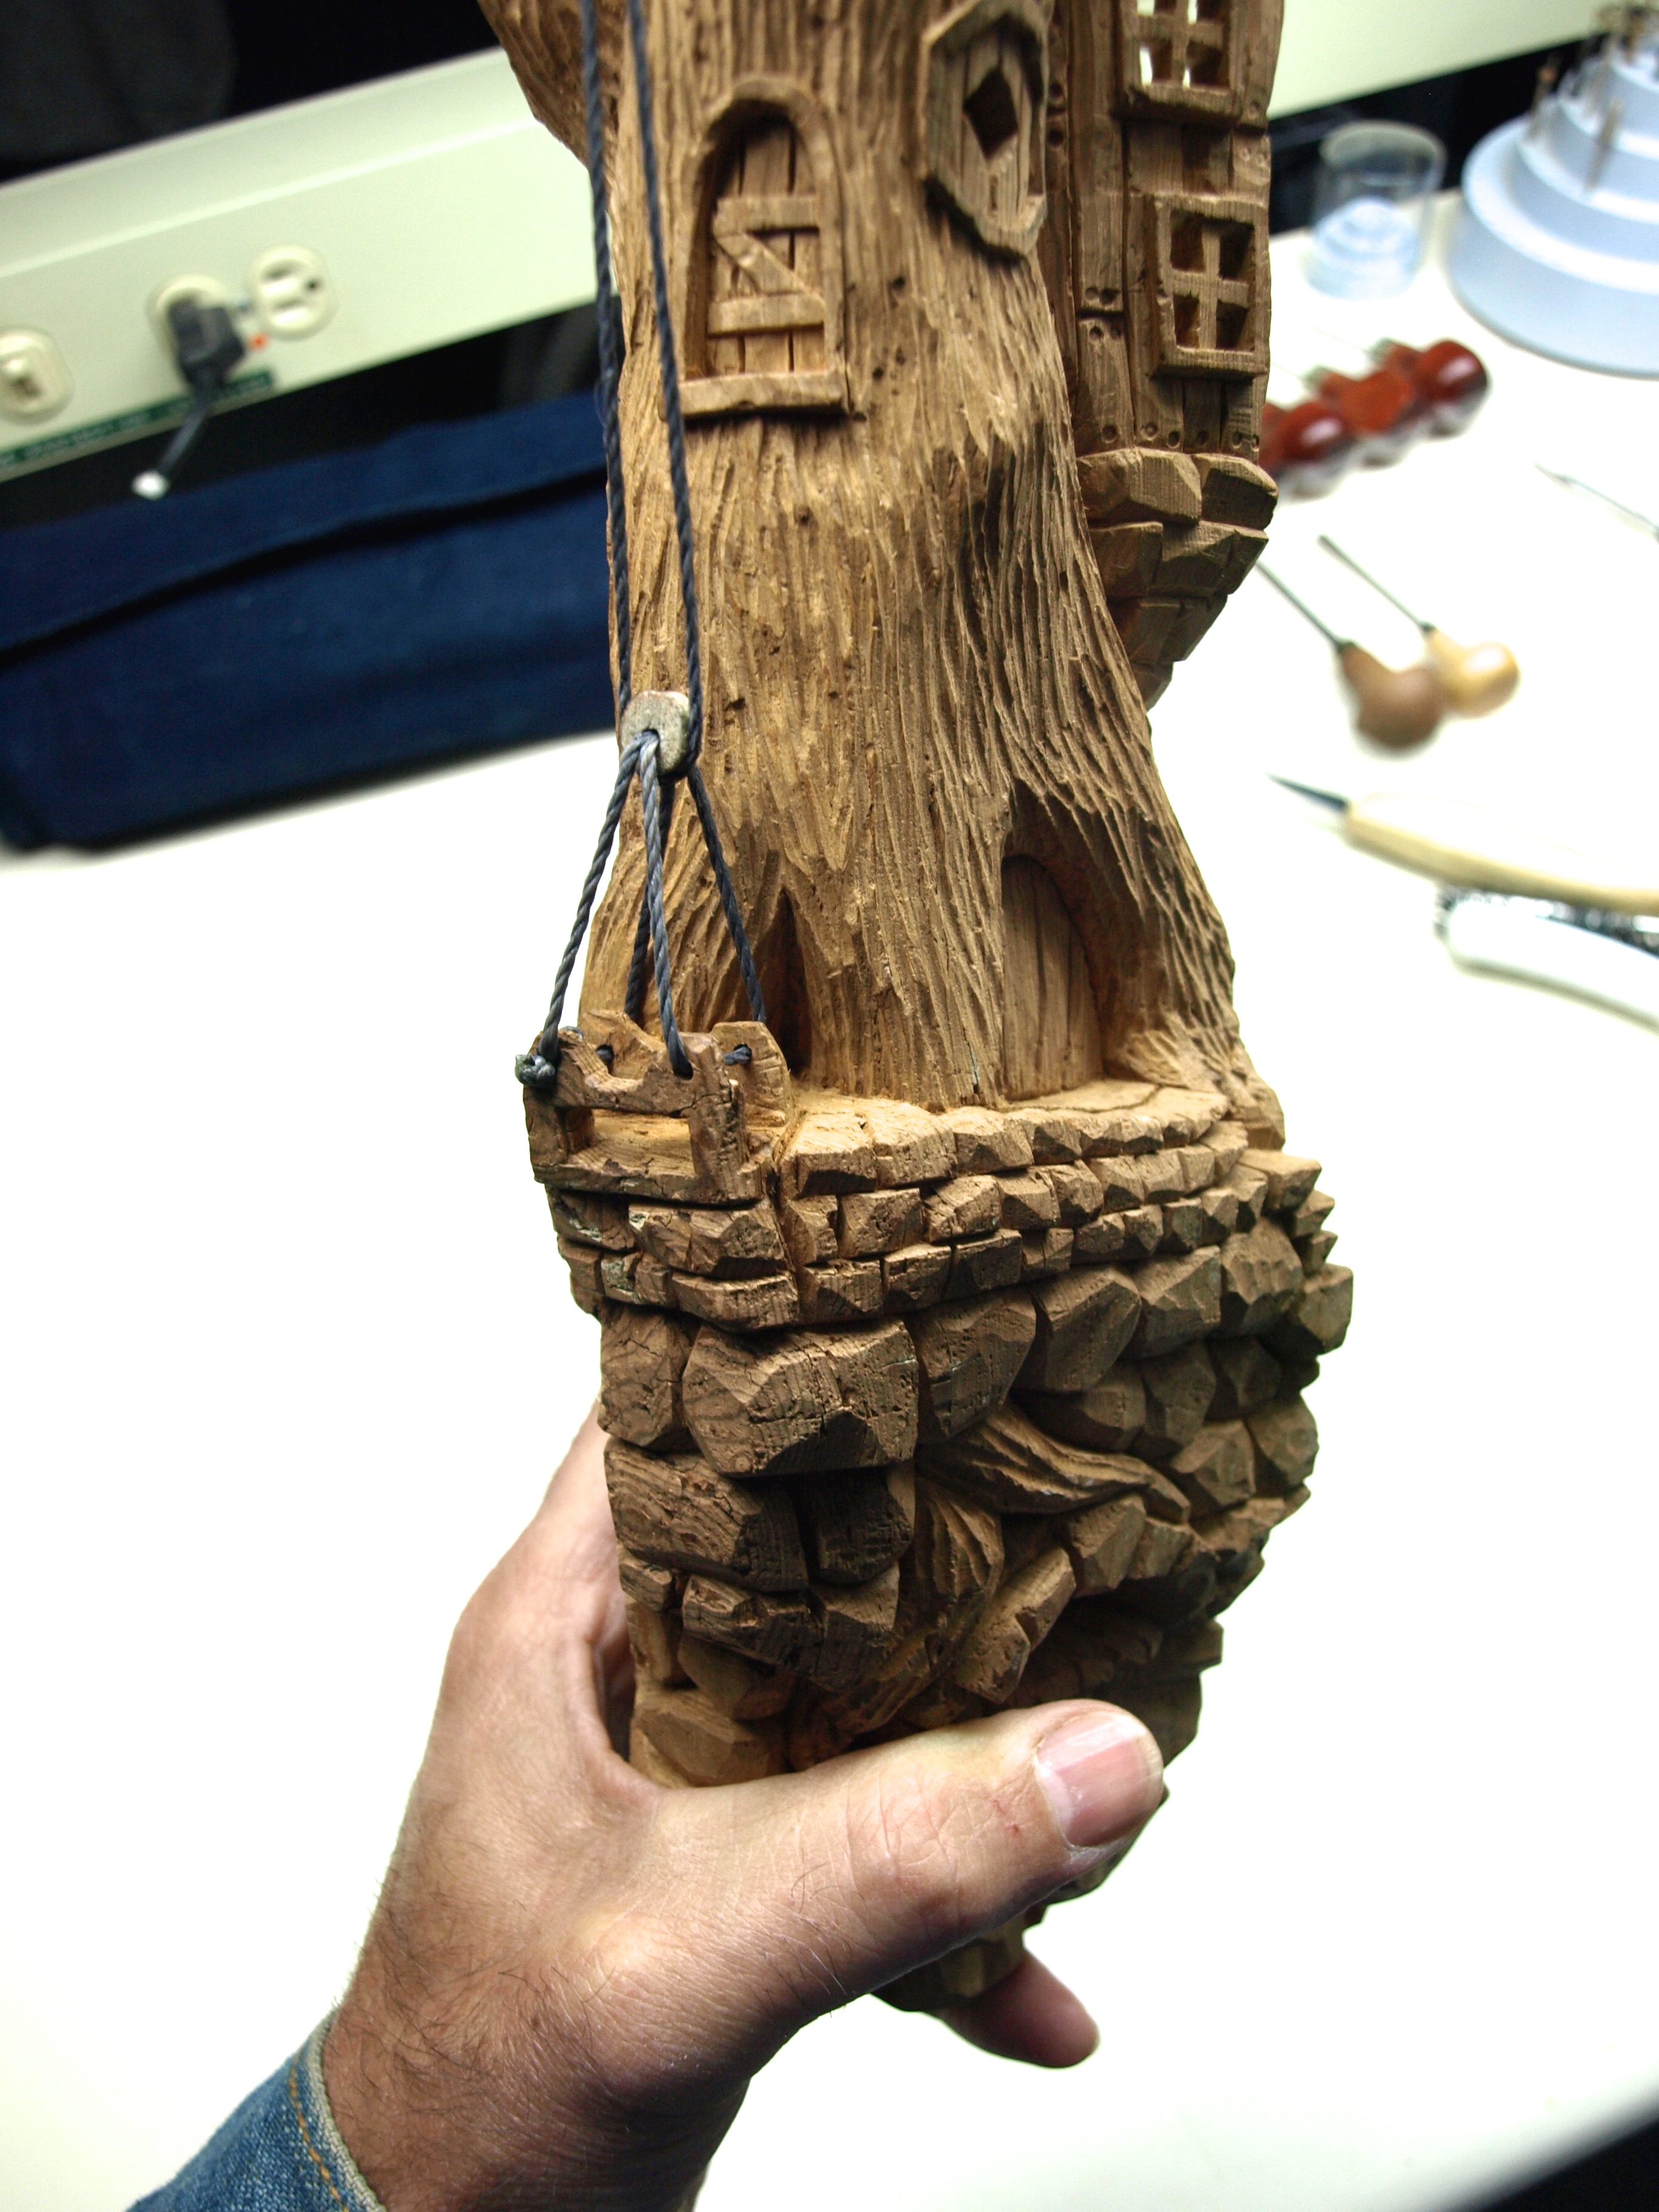
I cut two short segments from one piece of bark and, after planing the inside surface flat, I glued them together so that I could get an “in-the-round” carving out of it.  The inside of the bark is hollowed out so that the window openings have the impression of having some depth to them.  Next time I do this, I’m going to temporarily glue the halves together so that I can separate them easily after I’ve finished carving.  This separation will allow me to hollow out the sections near the windows a lot faster ( and easier ) than I did this one.

It’s a nice little carving that can sit on an end table.  Just click on the photo, below, to make it bigger.

Advertisement

A Completed Cottage

Here’s a couple of photos of the completed cottage.  Once again, I used a single coat of satin finish polyurethane all over the carving.  The fact that the first coat soaks into the bark leaves a very matted surface, which I like for this type of carving.  I could put a second coat on but it would leave it just slightly glossy even though the polyurethane is a satin finish.

The door knobs are the rounded ends of pop rivets.  I just pulled the sleeve off of the end of a pop rivet, cut off an inch or so of the rod and tapped them into drilled holes in the bark.  A quick coat of black acrylic and a touch of copper penny acrylic finished them off nicely.

What do you think?

Ready for a Lift

The pulley and basket system is ready for it’s first lift.  I wonder what those little dingbats will need to stock up on first?

The pulleys are made from “slices” of a dowel that I had hanging around the shop and have grooves cut into their circumference to hold the rope.  The rope is masonry twine, which was bright white until I put black shoe polish on it.  The basket is just carved into the bark and the jib that hangs over the door is carved from cherry.

The “rope” was fed through drilled holes and knotted and then the knots were melted with a burning tool so that they wouldn’t come undone.  The end rope that the dingbats will use to hoist the basket up with is fastened to a peg just outside the door.

A Sunny Day at the Bark Cottage

A beautiful day today in Kingston and Rosie and I spent a couple of hours enjoying the backyard…carving, weeding, barking at squirrels, etc.  Here’s a couple of pictures from our afternoon.

I’ve hollowed out the back of the carving with the Foredom tool so that I could open up the window panes.  I used the same process as the last time…drilled out the window pane with a small bit, hollowed out the back until I was able to see the drilled holes and then used knives and chisels to clean up the square panes.  I’ve also used a small gouge to create the look of bark on the tree and have added some blocks, boulders and a tunnel entrance to the bottom of the carving.

A bit more work on the base and then adding the rope and pulleys for the freight elevator and we’ll be ready for a finish to be applied.

Freight Elevator

I suppose that if you live at the top of a tree, in addition to a veranda and several entrances with hidden winding staircases and ladder ways, at some point you’ll need a freight elevator to get the really heavy stuff unloaded to the upper floors.

Well, this cottage has a freight elevator in the making.  Along with some extra doors and windows that I’ve added today, I started on a little jib and pulley that will eventually be hooked up via rope-work to the small basket at the base of the tree house.

No, it won’t actually work…maybe on the next one.

A New Bark Cottage

We called the last one a Cottonwood Cabin, so we’ll go with Cottonwood Cottage with this one.  Why am I carving another bark cottage/cabin?…because Emily has one and Peggy wants one too.  Plus, I like carving them.

Here’s what the bark looked like when I started out.  I wanted to do something similar to the cabin that I just finished, so, right off the bat, that rectangular portion on the top right started looking a lot like a chimney to me.

This time around, I did some quick blocking and shaping with the Foredom tool along with a Typhoon bit.  I blocked in two stepped roof lines ( one for shingles and the other for a thatched roof ) and the start to a tree with several limbs wrapping around the cottage.

You’ll definitely need a good vacuum system to catch all of the dust that this Typhoon bit on bark produces.  That bark is very light and if your system isn’t picking it up as soon as it comes off of the block, you’ll be in the doghouse.

Once that rough shaping was complete it was just a matter of using the knives and chisels to start shaping the cedar shingles and, below that, the thatched roof.  I added a few windows for interest and plan to add several more as I go.

Stay tuned for more!

Post Navigation

%d bloggers like this: