tributesinwood

Wood Carvings by Mark Sheridan

Archive for the tag “caricature carvings”

Movin’ Mervin Slims Down

Well, it’s going to be Mervin.  And he, in fact, is slimming down a bit with some detailing.

Using knives and chisels, now, I’m taking some measurements from the clay that I produced and transferring them to the wood carving.  I’m not getting too hung up on precision but am trying to use the clay sculpture as a general guide for the pose.

His face got a bit of detailing too and I like the way that he’s starting to look.

Back to helping Peggy with the Christmas baking…she really can’t do without my taste-testing!

OLYMPUS DIGITAL CAMERA

A New Tool!

Actually, it’s a tool that I have had for almost a year but really haven’t given it a project yet.  It’s a Proxxon reciprocating chisel and a tool that I had the pleasure of winning at the last Ottawa Carving Show and Competition.

OLYMPUS DIGITAL CAMERA

This unit comes with three interchangeable blades that move back and forth at a very high rate of speed with little vibration and just a gentle “whir” from the motor.  Actually, the thing that you hear is the hammering of the reciprocating mechanism which is very slight in my opinion.  Best of all, it cuts like a hot knife through butter.  If you’ve ever been prone to soreness in your wrist from the heavier cutting associated with roughing-in a carving, you’ll want to at least consider this item.

I started roughing in the bandsaw-ed profile with a large Typhoon bit on a Foredom tool.  You can see the roughed up basic shape, here.

OLYMPUS DIGITAL CAMERA

Then, I turned to this little gem of a tool for the final roughing.  What you see, here, is the Proxxon effect with a gouge blade as well as a little additional detailing with a regular carving knife on the head.  I’m on my way, now!

OLYMPUS DIGITAL CAMERA


On With the Carving

It’s time to put the clay aside and start some carving.

I glued a couple of pieces of basswood together to get the right thickness and used the clay sculpture to come up with a pattern to cut out on the bandsaw.  Again, I’m doing the head and body separately.  I’m also going to try to do the body in one piece and so oriented the grain in a way that will run up and down the arms as they’ll be fairly slight once the carving is finished and will require a bit of strength.  Another weak point will be the legs, and the grain is running in the right direction for their strength as well.

I’m cooking up a couple of ideas about the load that he’ll be carrying and how part of that load might be touching the ground so as to provide another contact point for the carving.  More to come on that.

OLYMPUS DIGITAL CAMERA

OLYMPUS DIGITAL CAMERA

“Moving Day”

This next carving is going to be called “Moving Day”.  I came across an image of a guy crouched under a heavy load and it led me to think about a one-man moving task.  I’ve always admired the professional movers who are able to cradle a heavy box on their back and run up a set of stairs with it.

This little guy, yet to be named, won’t really have the physique needed for the job but through sheer will manages to move his belongings all on his own.

I decided to start with a clay sculpture again to make sure that I get the form right.  The packages and articles that he will carry won’t be sculpted in clay first…I just wanted to get the body right before tackling it in wood.

I started by stripping house wiring and twisting the three copper wire lengths together using my battery operated drill.  I then fashioned the basic body form and soldered the joints together.  Then, I just started applying modelling clay.  Still a ways to go before I start carving.

Let me know what you think!

OLYMPUS DIGITAL CAMERAOLYMPUS DIGITAL CAMERA

OLYMPUS DIGITAL CAMERA


The Beach Basset Completed

Here’s the completed carving of the Beach Basset.  Enjoy!  I’ll get some more photos on he Flickr Site shortly.

OLYMPUS DIGITAL CAMERA

OLYMPUS DIGITAL CAMERA

A Little Reading Material

Well, here’s something new for me.

You’ll recall from an earlier post that I fashioned a newspaper out of a light sheet of brass, with some soldering and “newspaper white” painting included.

Now comes time for the printed sections.  I knew that the printing couldn’t be readable given the size of the paper (!) and that I only needed to provide some chicken scratch for the articles, but, I wasn’t completely sure how I was going to do it.  I eventually decided on using a mechanical pencil with an HB lead ( read: small, soft and dark ), followed with a light mist coating of a matte finish urethane to prevent things from smudging.

I’ve completed the front of the paper and even included a couple of advertisements and a “photo” of a doghouse to go along with one of the articles.  I’m pretty pleased with the Daily News so far!

OLYMPUS DIGITAL CAMERA

A Sandy Base

I’ve been poking along on my carving in between raking leaves, cleaning windows, raking leaves, getting the house ready for winter, raking leaves…did I mention raking leaves?

The base is my usual 1/2″ oak and I’ve added some sand for the beach scene.  The sand is once again a polymer mixed with aggregate that is used in the patio block laying business.  The nice thing about the mix is that once I screen out the larger pieces and am left with the “sand”, adding a little water activates the polymer and sets it rock hard.  I actually mix it with a bit of white glue and water to give it greater sticking power.

Here’s a photo of what it looked like while it was still drying.  Once dry, I’ll give it a couple of coats of sand coloured acrylic paint.  By the way, I’ve added a little sand pail and shovel along with some small shells.  The shells almost look real because…they are.

OLYMPUS DIGITAL CAMERA

OLYMPUS DIGITAL CAMERA


Time for a Pina Colada

Our little hound just needed a drink, that’s all.

A few steps…the coconut was carved and then just roughed up a bit with a typhoon bit on a foredom tool to give the coconut some “fuzz.”  It was painted with brown acrylic and then dry brushed with a lighter brown for highlights.

The umbrella was made of a piece of brass that was cut in a circle and then shaped into a point by cutting one radius line and overlapping the brass followed by soldering.  The stem of the umbrella is just the rod of a pop-rivet that was epoxied in place.  A straw was bent from a short length of metal rod about the size of a finishing nail.

Everything was painted with acrylics and topped with a matte coat of urethane spray.

The drink in the coconut was made from epoxy mixed with some flour ( to give it some “foam” ) and a bit of pink acrylic paint.

I think he’ll enjoy this drink.

A Little Metal-Work

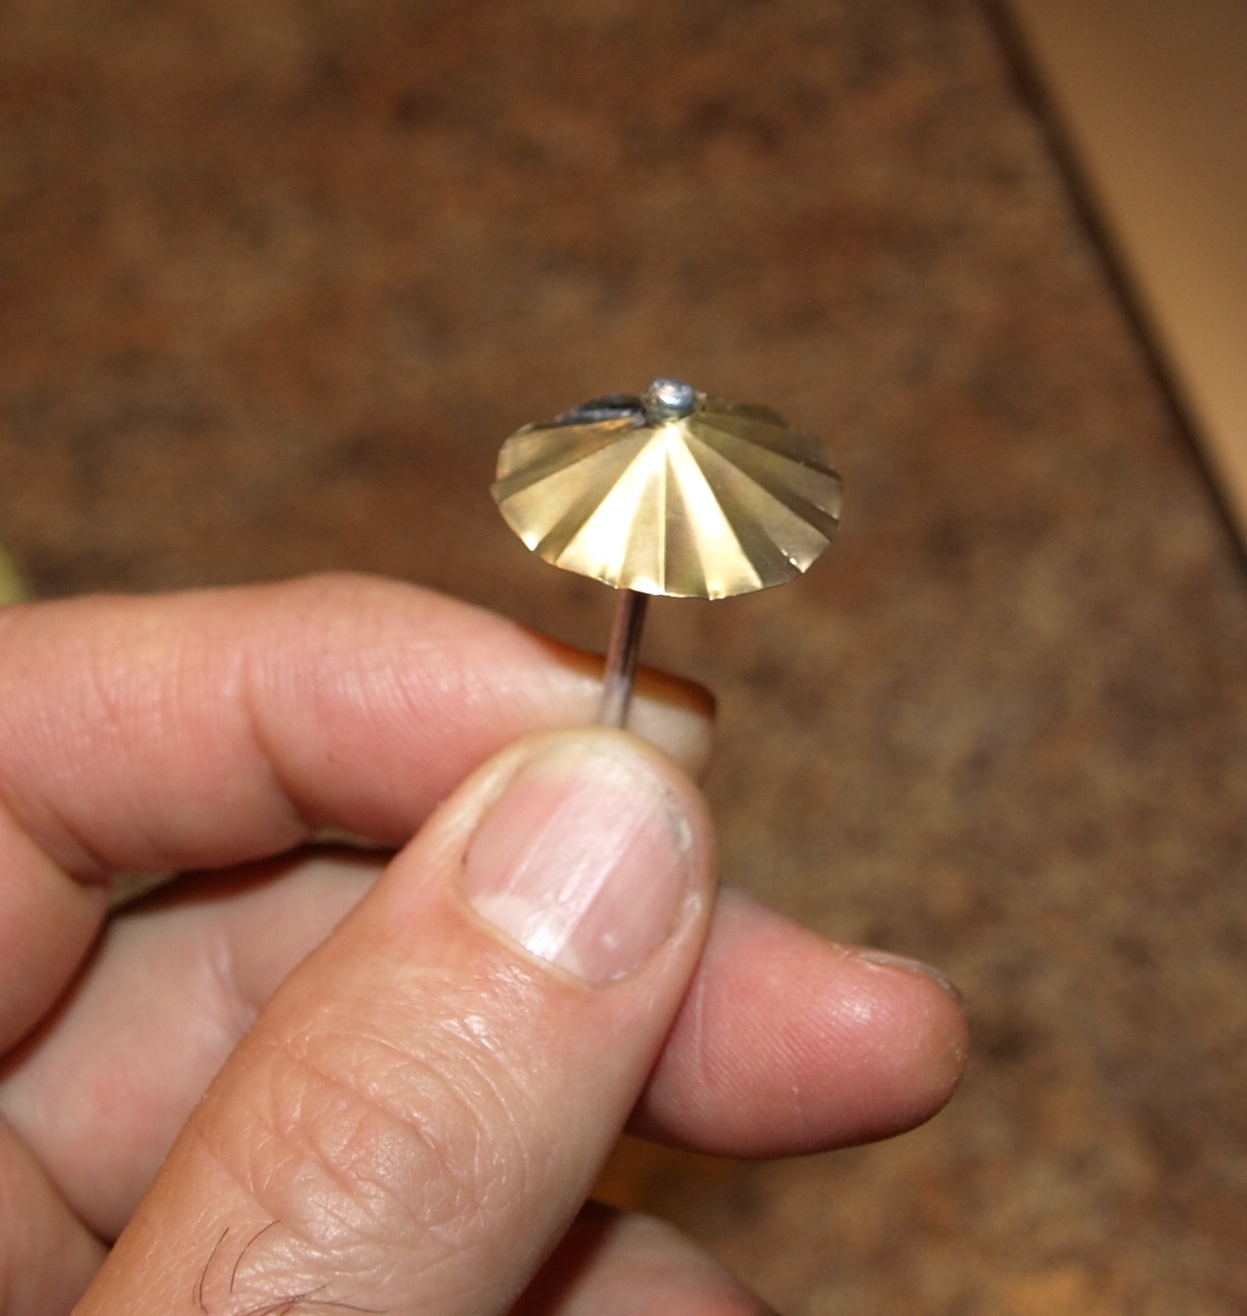
It was time to bring out the tinsmith in me if we were going to get any decent looking newspaper for the beach-bound-hound to read.  A quick trip to the hobby shop did the trick and I came home with a good sized piece of 0.005″ brass.  I could have bought some thinner stock as they had anywhere from two thousands to five thousands of an inch but the five thou felt about right to me for stiffness.

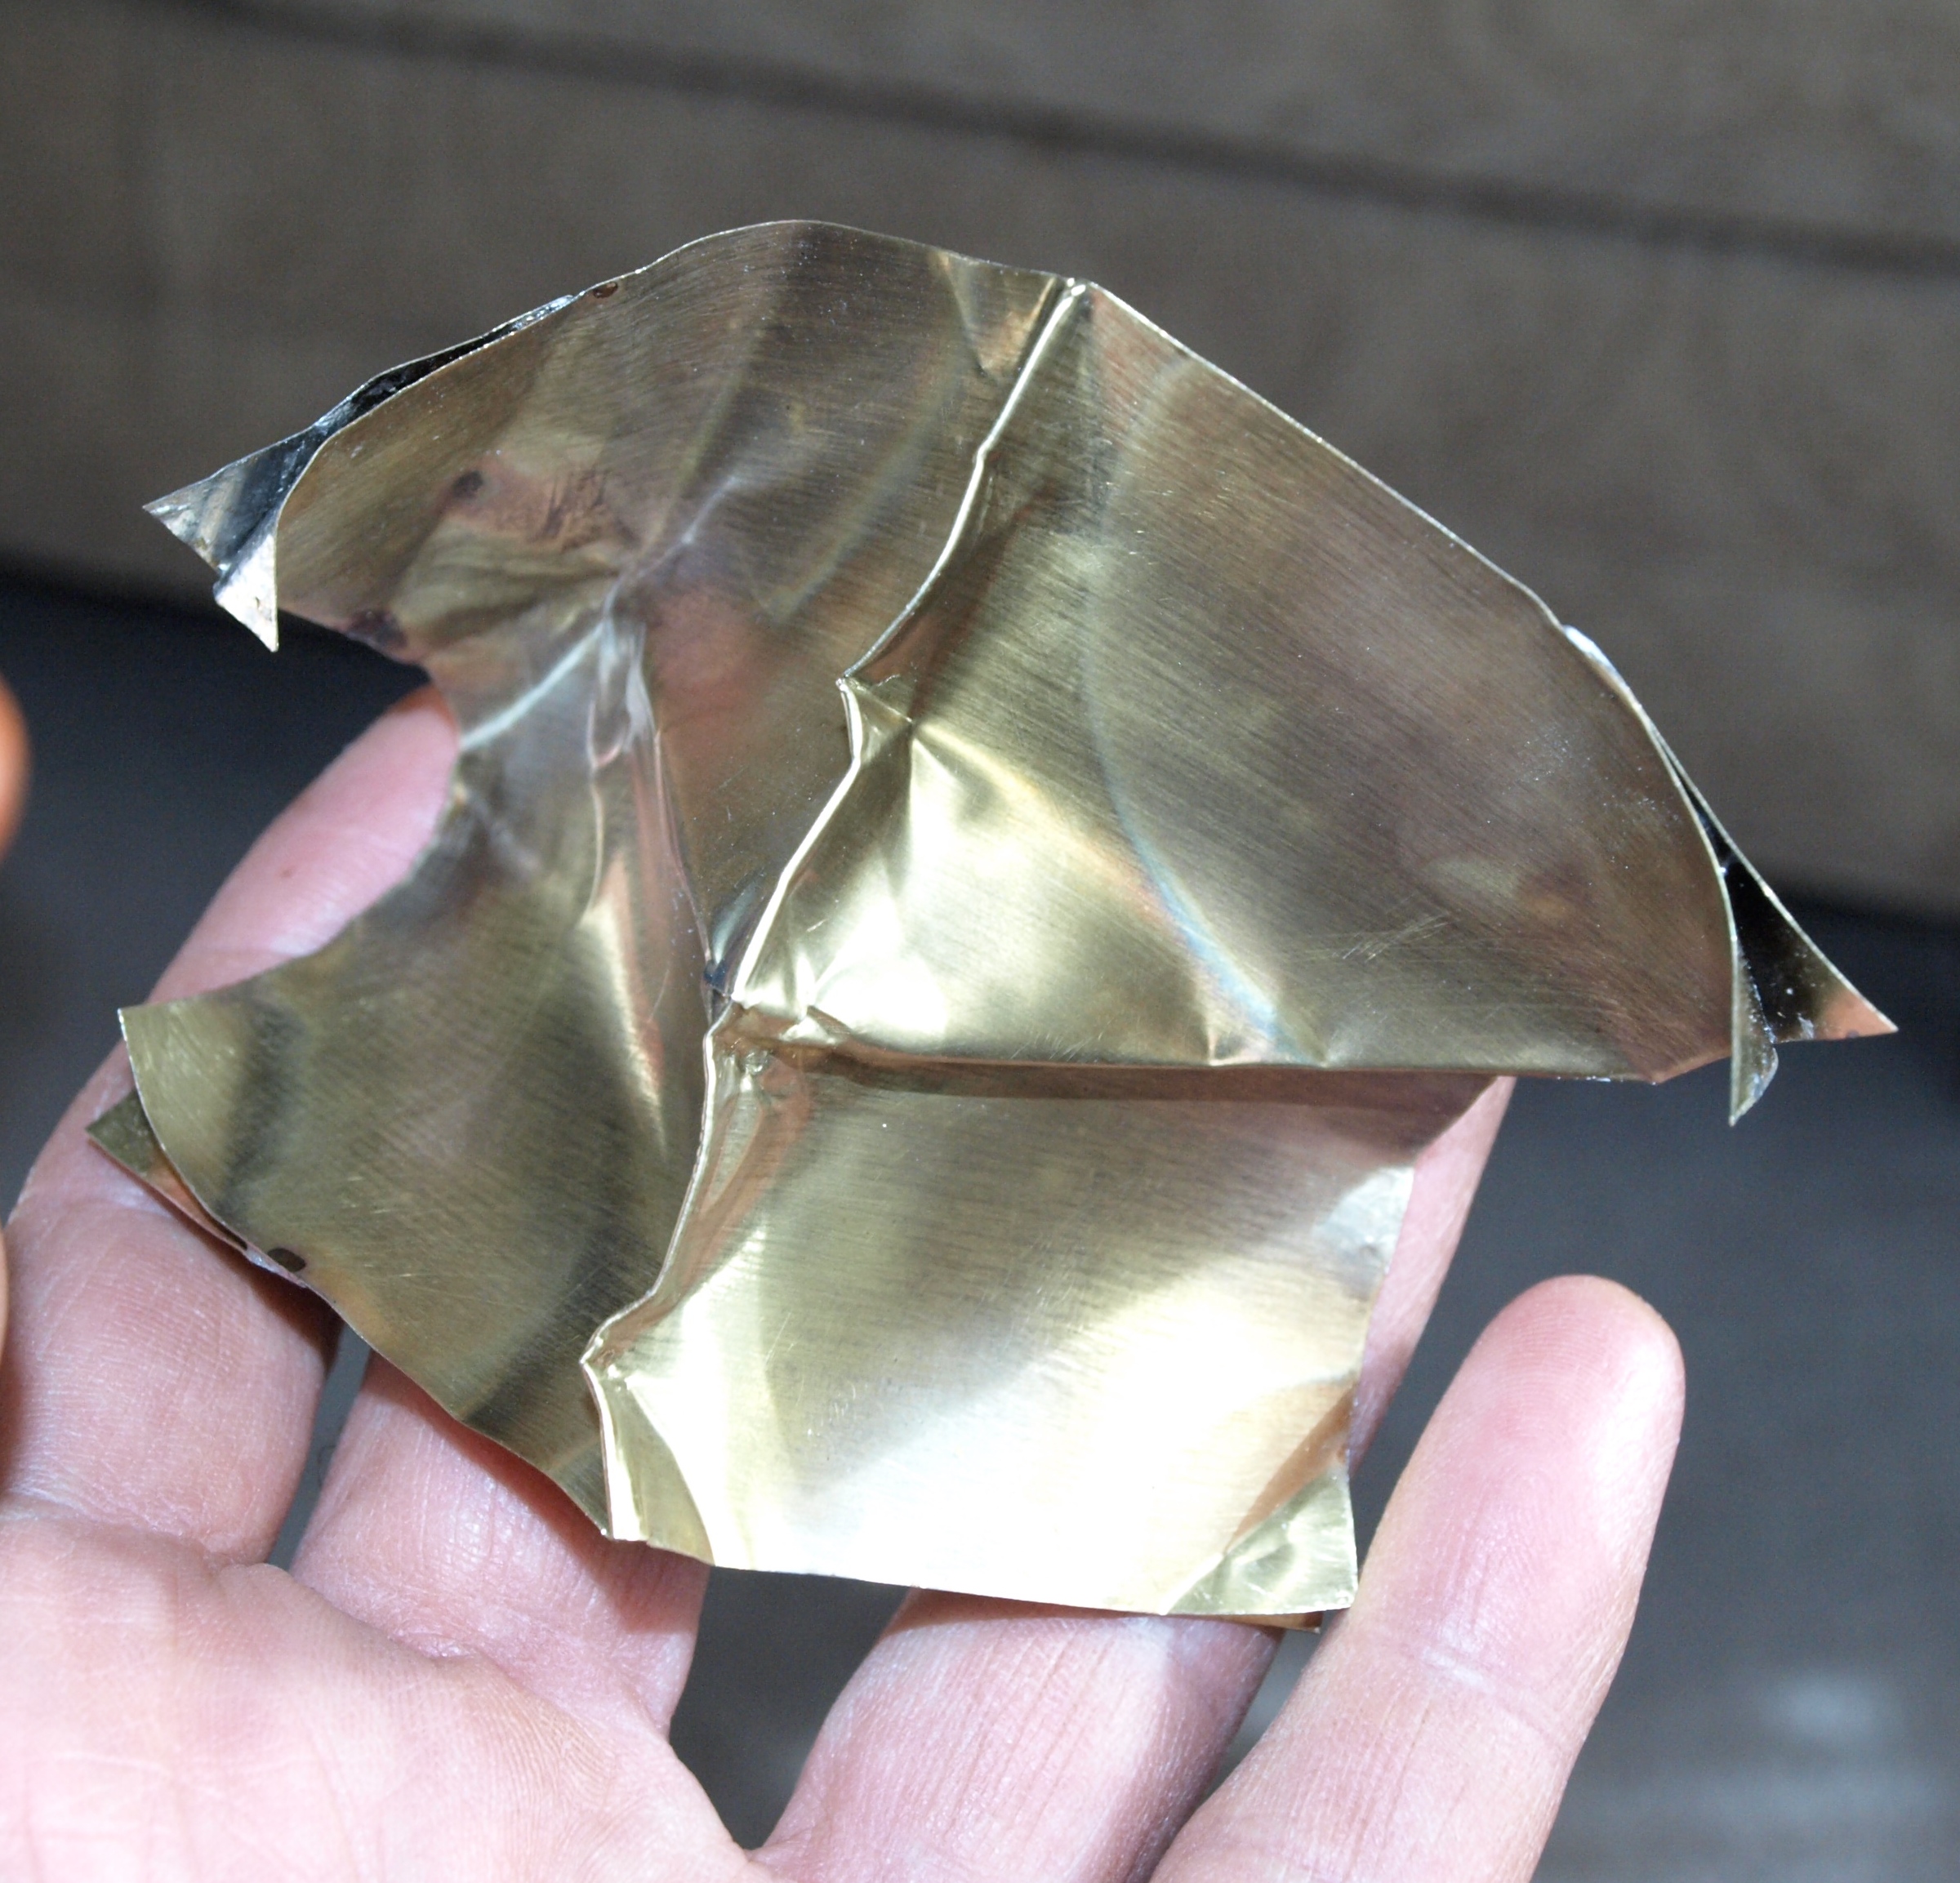
I actually started by taking some aluminum tape and doubling it up.  I then bent ( easily ) the tape into the size and shape that I wanted for the newspaper…wrinkles and creases included…and used this as a mock-up for the stiffer and more difficult to shape brass.

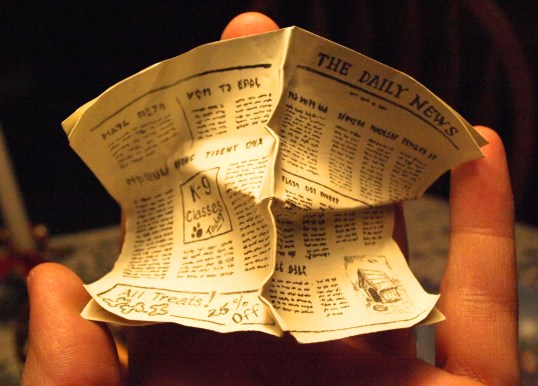
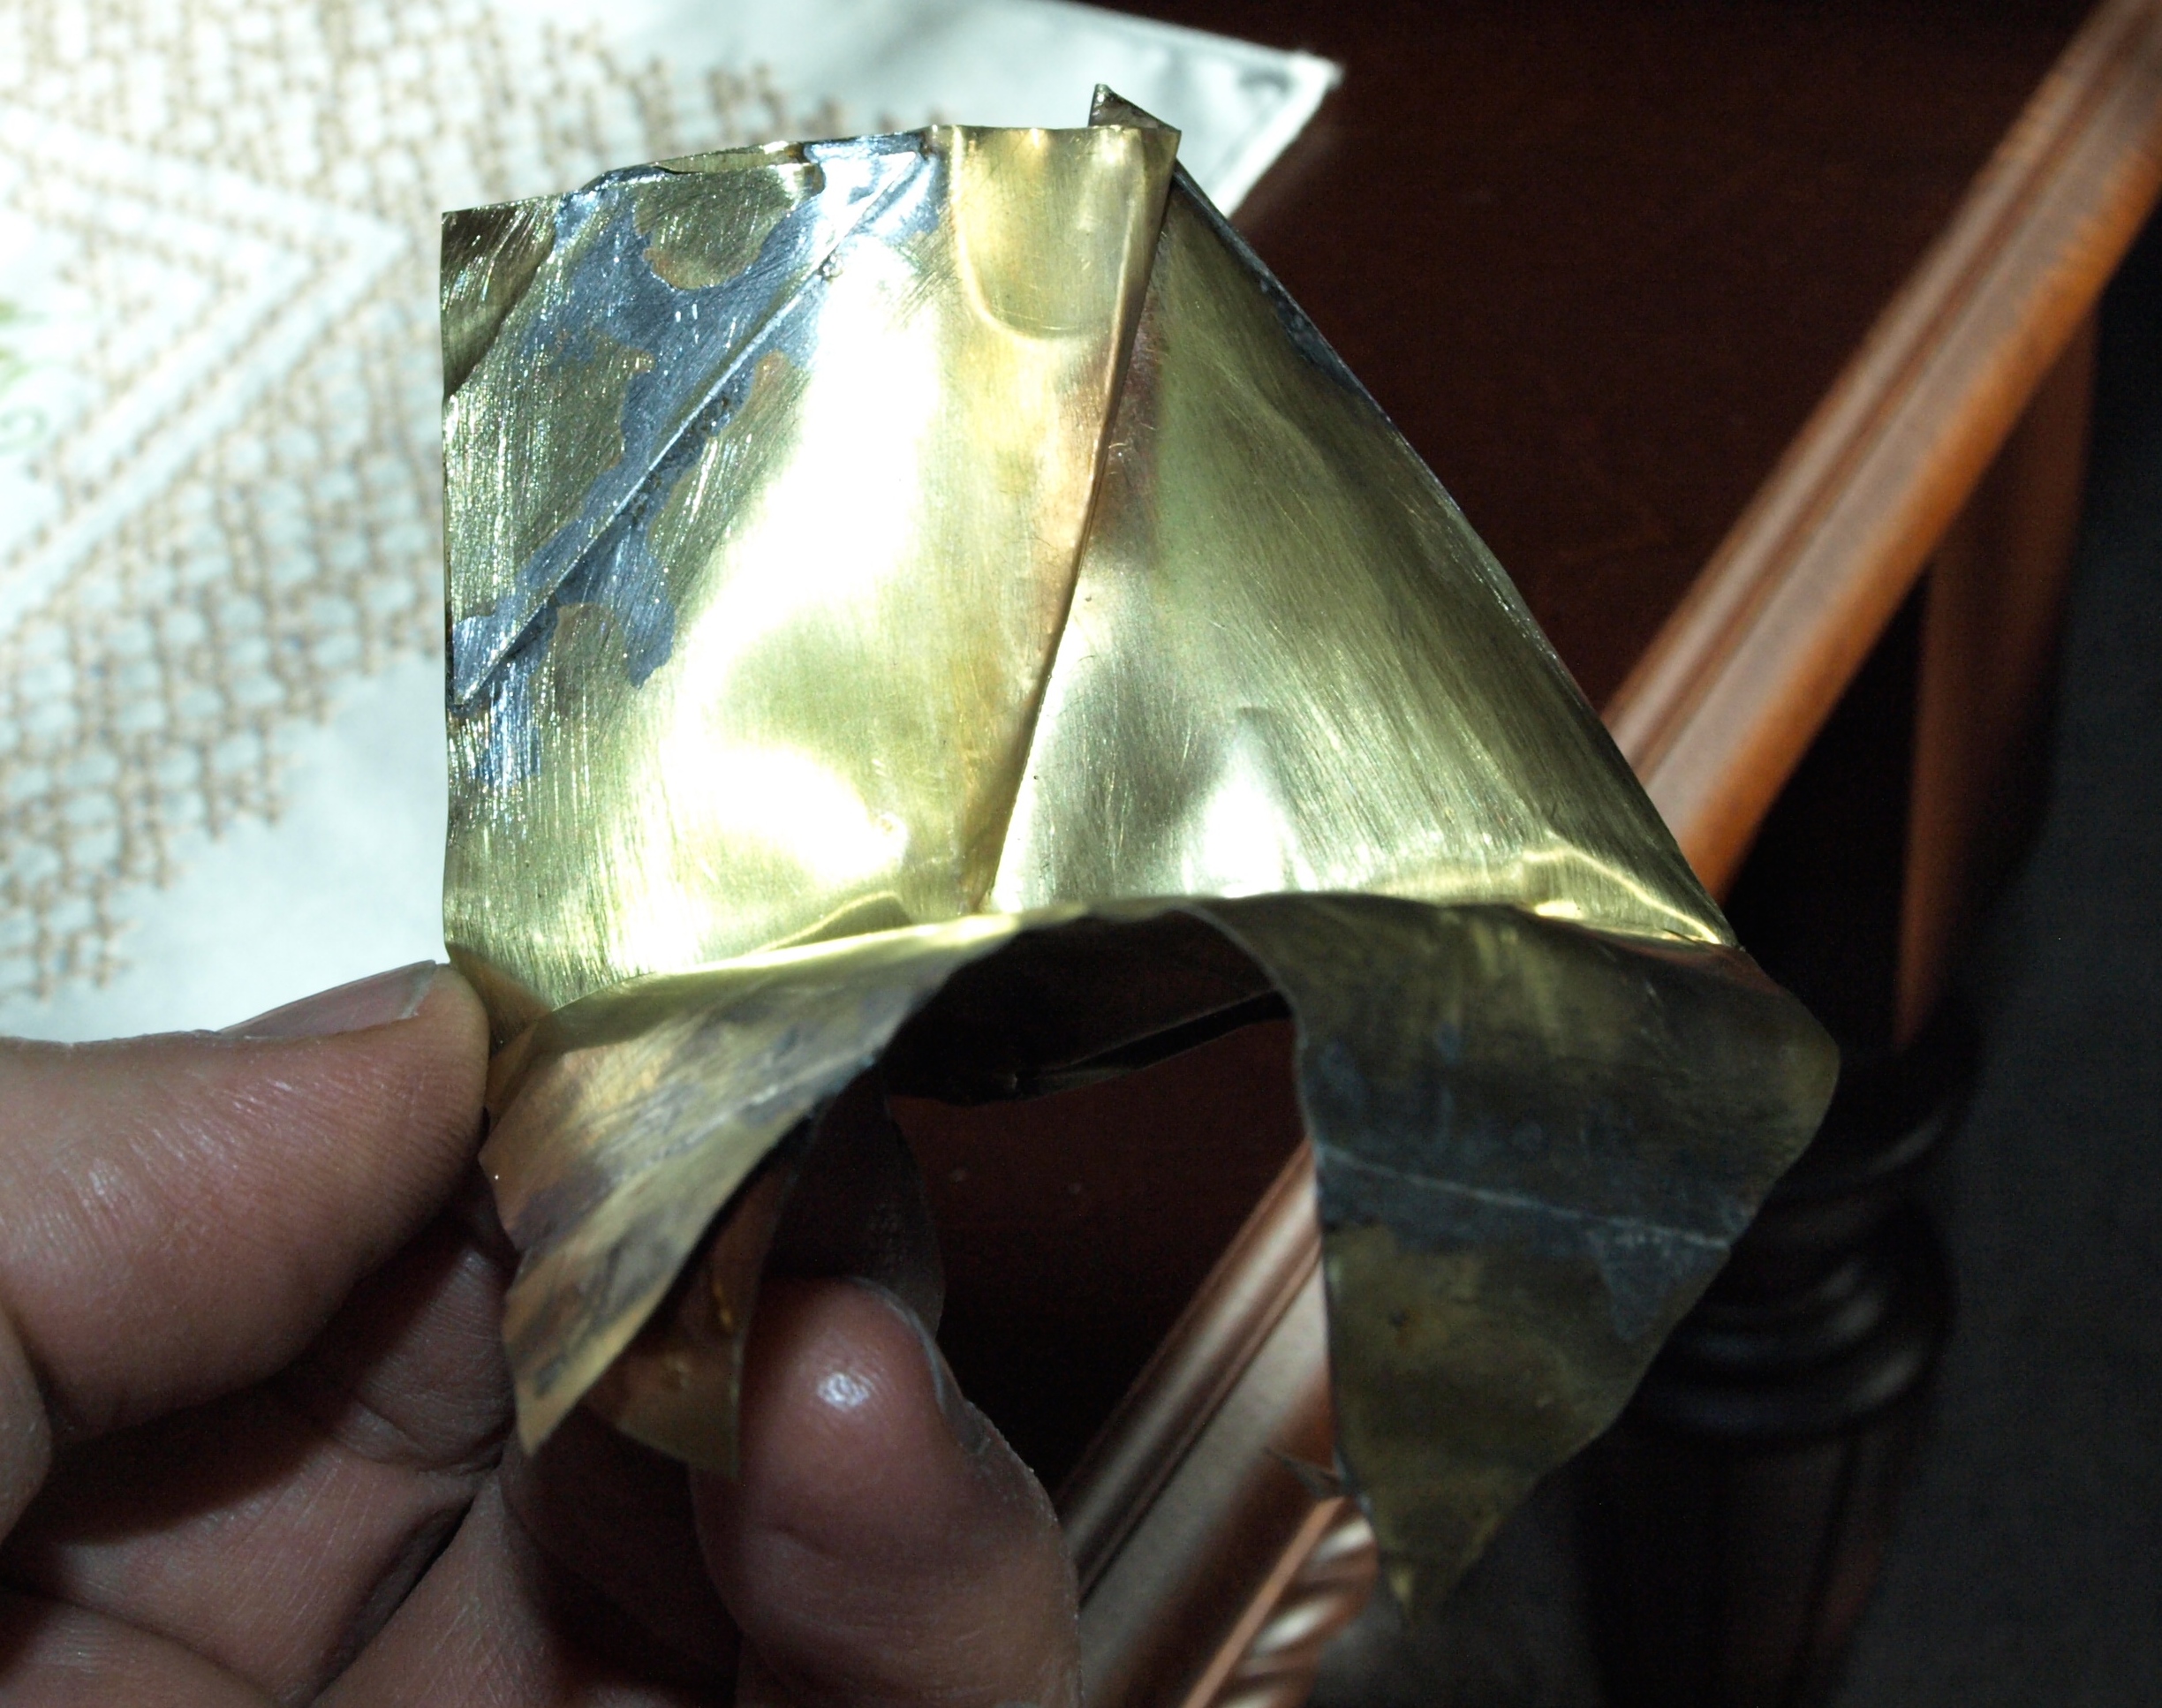
Here’s what it looked like at that point.  You’ll notice that each of the four corners have an additional layer of brass to give the paper the impression that there are several pages.  I did this by just cutting little triangles and soldering the triangles in place and later curling the two layers away from each other.  I actually was quite surprised that the brass took soldering but the joints are very strong.

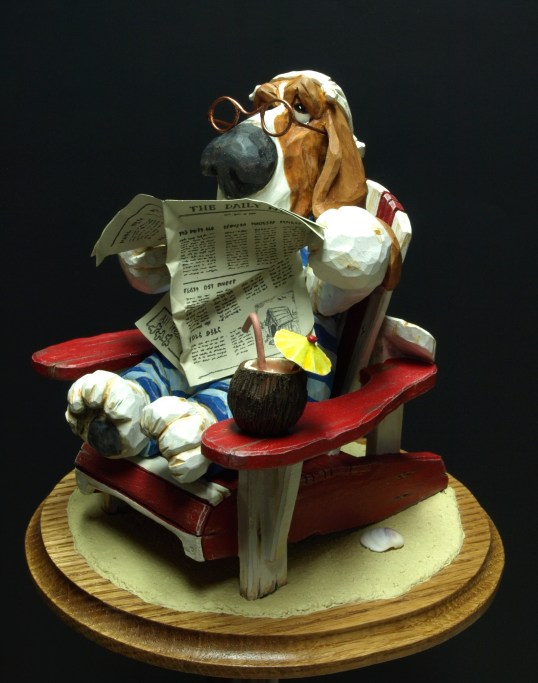
I was able to sand and file the soldered marks smooth and then added a light coat of epoxy as a filler to do any final sanding.  Automotive spray paint primer was also added with some final sanding of those soldered seams in between coats.  And then, finally, I mixed up some white gesso with an ivory coloured acrylic and painted the primed surface with several coats leaving just a bit of the grey primer showing very slightly through.  The whole procedure ended up looking pretty close to newsprint to me.

Well that was a lot of fun.  I’ll have to find reasons to add brass to the rest of my carvings.  Next step…add some printed sections.

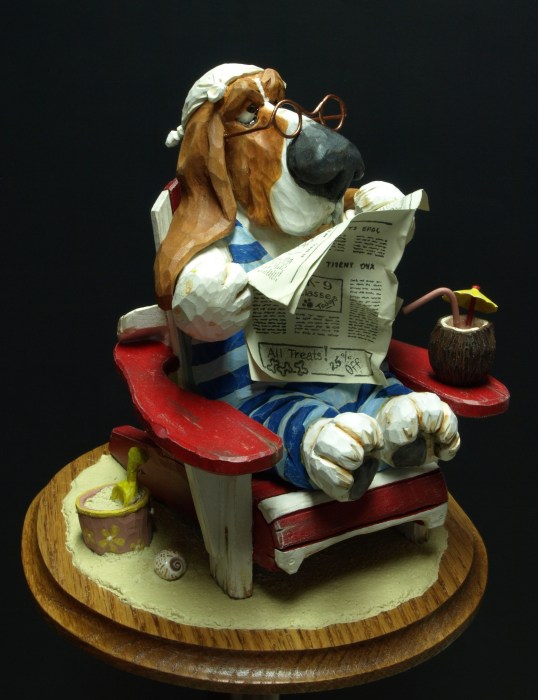
Now that I see this picture that I just added…I should mention that I decided to replace the yellow stripes on his bathing suit with a darker blue stripe.  I think the darker suit looks better than the original blue and yellow.

A Pair of Reading Glasses

This is my first attempt at making some wire frame glasses to go along with a wood carving.  I started by making a round loop in some copper wire by wrapping some soft copper wire around a dowel of suitable diameter.  I then used a very fine saw that I have to “miter” cut the excess wire so that I’d end up with a fine and tapered joint to solder against.  I left enough excess wire to fashion the arms of the glasses.

That excess wire was then bent back at 90 degrees to begin to form the arm of the glasses.  A second loop/arm arrangement was made for the other lens and arm of the glasses.  Notice how the solder was filed down to give some shape to the section of the glasses where the lens frame meets the arm.

Lastly, a nose section was made and used to solder the two lens frames and arm “assemblies” together.

With a little bit of filing and smoothing, some “worn penny” acrylic paint followed by a coat of urethane…and we have a pretty presentable set of reading glasses.

Post Navigation