tributesinwood

Wood Carvings by Mark Sheridan

Pretty Tough

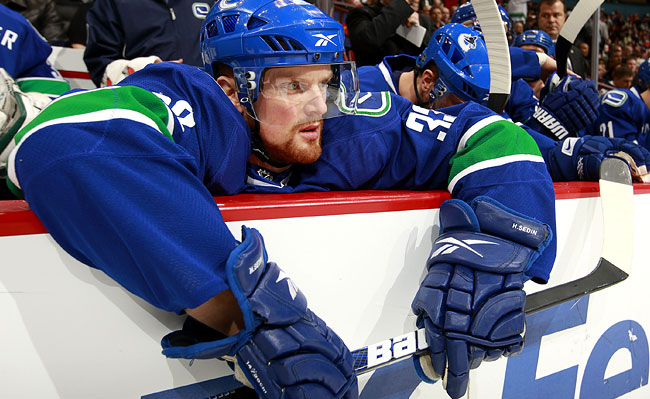
Here’s the image that I found that is sort of the inspiration for this particular carving.  It’s basically going to be a bust, in a fashion, with the penalty box boards being the pedestal for the bust.  Should be interesting.

Emily is wrong

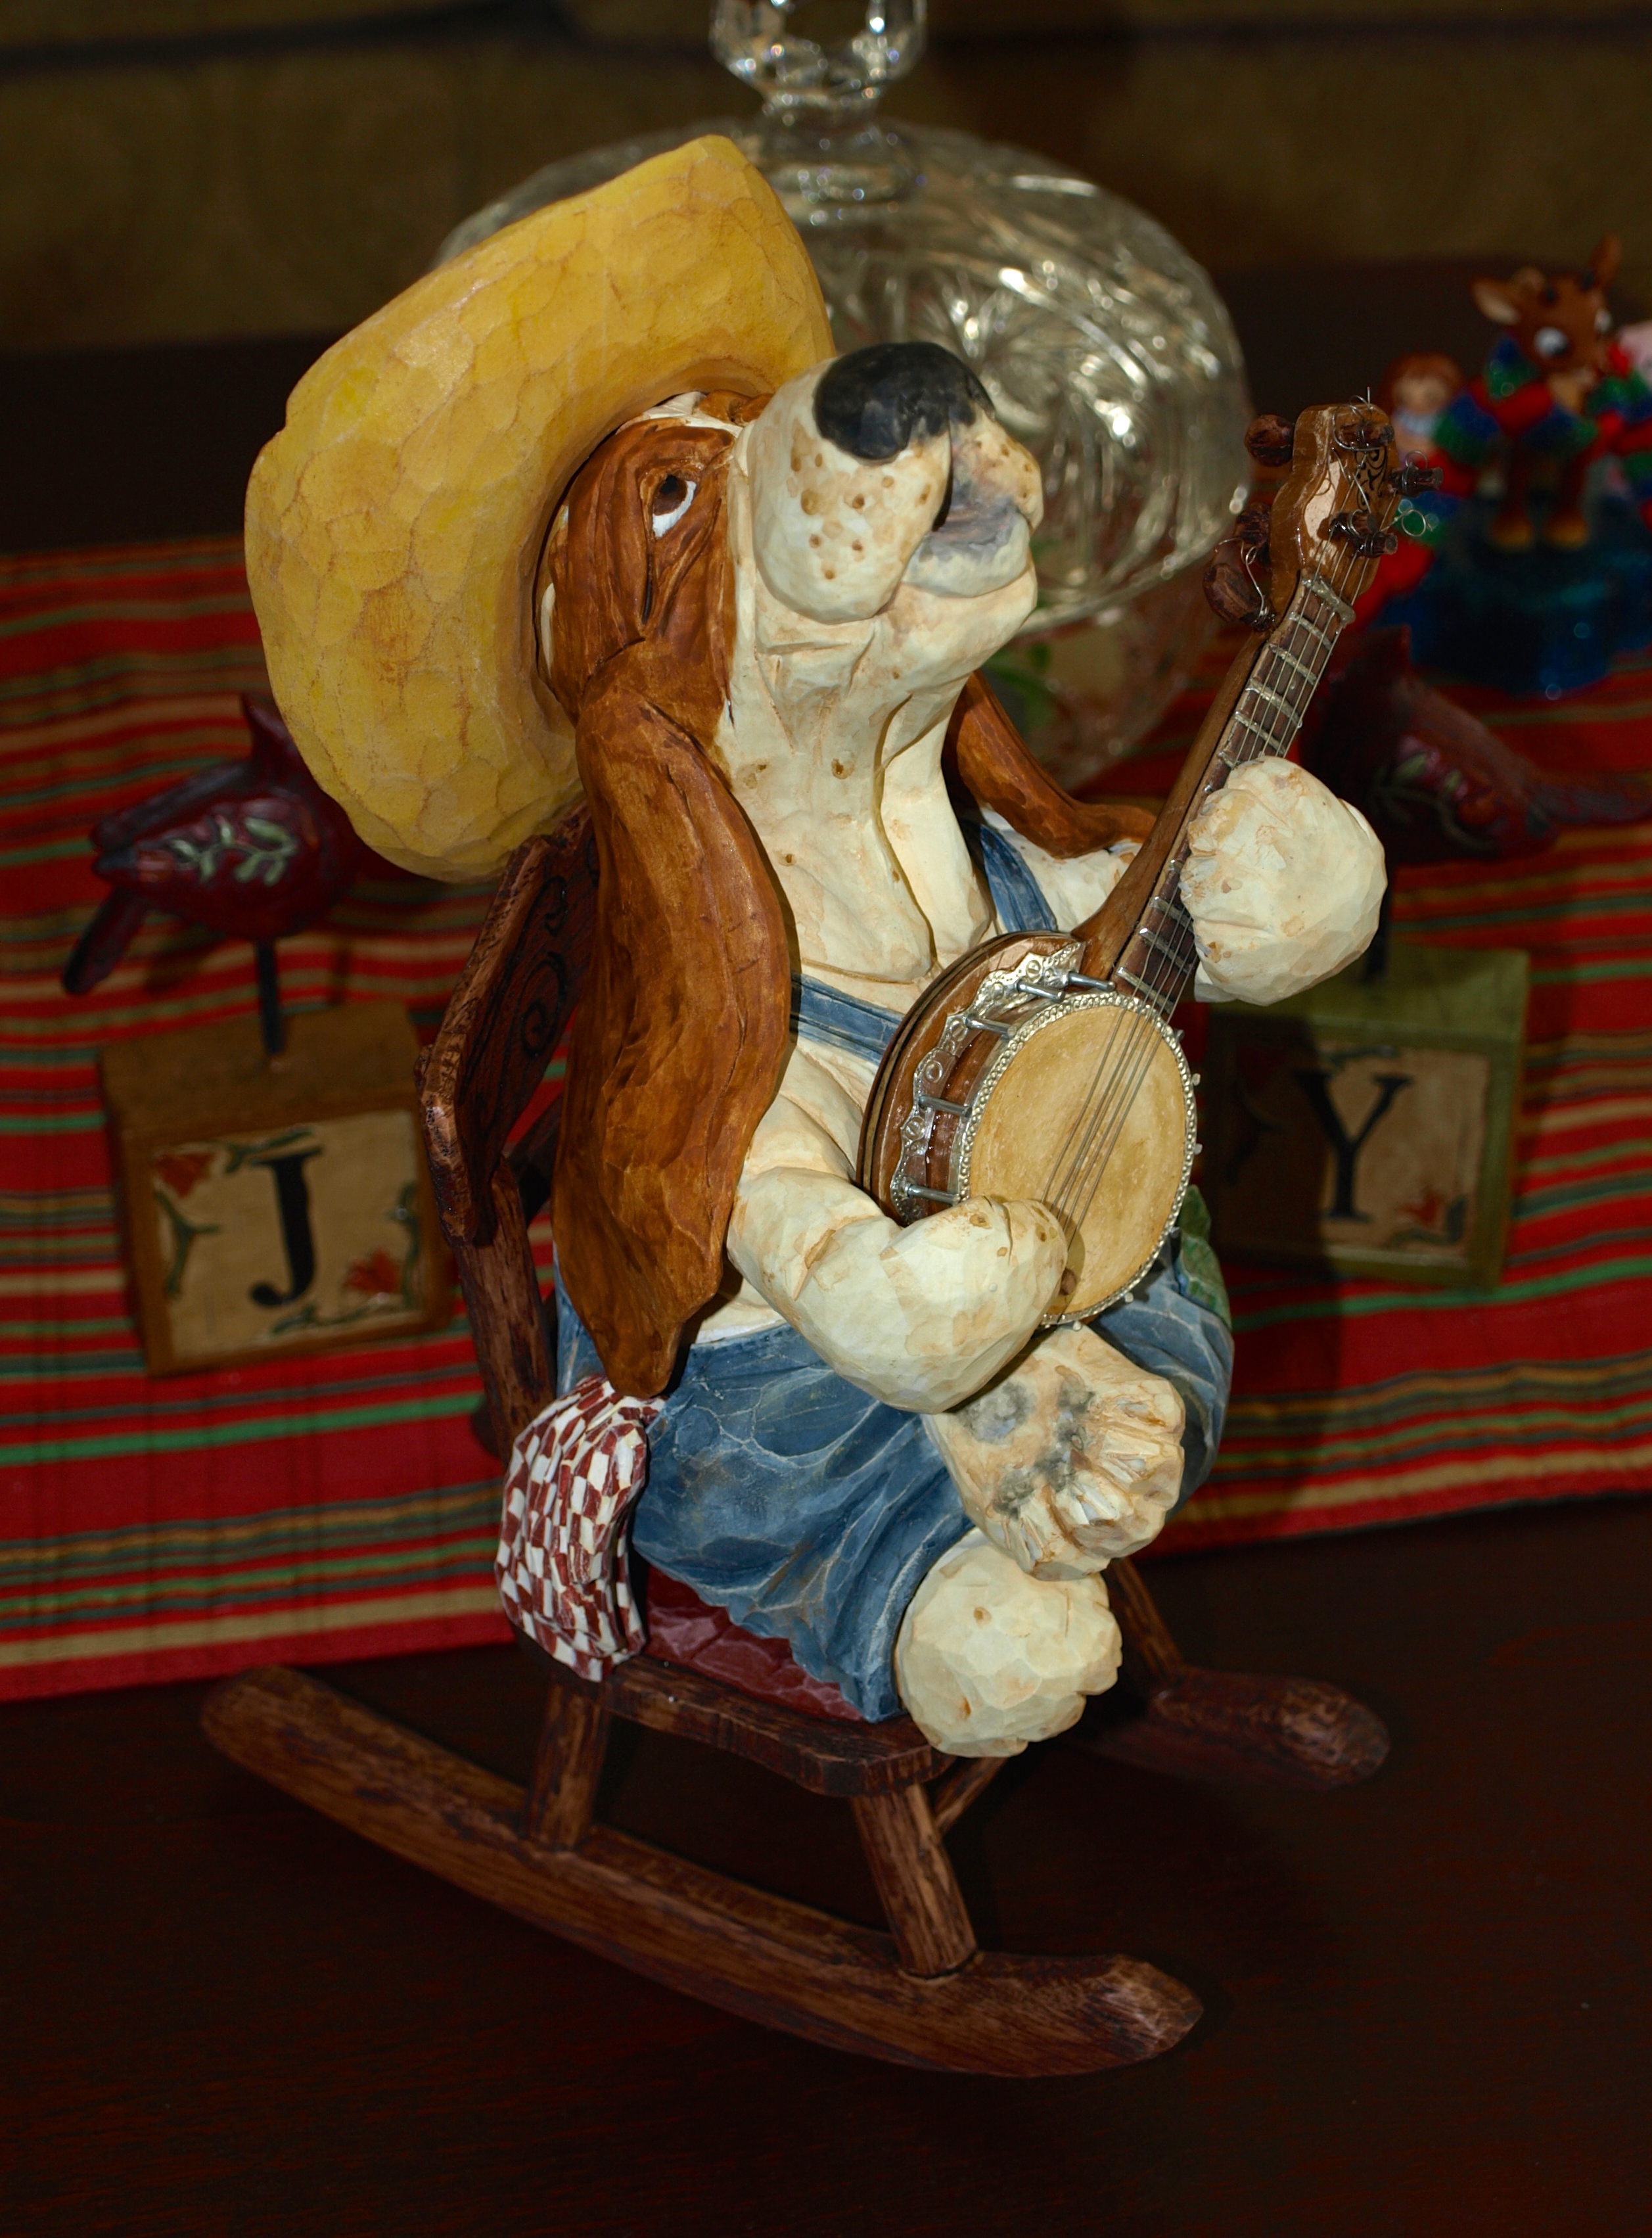
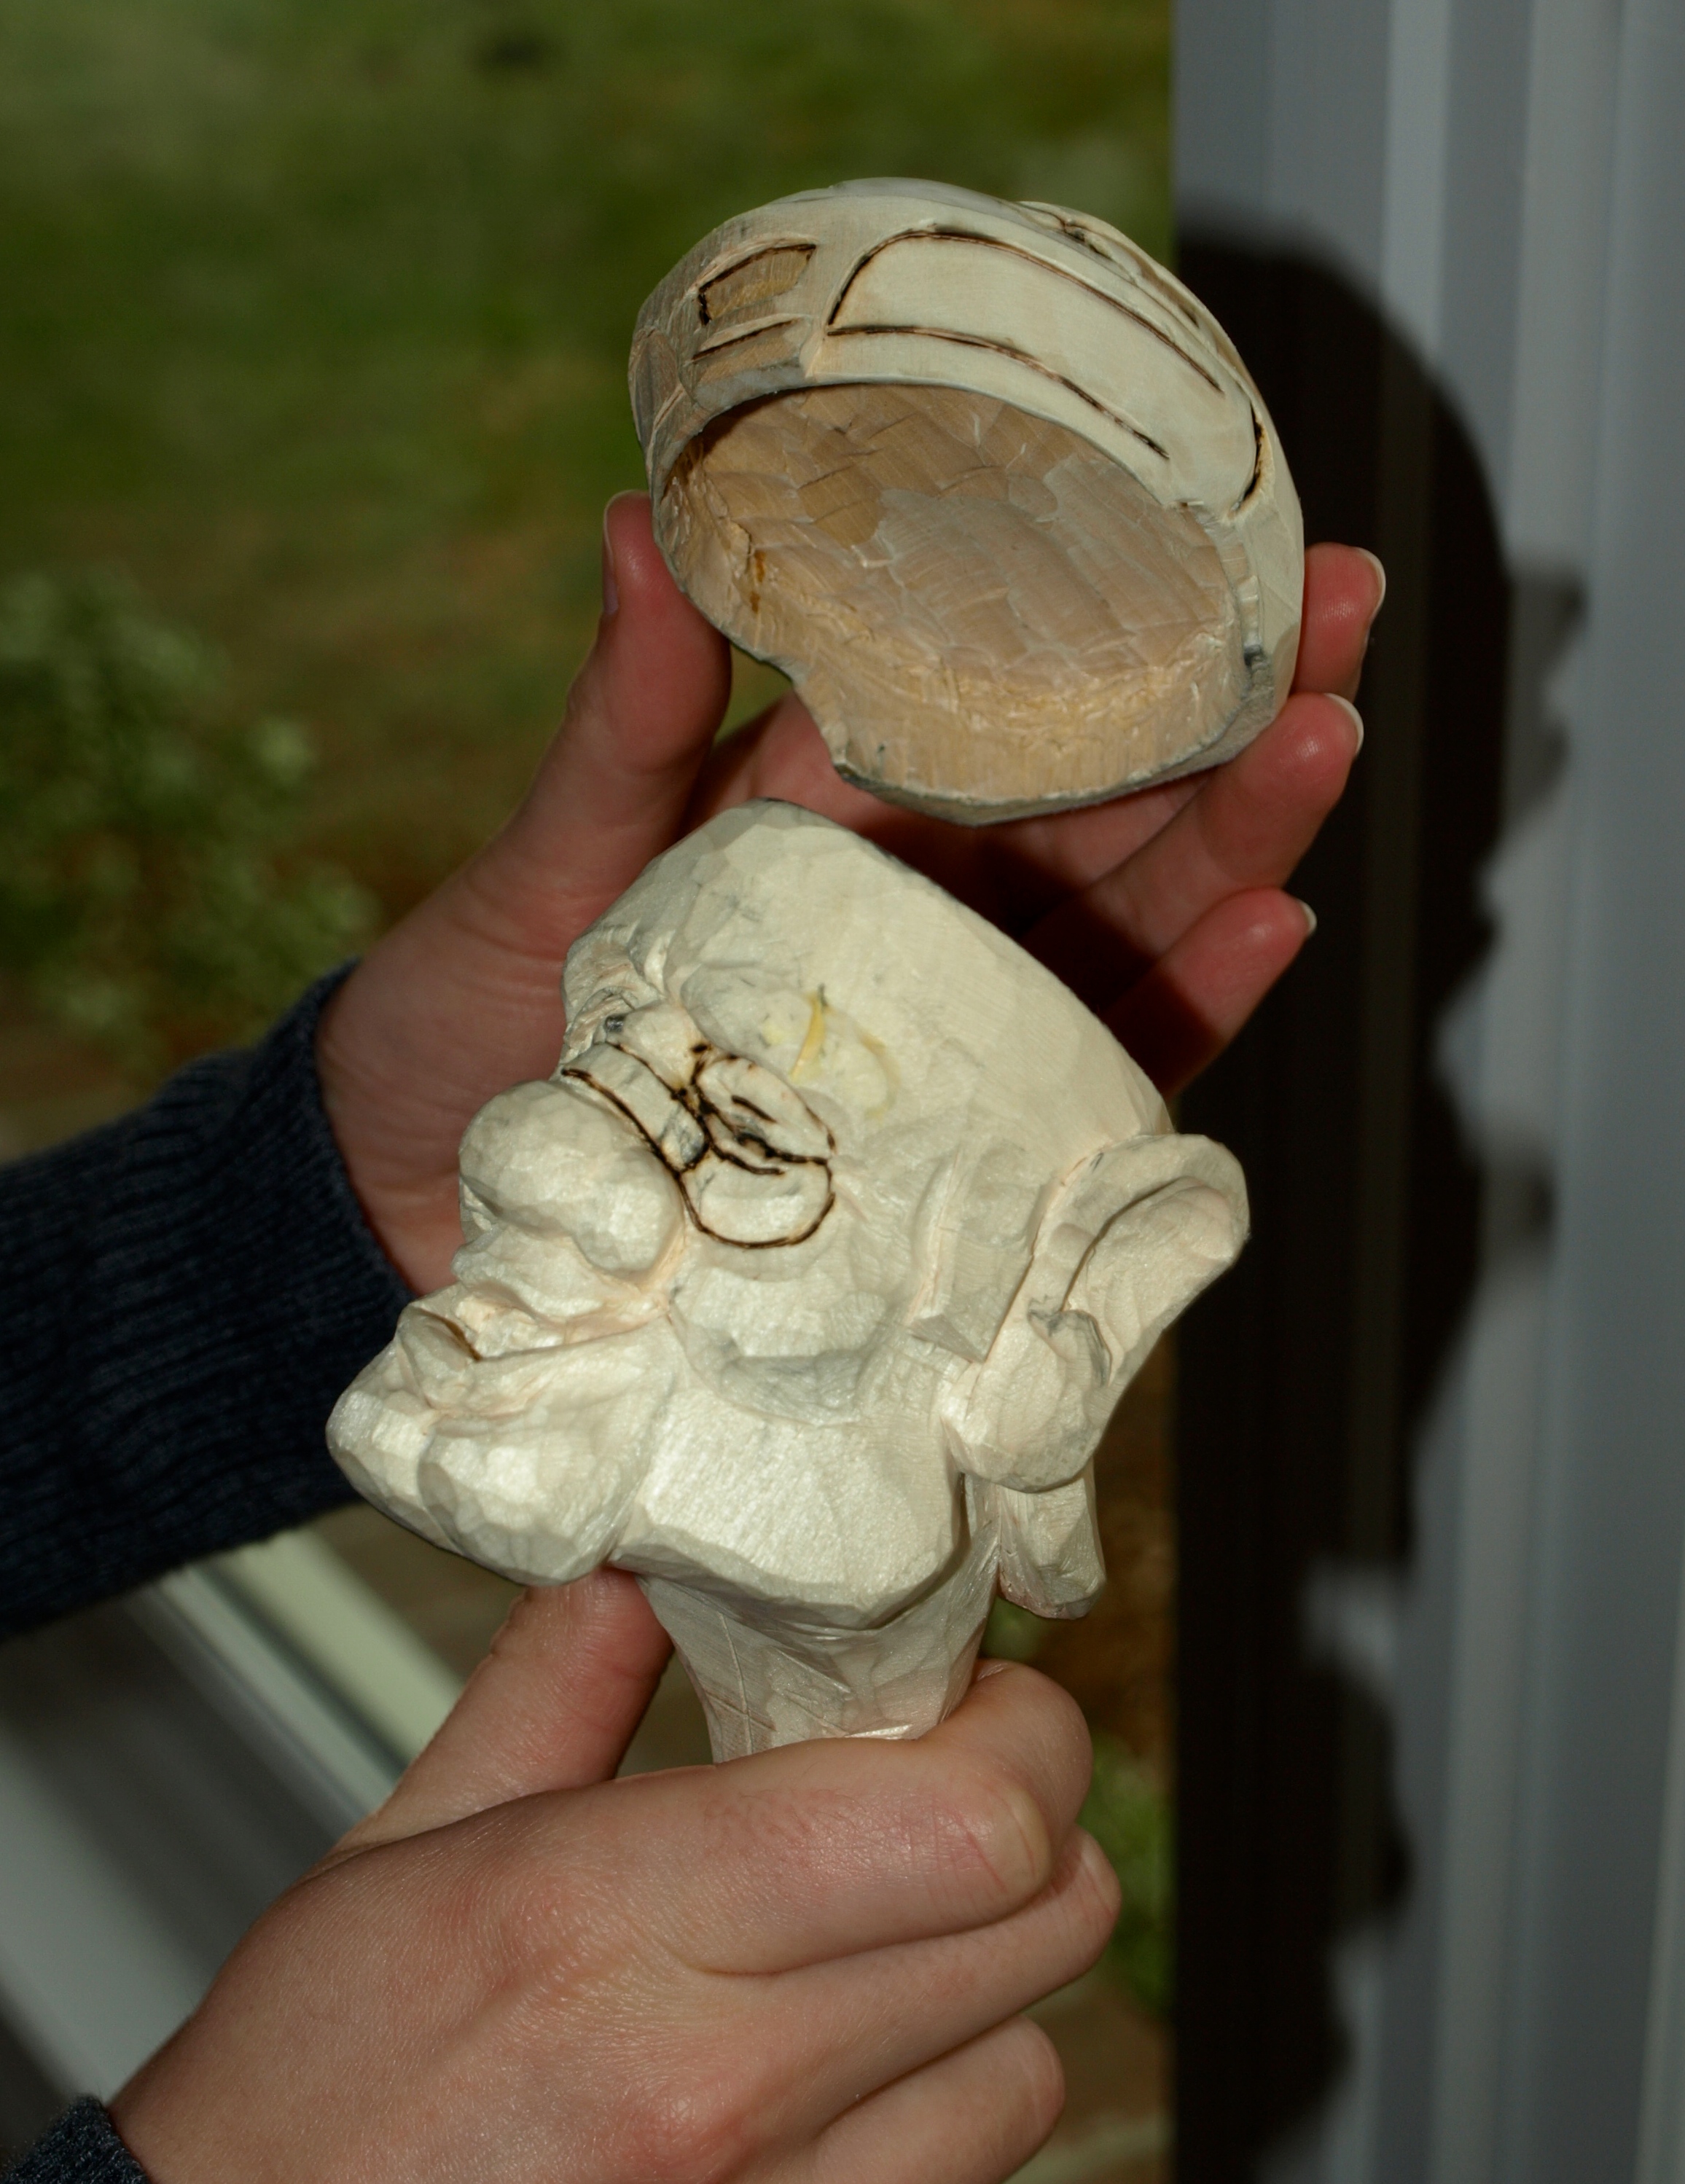
Our little fighter is looking pretty tough but definitely has a soft side to him…just look at that toothy grin.

OLYMPUS DIGITAL CAMERA

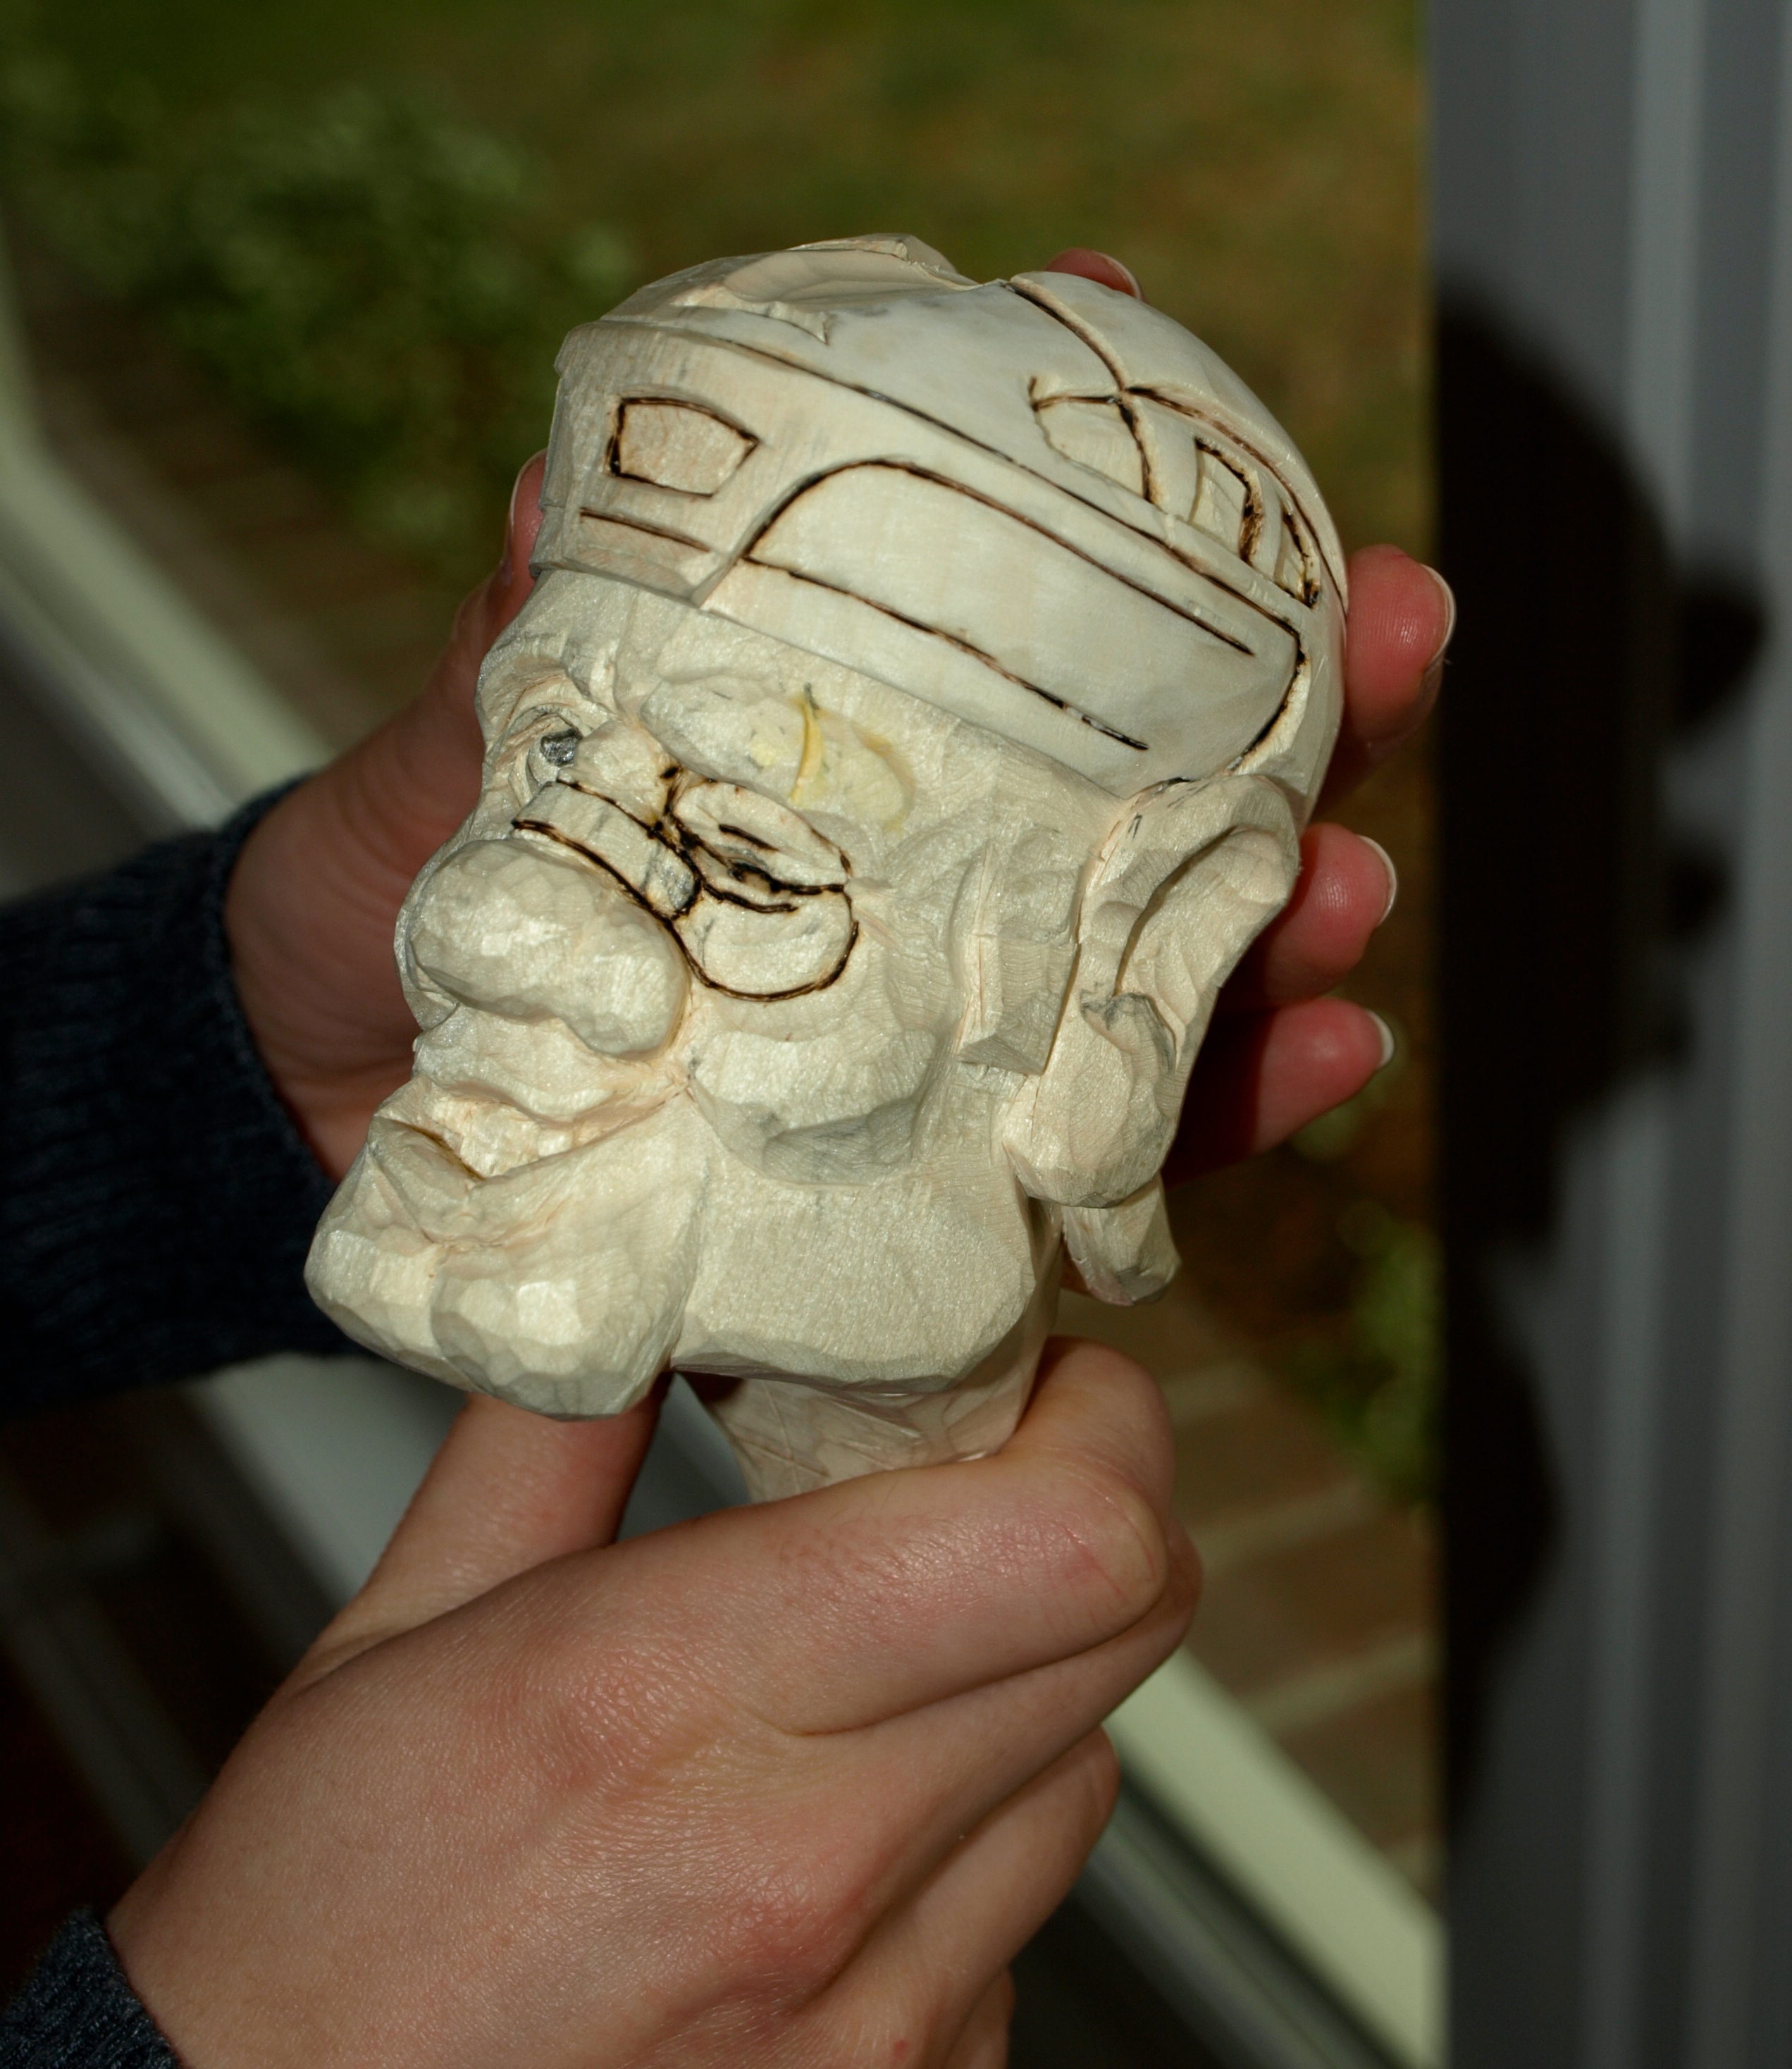
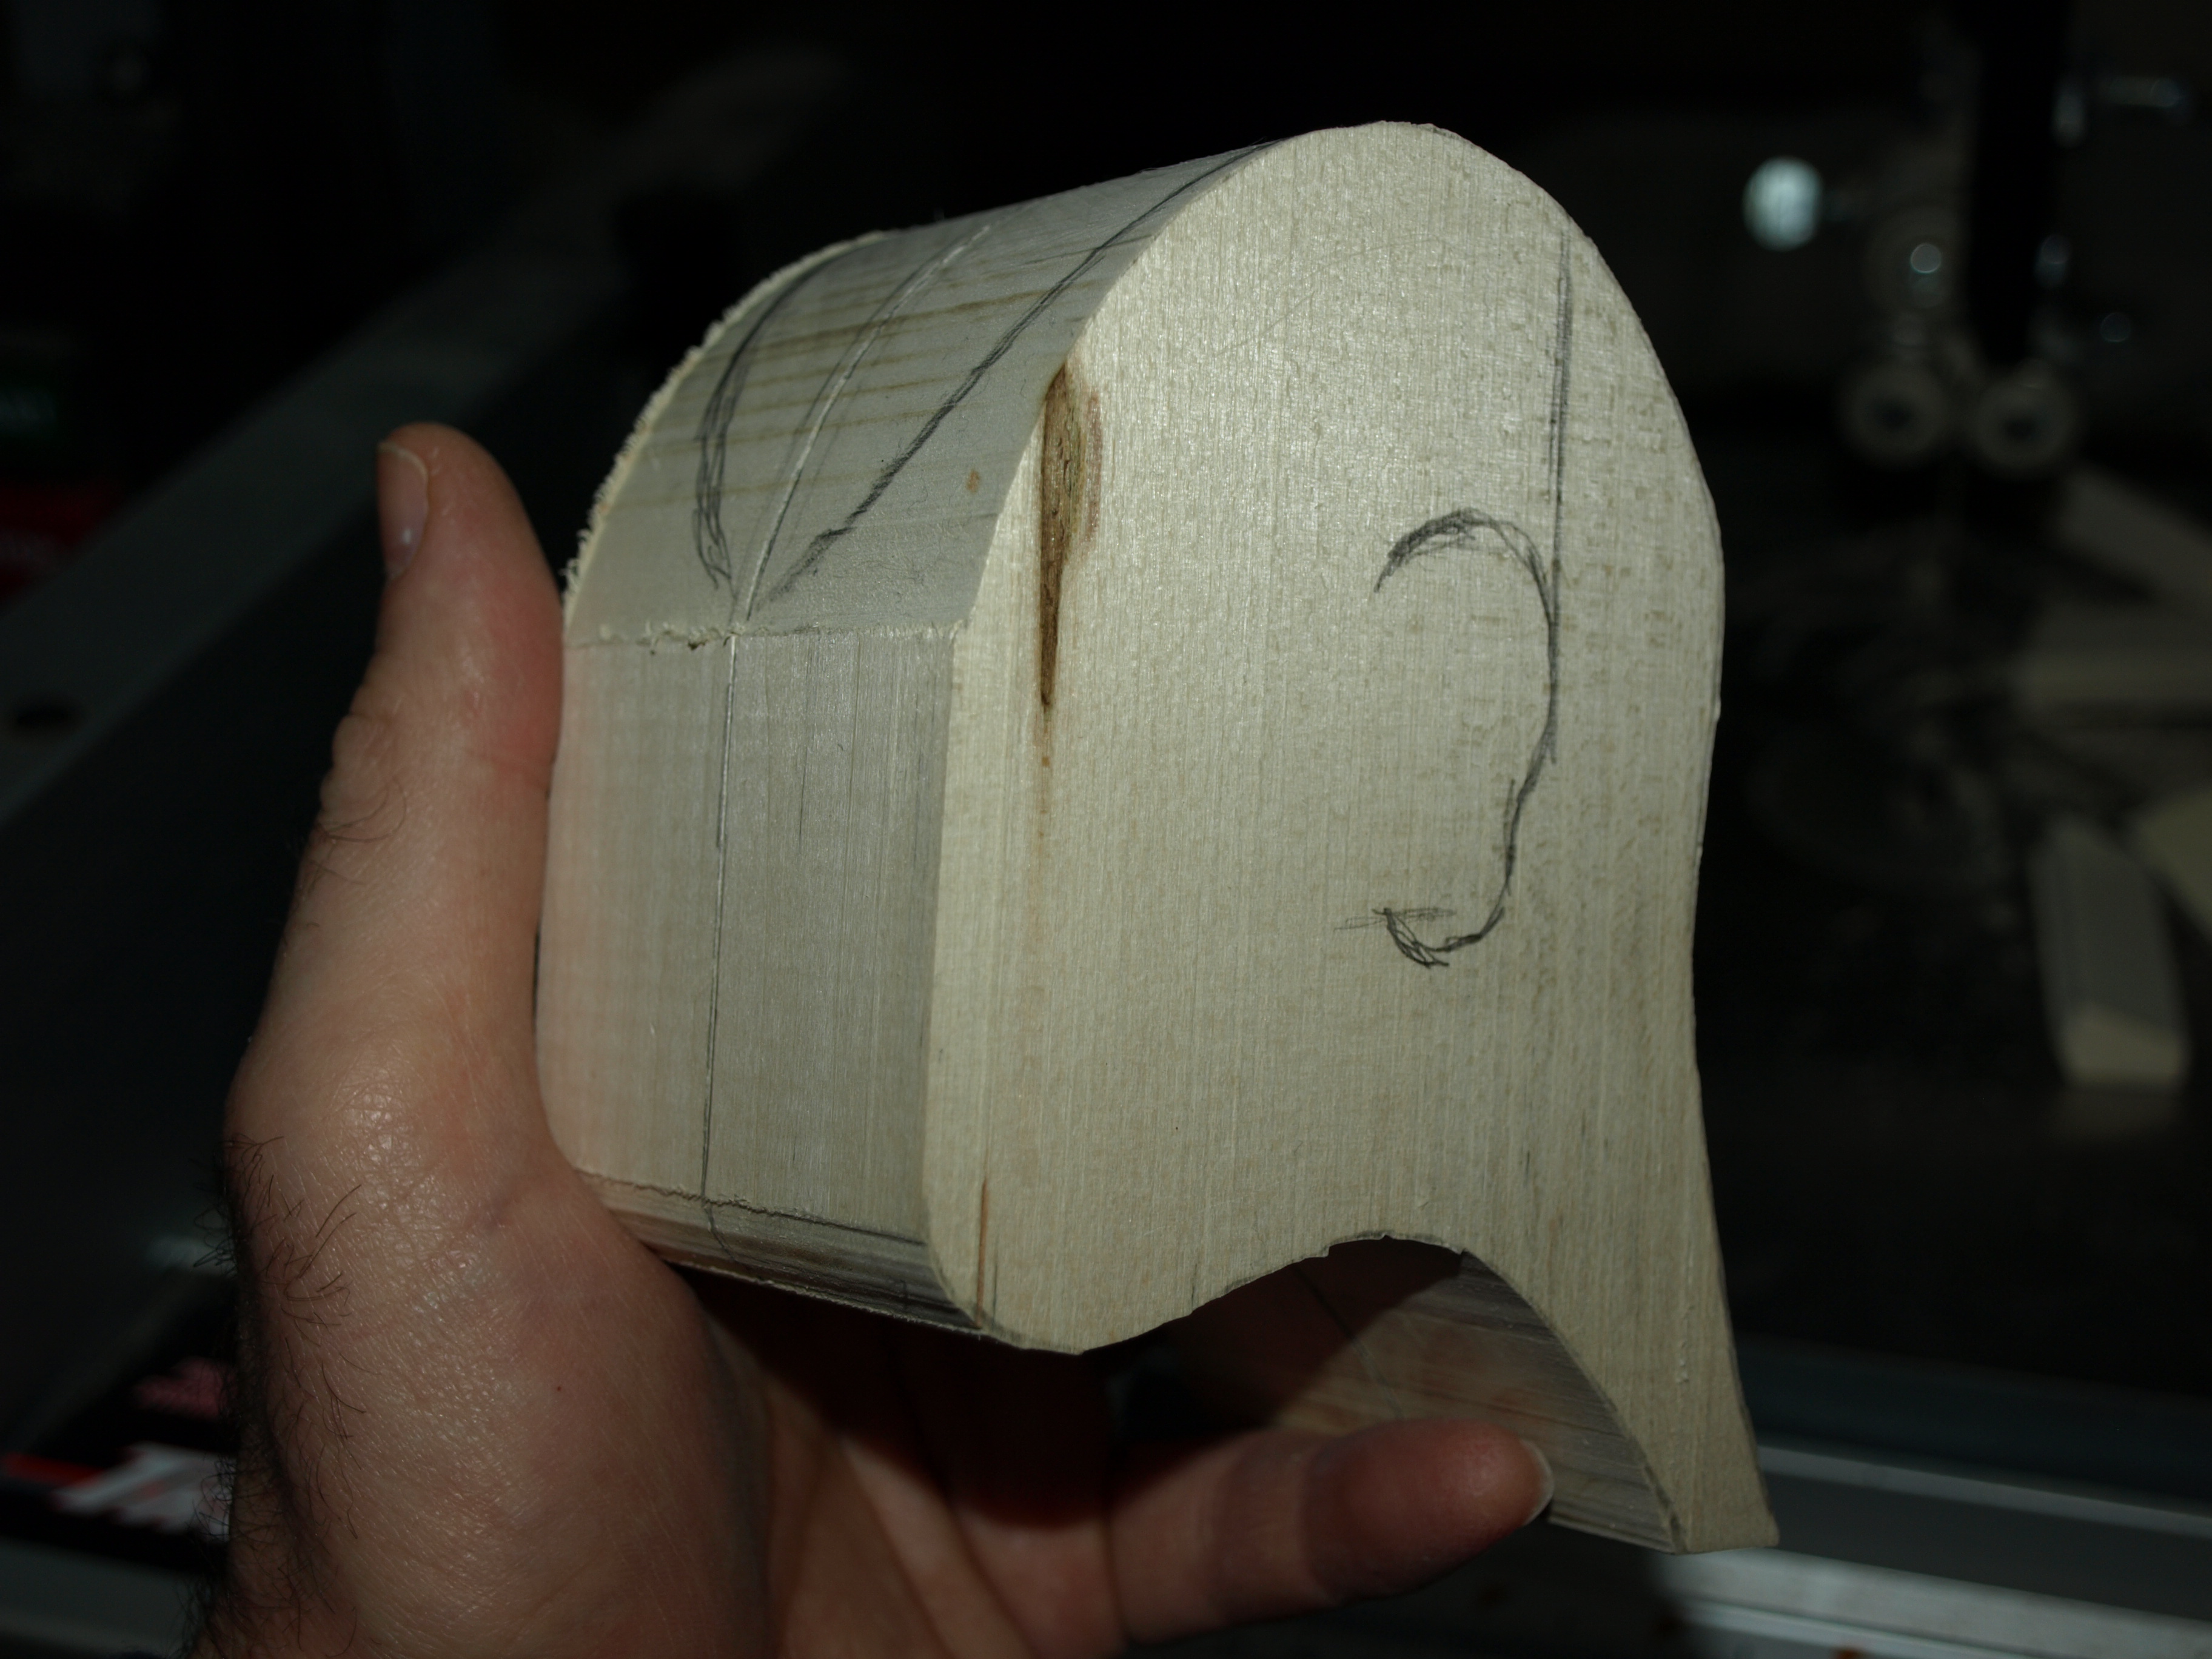
The helmet is being carved in two separate pieces…a top and back…so that it conforms tightly to the head.  I could have carved this as one piece, but I just like the way that a hat, or in this case a helmet, looks when it’s carved separately.  It just sits nicer on the head with a realistic gap between the headband and the head.

OLYMPUS DIGITAL CAMERA

It’s left-over turkey today for dinner.  My second favourite meal of the season!

Two Minutes – Fighting

That’s the theme and name of my next carving…”Two Minutes – Fighting”.

My little hound painting is coming along nicely so I thought this would be a good time to start the carving portion of my next project.  “Two Minutes – Fighting” is inspired by those who find themselves in the penalty box and will feature a pretty rough looking hockey player with an even rougher-than-usual look about him having very recently taken part in his favourite hockey activity.

I did a very quick sketch of what I’m shooting for and am starting off with carving the head.  My plan is to have quite a square-jawed character with quite a swollen eye…which is fun, as it’s a bit different from the other faces that I’ve carved.  In fact, Peggy often tells me that my carvings could be brothers as they look a bit alike.  Well, I’m going to do my best to ensure that this one will not be mistaken as a brother.

I started in my usual fashion with a basswood blank.  I’ve cranked the jaw forward quite a bit and the neck back as my plan is to have him stretching his head beyond his shoulder line as he sits behind the penalty box.

OLYMPUS DIGITAL CAMERA

OLYMPUS DIGITAL CAMERA

I started with his many-times-broken nose and ensured that it was good and crooked.  My plan is to carve a piece of white medical tape across the bridge of the nose.  You can see the start of that in the last photo.  His less than toothy grin just shows that he knows that it’s just a big game and the fights are as important to him as the goals.  The cheekbones and jaw line protrude quite a lot right now and you can see some swelling in his left eye and eye-brow.  It might get worse.

OLYMPUS DIGITAL CAMERA

OLYMPUS DIGITAL CAMERA

Still lots to do on his facial expression.  My plan is to do the helmet separately similar to the way that I’ve done the hats that I’ve carved.  I’m looking forward to carving the helmet almost as much as I looked forward to carving the banjo!

On a more peaceful note, Emily has arrived and our Christmas festivities have started!

OLYMPUS DIGITAL CAMERA

Some Painting for the Country Pup

Here’s a quick first peak at the little pup with much of the painting completed.  This weekend, I’ll apply some satin clear urethane to seal and brighten the colours and that should be about it on the figure before I start into the base on which the rocking chair will sit.  I have some ideas for that but I’m sure they’ll change as I get started and add more to the scene.

So, here’s what I’ve been up to…

The hound got a base coat of ivory lightened with a bit of white.  Then, in many individual washes ( very diluted paint ) of alternating milk chocolate and asphaltum browns, he got his colouring and little “spots”.  Then, the figure received a very dilute wash of asphaltum brown over everything to bring out all of the little contours in the carving.  Finally, I applied some yellow ochre and raw sienna in little smudges just to show that his paws, in particular, are a bit dirty here and there.  After all, he is a Country Hound and should have spent at least a little bit of time close to the earth!

The overalls were  painted in several washes of midnight blue.  I darkened up the recesses and wrinkles with extra washes of the same colour, and then added some whitened blue to show where the high points were and where those denims may have been worn away a bit.  I also added a nice green and yellow plaid patch to the knee patch that I had carved earlier.  After a few hints of yellow ochre and raw sienna “dirt”, a dry brush of slightly darkened ivory was used to give the overalls that dusty and worn look that I like on the clothing that I carve.

For those interested in seeing these methods used in outstanding fashion, be sure to watch one of Lynn Doughty’s videos which you can link to off to the side of this page.

Well, that’s about it for now…hope you enjoy the progress so far and are having fun with your Christmas and Holiday preparations.

OLYMPUS DIGITAL CAMERA

OLYMPUS DIGITAL CAMERA

The Tail Takes a New Direction…Literally

Any good artist always listens to input from others.  Did you know that Michelangelo actually started painting the floor of the Sistine Chapel?  Don’t quote me on that.

Well, after some good input from Cheryl and Lynne, some agreement from Peggy and a bit of experimentation on Rosie ( sorry Rosie ), the tail has taken a new direction.  Haha!

Actually, this is a good chance to show what the tail looked like with just the copper wire twisted together.  Once the epoxy is applied it fattens up the tail considerably and smooths out all of the bumps and spirals of the copper wire.

I like this look a lot better and I think I’ll fatten the tail up even more this time with the epoxy, but please weigh in!…your suggestions make this a lot of fun…and it’s easy to adjust the tail or remove it completely.

OLYMPUS DIGITAL CAMERA

All Prepped for Paint

Well, I think that I’ve done about as much as I need to before putting a bit of colour to this little hound.  Let me tell you what I’ve done since my last post.

The little handkerchief got a bit of checker-board paint.  The colours are barnyard red and butterscotch, with a bit of highlighting over the butterscotch with bright white.  Finally, the whole thing got a dry brushing of ivory to make it look a bit used.  I still need to put a coat of urethane on it to brighten up the colours further…but, I like the result so far.

I also carved in a hint of some claws on all of the paws and then epoxied all of the pieces in place…the ears and the one back paw that cuddles the banjo.  After that I gave the whole thing a coat of very thinned gesso.  Again, I like to use the gesso where many others like to paint directly onto the bare wood.  For me, the gesso serves to seal the wood and make a good base for the acrylics and it also tends to highlight any imperfections so that I can deal with them before the final paint.  Normally, the imperfections are little stray knife marks or some wood “fuzz” that I don’t like.  Normally.

This case wasn’t normal…once I put the gesso on I noticed for the first time that I forgot something…a tail!  I guess that the overalls threw me off…but I corrected that after I stopped laughing.  I made the tail in my typical fashion with some copper wire twisted together and coated with epoxy.  I wrapped it around the back of the chair and I like the way that it balances the handkerchief on the other side of the carving.  I’m still chuckling a bit because I have been accused in the past of omitting tails!

Hope you like the way that it’s turning out…I’m enjoying it.

OLYMPUS DIGITAL CAMERA

OLYMPUS DIGITAL CAMERA

OLYMPUS DIGITAL CAMERA

OLYMPUS DIGITAL CAMERA

A Backyard Christmas Scene

For those of you who visit my website and are enjoying much warmer climates…here’s what it looks like in our part of Canada tonight.  I guess Santa won’t have any trouble getting his sleigh around this year.

OLYMPUS DIGITAL CAMERA

A Country Hat and a Pretty Pup

Although I wasn’t able to spend much time on my carving this week, the little hound’s hat did get some paint.

Basically a  light yellow combined with some yellow ochre to come up with an interpretation of a straw hat.  Just a hint of burnt sienna around the brim and some yellow ochre here and there to make it look a bit lived-in.  Finally a dry-brush “dusting” of off-white to make the worn parts stand out a bit.  I think the result is a good rendering of a straw hat that a little banjo playing hound dog might sport.

OLYMPUS DIGITAL CAMERA

Now, this isn’t a Basset Hound by any means, but my little Sheltie, Rosie, got her Christmas hair-do today and insisted on being included in this post.  I try to keep Rosie happy.

OLYMPUS DIGITAL CAMERA

Pickin’ and a Grinnin’…

Our little hound will soon be pickin’ and a grinnin’ with this little banjo on his knee.

I cut the heads off of some very small, shiny finishing nails and arranged them around the tin section of the banjo.  This is meant to resemble the small bolts found on full size banjos that are designed to keep the drum skin tight.  Each nail is epoxied into holes that I drilled around the banjo skin.

OLYMPUS DIGITAL CAMERA

I carved some “ears”, or tuning mechanisms, for the banjo out of oak and gave them a dark stain.

OLYMPUS DIGITAL CAMERA

I then bundled some very fine wire together in five strands and epoxied it in a hole that I drilled in the base, or end, of the banjo and glued that bundle in place.  Then it was a matter of fashioning a very small bridge and gluing it to the banjo body skin to route the little strings across.

After drilling some holes in the tuning mechanisms will a pin, I threaded each wire through and wrapped it around the tuning dowels and epoxied them in place.  Finally, I arranged the strings evenly across the bridge and epoxied that end and the other end of the strings at the neck of the banjo so that everything would stay put.

A few twists of the remaining wire around a little dowel to make the curly bits at the end…and we’ve got ourselves a little banjo.

Now, that was fun.  I really need to think up more reasons to make banjos.  I wonder if they’d make nice Christmas Tree decorations?

OLYMPUS DIGITAL CAMERA

Christmas Elf

Well, our #1 Christmas Elf has given the green light for the beginning of Christmas decorations.  Paul has been busy this week decorating the house.  I think what kicked it off was running into Santa unexpectedly on a trip to visit a local garden centre that had a few visiting reindeer…we expected to see reindeer, but not Santa!

It didn’t take much convincing after that to start getting the decorations out.

Happy Thanksgiving to all my friends from the U.S….take it slow because another turkey dinner is only a month away.

OLYMPUS DIGITAL CAMERA

Some Final Fitting

The banjo is looking so nice that I couldn’t resist doing some final fitting with everything together.  I added a bit of colour to the skin of the banjo to make it look well used.  I also added some of the aluminum tape to the frets to give them a metal shine.  To make the frets, I had started with a wood burning tool and a bit of silver paint, but just wasn’t satisfied with the look.  So I carved out small channels and inlaid the metal tape.  I’m a lot happier with that look.

If you remember the term “letraset”and the letters, numbers and figures that came with this product, you’ll remember this print application that basically rubs off on the item that you want to add some printing on.  Well I have a bit of that left in my shop and found a little swirly application that I added to the head of the banjo.

Still quite a bit of work to do on the banjo but I’m also getting very close to starting the painting on the hound.

OLYMPUS DIGITAL CAMERA

Post Navigation