tributesinwood

Wood Carvings by Mark Sheridan

Gotta Love a Banjo…

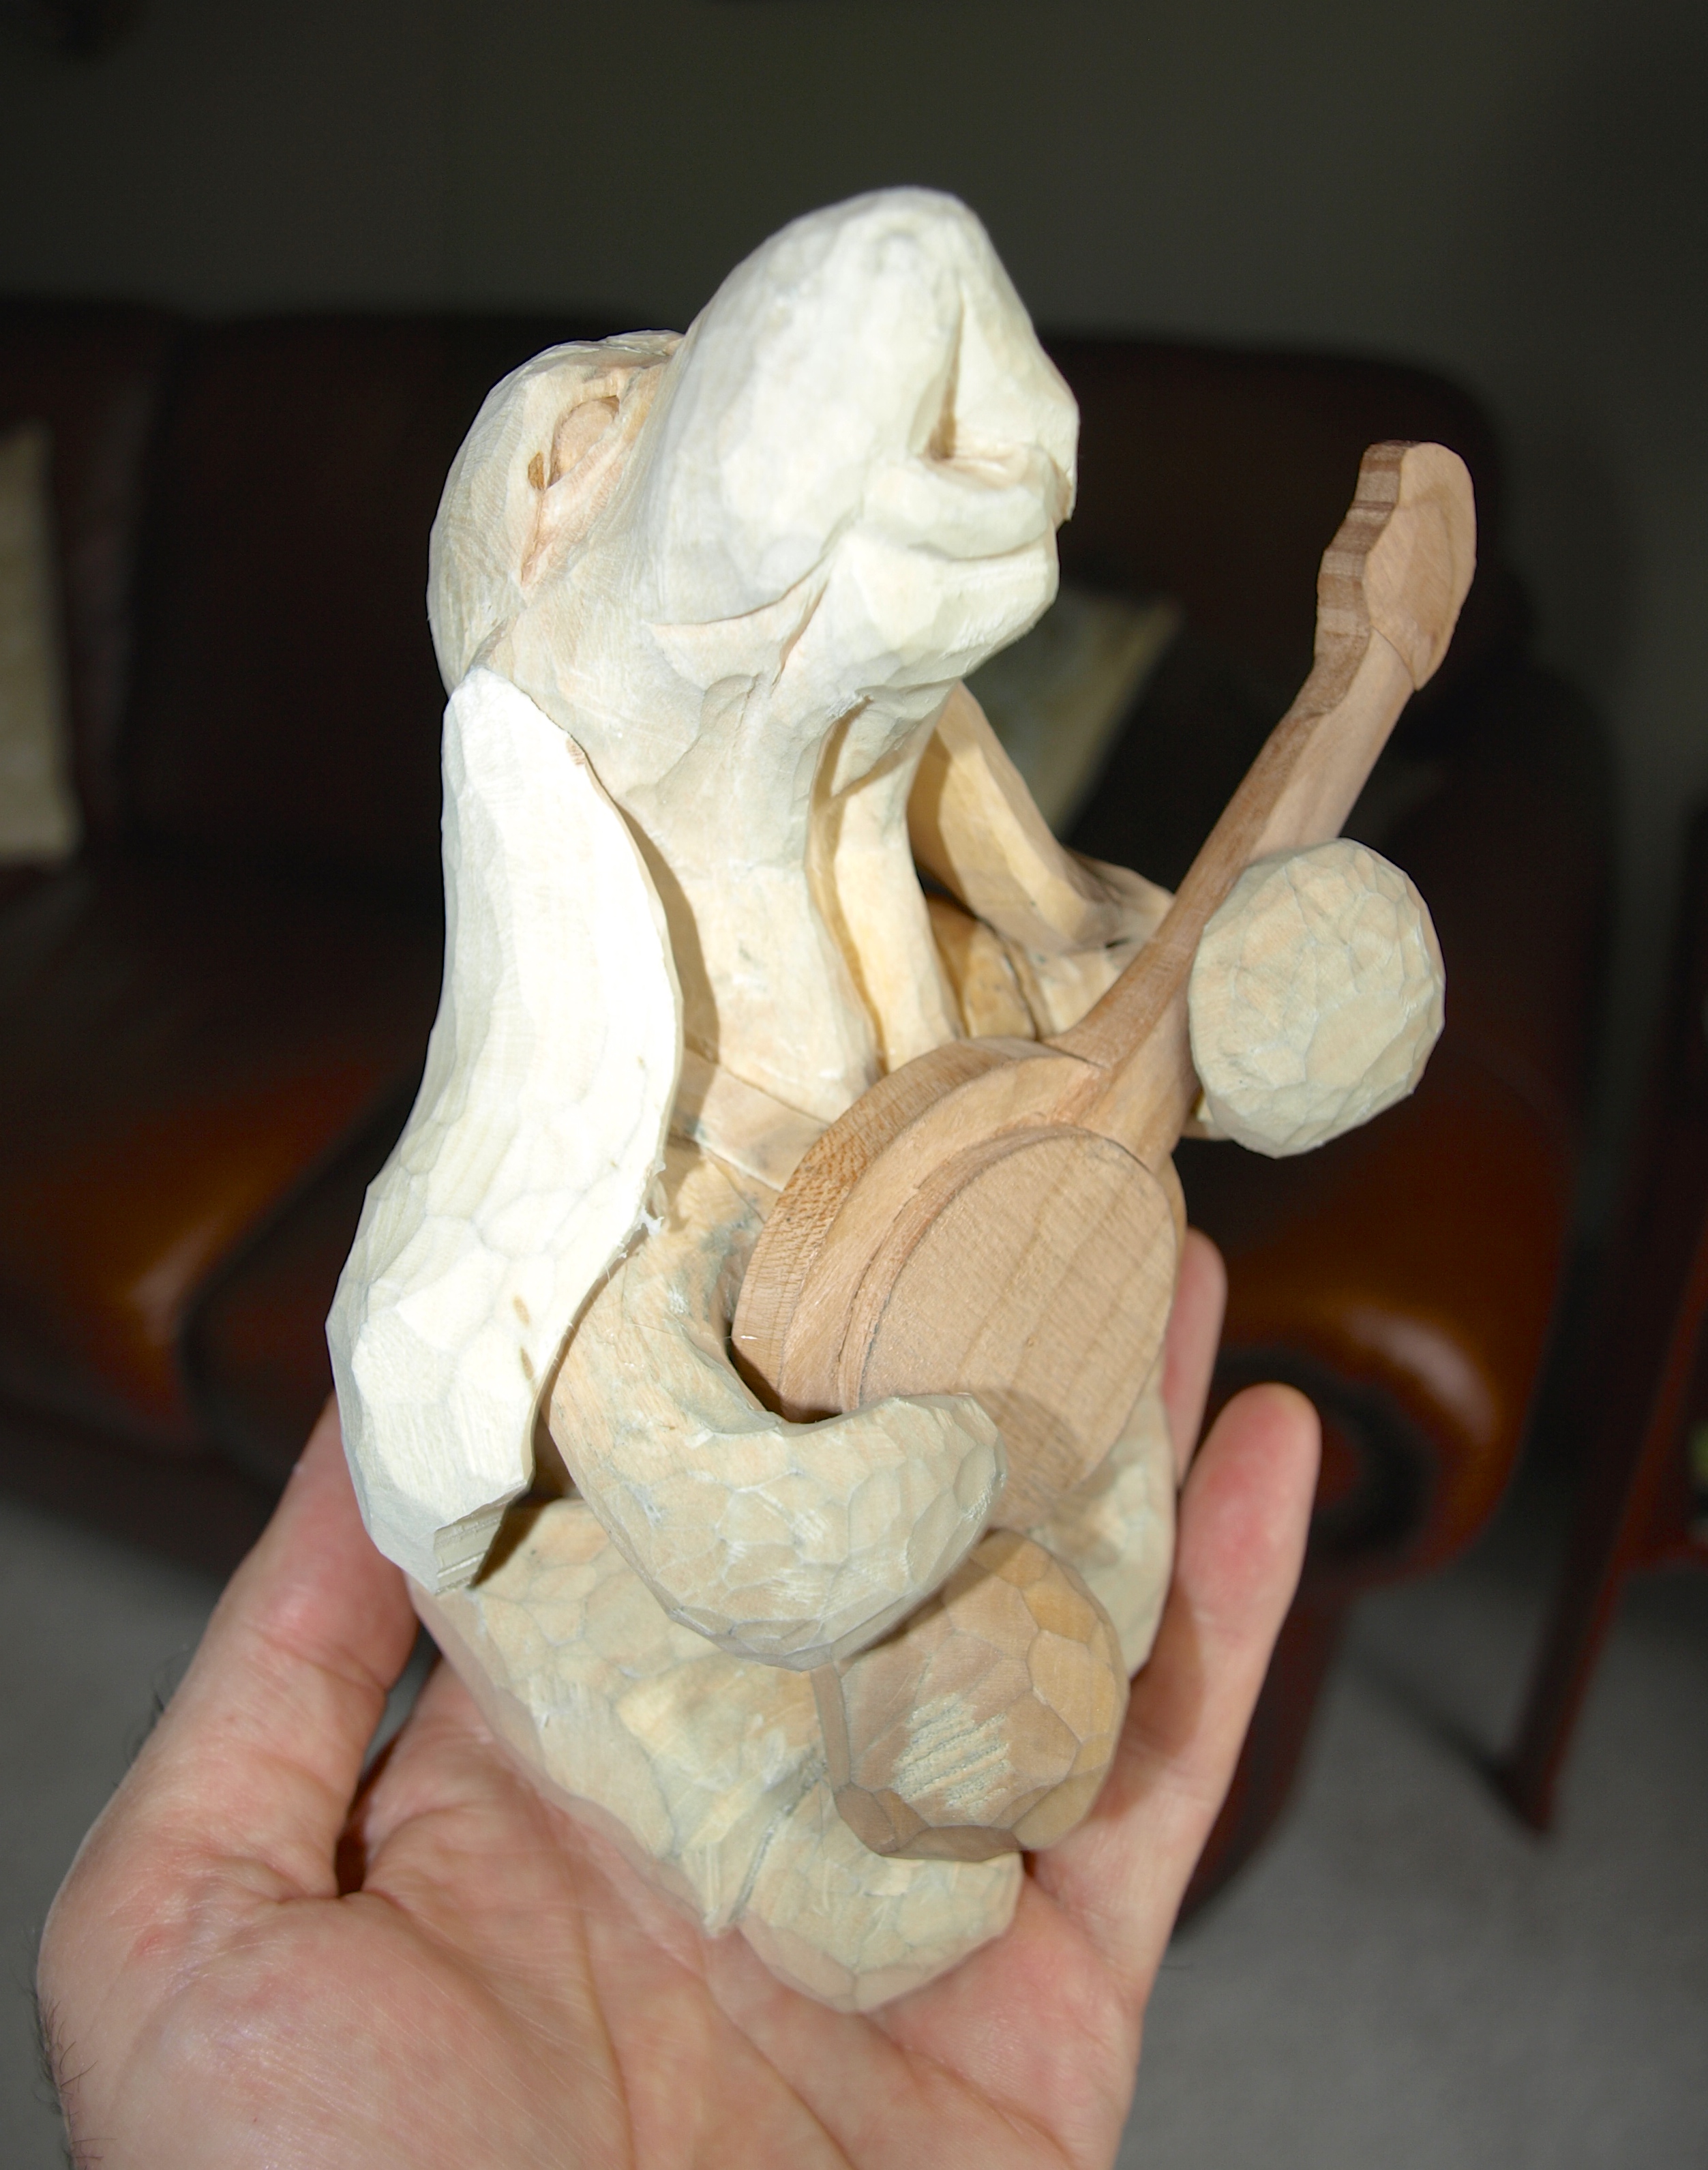
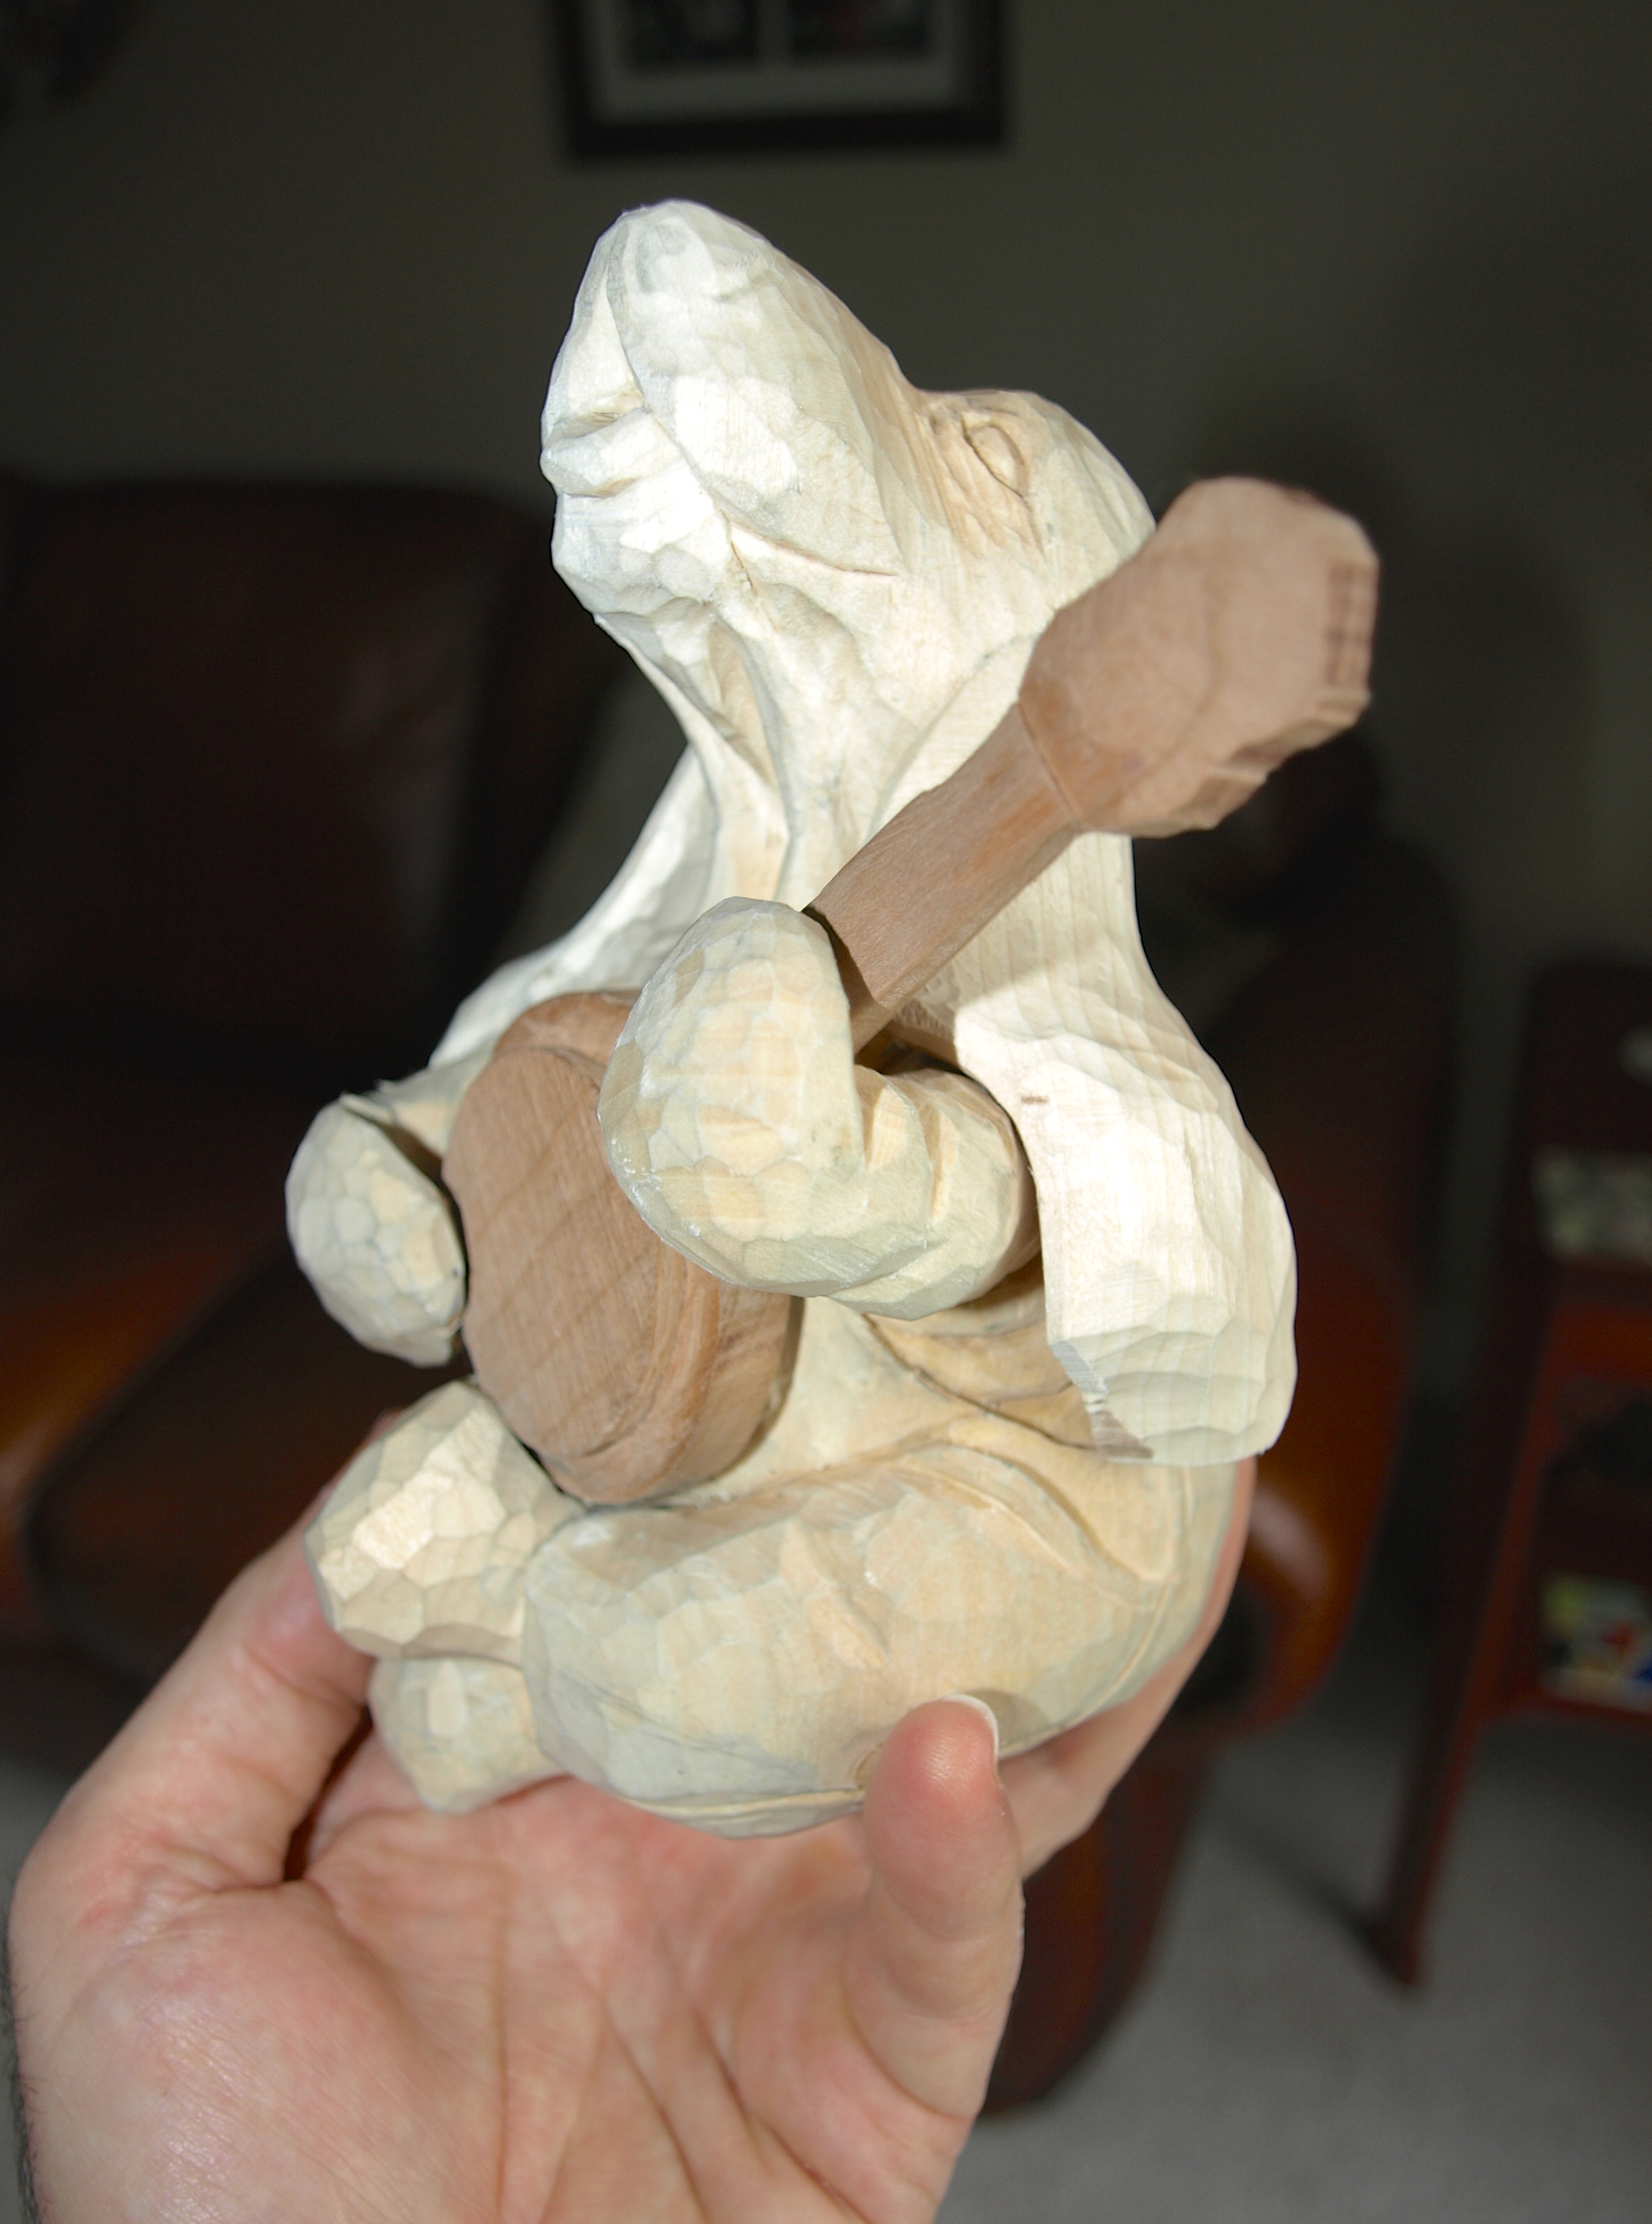
I’ve been looking forward to working on this banjo ever since it was suggested to me…and now with the Hound’s ears well underway, I’m going to turn a bit more attention toward it.

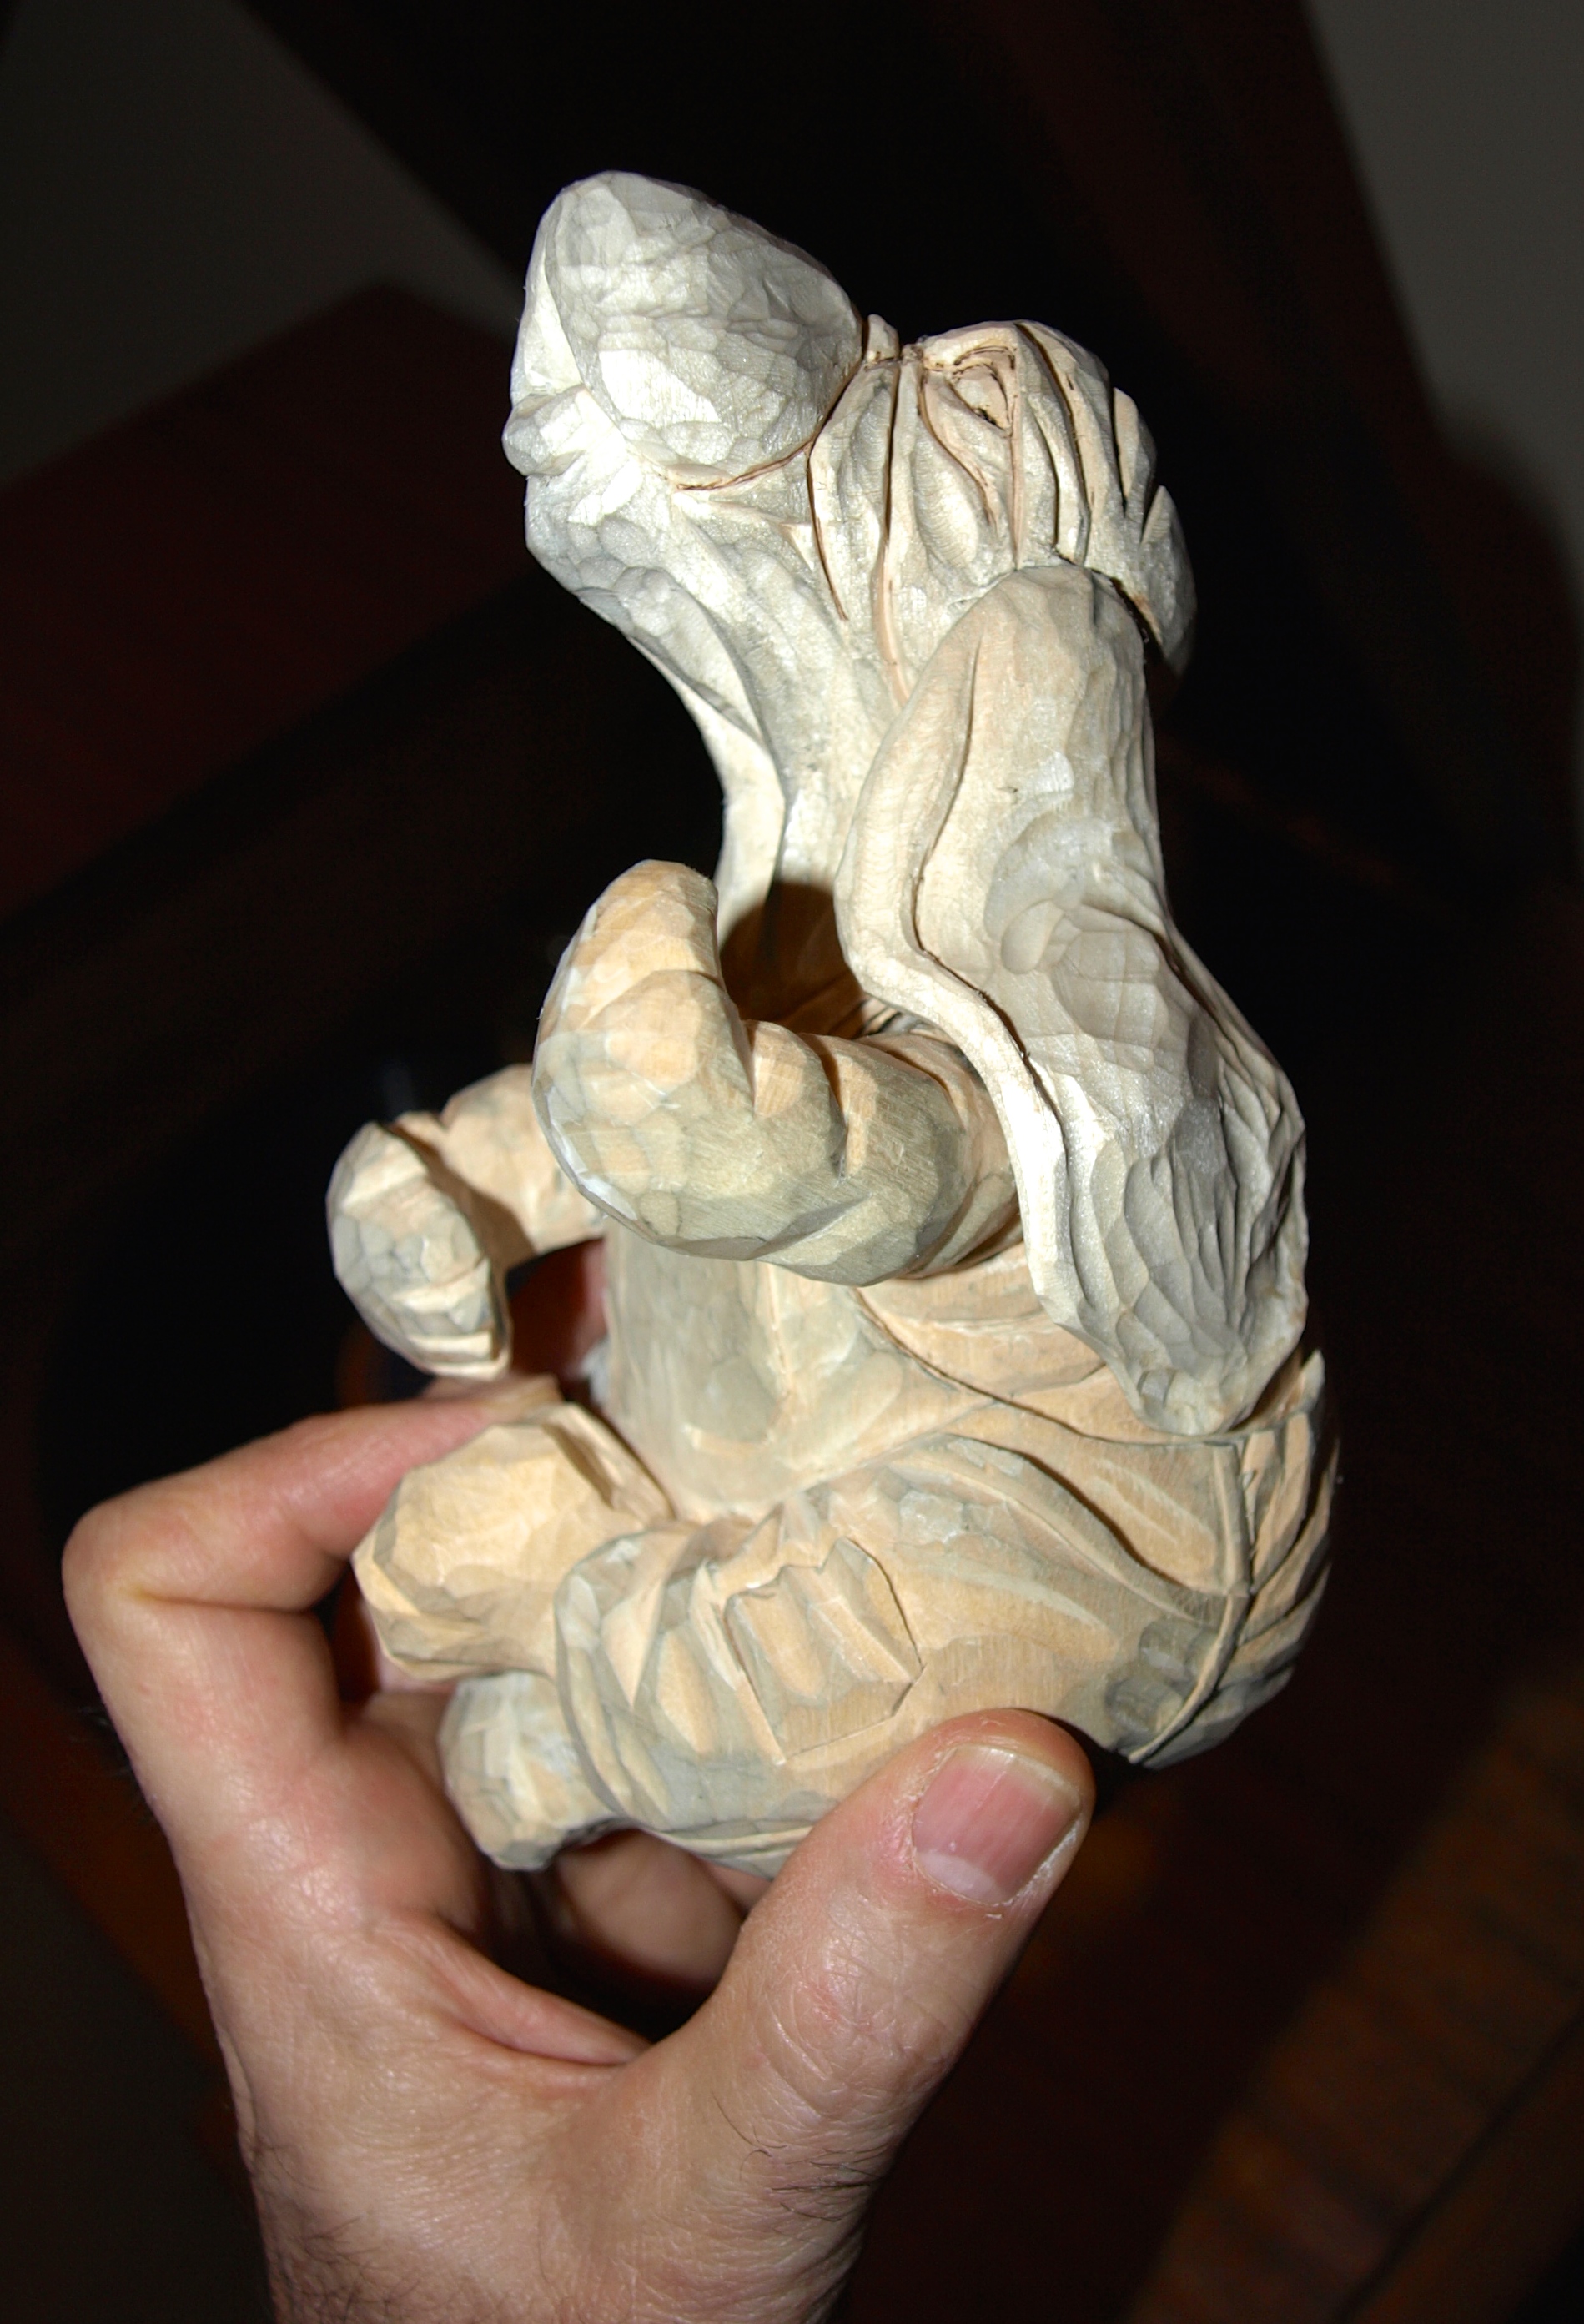
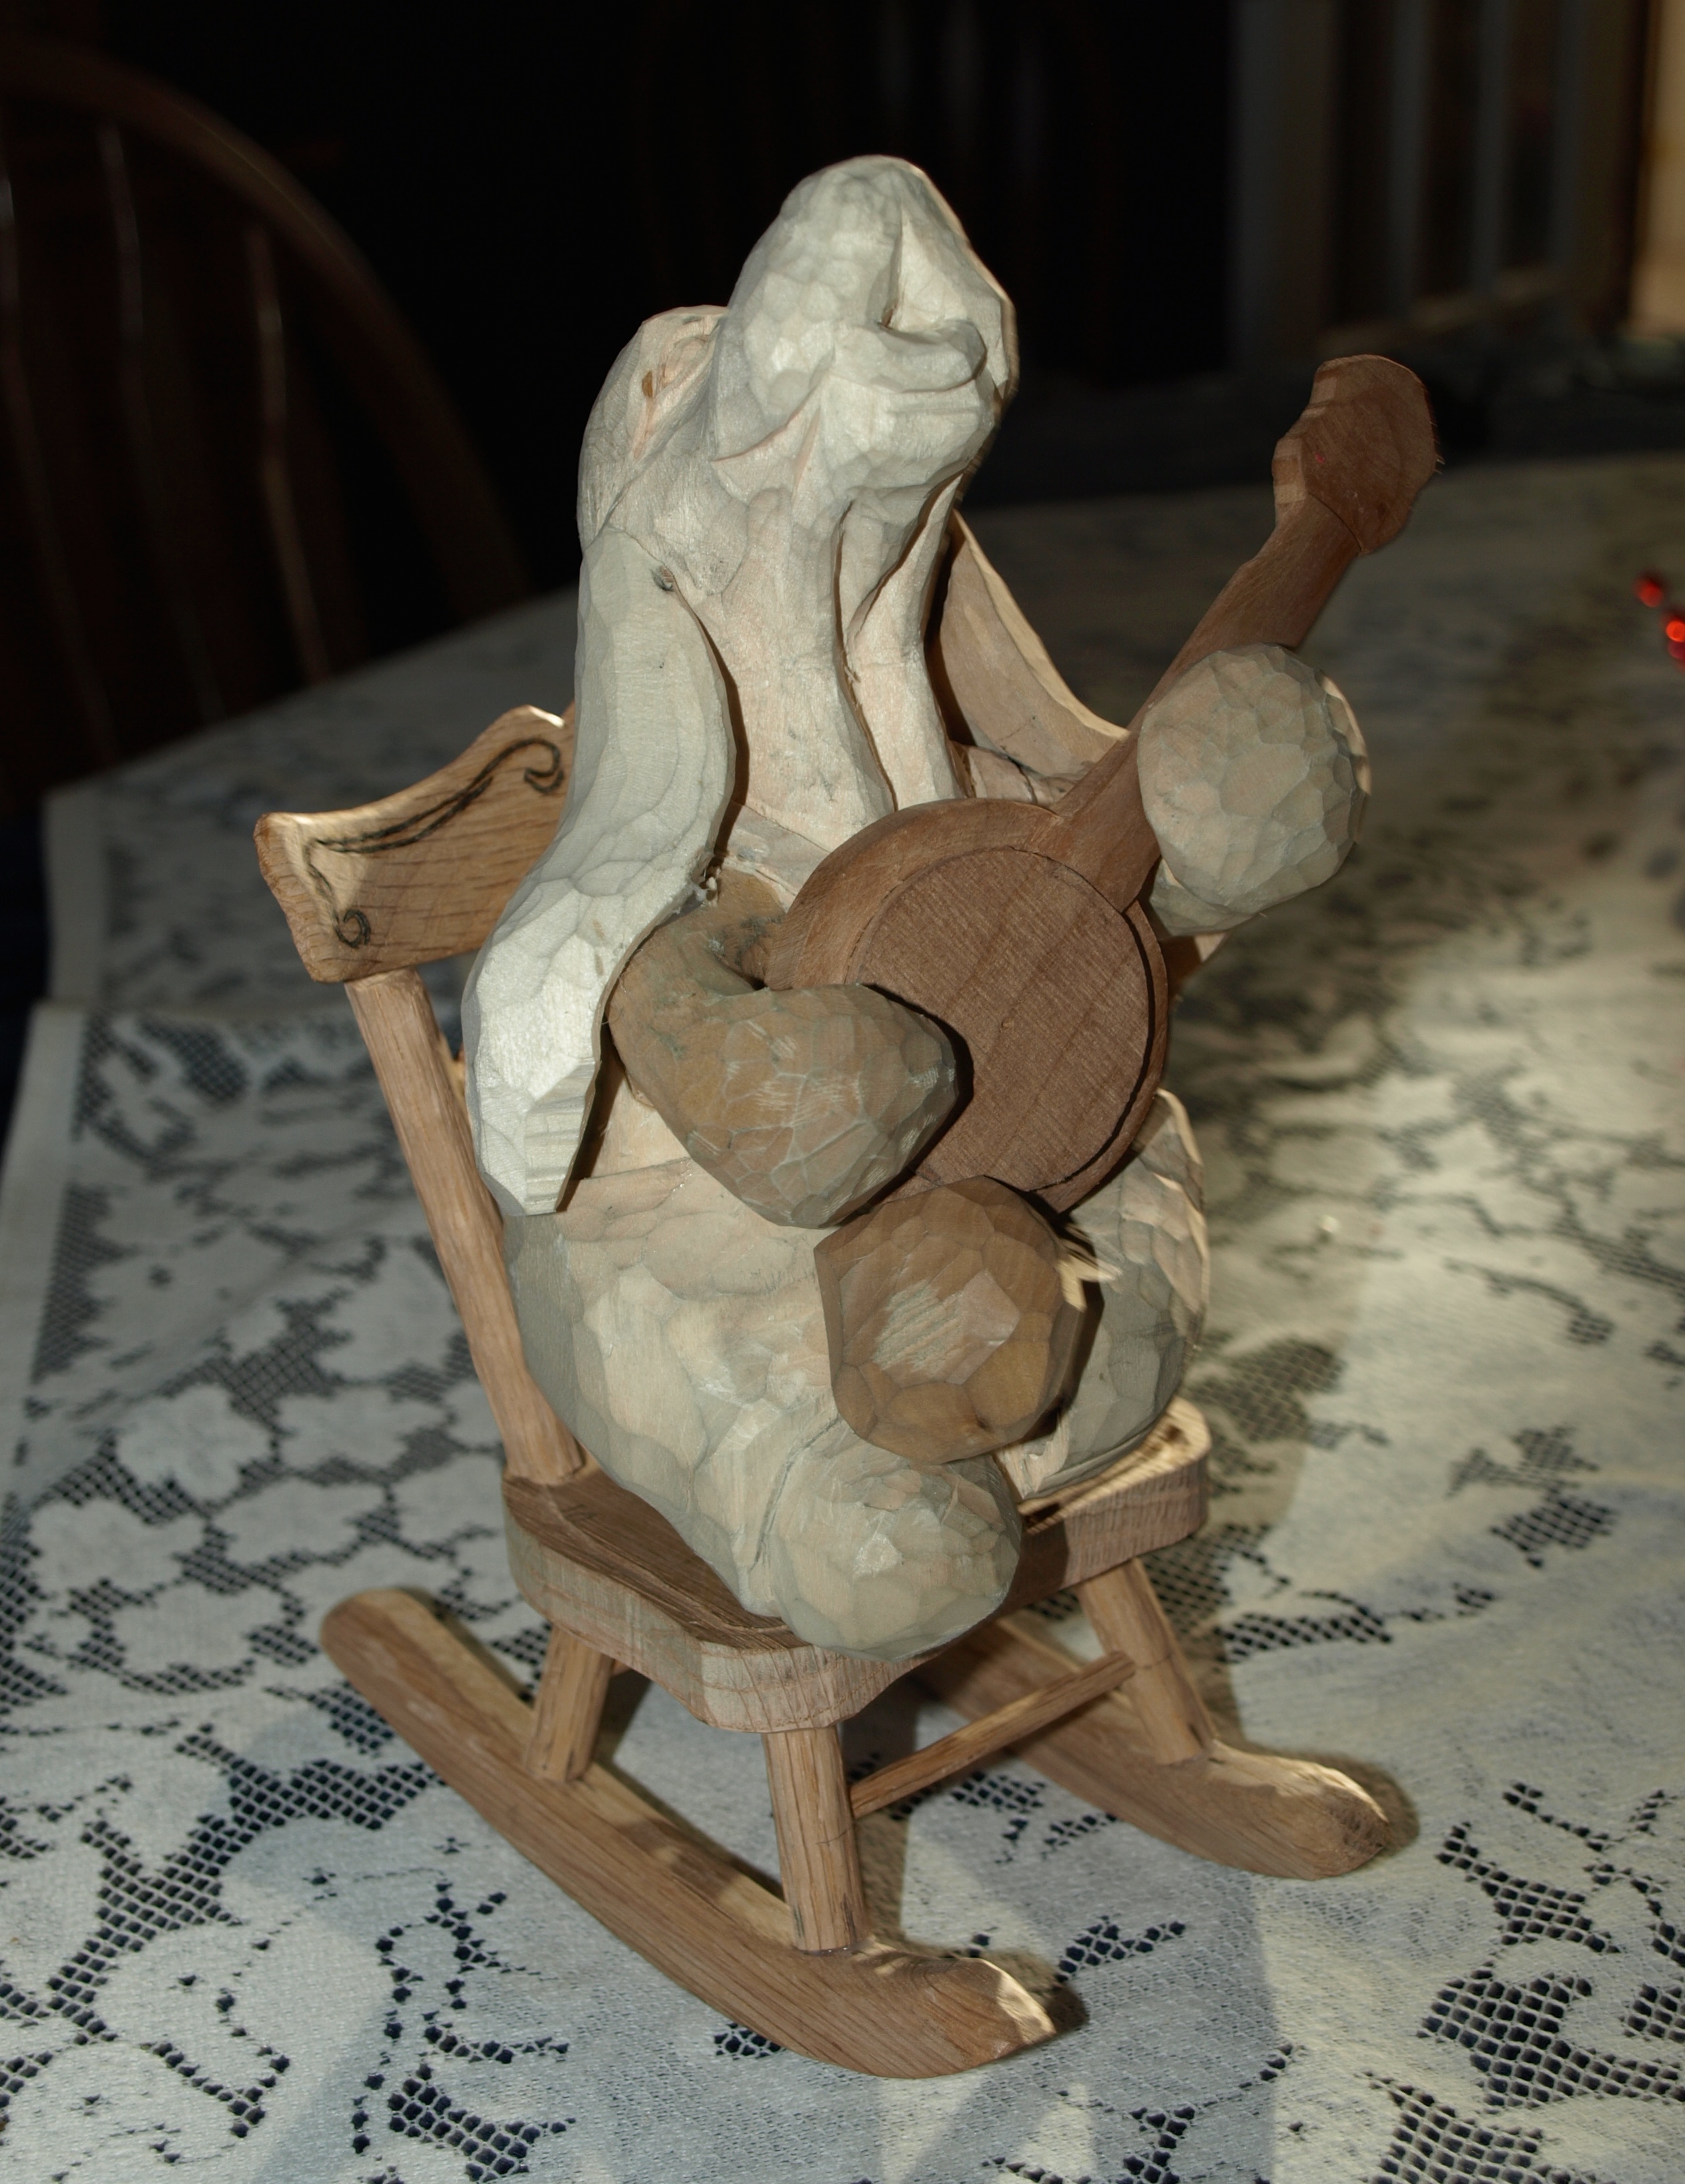
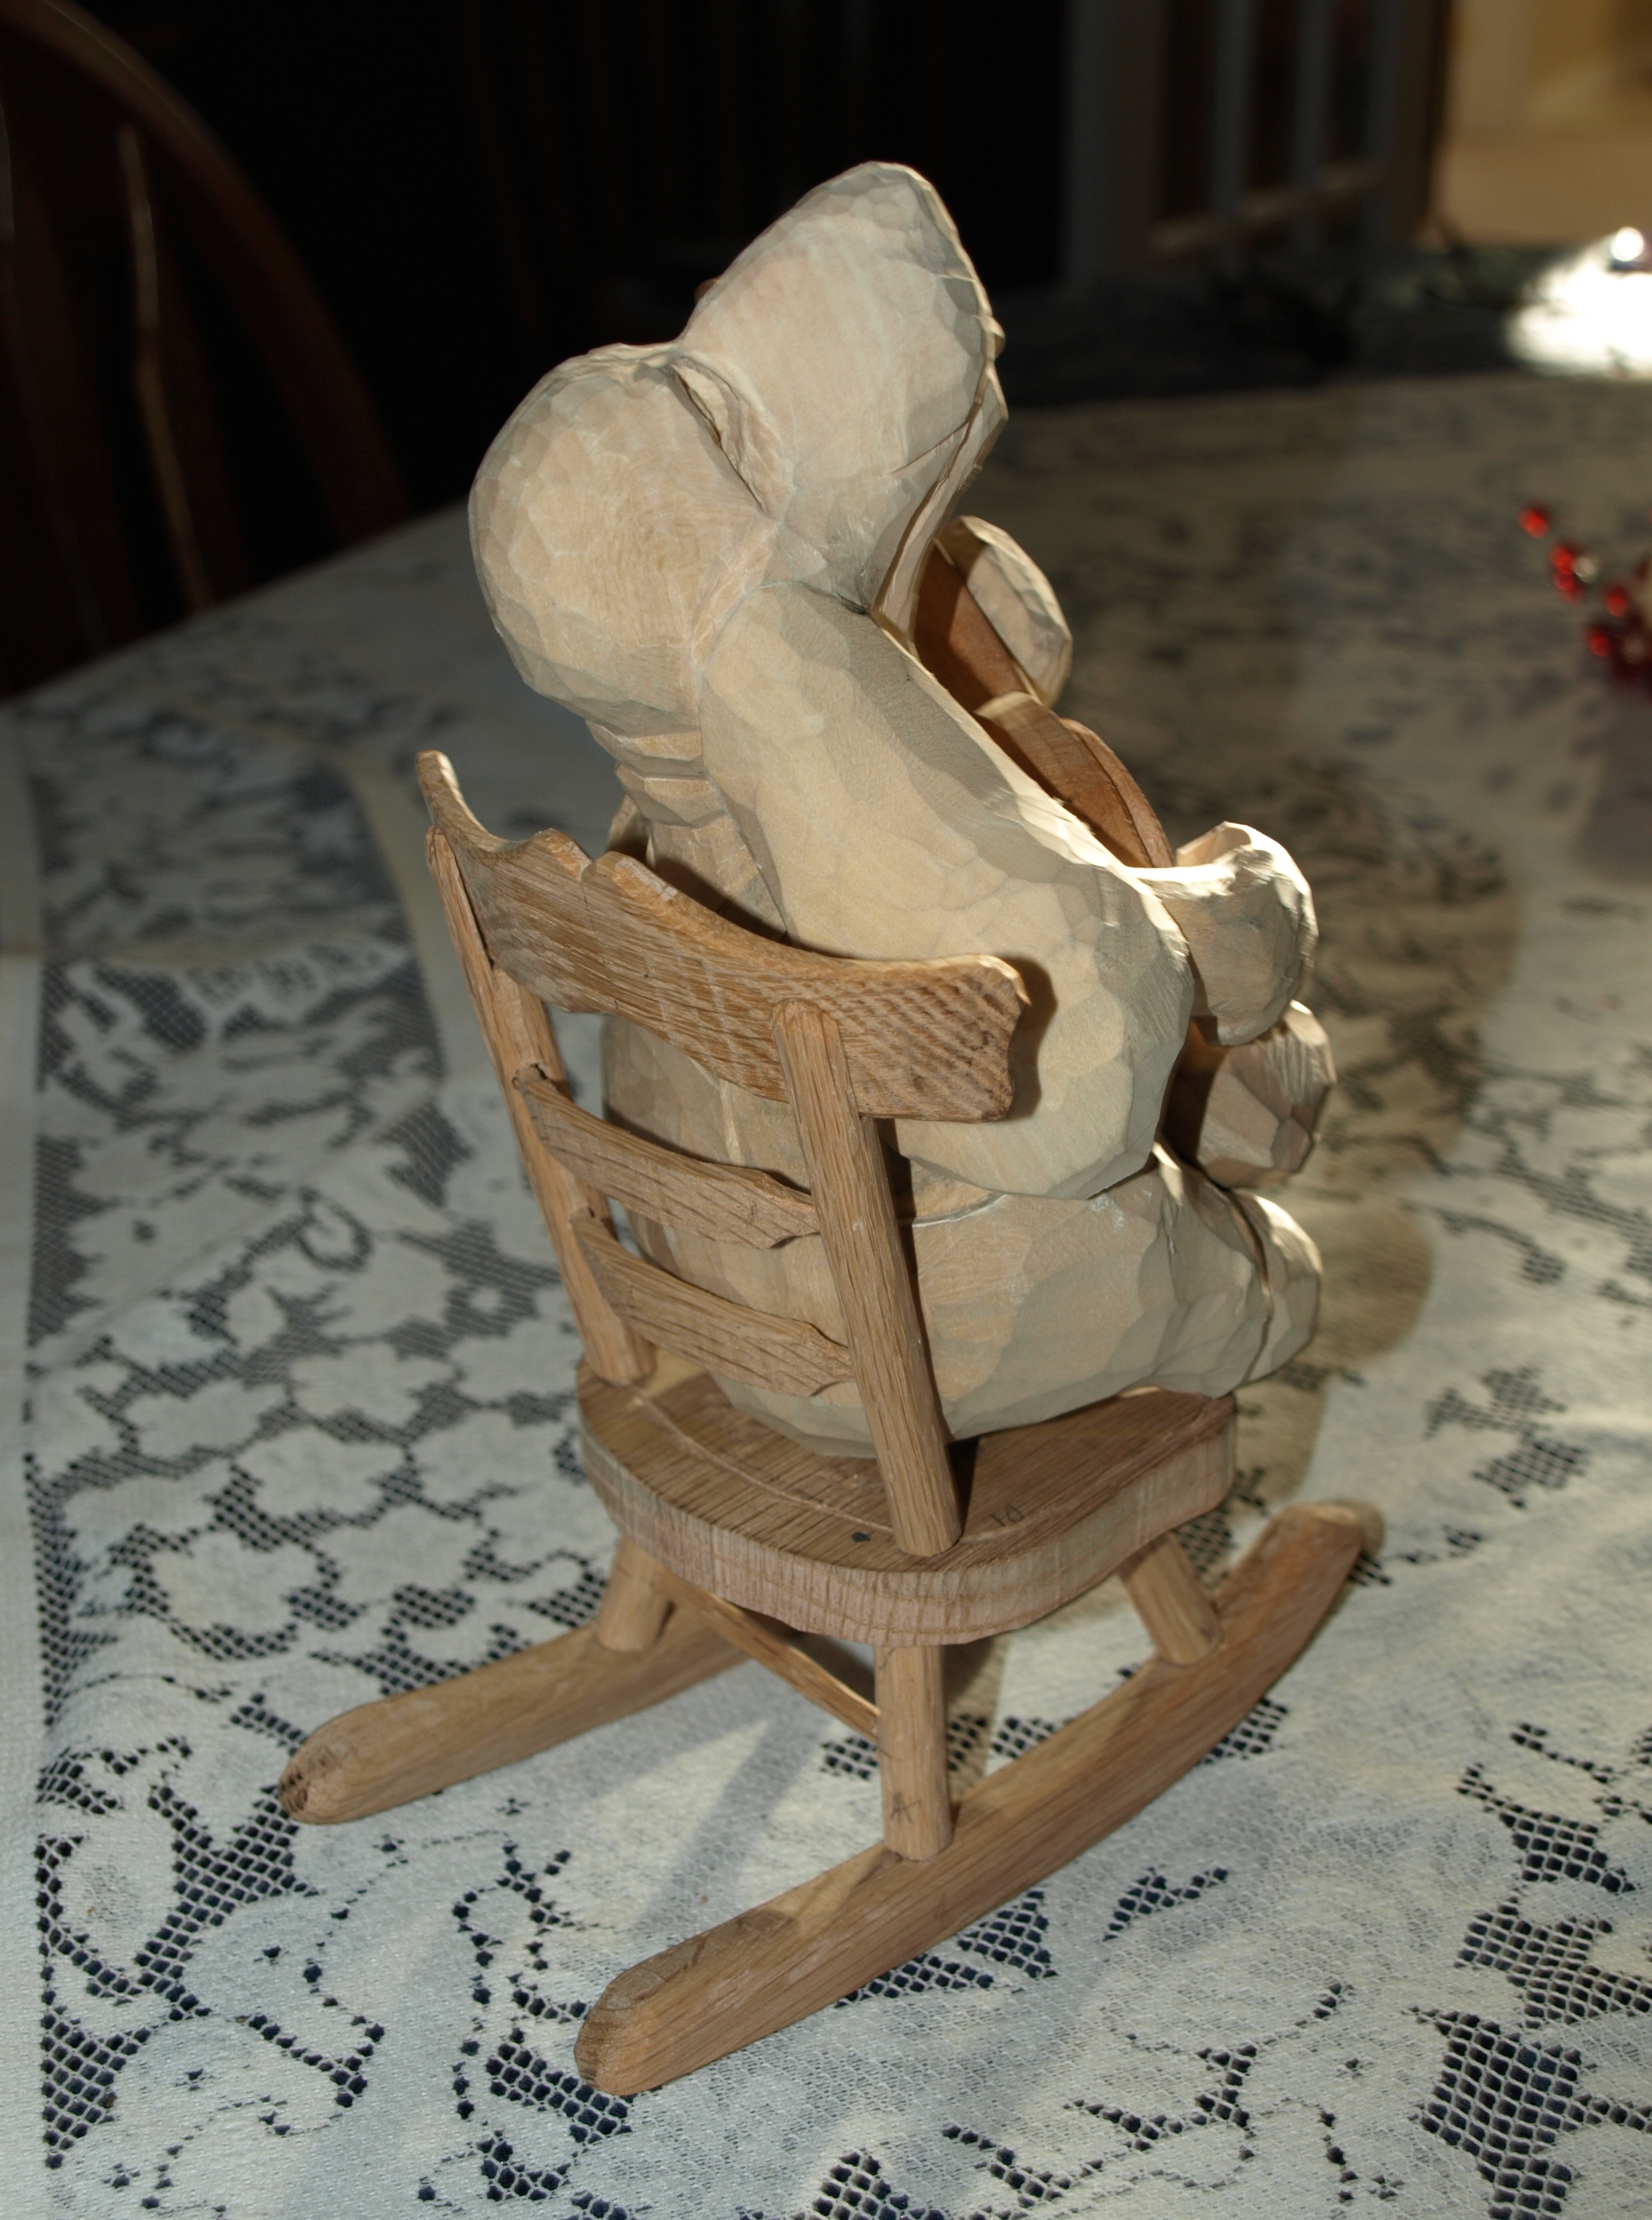
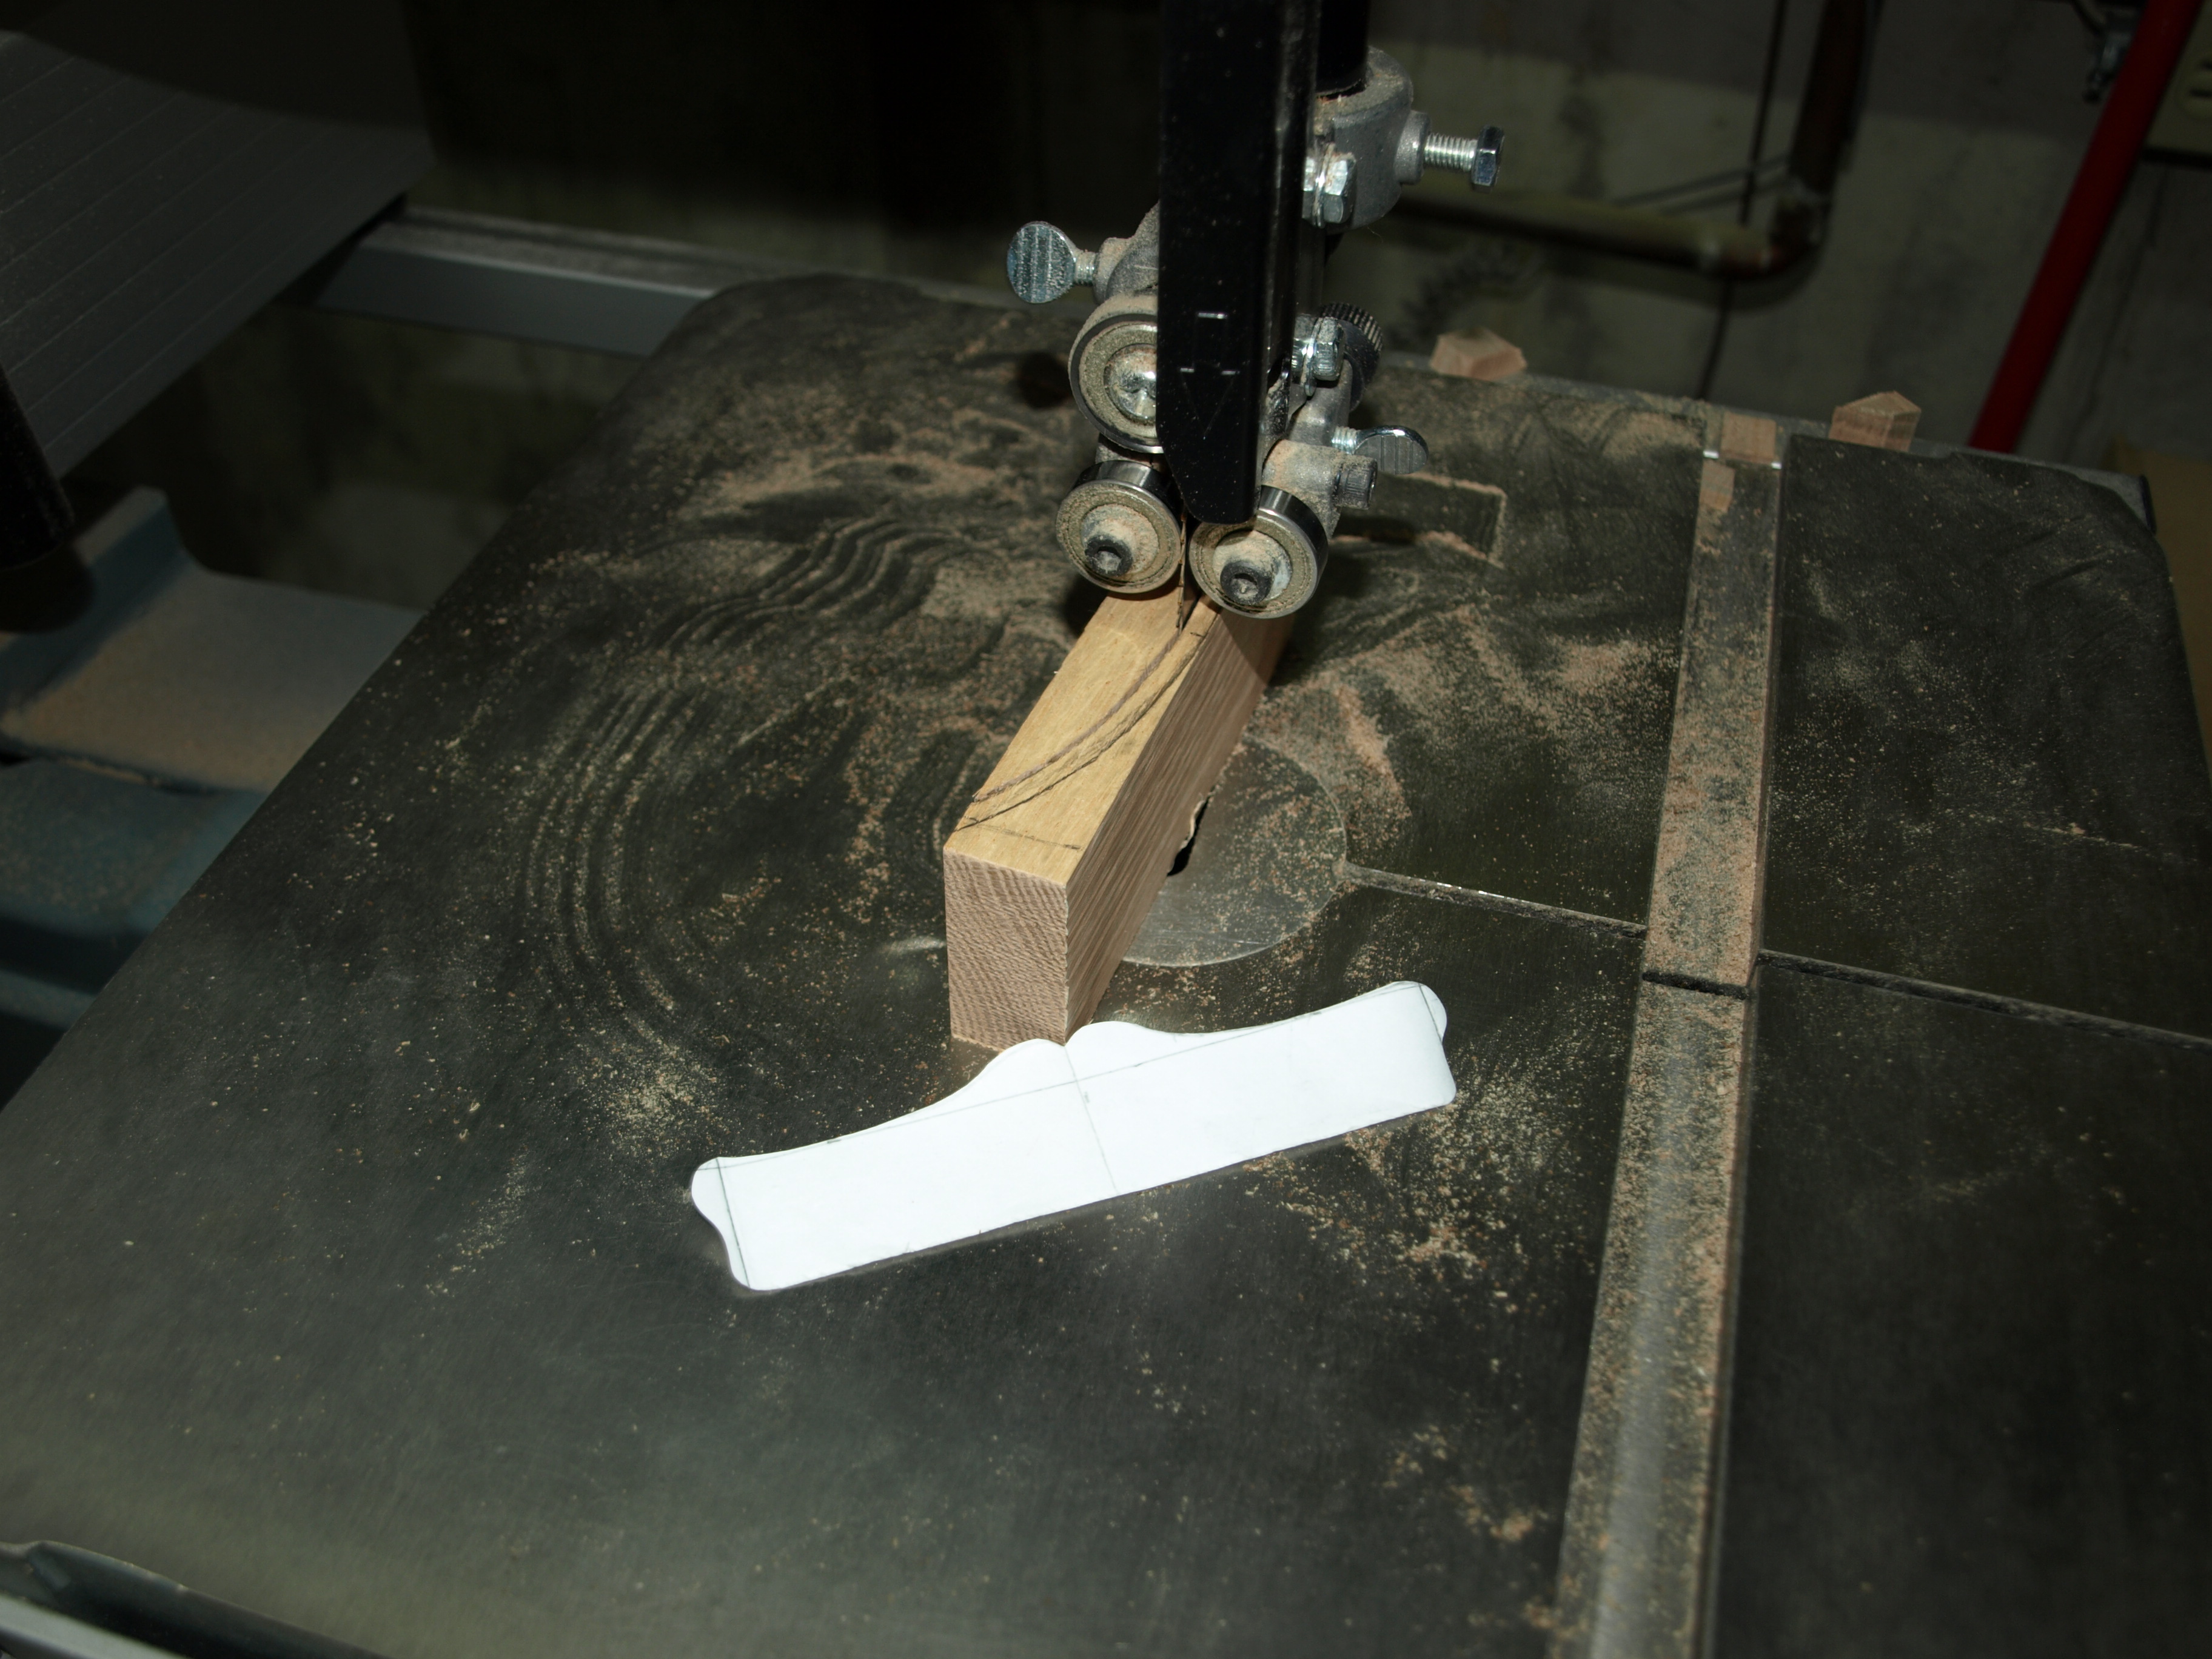
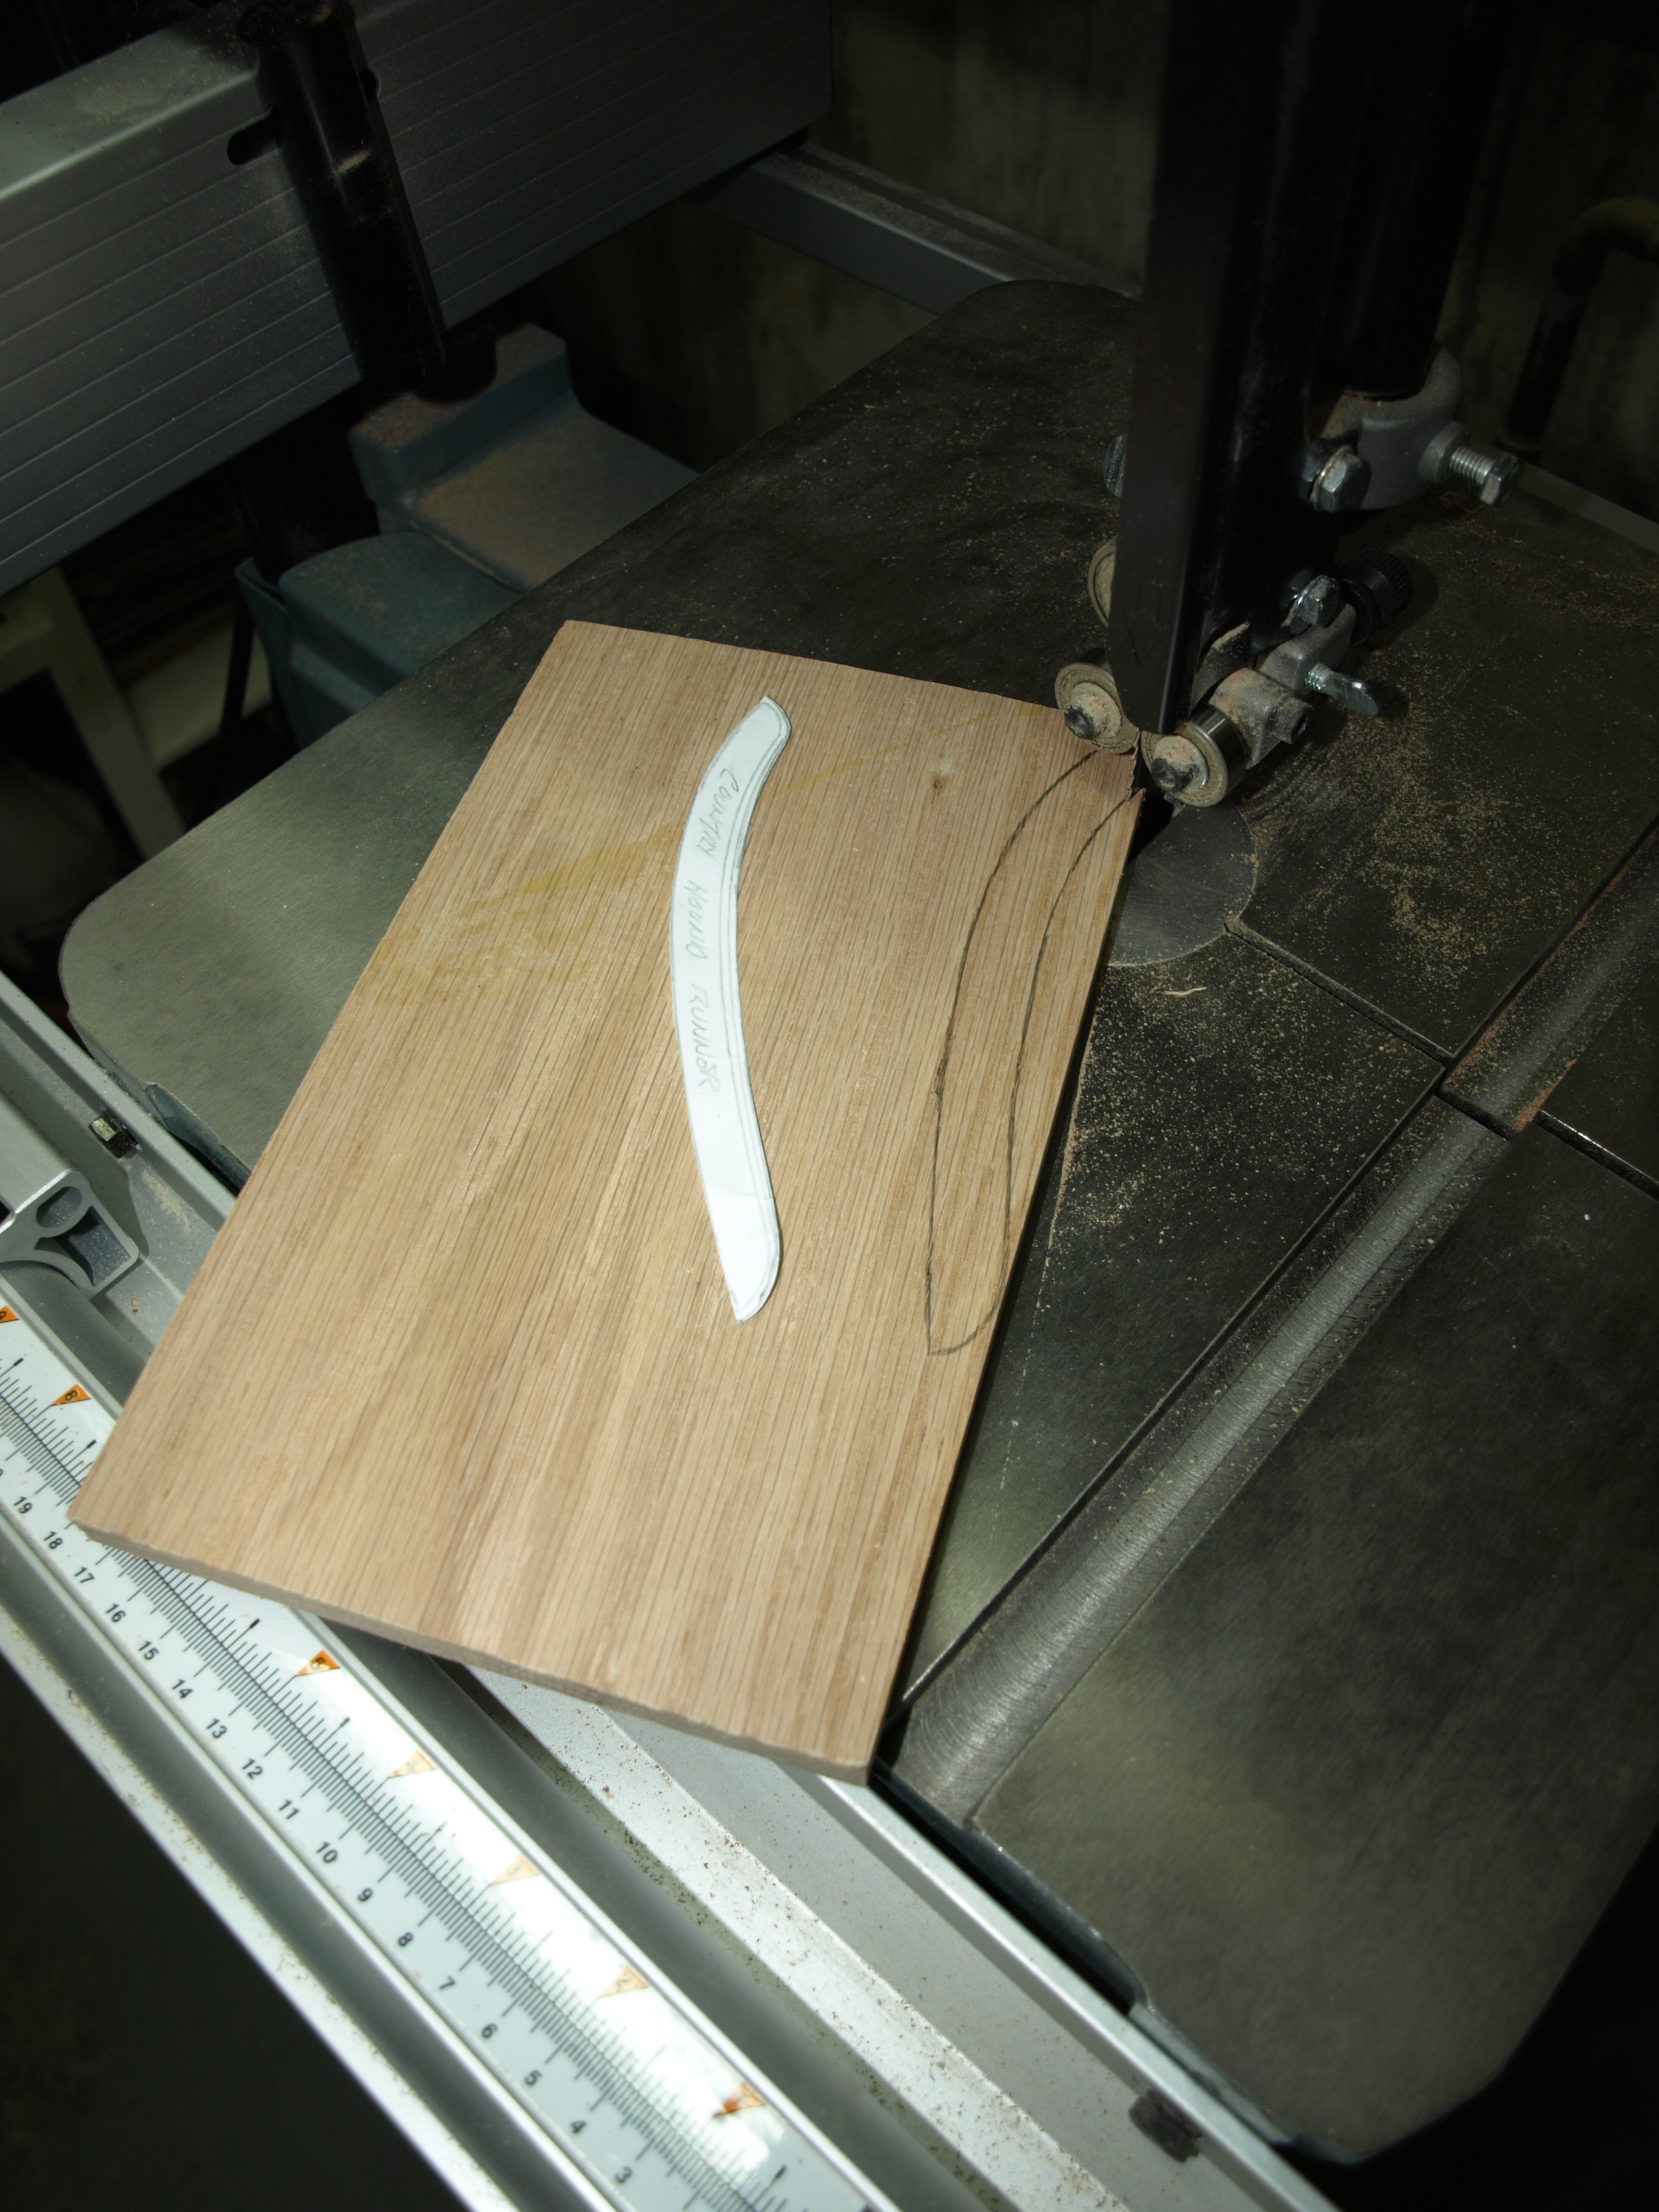
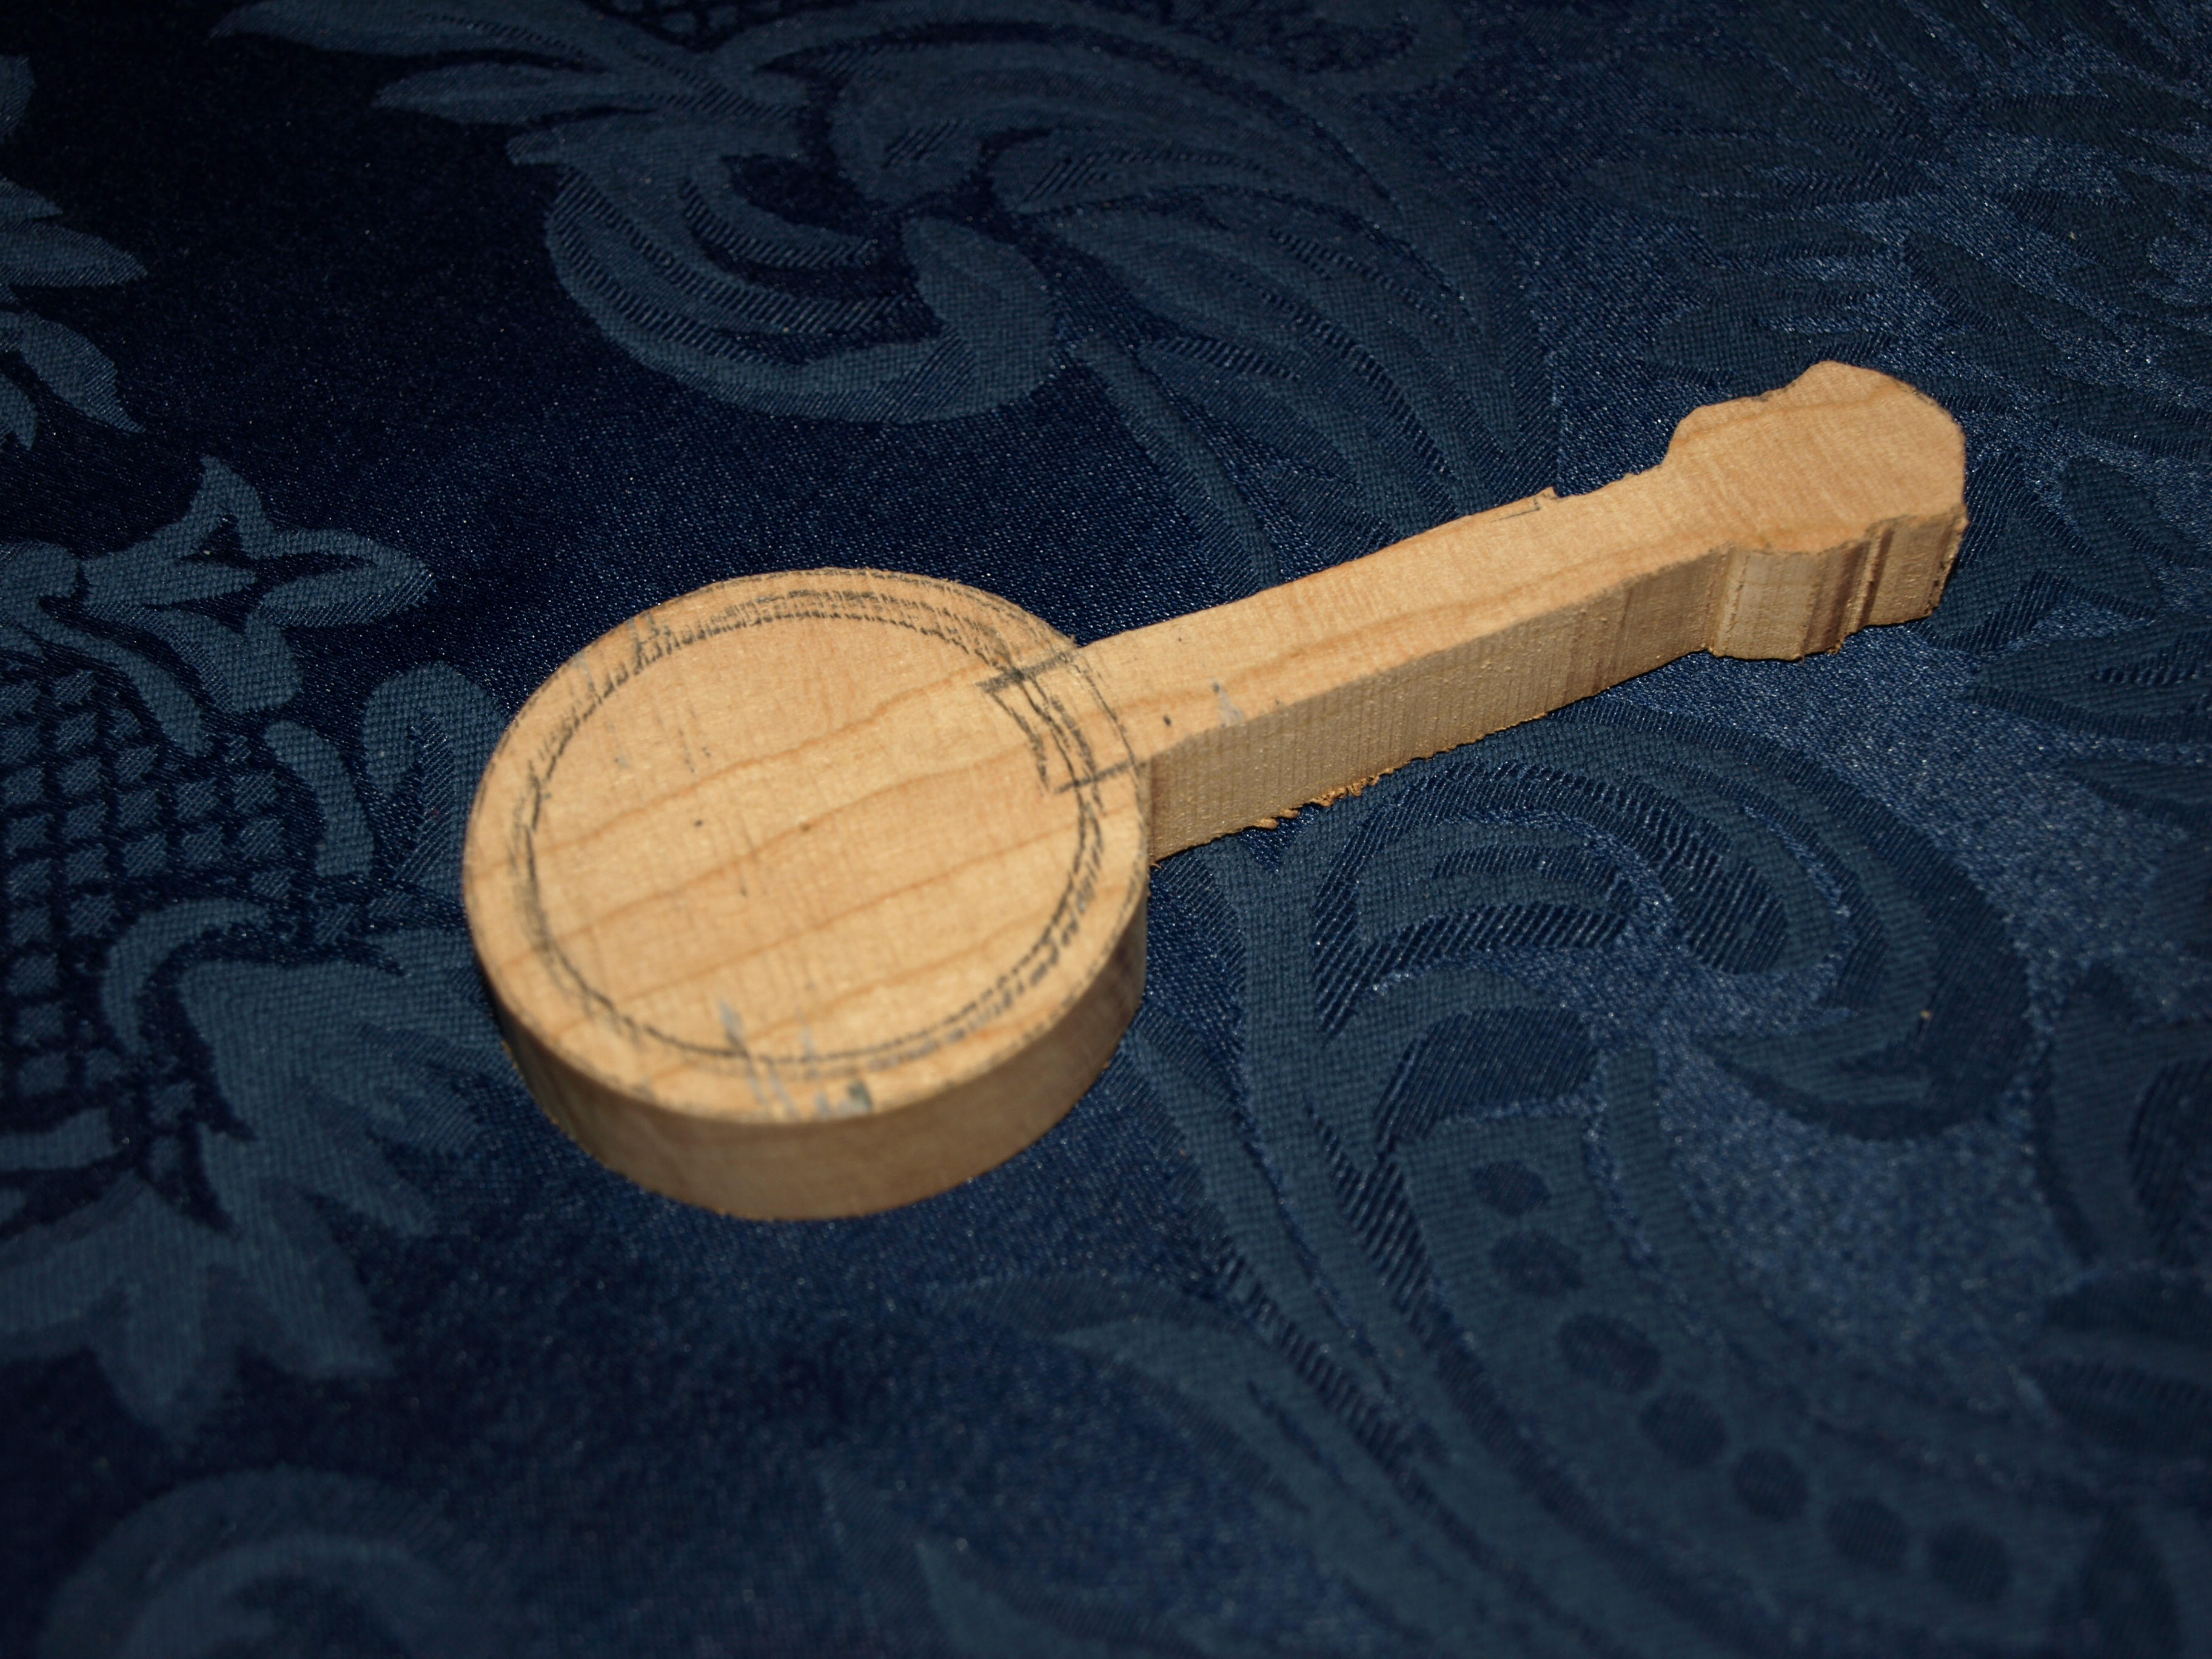
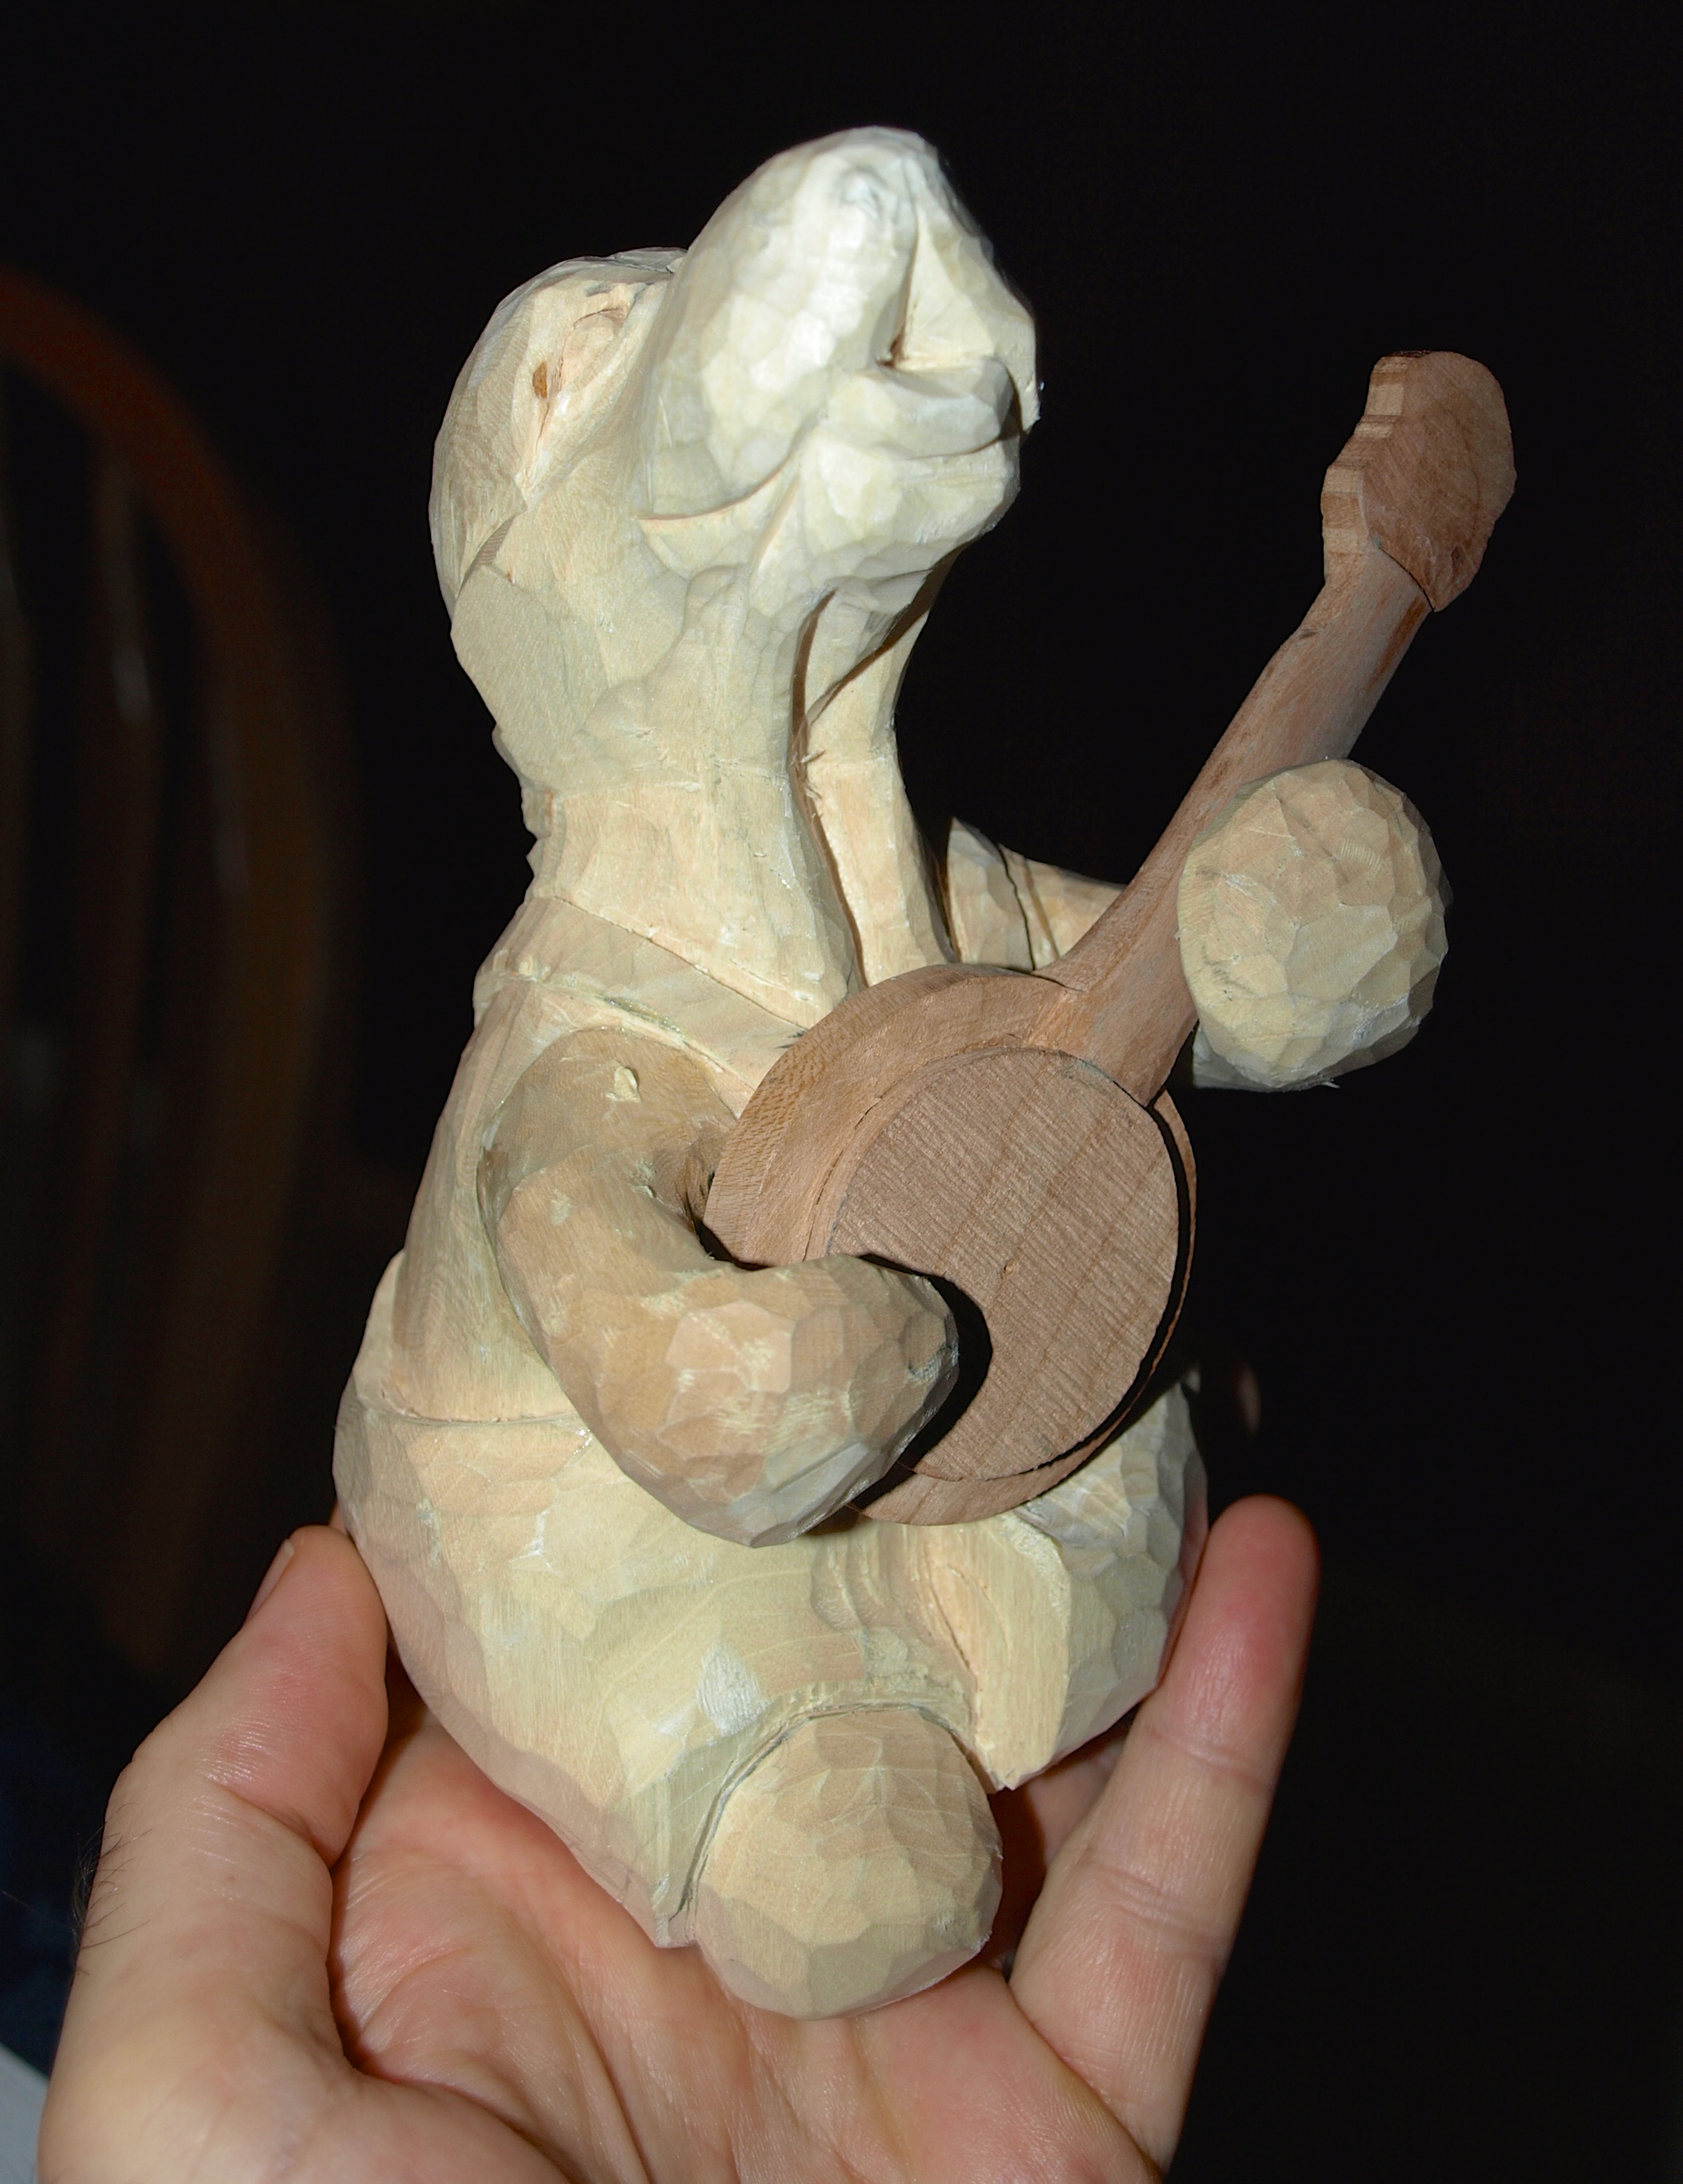
You’ll remember from an earlier post that I used a bandsaw to carefully cut out the basic shape of a banjo from a piece of oak.  With that rough out, I did a bit of carving, but mostly sanding to get it to the shape that I imagined.  This will be a five string banjo, which means that four of the mechanisms ( ears ) will be on the head of the banjo and one mechanism will be on the neck.  If you look close, you can see that I made a little indentation on the neck to fit that fifth mechanism.

OLYMPUS DIGITAL CAMERA

OLYMPUS DIGITAL CAMERA

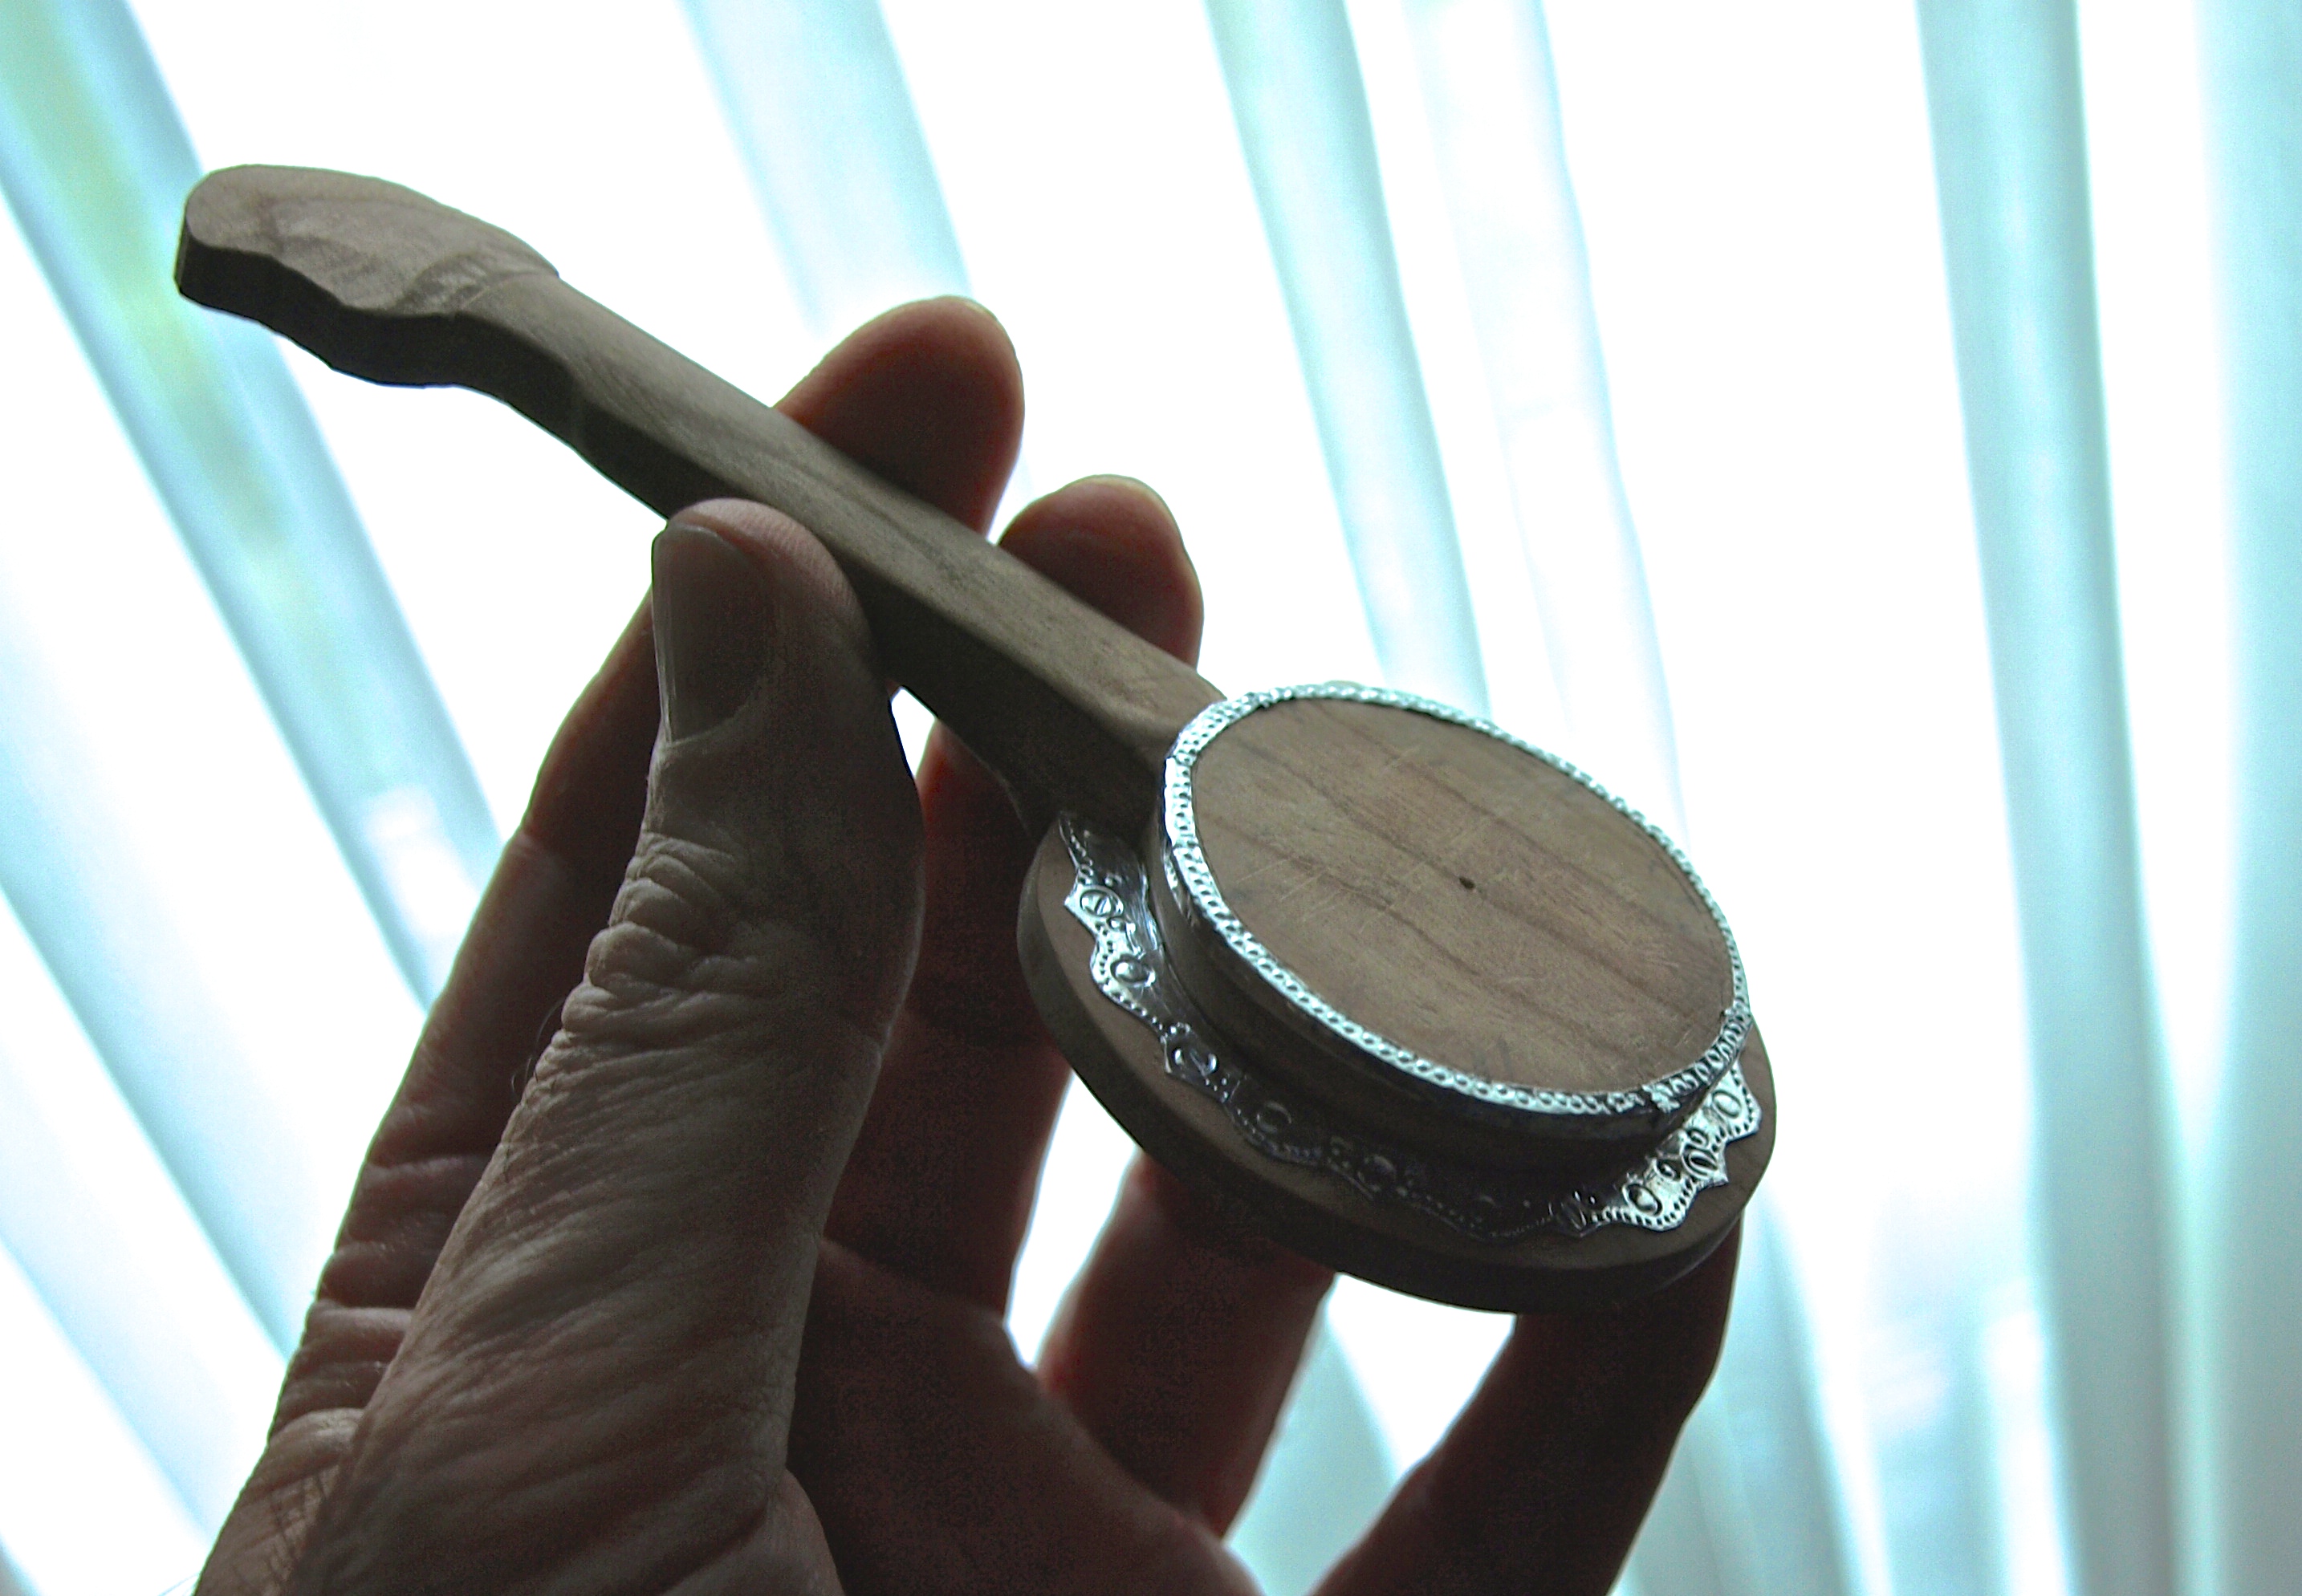
Now, comes the fun part.  I want to put in a lot of metal looking parts on the body of the banjo in particular.  If you take a look at a picture of a banjo, you’ll notice that one style has quite decorative “tin” around the stretched banjo skin and is held together, or tight, with long-ish bolts.  This is the look that I’m after.

So, I’ve first started with the tin pieces.  My version is made with metal tape that you commonly see used on ductwork.  This is an aluminum tape with a strong adhesive back.  One nice thing about the tape is that it can be burnished ( rubbed ) with a tool to flatten out completely and to some extent accommodate small curved sections.  The other nice thing is that it can take an impression by pressing into it.

So, with the tape in hand I went about creating what I’ve seen on some of the banjos that I like.  After the burnishing, I used a few small tools that I had lying around to make little impressions that look like screw heads and the general decorations that you see on a full sized banjo.

Still a long way to go, but I like the way that it’s turning out so far…and, it’s fun.  My goal is to be able to play at least one tune on it before handing it over to the little hound.

OLYMPUS DIGITAL CAMERA

OLYMPUS DIGITAL CAMERA

Trimming of the Ears

Some ear trimming was the next step for our little hound.  Basically, I just picked up where I left off earlier with the fitting of the ears to the arm and body contours using pencil lead as a marking tool to highlight the high spots that needed to be removed to get as tight a fit as possible.  Today, I shaved down the outside of the ears and added a bit of a fold at the front of the ear and a bit of a wave where the ear flows around the front leg, or arm, in this case ( because who ever heard of playing a banjo with a leg ).  Trimming the ear down went a long way to making the ear look soft and flexible like hound’s ears happen to be.

OLYMPUS DIGITAL CAMERA

The other fun item was working the handkerchief a bit more.  Again, the inner fitting had been done earlier and now it was just a matter of creating some interesting folds and waves on the outside of the cloth.  Again, I tried to trim it down enough to make it look like how you’d imagine a bundle of light cloth to lay.  I’m already thinking of a nice checkered pattern for this handkerchief similar to the way that I painted the hobo bindle used on my carving of Hobo and Ned.

OLYMPUS DIGITAL CAMERA

OLYMPUS DIGITAL CAMERA

And lastly, I put a coat of satin urethane on the rocking chair and cushion to finish it up.  The urethane brought a nice glow to the wood and also made the “barnyard red” coloured cushion come to life a bit more.  I still want to add some cushion ties on the back, but, other than that, the rocker is complete.

OLYMPUS DIGITAL CAMERA

It’s All in the Details…

I had a chance to start a bit of detailing on the little hound yesterday.

I removed the ears to detail in the face.  Remember, that I only used a glue gun to lightly tack the ears in place for some initial roughing in.  I removed them again to add some wrinkles to the face and to carve the eyes and eyelids.  I’ll do some additional facial detailing then re-attach the ears permanently to carve in some detail lines and folds to them.

OLYMPUS DIGITAL CAMERA

I also included a few more wrinkles and folds in the legs of the hound’s overalls.  On this particular leg, a patch has also been added just for some additional interest.  It’ll look really good and stand out nicely once I paint it to contrast with the colour of the overalls.  I originally had the idea of a chest pocket…but, as it turns out the banjo is going to completely cover it anyway.  We’ll know it’s there though.

OLYMPUS DIGITAL CAMERA

The other leg also got a few wrinkles and folds.  You’ll notice that it also has a very deep and open pocket…which will contain a handkerchief very shortly…draped out of his pocket and hanging below the rocking chair seat cushion.  A wise country hound always carries a handkerchief.  Everyone knows that.

OLYMPUS DIGITAL CAMERA

OLYMPUS DIGITAL CAMERA

Hound in a Hat…

I’ve carved in the cushion for the rocking chair and have added a nice barnyard red to it to provide that country look.  With the bit of dry-brushing that I did on the cushion, I’m thinking that it’s looking sufficiently worn like a good rocker should be.  I put a darker stain on it and then pulled away some of the colouring on the high spots, again, to give it a well used look.  When I get a bit of urethane on it, the colour of the cushion and the grain in the rocking chair will really stand out.  I’m also planning to add some cushion ties when things are in the final stages to really give it a complete look.

OLYMPUS DIGITAL CAMERA

I also did some roughing-in on the hat.  I was shooting for something that looked like a big straw hat somewhere between a cowboy hat and a sombrero.  I think I’m pretty close.  The trick was to ensure that the hat looked like a good fit on the Country Hound…and fit around the back of the rocking chair.  Took a bit of fitting back and forth.  In making the hat ( two pieces ) and fitting it to the Hound’s head, I used the process of scribbling pencil lead on one of the two mating parts and then cutting away the high points where the lead marked the clean mating piece.

OLYMPUS DIGITAL CAMERA

With all of the individual pieces together, our little Hound is coming right along.  Time to start adding some detail next.

OLYMPUS DIGITAL CAMERA

Ottawa “Poetry on Wood” Carving Show

I enjoyed the Ottawa carving show this past weekend and was happy to receive four ribbons for my entries of Hobo and Ned, and the Three Hounds:  a 1st in Caricatures and a 1st in Division for Hobo and Ned; and, a 2nd in Caricatures and a 3rd in Division for the Hounds.  A nice weekend and a terrific club in Ottawa.

OLYMPUS DIGITAL CAMERA

OLYMPUS DIGITAL CAMERA

Once again, just some beautiful carvings were shown over the weekend from about 200 carvers from Ontario and Quebec.  Here is a sampling of just a few photos of the carvings that I enjoyed.

OLYMPUS DIGITAL CAMERA

OLYMPUS DIGITAL CAMERA

OLYMPUS DIGITAL CAMERA

OLYMPUS DIGITAL CAMERA

OLYMPUS DIGITAL CAMERA

Ottawa and Progress on the Country Hound

Tomorrow afternoon I’ll be heading out to Ottawa to drop off my carvings for the “Poetry in Wood” Carving Show and Competition.  I’ll bring along the same carvings that I had entered in the Pickering Show of a couple of weeks ago: Hobo and Ned; and, the Three Louisiana Hounds.  I’m sure that they’ll be enjoyed in Ottawa because it’s a great group of people who meet there for the show.

My location in Kingston and my links to Southern Ontario are quite nice from a carving standpoint…the Pickering Show which is a couple of hours away brings in carvers from central Ontario around the Toronto area; the Ottawa Show which is a couple of hours in the opposite direction brings in carvers from Eastern Ontario and Western Quebec; the Hamilton Show at the beginning of next year brings in Central and Western Ontario and is located almost in the backyard of my daughter’s home in Ancaster; and, the Niagara Competition brings in carvers from Southern Ontario and is a stone’s throw from my Mom’s home.  So, I pretty conveniently take in the major competitions around the province.  There is one other great competition that I know of in Kitchener which is in Western Ontario…hmm…I do have an Aunt who lives in those parts…just thinking.

Here’s a quick couple of photos of the Country Hound.  Not much changed since my last update although I’ve detailed the rocking chair a bit more, added in some cross braces on the legs and did some wood burning on the upper-most head piece.  He’s coming along.

OLYMPUS DIGITAL CAMERA

OLYMPUS DIGITAL CAMERA

A Bit More on The Rocker

The two rungs on the back of the rocking chair were fashioned similar to the head-piece shown below.  Basically, I sketched out the contour of the back of the chair seat and cut that out of a piece of oak so that they ended up being about 1/8″ or so thick.  With that, I sketched the shape of the headpiece on the curved section that I had just cut out and headed back to the bandsaw to cut out that piece.  The rungs were far too small to cut out on the saw so I just carved their shape once I had the curved pieces cut out.

OLYMPUS DIGITAL CAMERA

OLYMPUS DIGITAL CAMERA

All put together, the chair started to look like something a Country Hound could sit on while playing his banjo.  Notice again that all of the pieces are numbered so that I know what I’ve carved to fit where once it’s all apart again.

OLYMPUS DIGITAL CAMERA

OLYMPUS DIGITAL CAMERA

A little bit of rounding and shaping has the rocking chair at this stage in it’s development.  That head-piece is starting to look a lot like a press-back chair to me, so I wouldn’t be surprised if it gets adorned with some carved and wood burned patterns very shortly.  If you look hard at the seat, you can also see the beginnings of a cushion for the little banjo player to rest on.  I’d still like to do a slender cross brace between the two rocking chair runners just to finish off the look.

Let me know what you think of it so far.

OLYMPUS DIGITAL CAMERA

Ain’t Nothin’ but a Hound Dog…

…rockin’ around town.  Ok, now it’s time to get rockin’ on the rocking chair.

The little chair for the country hound will be made from oak and fashioned as you’d expect a country chair with a bit bulky pieces rounded simply and with a ladder back. The first photo depicts the runners cut from about a 3/8″ piece of oak with the grain running in the direction of the runner.   I had to take a good look at my Grandma’s rocking chair that I have at home to realize how slight a curvature is actually in the rocking chair runner.  Also, if you hadn’t noticed before, the rear of the runner on a rocking chair is flatter than the front to prevent the chair from rocking too far backwards and up-ending the occupant.

You see how much you learn when you try to carve something!?  The second photo is of the two runners cut out.

OLYMPUS DIGITAL CAMERA OLYMPUS DIGITAL CAMERA   The uprights for the base of the chair that attaches to the runners were cut of the same material.  Again the grain was oriented for greatest strength.  The second photo, below, shows the drilled hole in the runner along with a carved-down upright piece that fits snuggly in place.  Although everything will be rounded out nicely after I do some carving, I want to keep the look of the tapered sections that fit into the holes as it will give the chair a less refined and more rustic country look…just like some country craftsman ( crafts-hound? ) made it without the availability of the best power tools on the market!

OLYMPUS DIGITAL CAMERA OLYMPUS DIGITAL CAMERA   So, this is what it shapes up to look like at this stage.  I like the general proportions.  I still need to add in some cross members between the uprights on the two runners. The chair seat is nice and thick at this point and will give me a chance to trim it down and possibly include a chair cushion…I’ll have to think about that but right now a colourful chair cushion might be a nice addition.  Next steps will be the chair back with its ladder rungs and, of course, all of the rounding and detailing.

OLYMPUS DIGITAL CAMERA

Now that I look at this picture, I should also mention that I numbered each mating piece as it’ll be important when I do the final gluing that the right pieces went in the right spots in the right way.

Enjoy the photos.  Any comments or questions, just fire away.

Happy Hallowe’en

Well, I guess that we’ll start a tradition of posting Paul’s Hallowe’en costume on this blog.  If you look back, you’ll see his amazing Captain America costume from last year that his talented Mom made for him.  Paul wanted to be Aladdin this year and Peggy once again rose to the challenge and came up with a knock-it-out-of-the-park costume.  Peggy sewed and created all of this including the shoes!

Paul’s pretty happy and has already been at a couple of parties with another one tomorrow before the big day.

Happy Hallowe’en everyone!

OLYMPUS DIGITAL CAMERA

Just Needs a Hat

This little Country Hound really does just need a hat now before I can say that the roughing-in portion is complete.  Of course, all of the detail is ahead of me in order to really bring out his personality.  After the hat is roughed in, I’ll probably begin the rough in of his rocking chair just so that I’ll know the basic fit of everything before the detail gets carved in.

So, since my last post, this little guy has acquired a second ear as well as a second rear leg.  The leg had to wait until I was sure on the placement of the banjo.  Both the second ear and the leg went in with the same fashion as I outlined in the previous post…some lead “pencil” rubbed on the body of the carving and then some repeated fitting and removal of the lead marks on the leg and ear.  Everything is just placed together right now with a glue gun, so it will be a simple matter to remove these pieces and add the detail that I want later on and then use the same lead-mark-removal method to get the final tight fit.

Oh…and for those worrying about my house chores…I also painted three windows this weekend ( just in case Peggy is reading this post ).

Hope you enjoy the photos.

OLYMPUS DIGITAL CAMERA

OLYMPUS DIGITAL CAMERA

OLYMPUS DIGITAL CAMERA

Post Navigation